Installing a paver patio is a project most dedicated DIYers can handle over a weekend or two. The basic process: mark your area, excavate 7 to 9 inches deep, compact a gravel base, screed 1 inch of bedding sand, lay your pavers in the pattern you want, lock in the edges, and finish with polymeric sand and sealer. If you want a full walkthrough, follow the detailed guide on how to install resin patio pavers next, since the steps are closely aligned basic process. If you want a more detailed walkthrough, see how to install paving stone patio for the exact order of marking, excavation, bedding sand, paver layout, and joint finishing. Done right, a paver patio will stay level and look great for 20 years or more. Done wrong, you get a wavy, shifting mess after the first winter. The difference almost always comes down to base prep.
How to Install a Paver Patio: Step-by-Step DIY Guide

Choose Your Paver Type and Layout First
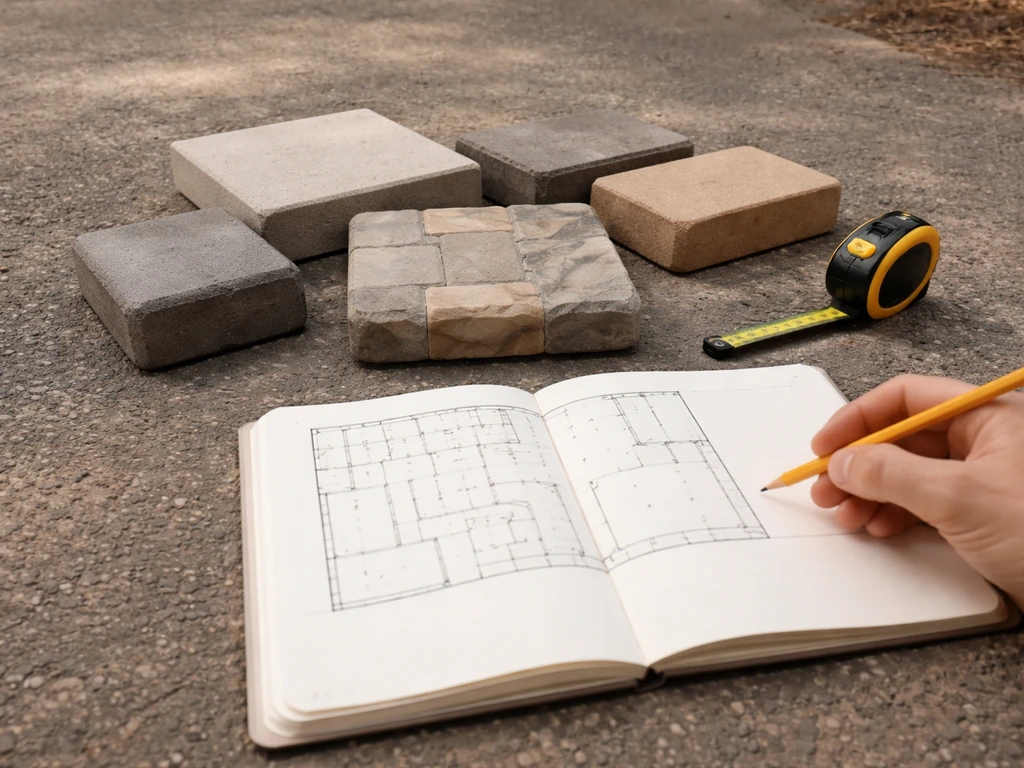
Before you dig a single shovel, decide what you're working with. Concrete pavers are the most popular choice for DIYers because they're uniform in thickness, widely available, durable, and relatively affordable. Natural stone pavers (like bluestone or travertine) look stunning but vary in thickness, which makes leveling harder. Clay brick pavers are dense and classic but also less consistent than concrete. For most first-time patio builders, concrete pavers are the smart pick.
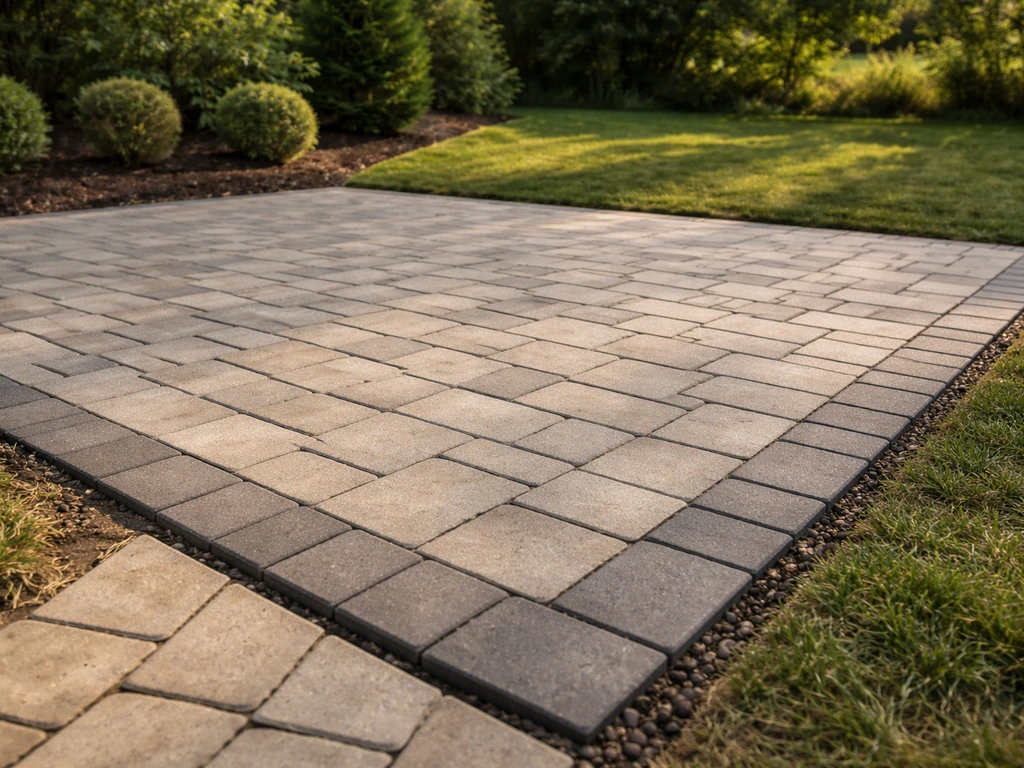
Layout comes next. Measure your space and sketch it out on paper with dimensions. This lets you calculate how many pavers you need and figure out where cut pieces will fall. Try to center your pattern so you're not left with tiny slivers at the edges. A few popular patterns to consider: herringbone (the strongest and best for load-bearing areas), running bond (clean and simple), and basket weave (a classic look). Herringbone at 45 or 90 degrees offers excellent interlock, which is why ICPI highlights it in their installation guidance. Whatever pattern you choose, commit before you start so your string lines and starter rows are set up correctly.
For sizing, plan a slope of 1/8 to 1/4 inch per foot (roughly 1% to 2%) away from your house or any structure. If you're installing patio pavers against a house, getting the drainage slope right is one of the biggest factors in avoiding pooling and shifting over time slope of 1/8 to 1/4 inch per foot away from your house. That's enough to drain rainwater without making the patio feel like a ramp. If you're working near your home's foundation, factor this into your grade before you ever start digging.
Site Prep: The Phase That Determines Everything
There's no shortcut here. A weak base means a failing patio, full stop. ICPI is explicit: installation should not proceed until subgrade soil and base conditions meet spec. Here's what proper site prep looks like.
- Mark your patio outline using stakes and string lines, adding 6 inches on each side for edge restraint room.
- Call 811 (in the US) to have utilities marked before digging.
- Excavate to a depth of 7 to 9 inches below your intended finished surface. This accounts for 4 to 6 inches of compacted gravel base, 1 inch of bedding sand, and your paver thickness (usually 2.375 inches for standard concrete pavers).
- Remove all grass, roots, and organic material. Don't try to compact over soft or organic soil. If you hit soft spots, dig them out and fill with compactable gravel.
- Compact the subgrade with a plate compactor (rent one for about $80 to $100/day). Make two passes.
- Add your gravel base (crushed stone, also called road base or Class II base) in 2- to 3-inch lifts, compacting each layer before adding the next. Total compacted depth should be 4 to 6 inches for a residential patio.
- Check your grade with a long level or laser level as you build the base. You want the finished surface to slope 1/8 to 1/4 inch per foot away from the house.
- Install edge restraints around the perimeter before you add bedding sand. Use plastic or aluminum restraints spiked into the compacted base with non-galvanized spikes. ICPI specifies at least 1 inch of vertical restraining surface in contact with the side of the paver for adequate lateral hold.
Edge restraints aren't just cosmetic. Without them, pavers at the perimeter have nothing to push against, and they gradually migrate outward, widening joints and causing the whole field to lose its interlock. Install them before the sand, not after.
How to Install Pavers Step-by-Step
Once your base is compacted and your edges are in, you're ready for bedding sand and pavers. If you want to use rubber pavers instead of standard concrete or stone, the layout and base prep steps are similar, but the rubber paver system requirements can change the way you compact, level, and finish the surface how to make a patio with rubber pavers. If you're planning a pavestone patio, the same step-by-step process applies from base prep through filling the joints and finishing with sealer how to install pavestone patio. Work through these steps in order and don't skip the checkpoints.
Step 1: Screed the Bedding Sand
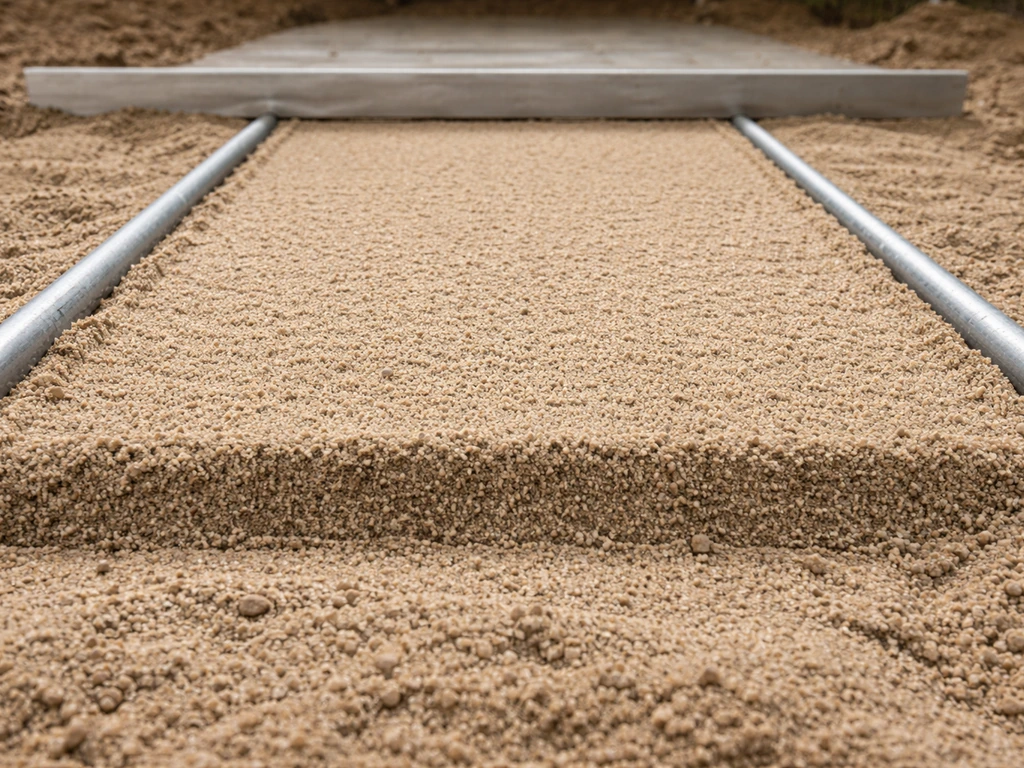
Spread coarse washed sand (also called concrete sand) over your compacted base. Use two 1-inch diameter pipes or conduit as screed rails set at the correct height. Pull a straight 2x4 across the rails to create a perfectly flat, 1-inch-deep sand bed. This 1-inch thickness is the ICPI-specified nominal depth for bedding sand. Don't go thicker, it doesn't help and makes the surface less stable. Once screeded, don't walk on the sand bed.
Step 2: Set a Starting Point and String Lines
Snap chalk lines or set string lines across your patio to guide your pattern. Start from a straight edge (usually the house wall or a fixed edge) and work outward. For a 45-degree herringbone, you'll need a diagonal starting line. Keep checking that your joint lines stay straight by referencing your string lines every few rows.
Step 3: Lay the Pavers
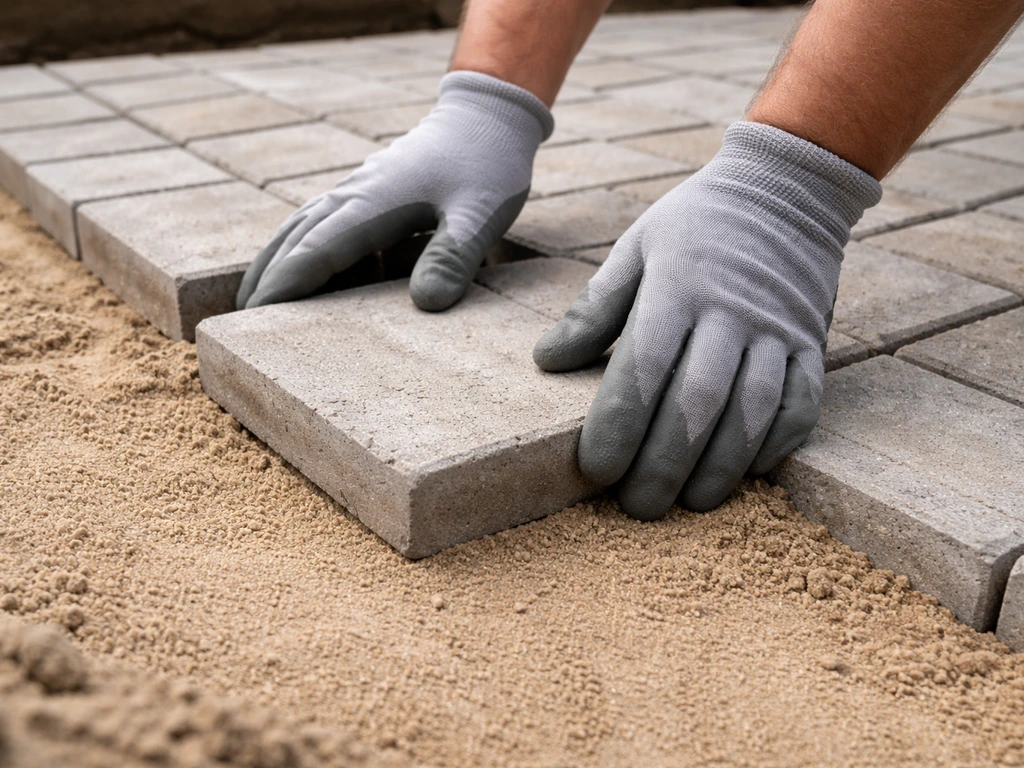
Place each paver gently onto the sand bed, don't slide them or you'll disturb the screeded surface. Butt them tight together, targeting a joint width of 1/16 to 3/16 inch (2 to 5 mm) as specified by ICPI. Use a rubber mallet to tap each paver lightly into place. Check level frequently with a straight edge across 3 to 4 pavers. Pull from several pallets at once to mix color variation naturally.
Step 4: Compact the Paver Field
Once all full pavers are laid (before cuts), run the plate compactor over the entire field. Use a rubber or poly pad on the compactor plate to protect the paver faces. Make two passes in different directions. This seats the pavers firmly into the sand bed and locks the interlock.
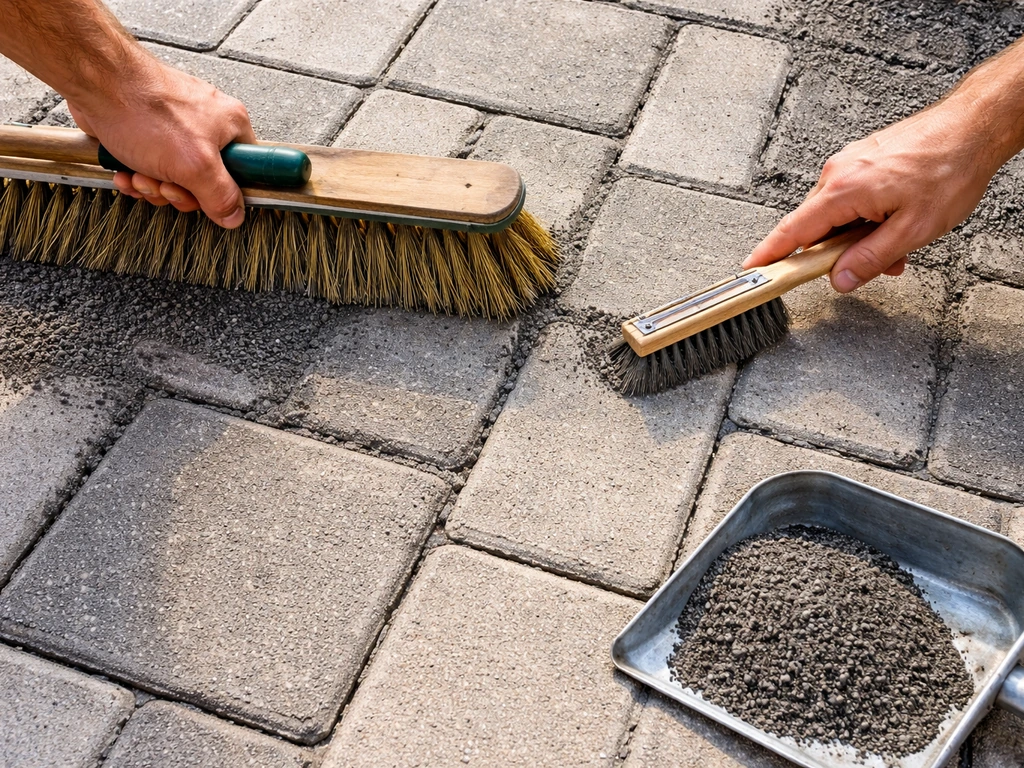
Step 5: Fill Joints with Polymeric Sand
blank" rel="noopener noreferrer">Sweep polymeric jointing sand across the entire paver surface, working it into the joints. Products like QUIKRETE HardScapes Polymeric Jointing Sand are designed for joints up to 2 inches wide and work with all standard interlocking pavers. Sweep in multiple directions, then compact again to vibrate the sand deeper into the joints. Keep sweeping until joints are filled to about 1/8 inch below the paver surface. Then lightly mist the entire area with water. Don't soak it and don't use a high-pressure nozzle. The light mist activates the polymer binders that lock the sand in place. Let it cure fully (usually 24 hours) before walking on it.
Laying Pavers Over an Existing Concrete Patio
If you already have a concrete patio that's structurally sound (no major cracking, heaving, or drainage problems), you can lay pavers directly on top rather than demolishing the slab. This saves serious time and effort, but there are things you need to handle correctly.
First, check the concrete. Minor hairline cracks are fine. Large cracks, frost heave, or soft spots under the slab are problems that will telegraph through your pavers. Fix or stabilize those first. Also check the existing slope. If the concrete already drains away from the house at 1/8 to 1/4 inch per foot, you're in good shape. If it slopes toward the house, you'll need to build up a mortar base to correct the grade, which gets complicated.
There are two approaches for setting pavers over concrete. The dry-set method uses a thin layer of sand (about 1 inch, screeded flat) directly on the concrete slab. This works well if the slab is level and clean. The mortar-set method uses a thin-set or mortar bed, which gives you more control over leveling but is harder to work with and less forgiving. For DIYers, dry-set over a sound, flat slab is usually the better choice.
One critical detail with over-concrete installs: your finished surface will be 2.5 to 3.5 inches higher than the existing concrete (accounting for sand bed plus paver thickness). Check that this new height won't conflict with door thresholds, steps, or drainage inlets. You may need to raise or rebuild steps to match.
Special Builds: Raised Patios, Sloped Sites, and Other Variations
Raised Paver Patios
A raised patio is essentially a paver field built on top of a retaining structure, usually a mortared or dry-stacked block wall, or over a concrete slab. This style is common when you want a level patio area in a sloped backyard without grading the entire slope. The paver installation process is the same once your structural base is built, but the wall construction needs to be done right first. Block retaining walls over 24 to 30 inches typically require a permit and engineer input depending on your municipality. For lower raised patios, dry-stack block is manageable for most DIYers. The key is a solid, compacted gravel base behind and under the wall, plus drainage (crushed stone backfill and a perforated drain pipe) to prevent water buildup behind the wall.
Sloped Sites
If your yard slopes, you have two options: cut and fill to create a level grade (involves moving significant soil and possibly retaining walls), or step the patio in tiers. Either way, your finished paver field still needs that 1/8 to 1/4 inch per foot drainage slope built into it. Sloped sites also make drainage planning critical. Think about where water will flow off the patio and make sure it doesn't pool against a foundation or neighbor's property. Permeable pavers are another option worth considering for sloped or drainage-challenged sites, since they allow water to pass through the joint system directly into the base. If you're wondering how to install permeable paver patio systems, focus on building a drainage-ready base and joint setup that lets water pass through Permeable pavers.
Patios Installed Over Grass or Uneven Ground
You can't just lay pavers on grass. Grass and organic soil will compress, shift, and rot under pavers, causing sinking and unevenness within a season or two. Always excavate fully, remove organic material, and build a proper compacted gravel base. If the ground is uneven, the gravel base is where you correct it, not the sand layer.
Cutting Pavers, Finishing Details, and Sealing
Cutting Pavers to Fit
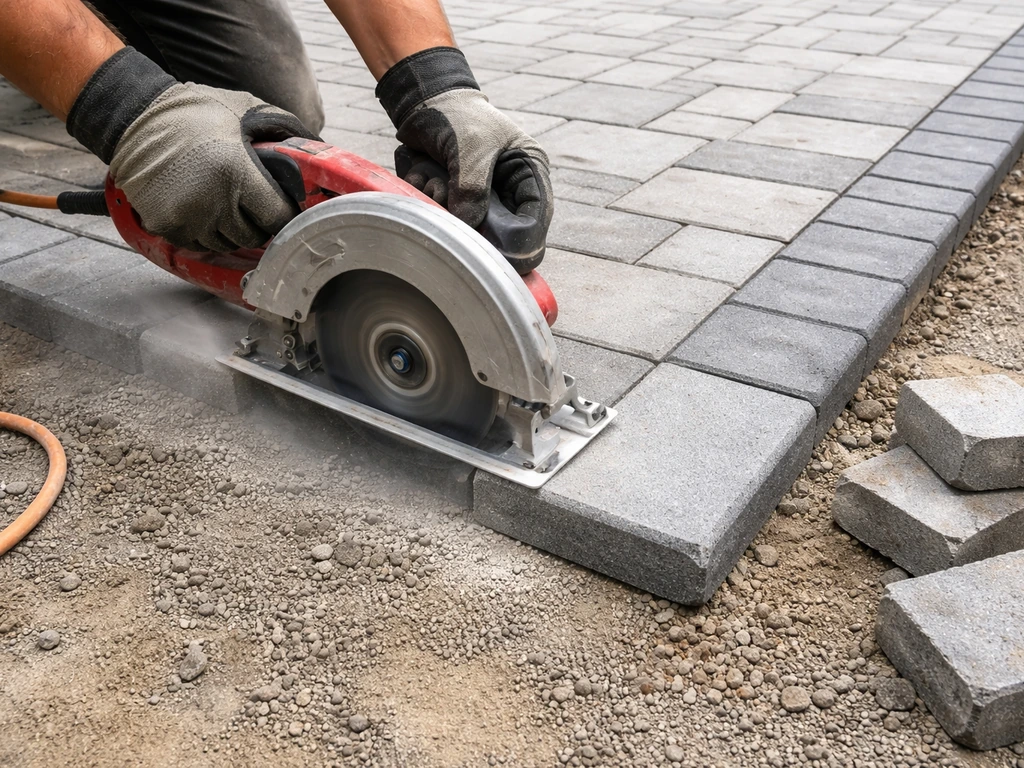
Once your field is laid and compacted, trace and cut the border pieces to fill the gaps at the edges. Use a circular saw or angle grinder fitted with a diamond masonry blade. Home Depot and Bob Vila both recommend diamond blades for cutting pavers, and the blade should be rated for your specific material: concrete pavers need a diamond blade designed for concrete, while natural stone needs one rated for stone. Wet cutting (using water to cool the blade) dramatically reduces dust and extends blade life. Dry cutting works in a pinch but produces a lot of fine silica dust, so always wear a properly fitted N95 respirator either way.
For straight cuts, a masonry saw (wet tile saw or circular saw with a guide) is faster and cleaner. For curves, a handheld angle grinder gives you more control. Score the cut line first if you're using an angle grinder, then make the full cut.
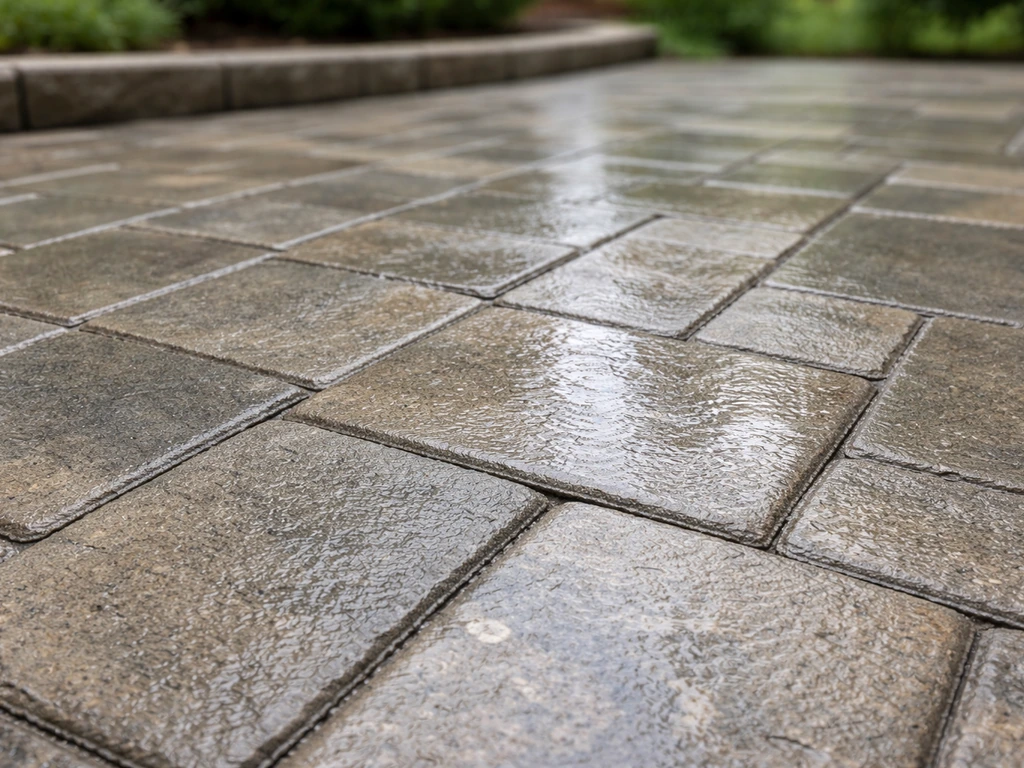
Sealing the Patio
Sealing is optional but worth it for most patios. A good paver sealer enhances color, protects against staining, and helps the polymeric sand hold up longer. Wait at least 90 days after installation before sealing new pavers. The ICPI cautions that sealing too soon, or sealing when joints or surfaces are not fully dry, can cause whitening (efflorescence bloom) that's hard to remove. Make sure the patio is bone dry and hasn't had moisture recently before you apply sealer. Use a low-pressure garden sprayer or roller, apply in thin even coats, and let the first coat dry fully before applying a second.
Troubleshooting and Keeping It Looking Great
Uneven or Sinking Pavers
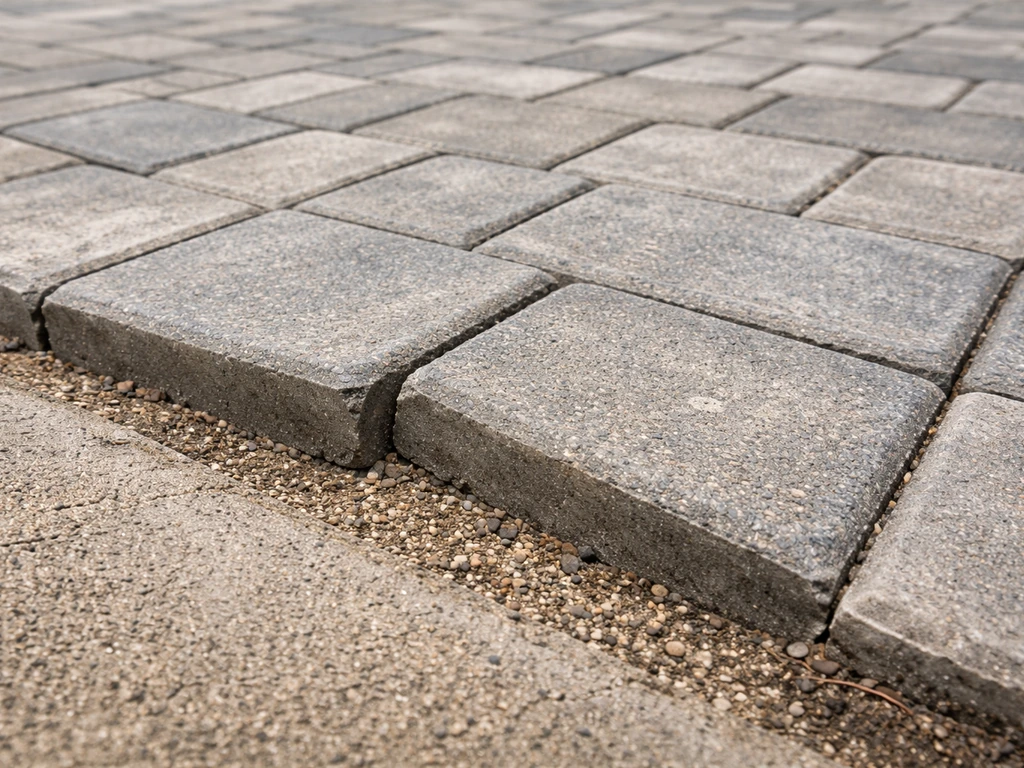
The most common issue after install is pavers sinking or going uneven. This almost always traces back to base prep: either the subgrade wasn't fully compacted, the gravel base was too thin, or organic material was left under the base. The good news is pavers are easy to repair. Pop out the affected pavers with a flat bar, add or redistribute base material, re-compact, re-screed the sand, and reset the pavers. No jackhammer, no concrete demolition.
Edge movement is another common problem. If pavers near the perimeter are rotating or spreading apart, your edge restraints aren't holding. ICPI's distress research shows that failing edge restraints lead to widened joints and paver rotation at the edges. Pop in additional spikes and add a restraint if needed. The fix is simple as long as you catch it early.
Weeds in the Joints
Weeds grow in joints from windblown seeds landing on the surface, not from below. Polymeric sand significantly reduces the problem by creating a semi-rigid joint that's harder for seeds to take root in. If weeds do appear, pull them while young and re-fill the joint with polymeric sand. Avoid herbicides that can stain pavers or discolor sealers.
Drainage Problems
If water is pooling on or around your patio, the slope is either wrong or there's nowhere for the water to go. First confirm your patio still has its drainage slope: grades can shift slightly after the first freeze-thaw cycle. If the grade is right but water still pools at the patio edge, you may need to add a channel drain or direct water to a lower part of the yard. Getting drainage right from the start is much easier than fixing it later, which is why it's worth thinking through before you dig. To get that drainage right, follow a clear plan for grading, base build-up, and any needed channel drains before you lay the pavers drainage plan.
Ongoing Maintenance
A properly installed paver patio needs very little maintenance. Re-apply polymeric sand to joints every few years as it wears down. Re-seal every 3 to 5 years depending on climate and traffic. Check edge restraints annually and add spikes if any have loosened. Rinse the surface with a garden hose periodically. Avoid pressure washing at high pressure as it can blast polymeric sand out of the joints. If you do pressure wash, re-sweep joints with polymeric sand afterward and re-activate with a light mist.
| Issue | Likely Cause | Fix |
|---|---|---|
| Sinking or uneven pavers | Inadequate base compaction or organic material in base | Pull pavers, correct base, re-screed sand, reset |
| Spreading edge pavers | Edge restraints failing or not installed | Add spikes, reinforce restraint perimeter |
| Weeds in joints | Windblown seeds landing in open joints | Pull weeds, refill with polymeric sand |
| Water pooling on surface | Insufficient drainage slope or blocked outflow | Check grade, add channel drain if needed |
| White haze on pavers | Sealer applied over damp surface or efflorescence | Strip sealer, let pavers dry fully, reapply |
| Joint sand washing out | Polymeric sand not activated properly or pressure washing | Re-sweep polymeric sand, mist lightly to reactivate |
Installing a paver patio is one of the most rewarding weekend projects you can tackle. It takes real effort, the right tools (rent the plate compactor, it's worth it), and patience during base prep. But when you're done, you have something that's genuinely beautiful, highly functional, and built to last decades. Take your time on the base, keep your sand bed at exactly 1 inch, use polymeric sand in the joints, lock your edges down properly, and you'll have a patio you're proud of every time you walk out the door.
FAQ
Can I install paver patio directly over an existing concrete slab?
Yes, but only if the slab is truly sound and stable. If the concrete has heaving, soft spots, major cracking, or ongoing drainage issues, the pavers will follow that movement. Also account for the added height (about 2.5 to 3.5 inches), then verify door openings, step heights, and any nearby drains will still function after the overlay.
How much water should I use to activate polymeric sand?
Don’t. Polymeric joint sand is designed to be activated with a light mist so the binders set without washing the sand out. If you soak the joints with a hose or use a pressure washer nozzle, you can pull polymer out, leading to sand loss, joint gaps, and a weaker lock between pavers.
What should I do if pavers start sinking or look uneven?
If the patio feels “floaty” or you see pavers rocking, stop and fix the base before finishing. Most unevenness comes from under-compacted subgrade or base that’s too thin. For spot repairs, remove the affected pavers, add or redistribute compactable base material, re-compact thoroughly, re-screed the 1 inch bedding sand, then reset the pavers and re-fill joints with fresh polymeric sand.
My edge pavers are shifting, how do I stop edge movement?
Aim for firm, consistent edge restraints that hold the perimeter under load. If you notice rotation, widening joints, or gaps along the borders, add more spikes or braces and reinforce the restraint system before it spreads inward. Early edge fixes are much easier than re-laying large sections.
How do I confirm the patio slope is correct before installing pavers?
Do a quick grade check using a long straightedge or string line before you lay pavers. Even if your layout looks correct, the final slope can drift after excavating or adding base, especially near the house. If you’re building near a foundation, set the drainage slope in your base plan so pooling does not develop later.
Can I lay pavers over existing grass or topsoil to save time?
If your patio is on grass or organic soil, you must remove all topsoil and organic material. Grass will compress and rot, and the gravel base will not be able to stabilize the system, even if the sand layer is perfect. Excavate to firm subgrade, then build the compacted gravel base over clean material.
How much extra material should I buy, and how do I plan the cuts?
For first-time installs, expect to cut several edge pieces and plan for them. Start your layout from a straight reference edge (often the house wall or a fixed boundary), and center the pattern so you avoid tiny slivers. When calculating paver count, include extra for cuts and future repairs (a good rule is ordering 5 to 10 percent more).
Can I make the bedding sand layer thicker to make leveling easier?
You typically don’t want a thick bedding layer. Keep the bedding sand at the nominal 1 inch depth using screed rails, because extra thickness can reduce stability and make leveling drift during compaction. If you need adjustments, correct them in the compacted base, not by adding more sand.
What are the right steps for compacting after laying pavers?
If you want to protect the paver face and keep the joint sand in place, use a rubber or poly pad on the plate compactor. Do multiple passes in different directions, and stop once pavers are firmly seated. Over-compacting or compacting aggressively without protection can chip paver edges and disturb the sand bed.
When should I seal the patio, and can I seal right after install?
Sealing is usually optional, but if you do it, wait until the patio is fully dry. Sealing too early can trap moisture and cause whitening (efflorescence bloom). Apply in thin, even coats using a sprayer or roller, let it dry fully, then apply a second coat if needed.
Step-by-step DIY guide to apply polymeric sand between patio pavers, prep joints, spread, fill, and activate without haz
Learn how to seal a paver patio step by step: clean, choose penetrating or wet-look sealer, apply, cure, and maintain.
Fix shifting patio pavers: diagnose base, bedding, drainage, edge restraints, and reset with proper compaction and joint