You can build a paver patio yourself in a weekend or two, and it will last decades if the base is done right. If you're wondering how to make a paver patio base that stays firm and drains well, focus on the right gravel depth and compaction base is done right. If you need a deeper dive beyond gravel depth and compaction, see our guide on how to build a paved patio from base prep through finishing paver patio base. The process goes like this: plan the layout, excavate and compact a gravel base, screed a 1-inch sand layer, lay the pavers in your chosen pattern, cut the edges, install edge restraints, sweep in jointing sand, and seal. That's the whole arc. If you want the full, step-by-step process, follow this guide on how to create a paver patio from planning through base prep and finishing. If you want the full, step-by-step process, follow this guide on how to create a paver patio from planning through base prep and finishing. The steps sound simple, and most of them are. The one place that genuinely makes or breaks the job is the base, so that's where this guide spends the most time. If you want even more detail on the foundation and base setup, see our guide on how to lay a paver patio foundation.
How to Build a Pavers Patio: Step-by-Step DIY Guide
Plan your patio before you dig a single shovelful
Start by deciding on size and shape. A 10x12-foot patio (120 sq ft) comfortably seats four people with a small table. A 16x20-foot space (320 sq ft) gives you room for a dining set and lounge chairs. Sketch it on paper, then mark it on the ground with stakes and string or marking paint. Walk around it. Sit in a chair inside the outline. Adjust before you've spent a dollar on materials.
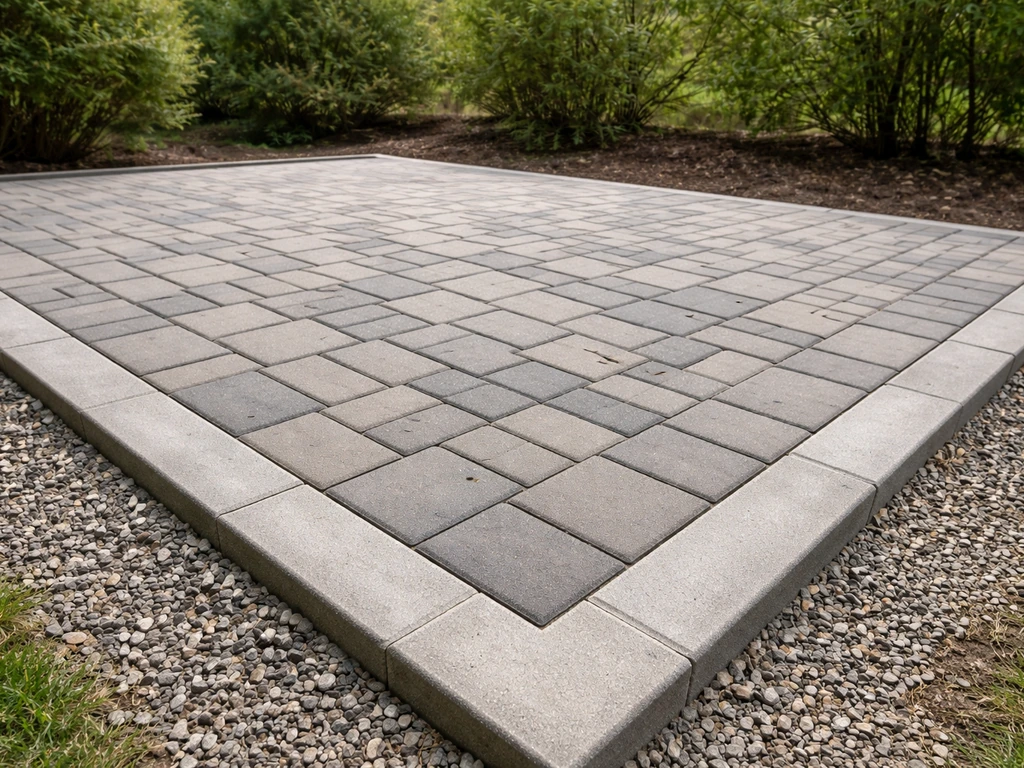
Next, pick your paver pattern. The pattern affects how you cut and how the patio looks, so choose it now, not mid-installation. Running bond (offset rows like brick) is the easiest for beginners. Herringbone is stronger under vehicle loads but requires more cuts. A simple grid or stack bond looks clean on square patios and minimizes cuts if your dimensions line up with full pavers. Basketweave works beautifully but needs pairs of matching-size pavers.
| Pattern | Difficulty | Cuts Required | Best For |
|---|---|---|---|
| Running Bond | Easy | Low (edges only) | Beginners, rectangular patios |
| Stack Bond / Grid | Easy | Very low | Square patios, modern look |
| Herringbone (45°) | Moderate | High (diagonal edges) | High-traffic, driveways |
| Herringbone (90°) | Moderate | Moderate | Classic look, rectangular spaces |
| Basketweave | Moderate | Low-moderate | Traditional gardens |
Also decide on paver size and material now. Standard concrete pavers (4x8 inches or 6x6 inches) are affordable, easy to find, and very DIY-friendly. Natural stone pavers like bluestone or travertine cost more and need more precise cutting, but deliver a premium look. Tumbled pavers give a more rustic feel. Thicker pavers (2.375 inches, or 60mm) work for patios; 3.125-inch (80mm) pavers are for driveways. Stick with the right thickness for foot traffic.
Finally, check with your local municipality about permits. Most jurisdictions don't require a permit for a ground-level patio under a certain size, but it's worth a quick call before you start. Also call 811 (in the U.S.) to have underground utilities marked before any excavation.
Everything you need before you start
Materials
- Pavers (order 10% extra for cuts and breakage)
- Compactable granular aggregate (crushed stone base, 3/4-inch clean or crusher run) — plan for 4 to 6 inches of depth
- Coarse bedding sand (concrete sand, not mason sand) — 1 inch deep after compaction
- Polymeric jointing sand
- Plastic paver edge restraints with 10-inch metal spikes
- Paver sealer (optional but recommended)
Tools
- Plate compactor (rent one — don't skip this)
- Tamper (hand tool, for edges the compactor can't reach)
- Rotary laser level or builder's level
- String line and stakes
- Tape measure
- Rubber mallet
- Screed rails (1-inch diameter pipes work perfectly)
- Long screed board (2x4 at least as wide as your screed rails)
- Circular saw with a diamond blade, or an angle grinder with a diamond disc (for cutting pavers)
- Brick splitter/guillotine (good for straight cuts on standard concrete pavers — cheaper to rent than a wet saw)
- Wet saw (for natural stone or complex cuts)
- Shovel, spade, and wheelbarrow
- Level (4-foot)
- Broom and leaf blower
- Safety glasses, hearing protection, dust mask
Supplies and safety gear
- Work gloves (pavers are heavy and have sharp edges)
- Knee pads (you'll thank yourself by day two)
- Marking paint or chalk line
- Landscape fabric (optional, goes between base and subgrade — not a weed guarantee, but it helps)
- Stakes and string
Site prep: layout, grading, excavation, and base setup
This is the phase that determines whether your patio looks great for 30 years or starts shifting and sinking in five. Don't rush it.
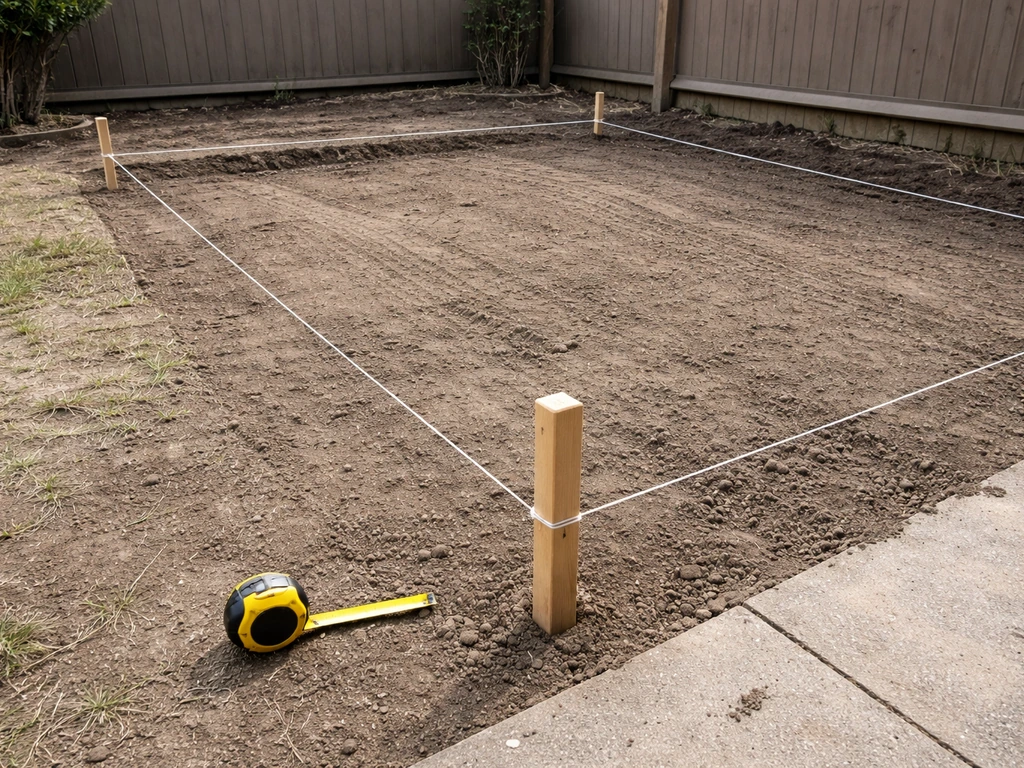
Step 1: Layout and grade
Mark your patio perimeter with stakes and string. Use batter boards if you want to maintain layout lines while you dig. Check for square by measuring diagonals, they should be equal. Now establish your slope. You need a minimum 1/8 inch per foot of fall away from your house (roughly 1% grade) so water drains off the surface and away from your foundation. Use a laser level or line level to set string lines at the finished paver height, then calculate your slope across the width.
Step 2: Excavation
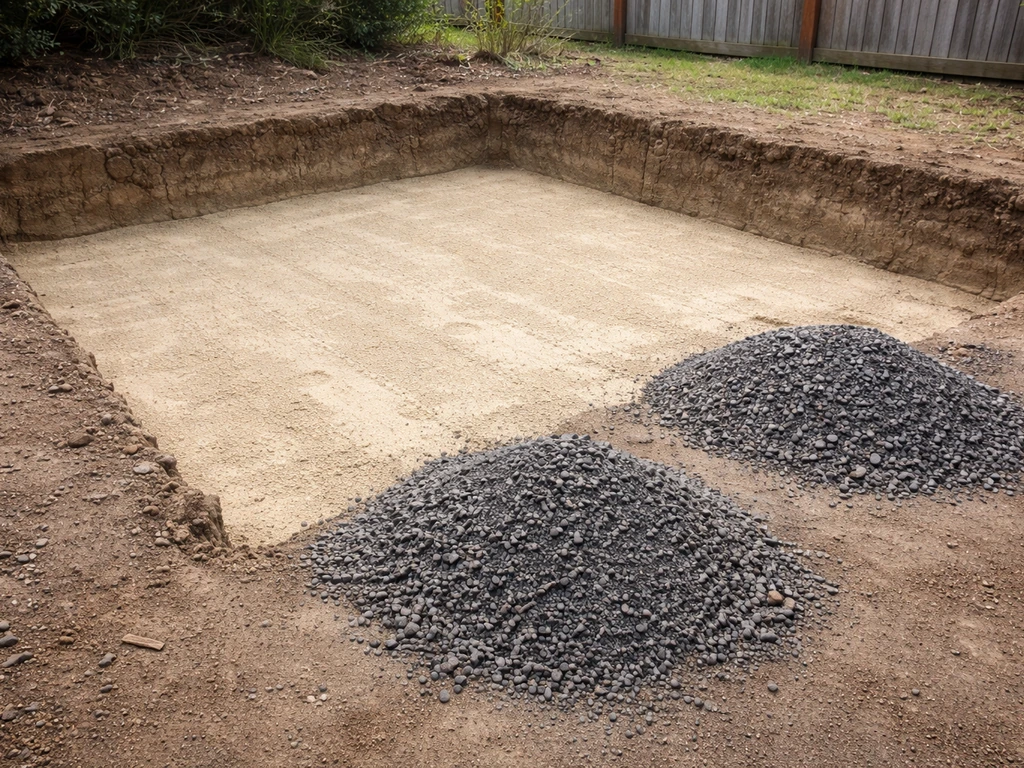
Dig down to accommodate your base depth (4 to 6 inches of compacted gravel), plus 1 inch of bedding sand, plus the paver thickness (typically 2.375 inches for a standard 60mm paver). That puts total excavation depth at roughly 7.5 to 9.5 inches below your desired finished surface. Add a little extra on sloped terrain. Remove all organic material and topsoil. If you hit soft, spongy subgrade, keep digging until you hit stable soil, then add more base material.
Laying over grass? You must remove the grass and topsoil entirely. Leaving organic material under a paver base leads to decomposition, settlement, and an uneven surface in a year or two. Laying over an existing concrete slab is a legitimate option that eliminates much of the excavation, but you need to verify the slab is structurally sound and account for the added height at doorways and transitions.
Step 3: Base material and compaction
Spread your compactable gravel base in lifts, no more than 2 to 4 inches at a time. Compact each lift with the plate compactor before adding the next. Belgard specifies compacting to 98% Standard Proctor density, which in practical terms means running the compactor over each lift in overlapping passes until the material stops moving and sinking. Typically two to three slow passes per lift is enough on well-graded material. The finished base should be firm, flat, and consistent with your slope built in. Total compacted depth should be 4 to 6 inches.
If you're considering a paver base panel system (an engineered foam-composite panel alternative to gravel base), that's a different approach that works well in specific situations and is covered separately. For most traditional installations on stable soil, compacted gravel is the proven standard.
Step 4: Bedding sand
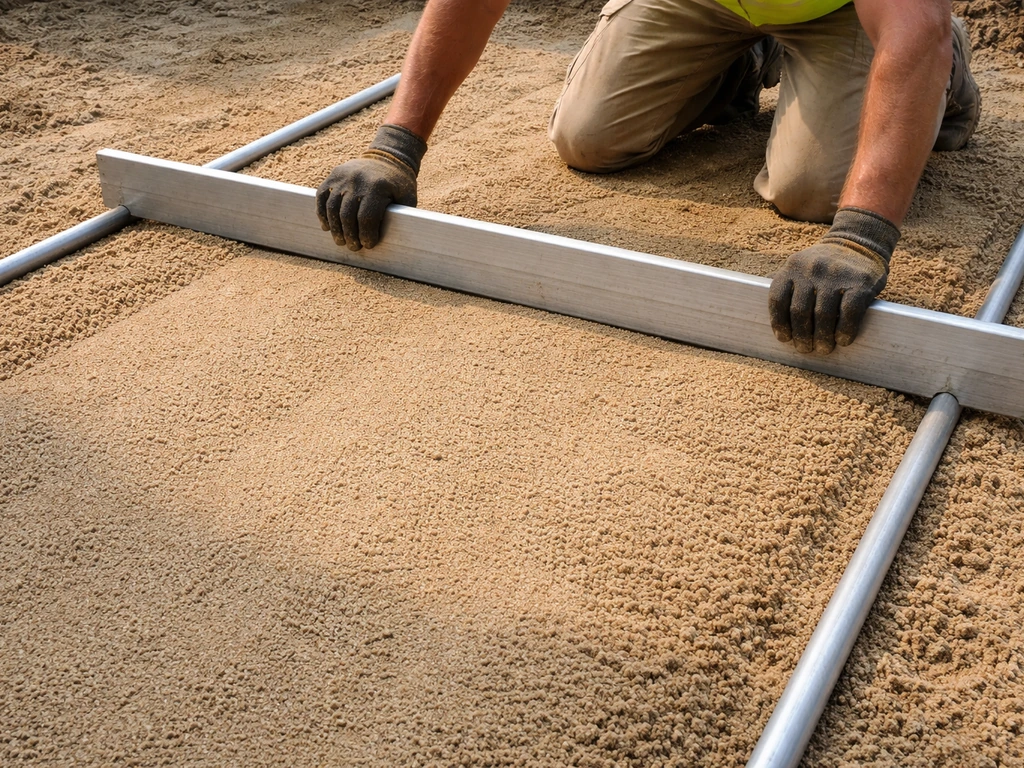
Lay screed rails (1-inch pipes) on top of your compacted base, spaced so your screed board spans them comfortably. The pipe diameter sets your sand depth. Spread coarse concrete sand between the rails, then drag your screed board across to create a perfectly flat, consistent 1-inch layer. ICPI guidelines note that loosely screeded sand at 1 to 1.5 inches will compact down to about 0.75 to 1.25 inches once the pavers are in place and compacted, which is what you want. Do not compact the sand before laying pavers, and do not walk on screeded sand. Work from kneeling boards placed on top of already-laid pavers whenever possible.
How to lay patio pavers: leveling, patterning, cutting, and edging
Where to start
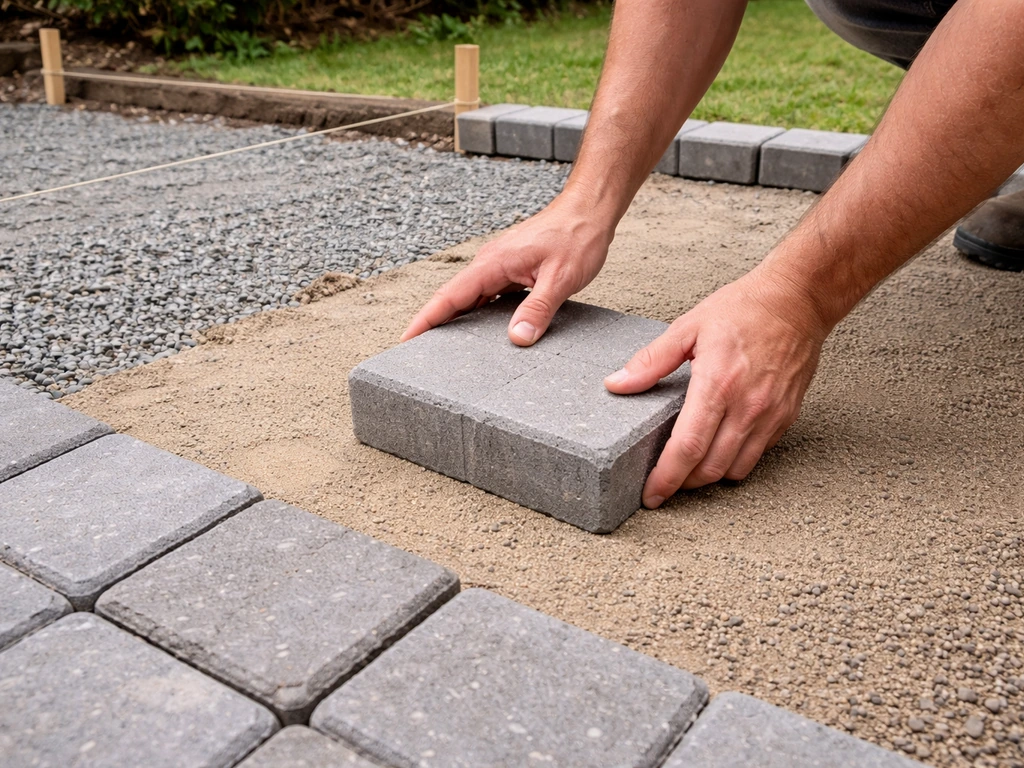
Start in the most visible corner or along the most prominent straight edge, usually the edge closest to your house. Lay a soldier course (a single row of pavers aligned with a string line) along two perpendicular edges first. These become your reference lines for the rest of the field. Set each paver gently, don't slide it, and tap it down with a rubber mallet. Use your 4-foot level frequently. Each paver should sit flush with its neighbors, with your slope maintained.
Laying the field
Work from your established corner outward, row by row, following your chosen pattern. Keep joints consistent, most concrete pavers have built-in spacer lugs that automatically maintain a 1/16-inch joint, which is ideal for polymeric sand. For pavers without lugs, use plastic paver spacers. Check every few rows with a string line and level. A slight high or low spot is easy to fix at this stage by pulling a paver, adding or removing a pinch of sand, and resetting.
Cutting pavers
Save all cuts for the end, once the full-size field is laid. Measure each cut individually rather than assuming they're all the same. Mark cuts with a pencil or chalk. For straight cuts on standard concrete pavers, a brick splitter gives clean results fast. For curves or complex shapes, use a circular saw or angle grinder fitted with a dry-cut diamond blade. For a round patio, plan the layout so you can cut wedge-shaped pieces and keep the pattern consistent as the rows curve For curves or complex shapes. For natural stone, use a wet saw to minimize cracking and dust. Always wear safety glasses, a dust mask, and hearing protection when cutting.
Edge restraints
Once all pavers including cuts are in place, install plastic edge restraints along every open edge. These are the unsung heroes of a long-lasting patio, without them, the outer pavers migrate outward over time, gaps open up, and the whole surface slowly falls apart. Spike the restraints into the base (not just sand) with 10-inch metal spikes every 12 inches or closer on curves. The top of the restraint should sit just below the paver surface so it's not visible.
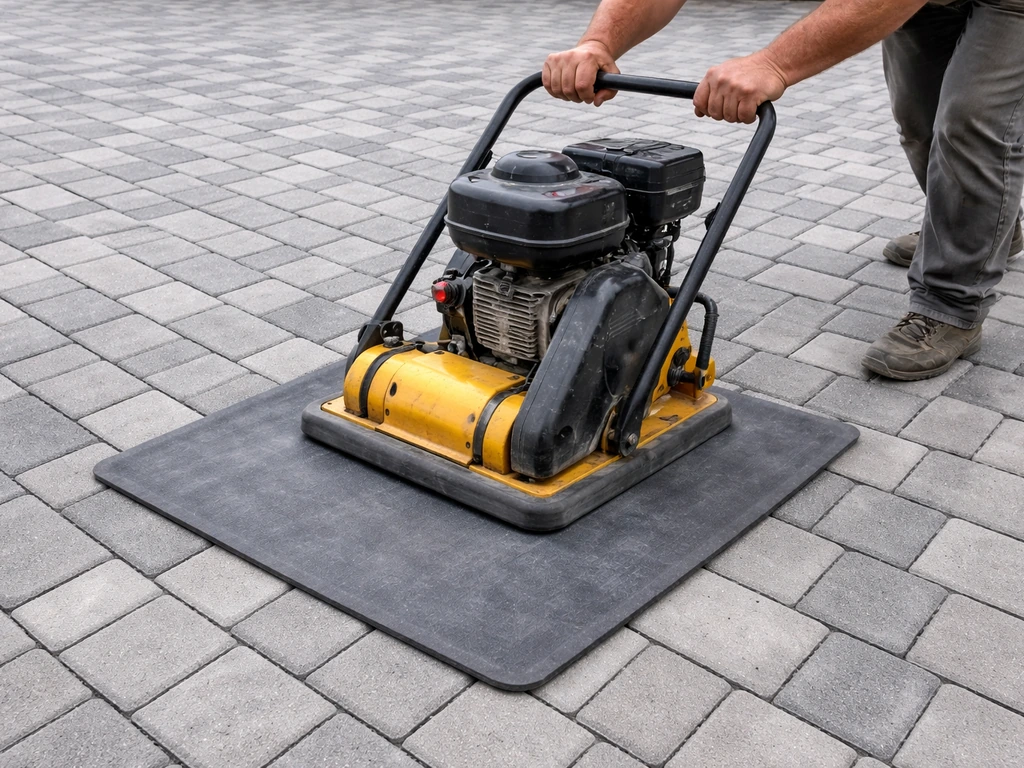
First compaction pass
Run the plate compactor over the entire paved surface to seat the pavers into the bedding sand. Use a rubber pad or protective mat under the compactor plate to avoid scratching the paver surface, especially on tumbled or textured pavers. This compaction step is what locks the surface together. Do a final check with your level and string line after compaction. Minor variations of 1/8 inch or less between pavers are acceptable.
Building patio steps with pavers
If your patio connects to a door threshold, deck, or a change in grade, you'll need steps. Paver steps aren't difficult, but they require careful planning for dimensions and solid support underneath. Get this wrong and steps can shift, settle unevenly, or become a tripping hazard.
Plan the riser and tread dimensions
A comfortable outdoor step has a riser height of 6 to 7 inches and a tread depth of at least 12 inches, ideally 14 to 16 inches. Calculate how many steps you need by dividing the total rise (height difference from ground to door/deck) by your riser height. For example, a 21-inch total rise needs three 7-inch risers. Most paver steps use stacked pavers or precast paver step units for the risers, with a full paver slab as the tread. A single layer of 60mm pavers is 2.375 inches tall, so three layers stacked (with mortar or construction adhesive between them) gets you to roughly 7 inches, which is perfect.
Build the step base
Steps need a solid foundation, not just the patio base. Dig down at least 6 inches in front of the first step location and compact a gravel base the same way you did for the patio. For larger step structures or in freeze-thaw climates, consider a poured concrete footing below the frost line. Steps placed on uncompacted ground will settle and separate from the patio surface, the most common DIY step failure.
Constructing risers and treads
- Set the bottom riser course first, directly on the compacted base. Use construction adhesive (like Sikaflex or Loctite PL Premium) between all paver layers — do not rely on gravity alone.
- Check that the first course is level side-to-side and sloped 1/8 inch per foot forward (toward the user) for water runoff.
- Stack the riser layers (as many as needed to reach your target riser height) with a bead of adhesive between each layer.
- Set the tread paver(s) on top of the riser stack. The tread should overhang the riser face by 1 to 1.5 inches (called the nosing). Apply adhesive between the riser top and the tread.
- Build the next riser directly behind the tread, on top of the patio surface or on its own compacted base, and repeat.
- Where steps meet the patio surface, ensure the transition is flush and secure. You can use a soldier course of pavers to create a clean edge that the steps butt against.
- Fill any gaps at the sides of steps with cut pavers or matching material, secured with adhesive.
For wide steps (more than 4 feet), use larger paver slabs or multiple pavers per tread. Make sure all joints between tread pavers are filled with polymeric sand or grouted, open joints on steps collect debris and become slip hazards.
Finishing: jointing sand, sealing, and cleanup
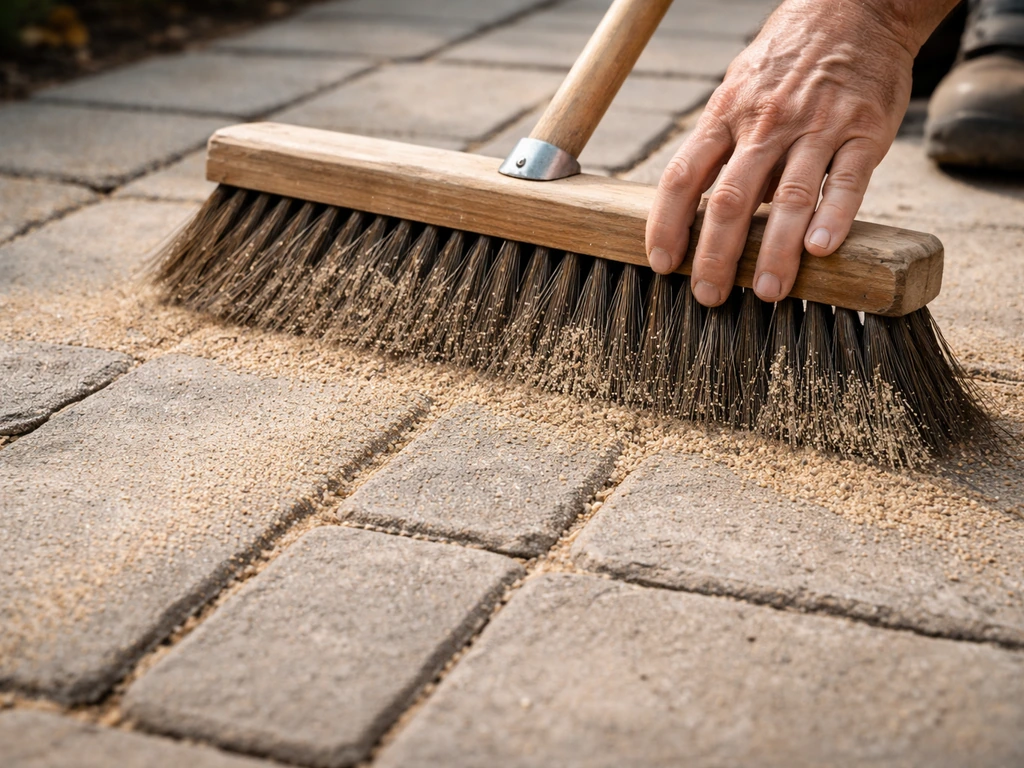
Spread polymeric jointing sand
Sweep dry polymeric sand across the entire patio surface with a stiff broom, working it into every joint. Make multiple passes in different directions. The joints should be filled to just below the chamfer (the small beveled edge on most pavers). Polymeric sand contains binding agents that activate with water, so it's critical that the pavers and joints are completely dry before application. Even slight moisture prevents proper activation.
Once the joints are filled and the excess swept off the surface, run the plate compactor (with protective pad) over the patio one more time to seat the sand fully. Sweep again to top off any joints that settled. Then mist the entire surface lightly with water using a hose on a fine spray setting, don't flood it, just activate the polymers. Let it cure for 24 hours before foot traffic.
Sealing (optional but recommended)
Wait at least 30 days after installation before applying sealer, the pavers need time to cure and any efflorescence (white salt haze) to work its way out. If efflorescence appears, treat it with a diluted muriatic acid wash or an efflorescence cleaner, rinse thoroughly, and let it dry completely before sealing. Apply a penetrating or film-forming paver sealer with a roller or pump sprayer according to the manufacturer's instructions. Sealer enhances color, makes cleaning easier, locks in jointing sand, and protects against staining. Reapply every 3 to 5 years depending on traffic and climate.
Final cleanup
Blow or sweep any remaining debris off the surface. Check the perimeter edge restraints are fully spiked and flush. Remove any string lines and stakes. Look along the surface from a low angle in raking light, this reveals any high or low pavers you may have missed. Minor lippage (one paver sitting higher than its neighbor) that exceeds 1/8 inch should be fixed now before sealer locks everything in place. Pull the paver, adjust the sand, and reset it.
When things don't go perfectly: troubleshooting and maintenance
Uneven or rocking pavers
This almost always means inconsistent bedding sand. Pull the offending paver, check the sand depth, and re-screed that area. If pavers are rocking diagonally, check for a small pebble or debris under one corner. The fix is easy and quick during installation, much harder to address after you've sealed.
Pavers sinking or settling after installation
Settlement usually means the base wasn't compacted enough or organic material was left in the subgrade. The repair involves pulling the affected pavers, adding and compacting fresh base material, re-screeding sand, and resetting the pavers. It's a tedious fix but a permanent one if you address the cause.
Pavers shifting or spreading apart
Missing, broken, or improperly installed edge restraints are almost always the cause. Check the perimeter first. Add restraints wherever they're missing, replace broken ones, and add extra spikes on corners. Reset any displaced pavers, refill joints, and re-compact.
Drainage problems and standing water
If water pools on the surface, the slope is insufficient or the surface has settled unevenly. A minimum 1% slope (1/8 inch per foot) is non-negotiable. If the patio was built correctly but a low spot has developed, it means the base settled there. Pull those pavers, add base material, compact, re-screed, and reset. For chronic drainage issues at the patio perimeter, consider adding a channel drain at the low edge.
Weeds in the joints
Polymeric sand dramatically reduces weed growth, but airborne seeds will still germinate on top of joints if the surface isn't maintained. Pull weeds manually, apply a paver-safe weed killer if needed, and top off the joints with fresh polymeric sand after any treatment. The real solution is reapplying sealer regularly, which blocks the fine gaps that would otherwise become a seedbed.
Routine maintenance that makes a big difference
- Sweep the surface regularly and remove debris before it stains or decomposes into the joints
- Rinse with a garden hose seasonally; use a pressure washer on a low setting (1,200 PSI or less) for deeper cleaning
- Inspect joints every spring and top off any areas where polymeric sand has washed out
- Check and re-spike edge restraints if any are loose, especially after hard winters
- Reapply sealer every 3 to 5 years to maintain color and joint protection
- In freeze-thaw climates, avoid metal shovels on paver surfaces — use plastic or rubber-edged snow removal tools
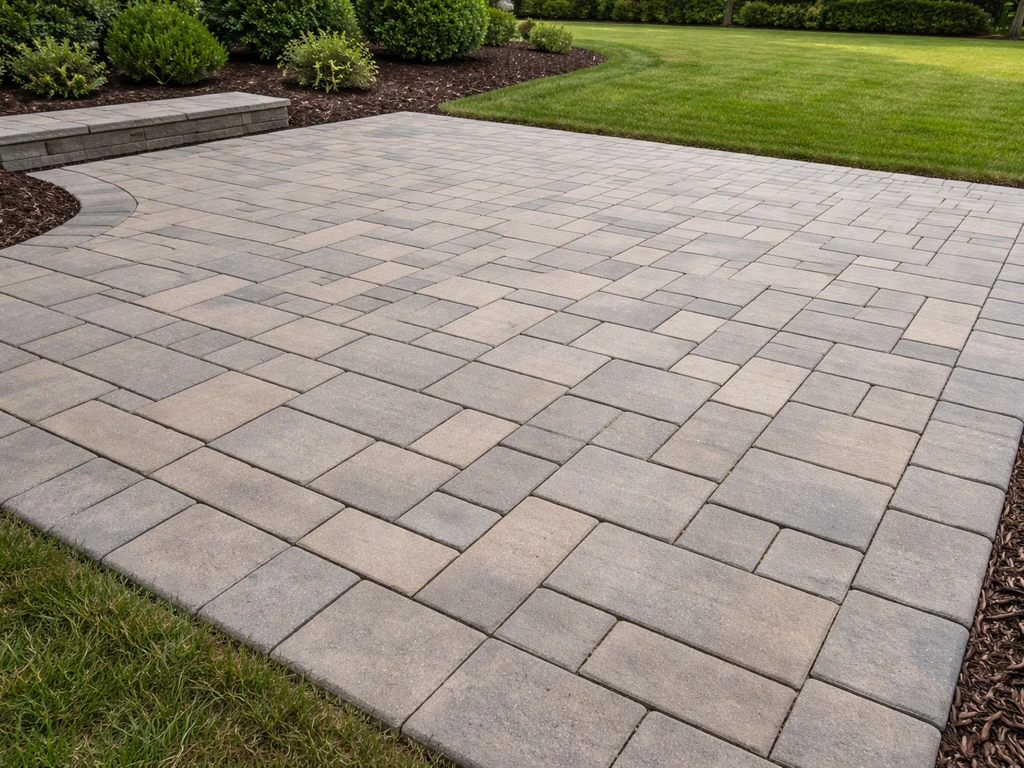
A paver patio built with a solid base and proper jointing is genuinely low-maintenance. Most of the work happens in that first installation weekend. Get the base right, keep the joints filled, and this patio will outlast any deck or poured slab you could have built instead.
FAQ
What’s the minimum slope I should build into a pavers patio, especially if it’s close to my house?
Use at least 1/8 inch of fall per foot (about a 1% grade) away from the house. If your yard already sheds water toward the structure, add a little extra fall, because small low spots after compaction can collect runoff at the doorway side.
Can I build a pavers patio on top of existing pavers or a compacted base that’s already there?
Usually no. Any existing material that contains topsoil, debris, or poorly compacted layers can compress further and create uneven pavers. If you’re considering it, the only safe approach is to verify the base is stable, level within your slope plan, and deep enough to still fit paver thickness plus bedding sand.
How do I choose between concrete pavers and natural stone pavers for a DIY job?
Concrete pavers are more forgiving on cutting and layout because many are designed with consistent dimensions and easier-to-maintain edges. Natural stone looks premium, but thickness and texture variations can make it harder to keep joints uniform, so it’s best if you’re comfortable spending more time on layout and fine cutting.
Do I need spacers if my pavers already have built-in lugs?
If the pavers have spacer lugs that maintain a consistent joint width, you typically do not need extra spacers for the main field. Use spacers only for paver types without lugs or where you find joints drifting wider or narrower due to pattern or edge conditions.
What’s the correct way to set the bedding sand so I don’t end up with uneven pavers?
Screed to a consistent 1-inch layer and do not compact the sand. Work from kneeling boards on completed pavers to avoid pushing the sand around. If you see a paver rocking during installation, stop and pull it immediately, then re-screed that area before continuing.
How much joint space should I plan for polymeric sand, and how do I avoid blowing sand out of joints?
Keep joints consistent so polymeric sand can pack properly. Fill just below the chamfer, then sweep off excess right away. Avoid flooding during activation, and after the initial misting and cure, keep heavy foot traffic light so the polymer can bind without washing out.
Is it normal for polymeric sand to look different after it cures or becomes darker?
Yes. It commonly darkens slightly as it activates and cures. What you want to avoid is sandy residue on the surface after curing, which usually means joints weren’t filled to the right depth or the sand was activated too aggressively with water.
How long should I wait before sealing, and what should I do if efflorescence appears?
Wait at least 30 days after installation before sealing. If white haze appears, treat it with an appropriate efflorescence cleaner or diluted acid wash, rinse thoroughly, and let the surface dry completely before any sealer goes on.
Do I have to use a plate compactor, or can I tamp by hand?
For most DIY patios, a plate compactor is strongly recommended because it seats pavers into bedding sand uniformly. Hand tamping typically leaves micro gaps and can cause premature rocking or joint sand loss, especially on larger or thicker paver surfaces.
What’s the best way to fix pavers that are uneven or have lippage after installation?
Fix it before sealing. Pull the high or low pavers, check for the correct sand depth, remove any debris under corners, then reset and re-compact the section. If lippage exceeds about 1/8 inch between neighboring pavers, don’t seal over it.
Why do pavers shift outward at the edges, and what’s the prevention step that matters most?
Most edge movement comes from missing or under-supported edge restraints. Install restraints along every open edge, spike them into the base (not just sand), and increase restraint support on corners so the perimeter can’t slowly migrate outward.
Can I add a patio to a deck or door without making steps or transitions fail?
Plan for solid support underneath transitions, and keep the height matching so you are not creating a “floating” edge. If the patio connects to a doorway threshold or deck, consider paver steps only when you can build an equivalent compacted foundation in front of the first riser.
What causes a patio to settle in only one area, and how do I diagnose the cause before repairs?
Localized settlement usually comes from insufficient compaction, leftover organic material in that spot, or an area that wasn’t excavated to stable subgrade. When you pull pavers to repair, inspect subgrade, then rebuild the base in compacted lifts and re-screed the sand before resetting.
Will a pavers patio freeze-thaw damage if I live in a cold climate?
It can, unless the drainage and base are right and the patio is fully compacted. Make sure you have the required slope away from structures and that joints are filled correctly so water doesn’t get trapped. In freeze-thaw areas, treat step footings seriously, and consider deeper footings where required.
How do I maintain weeds long-term without repeatedly adding polymeric sand?
Keep joints topped only after disturbed periods, like after cleaning or spot repairs, and maintain the seal schedule if you sealer-coated the patio. Polymerics reduce weed growth, but seeds can still land on top of joints, so prompt hand removal helps prevent repeat re-filling.
Step-by-step DIY for building a patio paver surface: plan, slope, excavate, base, pavers, joints, sealing, and troublesh
Step-by-step guide to build a paver patio: layout, base prep, paver installation, edging, drainage, sealing, and fixes f
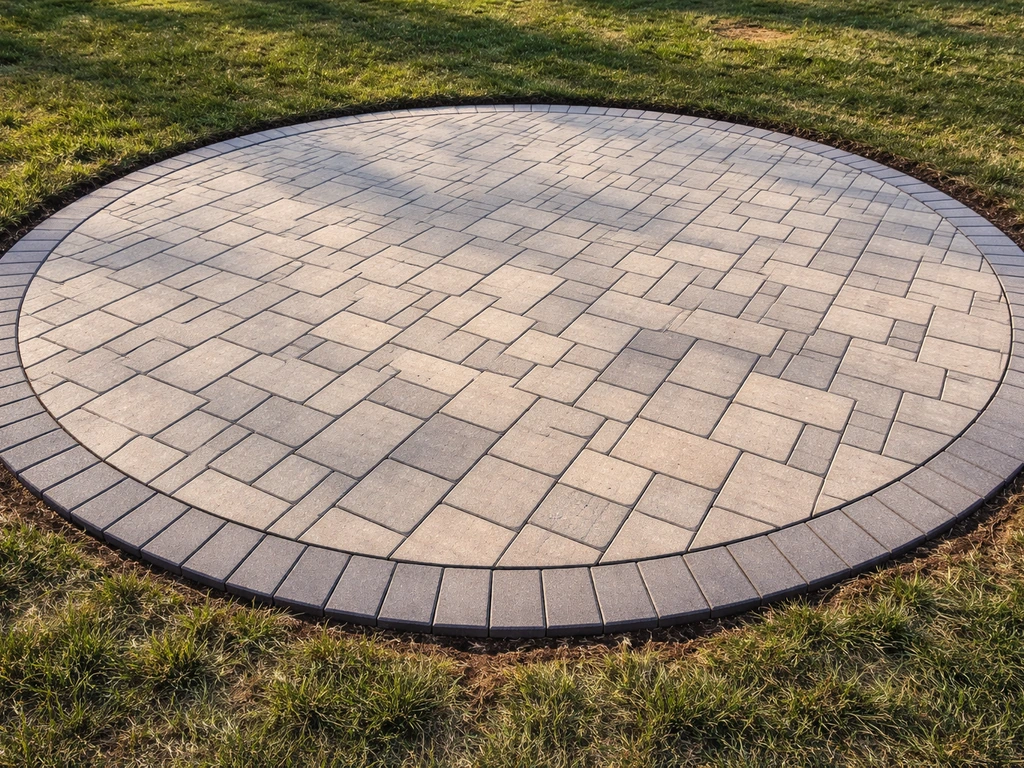
Step-by-step DIY guide to build a round patio with rectangular pavers: layout, prep, cutting, grading, edging, and troub