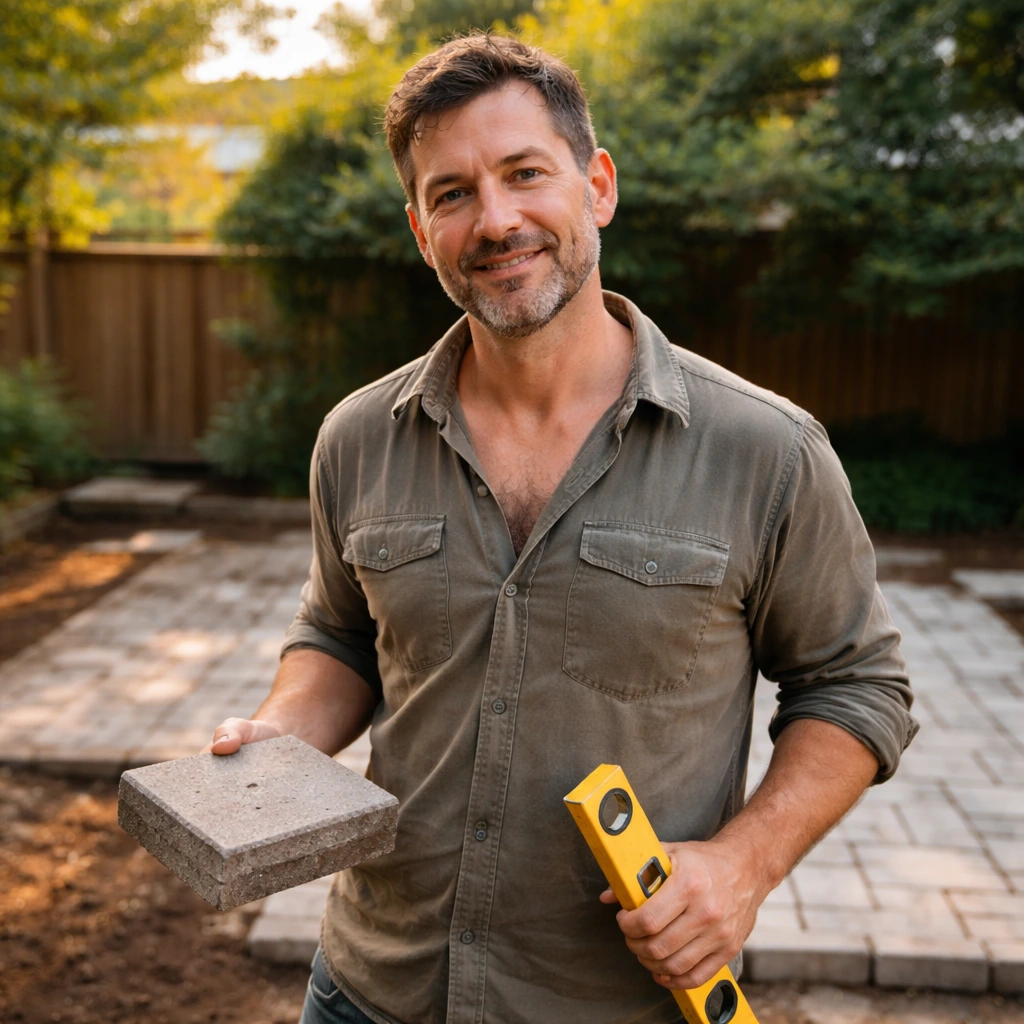
Yes, you can and should seal a concrete paver patio. A good sealer blocks water, oil, and UV damage, keeps joint sand locked in place, and makes the surface dramatically easier to clean. The catch is that prep matters more than the product itself. Seal over dirty, wet, or freshly-poured pavers and you will trap problems under the film instead of protecting against them. Do the prep right and the actual sealing is a straightforward afternoon job that most homeowners handle confidently on their first try.
How to Seal Paver Patio: Step-by-Step DIY Guide
Felix Rowe
15 May 2026
Should you seal your paver patio?
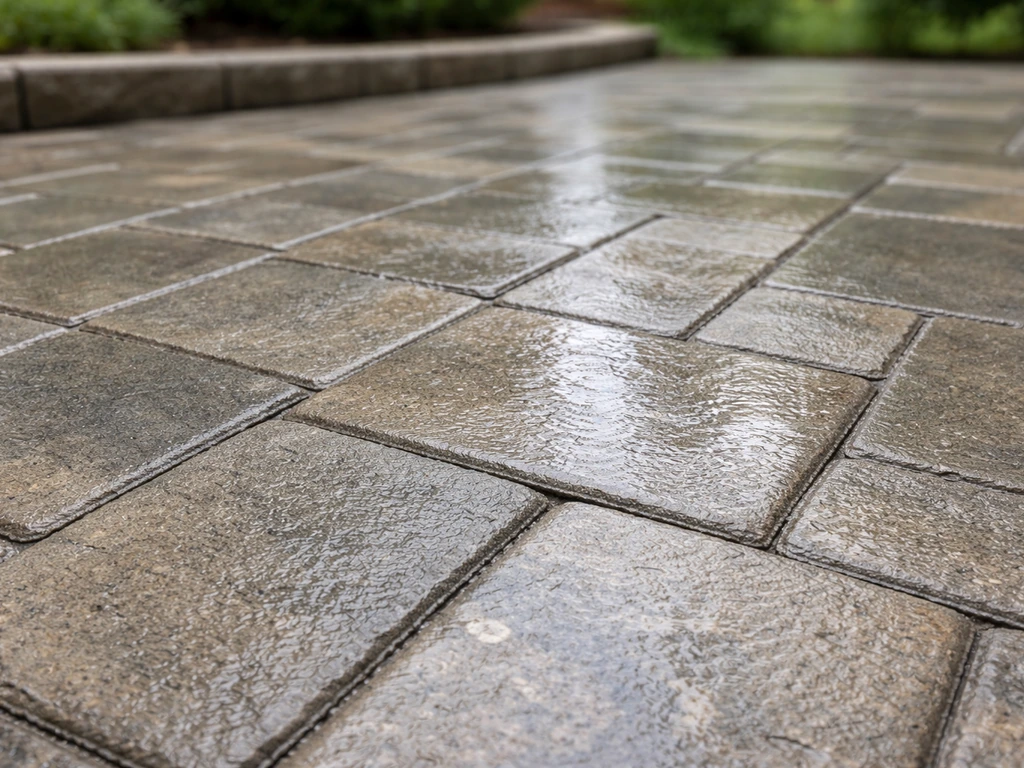
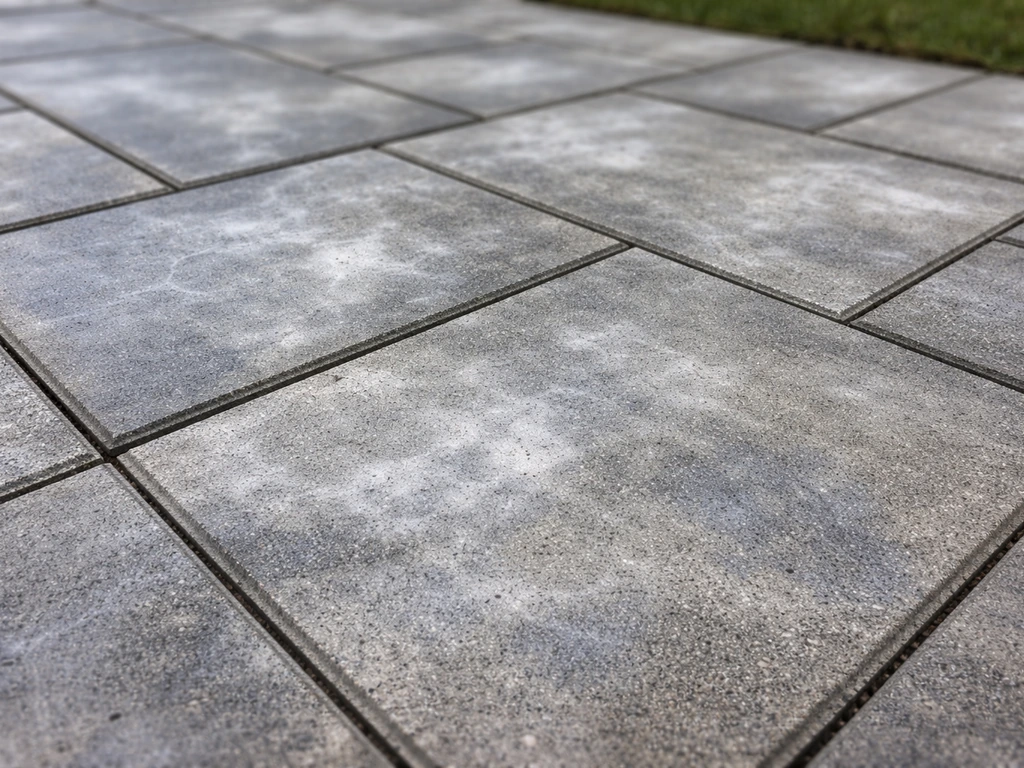
Concrete pavers are porous. Without a sealer, oil drips from the grill soak right in, rainwater carries dirt into the surface, freeze-thaw cycles chip and scale the edges, and efflorescence (that chalky white mineral bloom) keeps coming back. A sealer addresses all of those problems in one application, and it also hardens polymeric sand joints so they resist insects and weeds. The honest downside: you are committing to reapplication every two to four years and a bit of prep work each time.
The one situation where you should wait is brand-new pavers. New concrete needs time to cure and exhaust its initial efflorescence naturally before you lock anything in. Plan on waiting 60 to 90 days after installation before you reach for a sealer. Sealing too early traps moisture vapor inside the slab, which is exactly how you end up with milky white blush spots and premature peeling. If your pavers are already a season old and in good shape, you're ready to go.
Cleaning your pavers before you touch the sealer
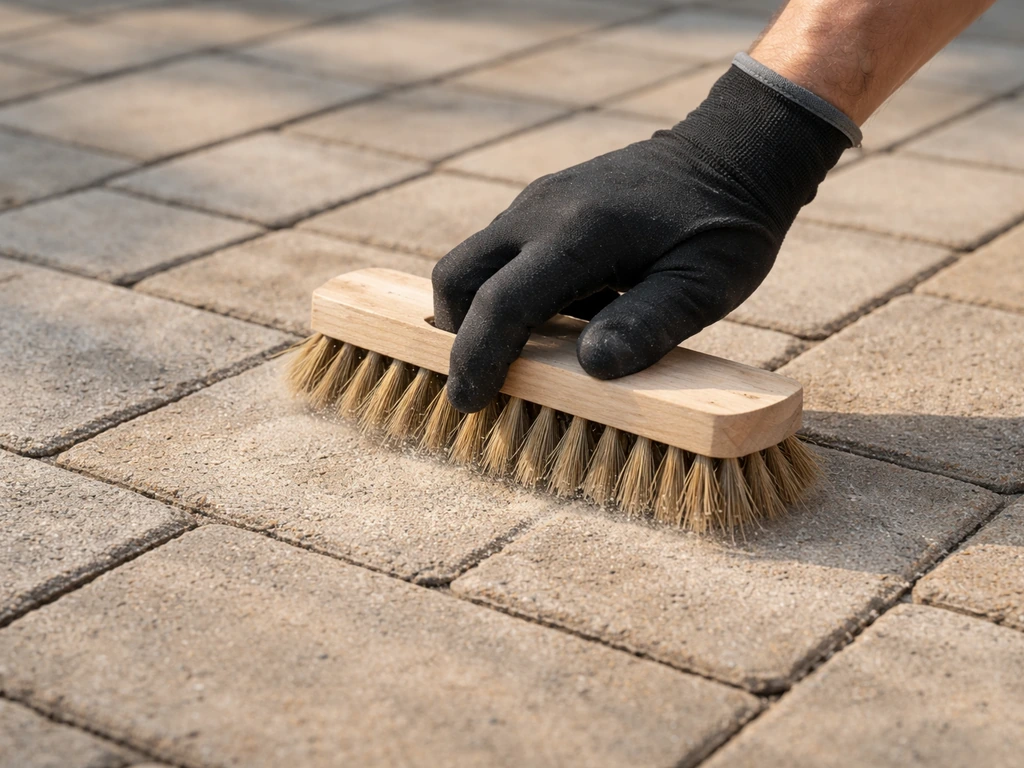
This is the step people rush, and it's the reason most sealing failures happen. The surface needs to be clean, free of efflorescence, and completely dry before any sealer goes on. A pressure washer handles most surface grime and will also dislodge loose joint sand, so have replacement polymeric sand on hand. For efflorescence, use a dedicated efflorescence cleaner or a diluted muriatic acid wash, rinse thoroughly, and let the pavers dry fully. Mutual Materials' industry guidelines are clear: allow at least 24 hours without any surface dampness before applying sealer. If you've used polymeric sand in the joints, give it 24 to 72 hours to fully cure before sealing, as H&C's guidance specifies, so the sand hardens completely and bonds properly.
One extra check: if you see any active white efflorescence on the surface, deal with it before sealing. Efflorescence forms when moisture migrates through the paver and deposits mineral salts on top. Sealing over it traps the moisture pathway and the problem gets worse, not better. Clean it, let the pavers dry out fully, and then seal. Some installers wait for 48 hours of dry weather (above 60°F) before the application, which is the approach Alliance Gator recommends for their resealer, and that's a good rule of thumb for any topical product.
Choosing the right sealer for concrete pavers
There are two main sealer categories for concrete pavers: penetrating sealers and topical (film-forming) sealers. They work differently, look different, and have different maintenance profiles. Here's how they compare:
| Feature | Penetrating (Silane/Siloxane) | Topical / Wet-Look (Acrylic or Urethane) |
|---|---|---|
| Appearance | Invisible / natural look | Gloss or semi-gloss sheen |
| Film on surface | No film formed | Yes, forms a surface film |
| Breathability | High (vapor passes through) | Lower (can trap moisture if applied incorrectly) |
| Water repellency | Excellent | Excellent |
| Stain protection (oil/grease) | Moderate | Very good (especially urethane) |
| UV stability | Good | Good to very good (check product) |
| Slip risk when wet | Minimal | Higher with high-gloss finishes |
| Freeze-thaw / salt protection | Excellent | Good |
| Recoat time | Single application typical | 1 hour between coats (urethane types) |
| Re-sealing interval | 3–5 years | 2–3 years |
| Best for | Natural stone look, cold climates, breathability needed | Color enhancement, easy cleaning, poolside aesthetics |
Penetrating sealers use a silane/siloxane blend that soaks into the paver and repels water from within without forming a surface film. Products like RadonSeal's PaverArmor and W. R. Meadows' Intraguard work this way. Because there's no film, moisture vapor can still escape, which makes them ideal for climates with hard winters or for pavers that see a lot of freeze-thaw cycles. They won't enhance the color at all, but they also won't peel, and the slip risk is very low.
Topical sealers, including acrylics and two-part urethane systems like H&C's Pro Series, sit on top of the paver and create a protective film. They're great for boosting color and delivering that wet-look sheen, and they're very effective at blocking oil and grease stains. The tradeoff is that high-gloss finishes can get slippery when wet, so if you're sealing around a pool or in a rainy climate, look for a product with a slip-resistant additive or choose a matte/satin finish. Bob Vila's testing specifically flags high-gloss/wet-look sealers for slip risk, and it's worth taking seriously.
For most standard backyard paver patios, a water-based acrylic or silane/siloxane penetrating sealer is the practical sweet spot. Water-based formulas like A-Tech Paver Sealer WB are lower VOC, easier to apply, and non-yellowing. If you want a natural finish that performs quietly for years, go penetrating. If you want to make the color pop, go topical acrylic. Save the two-part urethane systems for high-traffic commercial-style surfaces.
How to seal a paver patio: step by step
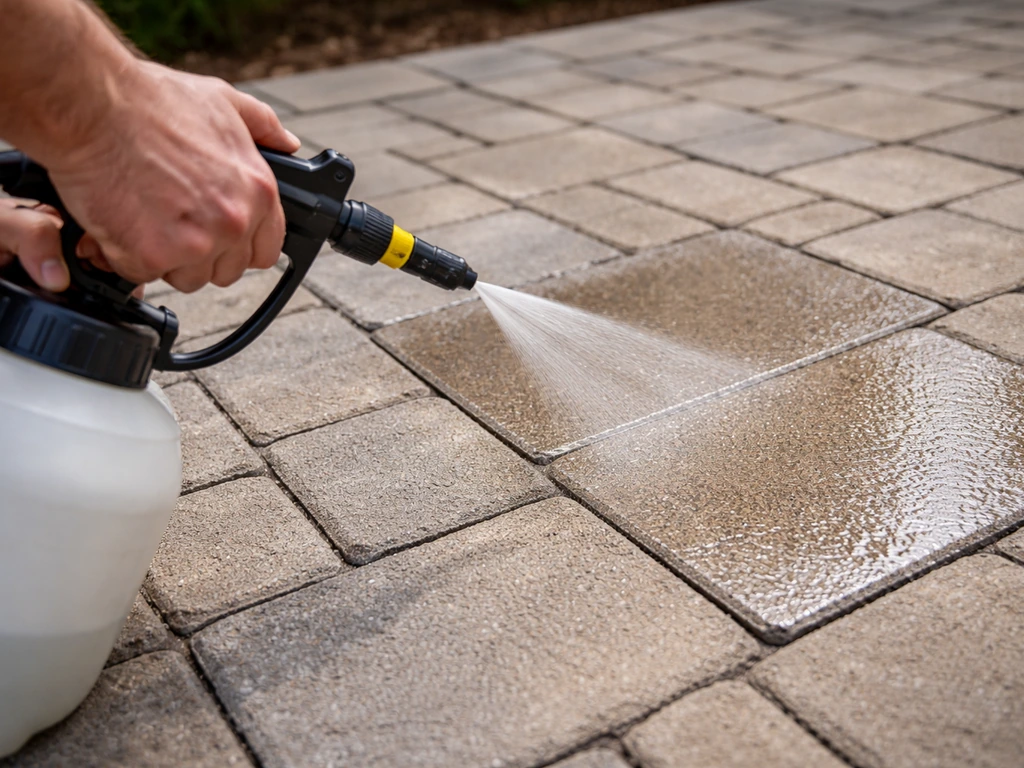
Before you start, check the weather forecast. You need a dry window of at least three to four hours after application, and both the air and surface temperature need to be between 50°F and 95°F. Eagle Sealer and Sakrete both flag the 50°F minimum, and it's real: sealer applied in cold conditions won't cure properly. Also verify your pavers have been dry for at least 24 to 48 hours. If you're resealing and there's polymeric sand involved, confirm it's fully set.
Tools you'll need: a pump garden sprayer or a low-nap roller (3/8 inch nap works well), a push broom, a pressure washer for prep, and painter's tape or plastic sheeting to protect adjacent surfaces. Filling paver joints with polymeric sand and compacting it properly helps lock the stones in place and reduces movement over time polymeric sand in the joints. If you want step-by-step instructions on the process, follow the rest of the patio sealing steps in order how to apply sealer to patio pavers. Safety gear: gloves, eye protection, and good ventilation if you're using a solvent-based product.
- Pressure wash the entire patio surface and remove all dirt, stains, algae, and efflorescence. Let the surface dry completely, a minimum of 24 hours and ideally 48 hours in humid conditions.
- Re-sand any joints that got washed out during cleaning. Sweep polymeric sand into the joints, compact lightly, and mist the surface to activate. Allow the sand to cure for at least 24 hours (up to 72 hours per the manufacturer's instructions) before sealing.
- Tape off or cover any adjacent surfaces, walls, or landscaping you don't want sealer on. Even water-based sealers are hard to remove from house siding.
- Stir (don't shake) the sealer according to the product label. Pour it into a pump sprayer or roller tray.
- Start at the far edge of the patio and work backward toward an exit so you don't step on wet sealer. Apply the first thin, even coat using overlapping passes, working the sealer into the joints as you go.
- Allow the first coat to dry per the product instructions, typically 1 hour for topical acrylic and urethane systems. Penetrating sealers usually require just one coat.
- Apply a second thin coat for topical sealers, keeping the same overlapping pattern. Two thin coats always outperform one heavy coat, both in coverage and in avoiding bubbles and uneven film build.
- Keep foot traffic off the patio for at least 4 to 6 hours, and avoid vehicle traffic for 24 to 48 hours. Full cure is typically 72 hours, though the surface will feel dry sooner.
Application tips and best practices
The biggest mistake DIYers make is applying sealer too thick. A heavy single coat looks faster, but it traps air bubbles, dries unevenly, and can peel within a season. Two thin coats give you better adhesion, more even gloss, and a film that lasts. Eagle Sealer's product guidance specifically recommends this two-coat approach, and every professional applicator will tell you the same thing.
- Apply in shade or on a cloudy day when possible. Direct sun heats the surface and causes the sealer to dry too fast, which leads to lap marks and uneven film.
- Work in sections, keeping a wet edge to avoid visible overlap lines.
- Don't apply if rain is in the forecast within 3 to 4 hours. A-Tech's application instructions flag this window specifically, and even light rain within the first hour can cause blushing or bonding failures.
- For penetrating sealers, wipe off any excess that pools on the surface within the time window on the label (usually 20 to 30 minutes). Pooled penetrating sealer dries into a whitish film.
- If you're adding an anti-slip additive to a glossy topical sealer, mix it into the second coat only for maximum grip at the surface.
- Don't mix sealer types or brands unless the manufacturer confirms compatibility.
Troubleshooting common sealing problems
White hazing or milky spots
This is the most common complaint, and it almost always comes from moisture trapped under the sealer. The cause is either pavers that weren't dry enough, rain hitting the surface within the first hour after application, or applying a topical sealer over new pavers that hadn't finished curing. Serveon's FAQ is direct about this: applying sealer over wet concrete or pavers causes white blushing. The fix depends on severity. Mild hazing on a topical sealer can sometimes be buffed out or corrected with a second coat once the surface is fully dry. Severe blushing usually means stripping the sealer entirely, waiting for the pavers to dry out completely, and starting over.
Peeling or flaking sealer
Peeling typically means the sealer didn't bond properly, usually because of a dirty or damp surface, or because a new coat was applied over an old, incompatible sealer that had failed. Strip the loose sealer with a chemical stripper designed for the product type, re-prep the surface thoroughly, and reapply. Going forward, always check whether a new product is compatible with whatever was previously applied.
Uneven gloss or missed spots
Uneven sheen usually comes from inconsistent application pressure or speed. If you catch it while the first coat is still wet, you can even it out immediately. If it's already cured, apply a second thin coat over the entire surface using consistent, overlapping passes. Don't spot-treat, because the patch will be visible.
Water isn't beading after application
If water soaks in rather than beading up after sealing, the coverage was likely too thin, the surface was contaminated during application, or the product has reached the end of its effective life. For a new application, add another coat. For an older patio, it's probably time to reseal.
Efflorescence appearing through or after sealing
If efflorescence shows up after sealing, it means moisture is still migrating through the paver and was present (if not visible) when you applied the sealer. Rochester Concrete Products specifically warns that sealing can worsen efflorescence if moisture vapor is trapped. Strip, clean with an efflorescence remover, allow thorough drying, and switch to a penetrating breathable sealer rather than a film-forming topical product, which handles this situation much better.
Maintenance and how often to re-seal
A well-applied sealer on a concrete paver patio typically lasts two to four years depending on foot traffic, UV exposure, and climate. Topical acrylic sealers in sunny climates tend to need attention every two to three years. Penetrating silane/siloxane sealers often go three to five years before needing a refresh. The best indicator isn't a calendar, it's the surface itself: when water stops beading and starts soaking in, it's time to reseal. If you want to finish patio pavers beyond sealing, focus on proper cleaning and joint sand so the surface stays stable and easy to maintain.
Between sealings, keep the patio clean with regular sweeping and an occasional rinse. Avoid pressure washing the surface aggressively once it's sealed, because it will shorten the sealer's life. For spot stains, use a mild soap and water solution rather than harsh chemicals, which can break down the sealer film. If you're in a climate with hard winters, avoid using rock salt on sealed pavers. Salt accelerates sealer deterioration and can undermine the freeze-thaw protection you're trying to maintain.
When it's time to reseal, you don't always need to strip the old sealer first. If the existing coating is in good shape and just thin, a light cleaning and a fresh coat of the same compatible product is usually enough. If the old sealer is peeling, flaking, or incompatible with the new product, strip it fully first. Taking shortcuts here is how you end up with the adhesion problems described in the troubleshooting section.
If weed control through the joints is a specific goal, look into the relationship between polymeric sand, sealer compatibility, and joint prep before you start, since those steps work together. And if you're starting from scratch with new pavers that need sanding and sealing as a combined workflow, treating those as connected steps will save you time and give you a much more consistent result.
FAQ
How can I tell if my paver patio is dry enough before sealing?
Besides waiting the recommended window, do a simple tape test. Press a strip of painter’s tape to the paver surface, leave it for about 10 to 15 minutes, then peel it back. If the tape comes off clean with no moisture haze or darkened area on the underside, the surface is likely dry enough. If the area darkens or looks damp, wait longer, especially after any cool nights or morning dew.
Should I seal pavers right after pressure washing, or should I wait longer than the minimum?
Wait longer than “until it looks dry.” Pressure washing drives water deeper into the paver and can soften or mobilize joint sand. If you can, plan for a full dry day, and ensure joints feel firm and not sandy. If weather is humid or temperatures drop after the wash, extend drying time because sealer can trap moisture that later shows up as milky spots or peeling.
Can I seal over polymeric sand if it hasn’t fully cured yet?
It’s better to delay. Even if the surface looks set, polymeric sand typically continues hardening for a day or two after application and exposure to moisture. Sealing too early can reduce bond strength, leading to joint movement and the need to rework sand sooner. If you reseal, confirm the joints are hard, not dusty, and not reactivating when lightly misted.
Do I need to clean efflorescence off even if it only appears in small spots?
Yes. Spot sealing over active white deposits usually doesn’t stop the underlying moisture migration, and the white bloom can return around the sealed area. Remove the efflorescence, rinse thoroughly until runoff is clear, then give the pavers extra time to dry before applying any sealer, especially if your patio has shaded areas where drying is slow.
What’s the best way to avoid streaks or roller marks on film-forming (topical) sealers?
Use consistent product application and keep a wet edge. Apply in overlapping passes, don’t let sections fully dry between passes, and avoid overworking the surface after it starts to tack up. If you notice streaking while the coat is still wet, correct it immediately by lightly leveling with a roller or brush in the direction of your last pass. Waiting to “fix later” often locks the lines in.
Can I use a mop, sprayer, or roller with any sealer type?
No. Penetrating sealers often respond well to controlled application (sprayer or low-nap roller) but still need even coverage without puddling. Topical sealers can be more sensitive to application method and can show lap marks if the spread rate is off. If you’re switching tools from one project to another, follow the product label for application rate and technique, since “same tool” does not always produce the same finish.
Is it safe to seal pavers if weeds already exist in the joints?
You’ll get better results by removing weeds first. If weeds are present, treat and remove them down to the root so you are sealing clean, stable joints rather than trapping growing material. Then ensure the joint sand is firm again before sealing. If your goal is long-term weed reduction, consider how your chosen sealer interacts with joint sand and whether you should rework joints before the coating.
How soon can I walk on the patio after sealing?
Assume “light foot traffic” is not the same as “full use.” Even with a dry-to-touch surface, cure time affects durability and how easily the surface scuffs. For most jobs, wait for the label’s cure timeframe, keep furniture and grills off early on, and avoid dragging items. If you apply a second coat, allow full dry and cure between coats as directed.
Why does my sealed patio get slippery, and what can I do about it?
Slip risk usually increases with high-gloss or wet-look topical finishes. If you haven’t applied yet, choose a matte or satin sealer or one with a slip-resistant additive. If the patio is already sealed and too slick, you may need to switch to a lower sheen or use a slip-improving product compatible with your sealer type. Test in a hidden area first to confirm appearance and traction.
Can I reseal without stripping if my current sealer is still intact?
Often yes, but only if the existing coating is bonded and not peeling. Do a quick adhesion check by pressing tape to a worn area and pulling it off. If the surface comes away or feels powdery, stripping and re-prep is usually required. If the coating is intact, wash and lightly clean, then apply the same or a proven compatible product to maintain the finish and avoid peeling from incompatibility.
What’s a quick check to know whether it’s time to reseal?
Use the water test. Sprinkle water in several spots across the patio. If it beads strongly, the sealer is likely still effective. If water soaks in quickly and darkens the paver uniformly, coverage is failing and resealing is due. This is especially useful if your patio has mixed sun exposure where one side may age faster.
Will sealing affect my joint sand and drainage, especially after rain?
A penetrating sealer is designed to repel water while allowing vapor to escape, which typically has less impact on trapped moisture. A topical film can reduce how quickly water interacts with the surface and may change how quickly dampness leaves after rainfall. After sealing, watch for pooling or persistent dampness. If you see standing water, address slope and drainage issues rather than just adding more sealer.
Citations
Mutual Materials’ industry guidelines state the cleaned surface must be completely dry prior to sealing and recommend allowing at least 24 hours without moisture/surface dampness before application.
https://www.mutualmaterials.com/wp-content/uploads/2024/10/mm-industry-guidelines-for-paver-cleaning-sealing-joint-stabilization.pdf
The same Mutual Materials guideline document provides a comparison table indicating different sealer film types and performance expectations (e.g., “can be re-coated,” “breathability”/ease of removal notes) and discusses that application procedures depend on surface condition and compatibility.
https://www.mutualmaterials.com/wp-content/uploads/2024/10/mm-industry-guidelines-for-paver-cleaning-sealing-joint-stabilization.pdf
Sakrete’s Concrete Paver Sealer – Natural look PDF includes an application condition warning to use only when product, air, and surface temperature are above 50°F (note appears as “above 50F” in the PDF instruction page).
https://www.sakrete.com/content/uploads/2021/07/Concrete-Paver-Sealer-Natural.pdf
A-Tech Paver Sealer WB application instructions specify substrate and sand must be dry and there must be no rain for 3–4 hours after application.
https://www.appliedtechnologies.com/wp-content/uploads/A-Tech_Paver_Sealer_WB_Application_Instructions.pdf
A-Tech Paver Sealer WB is described as a high-solids, water-based product that is presented as non-yellowing and designed to protect pavers/stone against oil/grease, water, efflorescence, mold/mildew, and UV damage (per spec sheet claims).
https://www.appliedtechnologies.com/wp-content/uploads/A-Tech_Paver_Sealer_WB_Spec_Sheet.pdf
RadonSeal states PaverArmor is a deep-penetrating, non-film-forming paver sealer using a silane/siloxane blend that allows vapor to escape while blocking water intrusion and helps prevent efflorescence, freeze–thaw damage, and salt deterioration.
https://www.radonseal.com/product/radonseal-penetrating-paver-sealer/
W. R. Meadows describes Intraguard as a penetrating silane/siloxane-based sealer that does not form a film (so it can remain breathable) and is designed to reduce scaling caused by deicing salts.
https://www.wrmeadows.com/intraguard-water-based-penetrating-sealing-compound/
Sika’s Sikagard H 177 is presented as a clear, water-based, breathable silane/siloxane water repellent (VOC-compliant) designed to repel water while allowing moisture vapor to move through masonry systems.
https://usa.sika.com/en/construction-products/coatings-water-repellents/silane-siloxianes/sikagard-h-177.html
The Alliance Gator Seal Resealer product listing states after cleaning you must wait at least 48 hours (above 60°F, with no rain) so the pavers and polymeric sand joints are completely dry before applying the resealer.
https://polymericsandstore.com/products/alliance-gator-seal-resealer-concrete-pavers
Mutual Materials’ cleaning/sealing guidelines emphasize that efflorescence and surface contamination must be addressed in prep before sealing, and that sealing is not a fix for trapped moisture/efflorescence issues.
https://www.mutualmaterials.com/guidelines-cleaning-sealing-paver-patioaining-hardscape-projects/
Serveon states applying a paver sealer over wet cast concrete/pavers (with stated exceptions) can cause undesirable white blushing/milky spots, and that with exceptions the surface must be dry when sealer is applied.
https://www.serveonsealants.com/faq-pavers/
H&C states polymeric sand used in joints should be allowed to cure 24–72 hours (per manufacturer instructions) before applying sealer.
https://www.hcconcrete.com/product/hc-pro-series-urethane-paver-sealer-2-part-clear-gloss/
H&C lists a recoat time of 1 hour for the urethane paver sealer system (with other cure/traffic timing noted on the page).
https://www.hcconcrete.com/product/hc-pro-series-urethane-paver-sealer-2-part-clear-gloss/
Eagle Sealer states for best results to apply when surface and air temperatures are above 50°F and below 95°F, and warns not to apply if rain is imminent.
https://www.eaglesealer.com/product-page/paver-sealer
Eagle Sealer specifies applying in two thin coats (not one heavy coat) to achieve coverage and reduce application defects like uneven film build.
https://www.eaglesealer.com/product-page/paver-sealer
Sakrete’s Concrete Paver Sealer – Natural look PDF presents its function as protecting pavers from oil/grease stains and weathering while being an “invisible protective barrier” approach (product positioning differs from wet-look/topical film products).
https://www.sakrete.com/content/uploads/2021/07/Concrete-Paver-Sealer-Natural.pdf
Bob Vila notes that some high-gloss/wet-look sealers can appear “slippery-when-wet” when dry and discusses breathability as the ability to allow moisture vapor to move through the stonework after sealing.
https://www.bobvila.com/articles/best-paver-sealer/
Rochester Concrete Products warns that moisture evaporation/evaspiration trapped by sealing can contribute to efflorescence and emphasizes allowing new concrete/brick pavers to fully cure/dry before sealing.
https://rochestercp.com/paver-sealant-to-seal-or-not-to-seal
A Florida-specific guide published April 14, 2026 states new concrete pavers need about 60–90 days to cure/release efflorescence naturally (then surface prep and sealer application follow).
https://firstcoastpropertyexperts.com/2026/04/14/paver-sealing-florida-guide/
Serveon’s FAQ states an immediate rain within the first hour after application can cause bonding issues and undesirable white “blushing/milky spots,” and it also notes issues may depend on timing after application (e.g., 1–2 hours).
https://www.serveonsealants.com/faq-pavers/
Next Articles
Do It Yourself Paver Patio Installation: Step by Step
Step-by-step guide to DIY paver patio installation: grading, base prep, paver setting, edging, joint sand, sealing and f
Do It Yourself Patio Paver Ideas: Layout, Prep, Install
DIY patio paver ideas with layout patterns, site prep, base thickness, leveling, edging, and fixing sinking, gaps, weeds
Patio Pavers Do It Yourself: Step-by-Step Guide
Step-by-step DIY patio paver install: plan, prep base, lay & cut pavers, ensure drainage, then compact, sand, seal.