You can absolutely install a paver patio yourself, and if you follow the right sequence, it will stay level, drain properly, and hold up for decades without shifting. The key is in the base: a well-compacted gravel sub-base, a correctly screeded bedding sand layer, and a consistent slope of about 1 inch for every 8 feet away from your house. To help you pull it off smoothly, follow a clear stone patio pavers do yourself approach that matches your site prep, base depth, and drainage needs. Get those three things right, and the rest is just patience and elbow grease.
Do It Yourself Paver Patio Installation: Step by Step
Felix Rowe
17 May 2026
Planning your DIY paver patio project
Before you touch a shovel, spend real time on planning. The decisions you make here determine how much you'll spend, how long the project takes, and whether you'll be proud of the result or quietly frustrated every time you look at it.
Realistic time estimates
For a solo DIYer or a two-person team, a 200 to 300 square foot patio typically takes one full weekend for prep and base work, and another weekend for laying pavers and finishing. That's assuming you've lined up your materials and equipment rentals in advance. Larger patios, raised designs, or projects with lots of cuts can stretch to three or four weekends. Don't plan this for a holiday Friday when the rental shop is slammed.
What you'll need: tools and materials
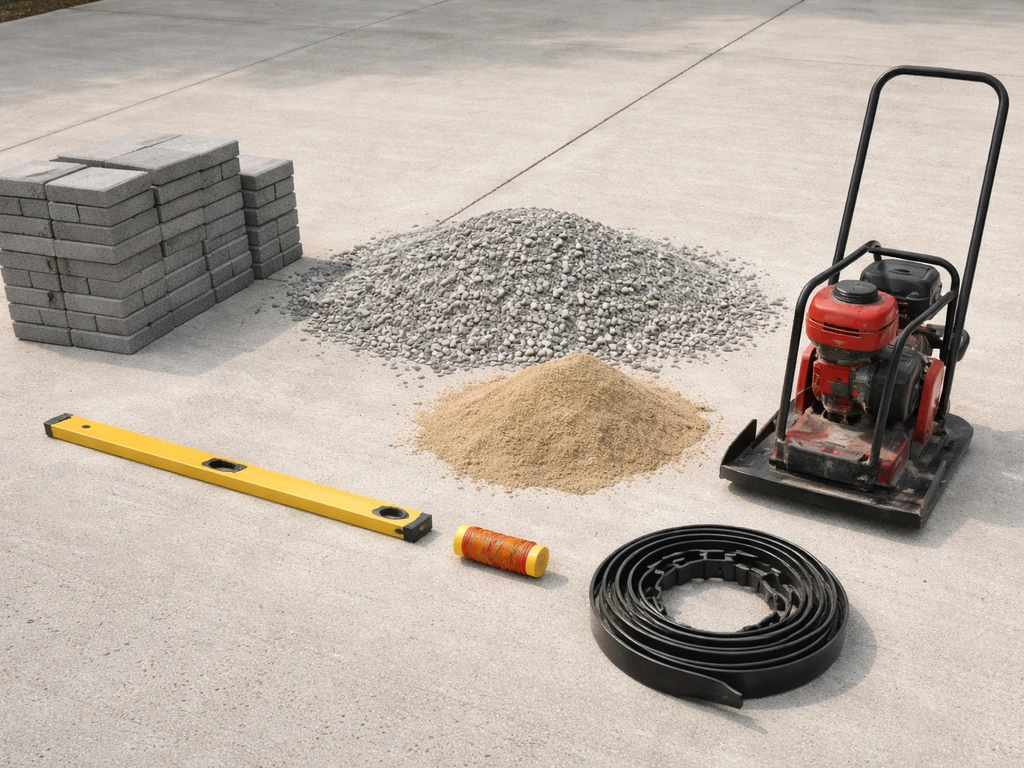
Gather everything before you start. Missing materials mid-project is one of the most common reasons DIYers end up with poorly compacted bases or uneven joints.
- Pavers (add 10% for cuts and waste)
- Crushed stone or gravel for the sub-base (typically 4 to 6 inches deep)
- Coarse bedding sand (about 1 inch deep after screeding)
- Polymeric sand for joints
- Plastic edge restraints with spikes
- Plate compactor (rent this, don't buy it)
- Sod cutter or flat spade for removal
- String line and stakes for layout
- Screed rails or pipes
- Rubber mallet
- Level and long straightedge
- Angle grinder or wet saw for cuts
- Safety glasses, gloves, and knee pads
How to estimate your budget
Paver costs vary widely by material: basic concrete pavers might run $2 to $5 per square foot, while natural stone or premium tumbled brick can push $15 to $25 per square foot. Add base materials, sand, edge restraints, and tool rentals, and a typical DIY patio lands somewhere between $8 and $20 per square foot all-in, depending on your material choices and local prices. That's still significantly less than hiring a contractor, which often runs $20 to $50 per square foot for labor alone.
Check permits and utilities first
Most jurisdictions don't require a permit for a ground-level paver patio, but some do, especially if you're adding a fire pit or a raised structure. Call your local building department to confirm. More importantly, call 811 (in the US) before you dig. It's free, it's required by law in most states, and it prevents you from hitting a gas or electrical line.
Site prep and layout
This is the phase most DIYers underestimate. Site prep is physically demanding and time-consuming, but skipping steps here is the number one reason patios sink, shift, or drain into the house.
Marking your area
Use stakes and string lines to define the exact perimeter of your patio. A can of marking spray paint makes this easy. Make sure your corners are square using the 3-4-5 triangle method: measure 3 feet along one edge, 4 feet along the adjacent edge, and the diagonal should be exactly 5 feet. If it's not, adjust until it is. This matters more than most people think, especially when you're setting pavers in a running bond or herringbone pattern.
Removing grass and vegetation
You need to remove all organic material from the area. Grass, roots, and organic soil will decompose over time and cause settling. Rent a sod cutter if you're dealing with a large area; it makes this job dramatically faster and less back-breaking than cutting it out by hand. Remove sod to a depth that, when combined with your base layers and paver thickness, brings the finished patio surface to your target height (usually just slightly above or flush with surrounding grade).
Grading and dealing with uneven ground
Once the organic material is gone, grade the subgrade. You need a minimum slope of about 1 inch for every 8 feet, directed away from your home or toward a drainage feature. That translates to roughly a 2% grade. Don't eyeball this. Use a level and string line, and check slope in multiple directions. If your ground has significant high and low spots, fill low areas with compactable fill (not topsoil) and compact in layers before building your base. Uneven subgrade is the leading cause of uneven patios.
Building the base and setting your edging
The base is what separates a patio that lasts 30 years from one that starts heaving and shifting in five. Don't rush this phase.
Sub-base: gravel and compaction
Spread crushed stone or gravel (¾-inch crushed limestone or road base is ideal) to a depth of 4 to 6 inches for a standard ground-level patio. If you're in a freeze-thaw climate or dealing with soft soil, go 6 to 8 inches. Add the gravel in 2 to 3-inch layers, and compact each layer with the plate compactor before adding the next. This is critical. A single 6-inch uncompacted dump won't compact properly all the way through. Take your time, make multiple passes in different directions with the compactor, and check that you've maintained your drainage slope throughout.
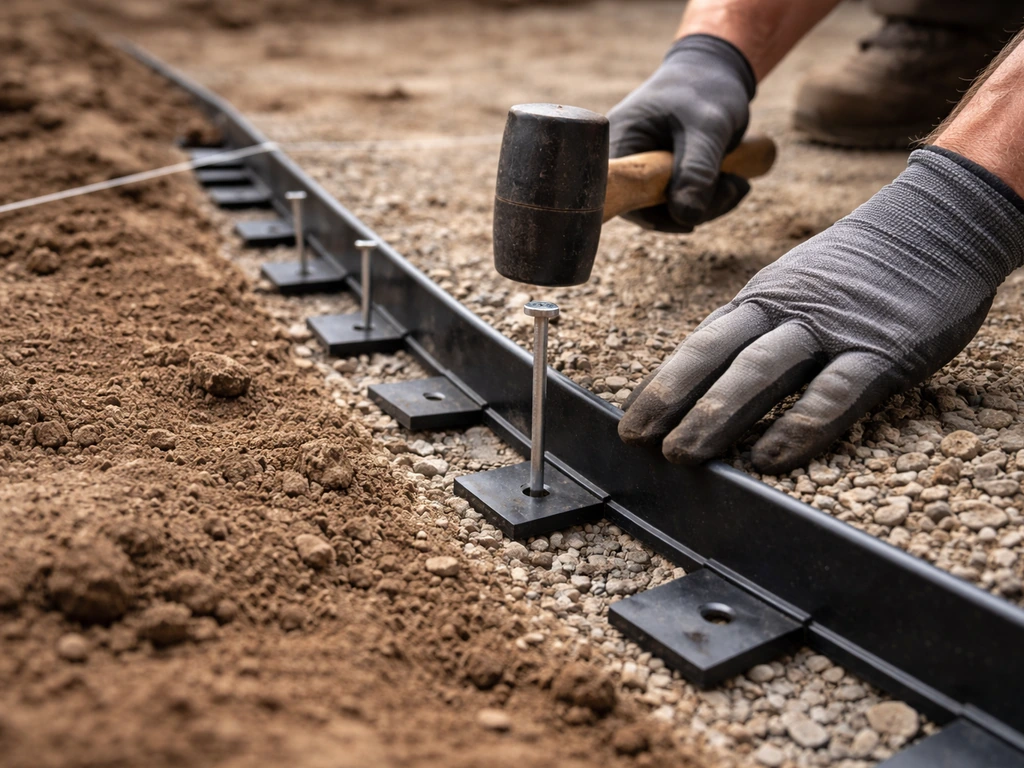
Installing edge restraints
Set your plastic edge restraints around the perimeter of the patio before laying bedding sand. Secure them with the included spikes (typically every 12 inches) into the compacted gravel base. Edge restraints are what keep your pavers from migrating outward over time. Skipping them or using flimsy ones is a shortcut you'll regret. The edging should be installed at the correct height to account for your 1-inch bedding sand layer plus the paver thickness.
Bedding sand layer
Add about 1 inch of coarse bedding sand (also called concrete sand, not fine play sand) on top of the compacted gravel. This layer is what you'll screed to create a perfectly flat, sloped surface for the pavers to rest on. Don't compact the bedding sand before laying pavers. It needs to remain loose so you can screed it smooth and make small adjustments as you set each paver.
Screeding, choosing your pattern, and setting the pavers
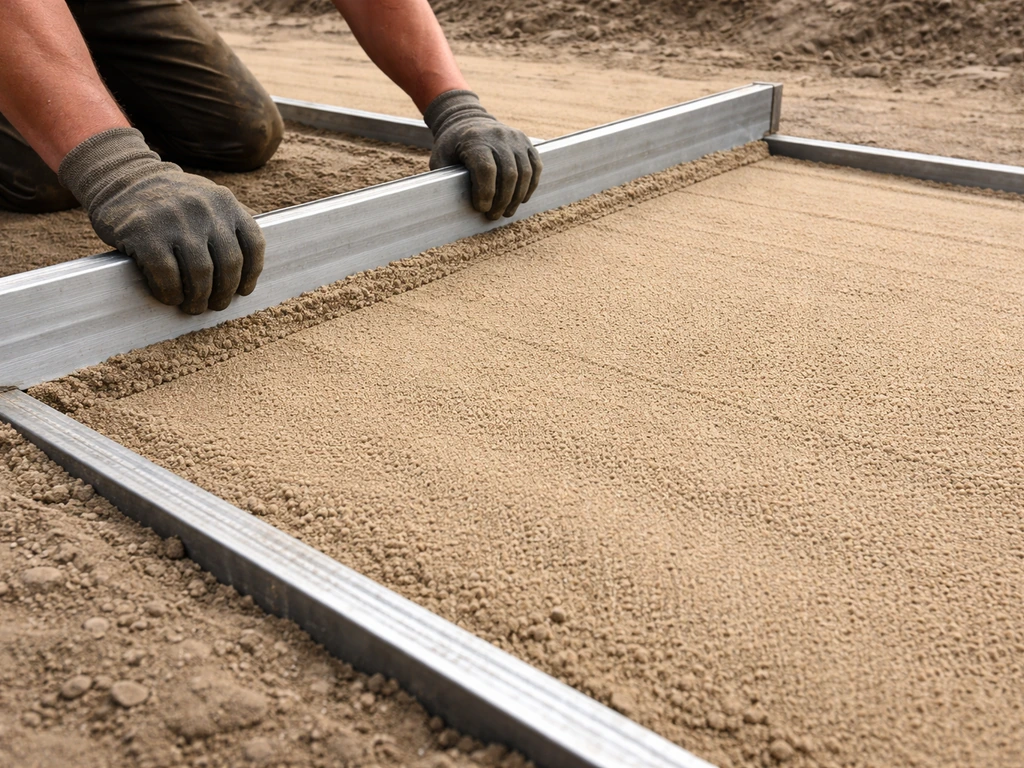
Screeding the sand flat
Screeding means dragging a straight board or pipe across screed rails to create a perfectly even, sloped surface. Set two parallel pipes or rails on the compacted gravel surface, shimmed so they follow your desired slope. Spread sand between them and drag a 2x4 across the rails to level it. Remove the rails after you've screeded a section, fill in the channels with sand, and lightly smooth them. The goal is a consistent 1-inch depth of sand across the entire area.
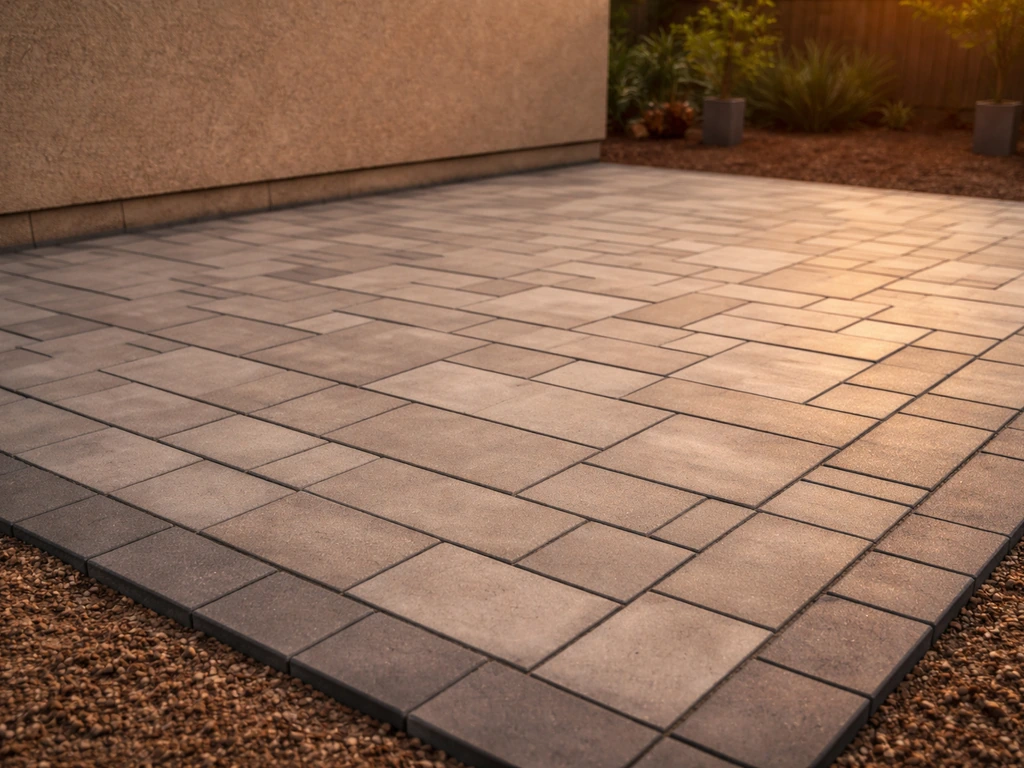
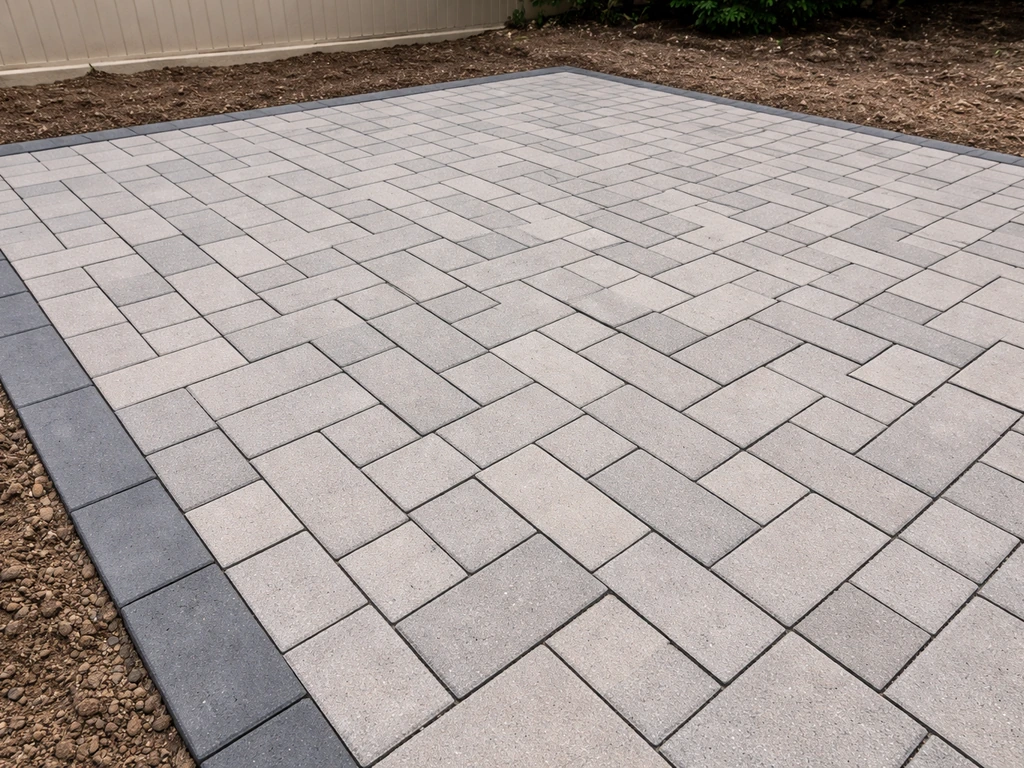
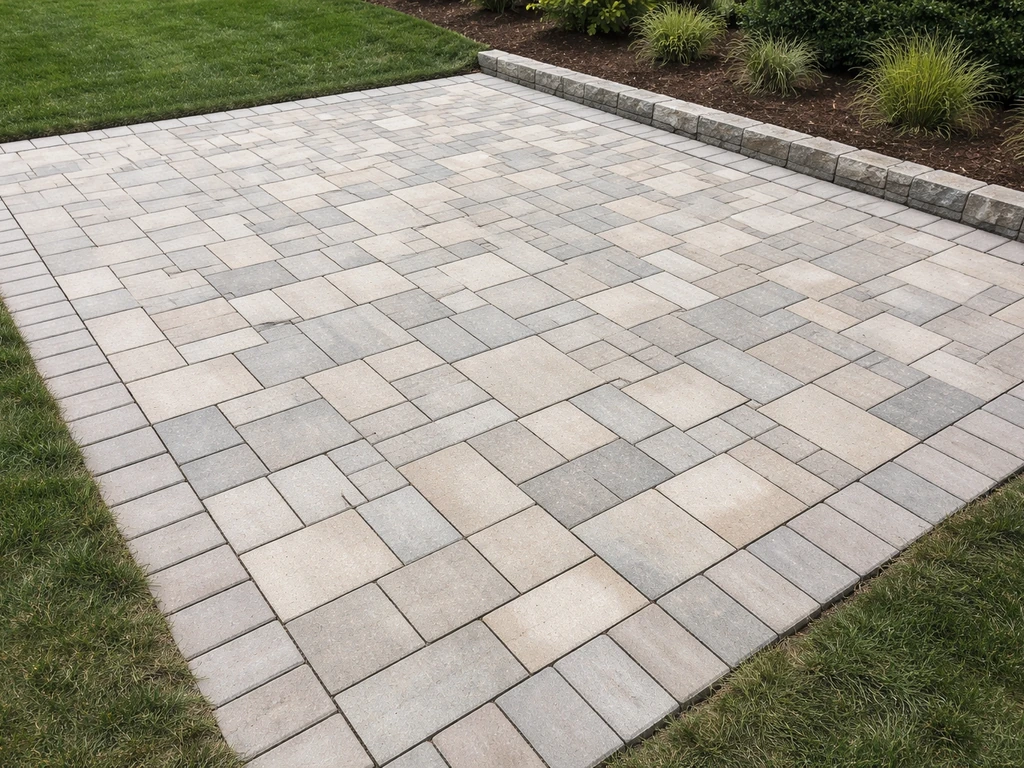
Picking your paver pattern
Your pattern choice affects how many cuts you'll need and how much structural stability the patio has. Herringbone (45 or 90 degree) is the most stable for driveways and high-traffic areas because the interlocking angles resist movement in all directions. Running bond (like a brick wall on its side) is simpler to lay and looks clean. Basketweave is easy with square pavers and requires almost no cuts for a rectangular patio. Random or ashlar patterns look great but require more planning and cutting. For a first-time DIYer, a simple running bond or 90-degree herringbone is a good starting point. If you want more inspiration for layout, textures, and finishes, look through do it yourself patio paver ideas before you commit to a pattern For a first-time DIYer, a simple running bond or 90-degree herringbone.
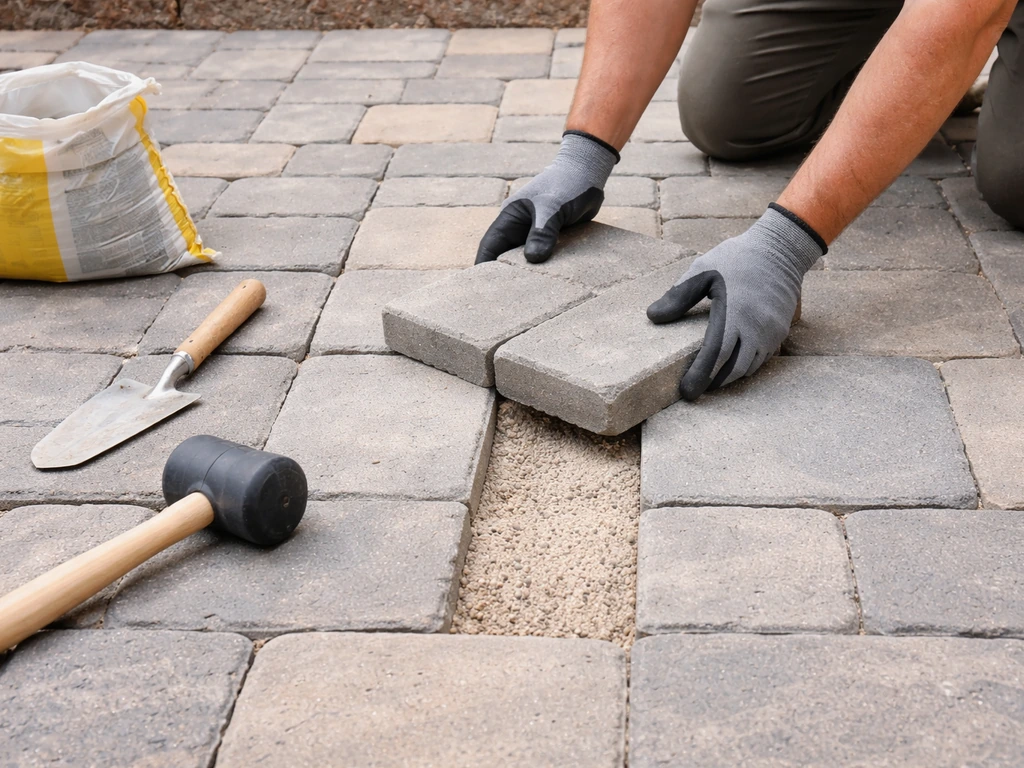
Laying the pavers
Start at the most visible corner or against the house and work outward. Set each paver down gently without dragging it, which disturbs the sand. Use a rubber mallet to tap each paver flush with its neighbors. Check your work frequently with a level and straightedge, and don't assume that if one paver looks right, the next one will too. Lay full pavers first, then go back and cut edge pavers to fit. Keep your joints as consistent as possible, typically about 1/16 to 1/8 inch apart.
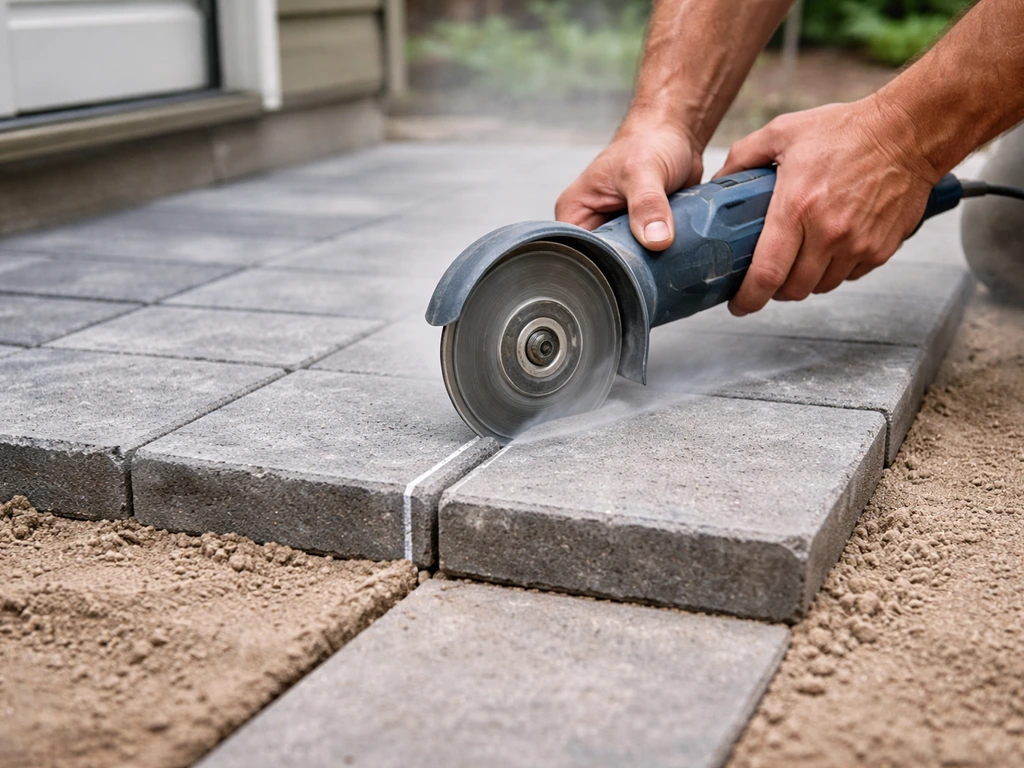
Cutting pavers for edges and angles
Use an angle grinder with a diamond blade or a rented wet saw for cuts. Wet saws are cleaner, safer, and less dusty, especially for natural stone. Mark your cut line with chalk or a pencil. For curved edges, use a series of small straight cuts or score and snap. Always wear eye protection and a dust mask. Cut pavers as you go on the border sections, dry-fitting before placing permanently.
Tricky scenarios: grass, concrete, and sloped sites
Not every backyard gives you a clean, flat, bare-dirt canvas. Here are the most common DIY scenarios and how to handle them.
Installing over grass
You cannot simply lay pavers on top of grass. The grass and soil beneath will decompose, compact unevenly, and your patio will be uneven and sunken within a few years. If you're planning a DIY patio, understanding these basics for how to do patio pavers yourself will help you avoid sinking or uneven areas later. Always remove the sod and top layer of organic soil, then build your base properly as described above. If the area is large, rent a sod cutter. Laying over grass is a shortcut that always fails.
Installing over existing concrete
If you have an existing concrete slab that's in decent condition (no major heaving, cracks, or drainage problems), you can lay pavers directly on top of it using a thin mortar or sand-set method. The advantage is that the concrete acts as a stable base. The challenge is that adding paver thickness on top of existing concrete raises your finished surface height, which can create issues at doorways and transitions. Check your door threshold clearance before committing to this approach. Also confirm the concrete slopes away from the house. If the slab slopes toward the house, that problem will carry through to your pavers.
Sloped sites and drainage
A gentle slope is your friend for drainage; it just needs to be managed. Target that 1-inch drop per 8 feet (or 1/8 to 1/4 inch per foot) directed away from any structure. If your yard slopes toward the house, you'll need to either regrade, install a catch basin at the low point, or design the patio to divert water to the sides. On steep slopes, consider building a raised patio with a retaining wall on the low side, or terracing the area into levels. Don't try to create a dead-flat patio on a steep site without a drainage plan.
Uneven or soft ground
If you dig down and find very soft, wet, or clay-heavy soil, you have a few options. You can excavate deeper and add more base material, install a layer of landscape fabric between the subgrade and gravel to prevent migration, or in severe cases, add a layer of geotextile stabilization fabric before the gravel. Clay soil holds water and is especially prone to freeze-thaw movement, so a thicker base (6 to 8 inches of compacted gravel) is strongly recommended in those conditions.
Finishing up: joint sand, sealing, fire pits, and raised patios
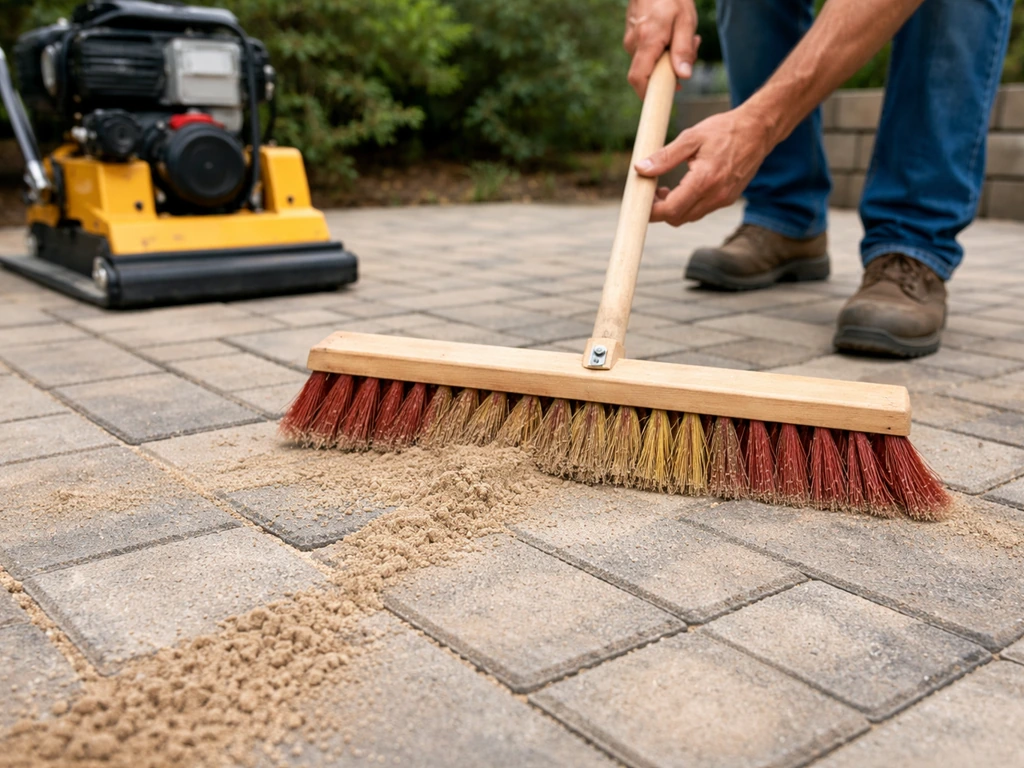
Sweeping in polymeric sand
Once all pavers are set, run the plate compactor over the entire patio (with a rubber pad or carpet scrap under the plate to protect the paver surface). This final compaction seats the pavers firmly into the sand and helps drive sand up into the joints slightly. Then sweep polymeric sand across the surface, working it into the joints with a push broom. Make multiple passes in different directions. Once the joints are full, blow off any excess sand from the paver faces with a leaf blower, then lightly mist the surface with water to activate the binding agents in the polymeric sand. Let it cure per the manufacturer's instructions, typically 24 hours, before use.
To seal or not to seal
Sealing is optional, but it offers real benefits: it helps lock in joint sand, makes the surface easier to clean, protects against staining (especially near a grill or fire pit), and can enhance the color of certain pavers. Use a penetrating paver sealer, not a film-forming one. Apply it when the surface is completely dry and temperatures are above 50 degrees Fahrenheit. Wait at least 30 days after installation before sealing so the pavers can stabilize and any efflorescence can work its way out. Reapply sealer every 3 to 5 years depending on exposure and use.
Building in a fire pit
If you're incorporating a fire pit, the design and base requirements change in a few important ways. First, keep the fire pit at least 10 feet from any structure, fence, or overhanging tree (check local codes, as some require more). Second, the area directly under and around the fire pit should use fire-rated or non-porous pavers. Many standard concrete pavers can crack or spall under intense heat, especially if moisture is trapped inside. Use pavers rated for fire or natural stone like flagstone or granite for the fire pit surround. Third, the base under a built-in fire pit structure needs to be especially well-compacted since the weight is concentrated in one spot. Finally, don't seal pavers within 18 to 24 inches of an open flame.
Raised patios
A raised patio, where the finished surface sits significantly above grade, requires retaining walls or a raised border structure to contain the base and pavers. The retaining wall needs to be engineered to handle both the lateral pressure of the fill and the weight of the patio surface. For anything more than about 18 inches of retained height, consult a local contractor or engineer for the retaining wall design. The paver installation itself is the same, but you need to ensure the fill inside the raised structure is compacted in layers just as thoroughly as a ground-level base.
Maintenance and fixing problems after installation
Keeping your patio looking good year after year
A well-built paver patio is genuinely low-maintenance, but it's not zero-maintenance. Every spring, inspect joints for gaps or loss of sand and re-sweep polymeric sand into any depleted areas. Pull weeds as soon as you see them, before roots get established in the joints. If you've sealed the patio, that sealer does a lot to prevent weed seeds from germinating in joints.
Troubleshooting common problems
| Problem | Likely Cause | Fix |
|---|---|---|
| Pavers are uneven or rocking | Uneven sand bed or inadequate compaction | Pull up affected pavers, re-screed sand, reset and re-compact |
| Pavers shifting or spreading apart | Missing or inadequate edge restraints | Add or reinforce edge restraints, refill joints with polymeric sand |
| Water pooling on surface | Insufficient slope or low spot in layout | Re-level affected section toward proper drainage direction |
| Weeds growing in joints | Missing or depleted joint sand | Remove weeds, top up with polymeric sand and activate with water |
| White powdery residue (efflorescence) | Mineral salts migrating to surface | Use an efflorescence cleaner; usually fades with time and rain |
| Sunken area after heavy rain | Inadequate base depth or compaction | Excavate section, add and compact more base, relay pavers |
| Gaps opening up along edges | Edge restraints failed or were skipped | Install or replace edge restraints and re-compact border pavers |
When to call a pro
Most problems with paver patios are DIY-fixable, and that's one of the best things about this material: individual pavers can be pulled up and reset without tearing out the whole patio. But there are a few situations where it's worth calling a professional. If you're dealing with significant soil movement or a high water table, if your retaining wall is more than 18 inches tall, if you're unsure about drainage near your foundation, or if the project is large enough that equipment and logistics feel overwhelming, a consultation with a paving contractor can save you from an expensive mistake. Getting one bid doesn't mean you have to hire them.
Your next steps
The best next step is to get outside and measure your space. Sketch it out, calculate your square footage, and start pricing materials at your local home improvement store or paver supplier. Once the numbers are in front of you, the project becomes a lot more concrete (pun intended). If you're still figuring out the design or want to explore what styles of pavers work for your space, diving into patio paver ideas and pattern options is a great place to build confidence before you order materials. The planning phase is where the project actually succeeds or fails, so it's worth the time. If you want a complete walkthrough, follow this backyard paver patio guide step by step from planning and base work to laying pavers and finishing the joints how to build a backyard paver patio all by yourself.
FAQ
Can I use regular play sand for the bedding layer in a do it yourself paver patio installation?
It’s not recommended. Play sand is too fine and can wash or compact unevenly, which leads to rocking pavers. Use coarse bedding sand intended for paver installations (often labeled concrete sand), and keep it loose until you screed it to the correct sloped plane.
How do I know my subgrade is properly compacted before I add gravel for a do it yourself paver patio installation?
Do a “walk test” after grading and compacting, you should not be able to leave footprints or see pumping when you press with your heel. Also verify you’re compacting in thin layers (2 to 3 inches of gravel at a time), not dumping a thick layer and hoping it compacts fully.
What should I do if my patio won’t drain correctly even after setting the slope away from the house?
Recheck the slope along multiple directions, not just one line. If the yard has a bowl shape or a low spot, you may need to create a drainage swale, add a catch basin, or regrade the subgrade. Fixing it after pavers are installed is much more difficult because sand and joints can’t correct major flow problems.
Do I need to use geotextile fabric under the gravel, especially for clay soil in a do it yourself paver patio installation?
If you have soft, wet, or clay-heavy soil, geotextile can help limit migration between the subgrade and base. For stable soils it’s often optional, but for problematic soils it can be a worthwhile safeguard. Follow the article’s guidance to increase base thickness in freeze-thaw or clay conditions even if you use fabric.
How do I handle small dips or humps I find after screeding the bedding sand?
Don’t try to “flatten it” by pressing pavers harder. Remove and re-screed the sand where the depth is wrong, then reset that section. Keeping bedding sand depth consistent is what prevents joint spacing issues and uneven surfaces later.
What’s the correct joint width for pavers in a do it yourself paver patio installation, and can I make joints tighter to reduce weeds?
Typical spacing is about 1/16 to 1/8 inch, as described in the article. Making joints dramatically tighter can reduce sand fill, which weakens the interlock and can cause pavers to shift. Weed control is better handled by using polymeric sand correctly and maintaining it, not by starving the joints.
Can I skip polymeric sand and just use regular paver joint sand in a do it yourself paver patio installation?
You can, but you’ll trade weed and sand stability. Regular joint sand tends to wash out and needs more frequent top-offs, and weeds can establish in gaps sooner. If you use polymeric sand, remember it needs correct joint fill, sweeping technique, and curing time with light misting to activate bonding.
How long should I wait before walking on or using the patio after polymeric sand is installed?
Allow it to cure per the product directions, the article notes about 24 hours as a typical window. Avoid heavy foot traffic, moving furniture, or washing runoff onto the surface during curing, because prematurely disturbing joint sand can weaken the binder effect.
Is sealing a must-do part of a do it yourself paver patio installation?
No, it’s optional. Sealing mainly helps with staining resistance and makes cleaning easier, and it can lock in joint sand. If you do seal, choose a penetrating sealer (not a film-former), apply when dry and above 50°F, and wait at least 30 days so stabilization and any efflorescence can finish.
What problems should I look for during the first week after installation in a do it yourself paver patio installation?
Check for joint sand loss after the first cure, look for pavers that feel rocking when stepped on, and monitor drainage direction during a rain. If you see sinking early, it usually means base compaction or slope was off, and it’s easier to address sooner than after polymeric sand cures fully.
Can I install pavers over a compacted base if I don’t have a plate compactor?
For a DIY job, the plate compactor is strongly tied to base quality. Without it, thick gravel lifts usually won’t compact properly, increasing the chance of settling. If renting is the issue, consider smaller section work you can compact thoroughly, but avoid building the base without compaction tools.
What special considerations apply if I’m doing a do it yourself paver patio installation near a driveway or garage where vehicles may cross it?
Increase base depth if you expect vehicle loads, and consider a more structurally resistant pattern like 90-degree herringbone for better movement resistance. Also confirm your patio elevation and transitions so vehicle tires don’t constantly ride over vulnerable edges, which can cause edge migration even when the main field is solid.
How do I cut pavers cleanly at a curved edge without creating a jagged look in a do it yourself paver patio installation?
Use small, incremental straight cuts to approximate the curve, then tighten the joints with dry-fitting before final placement. For scoring and snapping, that method works best for certain paver types, while natural stone often benefits from a wet saw for smoother, safer cuts.
When should I call a professional for a do it yourself paver patio installation even if I’m comfortable with DIY?
Call for help if you’re unsure about drainage near the foundation, encounter significant soil movement or very high moisture conditions, or need a retaining wall taller than about 18 inches. Equipment and logistics can also justify a pro consultation for large or raised projects where one mistake in base or wall design is expensive.
Citations
Belgarde describes the typical paver system as: a layer of compacted aggregate base, a layer of bedding sand, the pavers, and then jointing material (polymeric sand swept into joints) with a compactor used to help ensure sand is distributed into joints.
https://www.belgard.com/plan-design/installation-beyond/installation/
Mutual Materials’ paver installation instructions call out allowing 1/8" to 1/4" per foot of slope for correct water runoff.
https://www.mutualmaterials.com/installation-guides/paver-installation-instructions/
Interlock Concrete’s 2025 paver installation guide specifies a minimum 2% slope to drainage feature and notes slope guidance including approximately 1" to every 8 ft for patios (in the guide’s slope discussion).
https://interlock-concrete.com/resources/guides/paver-installation-guide-2025.pdf
Home Depot’s “How to Install a Paver Patio” guide includes slope guidance of about 1 inch every 8 feet, and also references approximately 1 inch of paver sand before adding the paver stones.
https://www.homedepot.com/hdus/en_US/DTCCOMNEW/fetch/Global_Assets/PDFs/How-To-Install-a-paver-patio-FINAL.pdf
Next Articles
Do It Yourself Patio Paver Ideas: Layout, Prep, Install
DIY patio paver ideas with layout patterns, site prep, base thickness, leveling, edging, and fixing sinking, gaps, weeds
Patio Pavers Do It Yourself: Step-by-Step Guide
Step-by-step DIY patio paver install: plan, prep base, lay & cut pavers, ensure drainage, then compact, sand, seal.
How to Seal Paver Patio: Step-by-Step DIY Guide
Learn how to seal a paver patio step by step: clean, choose penetrating or wet-look sealer, apply, cure, and maintain.