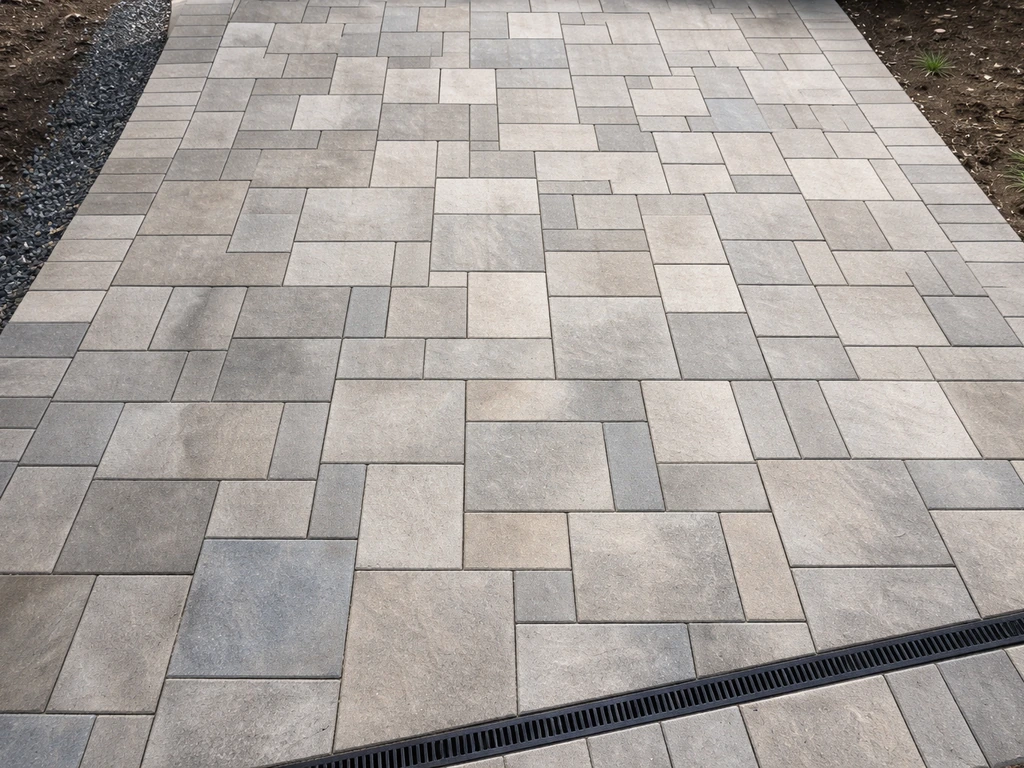
The best way to set patio pavers is to build a proper compacted gravel base at the right depth, add a screeded bedding layer of coarse sand, set your pavers in your chosen pattern with consistent spacing, lock the edges with restraints, and finish with polymeric jointing sand and a plate compactor. Once you have the base and bedding layer ready, you can follow a simple DIY approach to lay patio pavers step by step lay patio pavers diy. Do each of those layers correctly and your patio will stay level, drain well, and resist rocking or sinking for decades. Skip or rush any one of them and you will be pulling pavers up within a few years to fix it.
Best Way to Set Patio Pavers: Step-by-Step DIY Guide

Felix Rowe
24 Jun 2026
Start With a Real Plan Before You Touch a Shovel
Measure your patio area carefully and sketch it on paper. Note any slopes, obstacles like tree roots or downspouts, and where you want water to drain. You need a minimum slope of 1/8 inch per foot (about 1%) away from your house or any structure. Mark that grade on your plan now, because everything you build below the pavers has to respect it.
Choose your paver type before you calculate materials. Concrete pavers (the most popular DIY choice), natural stone, and brick all have different thicknesses and weight ratings. Most standard residential concrete pavers are 2 3/8 inches thick. Thicker 3 1/8-inch pavers are available if you expect vehicle traffic. For a backyard patio, standard thickness is fine. Confirm your local frost depth too. In cold climates, your base depth needs to account for freeze-thaw cycles, which means going deeper than you might think.
Before you dig, call 811 (or your country's equivalent) to have utilities marked. This is not optional. Also check whether your municipality requires a permit for patio work, especially if you are building a raised patio or adding a retaining wall. Finally, confirm whether your site drains well or sits in a low spot. A site that collects standing water after rain will need extra attention to drainage during base construction.
- Measure the area and calculate square footage (add 10% overage for cuts and breakage)
- Decide on paver thickness, style, and pattern before ordering
- Establish your desired finished surface height and work backward to figure out excavation depth
- Confirm local frost depth and utility locations
- Check for drainage problems, nearby tree roots, or existing concrete that will affect your approach
Site Prep: Clearing, Grading, and Dealing With What's Already There
If you are working over grass, strip it completely. Use a sod cutter (rent one for about $80 a day) to remove the top 2 to 3 inches of sod and root material. Do not just excavate down and leave organic material in the base. Organics decompose and cause settling, which is the number one reason DIY patios go lumpy within a couple of years.
If you are dealing with existing concrete, you have two options. You can break it up and haul it out, or, if the concrete is in good shape and sloped correctly, you can set pavers on top of it using a mortar or sand-set system adapted for concrete substrates. Following these tips for laying patio pavers, especially around grade and bedding, helps you avoid uneven surfaces and shifting joints. Breaking and removing concrete is hard work, but it gives you full control over your base. Setting pavers over concrete is faster but limits your ability to correct grade problems. If the concrete is cracked, heaved, or draining toward the house, remove it.
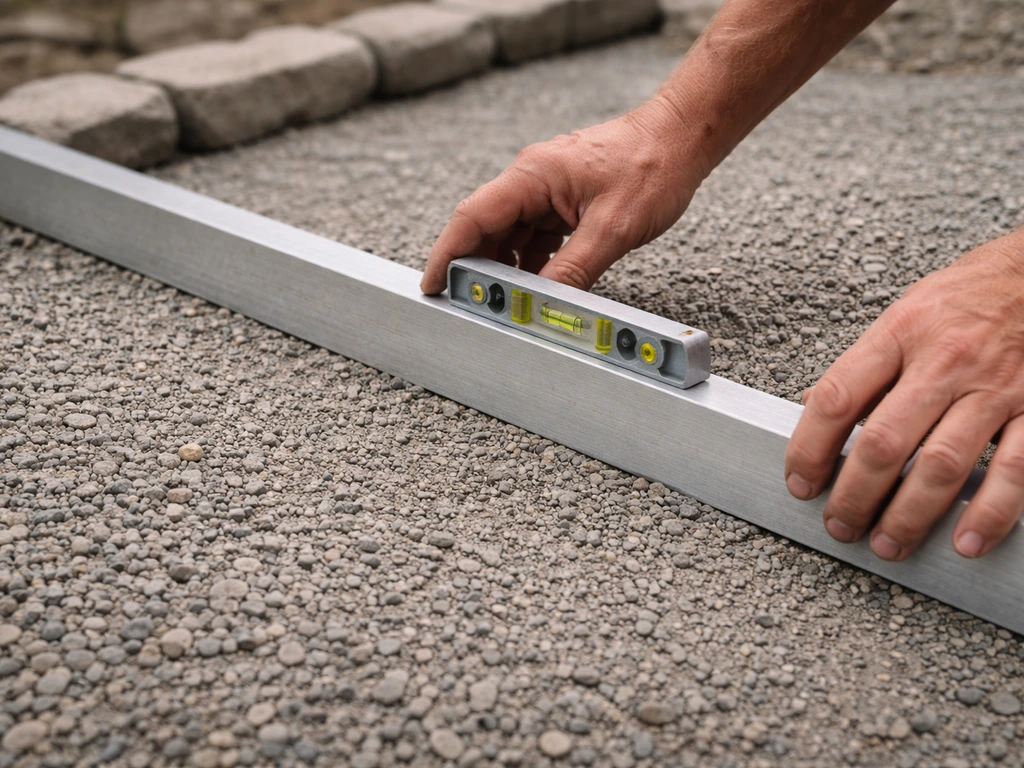
Uneven ground needs to be addressed at this stage, not later. High spots get cut down. Low spots do not get filled with extra sand in your bedding layer. Fill low spots with compacted base material in lifts (layers of no more than 4 inches at a time) so the fill is as stable as your undisturbed subgrade. A laser level or a long straightedge and a 4-foot level are your best friends here. Set up string lines at your finished grade elevation across the entire work area before you start building up your base layers.
Build the Base Right: This Is the Most Important Step
The base is where patios succeed or fail. A weak or shallow base is why pavers sink, rock, and shift. Plan for a minimum of 4 inches of compacted crushed stone for a residential patio in a mild climate. In areas with hard freezes, go 6 to 8 inches. If your soil is clay-heavy or soft, add another inch or two for safety. These depths are for the base material only, not counting your bedding sand or pavers.
Excavation Depth Calculation
Add up your layers to figure out how deep to dig: base depth (4 to 8 inches) plus bedding layer (1 inch) plus paver thickness (typically 2 3/8 to 3 1/8 inches). For a standard patio in a mild climate, that is roughly 7.5 to 8 inches below your desired finished surface. Mark that depth on your stakes and dig to it consistently across the entire area.
Choosing and Installing Base Material
Use compactable crushed stone, often called 'crusher run,' 'road base,' or 'Class II base.' This is angular, crushed aggregate that includes fines, which allows it to compact into a dense, interlocked mass. There is ongoing debate in DIY communities between using 3/4-inch clean stone versus material with fines. The short answer: material with fines (sometimes labeled 3/4-inch minus or 21AA) compacts more effectively for a pedestrian patio base. Clean stone compacts less and can shift under load. Use the material with fines unless you have a specific drainage reason to do otherwise.
If you are on soft or clay soil, lay a geotextile fabric directly on the subgrade before adding base material. This prevents fine soil particles from migrating up into your base over time, which is one of the sneaky causes of long-term settling. Some permeable paver systems even use geotextile layers above and below the base. For a standard patio, a single layer on the subgrade is enough.
Spread and compact the base in lifts of 3 to 4 inches. Never dump the full depth in at once and try to compact it all. Each lift gets compacted with a plate compactor (rent one for about $100 to $150 a day) until you cannot see significant movement underfoot. Compact in overlapping passes, working from the outside edges toward the center. Check your grade and slope after each lift. Make corrections now, not after the sand is down.
Setting Up the Bedding Layer and Laying Your Pavers
The Bedding Layer
The bedding layer is 1 inch of coarse, washed concrete sand (also called ASTM C33 sand). Its only job is to provide a smooth, slightly forgiving surface for your pavers to rest on and to allow fine-tuning of the finished level. Do not use fine play sand or stone dust for this layer. They drain poorly and can shift. One inch is the target, not 1.5 or 2 inches. Thicker bedding layers are less stable and give pavers more room to sink or rock after the fact.
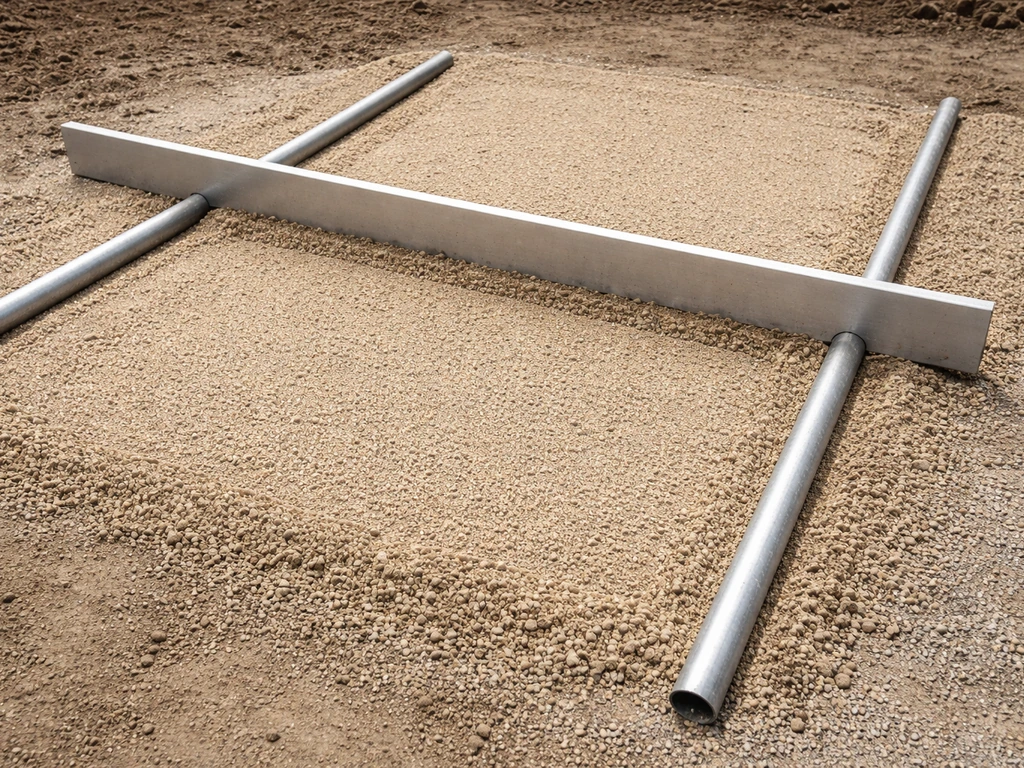
To screed the bedding layer perfectly flat, lay two steel pipes or electrical conduit (3/4-inch diameter works well) parallel across your base, spaced about 6 to 8 feet apart, set to your finished height minus your paver thickness. Dump sand between them, then drag a straight 2x4 board across the pipes to level everything off. Slide the pipes out after screeding and fill the channels with sand by hand, tamping lightly. Do not walk on the screeded sand before laying pavers.
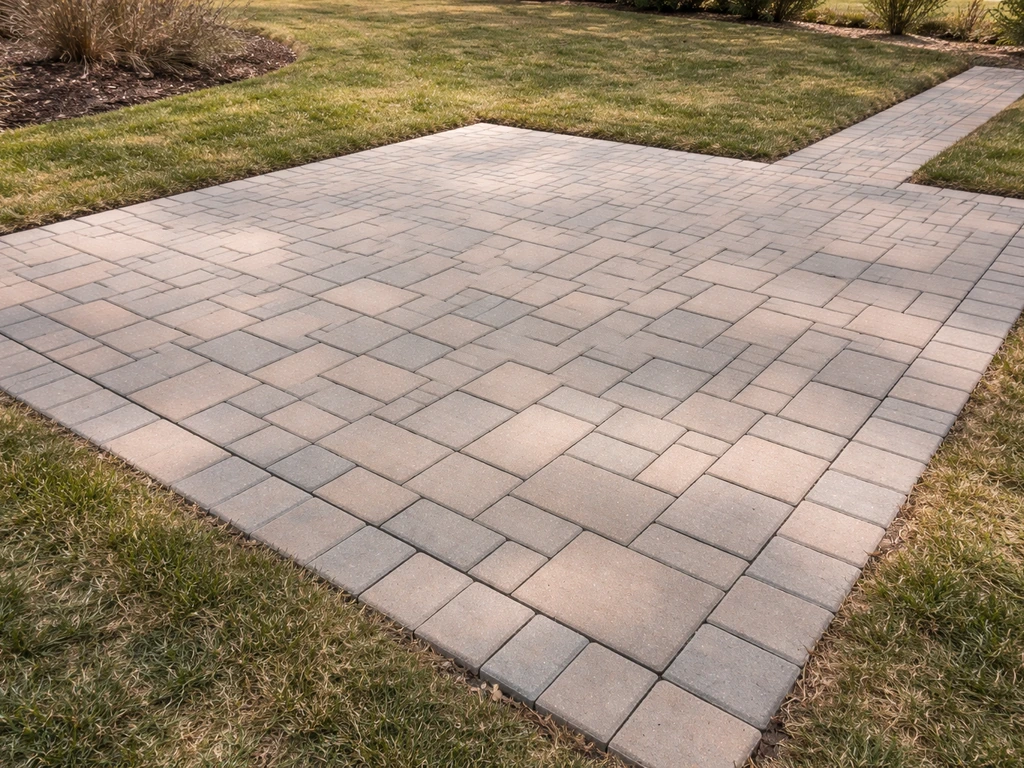
Setting Pavers in Pattern
Start laying pavers from a corner or a straight reference line, working outward so you always have a clean edge to kneel behind without disturbing placed pavers. Set each paver with a slight downward push and a tap from a rubber mallet to seat it into the sand. Do not slide pavers into position from above. Lower them straight down so you do not drag sand out of place.
Maintain consistent joint spacing, usually 1/8 inch for standard concrete pavers. Many pavers have built-in spacer nubs for this reason. Use a level or a long straightedge frequently (every 4 to 6 pavers) to check that your surface is staying flat and consistent with your intended slope. Catch high or low spots early. You can lift a paver, add or remove a little sand, and reset it. Once 20 square feet are down and looking good, it gets much harder to make corrections.
| Pattern | Difficulty | Waste/Cuts | Best For |
|---|---|---|---|
| Running bond (brick style) | Easy | Low | Rectangular areas, beginner DIY |
| Herringbone (45° or 90°) | Moderate | Moderate–High | High-traffic areas, visual interest |
| Basketweave | Easy–Moderate | Low–Moderate | Traditional look, square pavers |
| Random/ashlar | Hard | High | Natural stone look, irregular shapes |
| Pinwheel | Moderate | Moderate | Mixed paver sizes, decorative effect |
Edge Restraints, Cutting Pavers, and Handling Tricky Spots
Edge restraints are what keep your entire patio from slowly spreading outward over time. Without them, the outer pavers creep, joints open up, and the whole field eventually loosens. Install plastic or metal edge restraints along every exposed edge of your patio. The restraint needs at least 1 inch of vertical contact against the side of your pavers to hold them properly.
ICPI (interlocking) edge restraint detailing requires at least a 1 in. (25 mm) vertical restraining surface in contact with the side of the paver to adequately restrain it at least 1 inch of vertical contact against the side of your pavers.
Plastic spiked edge restraint is the most common DIY choice. Drive the spikes into the base (not just the sand) every 12 inches, or more frequently on curves.
If you prefer a more permanent edge, a concrete haunch is another option. To do this, screed the bedding sand away from the perimeter to expose the base material, then form and pour a narrow strip of concrete against the outside face of your border pavers. This is the approach used on commercial projects and high-end driveways. For most backyard patios, quality plastic or aluminum edge restraint is more than adequate.
Cut pavers to fit edges, curves, and obstacles using an angle grinder with a diamond blade or a wet tile saw. Mark your cut line with a pencil or chalk. For straight cuts, a wet saw is faster and cleaner. For curves or notches around posts, an angle grinder gives you more control. Always wear eye protection, hearing protection, and a dust mask when cutting. Concrete paver dust is fine and nasty to breathe.
Around corners, plan your layout so you minimize tiny slivers of cut paver, since small pieces are structurally weak and look sloppy. Around curves, cut the pavers slightly on an angle and allow your joints to fan out slightly on the outside edge of the curve. For obstacles like posts or drains, trace the shape directly on the paver face and make your cut. Test-fit before setting in sand.
Compaction and Joint Filling: Locking Everything Together
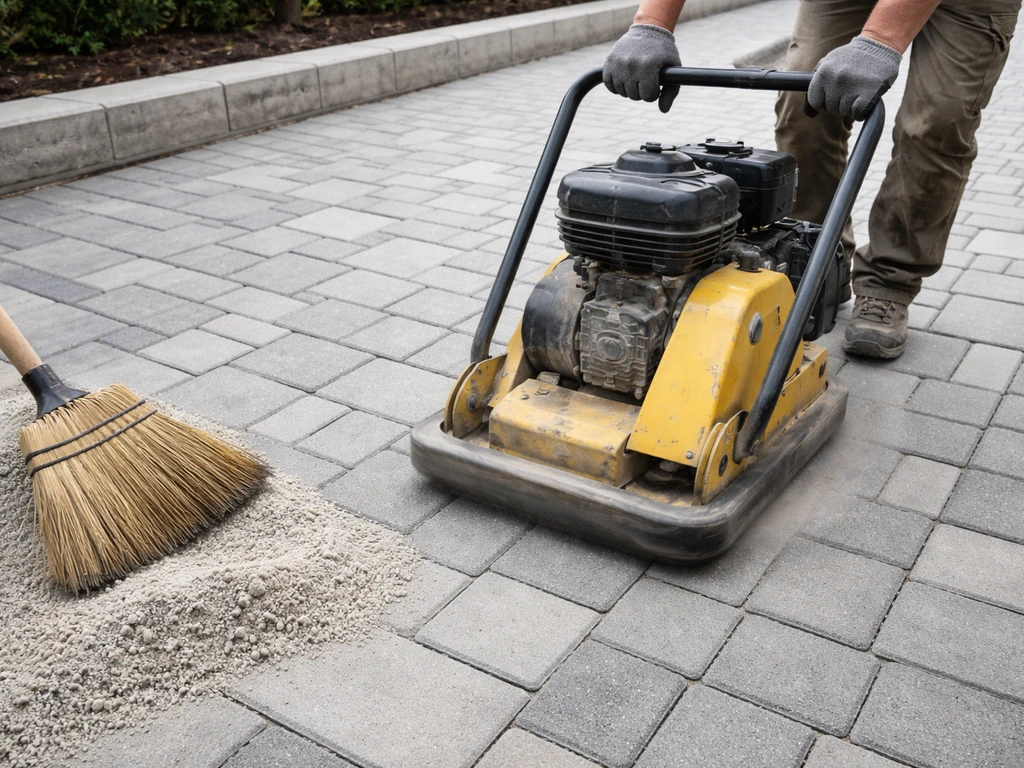
Once all pavers are set and edge restraints are in place, run the plate compactor over the entire surface. This does two things: it seats the pavers firmly into the bedding sand and brings the surface into a cohesive, interlocked plane. Use a rubber or poly pad attachment on the plate compactor (most rentals include one) to avoid chipping or marking the paver surface. Make at least two passes in different directions.
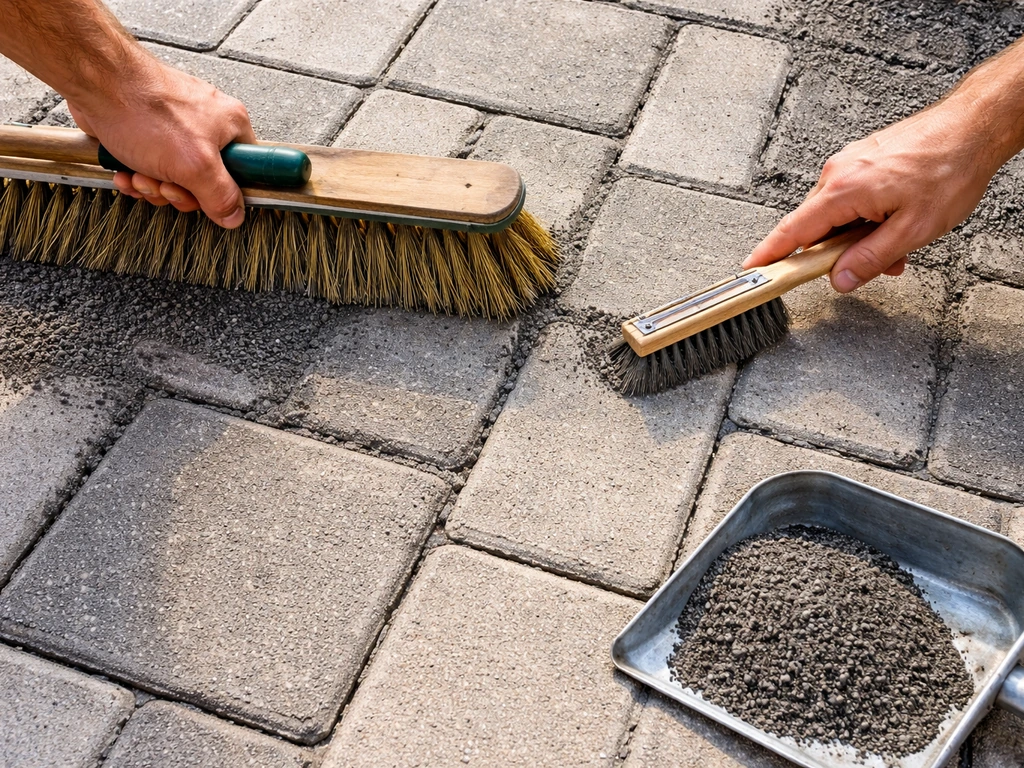
After the first compaction pass, sweep polymeric jointing sand across the surface and work it into the joints with a push broom. Unilock recommends using polymeric jointing sand that conforms to ASTM C936 (semi-coarse sand) when jointing patio pavers sweep polymeric jointing sand across the surface. A 50-pound bag of polymeric sand typically covers 25 to 50 square feet for standard 1/8-inch joints, or 15 to 30 square feet if your joints are wider around 3/8 inch. Sweep, compact again, and sweep more sand in. Repeat until the joints are filled to within about 1/8 inch of the paver surface. Do not overfill.
Activate the polymeric sand by misting the entire surface with water using a garden hose on a gentle spray setting. Avoid blasting water directly into the joints. The goal is to wet the sand thoroughly so the polymers bind and harden. Follow the product manufacturer's timing for misting. QUIKRETE and Sakrete both recommend a slow, fine-mist approach. Let it cure for 24 hours before walking on it, and 48 to 72 hours before placing furniture. Brush off any excess sand residue from the paver surface before it dries, as it can leave a haze.
Polymeric sand is worth the extra cost over regular sand. It resists washout, resists weeds, and does not invite ants to tunnel through it the way plain sand does. Just make sure your joint depth is adequate. If your joints are very shallow (less than 3/4 inch deep), polymeric sand may not bind well enough to stay put.
Special Scenarios: Raised Patios, Slopes, and Fire Pit Areas
Raised Patios
A raised patio involves building retaining walls (usually from segmental retaining wall blocks) to create a level platform above the surrounding grade. The base inside the raised area still needs to be excavated and built up correctly, with particular attention to drainage. Add a drainage aggregate backfill behind retaining walls and install drainage pipe at the base of the wall to prevent hydrostatic pressure from pushing the wall outward over time. Raised patios require more planning, more materials, and often more time than at-grade installs, but the result is dramatic and worth it if your yard has significant slope.
Sloped Sites and Drainage
If your yard slopes significantly, you need to decide early whether to step the patio down with retaining walls or to follow the slope with a series of graded runs. Never install a flat patio on a slope without proper drainage. Water will pool behind it and eventually erode the base from underneath. Keep your 1/8-inch-per-foot drainage slope consistent across the patio surface and make sure there is a clear path for water to go once it reaches the edge. Channel drains or a French drain system at the low edge may be needed on steeper sites.
Fire Pit Areas
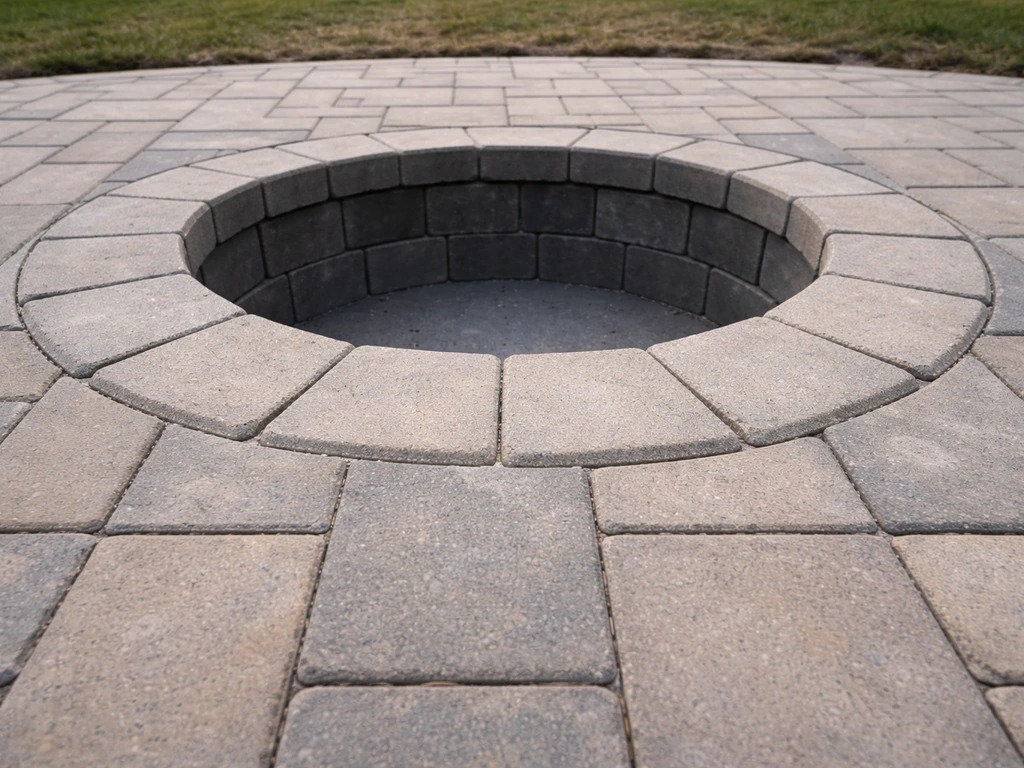
For a built-in fire pit on a paver patio, the fire pit blocks themselves should be adhered with heat-resistant concrete adhesive or mortar, not just stacked dry. For most regular patio paver installation, however, you should set pavers in mortar only in specific areas like steps or hearth details rather than for the whole field lay patio pavers with mortar.
The inside base of the fire pit can be filled with a layer of sand or clean stone to insulate and manage heat at ground level. The pavers surrounding a fire pit take more thermal stress than the rest of the patio. Allow a wider joint spacing around the fire pit ring, and consider using a heat-resistant polymeric sand or a sand-set approach without polymeric binder in that immediate zone, since repeated high heat can degrade polymer binders over time.
Sealing, Maintenance, and Fixing Common Problems
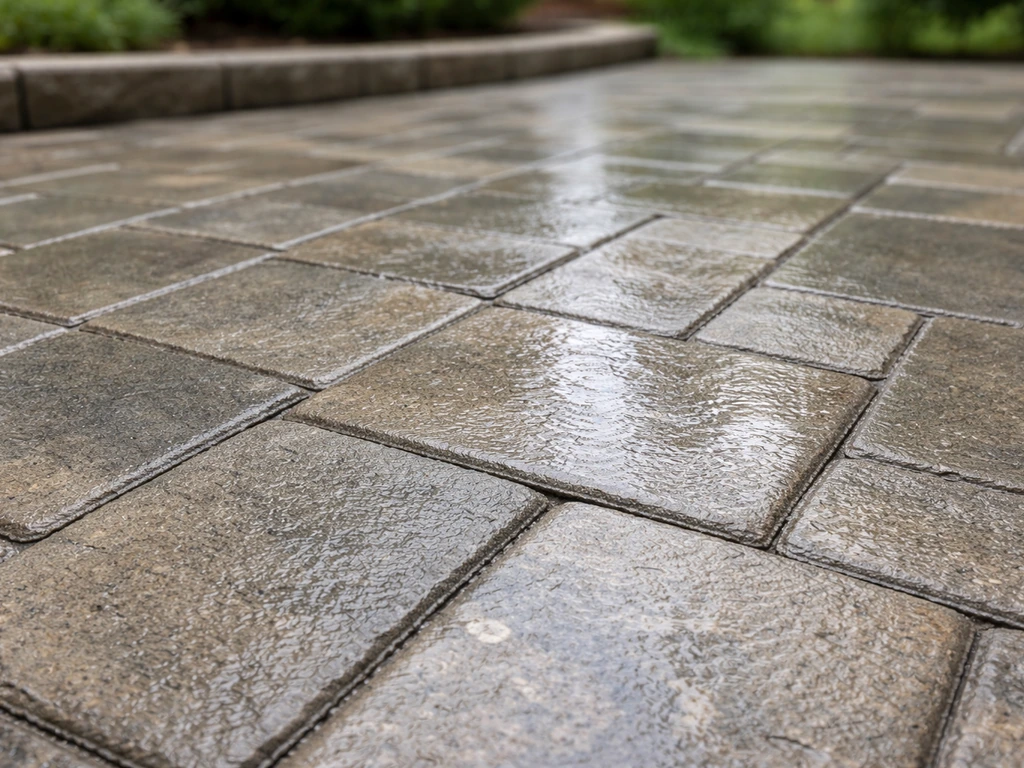
To Seal or Not to Seal
Sealing is optional, but it extends the life of your polymeric sand, protects the paver surface from staining, and enhances color. If you want to seal, wait at least 90 days after installation for the pavers and sand to fully cure. Use a paver-specific penetrating sealer or film-forming sealer depending on the look you want. Penetrating sealers give a natural look; film-forming sealers give a wet or glossy look. Reapply every 3 to 5 years as needed. Never seal over dirty or wet pavers.
Ongoing Maintenance
Sweep your patio regularly and rinse with a garden hose. Avoid pressure washing at high intensity directly into joints, because it will blast out polymeric sand. If you do pressure wash, re-apply polymeric sand to any joints that look depleted afterward. Inspect the edges once a year and re-drive any edge restraint spikes that have worked loose. One of the genuine advantages of pavers over poured concrete is that you can lift individual pavers, fix a problem underneath, and reset them. No cracking, no patching, no jackhammering.
Troubleshooting Common Failures
| Problem | Likely Cause | Fix |
|---|---|---|
| Pavers sinking in one area | Base not compacted or organic material left in subgrade | Pull up pavers, remove and recompact base, reset pavers |
| Rocking pavers | Bedding layer too thick, high spots in base, or debris under paver | Lift paver, level bedding sand or base, reset and compact |
| Edge pavers tipping outward | Edge restraint failed or base settling at perimeter | Re-drive or replace edge restraint, rebuild base at edge if needed |
| Weeds growing in joints | Plain sand used or polymeric sand not properly activated | Remove weeds, re-sweep and activate fresh polymeric sand |
| Sand washing out of joints | Polymeric sand not activated, joints too shallow, or pressure washing damage | Re-apply polymeric sand, activate carefully, avoid high-pressure washing |
| Water pooling on surface | Insufficient drainage slope or clogged joints | Reset pavers to correct slope, clear joints and check drainage path |
| Joint sand haze on paver surface | Polymeric sand dried on surface before cleanup | Try a paver cleaner/efflorescence remover; scrub and rinse |
Tools, Materials, and Realistic Expectations for Your Project
A typical 200-square-foot backyard patio will take most DIYers a full weekend, sometimes two, depending on site conditions. Plan for one day of excavation and base work, a second day for screeding, laying pavers, cutting, and edge restraints, and a third session for compaction, jointing, and cleanup. Do not underestimate the physical effort of excavation and base compaction. It is genuinely hard work.
- Sod cutter (rental): removes grass and root layer cleanly
- Plate compactor (rental): essential for base compaction and final seating
- Wet tile saw or angle grinder with diamond blade: for cutting pavers
- Laser level or string line and stakes: for establishing and checking grade
- Long screed board and screed pipes (3/4-inch conduit): for bedding layer
- Rubber mallet: for setting pavers without chipping
- 4-foot level and straightedge: for checking surface flatness as you go
- Push broom: for sweeping polymeric sand into joints
- Garden hose with fine mist nozzle: for activating polymeric sand
- Safety gear: eye protection, dust mask, hearing protection, gloves
Materials to estimate and order: crushed stone base (calculate by cubic yards based on your area and base depth), coarse bedding sand, pavers (area plus 10%), edge restraints (linear footage of all exposed edges plus corners), polymeric jointing sand (roughly one 50-pound bag per 25 to 50 square feet for standard joints), and sealer if desired. Order base materials in bulk delivered by truck. Picking up base material in a pickup truck or trailer works for smaller projects but gets heavy fast.
One thing worth knowing: properly installed pavers can be removed and replaced later if you ever need utility access underneath. That flexibility is something poured concrete can never give you, and it makes pavers a smart long-term investment even if the upfront effort feels intense. Take your time on the base, stay patient with the screed, and the laying itself is genuinely satisfying work.
FAQ
What is the easiest way to keep patio pavers level while I’m setting them, especially on my first row?
Start with a straight, taut string line for your finished elevation, then set the first course using a long straightedge across multiple pavers, not just one at a time. Recheck elevation after every 6 to 10 pavers and correct by lifting and adjusting sand, since once you’ve compacted, it becomes much harder to fix low spots.
Can I install patio pavers over existing asphalt or compacted road base without digging deeper?
Often you should not skip excavation. Asphalt and unknown-thickness road base can settle unevenly or drain poorly, which creates rocking. If you do reuse an existing base, you still need the same finished grade, a compacted angular base layer thickness, and a proper bedding depth over a stable, clean surface.
How do I choose the right compactor and avoid damaging pavers during patio installation?
Use a plate compactor with enough weight to stop visible movement in the base, but always use a rubber or poly pad attachment on top of pavers. Do not compact directly over unfilled bedding, and run the compactor in overlapping passes (usually two directions) after pavers are fully set.
Why do my pavers look “wavy” after compaction, even if the bedding sand seemed flat?
Wavy surfaces usually come from uneven base compaction, pushing pavers into sand unevenly, or checking grade too late. Fix early by lifting affected pavers, adding or removing small amounts of sand, and resetting before more area is laid, then verify slope with a straightedge frequently.
What should I do if I accidentally overfill the bedding layer or make it thicker in spots?
If the bedding is thicker than about 1 inch, pavers can sink or rock later because they have more room to move. The fix is to remove pavers in the affected area, re-screed to the correct thickness, and restack, rather than trying to “eyeball” it and compact through the mistake.
Is polymeric joint sand mandatory, or can I use regular sand for patio paver joints?
You can use regular sand, but it washes out more easily and can invite weeds. If you use polymeric sand, make sure your joints are deep enough (commonly at least about 3/4 inch) and don’t overfill, because excess can create surface haze and reduce bond.
How can I tell if my drainage slope is correct before I start laying pavers?
Before pavers go down, measure from a fixed reference point using a level and straightedge across multiple spots. Confirm the slope is consistent (commonly around 1/8 inch per foot away from structures), then do a water test with a light hose pour in different areas to ensure water flows where intended.
What’s the best way to handle paver edges where there is no border restraint, like next to mulch or garden beds?
Edges need restraint that has solid vertical contact with the sides of the pavers. If mulch beds sit right against pavers, install edge restraints first, then keep mulch from piling against the joints. Consider adding a small clean-gravel strip at the edge so water doesn’t get trapped against the patio border.
How much should I cut pavers for corners and curves to avoid weak small pieces?
Minimize narrow “sliver” cuts by planning your layout line so the pattern lands on larger blocks near the corner. If you must cut small pieces, stagger them and avoid placing the smallest slices at the highest-stress areas like steps, transitions, or frequently walked paths.
Do I need geotextile fabric under the whole patio, or only in some soils?
For stable, non-clayey subgrade, a single geotextile layer may not be strictly necessary, but it is very helpful over soft or clay-heavy soils. Use it at least on the subgrade to reduce fines migrating into the base, which helps prevent long-term settling and joint widening.
Can I set patio pavers on top of uneven soil and just use more sand to level it?
No, adding extra sand to compensate for low subgrade spots usually causes future rocking and settling. Low spots should be corrected using compacted base material in lifts, then re-screeded to the correct 1 inch bedding thickness.
How long should I wait before walking on the patio after jointing and misting polymeric sand?
Let the polymeric sand cure without foot traffic, typically about 24 hours, then avoid heavier use and furniture placement until around 48 to 72 hours. If it rains soon after misting, delay activation and follow the product’s timing guidance because premature washout can weaken bonding.
Should I seal pavers right away, or is there a safer timing window?
Wait for full cure before sealing, commonly around 90 days after installation, so moisture and polymeric sand have time to stabilize. Sealing too early can trap moisture and cause blotchy staining or uneven appearance.
What maintenance matters most to prevent pavers from shifting months or years later?
Annual edge checks are critical, re-drive any loose edge restraint spikes, and keep vegetation from growing right up against joints. Also avoid high-intensity pressure washing into the joints, since it can strip jointing sand and require re-application.
Next Articles
How to Make a Patio With Pavers and Sand Step by Step
Step-by-step guide to install paver patio with sand setting layer, from planning and base to leveling, cutting, joint fi
How to Apply Polymeric Sand to Patio Pavers: Step by Step
Step-by-step DIY guide to apply polymeric sand between patio pavers, prep joints, spread, fill, and activate without haz
How to Seal Paver Patio: Step-by-Step DIY Guide
Learn how to seal a paver patio step by step: clean, choose penetrating or wet-look sealer, apply, cure, and maintain.