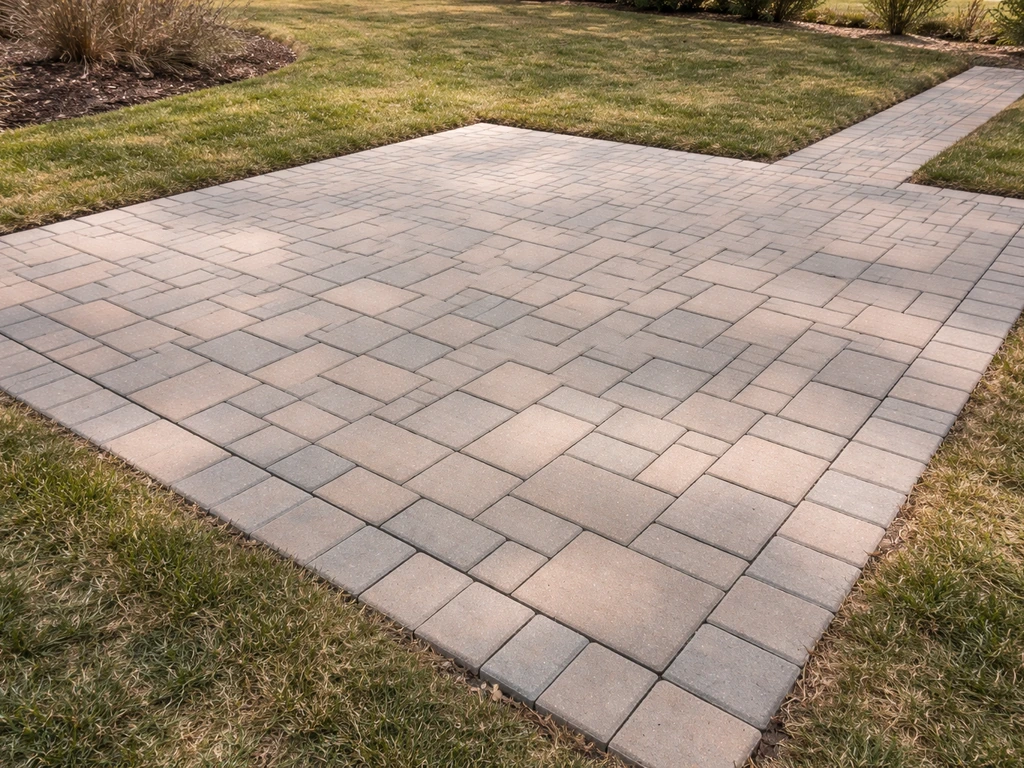
Building a patio with pavers and sand means excavating the area, compacting a 6 to 8 inch crushed stone base, screeding 1 inch of bedding sand over it, laying your pavers on top, then filling the joints with polymeric or regular jointing sand and compacting everything flat. Done right, the result is a stable, level surface that handles foot traffic, sheds water, and lasts for decades without cracking like poured concrete can. The full process takes most DIYers a weekend for a small to mid-size patio, and the learning curve is real but very manageable if you follow the right sequence.
How to Make a Patio With Pavers and Sand Step by Step

Felix Rowe
22 Jun 2026
What you'll need: tools and materials checklist
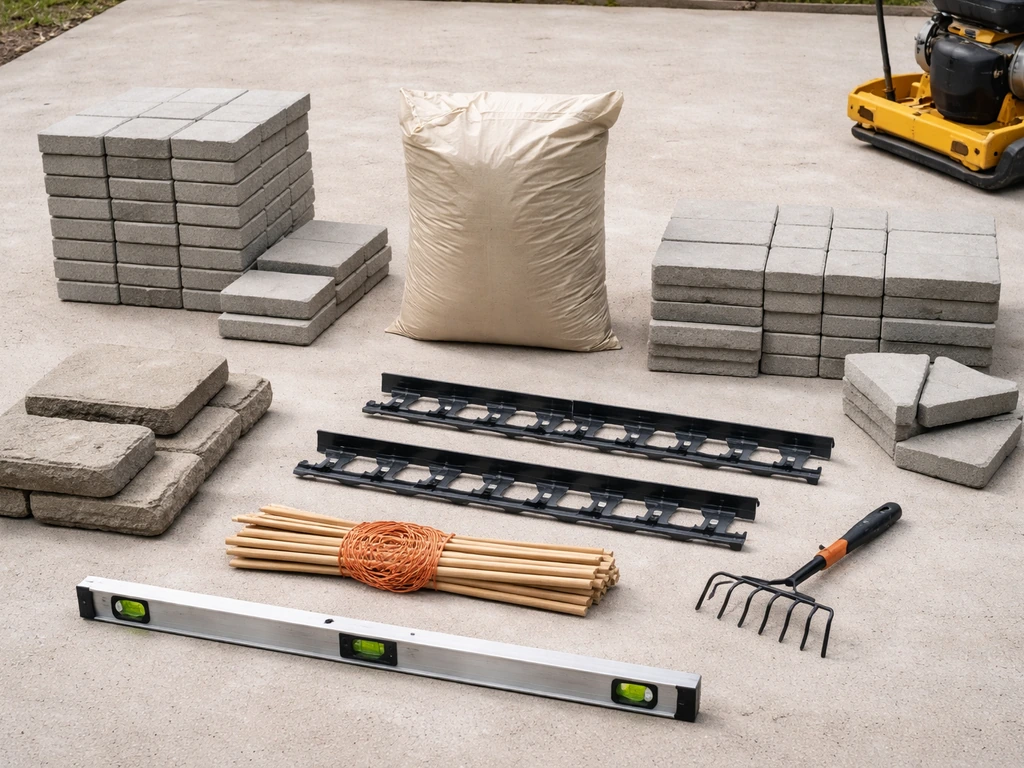
Get everything on this list sorted before you dig. Running to the hardware store mid-project is a time killer and can derail your leveling work if the sand dries out or shifts while you're gone.
- Pavers (concrete, natural stone, or porcelain) plus 10% extra for cuts and waste
- Crushed stone aggregate base material (3/4 inch minus or similar)
- Coarse bedding sand (concrete sand, ASTM C33 or equivalent)
- Polymeric jointing sand or regular coarse jointing sand (ASTM C936)
- Plastic or steel edge restraints with spikes
- Geotextile landscape fabric (especially on clay soils)
- Plate compactor (rent one — this is non-negotiable)
- Hand tamper for tight corners
- Screed pipes or 1-inch conduit (two lengths)
- Long straightedge or screed board (8–10 feet)
- String lines and stakes
- Carpenter's level and rubber mallet
- Tape measure, marking chalk or spray paint
- Masonry wet saw or angle grinder with diamond blade for cuts
- Broom and leaf blower
- Wheelbarrow and shovels
- Safety glasses, gloves, hearing protection
Step 1: Plan your layout, measure the space, and pick a pattern
Start with a sketch on paper. Measure your outdoor space, mark the patio footprint with stakes and string lines, and decide on dimensions that reduce cutting. Pavers typically come in standard sizes (4x8, 6x6, 6x9, 12x12 inches are common), so planning dimensions that align with those sizes saves a lot of time at the saw later. Add a border row to your plan, a single row of pavers around the perimeter looks clean and makes edge restraints easier to hide.
Choosing your pattern matters both visually and structurally. Running bond (like standard brickwork) and herringbone (45 or 90 degrees) are the most popular for DIYers. Herringbone at 45 degrees is actually the strongest pattern for interlocking because it distributes load in multiple directions, but it generates more cut pieces at the edges. Running bond and basketweave are simpler to lay and waste less material. If you're working around a feature like a fire pit or curved edge, plan that into your layout before you order materials, it changes your cut count significantly.
Once you have your pattern and dimensions, calculate your paver quantity by area (length x width), then add 10% for cuts and breakage. Order base material and sand at the same time. For a 200 square foot patio with a 6-inch base, you're looking at roughly 3 to 4 cubic yards of crushed stone and about 1 cubic yard of bedding sand. Most paver suppliers have calculators on their websites that make this easy.
Step 2: Site prep, removing grass, handling uneven ground, and working over old surfaces
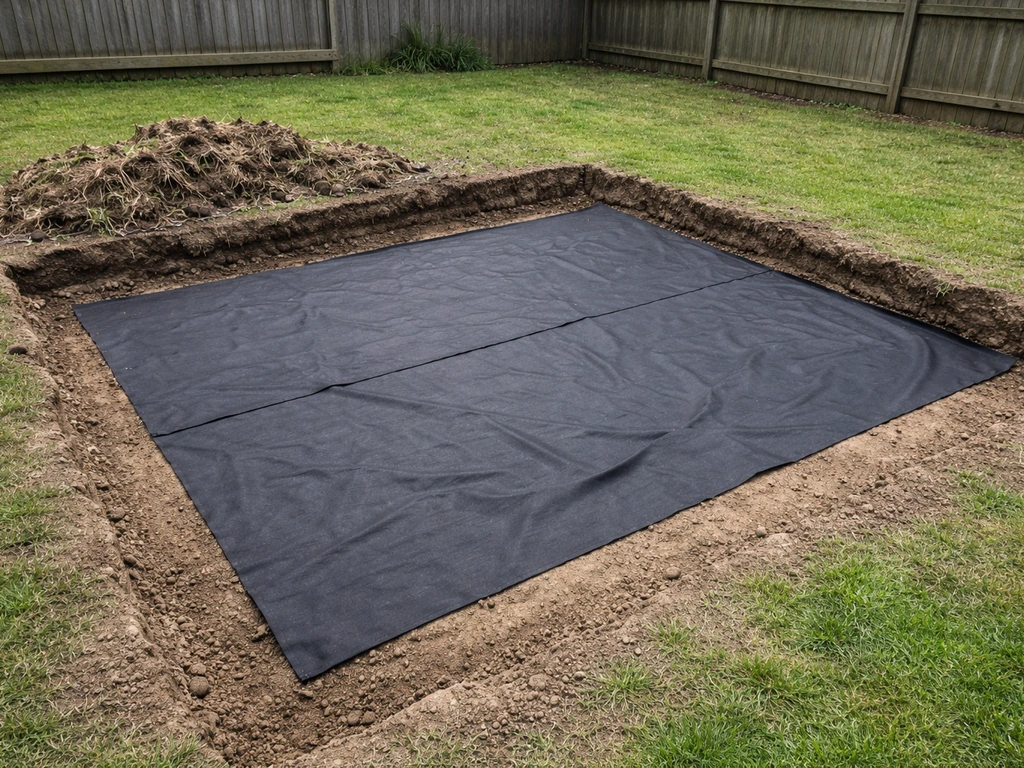
Mark the full perimeter of your patio with spray paint or string lines, then excavate everything inside it. You need to remove all sod, roots, and organic material. The target excavation depth is typically 9 to 10 inches below your finished patio surface: 6 to 8 inches for compacted base, 1 inch for bedding sand, and the thickness of your paver (usually 2 to 3 inches for standard concrete pavers). Measure and mark that target depth on a stake so you can check as you dig.
On clay soils, lay geotextile landscape fabric on the bottom of the excavation before adding base material. On clay soils, an industry guidance page from US Fabrics notes ICPI recommends installing geotextile fabric under pavers to reduce soil migration that can lead to system failure ICPI recommends installing geotextile fabric under pavers on clay soils. Without it, fine clay particles migrate upward into your compacted stone over time, contaminating the base and eventually causing the pavers to sink or heave. Fixing that later means pulling up the whole patio, so the fabric is cheap insurance. Overlap seams by at least 12 inches and fold it up the sides of the excavation slightly.
Uneven ground is normal. Your goal after excavating is a consistent depth, not a perfectly flat native soil surface. You're going to build the levelness into the compacted base, not the native ground. If you hit soft spots or areas where the soil feels spongy, excavate a bit deeper there and add extra base material.
If you're installing over an existing concrete slab, the slab itself becomes your base, but only if it's solid. Check for cracks wider than 1/4 inch, heaving sections, or soft spots. Minor surface cracking is usually fine. If the slab is structurally sound, you can skip the excavation and just lay bedding sand directly on it, but verify there's enough vertical clearance for sand plus paver height relative to your door thresholds and any adjacent surfaces.
Step 3: Build the compacted base and set the bedding sand
The base is the most important part of this whole project. A beautiful patio on a weak base will be a sinking, unlevel mess within a few years. Use crushed stone aggregate (3/4 inch minus, sometimes called 'crusher run' or 'processed gravel'), not rounded pea gravel, which doesn't compact well. Add the stone in 4-inch lifts, compact each lift with a plate compactor before adding more. For a 6-inch total base, that's two passes of compaction. After compacting, the surface tolerance target is no more than plus or minus 3/8 inch over 10 feet, use a long straightedge to check.
Set your slope during the base stage, not later. The finished patio surface should slope away from any structures at a minimum of 1 inch drop per 4 feet (roughly 2 percent). You can also think of it as 1/8 inch per foot minimum, with 1/4 inch per foot being even safer in wet climates. Establish this grade on your compacted base using your string lines as a reference, then maintain it through the sand and paving layers.
Once the base is compacted and graded, it's time for bedding sand. This section explains exactly how to use patio paver sand, including how thick to place it and when to screed before setting pavers bedding sand. Lay two screed pipes (1-inch conduit works perfectly) parallel to each other on top of the compacted base, about 6 to 8 feet apart. These act as guides for your screed board.
Pour coarse concrete sand between and around the pipes, then drag your screed board across the pipes to create a perfectly flat, 1-inch deep sand layer. The ICPI recommends bedding sand between 1/2 and 1 inch thick, 1 inch is the standard for most DIY patio installs. Do not compact the bedding sand before you lay pavers. The pavers themselves, during final compaction, will settle it properly.
Screed only as much area as you can pave in a single session. If bedding sand sits overnight or gets rained on, it can compact unevenly or wash out in spots, and you'll need to re-screed before laying pavers.
Step 4: Laying pavers, keeping lines straight, and adjusting for level
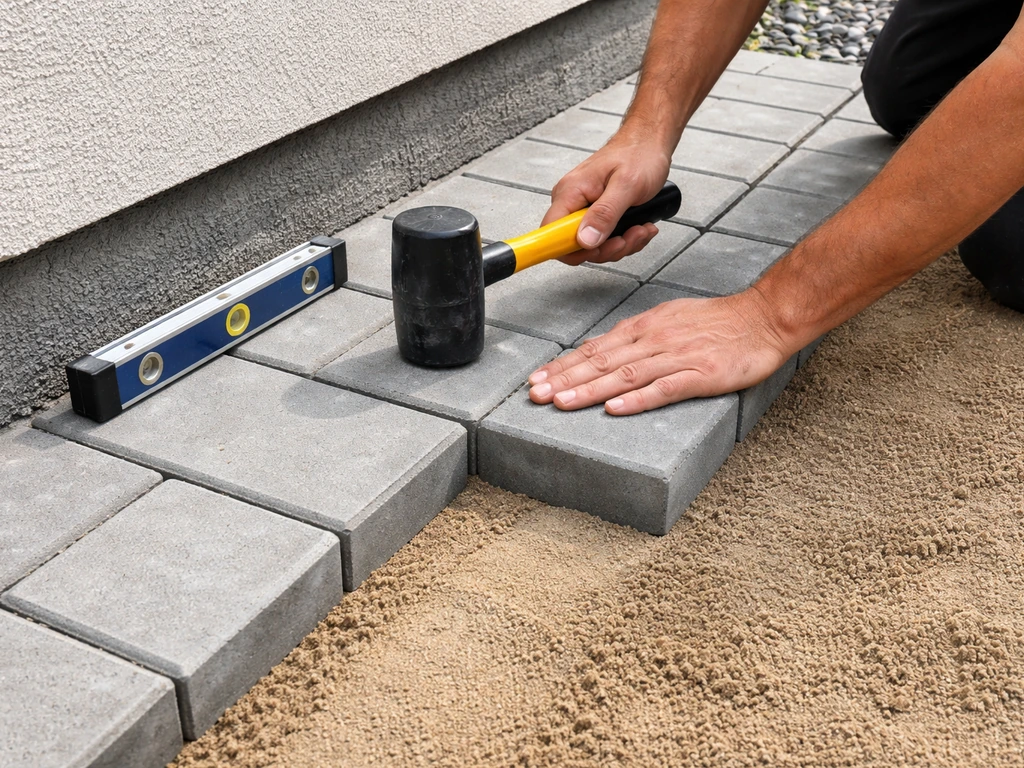
Start laying pavers from a straight edge, usually the house wall, a deck, or the longest straight border. Work outward from your starting point in the direction of your chosen pattern. Set each paver gently into the bedding sand without twisting or sliding it (sliding disturbs the sand surface and creates bumps). Bedding sand is what you put between patio pavers, and it helps level the surface and fill the joints so the pavers lock in place.
Butt each paver tight to its neighbor, aiming for consistent joint gaps between 1/8 and 1/4 inch (some sources say as tight as 1/16 inch). Techo-Bloc and others recommend string lines across the patio to keep rows straight, pull a string line every 4 to 6 rows and check alignment frequently.
Check level and slope constantly as you go. Use your long straightedge and a level across every few pavers in both directions. If a paver is high, gently tap it down with a rubber mallet. If it's low, pull it up, add a small pinch of sand under it, and reset. Do not let a slight variance slide, small height differences compound quickly as you lay more pavers, and fixing a rocking paver buried under 20 others is painful. A well-laid section should feel solid underfoot with no wobble.
Leave a margin of about 1 foot around the perimeter where you'll need cut pieces. Install all the full pavers first, then come back to cut and fill the edges. This approach keeps your lines true and avoids the awkwardness of fitting cuts on the fly while maintaining your pattern.
Step 5: Cut pavers to fit edges, borders, and transitions
Most patios need cut pieces along at least two sides, and more if you have curves, fire pits, or other obstacles. The right cutting tool depends on your paver type and how many cuts you need.
| Cutting Method | Best For | Quality of Cut | Notes |
|---|---|---|---|
| Wet masonry saw | All paver types, high cut volume | Best — clean, precise | Rent or buy; reduces dust significantly |
| Angle grinder with diamond blade | Occasional cuts, tight spots | Good for straight cuts | More dust; wear full PPE |
| Circular saw with diamond/masonry blade | Concrete pavers, occasional use | Good | Worm-drive preferred for control |
| Guillotine splitter (chisel/hydraulic) | Simple straight cuts, concrete pavers only | Moderate — can chip | Fast and cheap; not for porcelain or stone |
| Wet saw with porcelain blade | Porcelain pavers specifically | Best for porcelain | Standard blades chip porcelain badly |
Measure each cut piece individually rather than assuming all edge pieces are the same width, walls and structures are rarely perfectly straight. Mark your cut line with a pencil or chalk, make the cut, test the fit before placing it in the sand. For curves, you can score a line with an angle grinder and use a chisel to chip away material incrementally. It takes patience, but it works.
Once all cut pieces are set, install your edge restraints. Plastic or steel edging goes along all open sides of the patio (sides not bordered by a wall, step, or concrete curb). Drive the steel spikes through the restraint into the compacted base every 12 inches. Edge restraints are what prevent the whole patio from slowly creeping and spreading over time, don't skip them or use a light-duty version. Install them before you compact and before you add joint sand.
Step 6: Fill joints, compact, clean, and optionally seal
With all pavers set and edge restraints installed, run the plate compactor over the entire surface. Use a rubber pad or piece of plywood between the compactor and the pavers to prevent surface scratching. This final compaction settles the bedding sand uniformly and locks the pavers together. Do not put any jointing sand on the surface before this compaction pass, the sand will prevent the pavers from seating properly. That's a common mistake that leads to a wobbly surface.
After compaction, apply jointing sand. You have two main options: regular coarse jointing sand or polymeric sand. Regular sand is cheaper and easier to apply but can wash out over time and lets weeds germinate in the joints. Polymeric sand is blended with polymer binders that harden with water, creating a semi-rigid joint that resists washout, weeds, and ant tunneling. For a permanent patio, polymeric sand is worth the extra cost.
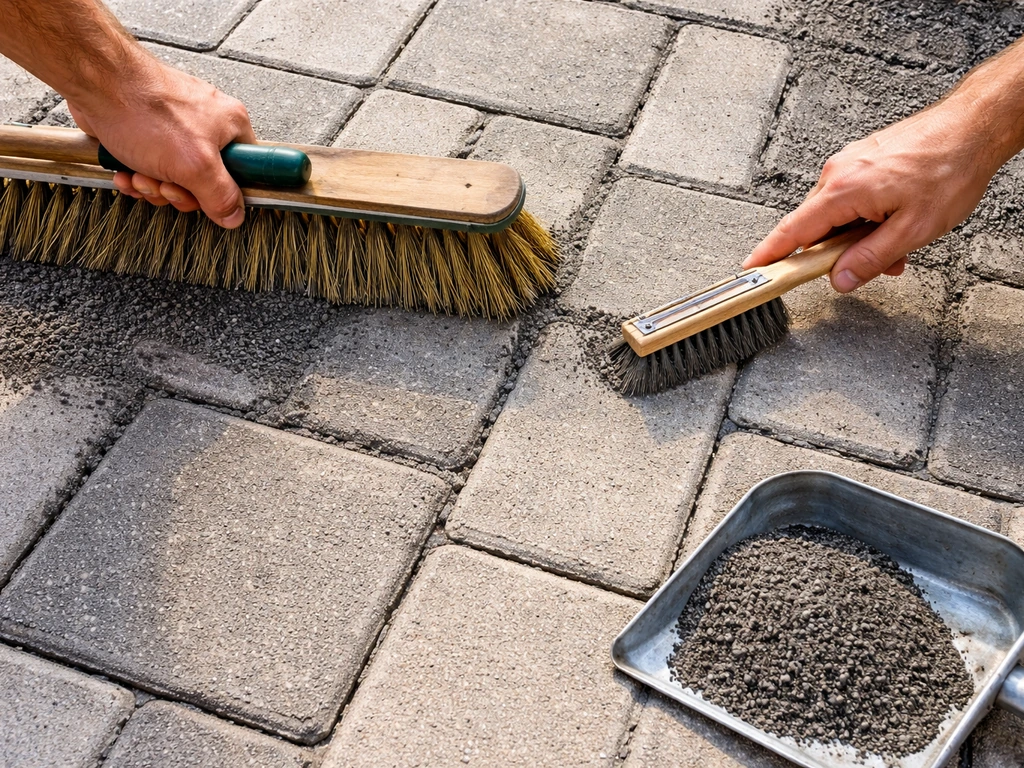
To apply jointing sand, pour it onto the paver surface and sweep it into the joints with a stiff broom, working in multiple directions. Keep sweeping until the joints are filled to about 1/8 inch below the top of the pavers (or just below the chamfer edge if your pavers have one). Run the compactor over the surface again to vibrate the sand down into the joints. Repeat the sweep-and-compact cycle until joints stay full after compaction.
For polymeric sand specifically, blank" rel="noopener noreferrer">use a leaf blower to remove any residual sand dust from the paver faces before activating. Then mist the surface gently with water, a continuous fine mist, not a hard spray that pushes sand out of joints. Follow the manufacturer's timing exactly. Getting the water application wrong is the leading cause of polymeric sand failure: too little and it won't harden, too much and it washes out or causes a white haze on the paver surface. Keep foot traffic off the patio for at least 24 hours after activation.
Sealing is optional but recommended on natural stone pavers and on any patio where you want stain resistance and enhanced color. Apply a paver sealer after the jointing sand has fully cured (usually 48 to 72 hours for polymeric sand). Clean the surface first, let it dry completely, then apply sealer with a roller or low-pressure sprayer in thin coats. Avoid over-applying, thick sealer layers turn white and peel.
Common problems and how to fix them
Uneven or rocking pavers
If individual pavers rock or feel soft underfoot, the bedding sand wasn't screeded evenly or the base beneath has a soft spot. Pull up the problem paver, check if the issue is too little sand (add some), too much sand creating a mound (remove some and re-screed), or a soft base spot (dig it out, add more compacted aggregate, and re-screed). The base flatness tolerance is plus or minus 3/8 inch over 10 feet, anything worse than that will show up as unevenness in the finished surface.
Joint sand washing out
Regular jointing sand will wash out in heavy rain and needs to be topped up periodically, that's normal. If polymeric sand is washing out, the water was applied too aggressively during activation, or the product wasn't given enough time to cure before rain hit it. The fix is to remove as much of the failed sand as you can, let the joints dry completely, and re-apply fresh polymeric sand from scratch following the manufacturer's water instructions precisely.
Pavers shifting or spreading
Shifting almost always means the edge restraints are missing, installed improperly, or have failed. Check the perimeter, if edge restraints are absent on any open side, the whole patio will slowly spread and gaps will open between pavers. Install proper restraints, re-close the gaps by tapping the pavers back together, re-compact, and re-fill joints.
Sinking or settled sections
A section that sinks over time usually means the base material wasn't compacted enough, or organic material (roots, sod) wasn't fully removed and has since decomposed. The repair requires pulling up the affected pavers, adding and compacting more base material, re-screeding the sand, and re-laying the pavers. It's disruptive but the pavers themselves are reusable, which is one of the big advantages of sand-set installation over poured concrete.
Polymeric sand white haze
White haze on paver faces after polymeric sand activation is usually from polymer residue that wasn't blown off before watering, or water splashing activated sand onto paver surfaces. Mild haze often weathers away on its own. Stubborn haze can be addressed with a paver efflorescence cleaner. Prevent it by using a leaf blower aggressively before watering, and by using a gentle mist rather than a hard stream during activation.
DIY variations: slopes, raised patios, and fire pit surrounds
Sloped designs for drainage
Every paver patio needs to slope for drainage, but some yards require a more deliberate approach. If your yard slopes toward the house, you need to establish a cross-slope or build a channel drain into the patio design. Plan this in the excavation stage, it's almost impossible to fix drainage slope after the base is compacted. Use your string lines to establish the target slope (1/4 inch per foot toward the yard is a comfortable target), then check it at multiple points as you add base material. Building slope into the base and maintaining it through the sand layer keeps everything consistent without trying to create it paver by paver.
Raised patios
A raised patio sits above grade, usually supported by retaining walls or paver borders built up from ground level. The sand-set paver system remains the same inside the raised area, but you need to build structural walls first and make sure they're strong enough to contain the base material under load. Segmental retaining wall blocks are a popular DIY-friendly option for the perimeter. Drainage is especially important in raised designs, incorporate gravel backfill and drainage outlets behind any retaining walls to prevent hydrostatic pressure from pushing walls outward.
Fire pit surrounds and built-in features
A fire pit area is a natural extension of a paver patio, and many DIYers build both at the same time. If you're incorporating a built-in fire pit ring or seating wall, those structures need their own footings or compacted base independent of the paver sand system. The pavers around the fire pit should be laid in a radiating pattern or concentric rings, this requires more careful layout and more cuts, but it looks intentional and clean. Keep in mind that pavers within about 18 inches of a regular wood-burning fire pit will be exposed to heat cycles; choose dense concrete or natural stone pavers in those areas rather than lighter materials that can spall.
Laying pavers over grass or an existing concrete slab
Laying directly over live grass is not recommended as a long-term installation, the organic material decomposes, creating voids, and the grass continues trying to grow through joints. Always remove sod and at least 2 inches of topsoil before you start. If you're laying over an existing concrete slab, that's a legitimate shortcut when the slab is in good condition. You skip most of the excavation and just work with a bedding layer on top. The challenge is height: adding bedding sand plus paver thickness (often 3 to 4 inches total) raises your finished surface, which can create issues at door thresholds and step transitions, so measure carefully first.
Realistic time and effort expectations
A small patio of around 100 to 150 square feet is genuinely a weekend project for two people with some physical fitness. A mid-size patio of 300 to 500 square feet typically takes two to three full days of work, not counting delivery and drying time. The base work (excavation and compaction) is the most physically demanding part. Laying pavers is actually enjoyable once the base is solid, it's methodical and satisfying. Allow a full day for the sand and jointing steps if you're using polymeric sand and want to do it carefully.
The biggest time traps for DIYers are underestimating excavation time, skipping or rushing the base compaction, and having to redo the bedding sand because it got disturbed overnight. Plan your schedule so you can complete the base and screeding in a single session, and have your pavers on site before you start so you can move directly from prep to laying.
Your next steps
If you're ready to get started, sketch your patio dimensions today, confirm your paver pattern, and call for material quotes. Order base stone and sand first, delivery lead times vary and these are the heaviest materials to source. Rent your plate compactor for the weekend you plan to do the base work, and price wet saw rentals at the same time. Once your materials are on site and your tools are lined up, follow the sequence above phase by phase.
The jointing sand step has the most room for variation depending on your product choice, so check out the guides on applying polymeric sand and using jointing sand correctly before you get to that stage, the technique details matter more than most people expect. If you are using polymeric sand, follow the steps for how to apply polymeric sand to patio pavers carefully so it properly bonds in the joints guides on applying polymeric sand.
FAQ
How do I figure out how deep to excavate for my specific patio height and door thresholds?
For a typical concrete paver patio, plan roughly 9 to 10 inches total removal from existing grade to finished height (6 to 8 inches base stone, 1 inch bedding sand, plus 2 to 3 inches paver thickness). If your patio connects to a door, measure the threshold height first, then work backward so you do not end up with a step transition that is too high to clear easily.
Should I always use polymeric sand, or is regular jointing sand better in some cases?
Polymeric sand can be used on many patios, but it is not ideal in settings where you will disturb joints frequently (for example, if you expect future utility work) or where water will continually wash over it. Regular joint sand is usually the safer, lower-cost choice for areas that get occasional heavy rain immediately after installation, since polymeric sand requires precise misting and curing timing to perform well.
What should I do if I notice uneven pavers after I’ve already laid them?
Do not add bedding sand after you have already set pavers unless you are doing a controlled re-leveling. If the patio feels uneven, pull the specific pavers, correct the amount and flatness of the bedding sand by re-screeding, then re-set and re-compact. Adding “top-up” sand around existing pavers often traps a mound and creates rocking spots that are hard to fix later.
My pavers shifted after compaction. What is the first thing to check before re-laying anything?
If your pavers move after the final compaction, the most common cause is missing or weak edge restraints on one or more open sides. Confirm every perimeter side has properly installed edging, then re-close gaps by tapping pavers together, re-compact, and sweep joint sand back in. If the base is soft, re-compaction alone will not solve it.
What type of gravel or base material should I use, and how can I avoid a base that settles?
Use crushed stone that is designed to compact (often 3/4 inch minus). Avoid rounded pea gravel, because it does not lock together and can settle under load. Also keep your lift thickness consistent (around 4 inches per pass for a 6 inch base) so you get uniform density and a surface flat enough to meet the straightedge tolerance target.
What’s the correct fix if polymeric joint sand washes out or didn’t harden?
If polymeric sand “fails” because of too much water, often the joints wash out and may look chalky or leave voids. The reliable repair is to remove as much of the affected sand as possible, let joints fully dry, then reapply fresh polymeric sand following the exact mist amount and timing. Attempts to “sprinkle more” later usually do not re-bond properly.
When should I seal the patio, and can sealing be done before the joints cure?
Sealing pavers is mainly about stain resistance and color enhancement, but it does not correct drainage problems or weak bases. If you seal polymeric-sand-filled joints too early or over wet sand, you can interfere with curing. Wait until the polymeric joints are fully cured (typically 48 to 72 hours) and the surface is dry before sealing.
How do I handle drainage if my yard slopes toward the house?
Yes, but pay special attention to slope and edge conditions. A cross-slope or built channel drain must be planned during base construction, since you cannot reliably “create” drainage after compaction. Use string lines to set the grade at multiple points so low spots do not develop under a pattern of pavers.
How do I prevent ponding where the patio meets a sidewalk, driveway, or step?
For a patio that meets another hard surface, like a driveway or sidewalk, plan your finished elevation so water can still drain away from buildings. If the patio is higher than adjacent slabs, water can pond at the seam and eventually work into the joints. Confirm you have enough freeboard from door thresholds before you commit to paver and sand thickness.
Why do I have a white haze on the pavers after polymeric sand, and what’s the best way to deal with it?
If you see white haze on paver faces after polymeric sand activation, the safest first step is prevention (blow off residual dust with a leaf blower before misting, and use a fine continuous mist rather than a jet). Mild haze often weathers, but for persistent residue you can use a paver efflorescence cleaner designed for masonry pavers, after the joint system has cured.
Does freezing weather change how I should plan slope, materials, or installation steps?
If you expect winter freeze-thaw, aim for the more conservative slope approach (often closer to 1/4 inch per foot). Also ensure the base is fully compacted and that edging is locked in, because water trapped in weak joints or at low spots can lead to heaving. Proper drainage matters more than the paver brand in cold climates.
Next Articles
How to Apply Polymeric Sand to Patio Pavers: Step by Step
Step-by-step DIY guide to apply polymeric sand between patio pavers, prep joints, spread, fill, and activate without haz
How to Seal Paver Patio: Step-by-Step DIY Guide
Learn how to seal a paver patio step by step: clean, choose penetrating or wet-look sealer, apply, cure, and maintain.
How to Care for a Paver Patio: DIY Maintenance Guide
Step-by-step DIY paver patio care: cleaning, weeds, joint sand, sealing, drainage fixes, and troubleshooting sinking or