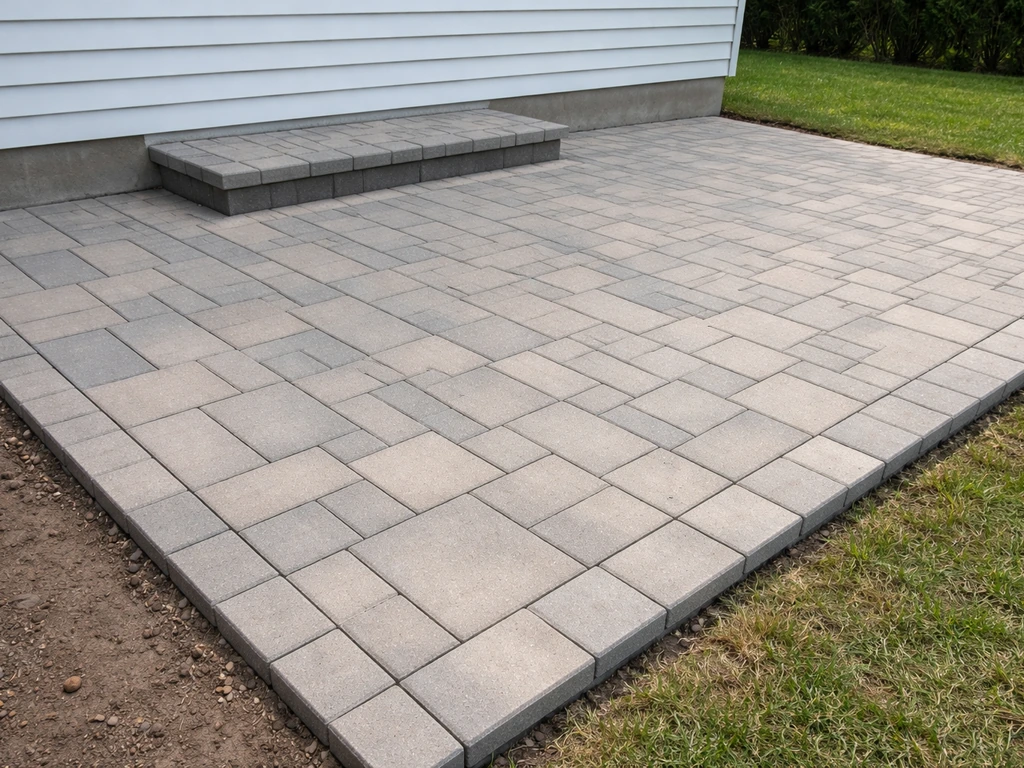
You can build a paver patio without full excavation, but what that actually means depends on what you're starting with. Over existing concrete, you're doing a true no-dig overlay: clean the slab, apply a 1-inch sand bedding layer, and set pavers directly on top. Over grass or soft ground, you'll need to remove the top layer of vegetation and loosen material (a few inches at most), but you're skipping the full 4–6 inch gravel base that a standard install demands. Both approaches work for patios that will see foot traffic, and both are well within DIY reach if you follow the process carefully.
How to Build a Paver Patio Without Digging: DIY Guide

Felix Rowe
12 May 2026
When a no-dig approach actually works
Before you commit, be honest about your site. A no-dig or minimal-dig patio is a smart choice in specific situations, and a bad idea in others. Here's when it makes sense:
- You have an existing concrete slab that's structurally sound (no major cracks, no heaving, no soft spots underneath)
- Your ground is relatively flat, with no more than about 1–2 inches of slope across the patio area
- The finished patio height won't cause problems at doorways, steps, or transitions to other surfaces
- The area drains reasonably well already and doesn't pond water after rain
- This is a pedestrian patio, not a driveway or heavy load-bearing surface
The approach has real limits. If your ground has soft, organic-rich soil or significant slope, you'll get pavers that rock, shift, and settle unevenly within a season or two. Similarly, if the finished surface will end up too high at a door threshold or create a tripping hazard at a step, you need to rethink the elevation before you start, not after. On grass or bare ground with more than a couple of inches of slope, you're honestly better off doing a light excavation to get a level starting point. Calling it 'no-dig' doesn't mean skipping the prep that keeps pavers stable.
Choosing your method: overlay vs. minimal ground prep
There are two distinct no-dig methods, and which one applies to you comes down to what's already there.
Method 1: Overlay on existing concrete
If you have a concrete patio or slab that's in decent shape, this is the cleanest no-dig option. You're essentially adding a 1-inch sand bedding layer on top of the concrete and setting pavers into it. The concrete acts as your compacted base, so you skip the gravel base entirely. The tradeoff is that your finished surface will sit roughly 3–4 inches higher than the existing slab (1 inch sand plus the paver thickness, typically 2.375 inches for standard concrete pavers). Check that this new height works at your door, existing steps, and any transitions before you start.
Method 2: Minimal ground prep over grass or bare soil
Over grass or unpaved ground, true zero-digging isn't realistic if you want a patio that lasts. What you can skip is the full 4–6 inch compacted gravel base. The realistic minimum is removing sod and the top 2–3 inches of loose, organic material, then adding a compacted layer of paver base (crushed stone) about 2–3 inches deep, followed by your 1-inch sand bedding. This keeps finished height manageable and gives the pavers something stable to sit on. If your soil is firm, compacted, and well-draining, you may be able to work with just the sand bedding layer on top of the ground, but this is the exception rather than the rule and works best for small, low-traffic areas.
| Factor | Overlay on Concrete | Minimal Prep on Ground |
|---|---|---|
| Existing surface | Sound concrete slab | Grass, bare soil, or compacted dirt |
| Digging required | None | 2–3 inches to remove sod and organic layer |
| Gravel base needed | No (concrete is the base) | Thin 2–3 inch layer recommended |
| Bedding sand | 1 inch on top of concrete | 1 inch on top of gravel/compacted soil |
| Finished height added | ~3–4 inches above existing slab | ~4–5 inches above ground level |
| Best for | Refreshing an old concrete patio | New patio on unpaved yard area |
| Long-term stability | Excellent if slab is sound | Good with proper prep, fair on soft soil |
Everything you'll need before you start
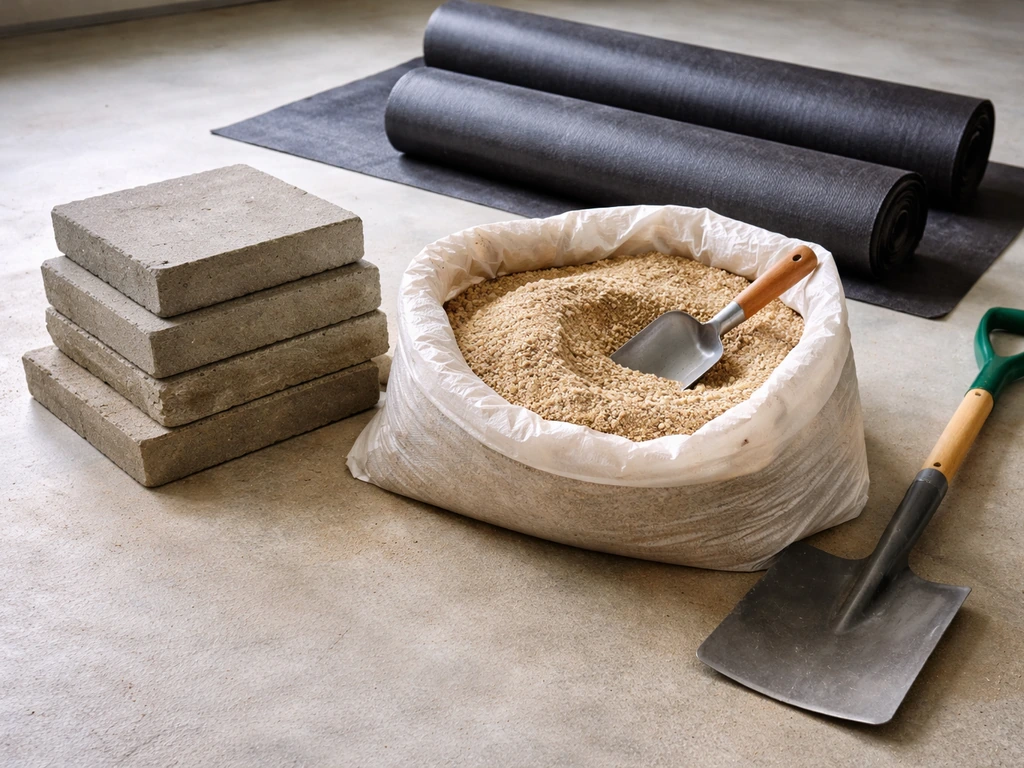
Materials
- Pavers (calculate square footage plus 10% overage for cuts and breakage)
- Coarse bedding sand (also called concrete sand or washed sand), enough for a 1-inch layer across your area
- Crushed stone paver base (if working on ground, not concrete): 2–3 inches deep across the area
- Polymeric jointing sand (sized for joint widths of 1/8 inch to 1/2 inch)
- Plastic or aluminum paver edge restraints with spikes
- Geotextile landscape fabric (for grass/soil installs to suppress weeds under the base)
- Paver sealer (optional, applied after polymeric sand cures)
Tools
- Sod cutter or flat spade (for removing grass, if applicable)
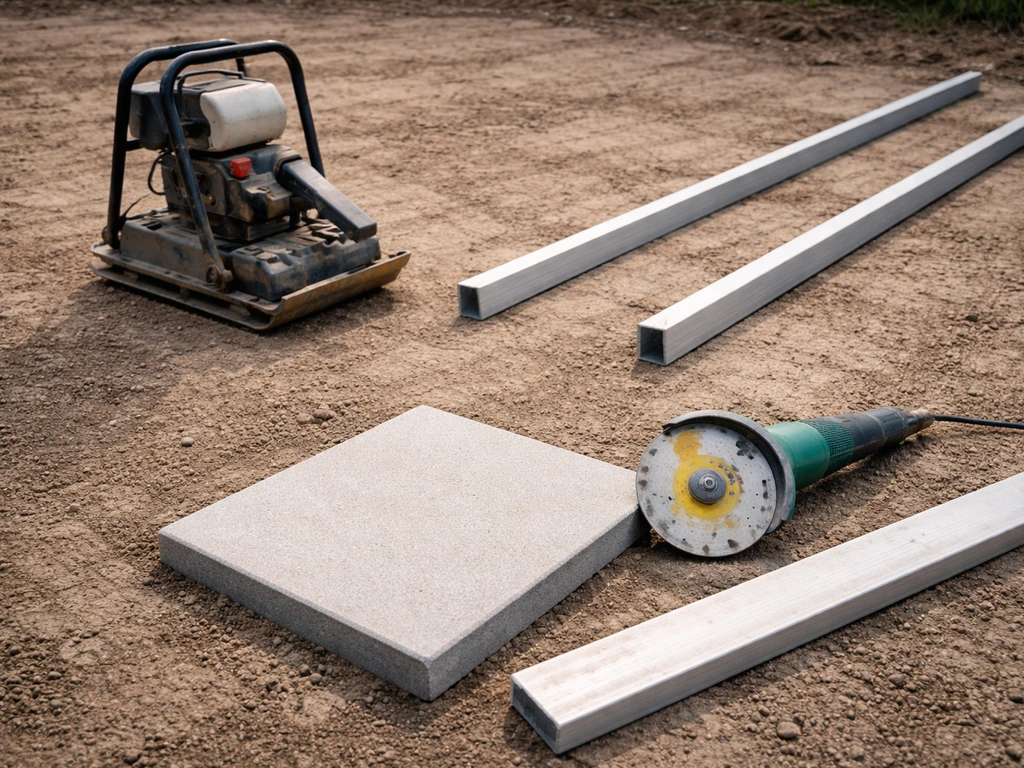
- Hand tamper or plate compactor (rental, capable of at least 5,000 lbf/22 kN centrifugal force for proper compaction)
- Screed rails and a long screed board (for leveling the sand layer)
- Level and a string line or laser level
- Rubber mallet
- Circular saw with a diamond blade, or an angle grinder with a diamond blade, for cutting pavers
- Tape measure and chalk line
- Push broom and leaf blower
- Garden hose or water source for activating polymeric sand
- Safety glasses and hearing protection for cutting
Step-by-step: how to lay it all out
Step 1: Prepare the surface
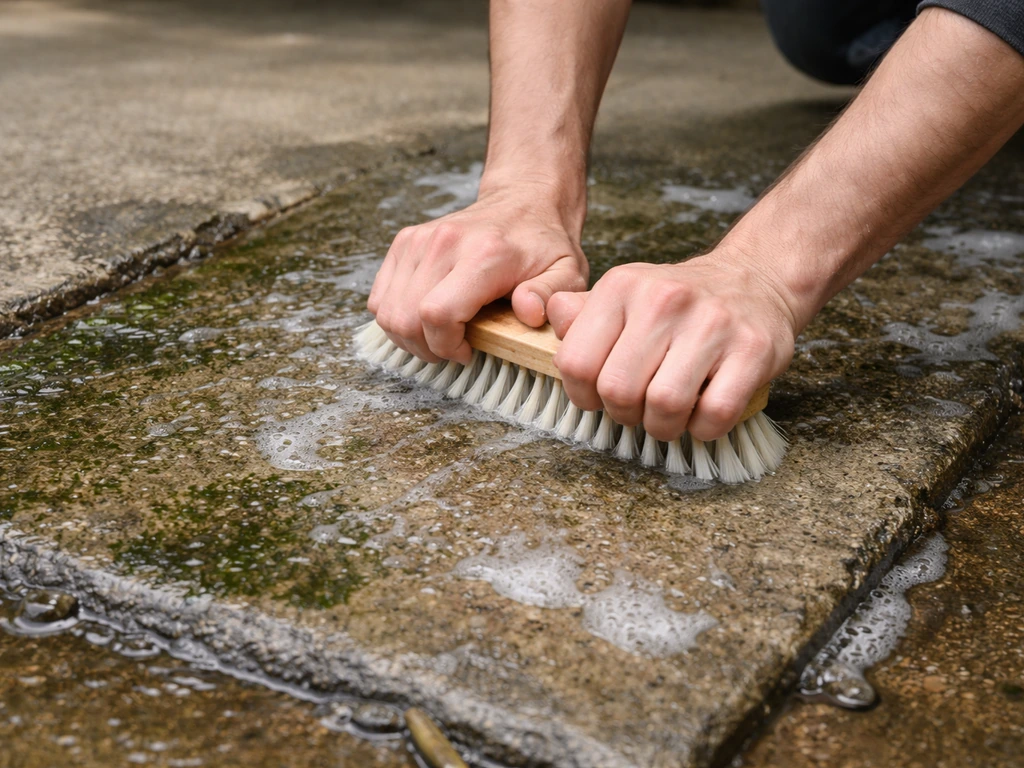
For a concrete overlay, sweep or blow off all debris, then scrub the slab with a stiff brush and water to remove dirt, algae, or oil. To understand the exact steps, see our guide on how to build a concrete paver patio. Let it dry completely. Check for high spots, cracks, or soft areas and fill any cracks with concrete patching compound before you proceed.
The slab doesn't need to be perfect, but it needs to be stable. For ground installs, use a sod cutter or flat spade to strip sod and remove the top 2–3 inches of organic soil across the entire patio footprint, plus about 6 inches beyond the planned edges on all sides. This extra border gives you room to install edge restraints properly.
Step 2: Add landscape fabric and base material (ground installs only)
blank" rel="noopener noreferrer">Roll out geotextile landscape fabric over the exposed soil, overlapping seams by at least 6 inches. This layer separates your base material from the soil beneath, which helps prevent weeds and stops the gravel from migrating down into soft ground over time. Pour in 2–3 inches of crushed stone paver base and spread it evenly. Compact it with a plate compactor, working in overlapping passes until the surface feels solid underfoot. If you're on a concrete slab, skip this step entirely and move to sand.
Step 3: Install edge restraints
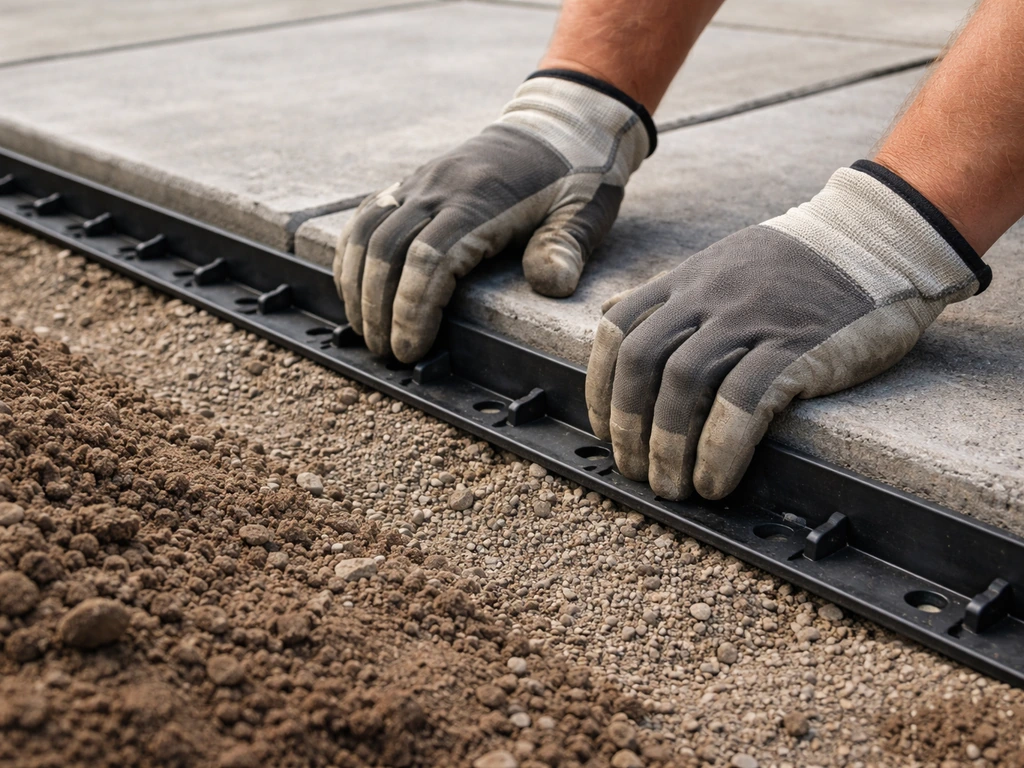
Edge restraints go in before your sand layer, positioned at the outer perimeter of the patio. Plastic or aluminum snap-edge restraints work well for both concrete overlays and ground installs. The restraint needs at least 1 inch of vertical contact with the side of the paver to hold it effectively. Spike them into the base material or soil at roughly 12-inch intervals.
Western Interlock's snap-edge restraint spike placement guidance offers general directions for spike spacing that can vary by conditions, including ranges such as 12 to 24 inches Spike them into the base material or soil at roughly 12-inch intervals. .
On a concrete slab where you can't drive spikes into the base, use a construction adhesive rated for concrete on the back of the restraint to bond it to the slab edge, then spike where you can reach soil at the perimeter. Getting edge restraints set correctly at this stage saves you a lot of grief later, because pavers that aren't contained at the edges will spread and shift.
Step 4: Spread and screed the bedding sand
Pour coarse bedding sand inside the edge restraints and spread it to an uncompacted thickness of 1 inch (25 mm). Use two screed rails set at the right height as guides and drag your screed board across them to create a flat, even surface. Do not compact the sand at this point. You want it loose and ready to accept the pavers, which will settle into it slightly as you work and as the plate compactor runs over them later. Compact the sand after all pavers are laid, not before. Keep the sand layer consistent, filling in any low spots and smoothing high ones as you go.
Step 5: Check slope for drainage
Before you lay a single paver, confirm your sand surface has a slight slope away from any structure. A slope of about 1/8 inch per foot (roughly 1%) is enough to move water off the patio surface without being noticeable underfoot. Use a level and tape measure to check this. If you're overlaying an existing concrete slab, the slab's original slope usually determines what you get, which is fine as long as it drains away from the house. A flat patio that holds water is one of the most common frustrations in DIY paver projects, and it's worth the few minutes to verify drainage before you commit to the layout.
Paver layout, cutting, and patterns
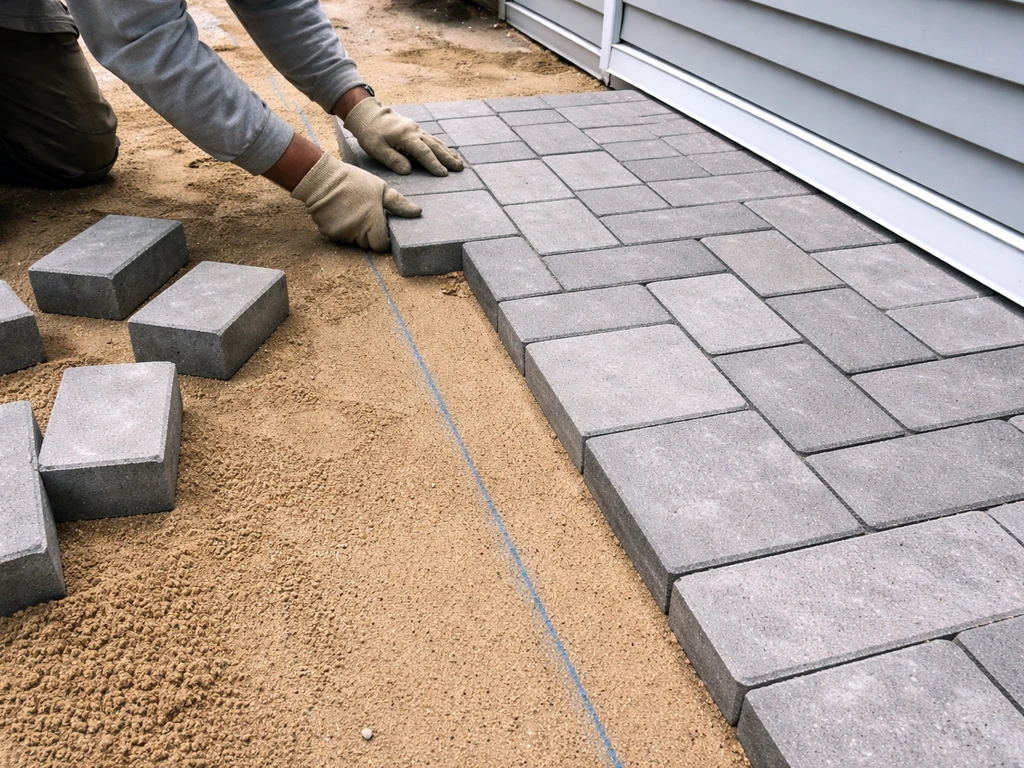
Start laying pavers from a straight reference edge, typically the side of a house, a fence line, or a chalk line you snap across the sand. Working from a corner or a straight edge keeps your pattern aligned as you move outward. Set each paver by placing it down rather than sliding it, which disturbs the sand bed. Use a rubber mallet to tap each paver flush and even with its neighbors. Leave consistent joint gaps of at least 1/8 inch (3 mm) and no more than 1/2 inch (13 mm) between pavers for polymeric sand to work properly.
Running bond (like brick rows offset by half a paver) and herringbone are both reliable pattern choices for rectangular pavers and work well on both concrete overlays and ground installs. Herringbone is particularly resistant to shifting under foot traffic. For rounded or curved patios, which require more cuts, the approach is the same as a standard layout but with more patience at the perimeter.
Curved paver patios work best when you plan a flexible edge line and expect to make more perimeter cuts For rounded or curved patios. If you're drawn to a round or curved layout, that's a whole design conversation worth exploring separately. To add style, choose a layout and pattern that complements your home, then finish with the right edging and joint sand for a cohesive look.
If you want a round paver patio, focus on how you handle cuts at the perimeter so the curve stays consistent round or curved patios. If you want your patio layout to look cohesive and match your space, use these design principles when choosing a pattern how to design paver patio.
Cutting pavers to fit
Save all your cuts for last. Lay out full pavers first across the entire field, then measure and mark the border pieces that need trimming. A circular saw with a diamond blade works cleanly on concrete pavers. Score the cut line with a slow first pass, then make the full cut on the second pass. Wear eye protection and a dust mask because cutting concrete creates a lot of fine dust. Always cut in a well-ventilated area and, if you're working on a concrete overlay, keep the blade away from the slab surface below to avoid unnecessary sparks and surface damage.
Finishing: sand, compaction, sealing
Compact the pavers
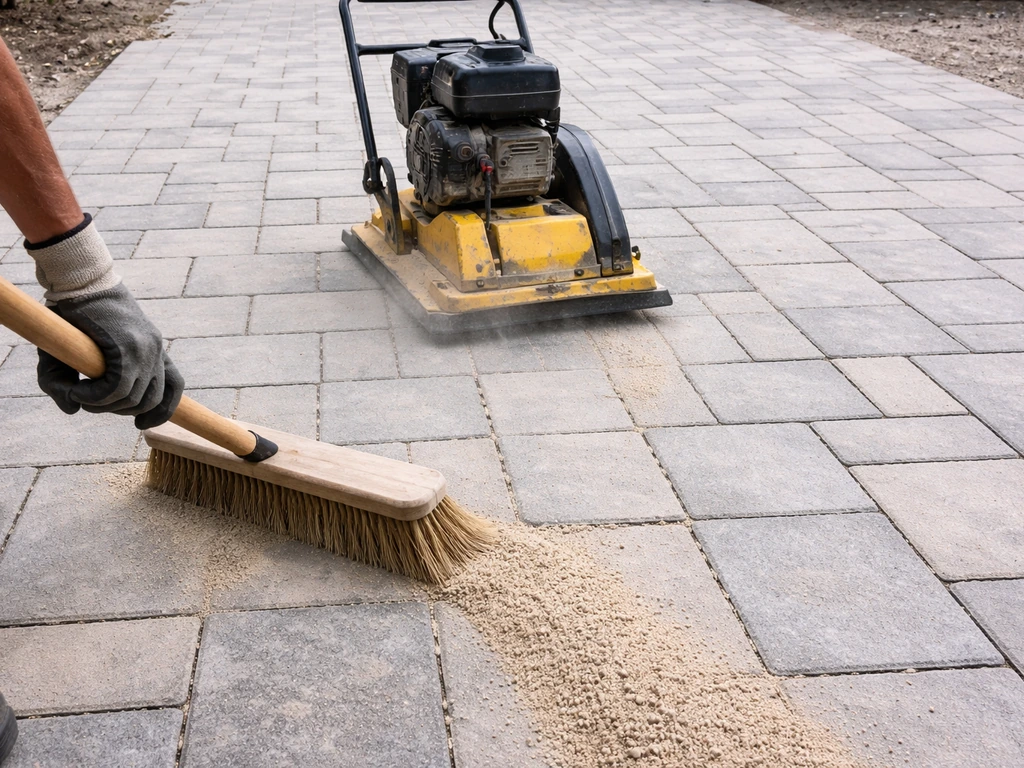
Once all pavers are laid and cuts are in place, run a plate compactor over the entire surface. The compactor should exert at least 5,000 lbf (22 kN) of centrifugal compaction force, operating at 75–90 hertz. You can rent one at any equipment rental shop and specify this use when you ask. Make overlapping passes across the full patio to consolidate the bedding sand and set the pavers firmly into position. Do not skip this step even on smaller patios. Compaction is what locks everything together and prevents the rocking, unevenness, and joint problems you'd otherwise see within the first season.
Fill joints with polymeric sand
[Wait until the paver surface is completely dry before applying polymeric sand. ](https://www. techniseal. com/pub/media/catalog/product/pdf/technisealpropolysandsmartsandssusproen.
pdf) Pour the sand over the patio and use a push broom to sweep it diagonally across the joints, working it into every gap. Run the plate compactor over the surface again to vibrate the sand deeper into the joints. Sweep more sand across, then blow off all excess from the paver surfaces with a leaf blower before wetting.
Polymeric sand needs to fill the full depth of the joint to work correctly, so don't rush the sweeping and compaction cycle. Once the surface is clean and joints are packed, mist the entire patio with a gentle spray from a garden hose, letting the water activate the polymer binders. Avoid rain or direct watering for at least 24 hours after activation so the binder sets properly.
Techniseal's EZSAND, for example, recommends keeping it dry for ideally 24 hours after installation.
Sealing (optional but recommended)
Sealer isn't required, but it extends the life of both the pavers and the polymeric sand, makes cleaning easier, and can enhance color. Wait at least 30 days after installation before sealing so the polymeric sand is fully cured. Apply sealer with a pump sprayer or roller on a dry day, following the specific product's instructions. A penetrating or wet-look sealer works well on concrete pavers. If you seal too soon or on a damp surface, you'll trap moisture and cause the sealer to haze or peel.
Troubleshooting common problems
Pavers are wobbling or rocking
A rocking paver almost always means the sand bed underneath is uneven or too thin in that spot. Pull the paver up, add or remove sand as needed, and reset it. Then compact again. If multiple pavers are rocking in the same area, check whether your base material (gravel or concrete) has a soft spot or void underneath.
Pavers are settling unevenly over time
Uneven settling on a ground install usually points to an inadequate base or organic material that was left in place and is now decomposing. Pull up the affected section, add more compacted base material, re-screed the sand, and relay those pavers. On a concrete overlay, this shouldn't happen unless the slab itself has cracked or shifted, in which case the concrete problem needs to be addressed first.
Weeds growing through joints
Polymeric sand significantly reduces weed growth in joints, but it's not a permanent fix. Weeds can still establish from airborne seeds on top of the patio surface. If weeds appear, pull them early before they push pavers apart with their roots. Re-sweeping polymeric sand into joints every couple of years (after removing old sand and letting the surface dry) is the best long-term approach. The landscape fabric under a ground install handles weed pressure from below.
Water pooling on the surface
If water pools after rain, your drainage slope isn't adequate. On a new install you can still fix this by carefully lifting sections of pavers, adjusting the sand bed to increase the slope, and relaying them. On a concrete overlay where the slab itself is flat, you're limited by what the slab allows. In that case, adding a small channel drain at the low point of the patio and connecting it to a dry well or landscape drain can solve the problem without rebuilding everything.
Pavers shifting at the edges
Edge movement is almost always a failure of the restraint system. Either the restraints weren't spiked at close enough intervals, the spikes pulled out of soft soil, or the restraint didn't have enough vertical contact with the paver sides. Pull the edge pavers up, reinstall the restraints with more spikes or use a construction adhesive for added hold, and relay the border pavers.
Ongoing maintenance to keep it looking great
A paver patio requires less maintenance than wood decking or poured concrete, but it isn't zero-maintenance. Every year or two, inspect the joints and top up polymeric sand where it has washed out or degraded. Before re-sanding, remove all loose or degraded existing sand down to the bottom of the paver joint, not just the top layer, because polymeric sand needs to fill the full joint depth to bond correctly.
Sweep debris off regularly so it doesn't break down into organic matter that feeds weeds. If you applied sealer, plan to reapply every 2–4 years depending on traffic and weather exposure. Check edge restraints each spring to make sure winter ground movement hasn't worked any spikes loose. A few minutes of inspection each season prevents the kind of gradual shifting that turns into a big repair job down the road.
FAQ
Can I build a no-dig paver patio directly on top of grass without removing sod?
Yes, but only if the ground is firm and well-draining. “Skip excavation” works best on small, low-traffic areas where the soil is already compacted, not organic. Even then, you should still remove loose top material and use at least a thin crushed-stone paver base and edge restraints, otherwise settling will show up as uneven pavers and failing joints.
What happens if I install pavers over damp ground or apply polymeric sand when it’s not fully dry?
Usually not. Polymeric sand relies on being vibrated into joints at the correct depth and staying dry long enough to set. If you install over damp surfaces or apply polymeric sand before the pavers and bedding sand are dry, it can haze, wash out sooner, or fail to bind. If rain is possible, plan a full dry day and wait for complete dryness before activation.
Do I need sealer for a no-dig paver patio, and what’s the difference between penetrating and wet-look sealers?
Not the same. Wet-look or penetrating sealers have different effects, penetrating types typically change the feel of cleaning and help reduce staining without trapping as much moisture on the surface. Also, sealing before polymeric sand cures can lead to haze or peeling, so even if you want the appearance, stick to waiting at least the recommended cure window (the article notes 30 days) before sealing.
How do I make sure a no-dig patio won’t create a door or step problem?
You’ll want to match the height plan, not just the pavers. A concrete overlay typically ends up about 3 to 4 inches higher than the existing slab, so you must account for door clearance and the ability to open doors fully. Check transitions to steps, garage thresholds, and any existing landscaping grade, because raising one side by even 1 inch can create a noticeable trip edge.
Can I skip the plate compactor step if my patio is small?
If you do it anyway, expect faster failures. Polymeric sand should be vibrated and filled to the full joint depth, then activated by misting. If you skip compaction before spreading polymeric sand, the pavers can move after you’ve bound the joints, which leads to cracked joints and washout. The common fix is to lift and reset affected pavers, then redo bedding, compaction, and joint filling.
What compactor specs matter most for stabilizing pavers on a no-dig overlay?
Renting the right compactor helps. Plate compactors need enough centrifugal force to consolidate bedding sand and set pavers, and using a lighter unit often results in rocking and inconsistent joints. If you cannot rent the right compactor, the alternative is to reduce scope (smaller area) and be extra strict about bed thickness and compaction, but for consistency, rental is usually the practical path.
If I’m minimizing digging, do I still need edge restraints?
For ground installs, yes you should still use edge restraints, even if you are skipping full excavation. Without containment, border pavers drift outward, joints loosen, and you get rocking at the perimeter. Install restraints before the sand so the vertical contact is correct, and on slab overlays use concrete-rated construction adhesive where spikes are not possible.
How can I tell if my patio has enough drainage before it’s done?
You should check drainage even if the area “feels flat.” A 1% slope (about 1/8 inch per foot) is usually enough to move water off the patio surface without making it look sloped. If water pools after rain, the repair may require lifting pavers, adjusting sand thickness to restore slope, and relaying, especially on overlays where you cannot change the slab.
How often should I reapply polymeric sand, and can I just top it off?
Plan for periodic re-sanding and early weed response. Polymeric sand helps but does not block weeds from seeds landing on the surface. When you re-sand, remove the existing degraded material down to the bottom of the joint, then sweep fresh polymeric sand and vibrate again, otherwise it may not bind properly through the full joint depth.
A single paver is rocking, but the surrounding area seems fine. Do I fix it by adding more sand?
Usually the remedy is mechanical, not just adding sand. If pavers rock, pull the affected paver(s), correct the bed by adding or removing sand where it is uneven, reset, and compact again. If several adjacent pavers rock, that points to a base void or soft spot underneath, so you may need to lift a larger section and rebuild the base layer locally.
My concrete-slab overlay patio pools water at one spot, what are practical fixes without redoing everything?
You may need to address drainage first, then water movement and joint stability. On a concrete overlay with a flat slab, the article suggests adding a small channel drain at the low point and connecting it to a dry well or landscape drain. That’s often less disruptive than trying to rebuild a slope that the slab does not allow.
Next Articles

How to Use Patio Paver Sand: Step by Step DIY Guide
Step-by-step guide to apply patio paver sand correctly: prep base, set pavers, fill joints, compact, and troubleshoot is

How to Install Patio Pavers in Sand: Step-by-Step
DIY step-by-step how to install patio pavers in sand, from excavation and base prep to leveling, cutting, joint sand and
How to Make a Patio With Pavers and Sand Step by Step
Step-by-step guide to install paver patio with sand setting layer, from planning and base to leveling, cutting, joint fi