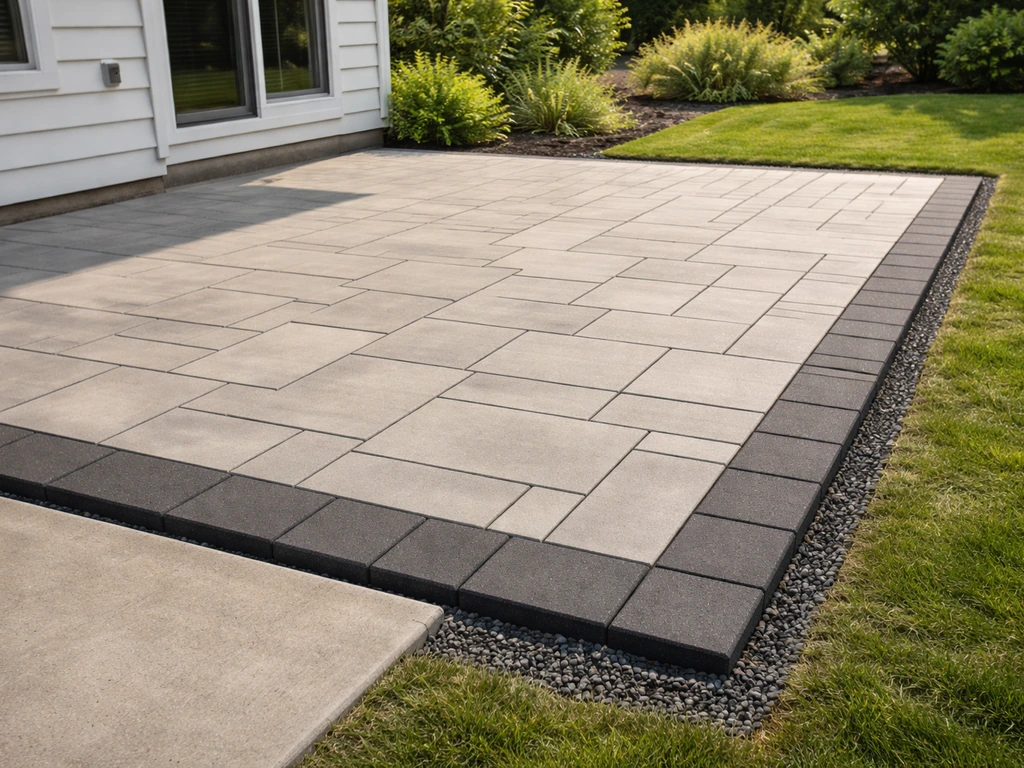
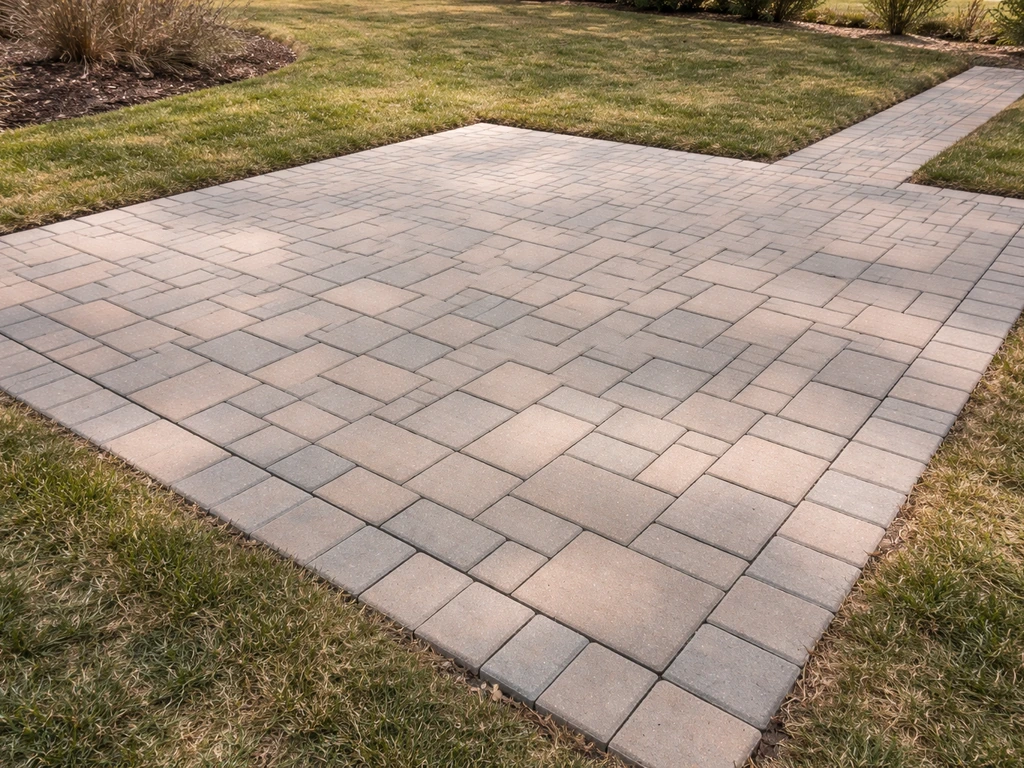
You can extend an existing patio with pavers by excavating the new area to match the finished height of your current surface, building a compacted gravel base (4 to 6 inches) topped with 1 inch of bedding sand, then laying pavers that align in pattern, height, and joint spacing with what's already there. The trickiest parts are matching elevation at the transition and preventing the new section from sinking or heaving over time, both are solvable with the right base depth and proper edge restraints. Whether you're extending onto bare ground, grass, or tying into an existing concrete slab, the process is mostly the same with a few scenario-specific tweaks covered below.
How to Extend a Patio With Pavers: Step-by-Step DIY

Felix Rowe
21 May 2026
Start by assessing your existing patio and planning the extension
Before you buy a single paver or rent a plate compactor, spend 30 minutes taking stock of what you're working with. Get this wrong and you'll spend weeks fixing a heaving, uneven mess.
Check the height at the transition point
The single biggest problem with patio extensions is a height mismatch at the seam. A difference of even half an inch becomes a trip hazard and looks terrible. Measure the finished surface height of your existing patio from the surrounding grade in several spots. That number tells you exactly what finished height your new pavers need to hit. If you're extending an existing paver patio, measure from the bottom of one paver to the top so you know the total build-up you need to match: paver thickness, plus 1 inch of bedding sand, plus your compacted gravel base depth.
Assess drainage before you design the layout
Water is the enemy of any paved surface. Look at how your existing patio drains during rain. Ideally, there's a slight slope away from the house (about 1/8 to 1/4 inch drop per foot). Your extension needs to continue that slope, not interrupt it. If you're extending onto a low area or butting up against a concrete slab, water can pool right at the transition. In those cases, plan a drainage channel or French drain along the seam before you even start digging.
Measure and mark your extension area
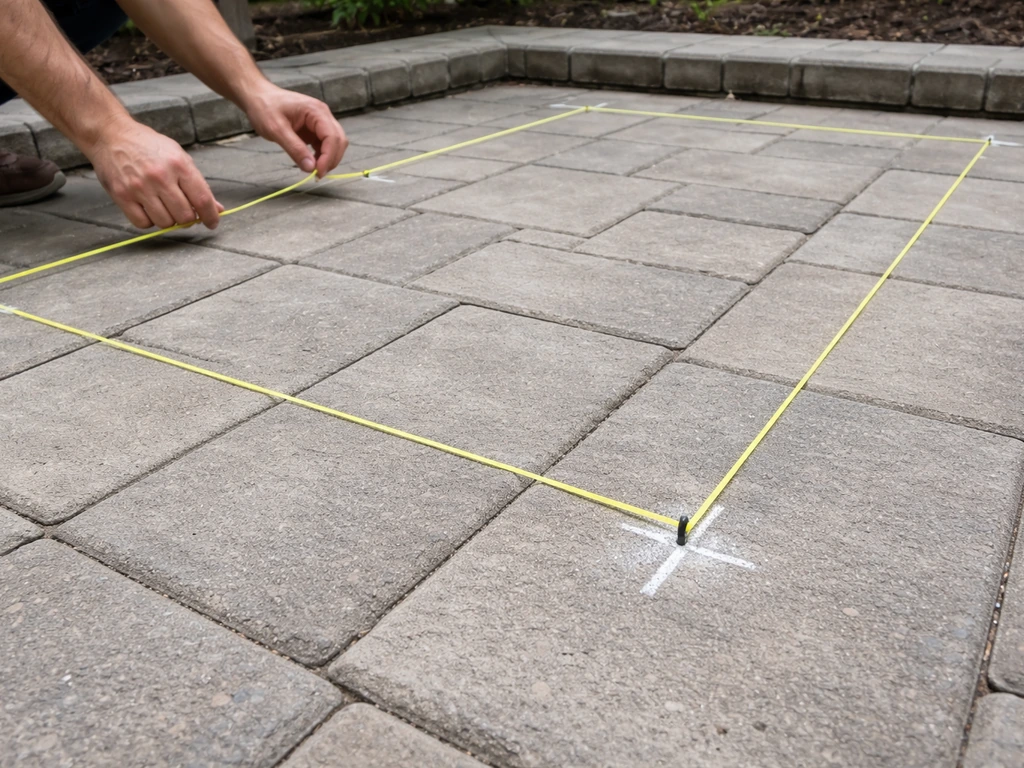
Stake out the full footprint of your extension using string lines. Account for paver overhangs at the edges if you're using edge restraints, and consider whether any side will be visible (those edges need a cut paver or a border course). Sketch a quick layout on paper with your paver dimensions to minimize cuts, starting from the transition edge and working outward usually produces the cleanest result.
Materials and tools you'll need
Here's a practical checklist for a typical DIY paver extension. Quantities depend on your square footage, but these are the non-negotiables.
Materials
- Pavers (match thickness, color, and texture to your existing surface as closely as possible; bring a sample to the supplier)
- Compactable gravel base (crushed stone, typically 3/4-inch clean or dense-graded aggregate)
- Coarse bedding sand (concrete sand or ASTM C33 washed sand; not polymeric, not fine play sand)
- Polymeric jointing sand (for locking joints and discouraging weeds and ants)
- Plastic or aluminum edge restraints with 10-inch spikes
- Landscape fabric (optional, below the gravel layer on problem soils)
- Paver sealer (optional, but recommended if you're sealing the existing patio too)
Tools
- Plate compactor (rent one with at least 7,000 lbf compaction force—a hand tamper won't cut it for the base)
- Sod cutter or flat spade for excavation
- Wheelbarrow and shovels
- Level (4-foot minimum) and a long straightedge
- String lines and stakes
- Screed rails or 1-inch pipes for leveling the bedding sand
- Rubber mallet
- Tape measure and chalk line
- Angle grinder with diamond blade, or a wet-cut concrete saw for paver cuts
- Safety glasses, ear protection, and work gloves
- Garden hose for activating polymeric sand
Site prep: excavate, remove old material, and compact the base
This is where most DIYers underestimate the work. Don't rush it. A well-prepped base is why some patio extensions look perfect after 10 years while others are rocking and sinking after one winter.
How deep to dig
For a standard residential patio extension, your total excavation depth is: paver thickness (typically 2 3/8 inches for most concrete pavers) + 1 inch bedding sand + 4 to 6 inches of compacted gravel base. That puts you at roughly 7.5 to 9 inches of total depth below your planned finished surface. In areas with expansive clay soil or heavy freeze-thaw cycles, go to 6 inches of base minimum. In well-draining sandy soils, 4 inches can work. When in doubt, go deeper. The cost difference in gravel is minimal compared to relaying sunken pavers later.
Remove grass, roots, and soft material
Strip all sod and organic material from the extension area. Organic material compresses and rots over time, causing the base to sink unevenly. Use a sod cutter for large areas. Dig out any roots you find, and if the soil is particularly soft or loamy, consider adding a few extra inches of gravel to compensate. Slope the bottom of your excavation slightly away from the house to encourage drainage at the base level.
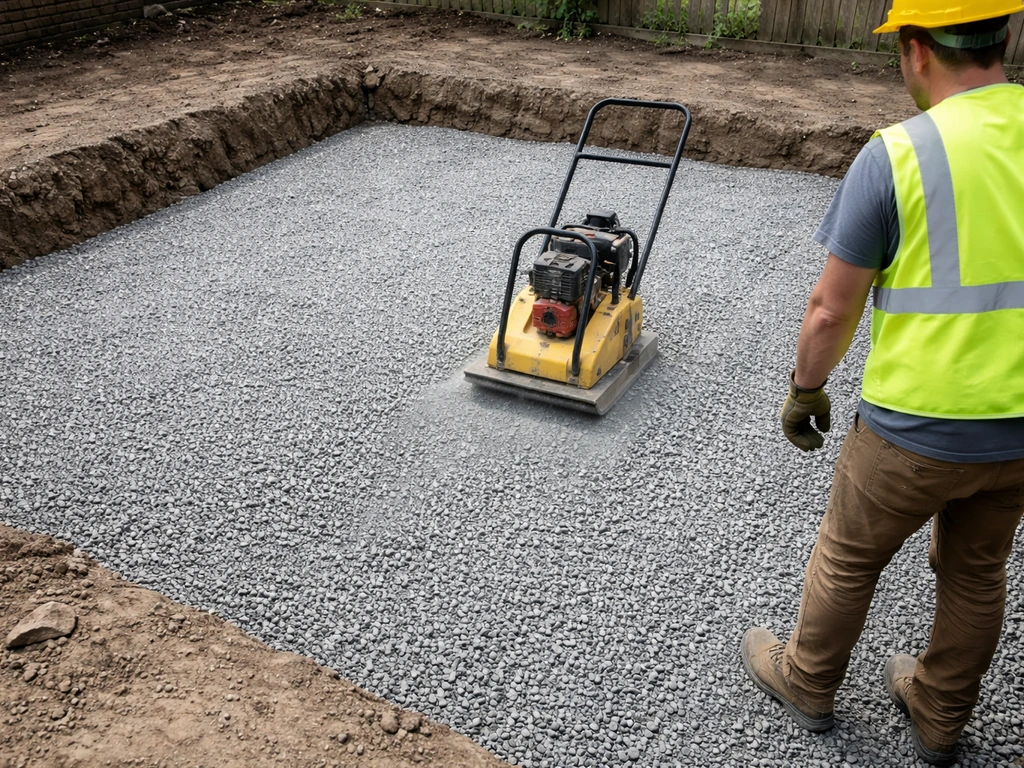
Compact the native soil, then add and compact the gravel
Before adding any gravel, run your plate compactor over the exposed native soil. Add your crushed gravel base in 2 to 3-inch lifts, compacting each lift before adding the next. This is the most important step most DIYers skip. Dumping in all your gravel at once and compacting once on top doesn't compress the lower layers. Each lift needs its own pass. When you're done, the gravel surface should feel rock-solid underfoot with no give.
Build the base layer and set your edge restraints
Install edge restraints before you lay a single paver
Edge restraints keep your pavers from creeping outward over time. This is especially important at the outer perimeter of your extension where there's no existing patio holding things in. Install plastic or aluminum restraints at the outer edges of the extension area by driving 10-inch spikes through the restraint tabs and into the compacted base at 12-inch intervals. At the transition edge where your new pavers meet an existing concrete slab or existing paver patio, you don't always need a restraint because the existing structure acts as one, but confirm the existing edge is stable and not crumbling before relying on it.
Screed the bedding sand layer
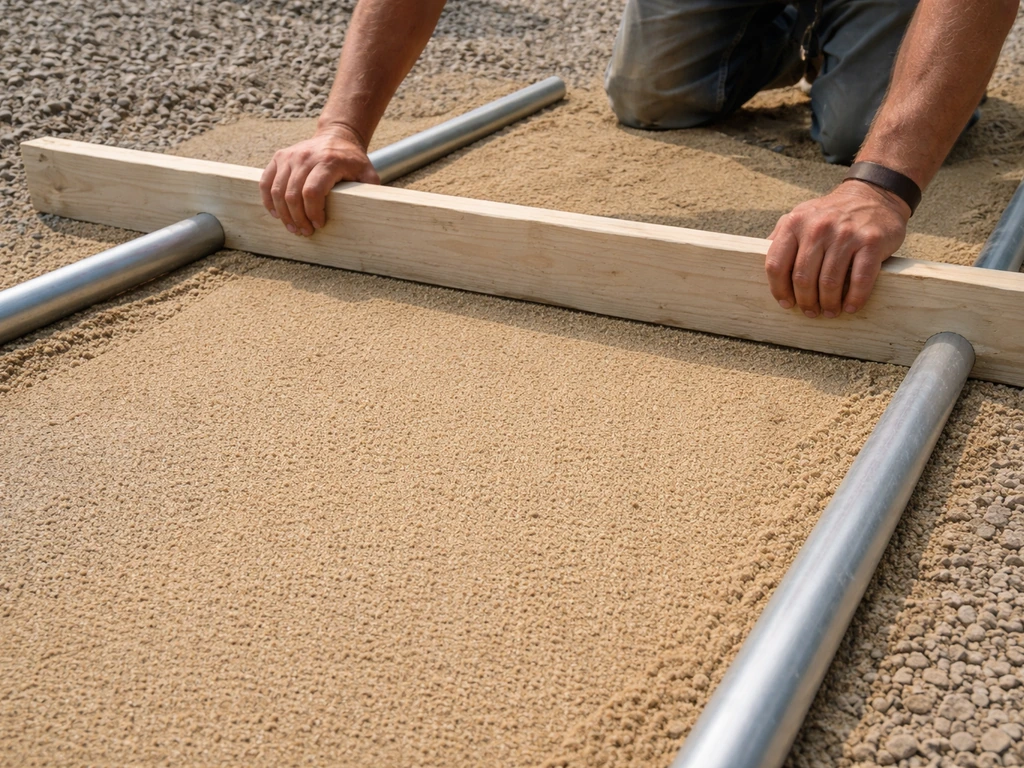
Spread a 1-inch layer of coarse bedding sand over the compacted gravel. Use screed rails or two 1-inch diameter pipes laid parallel across the surface to guide a straight board at the right height. Pull the board toward you to create a perfectly level 1-inch sand bed. Do not compact the bedding sand before laying pavers, it needs to stay loose so pavers can be pressed into it and leveled individually. Once the sand is screeded, avoid walking on it. Work off a kneeling board placed on the gravel if you need to reach the center.
Set the correct finished height
Before screeding, double-check that your planned finished height matches your existing patio surface. Run a string line from the edge of the existing patio across to the opposite edge of your extension area. The top of your laid pavers should meet that string line. Adjust the depth of your sand bed as needed to hit the target. Getting this right now saves hours of frustrating adjustments later.
Laying the pavers and creating a clean transition
How you handle the meeting point between old and new is what separates a professional-looking extension from an obvious patch job. For a step-by-step look at that overlay approach, see how to cover a concrete patio with pavers. For a step-by-step walkthrough of the base prep and edge details, see our guide on how to lay pavers next to an existing patio how to lay pavers next to existing patio. The approach differs slightly depending on what your existing patio is made of.
Extending onto an existing concrete patio
If your current patio is a concrete slab, you're generally extending the new paver section on a fresh sand-set base next to it, not overlaying the concrete itself. The challenge is that your new pavers need to finish at the same height as the top of the concrete slab. Measure from the ground to the slab surface, then subtract your total build-up (paver + 1-inch sand + gravel base) to figure out your excavation depth.
If you are trying to match these heights on an existing slab, use this as a starting point and then follow our guide on how to lay patio pavers on concrete for the sand, joint, and base details that change when concrete is involved. At the seam, leave roughly a 1/8-inch joint gap between the concrete edge and your first paver course to allow for minor movement.
Don't caulk or mortar this joint, let it breathe and fill it with polymeric sand like the rest of your joints.
Watch out for the elevation increase if the concrete slab is elevated above grade. Sometimes the only way to get your new pavers flush with an existing slab is to overlay the slab edge with a thin-set or pedestal system, which is a different method than sand-set. If you're going that route, check out the guidance on laying pavers over an existing concrete patio, since the technique and base prep differ from what's described here.
If you are overlaying a concrete slab, follow the specific steps in this guide on how to install brick pavers over concrete patio so the base prep and elevation details are correct laying pavers over an existing concrete patio. If your plan is to can you lay patio pavers over concrete, focus on slab-specific base prep and how you’ll handle movement at control joints laying pavers over an existing concrete patio.
Extending an existing paver patio
If you're extending a patio that's already paved with pavers, start by removing the edge restraints at the expansion edge and pulling back the last row or two of pavers to expose the existing base. This lets you connect your new base directly to the old one with no seam in the gravel layer. Inspect the existing base material. If it's still solid and level, you can often tie directly into it. If it's shifted or eroded at the edge, remove and recompact before continuing. When you relay those pulled pavers and continue outward, your base and bedding sand form one continuous system, which is exactly what you want.
Maintain pattern alignment and joint spacing
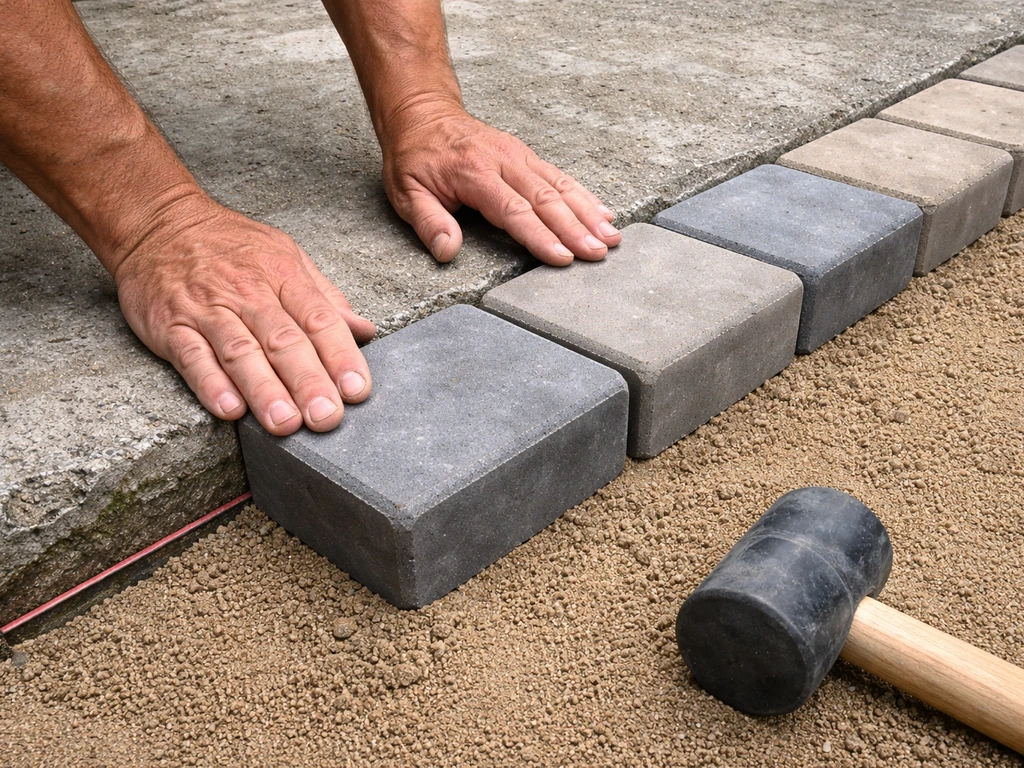
Run string lines in both directions across your extension area before placing the first paver. Use these as your alignment guides throughout the job. Snap chalk lines on the bedding sand every 4 to 6 feet to stay true. Standard concrete paver joint width is 1/16 to 1/8 inch, tight, but not touching. Pavers that touch each other directly have no room for movement and can chip or crack. Start laying at the transition edge and work outward so your full pavers are at the most visible seam. Set each paver with a firm push and a light tap from a rubber mallet to seat it into the sand.
Cutting, fitting, and finishing the edges
Cutting pavers to fit
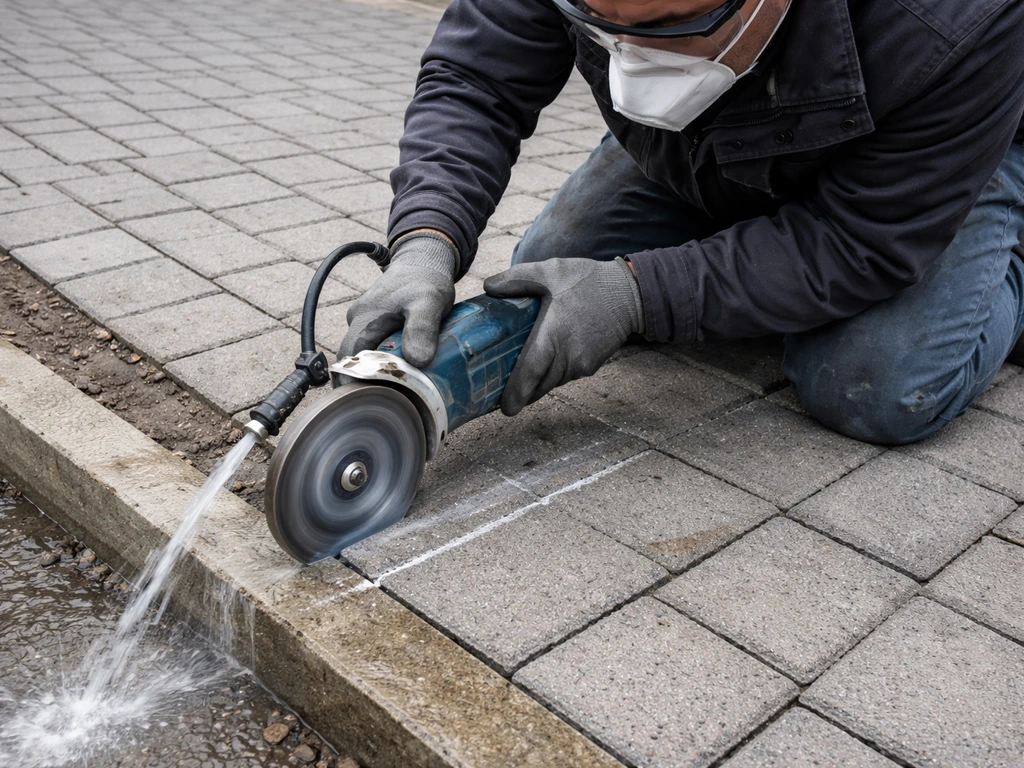
Save all cuts for the end. Lay out all your full pavers first, then go around the perimeter and mark what needs to be cut. For straight cuts, a wet-cut angle grinder with a diamond blade works well for occasional cuts, while a rented concrete saw gives cleaner results on larger quantities. A guillotine splitter (paver splitter) is faster for simple straight splits but can leave a rougher edge than a saw. Whatever method you use, cut each paver individually and test-fit before setting it in place permanently. Cuts at the transition edge especially need to be precise, a ragged edge at the seam draws the eye immediately.
Final compaction of pavers
Once all pavers are set, run the plate compactor over the entire surface. This seats all pavers uniformly into the bedding sand and levels out any minor high spots. Use a paver protection pad under the plate to avoid scratching the surface. After the first compaction pass, check with your level across rows and at the transition seam. Any pavers that are still proud or low can be lifted, sand added or removed underneath, and reset before the next compaction.
Sweep in jointing sand and compact again
Make sure all pavers are completely dry before applying polymeric jointing sand. Barkman Concrete’s paver installation guidance specifies that you can use either [joint sand or polymeric sand as jointing options](https://www. barkmanconcrete. com/wp-content/uploads/paver-and-slab-installation.
pdf), and that the jointing material is part of the overall paver installation system rather than an afterthought. This is critical, damp pavers cause the polymeric binder to activate prematurely and leave a cloudy haze on the surface that's very difficult to remove. Spread the polymeric sand, [sweep it into the joints with a push broom until every joint is fully filled, then run the plate compactor over the surface again](https://www. bellindustries.
com/help-advice/polymeric-sand-installation/). This forces the sand down into the joints. Sweep and compact a second time if joints aren't fully packed. Don't skip the second pass, joint filling is an iterative process and under-filled joints are the main cause of paver rocking, weed growth, and ant infestations.
Activate the polymeric sand
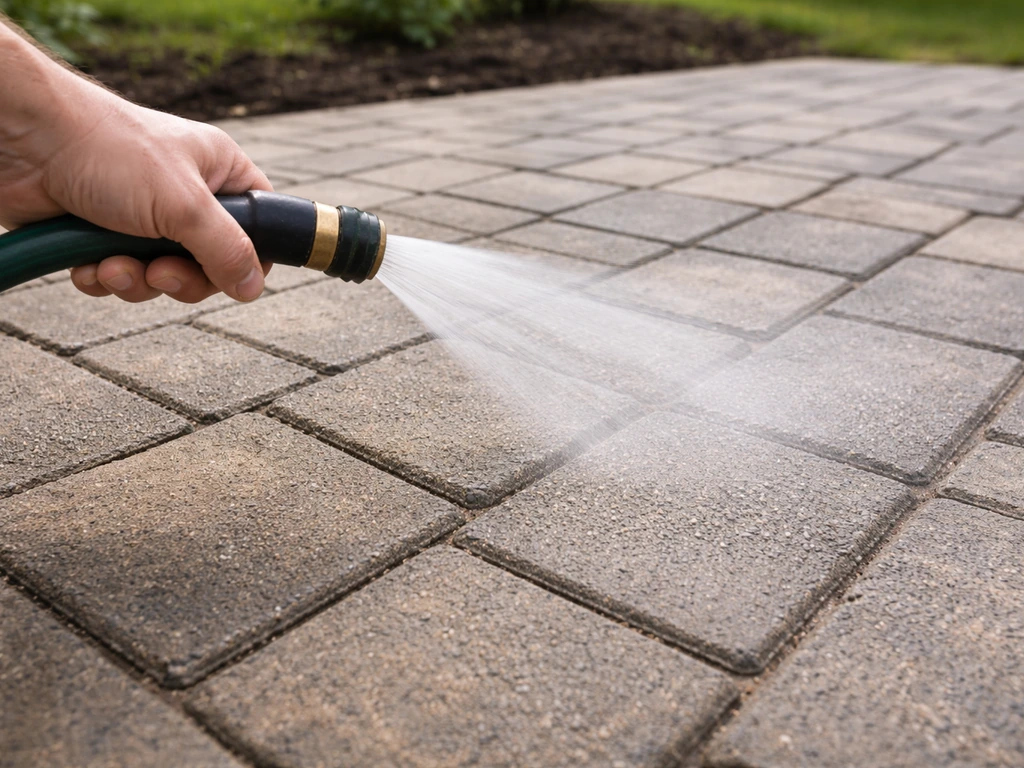
Once the joints are packed and you've swept excess sand off the surface, gently mist the entire surface with a garden hose. Use a gentle spray setting, not a direct blast that washes sand back out of the joints. The water activates the binder in the polymeric sand. Let it cure for 24 to 48 hours before heavy foot traffic. Some products require a second misting; follow the specific instructions on your brand.
Sealing, ongoing maintenance, and fixing common problems
Should you seal the extension?
Sealing is optional, but if your existing patio was sealed, you should seal the extension too so the color and sheen match over time. Wait at least 30 days after installation before applying sealer, the pavers need time to cure and the polymeric sand needs to fully harden. Clean the surface thoroughly before sealing. Apply sealer with a roller or sprayer in thin, even coats. Avoid thick puddles, which turn white when they dry. One light coat is usually enough for new pavers.
Ongoing maintenance to keep the extension looking good
- Re-sweep polymeric sand into joints once a year, or whenever you notice gaps or loose pavers
- Pull weeds promptly—once established they accelerate joint erosion
- Inspect the transition seam each spring for any settling or height changes, especially after a hard freeze-thaw winter
- Reapply sealer every 3 to 5 years depending on traffic and sun exposure
- After heavy rain, check that water is draining away from the house and not pooling at the seam
Troubleshooting common extension problems
| Problem | Most likely cause | Fix |
|---|---|---|
| New pavers are lower than existing patio | Base depth calculated incorrectly or sand layer too thin | Pull affected pavers, add bedding sand, re-level, and reset |
| Trip edge forming at the seam after winter | Frost heave from inadequate base depth or poor drainage | Deepen the gravel base in the affected area; add drainage if needed |
| Pavers shifting or spreading outward | Edge restraints missing, undersized, or improperly spiked | Remove outer course, reinstall heavier restraints with 10-inch spikes at 12-inch intervals |
| Joints growing weeds or attracting ants | Polymeric sand not properly activated or under-filled | Remove old sand, dry pavers completely, refill joints, compact, and re-mist |
| Pooling water at transition to concrete slab | Finished grade or slope not continued into extension area | Install a channel drain or French drain along the transition seam |
| Cracking or rocking at transition to concrete | No movement gap left between concrete edge and first paver course | Carefully remove affected pavers, widen the gap to 1/8 inch, refill with polymeric sand |
When to call a pro
Most patio extensions are well within reach for a capable DIYer with a free weekend and willingness to rent the right tools. That said, call in a professional if your existing patio has significant structural cracks or is dramatically out of level, if your yard has a steep slope that requires retaining walls or grading, or if drainage around your foundation is already a known problem. Getting those underlying issues wrong affects far more than just the patio.
If you're working directly on top of an existing concrete slab rather than next to it, the process is a bit different, choosing the right paver thickness matters more, elevation management at doorways and thresholds becomes critical, and you need to plan around the slab's control joints to avoid reflective cracking through the new pavers. That scenario has its own set of considerations worth reviewing separately before you commit to an overlay approach. That scenario has its own set of considerations worth reviewing separately before you commit to an overlay approach, such as how to install pavers over existing concrete patio.
FAQ
Can I extend a patio on a slope, or do I need to level the ground first?
Yes, but only if the transition is still designed around the same finished height. If you’re cutting into a slope or raising the patio edge, you’ll likely need either more base depth or an additional border course, otherwise the seam becomes a permanent height bump.
Do I need weed barrier fabric under the pavers, or is the gravel base enough?
Remove the topsoil and roots completely, then add a geotextile fabric over the compacted native soil only if you’re fighting frequent weed pressure or very mixed soils. Don’t use fabric as a substitute for a properly compacted gravel base, and keep fabric from wrapping up into the bedding sand.
Should I fill the gap between the new pavers and an existing concrete slab with mortar?
Plan for a true joint at the seam, especially where new meets existing concrete. Leave about a 1/8-inch gap at the concrete edge, don’t fill it with mortar or caulk, and use polymeric sand for the paver joints elsewhere.
What should I do differently if my area has expansive clay or frequent freeze-thaw?
If your extension is on expansive clay or you see prior seasonal heave, increase gravel depth and ensure each lift is compacted. Also, verify that water can drain away from the patio, because even a well-built base can heave if the subgrade stays saturated.
What’s the best way to fix a height mismatch if the seam is already higher or lower after the first day?
Start with your string-line height, then set your sand so the top of pavers hits the target without forcing the pavers to sit higher than surrounding surfaces. If your existing patio is already “rocking,” you may need to recompact or rebuild the old edge rather than just trying to match the height.
Should I compact the bedding sand before laying pavers to lock the base in place?
Don’t compact the bedding sand. Instead, compact only the gravel base in lifts, then after pavers are fully seated and aligned, compact the surface with a paver pad to level minor highs without displacing the sand bed.
How do I know the pavers are dry enough before spreading polymeric jointing sand?
Let the pavers dry fully before polymeric sand. If it has been raining, wait until surface moisture is gone and the joints are dry, otherwise the binder can activate too early and leave haze that’s difficult to clean.
Can I wash polymeric sand in with a pressure washer or a strong hose stream?
Use the gentlest misting method possible (light spray only), and avoid blasting the joints. If you see sand washing out, pause and mist less aggressively next time, then re-sweep and top up joints with fresh polymeric sand if needed.
How do I extend a patio with pavers when the edge is curved instead of straight?
Yes, but joints must be consistent and fully filled, and you still need edge restraints where there’s no existing patio holding the line. For curved layouts, dry-fit multiple pavers, prioritize consistent joint spacing, and cut only what’s necessary to maintain the curve without twisting the pattern.
Can I extend a patio using different paver thickness than what the existing patio uses?
Usually yes, if you follow the same excavation, base depth, and edge restraint principles. The main difference is that the paver thickness and the build-up math must be updated, and the cutting and leveling tolerances can feel tighter with some thicker or interlocking units.
When extending an existing paver patio, can I just set new pavers next to the old ones without rebuilding the base?
If the existing pavers are stable, tie into the old base by exposing it and connecting the new base and bedding sand as a continuous system. If the old edge base is eroded or shifted, remove the unstable portion and recompact rather than relying on the top pavers to “hold” alignment.
What causes paver joints to widen or open after installation, and how can I fix it?
If gaps open later, first look at settlement at the seam or a base area that wasn’t compacted in lifts. For polymeric joints, also check if joints were underfilled at installation, then correct by removing loose sand, re-filling joints, and re-compacting after proper drying.
Should I seal the extension the same day I seal (or if my original patio was sealed)?
Sealing is optional, but if the original patio is sealed, matching the same sealer type and sheen helps the color develop uniformly. Don’t seal too soon, and avoid thick coats that can turn cloudy or trap residue.
Are there situations where I should avoid DIY and hire a pro for a paver patio extension?
If the area is near a driveway, entry path, or places that get heavy loads, consider professional review. Common DIY failure points are reflective cracking when overlaying on slabs, insufficient slope leading to standing water, and missing edge restraint at exposed borders.
Next Articles

How to Use Patio Paver Sand: Step by Step DIY Guide
Step-by-step guide to apply patio paver sand correctly: prep base, set pavers, fill joints, compact, and troubleshoot is

How to Install Patio Pavers in Sand: Step-by-Step
DIY step-by-step how to install patio pavers in sand, from excavation and base prep to leveling, cutting, joint sand and
How to Make a Patio With Pavers and Sand Step by Step
Step-by-step guide to install paver patio with sand setting layer, from planning and base to leveling, cutting, joint fi