Installing patio pavers on a sand base means excavating 8 to 10 inches deep, compacting a 4 to 6 inch gravel base, screeding 1 inch of bedding sand, setting your pavers, then locking everything together with joint sand and a plate compactor. Done right, the patio stays solid, drains properly, and lasts decades. Skip or rush any of those layers and you will be re-leveling sunken pavers within a season or two.
How to Install Patio Pavers in Sand: Step-by-Step

Felix Rowe
25 Jun 2026

Planning and materials for a sand-set patio
Before you dig a single shovelful, spend an hour on planning. Sketch out your patio shape and measure it carefully so you can calculate square footage. Add 10 percent to your paver order to account for cuts and breakage. Decide on a pattern now too, because running bond, herringbone, and basket weave all affect how you start your layout and how many cuts you will need along the edges.
Here is a practical materials list for a standard pedestrian patio:
- Concrete or clay pavers (your choice of size and style, plus 10% overage)
- Crushed gravel or compactable aggregate base (enough to fill 4–6 inches across the excavated area)
- Coarse bedding sand, sometimes called concrete sand or sharp sand (enough for a 1-inch layer)
- Polymeric sand or dry jointing sand for the joints
- Plastic or aluminum edge restraints with spikes
- Landscape fabric (optional, placed under the gravel to suppress weeds)
- Plate compactor (rent one if you don't own it)
- Screed pipes or metal conduit (1-inch diameter, used as depth guides)
- Long straight board or screed board
- Rubber mallet
- Paver saw or angle grinder with a diamond blade
- String lines and stakes
- Hand tamper for tight spots
- Level and tape measure
- Broom (push broom and a stiff bristle broom)
On paver thickness: most standard concrete pavers are about 2 3/8 inches thick. Natural stone varies. Know your paver thickness before you calculate excavation depth, because it directly affects how deep you need to dig.
Site preparation and grading
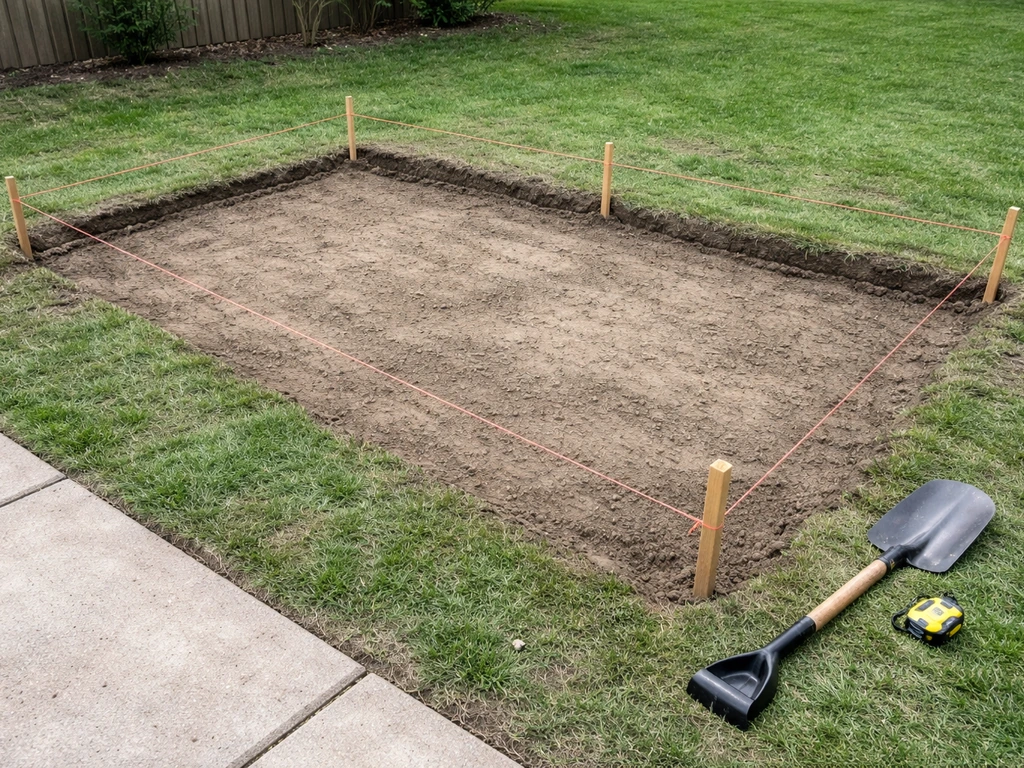
Mark out your patio area with stakes and string lines, then add about 6 inches on each side beyond your finished patio edge. That extra space gives you room to install edge restraints properly and make cuts without cramping yourself. Remove all grass, roots, and organic material from inside the marked area. Organic matter compresses and decays over time, which is one of the main causes of sinking patios.
Your total excavation depth is: gravel base depth + 1 inch of bedding sand + paver thickness. For a typical 2 3/8-inch concrete paver on a pedestrian patio, that works out to roughly 4 inches of gravel + 1 inch of sand + 2 3/8 inches of paver = about 7 3/8 inches total. Rounding up to 8 inches of excavation gives you a safe working margin. If your soil is soft, clay-heavy, or poorly drained, bump the gravel layer up to 6 inches, which puts your total excavation closer to 9 to 10 inches.
Slope is not optional. You need a minimum drop of 1/4 inch per foot directed away from your house or any structure. Some sources cite 1/8 inch per foot as acceptable, but 1/4 inch per foot gives you much better drainage insurance, especially in climates with heavy rain or freeze-thaw cycles. Set your string lines at that slope from the start, because your entire base system will follow those reference lines. A 10-foot-wide patio should drop at least 2.5 inches from the house side to the outer edge.
After excavating, compact the native soil (the subgrade) with your plate compactor before adding anything else. If the soil feels soft or springy after compacting, remove another inch or two and add more gravel. Do not try to compensate for bad subgrade with a thicker sand layer. That is one of the most common mistakes that causes long-term settling.
Building the gravel base and compacting it correctly
The gravel base is the structural backbone of your patio. For a pedestrian patio, you want 4 to 6 inches of compacted crushed gravel or road base aggregate. Do not dump it all in at once. Add it in 2 to 4 inch lifts, compacting each lift thoroughly before adding the next. This step-by-step DIY approach also emphasizes compacting the base in lifts and maintaining correct base depth to prevent uneven pavers over time Add it in 2 to 4 inch lifts, compacting each lift thoroughly before adding the next.. Compacting in lifts is the only way to get consistent density throughout the base. A single thick dump of gravel that you compact from the top will still have soft, uncompacted material at the bottom.
Rent a plate compactor for this step. A hand tamper is fine for edge spots and tight corners, but it cannot replace a mechanical compactor for the main field. Make at least two or three passes over each lift, running in different directions. After compacting, the surface should feel firm and show no give when you walk on it. Check your slope with a level as you build up each layer and correct it now, before you add sand.
Once your gravel base is fully compacted and at the correct grade, install your edge restraints. Proper spacing for patio pavers also depends on using spacers and keeping consistent joint gaps as you set each stone how to space patio pavers. This is important: edge restraints go on the compacted gravel base, not on the bedding sand. They need to be spiked into the gravel or subgrade so they provide a solid perimeter before you lay a single paver. Get the edges right now and the rest of the layout is much easier.
How to screed the bedding sand and set pavers
Screeding the sand layer
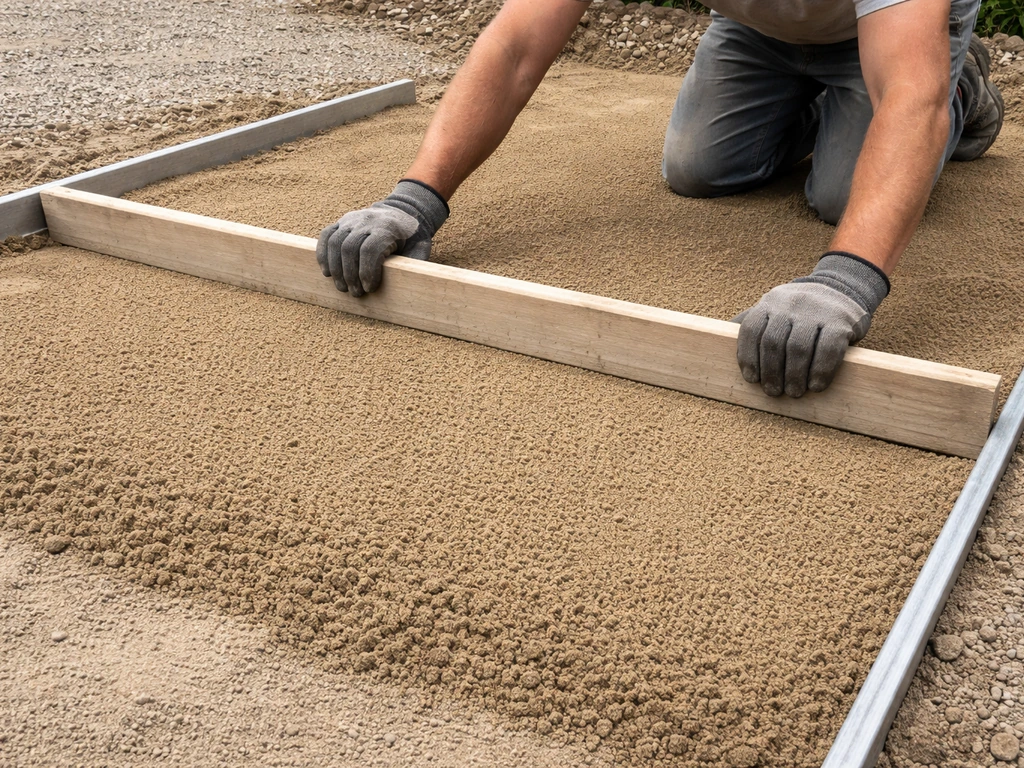
Bedding sand should be exactly 1 inch thick when uncompacted. That 1-inch layer will compress down to roughly 5/8 to 3/4 inch after the pavers are set and compacted, which is what you want. The way to get a consistent 1-inch depth is to use screed pipes as guides. Lay two parallel metal pipes or 1-inch diameter conduit on the compacted gravel base, set to your slope angle and spaced so your screed board can span between them. Dump your coarse bedding sand between the pipes, then drag your straight board along them to level the sand into a flat, even plane.
Use coarse concrete sand (also called sharp sand) for bedding, not fine play sand or polymeric sand. If you are wondering how to use patio paver sand for the bedding and jointing layers, follow the steps in this guide to get the right thickness and stability. Coarse sand stays more stable under load and allows the plate compactor to seat the pavers properly. Once you have screeded a section, do not walk on it. Pull the screed pipes out as you go and fill the grooves left behind with a little sand, smoothed by hand. Work in manageable sections so you are not trying to screed the entire patio at once and then stepping all over it to set pavers.
One critical rule: do not use the bedding sand layer to fix a bad base. If you screeded 1 inch in one spot and 2 inches in another because the gravel underneath is uneven, the thicker areas will compress more under load and create a wavy, uneven surface over time. If your gravel base is not level, go back and fix it now.
Setting the pavers
Snap a chalk line or set a string line for your first row of pavers. Starting from a straight, square edge (usually along the house or a defined border) gives you a reference point to keep the pattern aligned across the whole patio. Set pavers by placing them straight down onto the sand, not dragging or sliding them into position. Dragging disturbs the screeded sand surface and creates low spots.
Tap each paver gently with a rubber mallet to seat it, and check frequently with a level across multiple pavers. Most concrete pavers have small molded spacer nubs on their sides that automatically maintain about a 1/16 to 1/8 inch joint gap. If yours don't, use 1/8-inch plastic spacers or simply eyeball a consistent gap. Work in one direction so you are always stepping back on already-set pavers, never on the screeded sand. Lay a piece of plywood across set pavers if you need to reach further into the field without disturbing the sand.
Edges, cuts, and patterns for a clean fit
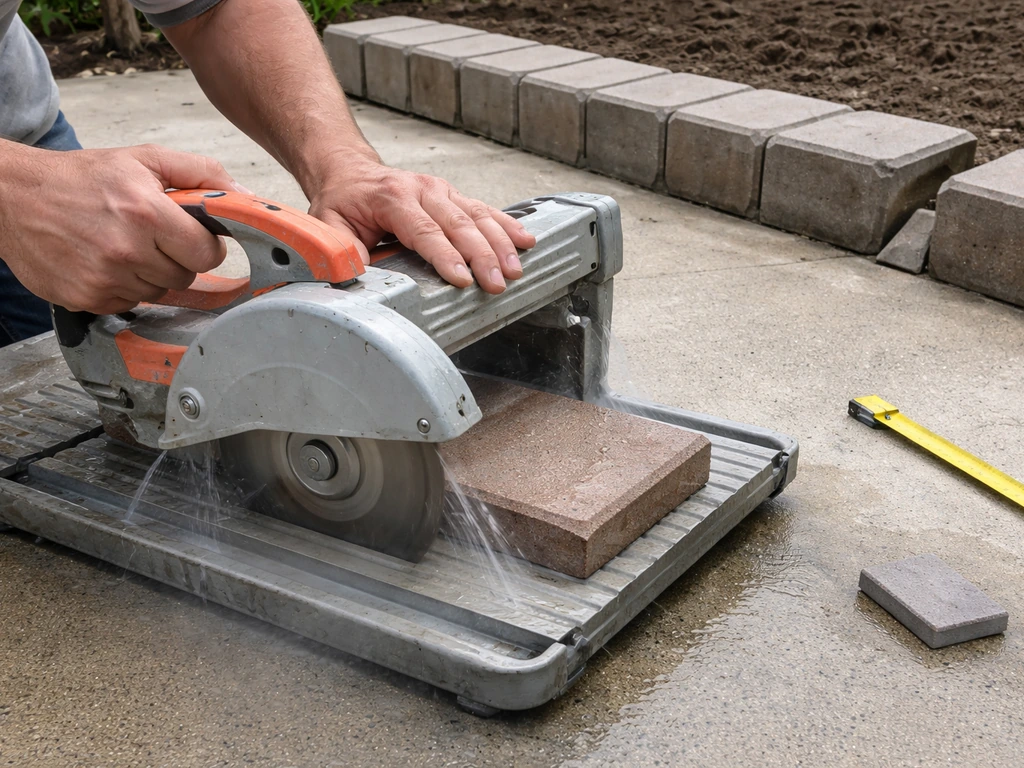
Save all your edge cuts for last. Set all the full pavers first, then come back and measure each edge gap individually. Patio shapes are rarely perfectly consistent over a long run, so measuring each piece separately prevents accumulated errors. Mark your cut lines clearly with a pencil or chalk.
For cutting, a wet-cutting paver saw with a diamond blade is the cleanest and safest option. The water keeps dust down and extends blade life. If you are renting a saw, ask for a blade matched to your paver material (concrete versus natural stone versus porcelain). Concrete Network’s diamond saw blade buyer’s guidance also emphasizes matching the blade to the material and considering wet versus dry cutting and tool compatibility for cleaner cuts with less chipping ask for a blade matched to your paver material. An angle grinder with a dry-cut diamond blade works for occasional cuts, but it kicks up a lot of dust, so wear a respirator and eye protection. Never use a standard abrasive masonry blade on concrete pavers if you can help it, as the results are rough and the blade wears out fast.
For fitting around obstacles like posts, tree bases, or curved garden beds, make a cardboard template first, trace it onto the paver, and make incremental cuts. Trying to cut a complex curve in one pass usually cracks the paver. Score and nibble your way to the line instead.
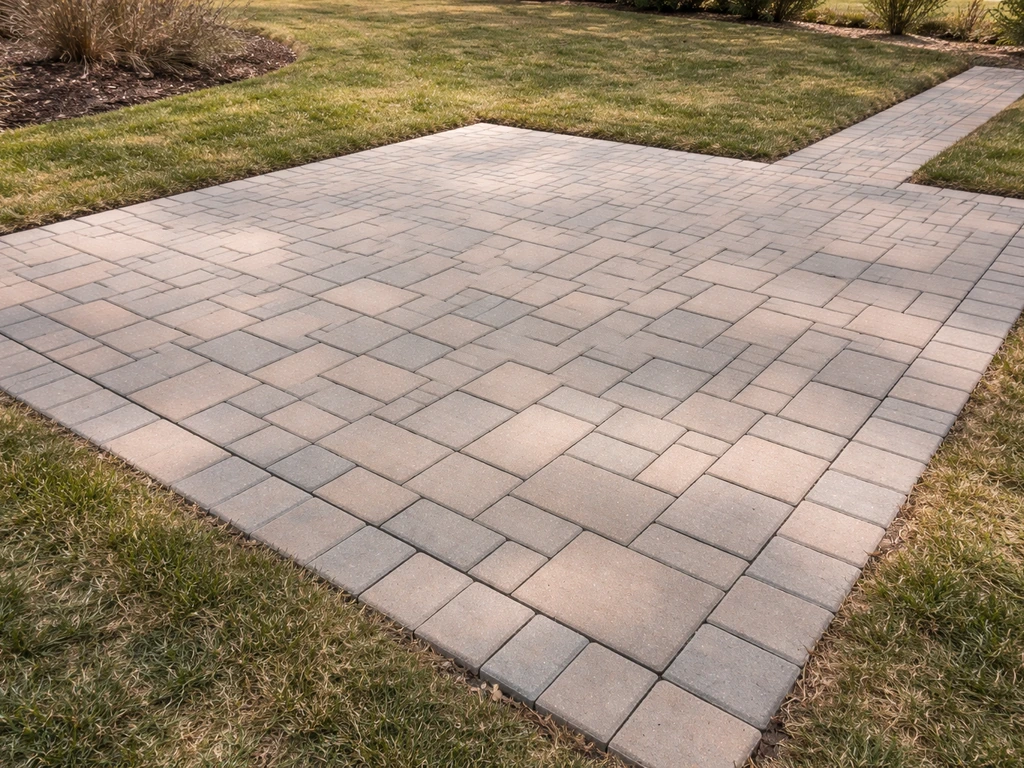
Pattern choice affects how the load distributes and how many cuts you will need. Herringbone (45-degree or 90-degree) is the most dimensionally stable pattern for pedestrian traffic and is the pattern most often recommended for sand-set installations. Running bond is easier to lay with fewer cuts, but can show more movement over time along the long joint lines. Basket weave is attractive and low-cut but less stable than herringbone under heavy use.
| Pattern | Cut Difficulty | Stability | Best For |
|---|---|---|---|
| Herringbone (45°) | More cuts at edges | Highest | High-traffic patios, driveways |
| Herringbone (90°) | Moderate cuts | High | Standard patios |
| Running Bond | Few cuts | Moderate | Low-traffic patios, simple installs |
| Basket Weave | Few cuts | Moderate | Decorative, low-traffic areas |
| Random / Flagstone | Most cuts, custom fitting | Varies by base quality | Natural stone, artistic layouts |
Filling joints, compacting, and final leveling
Once all your pavers are set (including the edge cuts), run your plate compactor over the entire surface. Make at least two to four passes in different directions. This seats the pavers firmly into the bedding sand and brings everything to a consistent, level plane. After compacting, walk the surface and look for any pavers that are high or low. A paver that is slightly high can often be tapped down with the rubber mallet. A low paver needs to come up: lift it out, add a little sand underneath, replace, and re-compact.
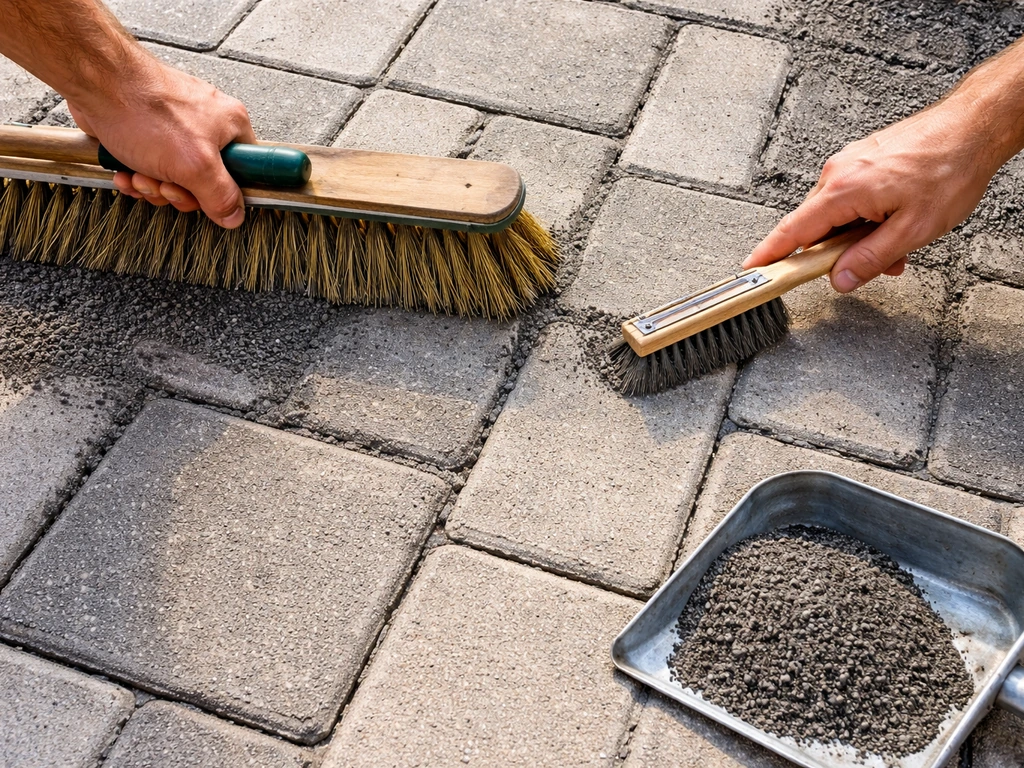
Now fill the joints. For a sand-set patio, you have two main options: regular dry jointing sand or polymeric sand. Regular jointing sand is cheaper and easier to re-apply, but it can wash out in heavy rain and allows weeds to grow over time. Polymeric sand hardens when wet, resists washout, and deters weeds. It costs more and requires careful application, but for most homeowners it is the better long-term choice.
To fill joints, pour your jointing sand across the surface and sweep it in with a push broom, working it across the joints in multiple directions until they look full. Then run the plate compactor over the surface again to vibrate the sand deeper into the joints. Sweep in more sand and compact again. Repeat until the joints are filled to within about 1/8 inch of the paver surface. For polymeric sand, follow the product's specific activation instructions, which typically involve a final sweep to clear the paver faces and then a light shower of water to activate the binder. Do not use a hard stream of water as it will wash the sand out of the joints.
Check weather before activating polymeric sand. Most products require temperatures above 32°F (0°C) and no rain for at least a few hours after activation. Application on a hot, sunny day can also cause issues if the sand dries before it can bond properly. Read the product instructions carefully, because brands like Techniseal, Gator, and others have slightly different timing requirements.
Sealing, maintenance, and troubleshooting common problems
To seal or not to seal
Sealing is not required, but it is worth doing if you want to protect the paver color, reduce staining, and harden the joint sand further. Wait at least 30 days after installation before sealing so the pavers can cure and any excess joint sand can be cleaned off completely. Use a penetrating sealer for a natural look or a wet-look sealer if you want enhanced color. Reapply every 3 to 5 years depending on traffic and weather exposure.
Routine maintenance
- Re-sweep jointing sand into any gaps that have washed or settled out, especially after the first winter
- Pull weeds promptly from joints before they establish roots that can lift pavers
- Check edge restraints annually to make sure they have not shifted or pulled away from their spikes
- Re-level any pavers that have sunk or risen due to freeze-thaw movement by lifting them, adjusting the sand beneath, and resetting
Troubleshooting common problems
Sinking or soft spots almost always trace back to one of two causes: inadequate base compaction or poor subgrade preparation. If a section of your patio sinks, pull up the affected pavers, dig down, and check whether the gravel base has compressed unevenly or whether water is pooling under the base and softening the soil. The fix is usually adding and recompacting gravel in the affected zone, then resetting the pavers.
Shifting pavers along the edges mean your edge restraints have failed or were installed incorrectly. Pull the edge pavers out, reset the restraints with new spikes driven fully into the base, and reset the pavers. If your edge restraints were placed on top of the bedding sand instead of on the gravel base, they will continue to move. That is the fix: dig them back to the gravel layer.
Jointing sand washing out after rain is usually a sign that either the drainage slope is insufficient or you used regular sand in a location where polymeric sand was needed. If it keeps happening, re-examine your slope (you need that 1/4-inch-per-foot drop) and switch to a quality polymeric sand product. Make sure your downspouts are not directing water across the patio surface either.
An uneven surface that appears after the first season often means the bedding sand layer was inconsistent, or that you used it to compensate for a poorly graded base. The only real fix is to lift the affected pavers, correct the base grade, relay the sand at a consistent 1-inch depth, and reset. It is tedious but not difficult, and the patio will be stable once it is done correctly.
If you are also thinking through which type of sand to use in the joints or how to apply polymeric sand correctly, those topics go deeper than this guide covers. Follow the product instructions for how to apply polymeric sand to patio pavers, including sweeping it into the joints and activating it with the right amount of water. Getting the joint sand right is its own process worth taking seriously, especially if you are choosing between different polymeric products or dealing with unusually wide joints. Similarly, if this is your first time working with paver sand in any capacity, it helps to understand how the different sand types (bedding sand versus jointing sand) play completely different roles in the system and should never be swapped.
FAQ
Can I install patio pavers in sand without a gravel base?
For most patios, no. The gravel layer is what spreads loads and stays stable, the bedding sand is not a structural substitute. If you skip gravel, soft subgrade compresses unevenly and you will usually see rocking or sinking within a season or two.
What exact sand should I use for the bedding layer when installing pavers in sand?
Use coarse concrete bedding sand (sharp sand) for the 1-inch bedding layer. Avoid fine play sand because it holds less structure and can pump or wash under vibration. Polymer-based sands are also not the same job as bedding sand, stick to sharp sand under the pavers.
How thick should the bedding sand be, and do I measure it before or after compacting?
Measure at about 1 inch thick when screeded and before pavers go down. After the pavers are set and compacted, that bedding typically settles to roughly 5/8 to 3/4 inch. If you screed thicker to “fix” low spots, you risk a wavy surface later.
How do I prevent the bedding sand from getting disturbed before pavers are set?
Do not walk on screeded areas. Work in small sections, pull screed pipes and fill grooves immediately, then start placing pavers right away. If you step into fresh sand, re-screed that section because footprints create low points.
What spacing should I leave between pavers in sand-set installations?
Aim for consistent joints, commonly about 1/8 inch. Many concrete pavers have molded side nubs that guide this automatically. If your pavers do not, use plastic spacers and keep the same gap across the whole field, especially at transitions near edges and cuts.
Do I compact after setting the pavers or only after the gravel base?
You should compact twice, first after each gravel lift, then after all pavers are set. The second compaction seats the pavers into the bedding sand and levels the surface. If you only compact the base, pavers can sit on top of sand unevenly.
How many passes should the plate compactor make on the paver surface?
Make multiple passes in different directions, typically at least two to four. More passes are better than one because it vibrates the sand uniformly into the joints. Stop and fix any high or low pavers before continuing.
Can I use a hand tamper instead of a plate compactor?
A hand tamper helps in tight corners, but it usually cannot achieve the same density across the main field. If the base is not uniformly compacted, pavers will settle unevenly. For best results, rent a plate compactor for the gravel and jointing steps.
What should I do if my patio isn’t square or the layout starts to drift?
Start from a true straight reference edge and set your first row carefully with a chalk line or string. Save edge cuts for later, then measure each edge piece individually. If you notice drift early, correct it in the next row rather than trying to force later cuts to fit.
How do I handle water management if my patio slopes away from the house but still collects puddles?
First verify the slope with a level along multiple points, especially near low corners. Then check for hidden issues like downspouts discharging toward the patio, a low spot in the gravel base, or buried debris under the base. If puddling persists, lift the affected area and correct the grade of the gravel before re-laying.
When should I use polymeric joint sand versus regular jointing sand?
Use polymeric sand if you have heavy rain, frequent washout, weed growth issues, or you want joints to resist erosion. Regular dry joint sand is easier to maintain after rain, but it typically washes out sooner and can allow weeds in time. Either way, the joint filler has to be swept in thoroughly and vibrated into place.
How long should I wait before activating polymeric sand, and what weather conditions matter?
Follow the product label, but common requirements include temperatures above freezing and no rain for several hours after activation. Apply water carefully using the activation instructions, do not blast with a hard stream because it can wash joints out before they cure.
How long should I wait before sealing pavers installed in sand?
Wait at least 30 days after installation before sealing. This allows joint sand to settle and any excess material to be cleaned away. Sealing too early can trap residue in the joints and reduce long-term joint stability.
Why do pavers sometimes shift at the edges, even if the center looks fine?
Edge movement usually points to edge restraints installed incorrectly or on the wrong layer. Restraints must be set on the compacted gravel base, not on bedding sand, and they need to be spiked fully into the base. Fixing edge failures requires digging back to the gravel layer and resetting restraints.
If a section sinks, is topping up with more sand enough?
Usually no. You should lift the pavers in the affected area, check whether the gravel base compressed unevenly or if water is undermining the subgrade, then add and re-compact gravel in lifts. Only after the base is stable should you re-screed the bedding sand and reset pavers.
Next Articles
How to Make a Patio With Pavers and Sand Step by Step
Step-by-step guide to install paver patio with sand setting layer, from planning and base to leveling, cutting, joint fi
How to Apply Polymeric Sand to Patio Pavers: Step by Step
Step-by-step DIY guide to apply polymeric sand between patio pavers, prep joints, spread, fill, and activate without haz
How to Seal Paver Patio: Step-by-Step DIY Guide
Learn how to seal a paver patio step by step: clean, choose penetrating or wet-look sealer, apply, cure, and maintain.