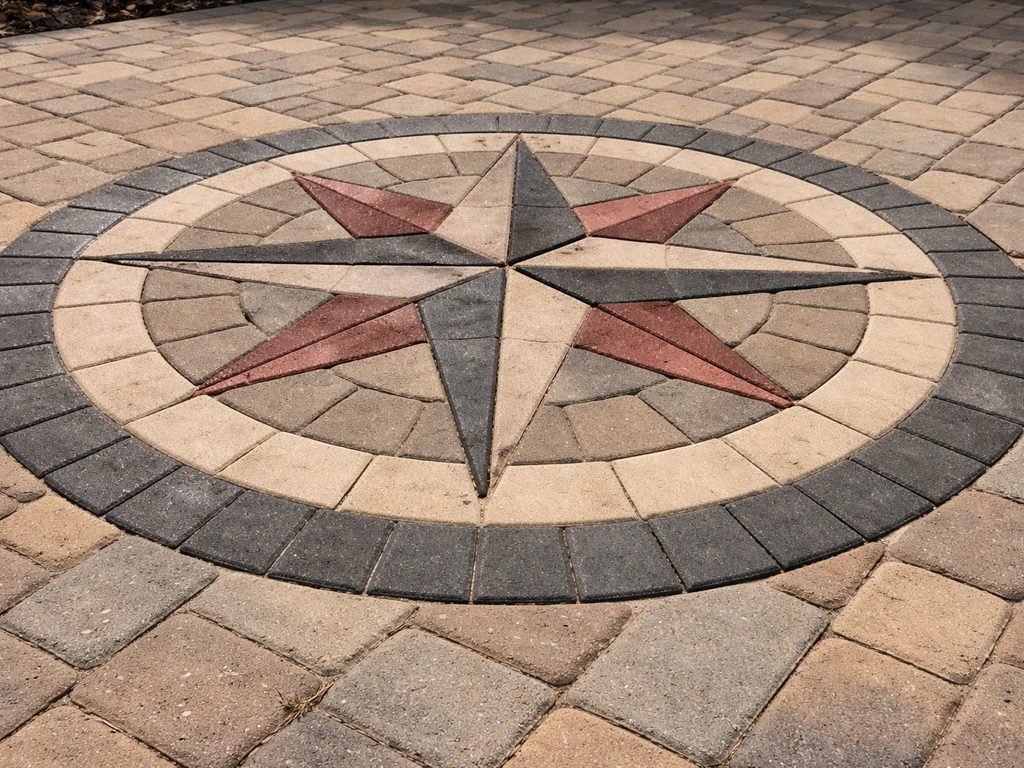
You can absolutely build a compass rose inlay with patio pavers yourself, and the results are genuinely stunning. The key is treating it like two projects in one: first, a perfectly prepared paver base (same as any patio), and second, a precise geometric layout that you mark, build, and cut your way through methodically. Get the base right and the layout right, and the compass rose almost builds itself. Rush either one, and you'll spend hours correcting humps, gaps, and tilted points.
How to Make a Compass Rose With Patio Pavers

Felix Rowe
17 Jun 2026
Pick your compass rose style and paver layout
Before you buy a single paver, decide what kind of compass rose you're actually building. There are three common approaches, and each has different skill and material demands.
- Kit-based inlay: Several manufacturers sell compass rose paver kits with pre-cut component pieces (curved segments, ray pieces, center medallions) that snap together to form a symmetrical motif. This is the easiest option and the one most likely to give you crisp, professional-looking points without a wet saw.
- Segmented color/shape inlay: You design your own compass rose using standard pavers in two or three contrasting colors. The center motif, the directional rays, and the surrounding border ring each use a different color or texture. This is the most DIY-friendly custom approach.
- Full custom cut design: You build the entire compass rose by cutting standard rectangular or square pavers on a wet saw to create the angled points and curves you want. This takes the most time and skill but gives you complete design freedom.
For most homeowners, the segmented color inlay hits the sweet spot between impressive and manageable. A classic 8-point compass rose using contrasting paver colors (say, charcoal for the main points, tan for the secondary points, and a single contrasting center stone) reads beautifully from any angle and doesn't require you to cut curves. If you're drawn to a fleur-de-lis or foliate style, look for a kit with curved component pieces rather than trying to cut those shapes freehand. Trying to cut concave curves on a wet saw without a lot of experience is how you end up with cracked pavers and a lot of frustration.
Decide on scale early. A compass rose inlay that's 4 to 6 feet in diameter works well as a focal point in the center of a 12x12 or larger patio. Anything smaller than 3 feet across tends to look cramped once the surrounding field pavers are laid. Anything larger than 8 feet requires very careful planning to keep all eight points symmetrical.
Tools and materials (and how to choose the right pavers)
Here's what you'll need for a typical segmented-color compass rose inlay on a standard patio. Some of these you may already have; others are worth renting rather than buying.
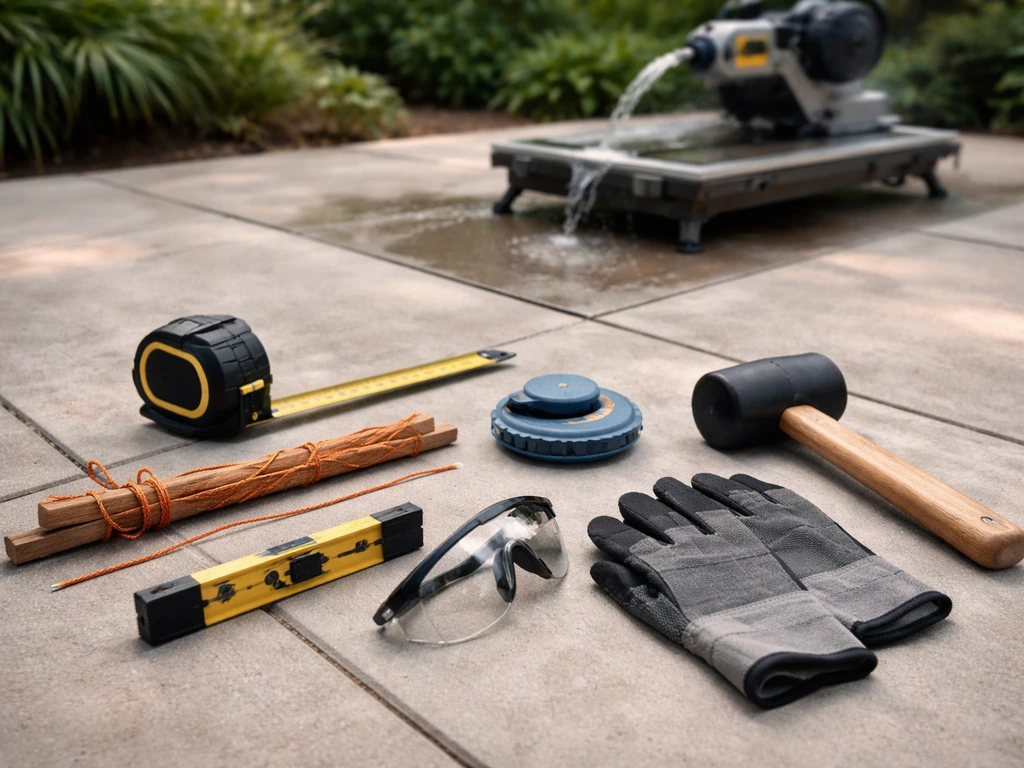
Tools
- Tape measure (25 ft minimum)
- String line and stakes
- Chalk line or marking chalk
- Speed square or large framing square
- Torpedo level and a 4-foot level
- Rubber mallet
- Wet saw (rent one if you don't own it — a basic 10-inch tile/paver wet saw handles most compass point cuts)
- Angle grinder with a diamond blade (useful for small trim cuts)
- Plate compactor (rent, do not skip this)
- Screed rails or straight boards
- Broom and garden hose
- Safety glasses, hearing protection, and work gloves
Materials
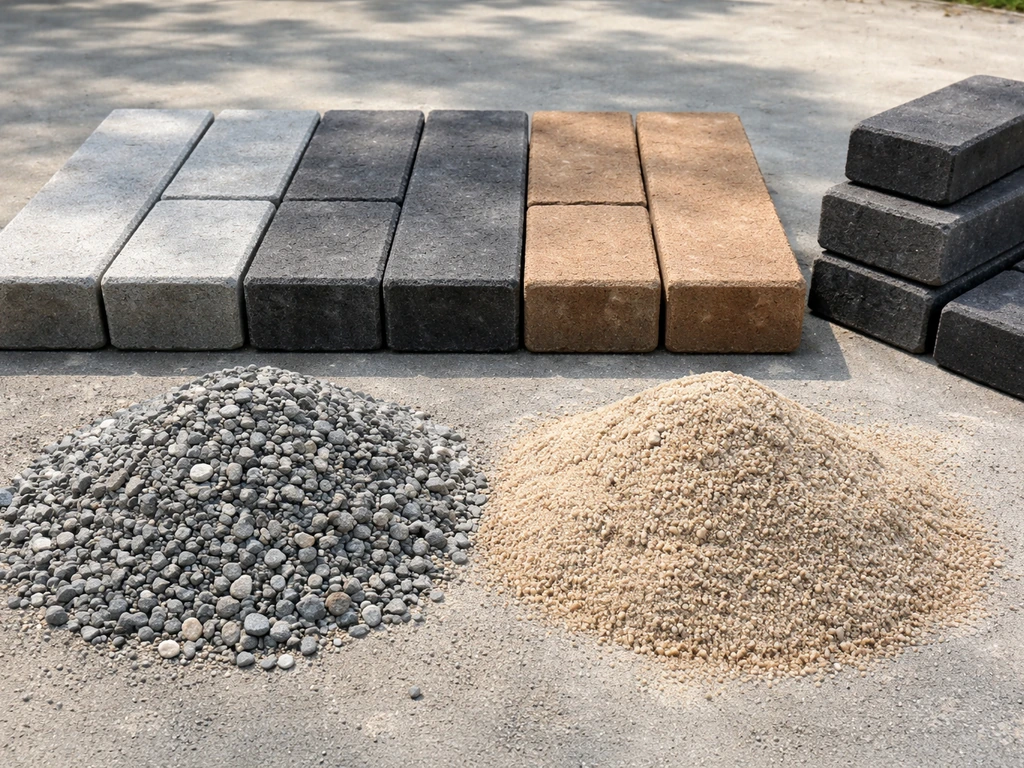
- Primary pavers for the surrounding field
- Contrasting pavers for compass rose points (2-3 colors)
- Compactable gravel base material (minimum 6 inches, 8 inches in freeze-thaw climates)
- Coarse bedding sand (1 inch depth after compaction)
- Polymeric joint sand
- Paver edging/restraints with spikes
- Paver sealer (optional but recommended for inlays with multiple colors)
Choosing the right pavers
For a compass rose inlay, consistent thickness is everything. Every paver in your project, including all the contrasting inlay colors, must be exactly the same thickness. If your field pavers are 2-3/8 inches and your inlay accent pavers are 2-1/4 inches, you'll have a recessed compass rose that collects water and looks sunken. Buy all pavers from the same manufacturer and verify the thickness specs before you order. Standard concrete pavers (typically 3-5/8 inches x 7-5/8 inches x 2-3/8 inches) are the easiest to work with for inlay designs because their rectangular geometry makes 45-degree point cuts clean and predictable. Natural stone like bluestone or travertine looks gorgeous but has more thickness variation between pieces and requires more leveling patience.
| Paver Type | Best For | Thickness Consistency | Cutting Ease | Cost Range |
|---|---|---|---|---|
| Concrete pavers (standard) | DIY segmented inlays | Excellent | Easy | Low to moderate |
| Tumbled concrete | Rustic/aged look | Good | Easy to moderate | Moderate |
| Travertine/natural stone | High-end custom builds | Variable | Moderate | High |
| Porcelain pavers | Modern, low maintenance | Excellent | Harder (brittle) | High |
| Kit inlay pieces | Pre-designed compass motifs | Excellent | None needed | Moderate to high |
Site prep and base leveling for an inlay design
This is where most DIY patio projects succeed or fail, and it's even more important with an inlay design. A compass rose sitting on an uneven base will show every flaw: individual points will tip up or sink down, and the whole motif will look off even if your layout was perfect. Don't rush this phase.
- Mark out the full patio area, not just the compass rose section. The inlay and the surrounding field must share the same base system.
- Excavate the entire area. A standard guide calls for roughly 10 inches total depth: about 6-8 inches of compacted gravel base plus 1 inch of bedding sand plus approximately 2-3/8 inches for the paver thickness. In areas with hard freeze-thaw cycles, go deeper on the gravel.
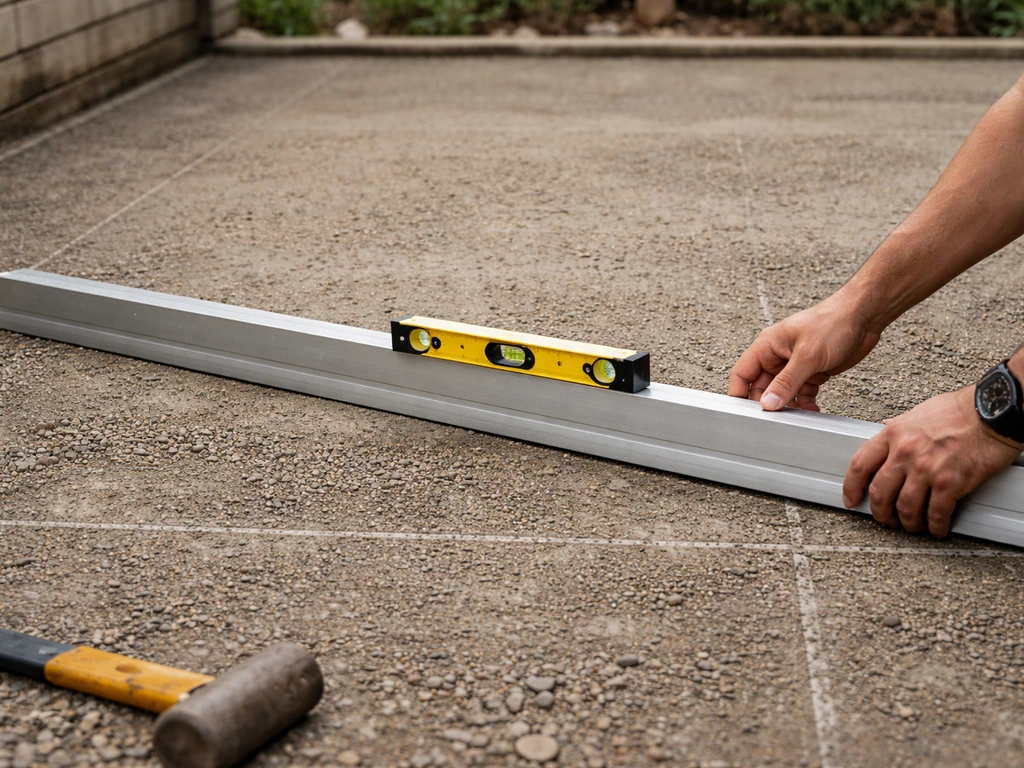
- Grade the subgrade away from your house (typically a 1/8-inch drop per foot for drainage). Do this before you add any base material.
- Add gravel base in two layers, compacting each layer with the plate compactor before adding the next. Compact in overlapping passes, first in one direction then perpendicular. You want the base to feel like it barely moves under the compactor.
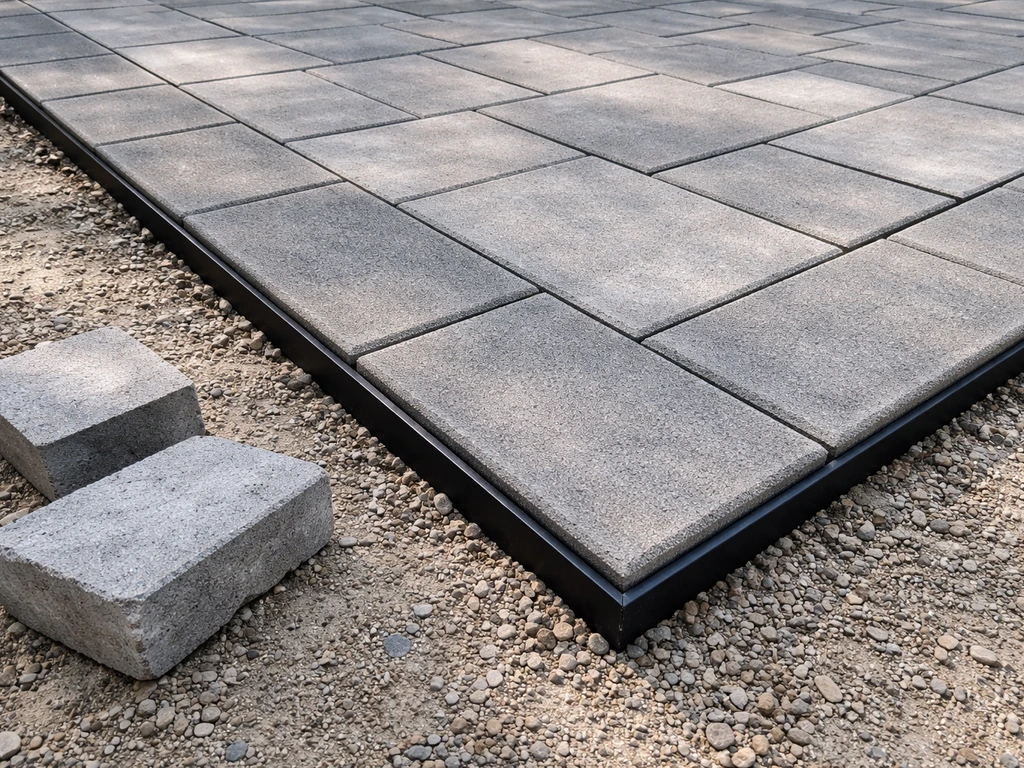
- Install your paver edging/restraints around the perimeter of the entire patio before you add bedding sand. This is your structural frame. If edging is installed after the fact, you risk edge blowout when pavers shift under load.
- Add 1 inch of coarse bedding sand (not fine play sand, which compresses unpredictably). Screed it level across the entire area using screed rails set to the correct height.
- Do not walk on the screeded sand or compact it before laying pavers. It needs to stay loose so each paver beds in evenly.
One thing worth mentioning: if you're adding a compass rose inlay to an existing concrete slab rather than building from scratch, the process changes significantly. If you want the edge finish to match the rest of the patio, see also how to edge patio pavers so the border lines stay crisp around the inlay.
You'd be mortaring or bonding the pavers on top of the slab, and you need to address any existing cracks or drainage issues before you start. That scenario is a separate project from a full inlay installation in fresh-prepared ground.
For a typical patio system, the guide describes excavating to the overall depth (about 10 inches in that example), using a compacted gravel base and about 1 inch of bedding sand before laying pavers, and it notes that this top-of-pavers height matters for features like inlays overall depth (about 10 inches).
How to mark and lay out the compass rose center, angles, and symmetry
Layout is where you earn a great result. Take your time here. A compass rose that's 3 degrees off-center is very obvious once it's set in stone, literally.
- Find your center point. Measure and mark the exact center of where you want the compass rose to sit. Drive a stake at that point. This stake becomes your reference for everything.
- Establish your north-south axis. Decide which direction 'north' will point on your compass rose (it doesn't have to be actual north, but aligning it toward a key sight line like your house or a garden feature usually looks most intentional). Run a string line from your center stake outward along this axis in both directions.
- Establish your east-west axis. Run a second string line perpendicular to the first through the same center stake. Use a framing square to verify the 90-degree angle, then double-check by measuring equal distances from center along both axes and confirming the diagonal distances match (the 3-4-5 triangle method works well here).
- Add your 45-degree diagonals for an 8-point compass. From the center stake, measure out equal distances along 45-degree lines to mark the NE, NW, SE, and SW points. You can find these angles precisely by measuring equal distances along both the N-S and E-W axes from center and snapping a diagonal string between those marks.
- Mark your compass rose radius. Tie a length of chalk or string to the center stake equal to your desired radius (e.g., 30 inches for a 5-foot diameter). Walk it around to scratch a circle in the sand. This defines the outer boundary of your inlay.
- Mark the inner compass point boundaries. Most 8-point designs have a smaller inner ring where the ray points narrow before reaching the center medallion. Mark this inner circle at roughly 30-40% of your outer radius.
- Photograph your string layout from above (stand on a ladder) before removing any strings. You'll reference this repeatedly as you build.
A common mistake at this stage is marking the layout only in the center area and assuming you'll 'eyeball' the field pavers around it. Don't. Lay string lines across the full patio in a grid at paver-width intervals. Once your compass rose is marked, you can plan how to landscape around the paver patio so the design looks intentional and finished landscape around a paver patio. This keeps your field rows straight, which in turn makes the compass rose sit square within the overall pattern.
Installing the base course and building the compass pavers course by course
Here's where the actual laying begins. The order matters: you generally want to lay your field pavers up to the edge of the compass rose area first, use those as a reference frame, then build the compass rose into the open space. This way, your inlay is constrained on all sides by already-set pavers, which helps keep everything aligned.
- Start laying field pavers from a straight edge (usually the house side or a string line) and work outward in rows, leaving the compass rose zone open. Set each paver firmly with a rubber mallet, checking with your level every 4-5 pavers. You want the surface to follow your planned slope, not fight it.
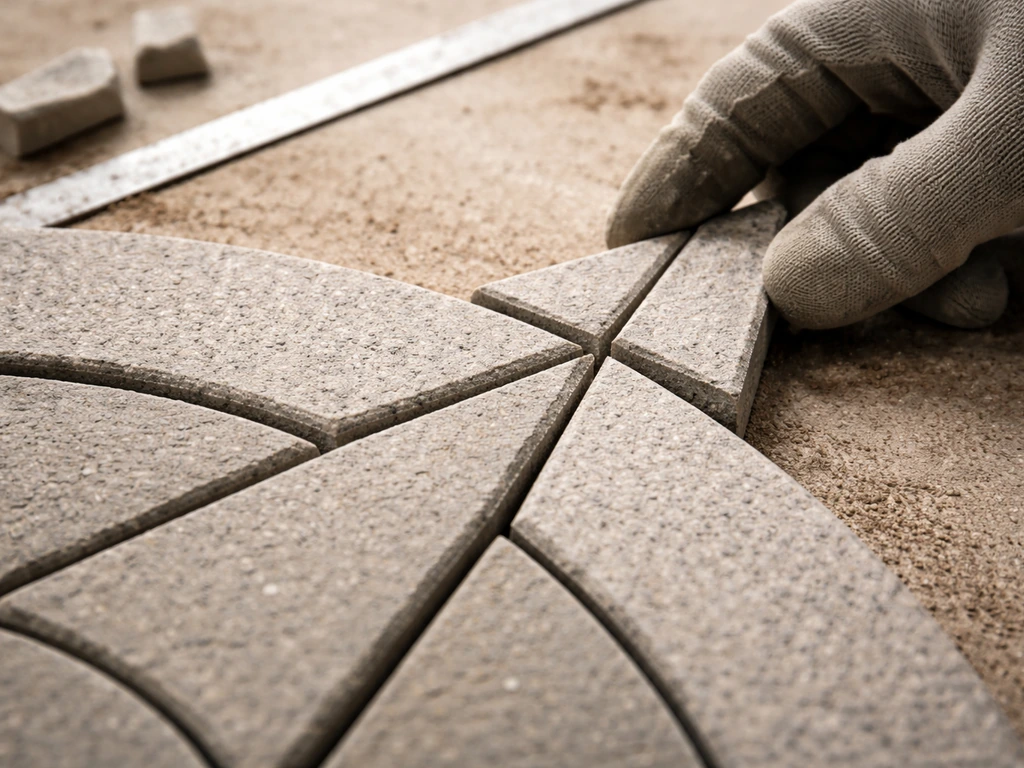
- When the field pavers surround the open compass rose area on at least two sides, begin the inlay. Start from the center out, not from the edge in. Place your center medallion piece first, set it level with the surrounding field, and confirm it matches the height of the adjacent field pavers perfectly.
- Build outward along your four main axes (N, S, E, W) first. These are your anchor rays. Set each ray paver, check it against your string lines, and confirm heights match the field course.
- Add the secondary (diagonal) rays next. These should be your contrasting color if you're doing a segmented design. Work symmetrically, placing the NE ray, then the SW ray, then the NW, then the SE to keep the visual balance as you build.
- Fill in the background segments between the rays with your background inlay color. These wedge-shaped fills are what make the rays appear to pop visually. Work in opposing pairs to maintain symmetry.
- Check your level constantly. Lay a straightedge or level across the compass rose and the adjacent field pavers every few rows. Any paver that sits high or low needs to be lifted, sand adjusted, and reset before you move on. Trying to fix a sunken stone after three more layers are set around it is miserable.
Patience here pays off. A typical 5-foot compass rose inlay takes most DIYers 3 to 5 hours just for the laying phase, not counting base prep. If you're rushing to finish before dark, stop and cover the open area with plywood overnight rather than laying pavers you haven't checked properly.
Cutting, fitting, and correcting tight compass-point details
The compass points are where the real cutting work happens, and this is the part most DIYers are nervous about. The good news: most of the cuts are straightforward 45-degree angle cuts, which any wet saw handles cleanly. The less good news: you'll make a lot of them, and each one needs to be right.
Cutting the ray points
Each compass ray narrows to a point as it reaches the outer edge of the design. To create that tapered point, you'll cut both sides of the outermost paver on each ray at matching angles. For an 8-point compass with equal rays, these are typically 22.5-degree cuts from centerline on each side, which makes 45-degree included angles at the tip. Mark your cut lines with a pencil directly on the paver face, make a dry test cut on a scrap piece first to confirm the angle, then cut your actual paver.
Fitting the background wedges
The wedge-shaped background segments between rays are typically filled with cut pieces from standard pavers. Measure the actual gap in the finished layout (don't trust your design drawing exactly, since small cumulative errors add up), then cut to fit. Use your angle grinder with a diamond blade for small trim adjustments of 1/4 inch or less. The wet saw is more accurate for anything larger.
Common fitting problems and fixes
- Point crumbles or chips when cutting: You're likely cutting too fast. Slow your feed rate on the wet saw and let the blade do the work. Keep the water flowing constantly.
- Gaps are uneven between rays: Go back and check your axis string lines. One ray is probably set slightly off-angle. You may need to lift and reset it before continuing.
- Cut paver is slightly too big: Trim with the angle grinder in small passes. Don't try to force an oversized piece in; you'll raise adjacent pavers.
- Cut paver is slightly too small: If the gap is less than 1/4 inch, polymeric sand will fill it adequately. More than that, recut a fresh piece.
- Paver tips keep tipping up after setting: The thin tip of a pointed paver has very little surface contact with the sand below. Make sure there's full sand contact under the entire paver, including at the tip, and tamp firmly.
Finishing: joints, compaction, sealing, and maintenance
You've got all your pavers set and the compass rose is looking great. For a raised patio edge, make sure the border pavers are aligned and firmly set so the perimeter stays straight and level as you compact the base You've got all your pavers set. Don't stop here. The finishing steps are what determine whether this project lasts 5 years or 25.
Compaction
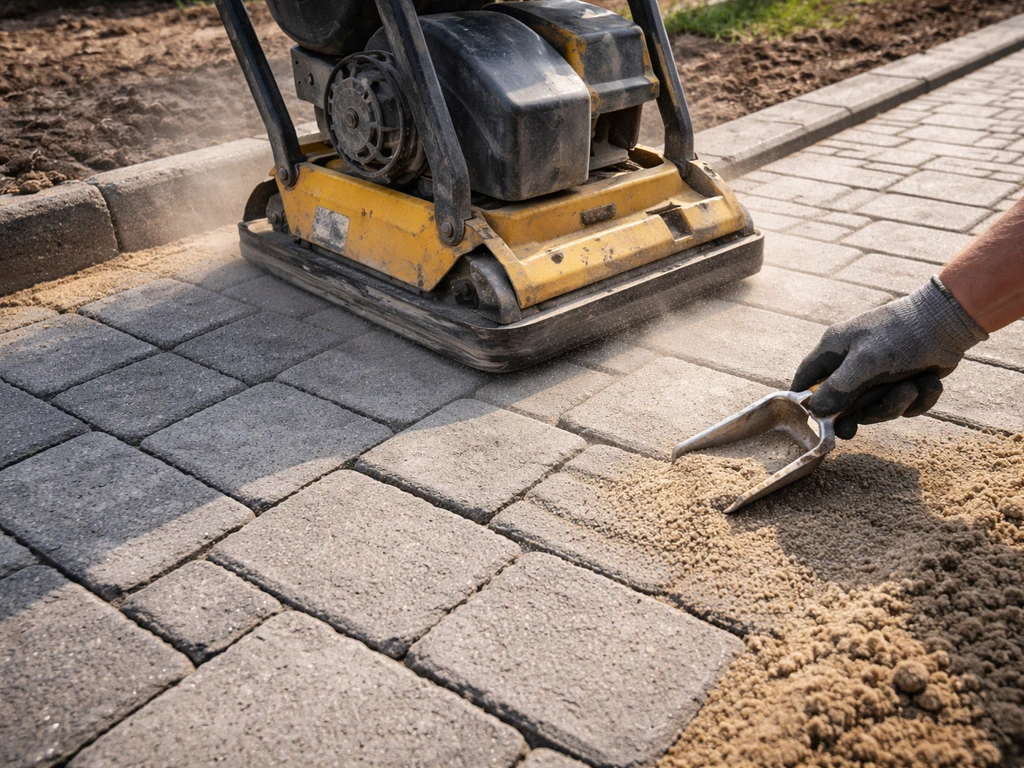
Run the plate compactor over the entire finished paver surface, including the compass rose area, to bed everything into the sand base. Use a rubber pad or compaction pad attachment over the inlay pavers to avoid scratching or cracking the thinner cut pieces. Make two passes in perpendicular directions. After compaction, check across the compass rose with a straightedge. To finish your project cleanly, make sure you also border the patio pavers with a tight, level edge so the whole compass rose stays aligned border a paver patio. Any pavers that moved or settled unevenly need to be lifted and re-leveled now, before joint sand goes in.
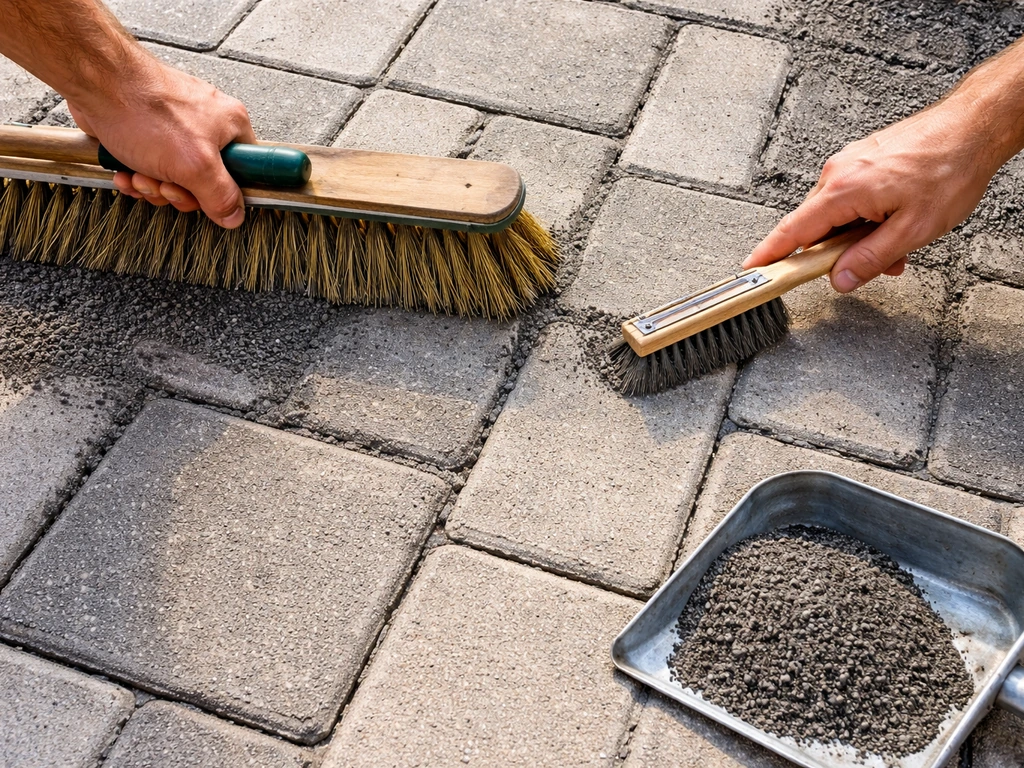
Joint sand
Sweep polymeric joint sand across the entire surface, working it into all joints with a push broom. Make multiple passes from different angles to ensure all joints, including the narrow angled joints around the compass points, are fully filled. Blow off excess sand with a leaf blower (low setting) or sweep clean, then lightly mist the surface with water to activate the polymer binders. Follow the manufacturer's timing for your specific product. Polymeric sand locks the joints and dramatically reduces weed growth and ant activity, which matters a lot for an inlay design where you don't want anything disturbing the visual pattern.
Sealing
Sealing is optional on a standard patio, but for a multi-color compass rose inlay, it's worth doing. A penetrating paver sealer protects the contrasting colors from UV fade and prevents staining (oils from a grill, tannins from leaves) from blurring the crisp color contrast that makes the design pop. Wait at least 30 days after installation before sealing to allow any efflorescence to work its way out. Clean the surface thoroughly, let it dry completely, and apply sealer with a roller or low-pressure sprayer in thin, even coats. Most sealers need reapplication every 3 to 5 years depending on foot traffic and sun exposure.
Ongoing maintenance
- Inspect the inlay joints each spring. Polymeric sand can erode in high-traffic areas or after harsh winters; top up as needed.
- If any individual pavers in the compass rose shift or sink after a winter, lift them, correct the sand depth, and reset them before the problem spreads to adjacent pieces.
- Avoid using metal shovels or scrapers directly on the inlay area during snow removal. A plastic shovel or snow blower with rubber paddles is much kinder to the paver surface and won't chip the pointed compass pieces.
- Re-seal on schedule. Color contrast is the visual heart of this design; keeping the sealer fresh is the single best thing you can do to keep it looking sharp for years.
- Keep the surrounding edging and border in good condition. A failed or displaced edging restraint allows the field pavers to migrate outward, which puts lateral pressure on the compass rose inlay and can push pieces out of alignment. If you're thinking about your border and edging situation more broadly, that's worth addressing as its own project alongside this one.
A well-built compass rose inlay is one of the best visual upgrades you can add to a paver patio, and it's genuinely within reach for a capable DIYer willing to take the layout seriously and not rush the base. Set aside a full weekend: day one for excavation, base, and edging, day two for screeding, laying, cutting, compacting, and jointing.
If your patio edging is misaligned or damaged, fix it early so the compass rose sits on a straight, stable border. If you've done basic paver work before, the compass rose design is just a more careful version of the same process. Take it one ray at a time, check your levels constantly, and you'll end up with a patio feature that looks like it cost twice what it did.
FAQ
Can I make a compass rose inlay using pavers of different thicknesses if I level everything afterward?
You can physically level over thickness differences, but it usually fails long term because thin inlay pieces tend to sit proud or dip as sand migrates. The safer approach is to use inlay and field pavers with matched thickness from the same manufacturer, then fine-tune grade using the base and bedding sand thickness (within the same product system).
How do I ensure my compass rose is truly centered if my patio isn’t perfectly square?
Don’t center off the excavation marks. Snap chalk lines using opposite corner diagonals to find the patio center, then measure from that center to the planned compass diameter and confirm it matches at two perpendicular directions. If the patio is slightly out of square, adjust the compass rotation rather than forcing the whole layout to look centered to a skewed grid.
What should I do if the rays don’t meet the outer ring cleanly after cutting?
First, measure the actual gap after dry placement, then re-cut the outermost wedge pieces to fit the real opening. Avoid trying to “force” mismatched wedges, because tiny gaps at multiple rays compound and will distort the point tips. Dry-fit, label pieces, and only commit to the final bedding after every ray closes.
Do I need to use a miter saw or tile saw instead of a wet saw for the angled cuts?
For pavers, a wet saw is usually the most accurate for repeatable angles and clean edges. A grinder can work for small trim, but using it for many main cuts tends to create slight angle drift. If you must grinder-cut, use a guide jig and make test cuts on scrap to verify the tip geometry.
How thick should the base be under a compass rose compared with the rest of the patio?
Use the same overall base build as the patio, then pay extra attention to compaction and final bedding depth specifically where the thinner wedge pieces sit. A common mistake is creating a slightly softer pocket under the inlay, which later causes points to settle unevenly. Keep the base uniform, then adjust bedding sand locally only to reach the correct final height.
Can I install the compass rose inlay over existing pavers instead of starting from bare ground?
Often no, at least not without significant prep. If you lay over existing pavers, you must maintain a stable, uniform thickness and address height transitions, joint sand condition, and possible rocking. Most DIYers get the best results by removing the affected area down to the base and rebuilding to the same standard as the rest of the patio.
Is there a workaround if I want curved compass styles but I don’t want to cut curves freehand?
Yes. Choose a kit that provides pre-formed curved or segmented pieces, then keep your cuts limited to wedge and border trimming where geometry changes. If you try to fabricate concave curves from straight pavers, you’ll need careful jigging and test cuts, and it’s easy to end up with hairline gaps that show after joint sand fills.
What’s the best way to prevent the compass rose points from chipping during compaction?
Use a compaction pad or rubber pad attachment over the inlay, and avoid aggressive passes directly across the point tips. Compact in perpendicular directions as planned, but keep passes light and check the surface immediately afterward with a straightedge to catch any moved pieces before the sand locks in.
How do I handle polymeric joint sand around the very narrow joints at the compass tips?
Work the sand in with a push broom using multiple directions, then verify joints are actually filled, not just surface dusted. Be careful with misting, too much water can wash out fine sand around the thin segments. If your joints look underfilled after activation, add a small amount of dry polymeric sand and repeat the misting step per the product instructions.
When should I seal a multi-color compass rose, and will sealing darken the contrasting pavers?
Wait at least 30 days so residual moisture or efflorescence doesn’t get trapped. Expect many sealers to slightly enhance color and deepen tones, which can change how charcoal versus tan reads. Test on a spare paver piece in the same shade range, and apply thin, even coats rather than heavy saturation.
Can I expand or shrink the compass rose size without redesigning all the cuts?
You can scale the overall diameter, but the ray tip angles and wedge widths must match the new proportions, especially for an 8-point design. If you change size, re-calc the spacing based on paver widths and redo a dry-layout test so the outer tips land on paver edges predictably.
How do I protect the design from weeds or ants if the compass rose has lots of angled joints?
Polymeric joint sand helps by locking joints, but the real prevention is tight base drainage and full joint fill. Before sealing, confirm the surface slopes correctly and that water won’t pool near the inlay. Also, keep maintenance consistent, since repairing eroded joints around narrow angles is harder once the pattern is locked and sealed.
Next Articles
How to Edge Patio Pavers: DIY Guide for Crisp Borders
Step-by-step DIY guide to edge patio pavers for crisp borders, stable lines, proper base, cutting, and troubleshooting c
How to Apply Polymeric Sand to Patio Pavers: Step by Step
Step-by-step DIY guide to apply polymeric sand between patio pavers, prep joints, spread, fill, and activate without haz
How to Seal Paver Patio: Step-by-Step DIY Guide
Learn how to seal a paver patio step by step: clean, choose penetrating or wet-look sealer, apply, cure, and maintain.