Removing patio pavers is a manageable DIY job for most homeowners. If your pavers are dry-laid on a sand bed (the most common residential setup), you can pry them up without special equipment, reuse the good ones, and have the area cleared in a weekend. If they're mortared down, expect more work and more breakage. Either way, the process follows the same basic path: assess what you have, lift the pavers carefully starting at an edge or damaged unit, deal with the sand or base underneath, then prep the area for whatever comes next.
How to Remove Patio Pavers: DIY Step-by-Step Guide

Felix Rowe
19 Jun 2026
Start here: figure out why you're removing pavers and what you're keeping
Before you grab a pry bar, spend five minutes thinking through your situation. The answer to two questions will shape everything about how you approach the job.
First: are you reusing the pavers? If yes, you need to be careful and methodical. Concrete and natural stone pavers chip easily when forced. If you're replacing them entirely and just need the area cleared, you have a lot more freedom to work quickly and not worry about every unit.
Second: are your pavers dry-laid or mortared? Get down and look at the joints. Dry-laid (sand-set) joints look granular, almost like fine dirt or sand. You can drag a key or screwdriver through them and material comes loose. Mortared joints look solid, bonded, and rigid. They won't crumble when you scratch them. Dry-laid pavers lift out cleanly. Mortared pavers often crack during removal, so plan to replace rather than reuse them.
Also think about what's underneath. Most residential patios sit on a compacted gravel base with about an inch of bedding sand on top. Some older or improvised patios were laid directly over soil, concrete slabs, or compacted dirt. You'll find out for certain once the first few pavers come up, but having a rough idea helps you estimate the cleanup work ahead.
- Dry-laid on sand: easiest to remove, high reuse potential, sand bed needs raking or replacing after
- Mortared/wet-laid: harder removal, more breakage, old mortar must be chipped or scraped off reused pieces
- Pavers over a concrete slab: the slab stays; you're just lifting pavers and dealing with mortar or adhesive residue
- Pavers over compacted gravel base: standard setup, expect sand on top of gravel once pavers lift
- Pavers over bare soil or grass: less stable base, likely needs full excavation and rebuild before re-laying
Tools and materials you'll actually need
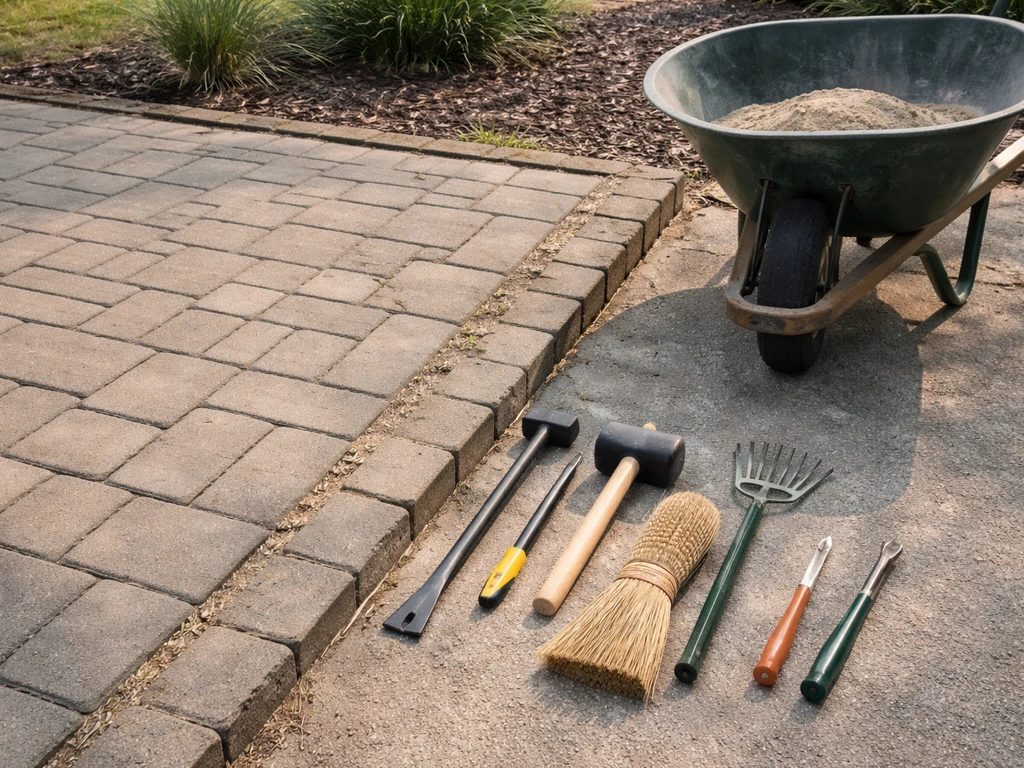
You don't need a lot of specialized gear, but having the right tools makes the job faster and saves pavers from unnecessary damage. Here's what to round up before you start.
| Tool / Material | What It's For | Notes |
|---|---|---|
| Flat pry bar (18–24 inch) | Lifting and leveraging pavers from joints | Essential; longer bar gives better leverage |
| Paver lifter / extractor tool | Lifting interlocking pavers without damaging neighbors | Worth renting if reusing pavers; reduces chipping |
| Flat spade or square shovel | Clearing bedding sand and loose base material | Also helps pry at edges |
| Rubber mallet | Tapping pry bar into joints without cracking pavers | Useful for mortared systems too |
| Cold chisel and hammer | Breaking mortar joints on wet-laid installs | Needed for mortared pavers only |
| Stiff broom or push broom | Sweeping loose joint sand before lifting | Helps you see joint lines clearly |
| Work gloves (heavy) | Hand protection from sharp edges and mortar | Non-negotiable |
| Safety glasses | Chips and debris fly during mortared removal | Required for any chiseling work |
| Knee pads | Comfort during extended ground-level work | You'll appreciate these by hour two |
| Wheelbarrow | Moving pavers and debris | Have two if you have a helper |
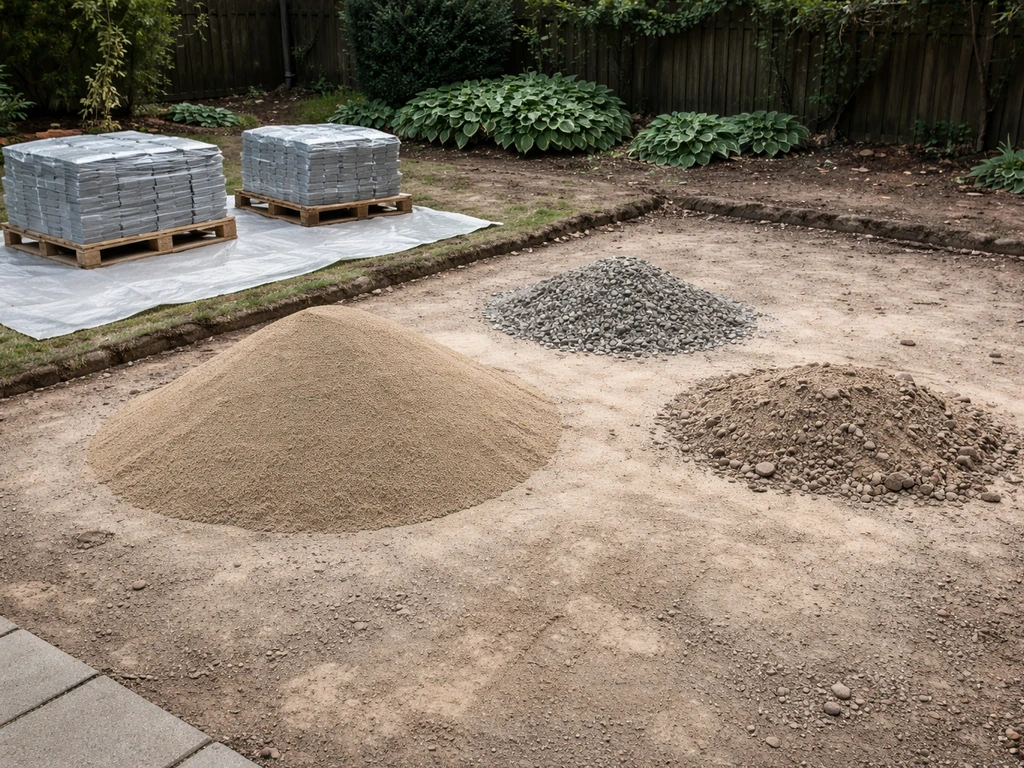
| Plastic sheeting or pallets | Stacking and protecting reusable pavers | Keeps them off wet ground |
| Garden hose or spray bottle | Wetting polymeric sand residue for easier cleanup | See note below on polymeric sand |
| Plate compactor (rentable) | Re-compacting base if rebuilding afterward | Rent from a local equipment yard |
A quick note on the paver lifter: it looks like a set of tongs designed to grip the top edges of a paver and pop it straight up. It's specifically made to avoid the problem where prying from a joint chips the corners of adjacent units. If you're planning to reuse pavers and have more than a small section to pull up, renting one for a day is genuinely worth it.
Step-by-step: how to remove patio pavers without wrecking what's around them
Step 1: Call 811 before any digging
If your removal involves any digging into the base or subgrade (not just lifting pavers), call 811 first. blank" rel="noopener noreferrer">Call 811 before you dig is a free service that helps protect underground utility lines from being struck. It's free, it's required by law in most states, and utility lines get struck more often than you'd think during patio work. Most states require you to call at least two business days before you dig. blank" rel="noopener noreferrer">Washington UTC explains that Washington’s “Call Before You Dig” law requires locating and marking underground utilities at least two business days before digging. Once utilities are marked, you know what's safe.
Step 2: Clear the surface and find your starting point
Sweep the entire patio thoroughly so you can see all the joints clearly. Look for a natural starting point: a damaged or cracked paver, a corner unit, an edge paver along the perimeter, or any area where the joint sand is already eroded and loose. Edges are almost always easiest because one side of the paver is already exposed. Avoid starting in the middle of an intact field of pavers if you can help it.
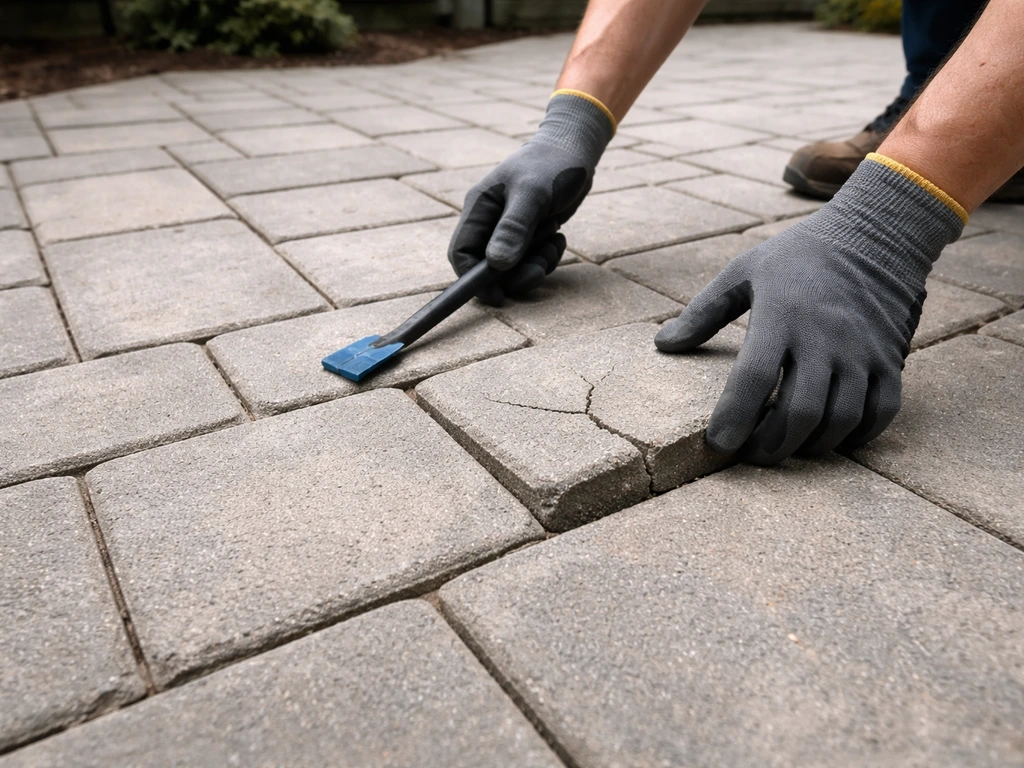
Step 3: Open up a gap
For dry-laid pavers, drag a pry bar or flat screwdriver along the joint lines around your starting paver to clear out joint sand. You need enough of a gap to get the pry bar tip underneath the paver. On interlocking pavers that fit tightly together, even a few millimeters of clearance is enough. If you're working in the middle of a patio with no obvious starting gap, remove a cracked or damaged paver first, even if you have to sacrifice it, to create your entry point.
For mortared pavers, use a cold chisel and hammer to chip away the grout or mortar in the joints around your starting paver. For cutting a patio paver, you can use a chisel and light hammer taps to score the cut line and separate the piece safely cut a patio paver. Work on one joint at a time and go slowly. This takes patience. Once the joint material is broken on two or three sides of a unit, you can attempt to lift it.
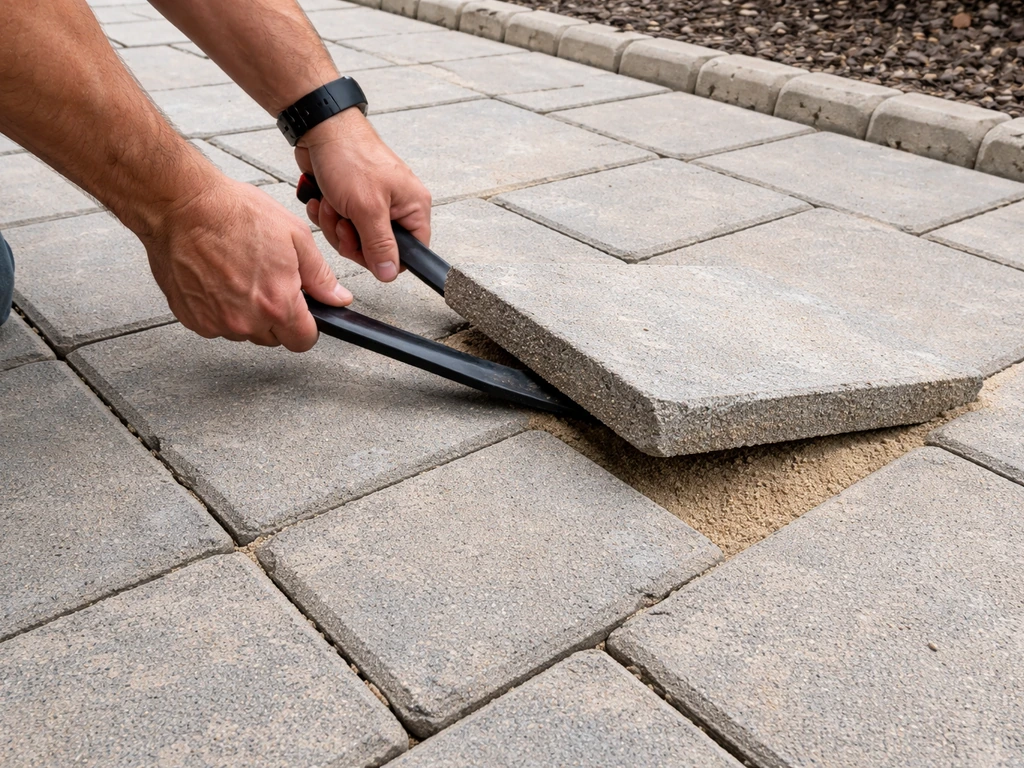
Step 4: Lift the first paver
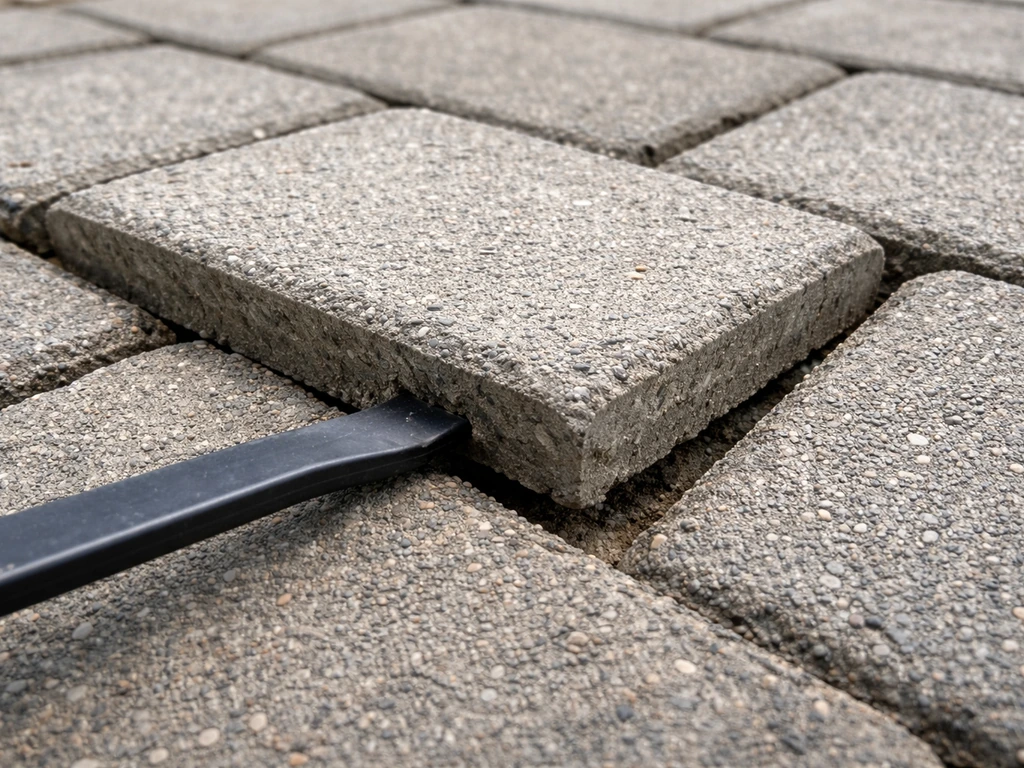
Slide the flat end of your pry bar into the joint and apply gentle upward leverage. Don't crank it hard immediately. Work around the paver, applying pressure from two or three sides to loosen it progressively before lifting. On dry-laid installs, pavers typically pop up cleanly once you've broken the suction in the bedding sand.
Use a paver lifter tool if you have one: hook the tongs under two opposite edges and pull straight up. If you also need to drill into the pavers later for fixtures or repairs, you can follow the same careful, non-destructive mindset from the related guide on how to drill into patio pavers Use a paver lifter tool if you have one: hook the tongs under two opposite edges and pull straight up. .
Step 5: Work outward in rows
Once your first paver is out, the rest come up much faster. You now have an open slot that makes it easy to slide your bar under adjacent units. Remove pavers row by row or in a pattern that keeps the remaining pavers stable. Avoid randomly pulling pavers from the middle of large sections, since the surrounding units can shift into the gaps and become harder to remove cleanly.
Step 6: Stack and protect pavers you're keeping
As pavers come up, stack them immediately on a pallet or plastic sheeting away from the work area. Stack them flat, not leaned against something, and keep piles under about 3 feet high for stability. If you're reusing them, inspect each one for chips and cracks and set damaged units aside separately. Don't let good pavers sit in a pile where they'll get walked on or driven over.
What to do with the base and bedding layer once pavers are up
Lifting the pavers is actually the easy part for most people. What trips up a lot of DIYers is not knowing what to do with the material underneath. Here's how to think about it.
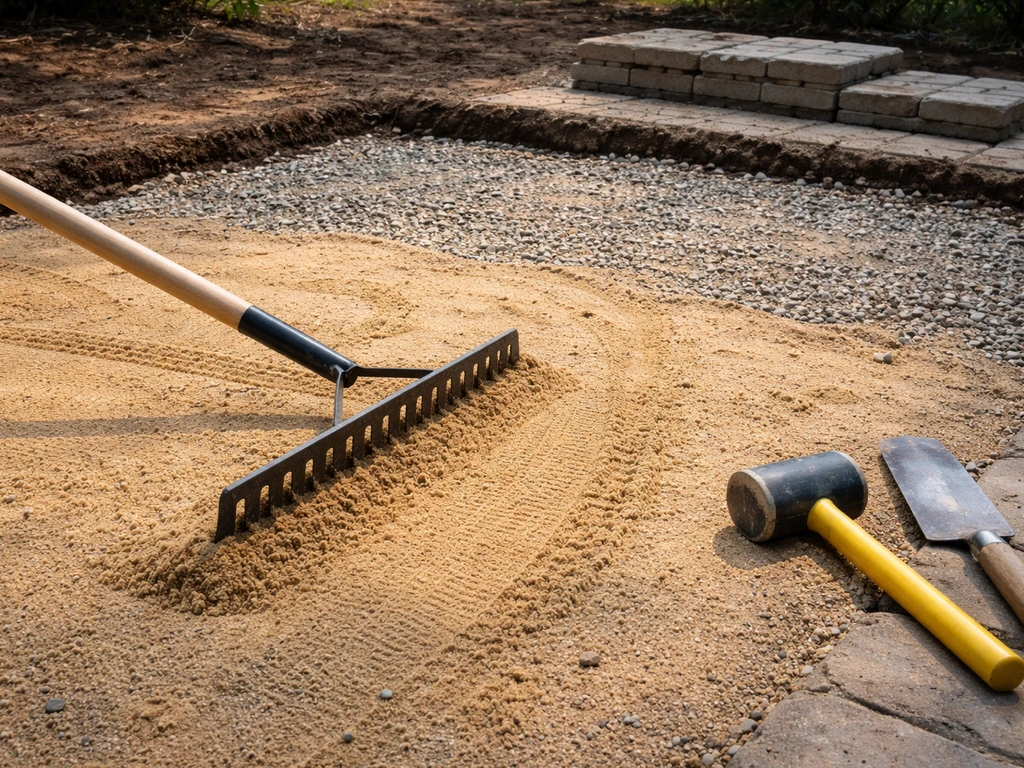
In a typical dry-laid patio, you'll see a layer of bedding sand (usually about 1 inch deep) sitting on top of a compacted crushed stone base. The sand will be loose and disturbed from the removal process. If you're re-laying pavers in the same spot, you don't necessarily have to remove all the base material. You may just need to rake and re-screed the sand layer to get it level again. But if the base was inadequate to begin with (which is often why the patio needed work), you'll want to dig down and rebuild it properly.
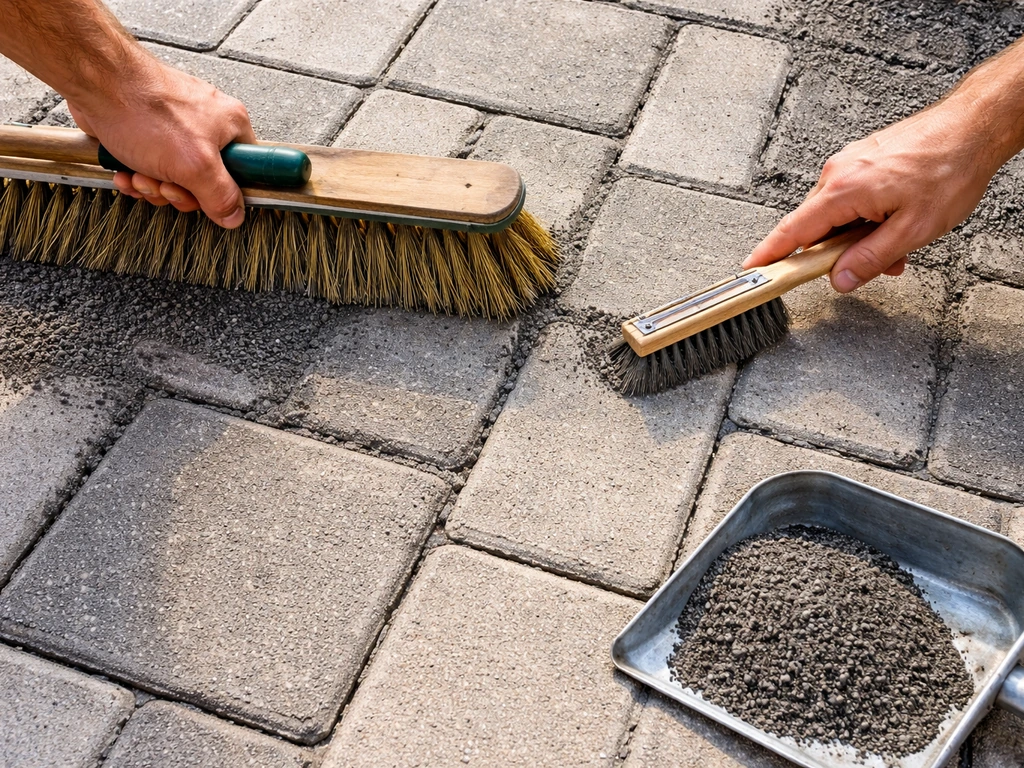
If you had polymeric sand in the joints, deal with the residue carefully. Polymeric sand contains a binder that activates with water. Scrape and vacuum out as much of it as possible from the joint areas before any water gets involved. If you wet it before removing it, it bonds hard and becomes very difficult to clean off.
After the pavers are removed, here's a decision tree for the base:
- If the base looks solid, compacted, and level: rake the bedding sand smooth, re-screed to 1 inch depth, and you're ready to re-lay.
- If the sand is contaminated with organic material, roots, or mixed into the base: remove it entirely, inspect the compacted base below, and add fresh bedding sand before re-laying.
- If the compacted base is soft, uneven, or missing entirely: excavate down to stable subgrade (total excavation is typically around 10 inches for a patio: paver thickness plus 1 inch sand plus 4–6 inches compacted gravel base), add compacted gravel in 2–4 inch lifts, then screed 1 inch of fresh sand on top.
- If the patio was laid directly on soil or grass: plan on a full base rebuild. Soil alone doesn't provide adequate drainage or stability, so don't just relay pavers onto bare dirt.
- Remove any plastic edging, metal restraints, or spike stakes from the perimeter. These need to come out before you can rebuild the base correctly or install new edging.
One important thing to get right when rebuilding the base: slope. A properly graded patio should slope away from your house at about 1.5 to 2 percent (roughly 1/4 inch drop per foot of run). When you're screeding your bedding sand layer, build that slope in at the sand stage so it transfers through to the finished paver surface. Skipping this step is one of the most common reasons patios end up with drainage problems after reinstallation. Once the pavers are out, you should address drainage so water does not pool in the patio area.
Handling specific patio situations
Pavers laid over grass or bare soil
Lift the pavers and you'll often find grass, weeds, or just compacted dirt underneath, especially on older or improvised installations. The removal itself is straightforward since there's no base material to worry about. But you should plan on a full base excavation and rebuild before re-laying. Dig down about 10 inches from finished grade, compact the subgrade, add your gravel base in lifts, and screed fresh sand. Relaying directly onto soil causes settling, frost heave, and drainage problems.
Pavers over a concrete slab
If your pavers were mortared or glued onto a concrete slab, you're dealing with mortar or adhesive residue on the slab surface after removal. Use a cold chisel and hammer (or an angle grinder with a chisel bit for larger areas) to chip off mortar lumps. Get the slab as flat as you can before relaying. The concrete slab itself is your base, so you don't need gravel or compacted fill. You're essentially doing a wet-lay job again or using a specialized adhesive system for re-installation.
Uneven ground
When you pull pavers from an uneven or heaved area, some units will have extra sand underneath where the base sank, and others will barely have any. Rake all the sand out, inspect the base, and identify the low spots and high spots. High spots in the base need to be compacted down or removed. Low spots need fill (more compacted gravel). Then re-screed your sand layer uniformly at 1 inch to create a fresh, level starting point.
Sloped patios
Removing pavers on a slope introduces one extra challenge: loose pavers want to slide. Work from the bottom up when removing them so you're not pulling pavers out from underneath a stack that can slide down on you. Stack removed pavers off to the side, not below the work zone. When rebuilding, pay careful attention to maintaining that 1.5 to 2 percent drainage slope away from your house (not just following the natural ground slope). If water pools against your foundation, you'll be doing this job again.
Raised edges, borders, and areas around fire pits
Raised edge restraints (plastic or aluminum edging with spikes) need to come out before or during paver removal, since they lock the perimeter units in place. Pull the spikes and peel the edging back as you work your way to the border. For pavers around fire pits or raised features, the same approach applies: work outward from an open area toward the fixed structure, not the other way around.
Pavers close to fire pit rings or raised walls are often tighter and may have been cut to fit, so label or photograph the pattern before removal if you plan to reuse them and reinstall in the same configuration. If you need to cut pavers to fit around a feature during reinstallation, that's a separate job covered in detail elsewhere on this site.
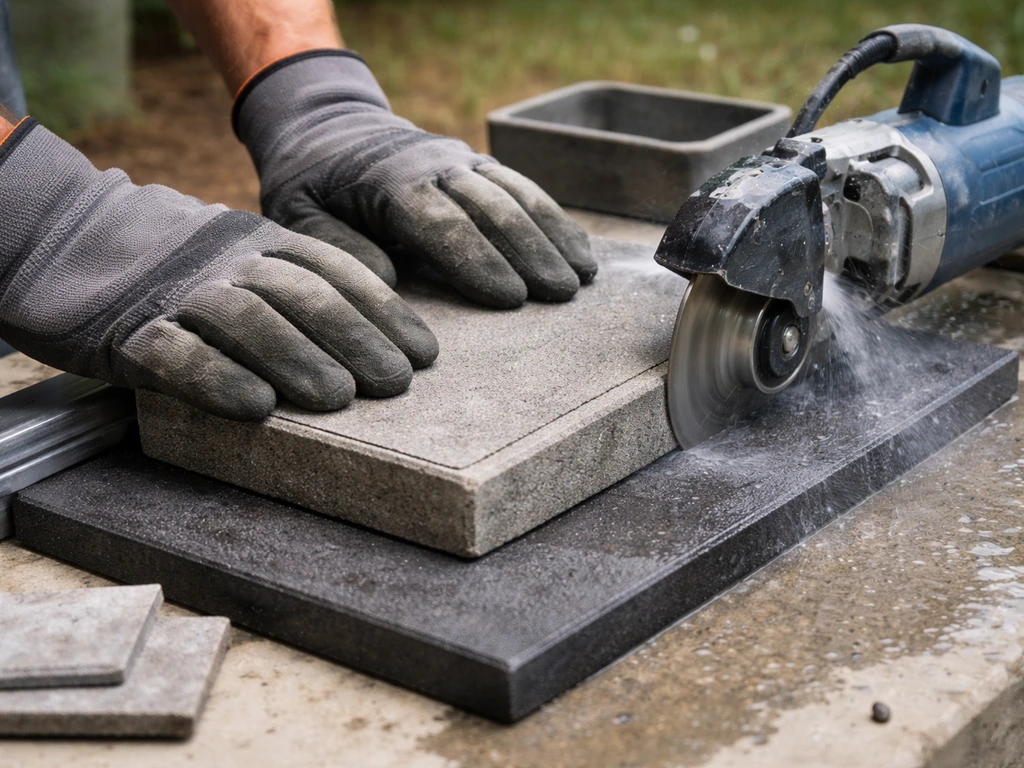
If you also need to cut patio pavers to fit around edges or features, use the right blade for the material and measure twice before you make each cut how to cut patio paver.
Cleanup, disposal, and getting ready for what's next
Dealing with debris and leftover material
Once all the pavers are up, you'll have a pile of sand, possibly some base gravel, old joint material, edge restraints, and debris. Once you have everything out, use the right disposal method for patio pavers so they don't end up in the wrong place how to dispose of patio pavers. Shovel the sand into a wheelbarrow and either bag it for disposal or set it aside if it's clean and you'll reuse it as base fill (not as bedding sand, which should always be fresh). Haul old edging and stakes to your trash or dumpster.
For the pavers themselves: reusable ones go on pallets or flat stacks as described earlier. Broken or cracked ones that you won't reuse need to go somewhere. Concrete pavers can usually be dropped at a local concrete recycling facility, some landscaping suppliers will take them back, or you can list them free on community sites like Nextdoor or Facebook Marketplace. Many people are happy to haul away free pavers for their own projects. If you're not sure what to do with extras, there's a full breakdown of options elsewhere on the site for extra patio pavers.
Prepping for re-laying or a base rebuild
Before you lay a single paver back down, do a honest assessment of the base. Walk on it, press down with your foot, and look for soft or spongy spots. Probe low corners with a screwdriver. Any soft areas need additional compaction or fill before you screed sand over them. Rent a plate compactor if you're rebuilding more than a small section. Use a rubber pad or mat under the plate compactor when you eventually compact the finished paver surface so you don't chip the edges.
Set your screed rails or guides to give you a 1-inch-deep sand layer with the correct drainage slope built in (1.5 to 2 percent away from structures). Rake and screed the sand smooth, but don't compact it. Bedding sand is meant to stay loose so the pavers can seat themselves and any excess can be pushed aside as they settle.
Then you're ready to start relaying. For cutting patio pavers in a circle, measure the radius carefully and use a wet saw or angle grinder to make accurate curved cuts cut patio pavers in a circle. If you're rebuilding an entire patio from scratch, you'll work through base installation, leveling, and pattern layout as a fresh install. If you're just resetting a section, start from a fixed reference point (a wall, an existing straight edge of pavers you kept in place, or a string line) and work outward.
A realistic time check
Removing a typical 200 to 300 square foot dry-laid patio takes most homeowners 4 to 8 hours with basic hand tools, depending on how tightly the pavers are interlocked and how much joint sand cleanup is involved. A mortared patio of the same size can take a full weekend. Add time for base work: raking and leveling an existing sand bed takes an hour or two, while a full base rebuild with compacted gravel can take another full day. Budget the time honestly so you're not racing to finish before weather changes.
FAQ
How do I tell if my patio pavers are dry-laid or mortared without damaging them?
Start with a small visual check at a joint and an inconspicuous edge paver. If the joint material looks sandy and you can loosen it by scratching with a screwdriver, it is likely dry-laid. For mortared installs, joints look continuous and rigid, and you typically see mortar smeared or bonded into the gaps, so plan on chiseling and replacing more units.
Can I remove patio pavers in sections and stop, then finish later?
Yes, but stabilize what remains. Remove pavers in a controlled pattern that keeps a firm “border” of intact units, avoid pulling from the middle of a large field, and don’t leave deep exposed base areas overnight if rain is possible. Cover open sand and base with a tarp or plastic to reduce washout.
What’s the safest way to pry up pavers if they are tightly interlocked and there’s no gap?
Create an entry point by removing one cracked, damaged, or cut-to-fit paver first, then work outward from that slot. Once you have a couple millimeters of clearance at the next joint, you can insert a pry bar gradually. Avoid twisting motions that chip corners, especially if you intend to reuse pavers.
Do I need to remove all bedding sand and base gravel if I’m only resetting a small area?
Not always. If the surrounding base is sound and you are only correcting a localized problem, you can often rake and re-screed the bedding sand in the affected zone. However, if you find soft or spongy spots when you step on or probe the base, you should excavate deeper and rebuild locally rather than trying to “top up” with sand only.
What should I do with polymeric sand in the joints during removal?
Keep it dry until you have the pavers lifted. Scrape and vacuum out joint material around each paver as you go, and avoid hosing the area. If polymeric sand has already gotten wet or is smeared across the surface, assume it will require extra mechanical scraping and more thorough cleanup before reinstallation.
How do I prevent pavers from breaking if I want to reuse most of them?
Use upward leverage progressively from more than one side, don’t force a pry bar straight through intact joints, and lift from exposed edges whenever possible. If the install is mortared, treat that as breakage risk and plan to replace those units rather than insisting on reuse.
What’s the correct disposal approach for joint sand and base material I remove?
Treat bedding sand as contaminated with fines and joint residue, especially if polymeric sand or weeds were present, so it usually shouldn’t be reused as bedding sand. You can often reuse clean, dry base gravel if it is properly separated and no longer contains soil or debris, but if you are unsure, bag it and dispose of it instead.
How should I handle weeds or grass that come up with the pavers?
Remove all visible roots and loosened soil from the excavation area before rebuilding. If you simply rake the surface and relay on top, you increase the chance of regrowth through new joint sand. Consider adding a suitable weed-control layer over the prepared base only if it matches your intended drainage and base plan.
How do I remove edge restraints or coping pieces without cracking adjacent pavers?
Pull spikes and peel edging back while you’re actively removing perimeter pavers, not after the perimeter units are loose. Keep the border units supported as you work so they don’t shift and chip during edging removal, and photograph the layout if your edging or border pavers include a special pattern.
My patio pavers look uneven or heaved, how do I decide whether to rebuild the base or just re-level sand?
Probe the base after lifting pavers. If you find soft spots, pumping, or widespread low and high areas, it indicates base or subgrade issues and you should rebuild with compacted gravel in lifts. If only the bedding sand is disturbed and the base feels firm everywhere, re-screeding fresh sand at the correct thickness and slope may be enough.
Can I compact the base with a plate compactor, and how should I protect the pavers?
Yes, but compact the base during rebuild, not the bedding sand. When it is time to compact the finished paver surface, place a rubber pad or mat under the plate compactor to reduce edge chipping and prevent pattern displacement. Also compact in overlapping passes rather than one spot at a time.
What drainage slope should I maintain when rebuilding, and how do I keep it consistent?
Aim for about 1.5 to 2 percent slope away from structures, roughly a quarter inch drop per foot. Build the slope at the sand and base stages by using screed rails or guides, then verify with a straightedge so the finished pavers match the intended grade.
How much time should I budget if I’m removing pavers plus rebuilding the base?
Plan for the higher end of the job. Lifting and clearing might be a half to full day, but excavating and rebuilding with compacted gravel typically takes another full day for many DIYers. Weather can add time, so if you’re digging, schedule extra buffer for rain delays and drying of disturbed areas.
Next Articles
How to Cut Patio Pavers Today: Tools, Steps, and No-Saw Options
Step-by-step ways to cut cement patio pavers today, including no-saw options, curved cuts, and rubber paver tips.
How to Apply Polymeric Sand to Patio Pavers: Step by Step
Step-by-step DIY guide to apply polymeric sand between patio pavers, prep joints, spread, fill, and activate without haz
How to Seal Paver Patio: Step-by-Step DIY Guide
Learn how to seal a paver patio step by step: clean, choose penetrating or wet-look sealer, apply, cure, and maintain.