
To sand and seal patio pavers, you sweep joint sand into the gaps between pavers, compact and brush off the excess, let everything dry completely, then apply sealer in two thin coats with a pump sprayer or roller. Cleaning, Sealing and Joint Sand Stabilization of Interlocking Concrete Pavement (CMHA/ICPI Tech Spec 5) – efflorescence guidance notes that Efflorescence removal: ICPI/CMHA recommend proprietary efflorescence removers (acidic cleaners formulated for masonry) applied per manufacturer directions, with low‑pressure application (30–100 psi pump spray), scrubbing if needed, thorough water rinsing, and drying before sealing; manufacturer cleaners (Prosoco, Sika, Techniseal) and specialty efflorescence products are commonly used rather than raw muriatic acid for DIY sensitivity. Done in the right order and in the right weather, the whole process takes a weekend and protects your patio for two to five years.
How to Sand and Seal Patio Pavers: Complete DIY Guide

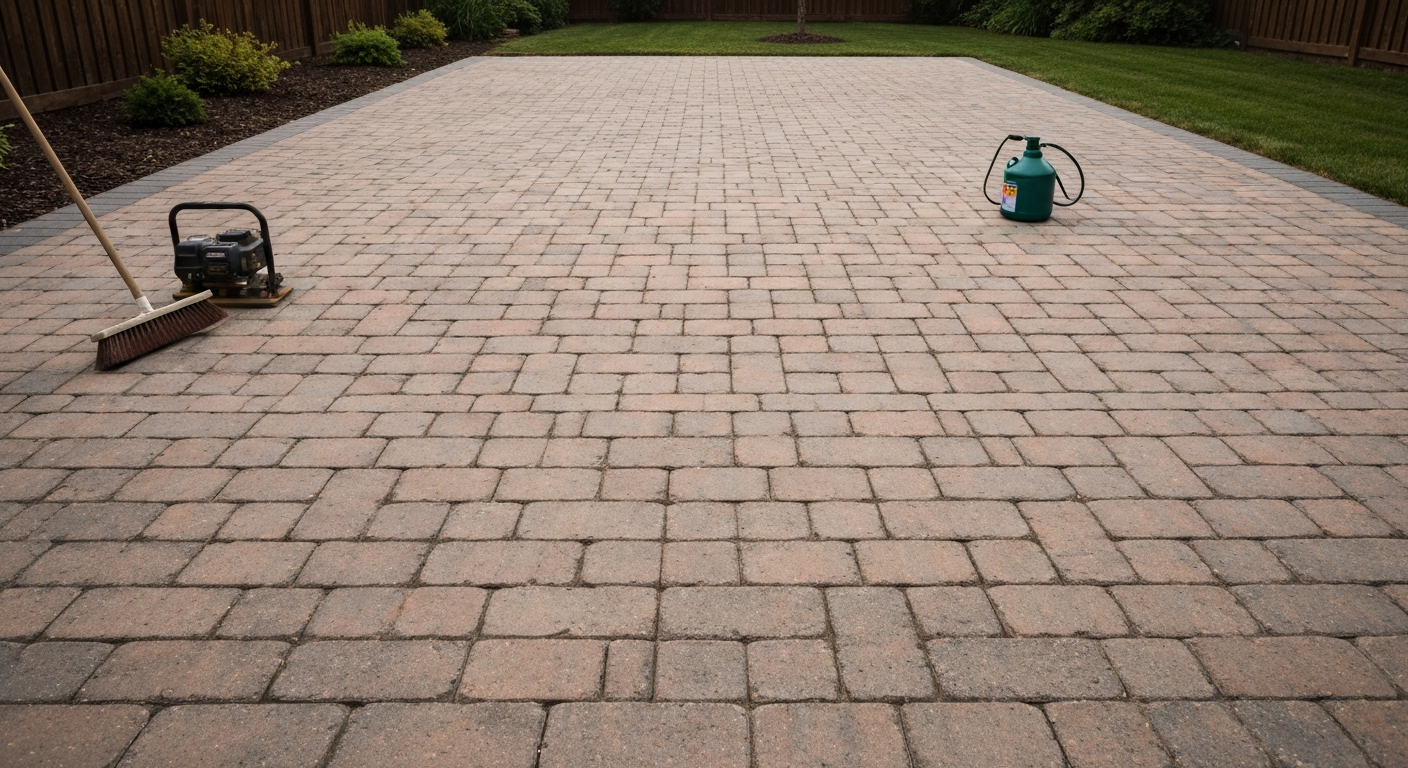
Do you actually need to sand and seal your pavers?
Not every patio needs this treatment, so it is worth being honest with yourself before you buy supplies. Sanding (joint-filling) is genuinely important if your existing joint sand has washed out, if weeds are pushing up between pavers, or if you have just laid a new patio and the original sand has settled low. Sealing is a good idea if your pavers are staining easily, if you want to slow efflorescence, if you want to lock in a richer color, or if you live somewhere with freeze-thaw cycles that stress the surface. Both steps together make the most sense on a patio that is already in good structural shape and clean.
You can skip sealing if your pavers are natural stone like travertine or certain tumbled limestones that require specific breathable sealers (check the stone type first), if the patio is less than two or three years old and still performing well, or if you simply prefer the natural, matte look. You can skip re-sanding if your joints are still full and firm. What you should not do is seal over gritty, depleted joints or dirty pavers, the results will look bad and will not last.
What sanding and sealing actually do, and what they do not
Joint sand does one job: it locks pavers in position by filling the gaps so the units cannot rock or shift against each other. Properly filled joints also reduce the space available for weed seeds to germinate and make it harder for ants to excavate bedding sand from below. That said, joint sand is not a waterproof barrier. Water still drains down through the joints, which is exactly what you want for drainage, so do not expect filled joints to eliminate all weeds forever, especially in shaded areas where seeds blow in on top.
Sealer works differently. A penetrating sealer soaks into the pores of the paver and repels water from inside, reducing staining, slowing efflorescence, and improving freeze-thaw resistance without changing the look much. A film-forming (topical) sealer sits on the surface and adds a visible sheen while creating a more stain-resistant barrier. Neither type makes pavers indestructible, and both need reapplication every two to five years depending on traffic and UV exposure. The realistic expectation is that sealing makes your patio easier to maintain and keeps it looking better longer, it is not a permanent fix.
Regular masonry sand vs polymeric joint sand, which one is right for you?
This is the first real decision point. Regular masonry sand (sometimes called coarse washed sand or bedding sand) is the traditional choice and has been used in paver joints for decades. Polymeric sand contains polymer binders that harden when activated with water, creating a firmer joint that resists washout and insects better. Both work, but they suit different situations.
| Factor | Regular (Masonry) Sand | Polymeric Sand |
|---|---|---|
| Cost | Low (under $10 per 50 lb bag) | Higher ($20–$35 per 50 lb bag) |
| Weed resistance | Minimal — seeds germinate easily | Good when properly activated and sealed |
| Ant resistance | Poor — easily excavated | Better once hardened |
| Washout risk | Higher in heavy rain or with hose use | Low when correctly installed |
| Application difficulty | Simple — sweep, compact, brush | Moderate — timing and water control are critical |
| Failure risk | Low — just refill if it washes out | Higher if pavers are damp or overwatered |
| Best for | Budget projects, large joints, first-time DIYers | High-traffic patios, areas with frequent rain, pest pressure |
| Joint width compatibility | Flexible — works in most gaps | Needs joints 1/8" (3 mm) min, typically up to 1/2" (13 mm) |
| Sealing over it | Seal any time after it is dry and set | Wait until fully cured (24–72 hr); confirm with manufacturer TDS |
My honest recommendation: if you are a first-timer, have large or irregular joints, or are working on a budget, start with regular sand and seal over it. If your patio gets heavy rain runoff, you have had serious weed or ant problems, or you want the most durable result and you are confident following precise instructions, polymeric sand is worth the upgrade. Just know that polymeric sand punishes mistakes, damp pavers, overwatering, or skipping the compaction step are common causes of hazy residue and poor bonding.
Penetrating vs film-forming sealer, matching the sealer to your goals
Penetrating sealers (silane, siloxane, siliconate, or silicate-based) soak into the paver and chemically bond inside the pores. They are breathable, typically very low or zero VOC, and leave little visible sheen. They resist efflorescence well because they do not trap moisture under a surface film. They are the safer choice if you have any concern about moisture being present in the pavers, if you live in a wet climate with freeze-thaw cycles, or if you want to preserve the natural look of the paver. Coverage varies widely by porosity, a highly porous concrete paver might take a gallon per 50 to 100 sq ft, while a dense unit might stretch to 200 to 250 sq ft per gallon.
Film-forming sealers (water-based or solvent-based acrylics, polyurethanes) build a visible coating on top of the paver. This enhances color, can add a wet-look or satin sheen, and provides a more obvious stain barrier. The trade-offs are real: glossy finishes can become slippery when wet, a genuine hazard on pool decks or ramps, and if you apply a film-forming sealer over damp pavers or over efflorescence you have not fully removed, you will trap moisture and get a white cloudy blush that is frustrating to reverse. These sealers also need more frequent recoating, typically every two to three years in high-traffic or high-UV areas.
| Factor | Penetrating Sealer | Film-Forming (Topical) Sealer |
|---|---|---|
| Visible finish | Natural/matte, minimal color change | Satin to high gloss, color enhancement |
| Breathability | Yes — moisture escapes freely | Reduced — non-breathable grades trap moisture |
| Slip risk | Low | Higher with glossy grades — add anti-slip additive for wet areas |
| Efflorescence risk | Low — does not trap surface moisture | Higher if applied over moisture or residue |
| Reapplication interval | 3–5 years typical | 2–3 years typical under foot traffic |
| Best paver types | Natural stone, highly porous concrete, wet climates | Dense concrete pavers where color enhancement is desired |
| VOC level | Typically very low to zero | Varies — solvent-based acrylics can be high VOC |
| Application method | Pump sprayer, roller, or brush | Low-pressure fan spray or foam roller (avoid atomizing) |
If you are sealing a patio near a fire pit, on a slope, or over concrete (where drainage is different), a penetrating sealer is the safer, more forgiving choice. For a standard concrete paver patio where you want that rich, just-rained-on color, a quality water-based acrylic topical sealer works well, just keep the coats thin and add an anti-slip additive if there is any wet-foot traffic.
Tools, materials, and how much you will need
Measuring your joints and calculating sand volume
Start by measuring the total patio area (length x width in square feet). Then estimate how deep your joints need filling, probe several joints with a thin screwdriver or pencil to find the current sand depth versus the top of the paver. You want joints filled to about 1/8 inch (3 mm) below the top of the paver or chamfer edge. For a typical 4x8 inch paver with 3/16-inch joints laid in a running bond pattern, industry estimates put joint volume at roughly 5 to 7 percent of total paved area. A 50 lb bag of joint sand covers approximately 30 to 50 sq ft of patio at a 1-inch fill depth, depending on joint width and spacing. When in doubt, buy one extra bag, unused sand stores fine in a sealed bag, and running short mid-project is genuinely frustrating.
Calculating sealer coverage
Always check the product data sheet (PDS) for the specific sealer you buy. Coverage varies enormously with paver porosity. A rough planning number for penetrating sealers on average-porosity concrete pavers is 100 to 200 sq ft per gallon for the first coat, with the second coat covering more since the surface is already partially saturated. Film-forming acrylics typically cover 150 to 250 sq ft per gallon per coat. If you have old, very porous, or recently cleaned pavers, plan on the lower end. It is always better to buy slightly more than to run out halfway through a coat and have a visible application line.
Full materials and tools list
- Joint sand (regular masonry sand or polymeric sand — see quantities above)
- Paver sealer (penetrating or film-forming, enough for two coats)
- Stiff push broom or brush (for sweeping sand into joints)
- Leaf blower (for clearing excess sand from paver surface before activation — critical for polymeric sand)
- Plate compactor with non-marring pad (rubber pad or carpet pad on the plate to protect paver surface)
- Low-pressure pump-up garden sprayer (1.5–2 gallon, for water activation of polymeric sand and sealer application)
- Foam roller or wide sealer roller with extension handle (alternative or supplement for sealer application)
- Garden hose with adjustable spray nozzle (for rinsing and polymeric sand activation)
- Pressure washer (1,000–1,500 PSI, wide 25–40° fan tip — for prep cleaning only)
- Efflorescence remover / masonry cleaner (pre-mixed or concentrate, per label)
- Degreaser or oil stain remover (if grease or oil spots are present)
- Concrete/paver adhesive or replacement pavers (for any cracked or damaged units)
- Plastic sheeting or painter's tape (to protect house foundation, plants, and adjacent surfaces during sealing)
- Bucket, stir stick
- Knee pads
- NIOSH N95 or P100 respirator (mandatory when handling polymeric sand or cutting pavers — crystalline silica hazard)
- Safety glasses or goggles
- Chemical-resistant gloves (nitrile or rubber, for cleaners and sealers)
- Old clothing or disposable coveralls (sealers stain)
- Caution tape or cones (to keep foot traffic off while curing)
Site inspection and prep, the step most people rush past
Prep is where the project succeeds or fails. If you seal over dirty pavers, you seal in the stains. If you skip fixing a wobbly paver, that paver will keep rocking and eventually crack the joint sand or sealer around it. Spend the time here and the rest of the job is straightforward.
General cleaning
Sweep the entire patio clear of debris, then wash it with a pressure washer set to 1,000 to 1,500 PSI using a wide 25- to 40-degree fan nozzle. Keep the nozzle 6 to 12 inches from the surface and angle the spray so it does not blast directly down into joints, that will excavate your existing sand. A surface cleaner attachment is great here if you have one. After washing, let the patio dry fully. In warm weather that typically means 24 to 48 hours. Do not seal or apply polymeric sand over even slightly damp pavers.
Oil and grease removal
Oil and grease are the enemies of both sand bonding and sealer adhesion. Apply a dedicated degreaser or paver oil remover to any dark spots, scrub with a stiff brush, and rinse thoroughly. Some deep oil stains in porous concrete pavers may need a second application. You will know the spot is clean when water no longer beads on it but the paver absorbs the rinse water normally.
Efflorescence treatment
Efflorescence is that white or gray powdery deposit that forms when soluble salts migrate to the paver surface. It looks like the paver is dusty or faded. Do not try to seal over it, the film-forming sealer will trap it and create a permanent blush. Use a proprietary efflorescence remover formulated for masonry (brands like Techniseal, Prosoco, or Sika make these), applying it with a low-pressure pump sprayer at 30 to 100 PSI, scrubbing with a stiff brush, and then rinsing thoroughly with plenty of clean water. Avoid raw muriatic acid for DIY use, it is aggressive, requires extensive neutralizing, and can etch softer pavers. After treatment, let the surface dry completely before proceeding. If efflorescence is severe and keeps returning, that usually signals a moisture issue in the base, fix that first, or it will come back through any sealer.
Replacing damaged pavers and fixing base problems
Walk the entire patio and press on each paver with your foot. Any paver that rocks, clicks, or sits noticeably high or low needs attention before you sand and seal. A paver that rocks means the bedding sand beneath it has been displaced or the base has settled. The right fix is to lift the paver, examine the bedding sand and base layer, correct the problem (add or regrade bedding sand, address any soft spots in the base), and relay the paver. ICPI Tech Spec 6 – Reinstatement of Interlocking Concrete Pavements provides step‑by‑step procedures for lifting pavers, inspecting and repairing the bedding and base (including replacement or compaction of bedding sand), and relaying pavers rather than patching when settlement or base failure exceeds routine tolerances. Cracked pavers should be replaced entirely, a crack will telegraph through any joint sand and sealer. If you notice a large area of settlement (more than a few pavers all sloping together), that may indicate a base failure that goes beyond cosmetic repair, and it is worth addressing the base before you invest in sanding and sealing. Edge restraints should also be checked and re-staked if they have shifted.
Step-by-step: filling joints with regular masonry sand
This is the simpler of the two sand options. The process is forgiving, and if something goes wrong you can just redo it. Make sure pavers are completely dry before you start. For a detailed step-by-step walkthrough on how to fill patio pavers, see our guide on how to fill patio pavers.
- Pour a small mound of dry masonry sand onto the patio surface — start in one corner and work in sections of about 50 to 100 sq ft at a time.
- Use a stiff push broom to sweep the sand diagonally across the joint lines, working it into the gaps. Sweep in multiple directions (0°, 45°, 90°) so the sand fills completely rather than bridging across the joint opening.
- Make one to two passes with a plate compactor fitted with a non-marring pad. The vibration settles the sand into the joints and simultaneously seats the pavers more firmly into the bedding layer.
- After compacting, sweep more sand over the surface to refill any joints that have dropped, then compact again. Repeat until joints remain consistently filled after compaction.
- Use a stiff broom to sweep all loose surface sand off the paver tops — do not leave sand sitting on the surface or it will interfere with sealer adhesion.
- Let the sand settle for 24 to 48 hours before sealing (longer if rain is expected). The sand needs to be fully dry and settled before sealer goes on.
- Check joint levels before sealing. Sand should sit roughly 1/8 inch (3 mm) below the top of the paver or chamfer edge — not flush with or above the surface, and not so deep you can see bare paver sides below 1 inch from the top.
Step-by-step: installing and activating polymeric joint sand
Polymeric sand demands more care than regular sand, but the result is a firmer, more weed-resistant joint. Read your specific product's technical data sheet (TDS) before you start, timing and water quantities vary between brands. The steps below reflect general best practices drawn from industry TDS documents, but always defer to your product's instructions.
- Confirm conditions: pavers and joints must be completely dry. Check the weather forecast and pick a window with no rain for at least 24 hours after you plan to activate (some products require 48-hour rain-free windows). Temperature should be above freezing — most products require a minimum of 32°F (0°C), and working between 50°F and 85°F (10°C to 29°C) gives the best results.
- Check joint dimensions: most polymeric sands require a minimum joint width of 1/8 inch (3 mm) and maximum of about 1/2 inch (13 mm), and a minimum joint depth of 1.5 inches (about 4 cm). Measure a few joints to confirm. If joints are outside these ranges, check your product's TDS for compatibility.
- Work in sections no larger than about 150 to 200 sq ft at a time, so you can complete compaction and activation before conditions change.
- Pour and sweep: distribute the polymeric sand across the surface and sweep diagonally in multiple directions to fill joints completely, just as you would with regular sand.
- Compact: run a plate compactor with a non-marring pad over the entire section once or twice. This is not optional — compaction is what allows the polymer to form a dense, bonded joint. Without it, the sand stays loose and bonds poorly.
- Blow off and check: use a leaf blower to remove all loose sand from the paver surface. This step is critical. Any polymeric sand residue left on top of the pavers will haze when activated. Run the blower in multiple directions and check that paver tops are clean. The sand in the joints should sit about 1/8 inch (3 mm) below the top of the paver or chamfer.
- Top up if needed: after blowing, some joints may have dropped slightly. Add a small amount of sand, sweep, compact again briefly, and blow clean again before activating.
- Activate with water: use a garden hose with a gentle showering nozzle (not a jet) or a pump sprayer set to a wide mist. Apply water evenly across the section, moving steadily. The goal is to saturate the joints — you will see the sand darken and the foaming from the polymer binders slow and stop. When water stops being absorbed into the joints and begins to pool on the surface, stop. Do not overwater. Excess water floats the polymer binders out of the sand and onto the paver surface, causing a hazy film.
- Let it cure: do not walk on the patio for at least 24 hours, and do not drive on it for at least 72 hours. Keep it dry for the rain-safe window specified on your TDS — this is typically 24 to 48 hours. The joint sand will harden to a firm but slightly flexible consistency as it dries.
- If you plan to seal after polymeric sand: wait until the sand has fully cured (at minimum the manufacturer's stated cure time, typically 24 to 72 hours) and the surface is bone dry before applying any sealer.
Avoiding the most common polymeric sand failures
- Damp pavers at application: even morning dew is enough to cause premature activation and bridging. Wait for a fully dry surface, confirmed by feel and by water droplet test (water should absorb into the paver, not bead).
- Skipping compaction: the joint will look filled but the polymer bonds poorly, leading to rapid washout or crumbling within a few rain cycles.
- Overwatering activation: more is not better. Flooding the joints washes polymer binder out of the sand and deposits it as a white haze on paver tops. Use a gentle shower and stop when joints stop absorbing.
- Leaving sand residue on paver tops before activation: any sand on the surface will fuse there when wet. Blow it off thoroughly.
- Applying in cold or rainy conditions: below freezing, the polymer will not cure properly. Rain before the product is rain-safe will wash out binders before they set.
Applying sealer to your patio pavers, the full process
Final pre-sealing checklist
Before opening the sealer, run through this mentally: pavers are fully clean and dry (at least 24 to 48 hours since any washing), joints are filled and at the right depth, no efflorescence or oil spots remain, temperature is within the sealer manufacturer's stated range (commonly 50°F to 90°F / 10°C to 32°C), no rain is forecast for at least 24 hours, and adjacent surfaces (house siding, garden beds, hardscape) are protected with plastic sheeting or painter's tape. For step-by-step instructions on how to apply sealer to patio pavers, consult the detailed guide (reference id 7bb5b534-507d-479a-b7b3-1198f10f0a72). For a step-by-step guide on how to seal paver patio, see the detailed guide (46380146-aa1c-4c9a-8e34-fe4ee6503a4b). For step-by-step finishing tips, see our guide on how to finish patio pavers.
PPE, do not skip this
Put on chemical-resistant gloves, safety glasses, and old clothing before opening any sealer. Solvent-based sealers require a respirator rated for organic vapors, not just a dust mask. Water-based sealers are less hazardous but still warrant gloves and eye protection. Work in a well-ventilated area and keep children and pets away until the sealer is fully cured.
Sealer application steps
- Stir (do not shake) the sealer thoroughly before use. Shaking introduces bubbles that can leave small craters in the finish.
- Apply the first coat using a low-pressure pump-up garden sprayer with a fan nozzle or a wide foam roller with an extension handle. The goal is a thin, even coat — not a puddle. Work in manageable sections of 50 to 100 sq ft, keeping a wet edge so you do not get lap marks.
- Avoid over-application: if sealer is pooling in the texture of the paver or running into joints in large amounts, you are applying too thick. Thin coats penetrate better and dry faster without leaving a milky residue.
- Allow the first coat to dry per the product TDS — commonly 1 to 4 hours for water-based sealers depending on temperature and humidity.
- Apply the second coat in the opposite direction to the first (if you rolled east-west the first time, roll north-south the second). Two thin coats always outperform one thick coat.
- Check coverage as you go. If the sealer is soaking in almost instantly and the surface looks dry right away, the pavers are very porous and may need a third thin coat. If it is sitting on the surface and not soaking in, you have likely applied enough.
- Keep foot traffic off the sealed surface for at least 24 hours, and avoid placing furniture or heavy objects on it for 48 to 72 hours. Full cure for most sealers is three to seven days.
- Clean your sprayer or roller immediately with the appropriate solvent (water for water-based sealers, mineral spirits for solvent-based) — do not let sealer dry in your equipment.
Troubleshooting common problems
| Problem | Likely Cause | Fix |
|---|---|---|
| White haze or blush after sealing | Sealer applied over moisture, or film-forming sealer trapping efflorescence | Strip with sealer remover, let pavers dry fully, treat efflorescence, reapply |
| Slippery surface when wet | Glossy film-forming sealer — over-applied or wrong product | Add anti-slip aggregate to next coat, or use a penetrating sealer instead |
| Sand washing out after rain | Regular sand with no sealer, or sealer applied before sand was fully set | Refill joints with sand, compact, let dry, then seal |
| Polymeric sand haze on paver tops | Residue not blown off before activation, or overwatering | Try dry scrubbing first; if persistent, use polymeric sand haze remover per product instructions |
| Weeds growing through joints | Seeds germinating on top of joint sand, or insufficient joint fill depth | Remove weeds, refill joints, compact, and seal with a film-forming or joint-stabilizing sealer |
| Sealer peeling or flaking | Applied over dirty/damp surface, or incompatible re-coat over old sealer | Strip old sealer completely, prep and reapply fresh coats |
| Joints crumbling after polymeric sand | Compaction skipped, joints too narrow/shallow, or rained on before cure | Remove failed sand, recheck joint dimensions, refill and re-activate in proper conditions |
| Color change looks uneven | Uneven sealer application or variable paver porosity | Apply a thin corrective second coat; some variation is normal with natural texture |
How long it takes and what it costs
For a typical 200 to 400 sq ft patio, plan on one full day for prep and cleaning (including dry time, often you will clean on Saturday morning and let it dry through Saturday), one half-day for sanding and compaction, and one half-day for sealing. Total active work time is roughly 4 to 8 hours depending on patio size and condition. The bigger time cost is waiting: 24 to 48 hours of dry time between cleaning and sealing, and another 24 to 72 hours of cure time after sealing. Plan this as a weekend project with built-in buffer time.
Cost estimates for a 300 sq ft patio (DIY, not including pressure washer rental if needed): regular masonry sand runs about $10 to $15 for the project; polymeric sand runs $40 to $80 depending on brand and bags needed. Efflorescence cleaner and degreaser add $15 to $30. Sealer is the biggest cost, budget $40 to $100 for a quality two-coat application depending on sealer type and coverage. Total DIY materials cost typically lands between $70 and $200 for a standard patio. Renting a plate compactor is about $50 to $75 per day if you do not own one, and a pressure washer rental is similar.
Notes for specific patio scenarios
Pavers installed over concrete
Pavers laid over an existing concrete slab drain differently than pavers over a gravel base, water cannot pass through the concrete base, so it tends to move toward the edges. This makes a penetrating sealer a better choice here than a film-forming sealer, which can trap moisture migrating laterally under the paver. Make sure edge drainage is clear before sealing.
Sloped patios and ramps
On any sloped surface, a glossy topical sealer is a slip hazard. Always add an anti-slip aggregate (check your sealer manufacturer's recommendations for compatible products) or choose a penetrating sealer with a low-gloss finish. Apply sealer starting at the top of the slope and work downward so you are not walking through fresh sealer.
Near fire pits and raised patios
The heat from a built-in fire pit can degrade film-forming sealers close to the burner ring over time, causing them to yellow or peel. For the ring of pavers immediately around the fire pit bowl, either leave them unsealed or use a penetrating silane/siloxane sealer rated for heat exposure. The rest of the patio can be sealed normally. On raised patios, pay particular attention to the perimeter edges, these are the most exposed to moisture and UV, so edge pavers may need an extra pass of sealer.
Uneven ground and areas with ongoing settlement
If your patio has areas that continue to settle or shift seasonally, sealing is at best a temporary cosmetic fix. Polymeric sand in particular will crack if the base underneath is still moving. Address the base problem first, lift the affected section, correct the compacted base and bedding sand layers, and relay the pavers, then sand and seal once everything is stable.
How often to re-seal and when to refill joints again
Penetrating sealers typically last three to five years on a residential patio. Film-forming sealers often need refreshing every two to three years in high-traffic or high-UV environments, or when you notice water no longer beads on the surface. A simple bead test tells you when it is time: pour a small cup of water on the paver surface. If it soaks in within 30 to 60 seconds rather than beading up, the sealer has worn down and it is time to reapply. Before resealing, always clean the surface and check joint sand depth, you may need to top up the sand before the next sealing cycle. Polymeric sand joints that remain intact do not need to be replaced, but regular sand joints may need refilling every one to two years in high-rainfall areas.
FAQ
Do I need to sand and seal my patio pavers?
Sanding joints is recommended whenever joint material is missing, loose, or prone to weed growth or washout; sealing is optional but advised when you want added stain resistance, color enhancement, reduced water absorption, or to help lock joint material in place. Choose sealing when pavers are porous, frequently stained (oil/food), in freeze‑thaw climates, or where aesthetics and easier maintenance matter. If the paving has an unstable base, large settlement, or active drainage problems, fix those first (lift/relay per ICPI guidance) before sanding or sealing.
Which joint sand should I use: regular (masonry sand) or polymeric (polymer‑modified) sand?
Use regular sand (coarse concrete/masonry sand) for wide joints (>1/2"), historic installations, or where you want easy future rework; it provides basic joint filling but can wash out and allows more weeds. Use polymeric sand when joints are within manufacturer limits (commonly 1/8"–1/2" width, ≥1.5" depth), you want stabilized joints with reduced washout and weeds, and you can meet requirements (dry joints, controlled activation, compaction). Read the polymeric sand TDS for minimum joint depth/width, compaction and watering procedures; avoid polymeric products in perpetually wet/submerged joints or where pavers are damp at application.
Which sealer type should I pick: penetrating vs film‑forming?
Penetrating sealers (silane/siloxane/siliconates/silicates) are film‑free, breathable, reduce water absorption, resist freeze‑thaw and efflorescence effects, and produce minimal color change—good for porous pavers and where breathability is needed. Film‑forming sealers (acrylics/urethane) create a visible sheen and improve stain resistance and color enhancement but can reduce slip resistance when wet, may trap moisture (risk of blushing), and typically need recoat more often. Match sealer to site: choose penetrating for pool decks, freeze‑thaw areas, or where minimal sheen is desired; choose film‑forming only when enhanced color/shine and stain blocking are primary goals and slip is managed.
What tools and materials do I need for the full sanding and sealing project?
Essential tools: stiff push broom, leaf blower, plate compactor with non‑marring pad, 25–40° fan nozzle or surface cleaner for pressure washer, pump sprayer or low‑pressure sprayer for sealer, foam roller (optional), hand tamper, shop vacuum, protective gloves, eye protection, and NIOSH‑approved respirator (N95 or better) for dusty work. Materials: chosen joint sand (polymeric or regular), paver sealer (penetrating or film‑forming), efflorescence or general masonry cleaner if needed, test patch materials (extra pavers if available), edge restraint repair materials, and anti‑slip additive if required. Consult SDS/TDS for PPE and handling.
What exact step‑by‑step workflow should I follow (including measurements and timing)?
1) Inspect and repair: check base stability; if settlement or base failure exists, lift pavers, fix base per ICPI Tech Spec 6, replace bedding sand and relay. 2) Clean: remove debris with broom/leaf blower. Pressure‑wash at moderate pressure (1,000–1,500 PSI; up to 2,000 PSI for durable units) with a 25–40° nozzle or surface cleaner; keep 6–12" distance and avoid aiming narrow jets into joints. Use efflorescence remover per manufacturer if present, rinse thoroughly, and let dry fully (48–72 hours depending on weather). 3) Prep joints: replace missing bedding sand to ensure proper depth. For polymeric sand, ensure joints and pavers are bone‑dry and plan work in sections ≤200 ft2 (manufacturer dependent). 4) Sweep sand into joints: fill joints to full depth but leave sand recessed ~1/8" (3 mm) below paver top for polymeric sand; for regular sand, overfill slightly then compact and brush flush. 5) Compact: run plate compactor (with protective pad) 1–2 passes to settle sand into joints; add more sand and compact until joints are full. 6) Clean residue: broom and blower to remove sand from paver faces until minimal residue remains. 7) Activate polymeric sand (if used): mist joints evenly with low‑pressure water in stages per TDS—spray until sand is visibly damp and polymer flows into joints; avoid overwatering or foaming; follow product cure time (commonly rain‑safe 24–72 hr, initial walkable after a few hours depending on product). 8) Test a small area: for sealer choice and application method, do a mock‑up (coverage, color change, slip). 9) Apply sealer: apply on a dry, clean surface with ambient temperature and humidity inside product limits—use low‑pressure fan spray or foam‑roller for film sealers; for penetrating sealers use recommended sprayer and apply 1–2 gallons per 50–250 ft2 depending on porosity—consult PDS for coverage. Avoid puddling and over‑application. 10) Cure and protect: allow sealer cure per manufacturer (commonly 24–72 hr before light use; film sealers may require longer before heavy traffic). Record product names and dates for future reseal scheduling.
How much sand and sealer will I need (measurements and coverage estimates)?
Joint sand: calculate joint volume = total paver area × average joint width × joint depth. Example: for 200 ft2 area with 1/8" (0.0104 ft) joint width and 1.5" (0.125 ft) depth: volume ≈ 200 × 0.0104 × 0.125 = 0.26 ft3 (~20 lb of sand). Bag coverages vary—polymeric sand commonly sold 20–22 lb/bag covering different joint geometries; check product TDS. Sealer: coverage varies with porosity—penetrating sealers may cover 50–250 ft2/gal; film sealers often 200–400 ft2/gal per coat. For calculation, perform a small test patch and measure actual coverage, then multiply to find gallons. Always buy extra (10–20%) for waste and variations.
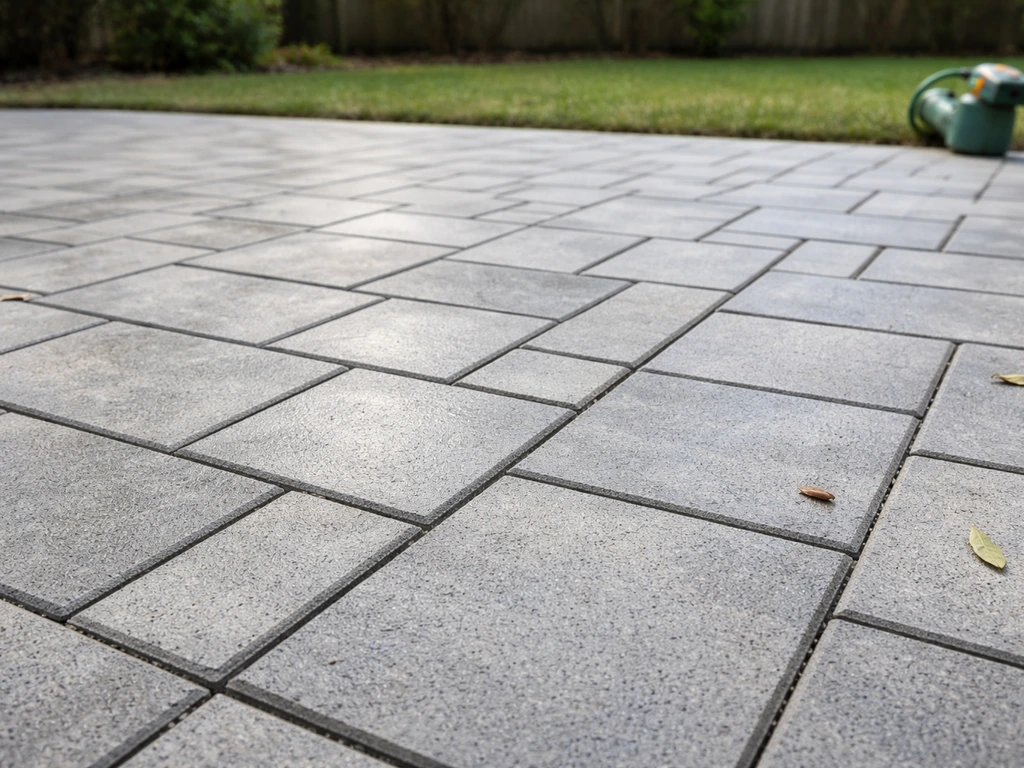
DIY guide to seal patio pavers, clean joints, use polymeric sand, choose sealer, and stop weed growth with proper prep.
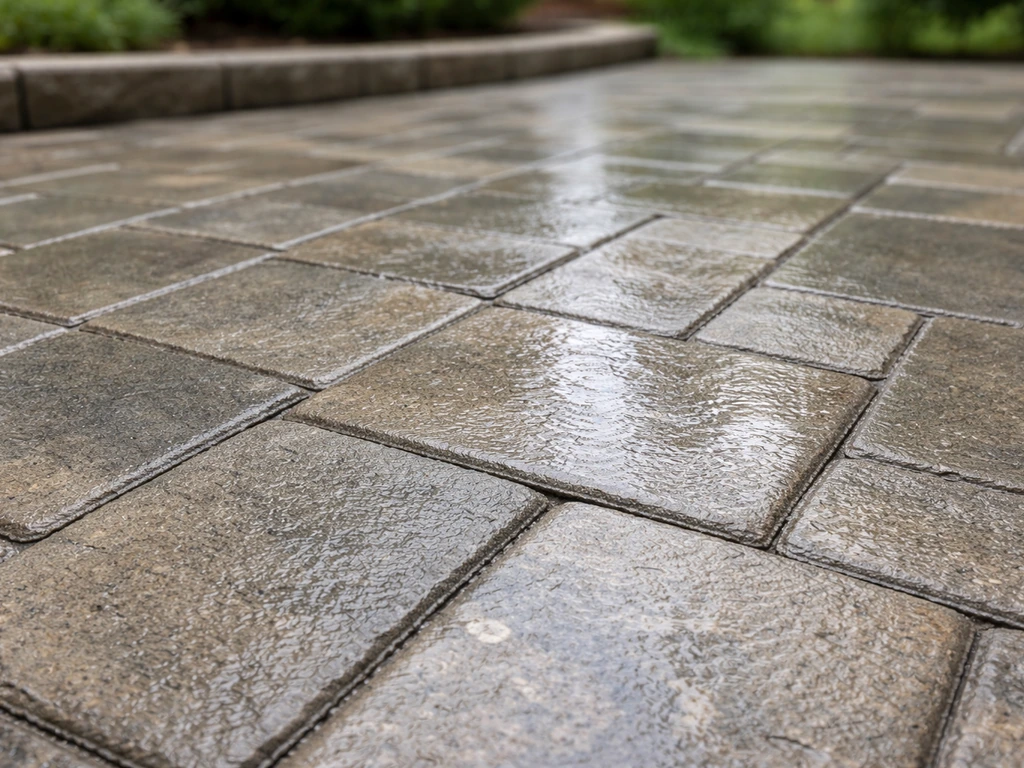
Learn how to seal a paver patio step by step: clean, choose penetrating or wet-look sealer, apply, cure, and maintain.
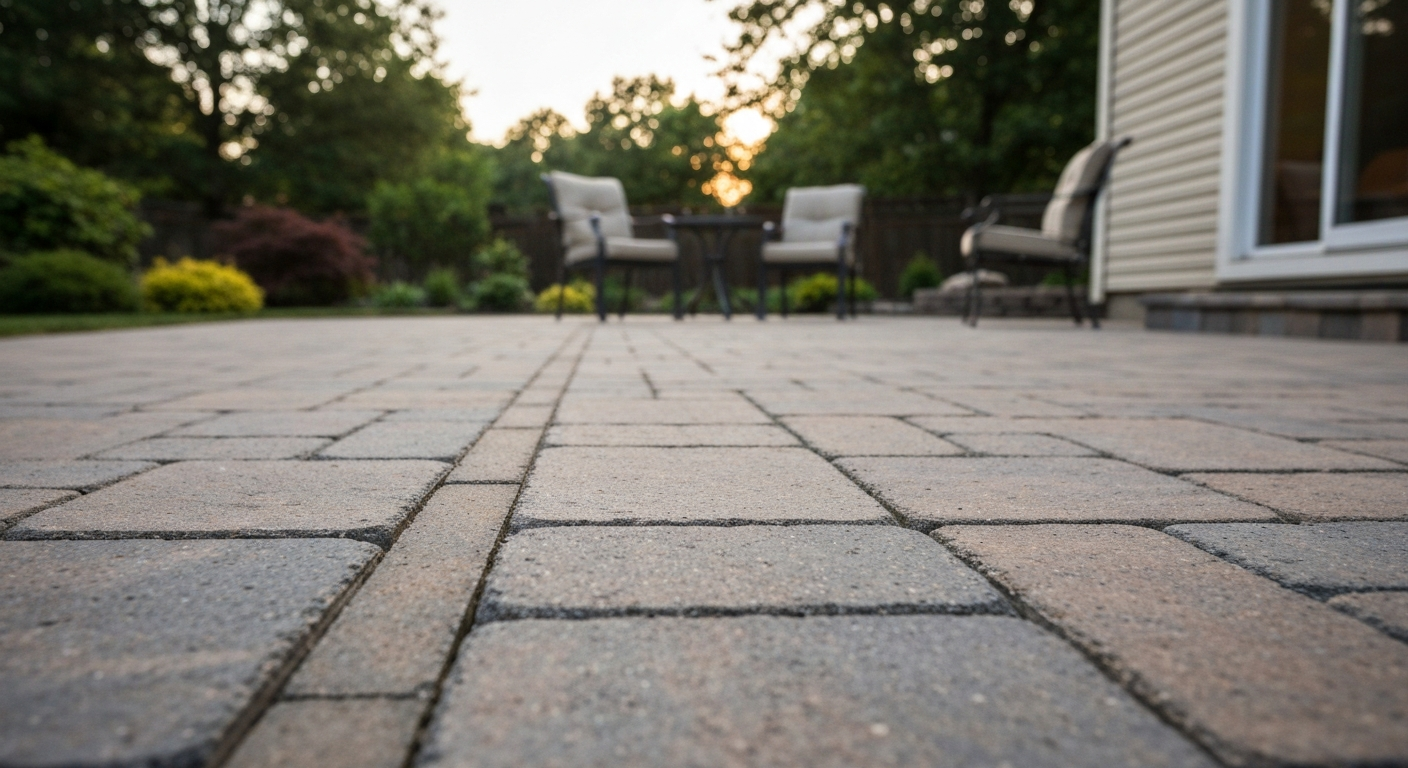
How to use Quikrete Patio Paver Jointing Sand: step-by-step application, tools, timing, coverage, and care.