
Quikrete Patio Paver Jointing Sand (Product No. 1150-59) is a fine, properly graded sand you sweep into the joints between pavers, dampen with a gentle mist, and refill over the first two weeks as it settles. Their polymer-modified version, PowerLoc Jointing Sand (No. 1150-47), works the same way but stiffens as it dries to resist erosion, weeds, and insects. Both products are genuinely DIY-friendly, but they have different activation requirements, and mixing them up is the most common mistake homeowners make. This guide walks you through the right product for your situation, exact prep steps, application, curing, and what to do when things don't go to plan.
How to Use Quikrete Patio Paver Jointing Sand: Guide & Tips

Felix Rowe
21 Jul 2026
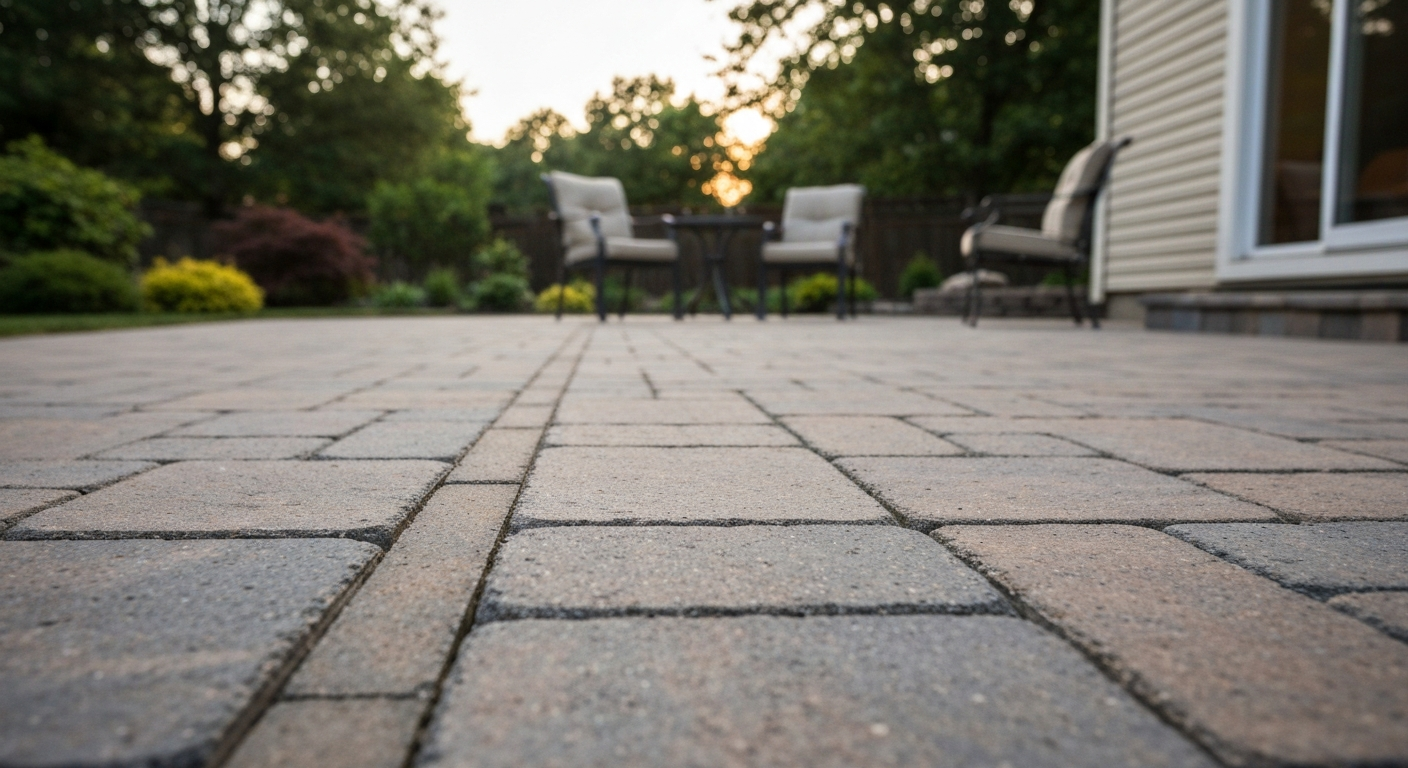
Which Quikrete jointing sand is right for you
Quikrete makes two distinctly different jointing sand products that often get confused at the hardware store. Understanding what each one actually is will save you a wasted trip and a frustrating redo.
Patio Paver Jointing Sand (No. 1150-59)
This is plain, kiln-dried, properly graded fine sand. There are no polymers or binders in it. You sweep it in, mist it, and it settles into the joints through gravity and compaction. Because it doesn't harden, you'll likely need to top it off several times during the first two weeks as it compacts. It's the right choice for dry-laid flagstone, natural stone with irregular joints, or situations where you want easy access to move a paver later. It's also cheaper per bag. The trade-off is that it's more vulnerable to washout from heavy rain and won't resist weeds or ants as well as the polymer version.
PowerLoc Jointing Sand (No. 1150-47)
PowerLoc is a polymer-modified sand, which puts it in the same category as what the industry calls polymeric sand. It contains sand (60 to 100%), Portland cement (1 to 5%), and acrylic polymer (1 to 5%). When you activate it with a fine mist of water, the binders link up and the sand stiffens as it dries. This creates a firm, erosion-resistant joint that does a much better job of keeping weeds and insects out. The activation process is more involved and less forgiving than plain jointing sand. Paver surfaces must be completely dry before you sweep it in, and you have to remove every trace of dry powder from paver faces before wetting. PowerLoc is designed for joints under 1/2 inch wide and is recommended for standard interlocking concrete pavers. It is not appropriate for areas with standing water or where streams of water regularly flow across the surface.
| Feature | Patio Paver Jointing Sand (1150-59) | PowerLoc Jointing Sand (1150-47) |
|---|---|---|
| Composition | Graded fine sand only | Sand + Portland cement + acrylic polymer |
| Hardens? | No | Yes, stiffens as it dries |
| Weed resistance | Low | Good |
| Erosion resistance | Low | Good |
| Max joint width | Up to 1.5" (flagstone, irregular) | Under 1/2" |
| Surface must be dry? | No strict requirement | Yes, completely dry |
| Traffic wait time | Walk on carefully same day | 24 hrs foot, 72 hrs vehicle |
| Refilling needed? | Yes, several times in first 2 weeks | Rarely after cure |
| Best for | Natural stone, flagstone, casual use | Interlocking concrete pavers, high-traffic patios |
Tools and materials you'll need
Gather everything before you start. Running to the hardware store mid-application with wet polymeric sand on your pavers is a situation you really want to avoid.
- Quikrete Patio Paver Jointing Sand or PowerLoc Jointing Sand (see coverage section for bag count)
- Stiff push broom or plate brush for sweeping sand into joints
- Leaf blower (critical for PowerLoc to remove surface dust before wetting)
- Garden hose with a gentle mist or fan-spray nozzle (never a jet or direct stream)
- Plate compactor with a urethane, neoprene, or rubber protective pad
- Hand tamper for small areas or tight corners a plate compactor can't reach
- Soft bristle broom for final surface cleanup
- Measuring tape for checking joint width and depth
- Safety glasses or goggles
- Impervious (nitrile or rubber) gloves, especially when handling PowerLoc
- N95 respirator or better for sweeping and pouring (the sand contains respirable crystalline silica)
A note on the respirator: this isn't optional. Quikrete's own Safety Data Sheet identifies respirable crystalline silica as a carcinogen via chronic inhalation. OSHA's silica rule for construction (29 CFR 1926.1153) and its respiratory protection standard (29 CFR 1910.134) both address exposure controls for exactly this type of task. An N95 mask costs about two dollars. Wear it whenever you're pouring, sweeping, or working near dry jointing sand.
Get the prep right before you open a single bag
Jointing sand performs exactly as well as your base and prep work allow. Skipping or rushing preparation is the single biggest cause of washout, uneven joints, and paver movement after installation.
Base and edge restraints
Your pavers need to be fully installed on a properly compacted base with edge restraints in place before you touch the jointing sand. For step-by-step instructions on laying pavers in a sand bed, see our guide on how to install patio pavers in sand. Industry practice (ICPI Tech Spec #2) is clear on this: pavers without rigid edge restraints will creep outward under load, opening up joints and causing joint sand to fall out over time. Plastic or aluminum paver edging spiked into the base is the standard solution. If you're still working on your base or paver layout, handle those steps first. If you need step-by-step instructions on laying a proper base and setting pavers, see how to make a patio with pavers and sand.
Clean, dry joints
For plain Patio Paver Jointing Sand, joints should be free of debris, old organic material, and weeds before you start. A stiff brush or compressed air works well. For PowerLoc specifically, both the paver surfaces and the joints must be completely dry. Any moisture in the joints or on the surface will prematurely activate the polymer binders, causing poor packing at the bottom of the joint and a haze on the paver faces that's difficult to remove. If it rained recently, wait for a full dry day (ideally two) before applying PowerLoc.
Compaction before jointing sand
Before you apply jointing sand, run a plate compactor over the installed pavers to achieve vertical interlock. Use a compactor plate with a protective urethane or rubber pad to avoid scuffing or etching paver surfaces. Industry guidance recommends a minimum plate compactor force of around 5,000 lbf at 75 to 100 Hz for typical residential pavers. This first compaction pass also helps seat pavers evenly and begins closing gaps. After this initial pass, you're ready to add jointing sand.
Joint width, depth, and paver spacing
Joint dimensions matter more than most people realize. Jointing sand fills only the joint space, so getting that space right determines how stable and attractive the finished result looks. If you're still laying pavers and thinking about spacing, that step connects closely to the overall installation process. For detailed guidance on setting consistent gap widths between pavers, see how to space patio pavers.
For standard interlocking concrete pavers with PowerLoc, joints should be no wider than 1/2 inch. The ideal range is 1/8 to 3/8 inch. Joints wider than 1/2 inch don't compact well with polymeric sand and are more prone to cracking after cure. For plain Patio Paver Jointing Sand, joints up to about 1.5 inches are workable, which makes it the right choice for irregular flagstone or natural stone with variable gaps.
Joint depth is equally important. The sand should fill the joint from the bottom up to within about 1/8 inch of the paver surface (just below the chamfer or beveled edge, if your pavers have one). Overfilling so sand sits flush with or above the paver surface causes it to get swept away and leaves residue on paver faces. Underfilling leaves joints weak and vulnerable to washout.
To check joint depth, lay a straightedge across two adjacent pavers and use a ruler to measure down to the existing sand or base. If old jointing sand is present, it should be at or below the 1/8-inch mark. If joints are deeper than about 1.5 inches, consider filling the lower portion with regular bedding sand first, then topping with jointing sand.
How many bags you'll need
Coverage varies significantly with paver size and joint width, so you really do need to calculate rather than guess. Quikrete provides an online calculator, but the table below gives you a useful starting point based on their PowerLoc TDS coverage data.
| Paver Size | Joint Width | Coverage per 50 lb bag (approx.) |
|---|---|---|
| 2" x 4" x 8" brick | 1/4" | ~16 sq ft |
| 2" x 4" x 8" brick | 3/8" | ~11 sq ft |
| 4" x 8" concrete paver | 1/4" | ~20 sq ft |
| 4" x 8" concrete paver | 3/8" | ~14 sq ft |
| 12" x 12" patio block | 1/4" | ~35 sq ft |
| Irregular flagstone (avg 1" joint) | Variable | ~8–10 sq ft |
Always buy 10 to 15 percent more than your calculation suggests. You'll need to top off joints after compaction and, for plain jointing sand, potentially several more times during the first two weeks. Returning for one extra bag mid-project is far better than running short. For PowerLoc especially, you want enough material on hand to complete the full project in a single session, since stopping partway through and resuming the next day creates inconsistent cure conditions across the surface.
There's no mixing required for either product. Both are ready to use straight from the bag. Just make sure the bags haven't been exposed to moisture in storage. A bag of PowerLoc that got wet in the garage may already have partially activated and will perform poorly.
Step-by-step application
Follow these steps in order. For a step-by-step how-to on how to put sand between patio pavers, see this practical guide. The sequence matters, especially for PowerLoc. See our step-by-step guide on how to apply polymeric sand to patio pavers for a visual walkthrough and extra tips. Skipping step 5 (removing surface dust before wetting) is the most common cause of polymer haze on paver faces. For step-by-step tips and timing details, see our guide on how to use patio paver sand.
- Check the weather forecast. For PowerLoc, you need dry conditions with no rain expected for at least 24 hours after application. Air temperature should be above 32°F and ideally above 50°F. Cold, humid, or wet conditions significantly slow stiffening. Plain Patio Paver Jointing Sand is more forgiving on timing, but still apply on a dry day.
- Confirm pavers are fully compacted and edge restraints are secure. Joints should be clean and, for PowerLoc, completely dry (wait 48 hours after any rain).
- Pour jointing sand onto the paver surface in manageable sections, roughly 50 to 100 square feet at a time. Don't dump the whole project's worth at once.
- Use a stiff push broom to sweep the sand diagonally across the joints, working it in at an angle to avoid pulling sand back out. Sweep in multiple directions to pack joints as fully as possible.
- Run the plate compactor (with protective pad) over the filled section. This vibration drives sand deeper into the joints and helps seat it. After compaction, joints will look partially empty again — this is normal.
- Sweep another layer of sand across the joints to refill what settled during compaction. Repeat the sweep-and-compact cycle two or three times until joints are consistently filled to within about 1/8 inch of the surface.
- Critical for PowerLoc: use a leaf blower to remove all remaining sand and dust from paver faces and surfaces before wetting. Any loose material left on the surface will bond to the pavers when wet and create a haze that is very difficult to remove. A soft broom pass followed by a leaf blower works well.
- For plain Patio Paver Jointing Sand: use a garden hose on a fine mist or gentle fan setting to dampen the paver surface so water runs into the joints. Avoid a jet stream, which will wash sand out. Wet thoroughly, let it settle, then check joints and refill any low spots. Expect to repeat this refilling process several times over the next two weeks as the sand settles further.
- For PowerLoc: apply a gentle fine mist (fan nozzle, not a jet) that floods the paver faces and allows water to run into the joints. Don't direct the hose nozzle straight down into joints — flood the surface and let the water carry into the joints naturally. Repeat the misting at least three more times during the first hour, allowing the surface to absorb between passes. The goal is thorough saturation without pooling or running water that would wash sand out.
- After misting PowerLoc, keep foot traffic off for at least 24 hours and keep vehicles off for at least 72 hours. Humid, wet, or cool conditions will extend these times. Let the surface dry completely before assessing the results.
Moist curing, activation, and the first week
Activation is where the two products diverge most sharply in how much attention they need.
Plain Patio Paver Jointing Sand (No. 1150-59)
There's no chemical cure to manage here. The sand simply needs to settle and compact via gravity, foot traffic, and light rain. Quikrete's own product data sheet notes that you may need to refill joints several times during the first two weeks. This is completely normal, not a sign of a failed install. Check joints after each rain or every few days, sweep in more sand, and lightly mist again. After two to four weeks of this cycle, the joints typically stabilize. You can walk on the pavers immediately, just avoid dragging heavy objects or furniture that might pull sand out of fresh joints.
PowerLoc Jointing Sand (No. 1150-47)
The first hour after wetting is the most critical. You're repeating the misting cycle three or more times during that window to ensure water penetrates fully to the bottom of every joint. Under-misting leaves the lower portion of the joint dry and unactivated, which means the top crust hardens but the bottom stays loose. That's a recipe for cracking and joint failure later. That said, overwatering is equally damaging. Pooling water or a running stream across the surface will wash activated sand right out of the joints. Use a fan spray held at least two feet above the surface and work in slow, even passes.
After the final misting, the joints will look slightly dark and wet. That's correct. As they dry over the next 24 to 48 hours, they'll lighten and firm up. In warm, sunny, low-humidity conditions this can happen within 24 hours. On a cool, overcast day with high humidity, stiffening might take 48 to 72 hours. If rain falls within the first 24 hours on freshly activated PowerLoc, you may see some surface wash. Light rain after about 6 hours typically causes minimal damage. Heavy rain in the first few hours can wash out joints and require a redo.
PowerLoc's manufacturer notes that the material will soften somewhat in persistently wet conditions and can partially reheal if disturbed, but it is not designed for areas with standing water or regular water flow across the surface. If your patio has drainage issues, resolve those before applying any jointing sand.
Specific scenarios: sloped patios, over concrete, fire pit areas
Sloped patios
On a sloped surface, misting must be done with extra care. Water naturally runs downhill and will carry loose sand with it if you're not gentle. Use a very fine mist held well above the surface. Apply multiple light passes rather than one heavy soak. For slopes greater than about 2 percent, plain jointing sand may need more frequent topping during the first two weeks. PowerLoc generally performs better on slopes once cured, but the misting technique is more demanding.
Pavers installed over existing concrete
The jointing sand application process itself is the same, but drainage is more restricted when pavers are laid over concrete. Joints often stay wetter longer, which can slow PowerLoc's cure and increase the risk of efflorescence (white mineral deposits on the surface). Make sure there are some drainage gaps at the perimeter and that water isn't trapped under the paver layer. If you notice white haze after PowerLoc cures, a diluted acidic cleaner (following product guidance) typically removes it.
Fire pit areas
Both jointing sand products are fine for the paver field around a fire pit. However, the pavers immediately adjacent to a built-in fire pit or fireplace experience significant heat cycling, which expands and contracts both pavers and joints. Plain jointing sand handles this better than polymeric because it's flexible and easily replenished. If you're using PowerLoc near a fire pit, plan for the possibility that joints close to the heat source may need periodic repair.
Troubleshooting common problems
Sand washed out after rain
For plain jointing sand, some washout from heavy rain in the first two weeks is expected. Top off and re-mist. If you're losing significant sand every time it rains and the pavers have been down for more than a month, check your slope and drainage. Water should be shedding off the patio, not pooling and running across it. If washout is chronic, consider switching to PowerLoc for a repair application once the underlying drainage is fixed.
PowerLoc didn't harden
This almost always comes down to one of three causes: under-misting (water didn't reach the lower portion of the joint), joints that were damp when sand was applied (premature partial activation before compaction), or cold/wet weather slowing the cure. Give it more time first, in cool weather, 72 to 96 hours may be needed. If joints remain loose after that, the most likely cause is moisture in the joints at application time. You'll need to remove the sand, let everything dry thoroughly, and reapply.
Haze or residue on paver faces
This is the classic PowerLoc mistake: dry sand or dust left on paver surfaces before wetting. The polymer bonds the fine particles to the paver face. Fresh haze (within a few hours) can often be scrubbed off with water and a stiff brush. Cured haze may require a diluted acid-based paver cleaner. Going forward, the leaf blower step before wetting is non-negotiable.
Uneven joint depth or gaps opening up
If joints look uneven after cure, the most common cause is inconsistent base compaction before paving, not the jointing sand itself. Pavers that shift slightly under load will open or close joints. Check that your edge restraints are still fully spiked in place. For cosmetic repairs, sweep in fresh sand, compact lightly by hand, and re-mist.
Weeds or ants appearing in joints
Plain jointing sand offers little resistance to weed seeds germinating in joints, this is normal and expected. Regular sweeping and occasional spot treatment help. If weeds are a persistent problem, transitioning to PowerLoc on your next repair cycle is worthwhile. For ant activity, the same principle applies: a well-packed polymeric joint gives insects much less to work with.
Long-term maintenance and when to add more sand
No jointing sand lasts forever. Plain jointing sand typically needs a top-off every one to two years depending on traffic, climate, and drainage. PowerLoc joints can last several years before needing attention, but do inspect them each spring. Look for joints that are more than 1/4 inch below the paver surface, any crumbling or cracked material, or areas where weeds or ants have established themselves.
For repair applications with PowerLoc, remove any loose or compromised existing material with a stiff brush or a joint scraper, blow the joints clean and dry, and apply fresh PowerLoc following the same steps as a new installation. You don't need to redo the entire patio, spot repairs work well as long as you feather the new material into the surrounding joints neatly.
Sealing your pavers after jointing sand has fully cured can extend the life of both the pavers and the joint material. Wait at least 90 days after PowerLoc application before applying a sealer to ensure the joints are fully cured and any efflorescence has been resolved. A penetrating sealer that goes on after jointing sand can help lock in the joint material and reduce staining from organic debris.
Safety and cleanup
Clean up spilled jointing sand immediately, especially from pavers, sidewalks, and storm drains. Rinse tools and the hose nozzle with clean water after use. PowerLoc that has partially cured on tools is much harder to clean than fresh product, so don't let it sit. Dispose of empty bags according to your local waste guidelines. Store any unused bags in a dry location off the ground, moisture infiltration in storage will partially activate the polymer binder and render the product unusable.
Wear your respirator, gloves, and eye protection from the moment you open the first bag until the sweeping and blowing steps are fully complete. OSHA's respiratory protection standard (29 CFR 1910.134) and silica guidance recommend using N/R/P95 or better respirators and implementing a written respiratory program (fit testing, training, cleaning) when respirators are required for silica‑containing dusty tasks 29 CFR 1910.134 - Respiratory protection (OSHA). Once the sand is in the joints and the surface is clean, the dust hazard is largely gone. But during pouring and sweeping, fine silica particles are airborne and the exposure risk is real. PPE during this phase is the right call every time.
FAQ
What product information and specifications do I need from Quikrete to write an accurate how‑to for Patio Paver Jointing Sand and polymeric-style jointing sands (PowerLoc/HardScapes)?
Collect the product technical data sheets (TDS) and safety data sheets (SDS) for the exact Quikrete SKU you’ll cover (e.g., Patio Paver Sands 1150‑49/59, PowerLoc 1150‑47, HardScapes 1175‑56). From the TDS gather intended uses, maximum recommended joint width/depth, activation/wetting procedure, recommended compaction and traffic times, coverage/yield tables and limits (e.g., joint size limits). From the SDS note composition (silica, Portland cement, polymer content), acute/chronic hazards, PPE recommendations, and first‑aid instructions. Also capture manufacturer troubleshooting notes (washout limits, not for standing water) and any product calculators or yield charts on Quikrete’s site.
How does Quikrete Patio Paver Jointing Sand differ from Quikrete polymeric-style jointing sands (PowerLoc/HardScapes)?
Patio Paver Jointing Sand (non‑polymeric) is a properly graded fine sand that stabilizes joints but relies on mechanical interlock and may settle — it can require repeat topping during initial weeks. Polymeric‑style jointing sands (PowerLoc/HardScapes) contain a polymer or cement binder that activates with water to form a semi-rigid joint that resists erosion, weeds and ants. Key differences: polymeric sands require completely dry joints and surfaces before installation to avoid premature activation and haze; polymeric sands stiffen after wetting and drying (manufacturer lists minimum cure/traffic times); non‑polymeric sands tolerate slightly more moisture during placement but may wash out more easily and need periodic top‑ups.
What preparatory steps and site conditions must be met before installing Quikrete jointing sand?
Ensure pavers are installed per ICPI/industry practice (correct base depth, well‑compacted aggregate base, proper bedding sand, correct pitch/drainage and rigid edge restraints). Joints and paver faces must be clean and bone‑dry for polymeric products; non‑polymeric sand also performs best with dry joints. Remove all debris, dust and loose bedding sand from joints using a broom, compressed air, or vacuum. Verify joint widths and depths meet product limits (consult TDS; many polymeric products recommend joints between ~1/8" and 1/2" and minimum joint depth equal to joint width or at least 1" where specified). Protect surrounding landscaping and seal off drains before wetting.
What tools and materials should a homeowner have on hand for this job?
Materials: Quikrete jointing sand SKU specified (PowerLoc or Patio Paver Sand), extra bags for topping, potable water for misting, and optional polymeric cleaner if manufacturer recommends. Tools: stiff broom, push broom, leaf blower or vacuum, plate compactor with a protective pad (urethane/neoprene) for delicate pavers, hand tamper for small areas, garden hose with fine‑mist nozzle or pump sprayer, gloves (rubber/impervious), safety glasses, N95 or P100 respirator when handling dusty bags (per SDS/OSHA), measuring tape, square/ruler for checking joint widths, scraper for removing excess sand, buckets, and shop towels for cleanup.
Step‑by‑step application procedure for Quikrete Patio Paver Jointing Sand (non‑polymeric)
1) Confirm joints and paver faces are dry and clean. 2) Pour or broadcast sand and sweep it into joints until full to the paver shoulders. 3) Use a plate compactor (with pad) or hand tamper to vibrate/settle sand into joints; repeat sweeping and compaction until joints are tightly packed and slightly below paver edges if required. 4) Remove excess sand and dust from paver faces (broom, blower). 5) Lightly mist the surface if the product PDS recommends dampening for settling — note standard non‑polymeric PDS states you may need to re‑fill joints several times over the first two weeks as the sand settles. 6) Allow curing/settling per product guidance and monitor joints, topping up as needed.
Step‑by‑step application procedure for Quikrete PowerLoc/polymeric jointing sand
1) Only proceed when paver surfaces and joints are completely dry (check forecast for at least 24–48 dry hours). 2) Sweep product into joints until joints are full up to the paver shoulders; compact with a plate compactor (urethane pad) or hand tamper to seat sand and eliminate voids; repeat filling and compaction until joints are tightly packed. 3) Remove all loose sand from paver faces — use a leaf blower and broom to avoid residual dust. 4) Activate the polymer by applying a fine mist of water so water runs over pavers and into joints; follow TDS instructions (manufacturers often recommend multiple short mists rather than heavy flooding and repeating misting several times within first hour). 5) Do not over‑wet — avoid puddles/streams and do not introduce long‑term standing water. 6) Allow the recommended set time (manufacturer lists minimums like 24 hours for foot traffic, 72 hours for vehicle traffic) before use.
Next Articles
How to Use Patio Paver Sand: Step by Step DIY Guide
Step-by-step guide to apply patio paver sand correctly: prep base, set pavers, fill joints, compact, and troubleshoot is
How to Install Patio Pavers in Sand: Step-by-Step
DIY step-by-step how to install patio pavers in sand, from excavation and base prep to leveling, cutting, joint sand and
How to Make a Patio With Pavers and Sand Step by Step
Step-by-step guide to install paver patio with sand setting layer, from planning and base to leveling, cutting, joint fi