
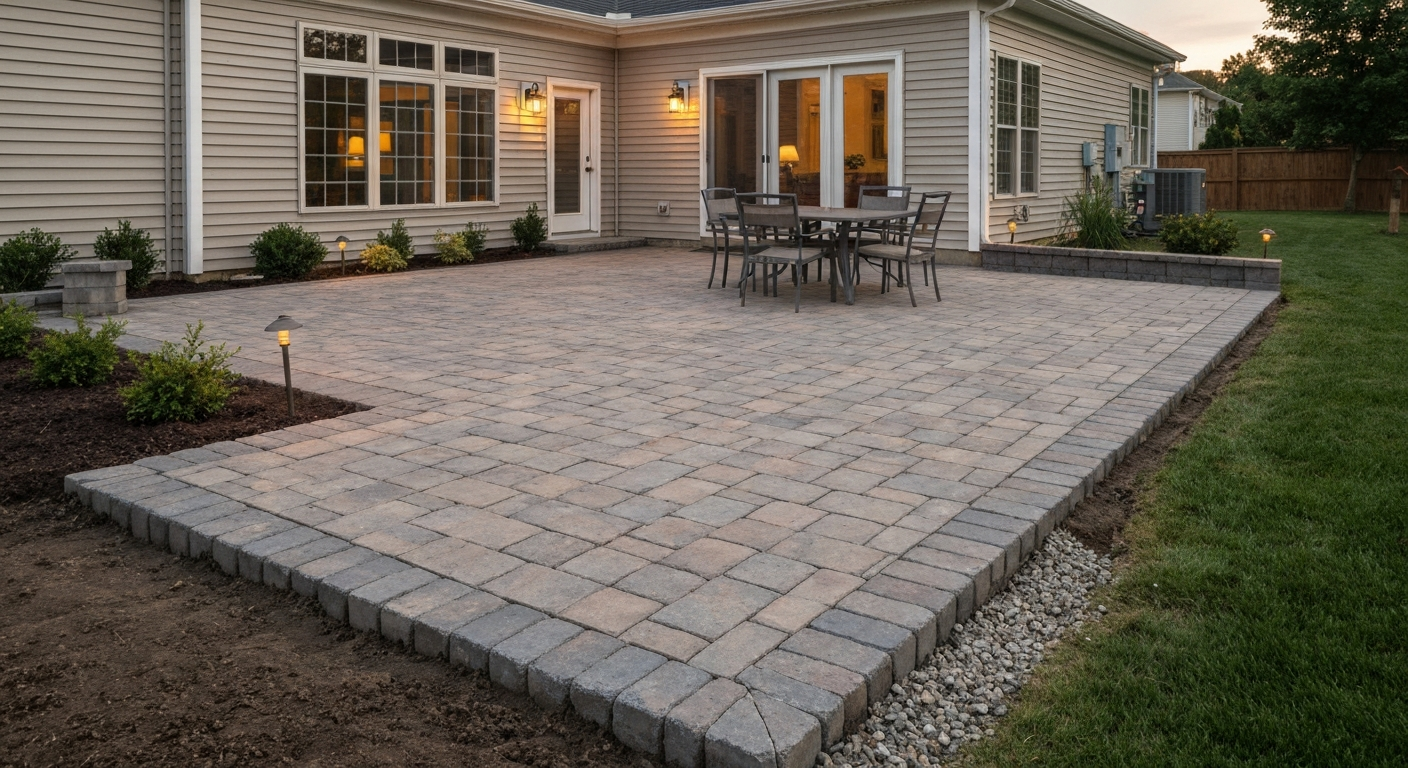
You can build a durable, good-looking stone paver patio yourself in a single weekend for a small space, or across two to three weekends for a mid-size project. For a step‑by‑step walkthrough on how to build a patio with paving stones, see the linked guide for detailed instructions and illustrations. The work breaks down into six stages: planning and design, site prep and excavation, base compaction, bedding and laying pavers, cutting and edging, and finishing with joint sand and sealer. Do each stage right and the patio will stay flat and stable for decades. Skip a step (especially base compaction) and you will be releveling pavers within a few years.
How to Create a Patio with Stone Pavers: Complete DIY Guide

Felix Rowe
9 Aug 2026
Who this guide is for and what you'll actually build
This guide is written for homeowners who are comfortable with physical labor, basic measurements, and renting equipment like a plate compactor. You do not need construction experience, but you do need patience. By the end, you will have a properly excavated, compacted, and laid stone paver patio at grade, meaning it sits at or just above the surrounding ground level. If you are planning something more involved, like a raised patio with a retaining wall or a patio built over an existing deck structure, those projects involve additional structural decisions. This guide focuses on a standard at-grade installation, which is the best starting point and covers about 90 percent of residential patio projects.
That said, many homeowners eventually want to connect their patio to a raised deck, incorporate a fire pit, or handle a sloped backyard. I will cover those scenarios in dedicated sections so you know what the at-grade foundation looks like and where the variations branch off.
Plan your patio before you touch the ground
The most common DIY mistake I see is skipping the planning phase and going straight to digging. Thirty minutes of layout work on paper saves hours of rework outdoors. Start by answering four questions: Where exactly will the patio go? How large does it need to be? What will you use it for? And how do people get to it?
Location and orientation
Walk your yard at different times of day. A patio on the west side of the house gets afternoon sun, which is great in spring and fall but brutal in July. A north-facing patio stays shaded all day in northern climates. Think about privacy too: a patio in direct sightline of neighbors may need a screen or planting buffer. Also check for tree roots nearby. Large roots can disrupt your base over time, and cutting major roots can stress or kill the tree.
Size and purpose
A comfortable table for four needs roughly a 12 by 12 foot space (144 sq ft). Add a grill station and you want 16 by 16 feet minimum. A lounge area with chairs works in a 10 by 14 foot rectangle. Do not size a patio based on what leftover space you have. Size it based on how you will use it, then check whether it fits the yard. Sketch it on graph paper at a 1:10 scale and tape off the footprint with stakes and string before you commit.
Access and drainage
Every patio must slope away from your house. The industry standard, backed by Belgard and other major manufacturers, is 1.5 to 2 percent, which works out to about 1/8 to 1/4 inch of drop per foot. For a 12-foot-wide patio running away from the house, that means the far edge sits 1.5 to 3 inches lower than the edge at the foundation. This is not optional. Without it, water pools against your foundation and finds its way into the basement.
Zoning and permit considerations
Most municipalities do not require a permit for an at-grade paver patio because it is considered an impervious surface addition rather than a structure. However, that changes quickly if your patio is over a certain size (commonly 200 to 400 sq ft depending on locality), if it is attached to the house in a way that adds load to the foundation, or if you live in an HOA with its own design approval process. Check with your local building department before you order materials. A five-minute phone call can prevent a stop-work notice.
Design choices: stone type, color, pattern, and edges
The words 'stone pavers' cover a wide range of products, and the differences matter both aesthetically and practically. Natural stone and manufactured concrete pavers behave differently underfoot, in freeze-thaw conditions, and in terms of installation difficulty.
Stone types compared
| Material | Look and texture | Durability | DIY difficulty | Approx. cost per sq ft |
|---|---|---|---|---|
| Concrete pavers | Uniform, many colors/finishes | Excellent, consistent thickness | Low to medium | $3–$8 |
| Natural flagstone | Irregular, natural variation | Good if thick; uneven shapes | Medium to high | $8–$20 |
| Travertine | Warm, porous, tumbled look | Moderate; porous in freeze-thaw | Medium | $10–$20 |
| Slate | Flat, layered, dark tones | Good in mild climates; splits in freeze-thaw | Medium | $8–$18 |
| Bluestone | Blue-gray, refined look | Excellent, widely used in Northeast US | Medium | $12–$25 |
| Porcelain pavers | Tile-like, very uniform | Very hard, low absorption | Medium (needs wet saw) | $10–$25 |
For most first-time DIYers, concrete pavers are the right choice. They come in consistent thicknesses (usually 2 3/8 in or 3 1/8 in for pedestrian use), which makes bedding and leveling straightforward. Natural flagstone is beautiful but irregular thickness means more fussing at every piece. Porcelain looks stunning but requires a diamond wet saw for cuts and is unforgiving if your base is not perfectly level.
Patterns and layouts
The pattern you choose affects how the eye reads the space and how much cutting you will do. Running bond (offset rows like brick) is simple and minimizes cuts. Herringbone at 45 or 90 degrees locks the pavers together structurally and is recommended for any area that might see vehicle traffic. Basketweave is visually interesting but creates a lot of perpendicular joints. Random or ashlar patterns work well with natural stone. My honest advice: if this is your first project, pick running bond or a simple stack bond and save the complex patterns for round two.
Edge styles
Edges define the visual quality of a finished patio more than most people expect. Options include a clean soldier course (pavers laid end-to-end along the perimeter), a curved edge using a flexible plastic restraint as a guide, a straight edge with a concrete border, or a step edge if the patio is slightly raised. Whatever edge style you choose, the structural edge restraint underneath it must be staked into the compacted base, not just into soil. That detail is critical and covered fully in the installation section.
Matching your home and landscape
Warm-toned brick homes generally pair best with tan, buff, or terracotta pavers. Gray or white siding works well with charcoal, slate blue, or cool gray pavers. If your home has a natural stone facade, pulling that same stone family into the patio creates strong visual continuity. When in doubt, bring a photo of your home's exterior to the paver supplier and let them walk you through samples in natural light.
Tools and materials checklist
Getting the right tools on site before you start prevents the classic mid-project run to the hardware store. Here is what you need, split by category.
Must-have tools
- Plate compactor (rent, do not buy unless you have ongoing projects): 3,000–5,000 lb compaction force minimum
- Hand tamper for corners and edges the plate compactor cannot reach
- Mason's line and line level (or laser level for accuracy)
- Tape measure and marking paint or chalk line
- Rubber mallet for seating pavers
- Long straightedge or screed board (a 2x4 works at 8 ft lengths)
- Screed rails (1-inch diameter conduit pipes are ideal for setting bedding sand)
- Push broom and stiff-bristle broom for joint sand
- Excavation tools: flat spade, pointed spade, and a mattock for roots
- Wheelbarrow for moving aggregate and spoils
- Angle grinder with diamond blade for cuts, or a circular saw with diamond blade
- Chisel and hammer for small natural stone adjustments
- Torpedo level and 4-foot level
Optional but useful tools
- Wet tile saw or masonry wet saw (strongly recommended for porcelain or large volume cutting)
- String line corner clamps for holding layout lines
- Soil compaction tester (DIY version available; helps verify base readiness)
- Paver splitter or guillotine cutter (rented, good for high-volume straight cuts in concrete pavers)
- Sod cutter for removing grass efficiently (saves time on larger areas)
Materials and consumables
- Stone pavers (calculated quantity plus 10% waste allowance)
- Compacted aggregate base: ASTM D2940 dense-graded crusher run or ASTM No.57 stone for permeable setups
- Bedding sand: ASTM C33 coarse sand, 1-inch depth after compaction
- Joint sand: kiln-dried sand or polymeric sand (not for permeable systems)
- Plastic or aluminum edge restraints with 10-inch spikes
- Landscape fabric (optional, below base aggregate only, never above base)
- Paver sealer (optional but recommended for natural stone and light-colored concrete pavers)
Personal protective equipment (PPE)
- Safety glasses or goggles (mandatory when cutting)
- Hearing protection when operating plate compactor or power saw
- Dust mask or N95 respirator when cutting stone or mixing polymeric sand
- Work gloves with cut resistance
- Steel-toed boots or heavy work boots
- Knee pads for laying and leveling work
Realistic time and cost expectations
I want to be straight with you here. Building a paver patio is real physical work spread over multiple days. Anyone who tells you a 400 sq ft patio is a single-day project either has a crew or has never actually done one solo.
Time ranges by project size
| Project size | Approximate sq ft | DIY time estimate (2-person crew) | Key time drivers |
|---|---|---|---|
| Small | Up to 150 sq ft | 1–2 weekends | Excavation and base compaction |
| Medium | 150–350 sq ft | 2–3 weekends | Base prep, material hauling, cuts |
| Large | 350–600 sq ft | 3–5 weekends | All phases, especially base and edging |
| Very large or complex | 600+ sq ft or slopes/retaining | 6+ weekends or phase over a season | Engineering, drainage, wall work |
These estimates assume two adults working full weekend days (6 to 8 hours each day) with rented equipment arriving on time. Solo projects take roughly 50 to 60 percent longer. Weather, soil conditions, and material delivery logistics all add time.
Cost breakdown
For a mid-range concrete paver patio in the 200 to 300 sq ft range, expect to spend $1,200 to $2,800 in materials if you are doing the labor yourself. That breaks down roughly as: pavers at $3 to $8 per sq ft, base aggregate at $0.50 to $1.00 per sq ft installed, bedding sand at about $0.30 per sq ft, edge restraints at $1 to $2 per linear foot of perimeter, and tool rental (plate compactor, saw) at $100 to $250 for the weekend. Natural stone or porcelain pushes material costs to $2,500 to $6,000 for the same footprint. Add sealer at $30 to $80 per gallon (one gallon covers about 80 to 150 sq ft depending on porosity). A professional crew doing the same job typically charges $15 to $35 per sq ft installed, so DIY saves real money if you can manage the labor.
Factors that push costs up fast include heavy clay or rocky soil (more excavation time and disposal fees), sloped sites requiring extra base material or a retaining wall, and premium stone choices. Disposal of excavated soil is a real cost people forget: renting a dumpster or hauling spoils runs $150 to $400 depending on volume and location.
Assess your site before you dig
The conditions under your patio determine how much base material you need and whether any engineering is required. Never assume all sites are the same.
Soil type and drainage
Do a simple drainage test: dig a hole about 12 inches deep and fill it with water. If the water drains within an hour, you have good drainage (sandy or loamy soil). If it sits for several hours, you have clay-heavy soil that drains poorly. Clay soil is the most common problem in DIY patio projects. It holds moisture, heaves in freeze-thaw cycles, and compresses unevenly under load. On clay, you will need to excavate deeper and potentially add geotextile fabric between the subgrade and base aggregate to prevent clay migration upward into your base layer.
Slope and grade
Measure your existing slope using a long level and tape measure. Place the level on the ground, hold one end up until it reads level, and measure the gap between the level and the ground at the low end. Divide that gap by the horizontal distance to get your slope percentage. If the yard already slopes away from the house at 1 to 2 percent, your excavation can follow that grade. If the yard slopes toward the house, you will need to address drainage as part of the base design, either by adding a catch basin or French drain at the low end of the patio.
Existing surfaces: grass, concrete, and asphalt
Over grass: this is the most common starting point. Remove sod completely. Grass and organic material left under the base will decompose, settle, and destabilize your patio. Use a sod cutter or flat spade to remove sod plus about 1 inch of topsoil. Then excavate for your full base depth.
Over existing concrete: if the concrete is in good condition (no major cracks, heaving, or hollow spots), you can lay pavers over it using a dry-mortar bed or an approved setting compound. However, this raises the finished height significantly and requires careful drainage transition at the edges. A cracked or heaving slab should be broken out rather than paved over.
Over uneven ground: if the ground undulates more than 3 to 4 inches across the patio area, you may need to do rough grading first (cutting high spots, filling and compacting low spots) before establishing your base depth. Fill material must be clean, compactable aggregate, never soil, wood chips, or debris.
Freeze-thaw and frost depth
If you are in a region with hard winters, frost depth matters. FHWA guidance and standard industry practice do not require you to excavate to the full frost line for a pedestrian patio (which could be 4 feet in Minnesota), but you do need to use a non-frost-susceptible base material. ASTM D2940 crusher run and ASTM No.57 aggregate are both non-frost-susceptible, meaning water does not wick through them the way it does through clay or silty sand. On frost-susceptible soils (clay, silt), going deeper (6 to 8 inches of compacted base rather than 4) gives your patio significantly better long-term stability.
Permits, utilities, and staying safe on site
When you need a permit
Call your local building department and ask two questions: does an at-grade paver patio over (your sq ft) require a permit, and are there impervious surface limits on my lot? Many municipalities restrict how much of a residential lot can be covered by impervious surfaces (often 30 to 50 percent of the lot area) to manage stormwater runoff. If you are already close to that limit, a large patio could push you over and trigger a permit requirement or a mitigation plan. If you want to add a fire pit, that may have separate setback requirements from property lines and structures.
Call 811 before you dig
In the United States, calling 811 at least three business days before you dig is the law, not a suggestion. A utility locator service will come to your property and mark underground gas, electric, water, sewer, and telecom lines with colored flags or paint. Digging through a gas line or buried electrical conduit can be fatal. Make the call. If you have a sprinkler system, mark those lines yourself before excavation since they often are not covered by utility locating services.
Site safety checklist
- Utility lines marked and flags clearly visible before any digging starts
- Excavated spoils staged away from the patio area, not next to open trenches
- Plate compactor operated with two hands; keep bystanders (especially children) back 10 feet minimum
- Angle grinder and wet saw used with blade guards in place and eye/hearing protection on
- Stone dust and concrete paver cutting generates silica dust; always wear a dust mask or N95 when cutting
- Hydration and shade available; patio work in summer sun leads to heat exhaustion faster than most people expect
- First aid kit on site
- Never work alone when operating heavy rented equipment if possible
How to estimate quantities and order materials
Getting material quantities right saves you from two bad outcomes: running short mid-installation or paying restocking fees on a massive surplus. Here is how to calculate each component.
Paver quantity
Measure your patio's length and width in feet and multiply to get square footage. Add 10 percent for a standard rectangular or running bond pattern (to cover cuts and breakage). Add 15 percent if you are using a diagonal or herringbone pattern, because diagonal cuts on perimeter pavers waste more material. Divide total sq ft (with waste) by the coverage per pallet or unit shown on the product spec sheet to get your pallet count. Always order a few extra pieces from the same production run because paver colors can vary between batches.
Base aggregate
For a standard pedestrian patio, you need 4 to 6 inches of compacted base. CMHA, Application Guide for Interlocking Concrete Pavements / Tech Notes and ICPI guidance specify compacted aggregate base depths by use: pedestrian patios/walkways 4–6 in, residential driveways 6–8 in, and heavier/vehicular applications 8–12+ in CMHA — Application Guide for Interlocking Concrete Pavements / Tech Notes. Because aggregate compacts by about 20 to 25 percent, you order more than the finished depth. Use this formula: (Patio sq ft x base depth in feet x 1.25) divided by 27 equals cubic yards to order. For example, a 200 sq ft patio with a 5-inch base: 200 x 0.417 ft x 1.25 = 104.2 cubic feet, divided by 27 = 3.9 cubic yards. Order 4 cubic yards. If you are on clay soil with freeze-thaw exposure, use 6 to 8 inches of base and adjust accordingly.
Bedding sand
The bedding layer is 1 inch deep after compaction. Formula: Patio sq ft divided by 12 divided by 27 = cubic yards needed. For 200 sq ft: 200 / 12 / 27 = 0.62 cubic yards. Round up to 0.75 cubic yards. Use ASTM C33 coarse sand. Do not use mason sand or beach sand; they are too fine, compress unevenly, and allow pavers to shift.
Joint sand
Joint sand fills the gaps between pavers. Coverage varies by joint width and paver thickness, but a general rule is one 50-lb bag of polymeric sand per 25 to 30 sq ft of typical paver joints. For a 200 sq ft patio, plan on 7 to 9 bags. Check the manufacturer's bag coverage chart for your specific paver and joint width.
Edge restraints
Measure the full perimeter of your patio in linear feet. Edge restraint typically comes in 8- or 10-foot sections. Divide your perimeter by section length and add one extra section. Include enough 10-inch spikes: plan for one spike every 12 inches on straight runs and every 6 to 8 inches on curves.
Quick reference estimating table
| Material | Formula | Example: 200 sq ft patio, 5-in base | Notes |
|---|---|---|---|
| Pavers | Sq ft x 1.10 (or 1.15 diagonal) | 220 sq ft worth | Match production run/batch |
| Base aggregate | (Sq ft x base depth ft x 1.25) / 27 | ~4 cu yd | 4-6 in pedestrian; 6-8 in on clay/freeze-thaw |
| Bedding sand (ASTM C33) | Sq ft / 12 / 27 | ~0.7 cu yd | 1-inch finished depth only |
| Polymeric joint sand | Sq ft / 25–30 per 50-lb bag | 7–9 bags | Check mfr. coverage chart |
| Edge restraint | Perimeter LF / section length + 1 | Varies by shape | Add extra for curves |
| Spikes for restraint | 1 per 12 in straight; 1 per 6-8 in curves | Perimeter x 1/ft | 10-inch spike minimum |
Phase 1: Excavation and grading
Mark your patio perimeter with stakes and string, then extend it outward about 6 inches on all sides. This extra width is where your edge restraints will sit. Use marking paint or a hose to indicate the cut line on the ground. Calculate your total excavation depth: finished patio height minus base aggregate depth (4 to 6 inches) minus bedding sand depth (1 inch) minus paver thickness (typically 2 3/8 or 3 1/8 inches). Most at-grade patios require removing 8 to 11 inches of soil total.
Excavate in sections. Start at the house and work outward. Use the string lines set to your finished slope grade (1.5 to 2 percent drop away from the house) as your depth reference. Remove all sod, roots, and organic material. Never leave organic material in the base zone. It will decompose and your patio will settle unevenly.
Phase 2: Building the compacted base
This is the most important phase. A paver patio is only as good as its base, and the base is only as good as its compaction. CMHA and major manufacturers like Unilock specify compacting base aggregate to 95 to 98 percent of maximum dry density (Standard Proctor, ASTM D698). You cannot achieve that with a hand tamper on a full base depth. A plate compactor is required.
Place base aggregate in lifts no deeper than 6 inches of loose material at a time, then compact each lift before adding the next. One pass of the plate compactor is not enough: make at least two to three overlapping passes over each section, then check that the aggregate no longer moves or shifts underfoot. On a typical 5-inch finished base, you will place about 6 to 6.5 inches of loose aggregate per lift and compact it down to 5 inches.
After compacting the full base depth, check your grade with a long straightedge and level. Adjust any high or low spots by scraping down or adding a small amount of aggregate and recompacting. Your finished base should match your planned slope within about 1/4 inch across the entire surface.
Phase 3: Setting the bedding layer and screed
Spread ASTM C33 bedding sand over the compacted base to a depth of about 1 to 1.25 inches. Place two 1-inch diameter conduit pipes parallel across the base as screed rails, spaced 4 to 6 feet apart. Rest your screed board (a straight 2x4 or metal straightedge) on the rails and pull it toward you in a smooth motion to create a perfectly level, 1-inch-deep sand surface. Remove the rails carefully after screeding each section and fill the rail grooves with loose sand.
Do not compact the bedding sand before laying pavers. Do not walk on it. Do not let rain sit on it overnight before you lay. The bedding layer should be placed and covered with pavers the same day if at all possible.
Phase 4: Laying pavers
Start at a straight reference edge, typically the house foundation or a chalk line you have snapped as a starting course. Lay pavers by setting each one straight down into the sand, not sliding them in from the side (sliding disturbs the bedding). Use a rubber mallet to seat each paver firmly. Maintain consistent joint spacing using paver spacers or by eye if the pavers have molded spacer nubs (most concrete pavers do). Check your layout for straightness and level every 4 to 5 rows using a long straightedge and level.
Work from the installed pavers outward, kneeling on the already-laid surface rather than on the screeded sand. Lay the full field first, then address cuts at the perimeter. Never force a paver into a joint by hammering; if it does not seat flush, pull it, adjust the sand depth, and reset.
Phase 5: Cutting, edging, and restraints
Once the field is laid, mark cut pavers by placing them face-up over the gap and marking the cut line with a pencil or chalk. For straight cuts in concrete pavers, an angle grinder with a diamond blade works well. For curved cuts or high volume, rent a paver splitter or wet masonry saw. Porcelain pavers must be cut with a diamond wet saw only. Always wear eye protection, hearing protection, and a dust mask when cutting.
Install edge restraints after all cuts are in place. Press the restraint firmly against the outside edge of the last paver course, seated on the compacted base, not on the bedding sand layer, and drive 10-inch spikes through the restraint's pre-drilled holes into the base every 12 inches. On curves, use flexible plastic restraint and spike every 6 to 8 inches. If the restraint is not anchored solidly into the base, the perimeter pavers will creep outward over time, especially through freeze-thaw cycles. This is one of the most common reasons DIY patios fail at the edges.
Phase 6: Compacting the finished surface and jointing
Before adding joint sand, run the plate compactor over the entire paved surface. Use a rubber or neoprene pad under the compactor's plate to avoid scratching pavers. This final compaction seats all pavers firmly into the bedding layer and brings the surface to a consistent plane. Make two to three passes. Check for any pavers that are rocking or sitting higher or lower than their neighbors and adjust them now before the joints are filled.
Sweep joint sand across the surface using a push broom, working it into the joints from multiple directions. If using polymeric sand, follow the manufacturer's instructions precisely. Most products require sweeping in two or three passes, then activating with a fine water mist. Polymeric sand must be dry on the paver surface before activation; any residue left on the paver face will haze and bond. Read the temperature and humidity limits on the bag: most polymeric sand products should not be installed below 32 degrees F or above 95 degrees F, and should not be wetted if rain is forecast within 24 hours. After activation and curing, run the plate compactor one final time with the pad to lock joints.
Drainage, slopes, and what to do with a challenging site
Most sloped backyards fall into one of three scenarios. First, the yard slopes gently away from the house already: this is ideal. Set your patio grade to follow that natural fall and your drainage is handled. Second, the yard slopes toward the house: you need to intercept water before it reaches the patio and foundation. Install a channel drain or linear strip drain at the far (low) edge of the patio connected to a downslope drain point. Third, the yard slopes laterally: this creates an uneven patio surface if you follow the grade. In this case, establish a level or gently sloped patio plane and add a retaining edge on the downhill side, which may grow into a small retaining wall depending on elevation change.
For sites with significant slope (more than 6 inches of elevation change across the patio footprint), consider building a raised patio section with a retaining wall. Combining a flat paved surface with a low retaining wall is one of the most functional and attractive solutions for sloped suburban yards. That process involves additional engineering decisions around wall drainage and base construction that go beyond the scope of a basic at-grade install.
Special scenarios: fire pits, backyard patios, and connecting to a deck
A fire pit integrated into a paver patio is one of the most popular design requests. Built-in fire pit rings require a non-combustible surround, typically fire-rated brick or natural stone, and a specific clearance from any combustible materials (check your local code, but 10 feet from any structure is a common minimum). The patio base beneath and around a fire pit is installed the same way as the rest of the patio. Do not use standard concrete pavers directly as the fire ring wall; they are not fire-rated and can spall or crack from repeated heat exposure.
Backyard patio projects that are freestanding (not adjacent to the house) follow the same installation steps but have more flexibility in orientation and drainage direction. For step-by-step instructions on how to make a backyard patio with pavers, see our full guide to building a backyard paver patio. The base depth and compaction requirements do not change regardless of where the patio sits in the yard.
Connecting a paver patio to an existing deck creates a transition zone that needs attention. For step-by-step guidance on integrating a paver patio with an existing deck, see our detailed guide on how to build a patio deck with pavers. The patio surface needs to be set at a height that works visually and functionally with the deck boards without creating a trip hazard. Typically, the top of the pavers should sit 1/2 to 1 inch below the top of the deck surface. Because decks move seasonally with wood expansion and contraction and frost, the patio and deck should not be rigidly tied together. Leave a 1/2-inch gap between the deck framing and the edge restraint to allow for independent movement.
Permeable paver systems: when they make sense
Permeable interlocking concrete pavement (PICP) is a legitimate option if your municipality has impervious surface restrictions or if you are managing stormwater on a tight site. The U.S. EPA recognizes PICP as an official stormwater Best Management Practice. The installation method differs from standard sand-set construction in important ways: the base uses open-graded aggregates (ASTM No.57 stone for the base, No.8 stone for the bedding layer) instead of dense-graded crusher run and bedding sand, and the joints must be filled with clean angular aggregate, not polymeric or fine sand. Using polymeric sand in a PICP system blocks drainage and defeats the entire purpose of the system. PICP also requires more careful long-term maintenance including periodic vacuum sweeping to prevent sediment from clogging the aggregate reservoir.
Sealing and ongoing maintenance
Sealing is optional for concrete pavers but recommended for natural stone (especially travertine and limestone) and for light-colored concrete pavers in climates with significant staining potential from leaves, iron, or lawn chemicals. Wait at least 60 to 90 days after installation before applying sealer to allow any joint sand and efflorescence to fully settle and cure. Clean the surface thoroughly and allow it to dry completely before applying. Apply sealer with a low-pressure sprayer or roller in a thin, even coat. Two thin coats outperform one heavy coat.
For ongoing maintenance, sweep regularly to prevent organic debris from decomposing in joints. Re-apply joint sand to any gaps that have washed out after heavy rain seasons. Check the perimeter edge restraints each spring: any section that has heaved or shifted should be re-staked. Reseal every 3 to 5 years depending on traffic and climate exposure. Porcelain pavers generally do not need sealing.
Troubleshooting common problems
| Problem | Likely cause | Fix |
|---|---|---|
| Pavers sinking or rocking | Insufficient base compaction or soft subgrade | Pull affected pavers, add and recompact base, reset with fresh bedding sand |
| Perimeter pavers creeping or spreading | Edge restraints not anchored into base, or staked only into topsoil | Pull perimeter, re-seat and re-spike restraints into compacted base |
| Joint sand washing out | Fine sand used instead of polymeric, or polymeric not properly activated | Remove remaining sand, re-apply polymeric sand per instructions |
| White haze on paver surface | Polymeric sand residue activated while wet on face, or natural efflorescence | Clean with manufacturer-recommended efflorescence remover; rinse thoroughly |
| Pooling water on patio surface | Slope less than 1.5%, or low spots in base | Releveling affected pavers; check and correct grade at base level |
| Pavers cracking | Freeze-thaw on porous natural stone, or point load on inadequate base | Replace cracked units; improve base depth if recurring; switch to freeze-thaw-rated material |
| Weeds growing in joints | Fine sand joints without polymeric sand, or polymeric sand breakdown | Kill weeds, remove, re-apply fresh polymeric sand |
When to call a professional
Most homeowners can handle a flat, at-grade patio up to 400 square feet without professional help if they are willing to rent the right equipment and follow the base compaction steps carefully. The situations where I would strongly recommend getting a professional assessment (if not full installation) are: sites with significant slope requiring a retaining wall over 24 inches tall, sites with visible drainage problems into the foundation, projects over 600 square feet where the material and equipment logistics become hard to manage solo, and any project involving a structural connection to the house itself.
Getting a quote from a professional also gives you a useful cost benchmark. If the pro quote is $8,000 and your DIY material estimate is $3,200, you know exactly what your labor savings are and can decide whether the project scope is worth your time. That math often makes DIY very compelling, especially for straightforward at-grade installations.
FAQ
What are the first steps in planning a stone paver patio (size, layout, permits, and codes)?
Start by defining purpose, size and furniture/traffic zones; sketch a plan to scale and mark utilities (call 811). Check local building codes and HOA rules for setbacks, hardscape permits, impervious-surface limits, and fire-pit rules. For patios adjacent to structures ensure doors/thresholds and foundation clearance meet code and provide 1.5–2% slope away from the house. Document property lines and existing grades so you can design drainage and retaining needs before excavation.
How do I choose between permeable and non‑permeable paver systems?
Choose permeable interlocking pavers (PICP) when you need stormwater management, local approvals permit infiltration, or you want to reduce runoff. PICP uses open-graded bedding and joint stone and a reservoir base to infiltrate or hold runoff (may need underdrains/liner if infiltration is limited). Choose conventional sand-set pavers if permeability is not required; those use a sand bedding and jointing sand/polymeric sand. Consider soil infiltration, frost conditions, maintenance needs and local regulations when deciding.
What materials and tools will I need (concise checklist) for a typical 12×12 ft patio?
Materials: pavers (~144 sq ft + 5–10% waste), edge restraint, crushed stone base (see depths below), bedding sand (1 in ASTM C33) or No.8 open-graded bedding for permeable, joint sand or permeable joint stone, geotextile (optional), sealer (optional), polymeric jointing compound (if sand-set). Tools: tape measure, stakes & string, shovel, plate compactor with pad, 2–3 level & long straightedge, masonry saw or wet saw / angle grinder with diamond blade, rubber mallet, broom, wheelbarrow, shovel, edger/edging tools, protective gear (gloves, eye/ear protection).
What base and compaction specifications should I follow for a durable patio?
Typical compacted base depths: pedestrian patios 4–6 in, residential driveways 6–8 in; heavier loads require 8–12+ in. Use dense-graded crusher-run or AASHTO No.57/No.2 for permeable systems. Place base in lifts (≤6 in loose) and compact each lift to ~95–98% of Standard Proctor density (follow local spec). Final bedding: sand-set uses 1 in compacted sand bedding (ASTM C33); permeable systems use 2 in open-graded No.8 bedding. Seat edge restraints on the compacted base and anchor/stake through the base to the subgrade.
How much slope do I need for drainage and what if the yard is sloped or near structures?
Provide a minimum finished surface slope of 1.5–2% (about 1/8–1/4 in per ft) away from structures for positive drainage. For sloped yards terrace or build retaining walls/steps to create level patios. If patio is below grade or near foundations, plan for a taller base/underdrain or a waterproofed wall with positive drainage to an outlet. For permeable systems slope can be gentler, but still direct flow to infiltration areas or drains.
How do I prepare the site over grass, concrete, or uneven ground?
Over grass: remove sod/topsoil to required depth for base+bedding+paver thickness and compact subgrade. Over concrete: either remove concrete or build a granular base over it after verifying drainage; use geotextile and ensure edge restraint anchors into base, not only existing slab. Over uneven ground: cut back to design grades, add compacted lifts of base material to build uniform base depth. Always verify subgrade compaction and address soft/spongy areas with stone replacement or geogrid.
Next Articles
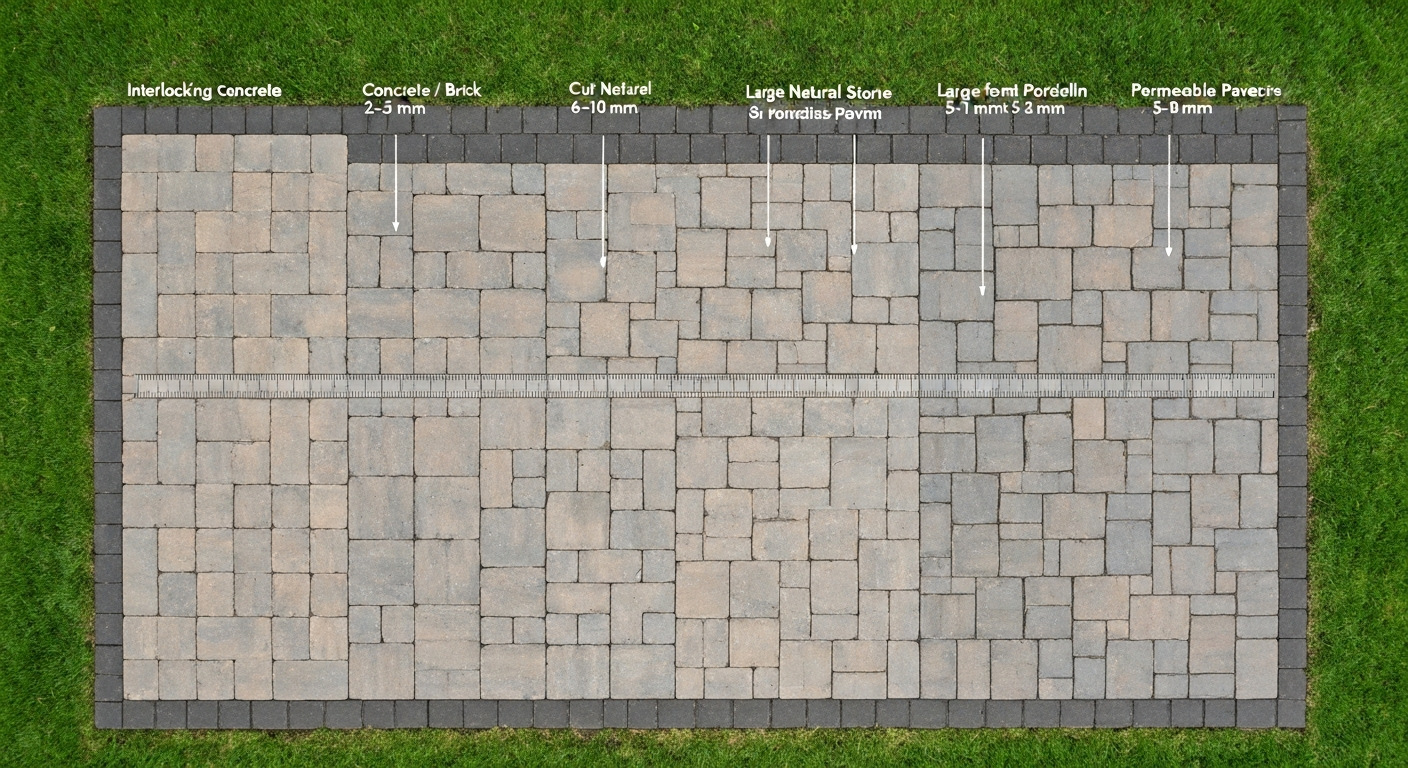
How to Space Patio Pavers: Joint Widths & Finishing Tips
How to space patio pavers: exact joint widths by paver type, step‑by‑step spacing, jointing & finishing tips.
How to Use Quikrete Patio Paver Jointing Sand: Guide & Tips
How to use Quikrete Patio Paver Jointing Sand: step-by-step application, tools, timing, coverage, and care.
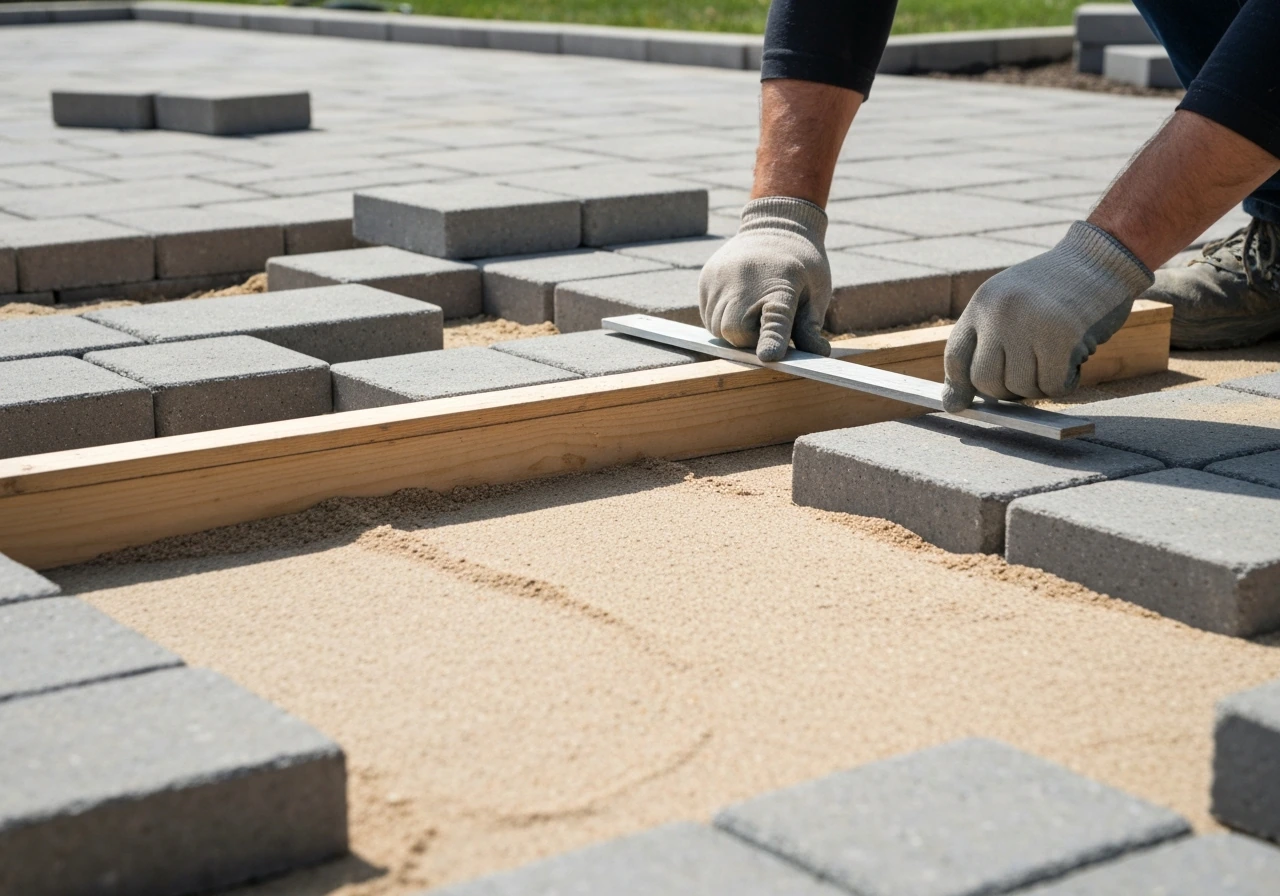
How to Use Patio Paver Sand: Step by Step DIY Guide
Step-by-step guide to apply patio paver sand correctly: prep base, set pavers, fill joints, compact, and troubleshoot is