Patio paver sand does two separate jobs: it creates a smooth, level bedding layer that pavers sit on, and it fills the joints between pavers to lock everything together. Get the sequence right and your patio stays flat, stable, and solid for years. Get it wrong and you end up with wobbly pavers, sand washing out after the first rain, or a muddy haze bonded to your paver faces. This guide walks you through both uses of paver sand, from prep to final compaction, so you can nail it on the first try. If you want the full step-by-step for setting and spacing patio pavers, follow the spacing-focused guidance for laying out consistent gaps.
How to Use Patio Paver Sand: Step by Step DIY Guide

Felix Rowe
2 Jul 2026

When to use paver sand (and which type)
There are two distinct moments in a paver installation where sand comes into play, and mixing them up is one of the most common rookie mistakes. When you follow the right process for how to make a patio with pavers and sand, you set yourself up for a flat, long-lasting surface paver installation.
The first is bedding sand, also called leveling sand. This goes down before you lay a single paver. It sits on top of your compacted gravel base and gives you a fine-tune leveling surface that you screed smooth. You want ASTM C-33 concrete sand here, a coarse washed sand that compacts well and won't shift like play sand or masonry sand. Spread it about 1 to 1.5 inches deep, no more. Thicker isn't better: a thick sand bed will compress unevenly under weight and your pavers will rock.
The second is joint sand, which goes in after all your pavers are set. This is what fills the gaps between pavers and locks the whole pattern together. You have two main choices here: plain dry sand (sometimes called sweep sand) or polymeric sand. Barkman’s paver and slab installation PDF also specifies using bedding sand and jointing sand on top of the pavers, including polymeric sand as an option for the joints either plain dry sand (sometimes called sweep sand) or polymeric sand.. Polymeric sand contains a binder that activates with water and hardens into the joints, making it far more resistant to washout, weeds, and ants. For most residential patios, polymeric sand is worth the extra cost. If you want a deep dive on applying polymeric sand specifically, that topic covers the full activation and wetting sequence in detail.
| Sand Type | Where It Goes | Best For | Watch Out For |
|---|---|---|---|
| ASTM C-33 concrete sand | Bedding layer under pavers | All patio installations | Don't go thicker than 1.5 inches or it will shift |
| Dry sweep sand | Joints between pavers | Contained or covered patios, budget projects | Washes out easily, needs regular re-sanding |
| Polymeric sand | Joints between pavers | Exposed patios, high-traffic areas | Must be applied dry; needs controlled wetting to activate properly |
Tools and materials you'll need
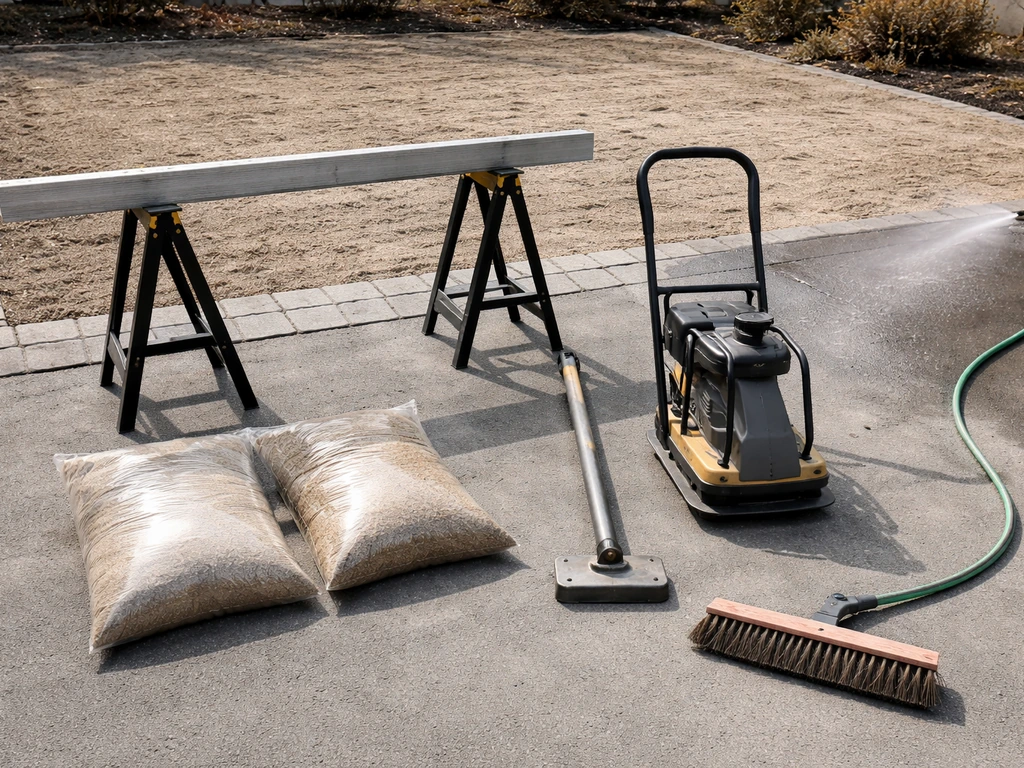
Before you start spreading anything, get everything on this list staged and ready. Running out of sand mid-screed or borrowing a neighbor's broom mid-compact creates problems.
- ASTM C-33 concrete sand for the bedding layer (plan for about 0.5 cubic feet per square foot of patio at 1-inch depth, or use a sand calculator with your exact dimensions)
- Polymeric sand or dry joint sand for filling joints (a 50 lb bag of polymeric sand covers roughly 56 square feet for average joint widths, so calculate accordingly)
- Screed pipes or rails (1-inch diameter metal conduit works perfectly as guides)
- A straight 2x4 or metal screed board long enough to span your work area
- A plate compactor (rental is fine, typically $60 to $90 per day)
- A rubber mallet for setting individual pavers
- A push broom and a stiff-bristle hand brush
- A leaf blower (helpful for removing excess joint sand without displacing it from joints)
- Edge restraints and spikes (plastic paver edging is standard)
- A long level or string line for checking grade
- A garden hose with a gentle spray nozzle (for activating polymeric sand)
- Safety glasses and work gloves
Surface prep before any sand goes down
Sand is not a fix for a bad base. If your base isn't solid, no amount of careful screeding will save you. This is where most DIY patio problems actually start, so take your time here.
Build and compact your gravel base first
For a standard residential patio, you need 4 to 6 inches of compacted crushed stone (also called road base, Class II base, or gravel base depending on your region) beneath the bedding sand. Excavate deep enough to account for the gravel base, the 1-inch sand bed, and your paver thickness, plus a little extra for the slope. Compact the gravel in lifts of no more than 4 inches at a time using a plate compactor. Trying to compact a deeper layer in one pass leaves the bottom loose. Each lift needs multiple passes until the surface doesn't visibly move under the compactor.
Set your slope for drainage
Your finished patio surface needs to slope away from your house or any structures at 1/8 to 1/4 inch per foot. That means a 10-foot-wide patio should drop between 1.25 and 2.5 inches from one edge to the other. Build this slope into your gravel base, not into the sand layer. If you try to create slope with a thick sand bed on one side, you're asking for uneven settling.
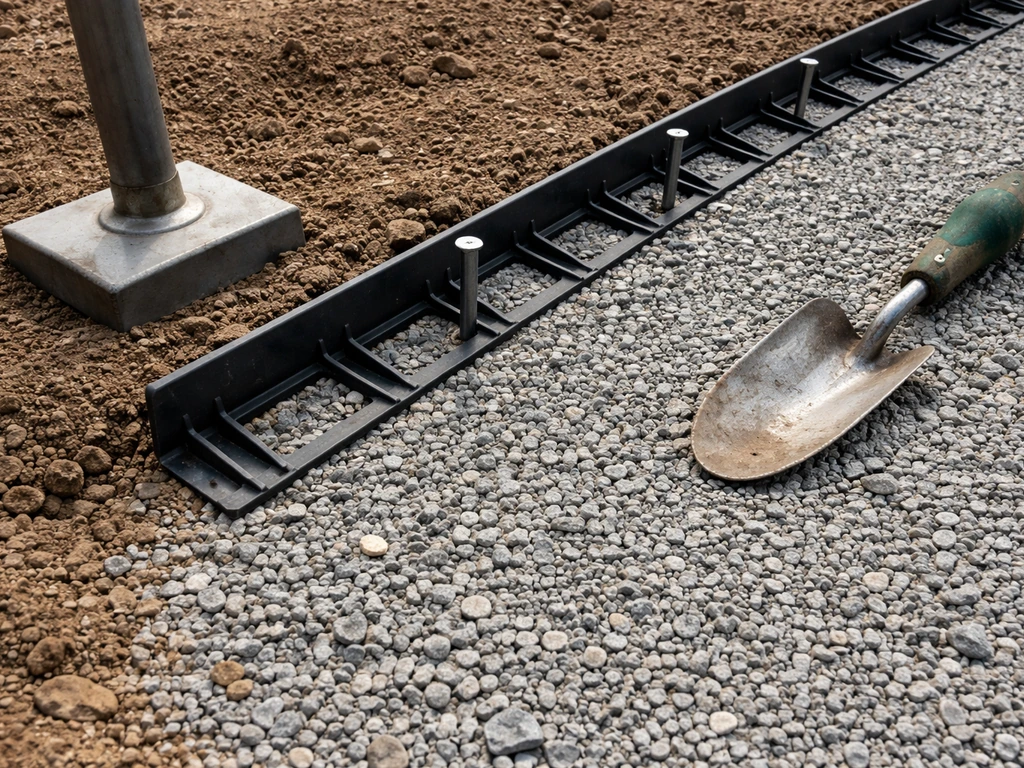
Install edge restraints before you screed
Edge restraints go in before the bedding sand, not after. Set plastic paver edging along the perimeter of your project, spiked into the compacted base. These keep the sand bed contained while you screed and prevent your outer pavers from migrating over time. Without them, the whole installation slowly creeps at the edges.
How to apply paver sand step by step
With a solid, compacted, and properly sloped base in place and your edge restraints set, you're ready for sand. Work through these steps in order and don't skip ahead. If you are wondering how to install patio pavers in sand, follow these same steps for bedding sand and joint sand to get a level, locked-in surface.
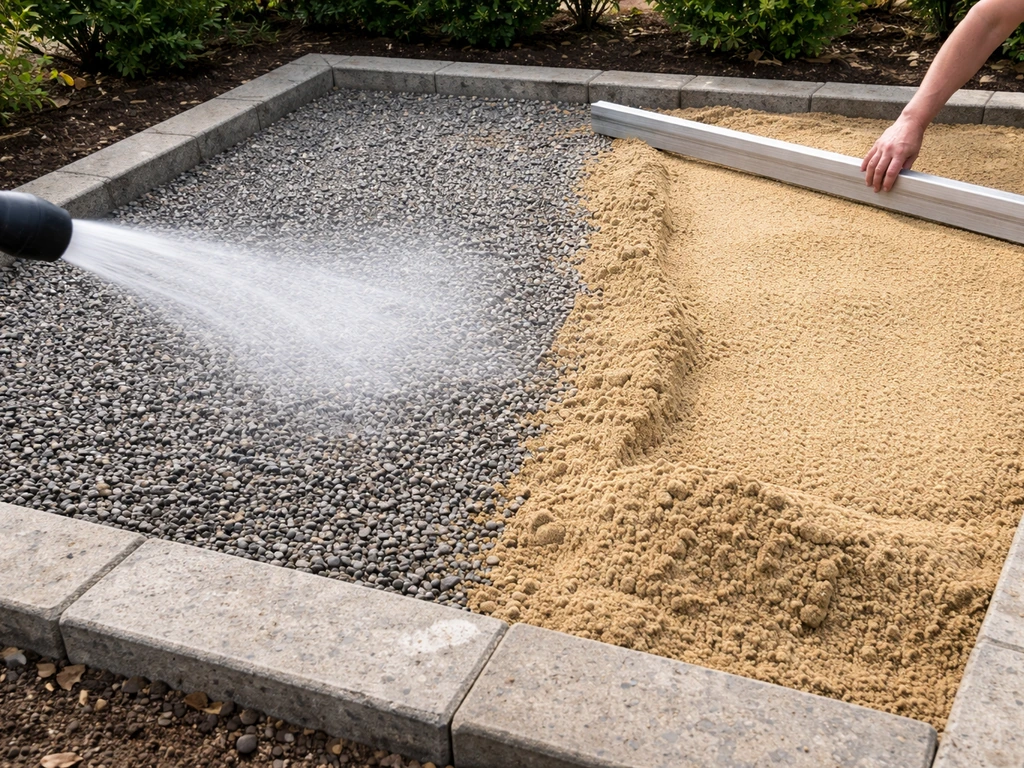
- Lightly dampen the compacted gravel base with a fine spray from your hose. You want it slightly moist, not saturated. This helps the bedding sand settle evenly without the dry base pulling moisture up through it.
- Set your screed rails (1-inch conduit pipes) across the base, parallel to each other, spaced so your screed board can slide across both. The top of the rails should sit at your target sand height, which is 1 inch above the base surface.
- Dump your ASTM C-33 sand between and around the rails. Don't worry about perfection yet, just get it roughly in the area you're working.
- Pull your 2x4 or screed board across the rails with a gentle back-and-forth sawing motion, moving it toward you. The rails act as depth guides and the board levels the surface. Fill any low spots and screed again.
- Carefully remove the screed rails and fill the channels left behind with sand. Smooth those spots gently with a hand float or trowel. Don't walk on the screeded sand.
- Begin laying pavers immediately. Set each paver by placing it firmly and tapping it down with a rubber mallet until it's flush with neighboring pavers. Check with a level every few pavers. If one sits high, remove it, scrape out a little sand, and reset. If it sits low, add a small amount of sand under it.
- Work in sections so you're always stepping onto set pavers or a kneeling board, never onto the screeded sand bed.
Once all your pavers are laid, do a quick visual inspection. Run a long level or straightedge across multiple pavers in different directions. Any pavers that rock or sit noticeably high or low need to be reset now, before you move on to joint sand. It's much easier to lift and adjust a paver before compaction than after. Polymeric sand for patio pavers follows a specific wetting and activation sequence after you sweep it into the joints how to apply polymeric sand to patio pavers.
How to fill joints and lock the pavers in place
This is where the real locking happens. Jointing sand migrates down into the gaps between pavers and, once compacted, creates a tight interlock that keeps individual pavers from shifting. The sequence here matters a lot.
- Make sure the paver surface and all joints are completely dry before you start. If it's rained recently or there's morning dew, wait. Damp joints prevent joint sand from packing properly and can cause polymeric sand to clump before it's in place.
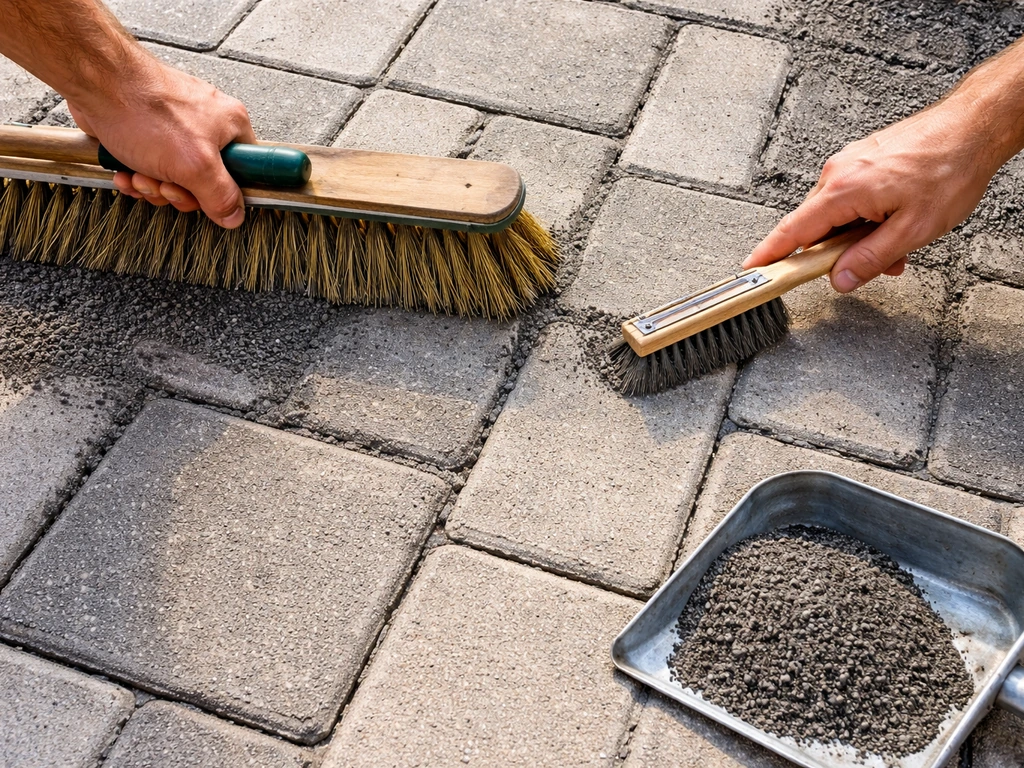
- Pour joint sand across the paver surface and use a push broom to sweep it diagonally across the joints. Sweeping at a 45-degree angle to the joint lines pushes sand down into the gaps more efficiently than sweeping straight across.
- Once joints look full, run the plate compactor over the entire paved area. Use a rubber pad or protective mat under the plate to avoid scratching pavers. This initial compaction vibrates sand down into the joints and slightly sets the pavers into the bedding layer.
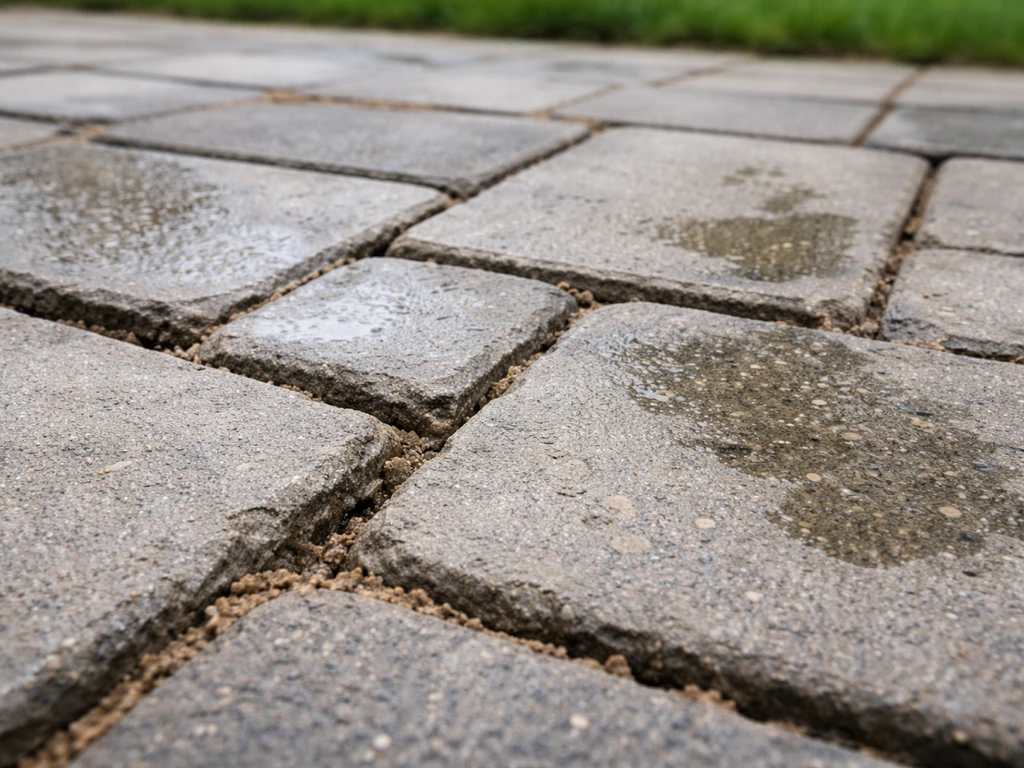
- Sweep more joint sand across the surface and repeat the compaction pass. The sand level in the joints will drop after each compaction cycle. Keep repeating this sweep-and-compact cycle until joints are full and stop dropping. Target joint sand height is about 1/8 inch below the top of the paver surface, or just below the bottom of the chamfer (the beveled edge on most pavers). Do not overfill.
- Once the joints are at the right level, use a leaf blower on its lowest setting or a stiff broom to remove all excess sand from the paver faces. For polymeric sand especially, any residue left on the paver surface will bond there when you add water and create a haze that's very difficult to remove.
- If using polymeric sand: mist the surface with a gentle shower spray (not a jet or heavy stream) until the joints are saturated but you don't see water pooling or running. Work in sections. Let each section absorb the water before checking. Wait 10 to 15 minutes and apply a second light misting if needed. Do not flood the surface. Flooding washes sand right out of the joints.
- Keep foot traffic and any water (rain, sprinklers) off the surface for at least 24 hours while the polymeric sand cures.
Common mistakes and how to fix them
These are the failures I see most often from DIYers, and most of them are fixable even after the fact.
Sand washes out after the first rain
This almost always means the joints weren't compacted before or after wetting, or water was applied too aggressively. If you used polymeric sand and it washed out, you either flooded it or it wasn't fully dry when applied. The fix: scrape out what's left, let everything dry thoroughly, and re-apply. If you used regular sweep sand, expect to re-sand after heavy rain events until the joints are fully settled. That's normal for dry sand, not a failure.
Uneven settling and rocking pavers
If pavers are rocking, the bedding sand was either too thick or not evenly screeded. A sand bed deeper than 1.5 inches compresses unevenly under weight, leaving some pavers high and some low over time. To fix a settled or rocking paver, pry it up with a flathead screwdriver and a paver tool (or carefully with two flat bars), adjust the sand level underneath, and reset it. If multiple pavers across a large area are uneven, the problem may be in the base, not the sand, and you may need to lift and re-compact that section.
Polymeric sand haze on paver faces
This happens when residue isn't swept or blown off before wetting. Once it bonds, it's hard to remove. Your best option is a diluted muriatic acid wash or a commercial paver cleaner specifically rated for polymeric sand haze. Always test on a hidden paver first. Prevention is much easier: blow off every trace of sand from the surface before you touch the hose.
Sand won't lock or joints stay loose
If you did multiple sweep-and-compact cycles and the joints still feel loose, check two things. First, are your joints wide enough? Very tight joints (under 1/8 inch) don't allow enough sand to enter to create interlock. Second, did you use the right sand? Fine mason sand or play sand won't lock properly. You need coarser joint sand or polymeric sand for real stability. Using the wrong sand granulation is a surprisingly common issue, especially when people grab whatever bag is on sale.
Base wasn't compacted enough
If your pavers are sinking in certain spots weeks or months after installation, the base wasn't compacted in proper lifts or the subgrade soil is settling. Unfortunately, there's no shortcut fix here. You'll need to pull the affected pavers, re-compact (or replace base material), and re-lay. It's frustrating, but a solid base is the whole foundation of a paver project. This is why spending the time on base prep upfront is so important.
Working with an already partially built patio
If you're adding sand to a patio someone else started, or picking up a project mid-installation, check the bedding sand depth before you lay any more pavers. Probe it with a screwdriver at multiple points. If it's uneven or deeper than 1.5 inches anywhere, scrape it out and re-screed that section. You can't just add more sand on top of a poorly screeded base and expect it to level out.
Maintenance and re-sanding over time
Even a well-installed patio will need some sand attention over the years. This is normal and not a sign you did anything wrong.
After the first major rainstorm following installation, walk the patio and look for joints that have dropped or partially washed. If you used polymeric sand and activated it correctly, you should see minimal loss. If you used dry sweep sand, expect to top off the joints after heavy rain events for the first season. Keep a bag of the same sand you used stored somewhere dry so you can refill as needed.
Once a year, ideally in spring, inspect every joint across the patio. Look for areas where sand has dropped, joints that are empty near the edges (where water runoff concentrates), and any pavers that have started rocking. Top off low joints with fresh sand and compact lightly if needed. If your jointing sand has degraded significantly, especially after several years, it's worth clearing the joints out with a stiff brush and starting fresh with new polymeric sand. The process is the same as first installation: dry surface, sweep in, compact, blow off residue, mist carefully. If you are using Quikrete patio paver jointing sand, follow the bag directions for sweeping it in, compaction, and (if polymeric) controlled misting to activate it new polymeric sand.
Seasonal freeze-thaw cycles will gradually work sand out of joints in colder climates. In those regions, a fall top-up of joint sand before winter and a spring inspection after the ground thaws is a smart annual habit. Keeping joints full is the single best thing you can do to extend the life of your patio, because empty joints let pavers shift, which lets more sand escape, which leads to bigger settling problems down the line.
If you're planning to seal your patio, always do it after the jointing sand has fully cured and settled through at least one weather cycle. Sealing over freshly installed polymeric sand that hasn't fully hardened can trap moisture and cause problems. A well-sanded, well-sealed patio can last 20 or more years with only basic seasonal upkeep, which makes the time you invest in doing this right absolutely worth it.
FAQ
Can I use patio paver sand for both the bedding layer and the joints?
No. Bedding sand is for leveling on top of the compacted gravel base, joint sand is for locking the gaps after pavers are set. If you try to use joint sand as bedding, it won’t level and compact consistently, and if you use bedding sand in the joints, it tends to wash out faster. Keep a clear separation in your workflow: screed and final check before pavers go down, then sweep joint sand in and compact after.
What bedding sand thickness is safe, and what if I need extra height?
Target about 1 to 1.5 inches for the bedding sand layer, then screed flat. If you need more height to hit grade, adjust the gravel base, not the sand depth. A thicker sand bed compresses unevenly over time, which shows up as rocking pavers and gaps that open up.
How do I create drainage slope, and can I do it with sand?
Yes, you need slope, but you build it in the gravel base. A typical residential target is 1/8 to 1/4 inch per foot running away from your house. If you add slope by making one side of the sand bed thicker, you increase the chance of uneven settling and a patio that eventually looks wavy.
How wet should the surface be when compacting and activating joint sand?
It depends on the joint sand type. For polymeric sand, you generally want to mist and activate in controlled, light applications, after the surface is swept clean and the joints are filled. For dry sweep sand, you usually do not mist to activate, you just compact and then top up if rain pulls it out. If you mist too aggressively with the wrong product, it can bind incorrectly or wash out.
What’s the correct sequence for sweeping and compacting joint sand?
It’s not just how many times you compact, it’s whether you do it at the right stages. Common approach is: sweep sand in, compact, sweep again, then compact once more (and blow off residue) before any polymeric activation mist. If you compact only once or skip the second sweep, joints may stay partially empty and feel loose.
When do I fix rocking pavers, before or after adding joint sand?
You should reset any pavers that are rocking or noticeably high or low before joint sand. If you add sand first and later discover uneven spots, lifting pavers usually disturbs the sand and you will likely need to re-sweep and re-compact joints. Quick check method: use a long straightedge or level across multiple pavers in different directions right after leveling.
Why does polymeric sand leave a haze on my pavers, and how do I prevent it?
If pavers look hazy after polymeric sand, the most common cause is residue left on the surface before rinsing or cleaning, or applying water in a way that activates too much material on top. Clean residue with a product rated for polymeric sand haze, and always test on a hidden area first. Prevention is to blow off every trace of sand before using a hose.
My joints still feel loose after jointing, what should I check first?
Very tight joints can prevent enough sand from packing and interlocking. If your joints end up under about 1/8 inch, consider re-spacing or making sure your layout tools are producing consistent gaps, then re-fill after adjustments. Also confirm you used the right gradation, fine mason sand or play sand may not lock as intended.
What causes pavers to sink weeks later, and can I fix it by adding sand?
If pavers sink after installation, it usually points to base or subgrade failure, not a sand issue. You generally need to remove the affected pavers, correct the base material, and re-compact in proper lifts. There is no reliable way to “top up” underneath without lifting because voids and soft spots remain.
Is it normal for joints to lose sand after rain, and do I need to reapply?
A good rule is to store the same jointing sand you used, kept dry, so you can top off low joints after heavy rain. For dry sweep sand, it is normal for joints to need re-sanding during the first season. For polymeric sand, you still may need small touch-ups, but significant washout usually signals activation issues.
When should I seal a paver patio if I used polymeric joint sand?
Wait until joint sand has fully cured and had at least one weather cycle before sealing, especially with polymeric products. Sealing too early can trap moisture in the joints and contribute to problems. If you seal, plan on inspecting and topping off any low joints before the seal so the surface cures evenly.
How should I handle joint sand in areas with freeze-thaw cycles?
In freeze-thaw climates, sand can be worked out over time as joints expand and contract. A practical habit is to top off in fall before winter and then inspect in spring after thaw. Keeping joints full reduces paver movement, which in turn slows down further sand loss.
Next Articles

How to Install Patio Pavers in Sand: Step-by-Step
DIY step-by-step how to install patio pavers in sand, from excavation and base prep to leveling, cutting, joint sand and
How to Make a Patio With Pavers and Sand Step by Step
Step-by-step guide to install paver patio with sand setting layer, from planning and base to leveling, cutting, joint fi
How to Apply Polymeric Sand to Patio Pavers: Step by Step
Step-by-step DIY guide to apply polymeric sand between patio pavers, prep joints, spread, fill, and activate without haz