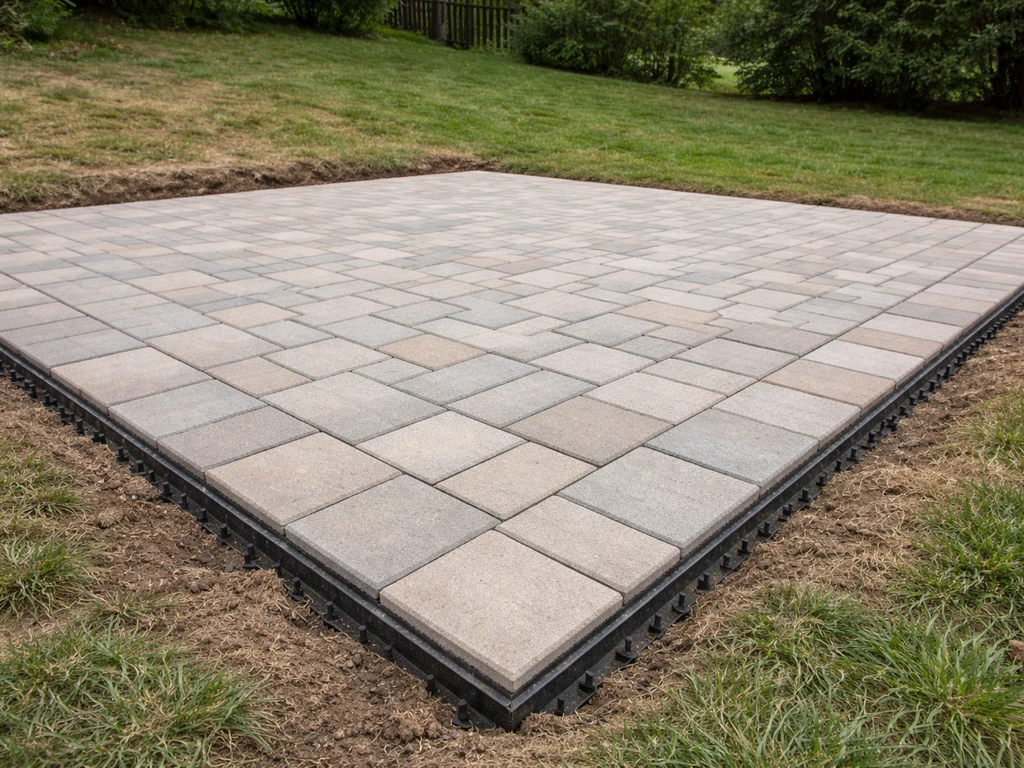
You can absolutely install a paver patio on uneven ground, you just need to fix the ground first, not work around it. The process comes down to assessing what kind of uneven you're dealing with (soft spots, slopes, dips, or high points), excavating and building a compacted aggregate base that corrects those problems, then screeding a 1-inch sand bed and laying pavers with string lines to maintain consistent elevations and a 1/4-inch-per-foot drainage slope away from your house. Get the base right, and the pavers will stay put for decades. Rush the base, and you'll be pulling them back up within a few years.
How to Install a Paver Patio on Uneven Ground

Felix Rowe
16 Jun 2026
Step 1: Assess your uneven ground and drainage needs
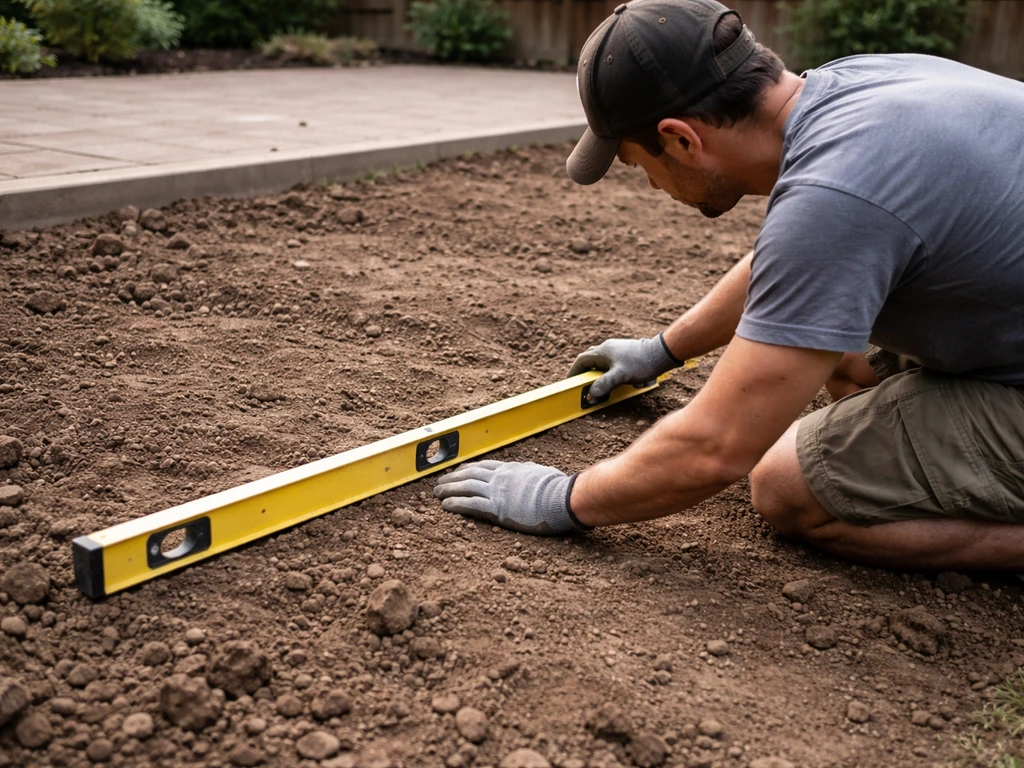
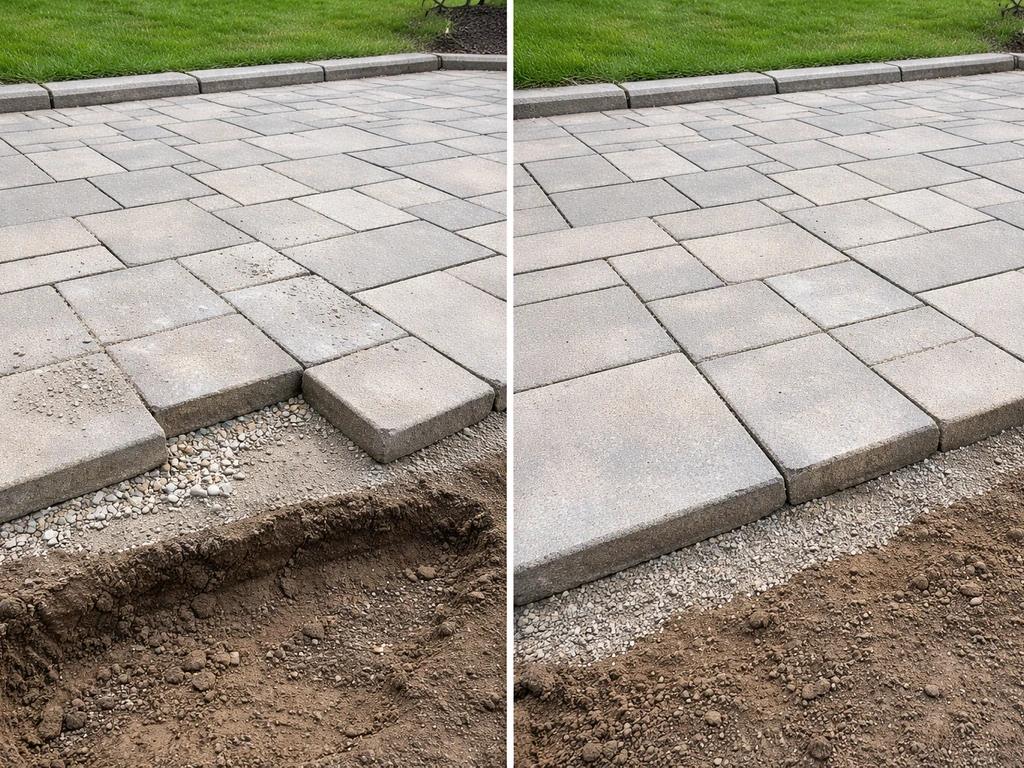
Before you dig a single shovelful, you need to understand exactly what you're working with. Walk your patio area and press your heel firmly into the soil in several spots. If it sinks noticeably, you've got soft or unstable subgrade, that's the most serious type of unevenness because no amount of extra base material will fully compensate if the ground underneath keeps moving. Mark those spots with flags or spray paint.
Next, use a long level (4 feet or longer) or a string line with a line level to map out the existing elevation changes. You want to know: how much does the ground drop or rise across the patio area, and in which direction? A mild slope of 1 to 2 percent away from the house is actually ideal for drainage, you'll want to work with that or build it in. Because a slope affects drainage and elevation changes across the whole patio, the steps for building a paver patio on a slope focus on setting firm base and consistent pitching build a paver patio on a slope. Slopes steeper than about 3 to 4 percent across the patio surface become uncomfortable to sit on and tricky to pave cleanly; those situations are more like a sloped patio build, which has its own approach.
Check drainage carefully. Look at where water pools after rain. If your uneven ground creates low pockets that collect water, those areas need to be graded out during excavation, not filled with extra sand during installation. Water sitting under your paver base is the number one cause of sinking, frost heave, and washed-out joint sand.
- Soft spots or spongy soil: plan to excavate deeper and possibly add geotextile fabric before your aggregate base
- Low pockets that collect water: re-grade the subgrade so water drains to the edges, not the middle
- High spots or roots: excavate those areas down to match your target depth
- Clay or silty soil: geotextile fabric is highly recommended to prevent base material from migrating into soft subsoil
- Slope running toward the house: your base and paver surface must redirect that slope — this is non-negotiable for long-term performance
Your drainage target for the finished patio surface is 1/8 to 1/4 inch of drop per foot of distance, sloped away from your home or any structure. Most pros use 1/4 inch per foot (about a 2% slope) as the reliable minimum. Get this number in your head early, every elevation decision you make from here on is built around it.
Step 2: Plan your layout, set elevations, and figure out excavation depth
Grab some stakes and string line and lay out the perimeter of your patio. This is where you design the finished surface elevations before you ever touch a shovel. Start at the point closest to your house, typically a door threshold or the edge of a concrete slab, and work outward. Set your string lines so they drop 1/4 inch for every foot of distance away from the house. If your patio is 12 feet deep, that's 3 inches of total drop across the surface. Use a line level or a digital level app on a straight board to verify your strings are pitching correctly.
Once your finished elevation strings are set, you can calculate excavation depth. The standard stack-up for a pedestrian patio is: 4 to 6 inches of compacted aggregate base, plus 1 inch of bedding sand, plus the thickness of your pavers (typically 2 3/8 inches for standard concrete pavers). CMHA’s PAV-TEC-010-22 guide lists minimum aggregate base thickness targets as a structural starting point of 4 to 6 inches for pedestrian areas, 6 to 8 inches for driveways, and 8 to 12 inches for streets 4 to 6 inches of compacted aggregate base. Add those together and you get your total excavation depth measured down from your finished paver surface string line. On uneven ground, this depth will vary across the site, and that's fine. You're excavating to a consistent finished elevation, which means you'll dig deeper in high spots and shallower in low ones.
| Layer | Thickness (pedestrian patio) | Notes |
|---|---|---|
| Compacted aggregate base | 4–6 inches | 6 inches recommended on soft or clay soils |
| Bedding sand (coarse) | 1 inch (screeded) | Do not vary thickness to compensate for uneven base |
| Pavers | Typically 2 3/8 inches | Measure your actual paver thickness and use that number |
| Total excavation depth | ~7.5–9.5 inches below finished surface | Measure from your string line, not from existing ground |
Mark the excavation depth on each stake using the string line as your reference point. On very uneven ground, use a tape measure at each stake to mark the correct dig depth, it will be different at every corner. This is the most important planning step you'll do, and it's worth taking an extra hour to get the measurements right before breaking ground.
Step 3: Build a stable base on irregular soil
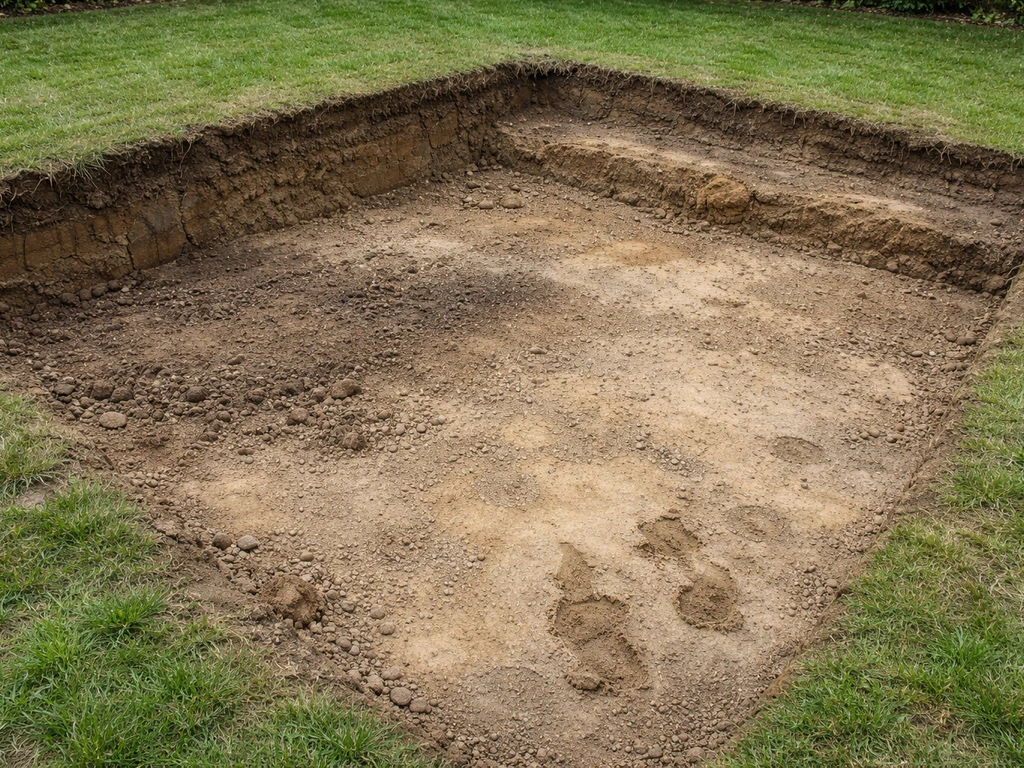
Excavate to your target depth, removing all grass, roots, and organic material. On uneven ground, you'll likely find areas where you're digging 10 inches and others where you're only at 6, that's expected. The goal is a consistent finished floor elevation at the bottom of your excavation (accounting for the fact that the floor itself will pitch for drainage). After excavation, compact the native subgrade with a plate compactor. Make at least two passes in perpendicular directions. If you hit soft spots that compress more than an inch or two under the compactor, excavate a little deeper and add extra aggregate base to stabilize them.
On clay, silty, or expansive soils, which are very common in yards with drainage problems, lay a layer of geotextile fabric across the entire excavated area before adding your base material. The fabric keeps your crushed stone base from slowly sinking into the soft subgrade over time, which is one of the sneaky causes of long-term paver settlement.
Add your crushed stone aggregate base (crushed limestone or processed gravel works well) in 2 to 3 inch lifts, compacting each lift thoroughly before adding the next. Never try to compact 6 inches of base material all at once, you'll get good compaction at the top and loose, unstable material underneath. On irregular ground, some areas will need more material than others to reach your target base elevation. Use your string lines as a constant reference: the top of your compacted base should sit at exactly 1 inch above the finished paver surface string (to leave room for the sand bed), plus your paver thickness.
Once the base is fully compacted, check it with a level across several directions. It should be firm enough that you can't easily press a screwdriver into it by hand. If you can, compact again. The base is where your patio's long-term stability lives, if it's solid here, the pavers above will stay put.
Step 4: Lay pavers and handle the leveling challenges of low and high spots
Before you place a single paver, install your edge restraints around the perimeter of the patio. Plastic or aluminum paver edging, spiked into the base material at 12-inch intervals, locks the whole system together. On uneven perimeters, you may need to notch or cut the edging to follow grade changes. Get this done now, trying to install edge restraints after the pavers are in is a frustrating scramble.
Screed your 1-inch bedding sand layer using two parallel screed pipes (typically 1-inch diameter conduit works perfectly) set on the compacted base, running in the direction of your drainage slope. Drag a screed board across the pipes to create a perfectly smooth, 1-inch deep sand surface. This is your precision leveling layer, and it's important to understand that the sand bed should be a consistent 1 inch thick everywhere. Use bedding sand that meets ASTM C33 (or CSA A23.1), as specified in CMHA-style interlocking concrete pavement guidance 1-inch deep sand surface. Do not use a thicker sand bed in low spots to compensate for base unevenness. A sand layer thicker than about 1.5 inches becomes unstable under load and leads to rocking pavers. If your base has low spots, fill them with additional compacted aggregate, not extra sand.
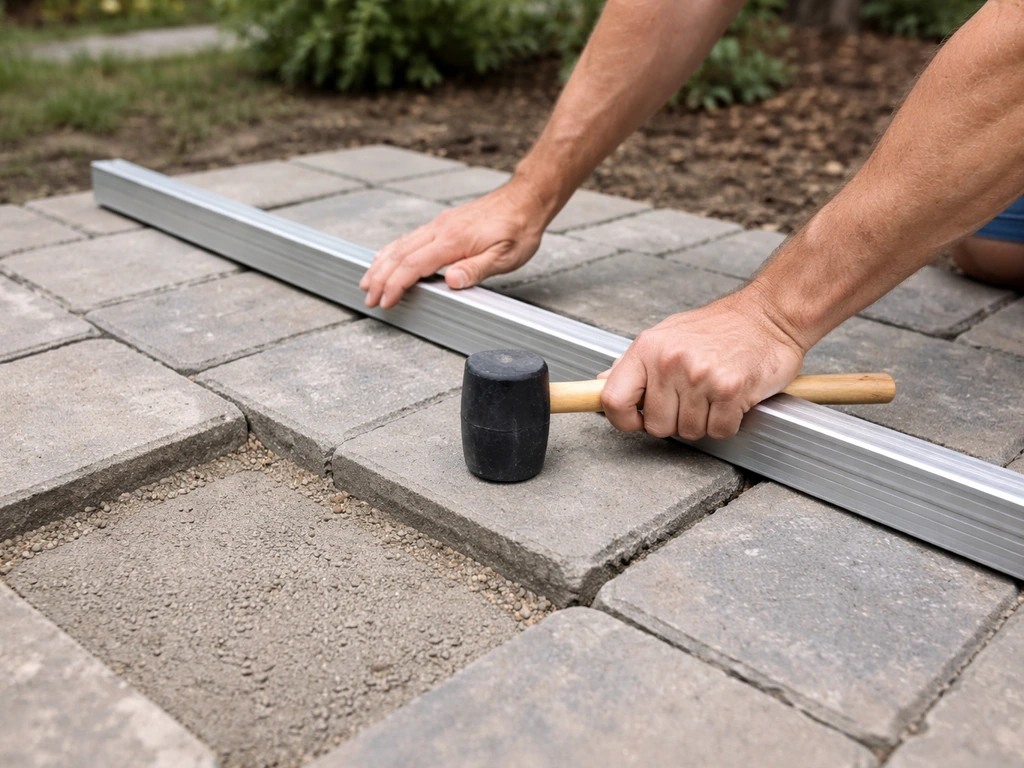
Set up your string lines across the patio at finished paver height, running in both directions at about 4-foot intervals. These lines are your primary leveling tool as you lay. Start laying pavers from the corner closest to the house (usually the highest elevation) and work outward and downhill. This way you're always working off a known good reference point. Place each paver by setting it straight down, don't slide it, as that pushes sand underneath and creates humps. Tap each paver with a rubber mallet to seat it firmly.
Check your work constantly with a long level across multiple pavers. On uneven ground, you'll encounter spots where the base isn't perfectly consistent despite your best efforts. For a paver that's slightly high, remove it, pull a little sand, and reset. For a paver that's low, add a small amount of sand, tamp it gently, and relay. Never try to correct more than about 3/8 inch of variation with sand adjustment, if it's more than that, you have a base issue that needs to be fixed before you continue. Learning how to level patio pavers also depends on getting the base and sand layers consistent before you fine-tune any high or low stones.
Step 5: Edge restraints, cutting, and fitting patterns on uneven areas
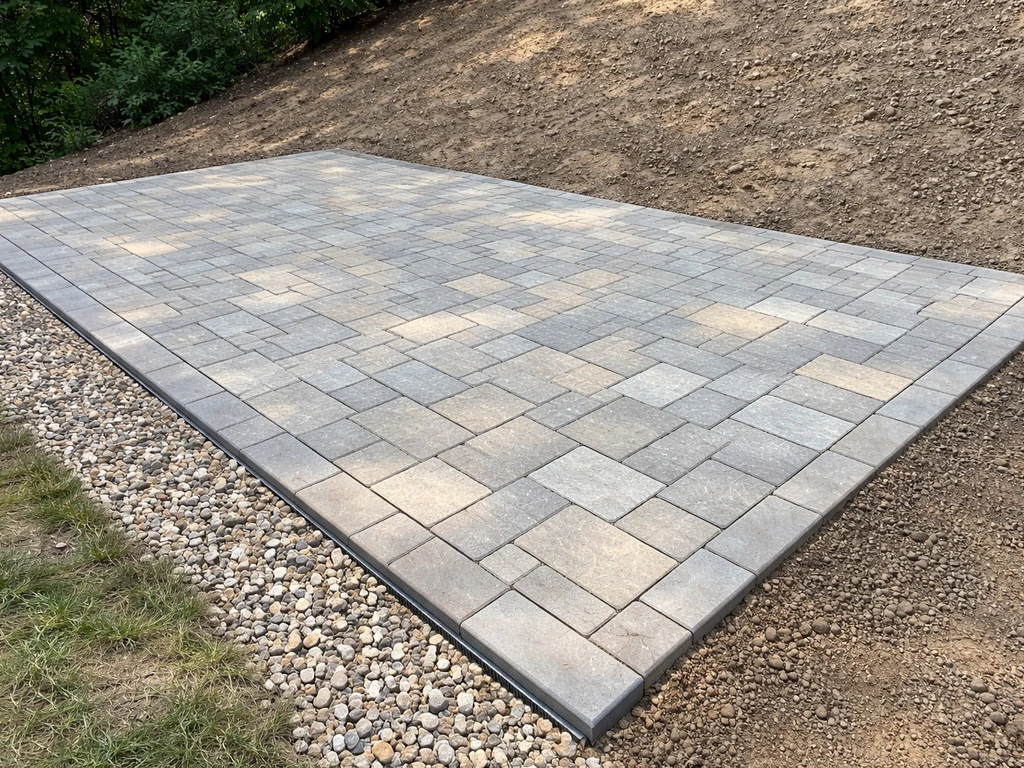
Choosing the right pattern matters more on uneven ground than people realize. Running bond (brick-style) and herringbone patterns are both forgiving on irregular sites, herringbone in particular creates a very stable interlocked surface that resists movement. Patterns with long straight lines running in the direction of your slope, like stacked bond, tend to telegraph settlement more visibly if anything shifts later. For most DIYers on uneven ground, a 45-degree herringbone is the most forgiving choice both structurally and visually.
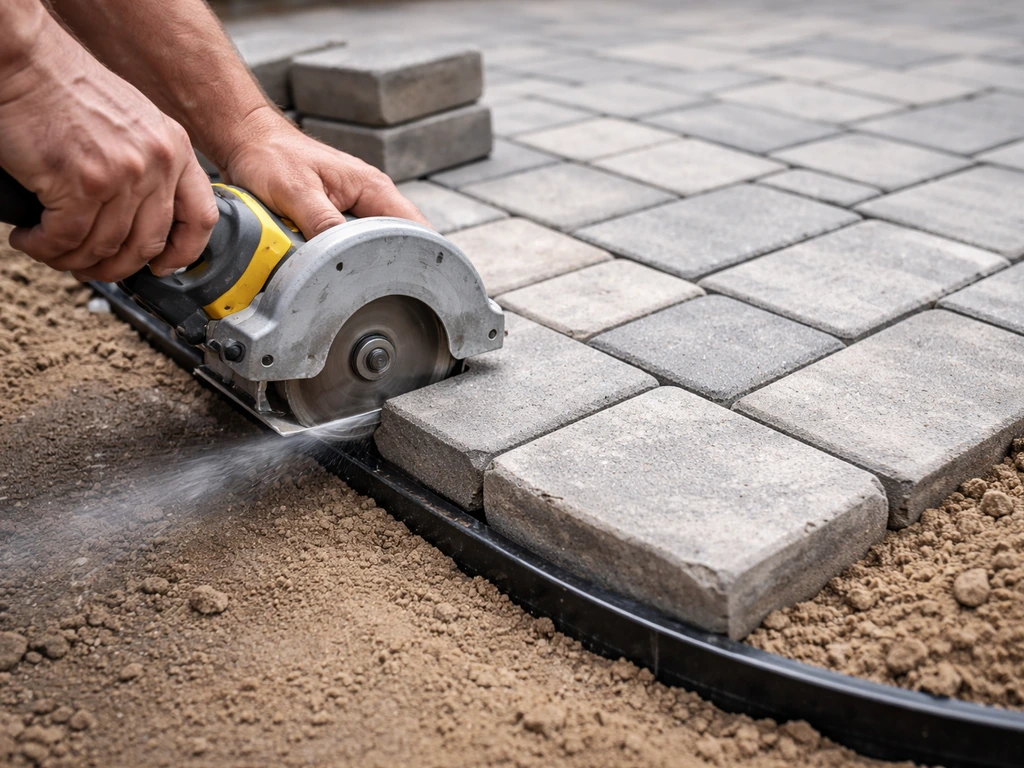
At the edges, you'll almost certainly need to cut pavers to fill the gaps between your last full paver and the edge restraint. Use an angle grinder with a diamond blade for curved or angled cuts, or a rented paver saw for straight cuts. Mark your cut line with a pencil or chalk, make the cut in a single smooth pass, and check the fit before setting the piece in sand. On uneven perimeters, cut pieces will vary in size, take your time and measure each one individually rather than assuming they'll all be the same width.
Keep joint width consistent at about 1/8 inch (3 mm) between pavers throughout the installation. On uneven ground, it's tempting to let joints drift when you're fighting elevation issues, but inconsistent joints weaken the interlocking effect and look sloppy. Use plastic paver spacers if you're struggling to maintain consistent gaps, especially in tight areas near the edges.
Step 6: Bedding sand, compaction, jointing, and final leveling
Once all pavers are laid and you're happy with the layout and elevations, run the plate compactor over the entire surface. This final compaction seats the pavers firmly into the bedding sand and locks them together. Make two or three passes in different directions. Use a rubber pad or compaction pad attachment on the plate compactor to protect the paver surface, skipping this step can chip or crack pavers, especially thinner ones.
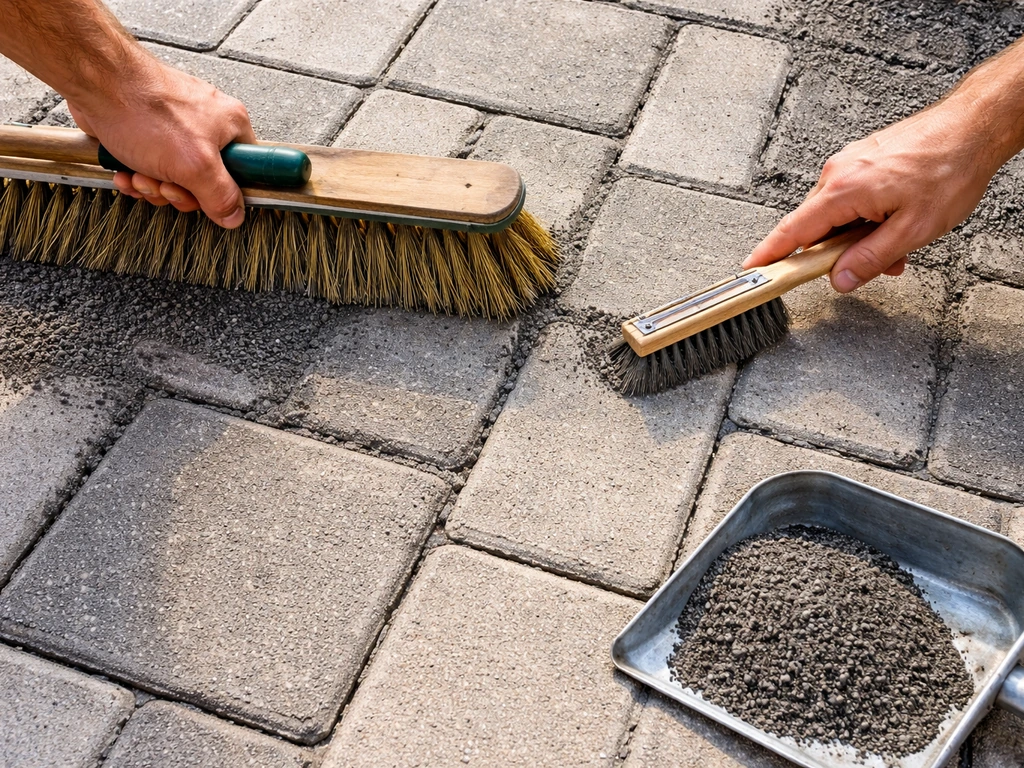
After compaction, sweep polymeric jointing sand across the surface, pushing it into all the joints with a broom. Polymeric sand is worth the extra cost over regular joint sand on uneven or sloped sites because it hardens when wet, resisting washout from rain. Sweep in multiple directions to fill joints completely. Blow off any excess sand from the paver faces with a leaf blower on a low setting, sand left on the surface can cause a haze when the polymeric sand activates. Then mist the surface with water according to the manufacturer's instructions to activate the polymer binders.
Do a final elevation check with your string lines before the polymeric sand fully sets. Walk the entire surface, pressing gently on each paver to check for rocking. Any paver that rocks needs to come out now, before the sand hardens. Pull it, adjust the bedding sand beneath it, reset, and re-compact that section. It's easier to fix a handful of rockers at this stage than to deal with them after the jointing sand has cured.
Step 7: Sealing, maintenance, and fixing what commonly goes wrong
Sealing isn't mandatory, but it's a smart move on patios in climates with heavy rain, freeze-thaw cycles, or lots of organic debris (leaves, pollen). Wait at least 60 to 90 days after installation before applying sealer, the polymeric sand needs time to fully cure and the pavers need to breathe. Use a penetrating or film-forming paver sealer appropriate for your paver material, and apply it with a pump sprayer or roller on a dry day when no rain is expected for 24 hours. Reapply every 3 to 5 years depending on your climate and traffic.
Common failure modes and how to fix them
| Problem | Likely cause | Fix |
|---|---|---|
| Sinking pavers in one area | Base not fully compacted, or soft subgrade beneath | Pull pavers, excavate, add and compact more aggregate base, relay |
| Rocking pavers | Bedding sand too thick, uneven base, or edge restraint failure | Pull paver, correct sand depth, check and re-stake edge restraints |
| Jointing sand washing out | Regular sand used instead of polymeric, or surface not draining properly | Re-sweep polymeric sand and check that drainage slope is adequate (1/4 in/ft minimum) |
| Frost heave in winter | Water infiltration into base; inadequate drainage slope | Improve edge drainage, reseal surface, check that base depth meets local frost depth requirements |
| Uneven edges pulling away | Edge restraints inadequate or spaced too far apart | Add more spikes at 12-inch intervals; replace plastic edging with aluminum on problem sections |
| Surface pooling water | Insufficient drainage slope or low pocket in base | Pull section, re-grade base to correct slope, relay pavers |
The most important maintenance task is re-sweeping polymeric sand every year or two, especially after a harsh winter or heavy rain season. Joints that empty out lose their ability to keep pavers locked together, and movement starts slowly at the edges and works inward. Catching it early with a bag of polymeric sand and 20 minutes of sweeping beats pulling up half a patio later.
Realistic tool and time expectations
For a typical 200 to 300 square foot patio on uneven ground, plan on a full weekend of work for two people, one day for excavation and base work, one day for laying and finishing. If your ground is significantly uneven or you're dealing with soft spots that need extra base work, add a half day. Tools you'll need or want to rent: plate compactor (essential), paver saw or angle grinder with diamond blade, long level (4 feet minimum), string line and stakes, screed pipes, and a rubber mallet. Skipping the plate compactor rental is a common DIY mistake, hand tamping simply cannot achieve the compaction density you need for a patio that stays level.
If your site has a significant cross-slope or you're thinking about building multiple levels into the design, those situations layer additional complexity onto everything covered here. A sharply sloped patio in particular involves different elevation planning than a mostly-flat site with dips and bumps, the foundation principles are the same, but the execution deserves its own focused approach.
FAQ
What should I do if my patio site has a high spot next to a low spot (like a ridge)?
Treat it as a base issue, not a sand issue. Plan the finished elevation by setting the string line pitch, then excavate deeper on the high side to bring the excavation bottom to the same level plane. If you leave the high spot uncorrected and try to “level” with thicker sand, you risk unstable bedding and rocking pavers.
Can I install pavers directly over existing concrete or old pavers if the area is uneven?
Usually no. Pavers need a compacted aggregate base with controlled drainage. Over concrete, the system will move differently, and unevenness can “print through.” Over old pavers, you also risk carrying debris and creating unstable spots, so the safer approach is remove to the subgrade and rebuild the base to target elevations.
How do I know if my uneven ground is soft enough that I need to excavate deeper or use geotextile?
Do the heel press test in several spots, then also observe subsurface clues like water staying pooled after rain (soft subgrade) and clay that stays plastic when damp. If the soil compresses more than about an inch or two under the plate compactor, plan extra excavation plus additional compacted base, and on clay or silty soils use geotextile across the whole excavated area.
What is the maximum amount of height correction I should try to make with sand?
Keep it small. The practical limit is about 3/8 inch for adjusting pavers during setting. Anything larger than that typically means the base is off, so you should remove and correct the aggregate base instead of relying on thicker bedding sand.
Why does polymeric jointing sand sometimes fail on sloped or uneven patios even when the paver base is good?
Most failures come from joints not being fully filled or sand being washed out before it hydrates properly. After sweeping, misting, and activation, avoid walking on the patio while it cures, and protect it from rain during the activation window. Also confirm you cleared joint voids during sweeping, not just on the surface.
How long should I wait to use the patio after installing polymeric sand and watering it?
Follow the manufacturer’s cure window, but as a rule of thumb, wait until the polymeric sand has fully set and joints are hard before placing heavy loads. If you must walk on it, keep traffic light and avoid shifting pavers, because movement before curing can loosen the joint fill.
What tools make leveling on uneven ground much easier, beyond the basic ones?
A laser level or rotating line laser helps you quickly confirm the slope direction and catch cross-slope issues. A straightedge (long screed board) used across multiple pavers makes it easier to spot rocking or small elevation differences before you continue laying.
How should I handle uneven perimeters where the edge restraint line doesn’t stay straight?
Snap a new restraint line that matches your designed pitch, then notch or cut each restraint section to fit grade changes. Measure each segment individually and keep restraint spiked into firm base at regular intervals. If the edge follows the wrong elevation, the paver field will twist as you progress.
Do I need to compact the bedding sand layer, and should I tamp it?
Do not plate compact the sand layer. Screed it to a uniform 1-inch thickness, then place pavers and seat them with light tapping. The compaction should be done with the plate compactor over the finished paver surface using a compaction pad to avoid disturbing the sand bed.
Should I seal a patio with polymeric joint sand, and what’s the risk if I seal too early?
You can, but wait. Sealing before polymeric sand fully cures can interfere with the joint sand’s hardening process and trap moisture in ways that increase staining or haze. Plan on waiting at least 60 to 90 days, especially in humid or freeze-thaw climates.
What’s the most common DIY mistake that causes pavers to shift on uneven ground?
Skipping or under-compacting the aggregate base. Hand tamping does not reliably achieve the density needed for long-term stability. If you feel the base compress under a foot or can press a screwdriver into it by hand after leveling and base compaction, it needs more compaction or localized base correction.
How often should I check and top off polymeric sand if the patio is settling slightly?
Inspect joints after heavy seasons, then re-sweep and top off as needed every year or two. Early top-off is faster than waiting until pavers start rocking, because once joints empty out significantly, movement tends to work from the edges inward.
Next Articles
How to Build a Paver Patio on a Slope: Step-by-Step DIY
Step-by-step DIY for building a level paver patio on a slope, with grading, drainage, base prep, and anti-shift tips.
How to Level Patio Pavers: DIY Steps for Flat, Stable Results
DIY steps to level patio pavers, fix uneven or sunken areas, prep base and bedding, reset, compact, and add joint sand.
How to Apply Polymeric Sand to Patio Pavers: Step by Step
Step-by-step DIY guide to apply polymeric sand between patio pavers, prep joints, spread, fill, and activate without haz