
Installing patio pavers over a compacted gravel base is the most reliable DIY method for a long-lasting, stable patio. You excavate to the right depth, build up layers of crushed stone and bedding sand, then set your pavers on top. Done correctly, the result is a surface that drains well, resists frost heave better than concrete, and can be repaired without demolition. This guide walks you through every stage from raw ground to finished patio, including special scenarios like building on slopes, around fire pits, or over existing concrete.
How to Install Patio Pavers Over Gravel: Step-by-Step Guide

Felix Rowe
16 Jul 2026
Who This Guide Is For and What You'll Learn
This is written for homeowners tackling a paver patio as a DIY project, with or without prior hardscaping experience. You don't need a contractor's background, but you do need a willingness to rent the right equipment and follow the sequence carefully. By the end, you'll know exactly how deep to dig, what materials to buy, how to compact each layer, how to lay pavers in multiple patterns, how to handle gravel or grass between pavers, and how to avoid the mistakes that cause patios to sink, shift, or grow weeds within a season. Related projects like creating a gravel-and-paver patio or integrating grass between pavers are also covered here, since they share the same base-building process.
When Gravel Makes Sense (and When It Doesn't)
A compacted gravel sub-base is the industry-standard foundation for interlocking concrete pavers (per ICPI Tech Spec 2), and for good reason. Crushed stone drains water away from beneath your pavers, which means less hydrostatic pressure building under the slab and less frost heave in cold climates. It's also more forgiving than concrete if you make a slight miscalculation, because you can adjust the bedding layer to compensate. Compared to setting pavers directly on dirt or undisturbed soil, a proper gravel base dramatically reduces settling and shifting over time.
That said, gravel isn't the answer for every situation. If your soil is extremely soft, silty, or consistently saturated, you may need to increase base depth significantly, add a geotextile fabric, or in severe cases, consult a geotechnical professional before proceeding. Gravel bases also require accurate excavation depth, which adds time to the project compared to laying pavers over existing concrete (a valid shortcut when the slab is sound). And if you're thinking about a fully permeable patio, the base material changes entirely: you'd switch to an open-graded aggregate system rather than dense-graded crusher run.
Quick Comparison: Gravel Base vs. Other Common Approaches
| Base Type | Best For | Main Advantage | Main Drawback |
|---|---|---|---|
| Compacted gravel (dense-graded) | New patios on grass or dirt | Excellent drainage, frost-tolerant, adjustable | Requires excavation and equipment rental |
| Existing concrete slab | Overlay projects on sound slabs | Faster, no excavation needed | Raises patio height, drainage must be managed |
| Compacted dirt/subgrade only | Temporary or very lightly used areas | Minimal work | Settles quickly, not recommended for permanent patios |
| Open-graded aggregate (permeable) | Fully permeable PICP systems | Maximum stormwater infiltration | Different materials, tighter tolerances, costlier stone |
Tools, Equipment, and Materials Checklist
Gather everything before you start. Running to the hardware store mid-project is how mistakes happen. Here's what you'll need for a standard sand-set paver patio on a compacted gravel base.
Tools and Equipment
- Plate compactor (reversible, 7,000–12,000+ lbf for base compaction; forward plate with urethane pad at 3,300–6,700 lbf for seating finished pavers)
- Concrete or paver saw (or angle grinder with diamond blade for cuts) — wet cut preferred
- Sod cutter or spade for stripping turf
- Mini excavator or hand tamper (for small areas) for subgrade prep
- Wheelbarrow and shovel
- Screed pipes (two lengths of 1-in or 1.25-in diameter pipe)
- Straight 2x4 screed board, at least as wide as your patio
- Long level and string lines with stakes
- Tape measure and marking paint or chalk line
- Rubber mallet
- Hand broom and push broom
- Garden hose or spray wand for compaction moisture
- Plate compactor urethane/rubber protection pad (critical for the final seating pass)
Materials
- Pavers: concrete, natural stone, or clay — quantity plus 10% overage for cuts and waste
- Compactable aggregate base (crusher run / DGA / ABC): dense-graded crushed stone meeting ASTM D2940 (angular, not pea gravel or rounded stone)
- Bedding sand: coarse concrete sand meeting ASTM C33 (do not substitute mason sand, stone dust, or play sand)
- Polymeric sand, loose joint sand, or chosen joint-fill material
- Non-woven geotextile separation fabric (recommended for silty or soft soils)
- Plastic or aluminum edge restraints with galvanized 10-in or 12-in spike fasteners
- Landscape stakes and string
- Safety glasses or goggles
- Hearing protection (especially when cutting and compacting)
- Heavy work gloves
- Steel-toed boots
- Dust mask or N95 respirator (for cutting)
- Knee pads
Base Depths and Material Specifications
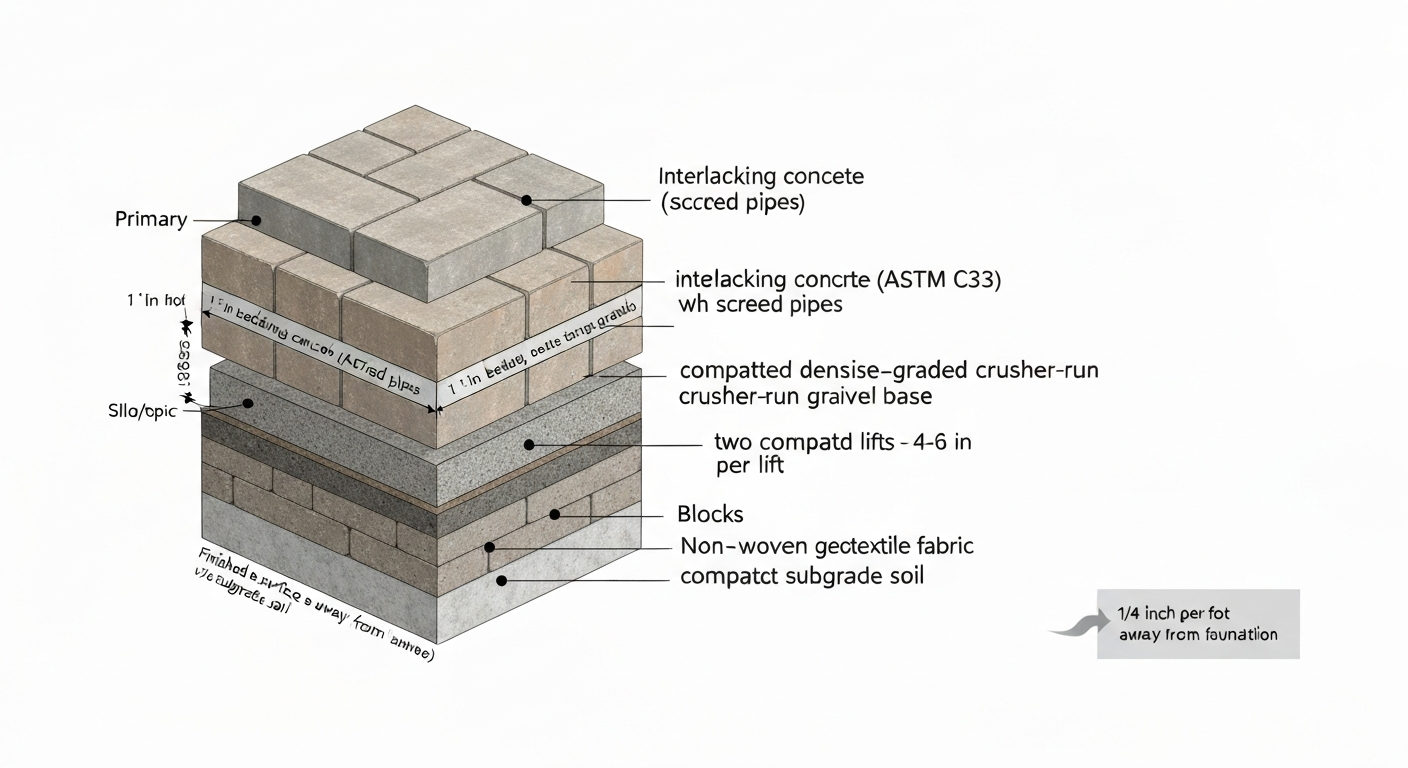
Getting base depth right is arguably the most important part of this whole project. Too shallow, and your patio will shift. Too deep, and you've wasted money and labor. According to ICPI Tech Spec 2, the minimum compacted gravel base depth for pedestrian patios is 4 inches (100 mm). If your soil is soft, silty, frost-susceptible, or you live in a climate with deep freeze-thaw cycles, bump that up to 6 to 8 inches, or more. Residential driveways call for at least 6 inches. On top of the compacted gravel, you add 1 inch (25 mm) of bedding sand, screeded smooth, which brings your total excavation depth to: paver thickness + 1 inch sand + base depth + any slope cut.
| Application | Minimum Compacted Base | Bedding Sand | Total Excavation (with 2.5-in paver) |
|---|---|---|---|
| Pedestrian patio (good soil) | 4 in (100 mm) | 1 in (25 mm) | ~7.5 in |
| Pedestrian patio (frost/soft soil) | 6–8 in (150–200 mm) | 1 in (25 mm) | ~9.5–11.5 in |
| Residential driveway | 6 in (150 mm) | 1 in (25 mm) | ~9.5 in |
| Commercial / heavy use | 8–12 in (200–300 mm) | 1 in (25 mm) | ~11.5–15.5 in |
For the base aggregate, use dense-graded crusher run (also called DGA, ABC, or road base depending on your region) that meets ASTM D2940. The angular, crushed particles lock together under compaction in a way that round pea gravel or river stone never will. For the bedding layer, only use concrete sand graded to ASTM C33. ICPI Tech Spec 17, Bedding Sand Selection (grading limits / ASTM C33) references ASTM C33/CSA A23.1-FA1 gradation bands for bedding sand (example limits: 100% passing 3/8 in; No.4 95–100%; No.8 80–100%; No.200 ≤1%) ICPI Tech Spec 17 — Bedding Sand Selection (grading limits / ASTM C33). Stone dust compacts and becomes rigid rather than allowing the bedding to self-correct under pavers, mason sand is too fine and squeezes out over time, and play sand has no structural value. ASTM C33 concrete sand is widely available at any masonry or landscape supply yard.
Planning, Layout, and Permits
Before you move a single shovel of dirt, spend an afternoon on planning. It will save you hours of rework. Measure your patio area carefully, adding a few inches on each side so edge restraints and base extend beyond the finished paver edge. Sketch the layout on graph paper at a rough scale, then try to size it so pavers land near full units along the most visible edges, minimizing small cuts.
Call 811 (in the US) at least three business days before digging to have underground utilities marked. This is not optional and it is free. Gas, electric, water, and telecom lines can all be within a few inches of the surface. Once utilities are marked, check with your local building department about permits. Many jurisdictions don't require a permit for a ground-level patio, but some do, especially in HOA communities or if the patio exceeds a certain square footage or is attached to the house. A five-minute phone call now prevents a stop-work order later.
Plan your drainage slope from the start. You need the finished surface to slope away from your house and any structures at a minimum of 1/4 inch per foot (roughly 2%), which is the commonly recommended grade for reliable sheet drainage. See ProLandscapes / industry guidance summarizing IRC/model-code slope recommendations (1/8 in/ft minimum; 1/4 in/ft commonly recommended) for details and to confirm the local authority having jurisdiction (AHJ) before finalizing slope. Some model codes allow 1/8 inch per foot, but 1/4 inch per foot gives you a real margin against pooling. If the area already drains away from the house naturally, you may be in good shape. If it slopes toward the house, factor in additional excavation or a drainage channel at the low edge.
Choosing a Paver Pattern
Your pattern affects both appearance and structural performance. Herringbone (90-degree or 45-degree) is the strongest interlocking pattern and resists horizontal creep better than running bond, which is why it's preferred for driveways and high-traffic areas. Running bond (offset rows like brick) is easy to cut and looks clean. Basketweave has a classic look but can drift if edge restraints aren't perfect. Stack bond (grid pattern) is the weakest and not recommended for anything beyond purely decorative use. Pick your pattern before ordering pavers, since 45-degree herringbone produces more cut waste at the edges (budget 15% overage instead of 10%).
Site Prep: Converting Grass or Dirt Into a Proper Base
This phase is the most physically demanding part of the job. The goal is to remove all organic material and reach stable, undisturbed mineral soil (your subgrade), then excavate to the correct total depth. Organic material, including topsoil, grass roots, and decomposed matter, compresses and decomposes over time, which means any pavers sitting above it will sink. There is no shortcut here.
- Mark the perimeter of your patio with stakes and string at the correct finished elevation, accounting for your 1/4-in-per-foot drainage slope.
- Rent a sod cutter to strip turf in clean rolls if you want to reuse it elsewhere; otherwise, cut and dispose of it. For larger areas, a mini excavator makes this fast.
- Excavate all topsoil and organic matter. In most residential yards this means going down 4 to 8 inches before hitting stable subgrade, depending on how thick the topsoil layer is. Use the string lines as your depth reference.
- Remove any large roots you encounter. Roots left in place will decompose and create voids under your base.
- Once you reach the subgrade, grade it to your planned drainage slope using a long level, string lines, and a rake.
- Compact the exposed subgrade with your plate compactor, making overlapping passes until the surface no longer deflects noticeably underfoot. ICPI recommends compacting residential subgrades to at least 98% of standard Proctor density (ASTM D698). You won't have a lab test on a DIY project, but a simple proof-roll (driving a loaded wheelbarrow over it and checking for ruts) gives you a reasonable field check.
- If you encounter soft, wet, or spongy spots, you have options: excavate and replace with compactable fill, add a geotextile, or increase base depth over that area.
If you're working on an area that's pure dirt rather than grass, the process is nearly identical: excavate to the target depth and expose undisturbed, non-organic soil. The key distinction between working on dirt versus grass is that grass areas usually have a thicker organic layer to remove. Both scenarios share the same base-building steps from this point forward.
Installing Geotextile and Preparing the Subgrade
Geotextile separation fabric sits between your subgrade and your gravel base, and it earns its place in specific conditions. If your soil is silty, fine-grained, or clayey, fine particles can migrate upward into your base aggregate over years of rain and freeze-thaw cycles, contaminating it and reducing its load-bearing capacity. A non-woven geotextile (specified to AASHTO M288 for separation applications) physically separates the two layers while still allowing water to pass through. It is not a substitute for proper compaction and is not universally required, but it is genuinely useful on weak or fine-grained soils and in frost-prone climates where you want maximum base integrity.
To install it, simply unroll the fabric over your prepared, compacted subgrade, overlapping seams by at least 12 inches. Let it run up the sides of the excavation a few inches so it also wraps behind your future edge restraints. Cut it neatly with a utility knife. Pin it temporarily if wind is a factor. Then proceed immediately to placing your first gravel lift so the fabric doesn't get displaced.
Building and Compacting the Gravel Sub-Base
The most critical rule in base-building is this: never dump all your gravel in at once and compact it in one pass. ICPI and standard construction practice call for placing base aggregate in uniform lifts of 4 to 6 inches loose thickness, compacting each lift before adding the next. Compaction equipment can only densify material to a certain depth in one pass; anything deeper than 6 inches loose and you'll have a well-compacted top layer over a loose, weak bottom layer.
- Spread your first lift of dense-graded crusher run to approximately 4 to 6 inches loose depth. Rake it level, following your drainage slope.
- Lightly mist the surface with a garden hose if the material is very dry. Crusher run compacts better at slightly above-dry moisture content (you want it damp, not muddy).
- Run the plate compactor in overlapping passes, working from the perimeter inward on the first pass, then switching to a perpendicular direction on the second pass. Overlap each pass by about 6 inches.
- After compaction, the surface should feel firm and not deflect. The material will have reduced in thickness by roughly 15 to 25% from its loose depth.
- If your total base depth requires more than 6 inches compacted, add a second lift and repeat the process. A 4-inch compacted base typically comes from a 5- to 5.5-inch loose lift.
- Check your final compacted base elevation against your string lines. The top of the compacted base should be exactly 1 inch (your bedding sand depth) plus your paver thickness below your target finished surface elevation.
- Do not disturb the base surface once compaction is complete. Foot traffic is fine; driving equipment over it is not.
Installing Edge Restraints and Perimeter Supports
Edge restraints are mandatory for sand-set pavers, full stop. Without them, the pavers at the perimeter have nothing to push against, and the entire patio slowly migrates outward. Per ICPI Tech Spec 3, acceptable options include cast concrete curbs, aluminum or steel curb strips, and spiked plastic or aluminum paver restraints. For most residential DIY projects, spiked plastic or aluminum restraints are the practical choice. They're affordable, easy to cut to length, and install quickly.
Install edge restraints directly on the compacted gravel base, not on the bedding sand. This is a common mistake: if you install them on the sand, they'll shift when the sand redistributes under load. Snap or nail the restraint to your perimeter string line, then drive 10- or 12-inch galvanized spikes through the pre-punched holes into the base at roughly 12-inch intervals. On curves, use flexible restraints and space spikes closer together (every 6 inches) to prevent gaps. The base should extend horizontally beyond the spike locations by at least as far as the base is deep, so a 6-inch base should have at least 6 inches of compacted gravel beyond the spike line, to resist outward lateral pressure and freeze-thaw forces.
Laying the Bedding Layer and Screeding
With edge restraints set, it's time for the bedding sand. This 1-inch layer is what you fine-tune to get your pavers perfectly level. Spread ASTM C33 concrete sand over the entire base area, then set two screed pipes (1-inch or 1.25-inch diameter pipe works well) parallel to each other at opposite edges of the area, resting directly on the compacted base. These pipes act as rails for your screed board and automatically set the sand to exactly the pipe diameter in height, giving you your 1-inch bedding layer.
Broadcast enough sand to slightly overfill between the pipes, then drag a straight 2x4 screed board across the pipes in a sawing motion, pulling toward yourself. Fill any low spots, re-screed, and pull the pipes out once done, filling the channels left by the pipes with a little loose sand. Do not compact the bedding sand before placing pavers, and do not walk on the screeded surface. The pavers themselves, once set and compacted, will seat the sand to its final density. Once you've screeded a manageable working section, start laying pavers immediately.
Laying Pavers: Patterns, Alignment, and Installation Workflow
Start laying pavers from a straight, fixed edge (a house wall, a previously installed edge restraint, or a chalk line) and work outward. Set each paver down into the sand without sliding it; sliding disrupts the screeded surface. Tap it gently with a rubber mallet to seat it. Maintain consistent joint spacing using paver spacers or by matching the manufacturer's built-in spacer lugs. Check alignment frequently with a string line or long straightedge, because small errors accumulate fast and a row that drifts by 1/8 inch over 10 feet becomes a visible problem by 20 feet.
For herringbone (the most structurally capable pattern), lay at 45 or 90 degrees to the primary viewing angle. Work diagonally to keep the pattern square. For running bond, keep every row offset by half a paver. For basketweave, set pairs of pavers perpendicular to each other in a checkerboard arrangement. Regardless of pattern, save all the edge and perimeter cuts for last. Set all full units first, then measure and cut the perimeter pieces as a final step.
Once you've laid a section, run the plate compactor over it with the urethane protection pad attached. Use a forward plate compactor in the 3,300 to 6,700 lbf range with the pad. Make at least two passes (first vibratory, then static). This seats the pavers fully into the bedding sand and brings joint gaps to a consistent width. Do not compact within 6 feet of an open (un-edged) face, as the pavers will push outward into the unrestrained area.
Cutting and Fitting Pavers
Cutting is unavoidable unless your patio dimensions are a perfect multiple of your paver size (and they almost never are). The cleanest cuts come from a wet-cut diamond blade saw, either a rented paver saw or a circular saw with a diamond blade and a water feed. Mark your cut line with a pencil or lumber crayon, cut slightly outside the line, then test-fit and trim as needed. For curved cuts, score the line with an angle grinder and carefully chip away material, or use a paver splitter for straight cuts on concrete pavers.
When fitting around obstacles like posts, drain covers, or irregular curves, make a cardboard template first, transfer it to the paver, and cut. Always wear eye protection and a dust mask when cutting, especially dry-cutting, which produces silica-containing dust. Wet cutting dramatically reduces dust exposure. Never cut a paver smaller than about half its original dimension for a structural edge piece; very small slivers will crack under foot traffic or frost pressure.
Joint-Filling Options and Methods
How you fill the joints between pavers affects weed resistance, stability, and the final look. You have three main options: polymeric sand, loose joint sand, and open joints (filled with gravel or planted with grass). Each has a different installation method and maintenance profile.
| Joint Fill Type | Weed Resistance | Permeability | Installation Notes | Best For |
|---|---|---|---|---|
| Polymeric sand | Excellent (hardens to resist weeds and ants) | Low (semi-permeable once cured) | Sweep in dry, compact, blow off excess, mist to activate binder — follow manufacturer's temp/humidity specs exactly | Most residential patios where clean look and low maintenance are priorities |
| Regular joint sand (loose) | Poor (weeds establish easily) | High | Sweep in, compact, re-apply after rain until stable | Temporary installs or areas where you plan to re-joint with polymeric sand later |
| Gravel between joints | Moderate (no soil for weeds) | Very high | Fill joints with small decorative gravel (pea gravel or crushed stone) after compaction; top up periodically | Permeable patios, gravel-and-paver designs, informal looks |
| Grass / turf joints | N/A (intentional planting) | High | Fill joints with topsoil/compost mix, seed or plug with low-growing grass or ground cover | Paver-and-grass hybrid patios, stepping stone layouts |
For polymeric sand: sweep it into joints after the first compaction pass, blow off any excess from paver faces (important, residue hazes are hard to remove once cured), then compact once more to drive sand deeper into joints. Blow off again, then mist gently with water to activate the polymer binder. Do not soak it. Apply in dry weather when rain isn't expected for at least 24 hours and air temperature is above 32°F. Most failures with polymeric sand come from applying it when pavers are damp or when rain hits within the curing window.
Integrating Gravel Between Pavers and Creating a Gravel-and-Paver Patio
A gravel-and-paver patio uses pavers as structural elements or stepping zones while gravel fills the spaces between paver groupings or defines pathways and borders. This design is extremely popular because it's flexible, drains beautifully, and uses fewer pavers (which reduces cost). The base-building process is essentially the same as a full paver installation, but you need to decide during the planning phase which areas will be paved and which will be gravel-filled, so you can install edge restraints to separate the two zones before screeding. For a step-by-step walkthrough on how to make a gravel and paver patio, see our dedicated guide. For detailed, step-by-step instructions on how to lay patio pavers with gravel in between, see our guide on how to lay patio pavers with gravel in between which covers planning, base construction, edge restraints, and joint-filling options.
For pea gravel or decorative stone fill between pavers, use angular crushed stone rather than round pea gravel if the joints are very narrow, since angular stone locks in place better. For wider gravel zones between paver rows, pea gravel works fine visually, though it migrates onto hard surfaces. Install a physical separator (a low aluminum restraint or a line of pavers on edge) between gravel zones and lawn areas to keep gravel from spreading. Top up gravel areas annually as they settle.
Integrating Grass Between Pavers
Grass or ground cover between pavers creates a soft, organic look that works beautifully in garden settings and low-traffic areas. For a step-by-step walkthrough on how to make a patio with pavers and grass, see our dedicated guide. The structural approach changes slightly: you need soil in the joints to support plant roots, which means you're managing a system that will need more maintenance than polymeric sand joints. For widely spaced pavers (stepping stone style), simply fill joints with a topsoil and compost mix, level it 1/4 inch below the paver surface to protect the grass crowns from foot traffic damage, and seed with a low-growing grass variety or plug with thyme, sedum, or other ground covers suited to your climate.
For tighter joint spacing, paver grid systems (plastic grid cells that hold soil and allow grass to grow through a grid framework) are a better option. These systems support the load structurally while providing deep enough soil cells for grass establishment. Whichever approach you use, be realistic about maintenance: grass in tight joints needs hand-trimming, irrigation during establishment, and occasional re-seeding in high-traffic spots. In shaded areas, a moss-type ground cover often performs better than turf grass.
Special Scenario: Laying Pavers on Existing Grass or Dirt
If you're considering laying pavers directly on top of grass or undisturbed dirt without proper base preparation, understand the difference between a temporary and a permanent installation. A temporary stepping stone path placed directly on soil is fine for a season, but any paver surface you expect to last more than a year or two needs to go through the full excavation and base-building process described in this guide. For a step-by-step walkthrough on how to lay patio pavers on dirt, see our detailed guide. For step-by-step instructions on how to lay patio pavers on grass, see our dedicated guide to converting turf into a stable paver base. Skipping the base to save time is the single most common reason DIY patios fail.
The conversion process from a grass or dirt area to a full paver patio is exactly the site preparation and base-building sequence covered above. If you've already got a gravel area in your yard, such as an old gravel parking pad or path, you may be able to use the existing material as a starting point: test it by compacting it with a plate compactor and checking for stability. If it compacts well and the depth is adequate, you may only need to add material and recompact rather than starting from scratch.
Special Scenario: Installing Pavers Over Existing Concrete
If you have a sound, structurally intact concrete slab and want to upgrade its appearance with pavers, overlaying is a legitimate approach that avoids excavation entirely. The concrete becomes your base. There are a few conditions: the slab must be free of significant cracks, heaving, or soft spots (tap it with a hammer and listen for hollow sounds, which indicate delamination), and you need to account for the added height of the pavers and setting material at doorways, steps, and thresholds.
For concrete overlays, you can use a thin mortar bed (3/8 to 1/2 inch) or a polymer adhesive rather than a full inch of sand, since the slab eliminates the need for the sand bedding layer's self-leveling function. Alternatively, thin pavers (as slim as 3/4 inch) are made specifically for overlay applications and reduce the height gain. Drainage is the key concern: make sure the existing slab still has adequate slope and that water won't pond at the edges of the paver surface. Fill any cracks in the slab with concrete repair filler before overlaying.
Special Scenario: Building on Slopes and Raised Patios
Moderate natural slope (up to about 5%) can often be handled by adjusting your excavation depth so the base is thicker on the uphill side and thinner on the downhill side, while maintaining the same finished surface elevation across the patio. Steeper slopes require more intervention: terraced retaining walls to create level pads, or a raised patio platform. If you're building a retaining wall to support a patio, the wall must be designed for the soil load it's holding. For walls taller than 3 to 4 feet, most jurisdictions require engineered drawings and a permit.
On slopes, the gravel base must still be compacted in lifts and must still extend beyond the edge restraints on the downhill side. Install edge restraints on the downhill perimeter first, since that's where the most lateral pressure will accumulate. Steps connecting slope terraces should be set on a compacted gravel footing at least as deep as your patio base, with risers typically built from full-height segmental retaining wall blocks, natural stone, or large-format pavers for stability.
Special Scenario: Installing Pavers Around Fire Pits
Fire pits create a few specific concerns for paver patios: heat, clearance, and base reinforcement near a heavy freestanding structure. For a wood-burning or gas fire pit sitting on the paver surface, most manufacturers recommend a minimum 10-foot clearance radius from any structure or combustible material. The pavers directly beneath and immediately around a fire pit will be exposed to radiant heat; concrete pavers can crack or spall under extreme heat, so consider using natural stone (like bluestone or granite) or brick pavers in the immediate fire zone, or simply leave a gravel or sand gap directly under the fire bowl.
If you're building an in-ground or permanent fire pit structure on or adjacent to the paver patio, reinforce the base beneath the structure: add an extra 2 to 3 inches of compacted base directly under the fire pit footprint, since the weight is concentrated rather than distributed. Build the fire pit walls on a solid concrete footing that extends below frost depth to prevent heaving. Always check local codes before installing a fire pit, as many municipalities regulate open burning and have specific clearance requirements.
Drainage, Slope, and Frost Considerations
You've heard the 1/4-inch-per-foot slope recommendation already, but drainage design goes beyond just the surface. If your patio is large or sits at the base of a slope, consider installing a linear drain or channel drain at the low edge to capture and redirect runoff. Downspout diverters should be positioned so roof water discharges away from the patio perimeter, not against your edge restraints.
In climates with freezing winters, frost heave is the primary long-term threat. When water in soil freezes, it expands and pushes upward, which can lift individual pavers unevenly. A well-draining gravel base helps enormously because it keeps water from accumulating beneath the pavers in the first place. In areas with deep frost lines (check NOAA's frost depth maps for your region), increase your base depth so it extends below or close to the local frost depth, or use a geotextile and slightly over-built base to add resilience. Pavers set in sand can be lifted and reset after a frost event, which is one of their great advantages over concrete, but building the base correctly minimizes how often you'll need to do that.
Troubleshooting Common Problems
Settlement and Sinking Pavers
If pavers sink in a specific area, the cause is almost always one of three things: inadequate base depth, insufficient compaction, or organic material left in the subgrade. To repair, pull up the affected pavers, excavate the area, remove any soft or organic soil, add properly graded base material, compact in lifts, re-screed the bedding sand, and reset the pavers. It's a frustrating repair but a straightforward one. The good news is you don't have to replace any pavers unless they cracked during the initial settling.
Shifting and Spreading Pavers
Lateral shifting at the perimeter almost always means edge restraints weren't installed, were installed on the bedding sand instead of the base, or the spikes weren't driven deeply enough. Pull the border pavers, reset the edge restraints correctly on the compacted base, re-drive spikes, and relay the border course. If restraints were installed correctly but still failed, check whether the base extends far enough beyond the spike line.
Standing Water
Pooling water on the surface means either the drainage slope is insufficient or the pavers have settled unevenly, creating a low spot. Use a long level to identify which. For insufficient slope, you may need to pull and re-lay a section of pavers after regrading the base. For an isolated low spot from settlement, the repair above (pull, excavate, compact, relay) applies.
Weed Growth in Joints
Weeds in joints mean either the original joint fill failed, was never polymeric sand, or the geotextile wasn't installed. For light weed invasion, treat with a paver-safe herbicide and re-apply polymeric sand after removing weeds and their roots. For severe invasion, you may need to pull pavers in the worst sections, ensure geotextile is installed in the base, relay pavers, and re-sand all joints with polymeric sand.
Safety, Permits, and Best Practices
Pavers are heavy. A standard 12x12-inch concrete paver weighs 18 to 25 pounds. Lifting from the hips rather than the back, using a paver cart for transport, and keeping cuts short all reduce injury risk. When operating a plate compactor, wear steel-toed boots (a machine roll-over is serious), hearing protection, and eye protection. During cutting, a properly fitted N95 respirator is essential to protect against crystalline silica dust, which causes lung disease with cumulative exposure. Wet cutting reduces airborne dust dramatically and is strongly preferred.
On the permit side: call 811 before every dig, check with your local building department about patio permits and setback requirements, and if your project includes a retaining wall, steps attached to the house, or a gas fire pit, assume a permit is required until you confirm otherwise. Unpermitted work can affect home sales and insurance claims.
Realistic Time, Labor, and Tool Estimates
Don't let optimistic YouTube time-lapses mislead you. A 200-square-foot patio is a genuine two-weekend project for a capable DIYer working alone, and a one-weekend project for a crew of two or three. Here's a realistic breakdown per 100 square feet of finished patio:
| Phase | Solo DIYer | 2-Person Crew | Equipment Needed |
|---|---|---|---|
| Excavation and soil removal | 4–6 hours | 2–3 hours | Sod cutter rental, wheelbarrow, hand tools |
| Subgrade compaction | 1–2 hours | 1 hour | Plate compactor (large, 7,000+ lbf) |
| Base material delivery and spreading | 2–3 hours | 1–2 hours | Wheelbarrow, rake, shovel |
| Base compaction (per lift) | 1–2 hours | 1 hour | Plate compactor (large) |
| Edge restraint installation | 1 hour | 30–45 min | Hammer or spike driver |
| Screeding bedding sand | 1–2 hours | 45–60 min | Screed pipes, 2x4 |
| Laying pavers | 4–6 hours | 2–3 hours | Rubber mallet, string line, knee pads |
| Cutting and fitting edges | 2–4 hours | 1–2 hours | Paver saw rental |
| Compacting pavers and joint fill | 1 hour | 45 min | Plate compactor (small, with urethane pad) |
| Cleanup and finishing | 1 hour | 30–45 min | Broom, leaf blower |
Equipment rental costs vary by region, but budget roughly $80 to $150 per day for a large plate compactor, $60 to $120 per day for a sod cutter, and $100 to $200 per day for a paver saw. If your patio is under 100 square feet, hand tools and a rented plate compactor are sufficient. Above 200 square feet, seriously consider renting a mini excavator for the dig phase: it turns a brutal two-day excavation into a three-hour job.
Maintenance, Sealing, and Long-Term Care
A well-built paver patio is remarkably low-maintenance, but 'low' doesn't mean 'none.' Inspect the patio every spring after the first freeze-thaw season: look for any pavers that lifted or settled, check edge restraints for movement, and re-drive any spikes that have worked loose. Reapply joint sand (or top up polymeric sand) anywhere the joint depth has dropped more than 1/4 inch, since shallow joints allow water to undercut the bedding layer.
Sealing is optional but extends the life of concrete pavers by protecting against staining, efflorescence (the white mineral deposits that leach through concrete), and UV fading. Seal for the first time 6 to 12 months after installation, after the polymeric sand has fully cured and any efflorescence has been cleaned off. Use a paver-specific sealer (penetrating or film-forming, depending on the look you want) and plan to reapply every 3 to 5 years. Do not seal pavers intended for permeable drainage, and do not seal before joint fill has fully cured.
For stain removal, act fast: oil stains respond to degreaser, rust stains to oxalic acid cleaner, and organic stains (leaves, berries) to a diluted bleach solution or specialized paver cleaner. Always test any cleaner on an inconspicuous paver first. Pressure washing at moderate pressure (1,500 to 2,000 psi with a fan tip) is effective for general cleaning but will eventually erode joint sand, so plan to re-joint after pressure washing.
Common Mistakes to Avoid and a Pre-Finish Checklist
Here are the mistakes I see most often on DIY paver projects, and every one of them is avoidable with good prep:
- Not calling 811 before digging (a potentially life-threatening mistake that's completely avoidable)
- Using the wrong base material (round gravel, pea gravel, or topsoil instead of angular crusher run)
- Using stone dust or mason sand for bedding instead of ASTM C33 concrete sand
- Skipping compaction or trying to compact the full base depth in a single pass
- Installing edge restraints on the bedding sand instead of the compacted base
- Not accounting for drainage slope before starting — retrofitting slope after laying pavers is a major repair
- Walking on screeded bedding sand before placing pavers
- Sliding pavers into position instead of setting them straight down
- Applying polymeric sand on damp pavers or before rain is clear for 24 hours
- Leaving pavers near a fire pit that will experience repeated direct heat without heat-tolerant materials
- Skipping the geotextile on silty or soft subgrades
- Underestimating paver quantity (always order 10% overage, 15% for 45-degree herringbone)
Pre-Finish Checklist
- Subgrade compacted and sloped correctly — confirmed with level and string lines
- Geotextile installed where required (silty or soft soils)
- Base aggregate placed in lifts and compacted to specified depth
- Edge restraints installed on compacted base with spikes fully driven
- Bedding sand screeded to 1-inch depth on top of base
- All full pavers laid with consistent joint spacing and pattern alignment checked
- All perimeter cuts made and fitted
- Pavers compacted with urethane-padded plate compactor (2 passes)
- Joint fill applied, compacted, and (if polymeric sand) activated per manufacturer instructions
- Final surface elevation and slope verified against original design
- Any excess sand or polymeric residue blown off paver faces
- Edge restraint top flanges trimmed flush if visible above finished grade
Finishing a paver patio you've built yourself from raw ground up is genuinely satisfying, and the result will outlast a poured concrete slab if you've followed the sequence properly. The base is everything. Get that right, and the rest of the project falls into place.
FAQ
What base depth do I need when installing patio pavers over gravel?
Follow industry guidance: compacted aggregate base depths of about 4 in (100 mm) for patios/walkways (pedestrian areas), 6 in (150 mm) for residential driveways, and 8–12 in (200–300 mm) for heavy/commercial use. Increase base depth where native soils are weak or frost‑susceptible (often +50–100%).
Can I install pavers directly on top of existing gravel?
Yes, if the gravel is well‑graded, free of organic material, properly compacted, and at the correct thickness. Remove at least the depth needed for pavers and bedding, verify compaction (target ≥98% of Standard Proctor for pedestrian areas), add or re‑place base in uniform lifts and compact each lift before screeding bedding sand.
How do I convert grass or dirt into a proper compacted gravel base?
Strip and remove topsoil/organic material to expose stable subgrade, excavate to the required depth (paver thickness + 1 in bedding + compacted base), compact the exposed subgrade to specification, lay a non‑woven geotextile if needed, place crushed aggregate in 4–6 in loose lifts, compact each lift, then screed the 1 in bedding sand before laying pavers.
What materials and tools do I need for a DIY patio paver install over gravel?
Materials: angular crushed aggregate (DGA/ABC) or open‑graded stone for permeable systems, ASTM‑grade bedding sand (~1 in), pavers, edge restraints (plastic/aluminum/ poured concrete), jointing material (polymeric sand, pea gravel, or turf), geotextile if required. Tools: excavator or shovel, plate compactor (reversible for base, padded plate for seating), rake, screed rails and board, level, string line, masonry saw or cutter, rubber mallet, broom, wheelbarrow, safety gear (gloves, eye/ear protection).
What bedding sand should I use and how thick is it?
Use clean, non‑plastic concrete sand meeting ASTM C33 (ICPI bedding gradation). Screed to approximately 1 in (25 mm) loose thickness — expect some settlement (~3/8 in) after compaction. Do not use stone dust or mason sand for the bedding layer.
How do I install and anchor edge restraints?
Install edge restraints on the compacted aggregate base (not on bedding sand). Options: poured concrete perimeter curbs, cast‑in‑place curbs, aluminum/steel restraint strips, or spiked rigid plastic restraints. Anchor restraints into the compacted base with spikes or concrete so the base extends laterally to resist movement; restraints prevent lateral spread and are mandatory for sand‑set systems.
Next Articles
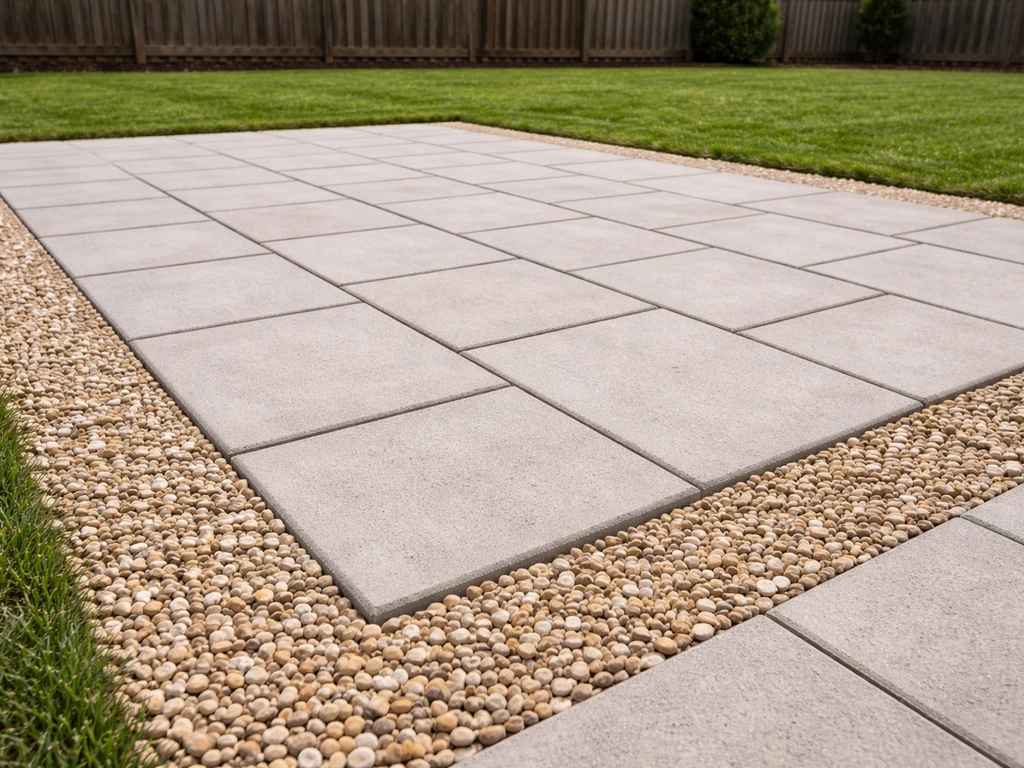
How to Make a Gravel and Paver Patio DIY Guide
Step-by-step DIY guide to build a pea-gravel and paver patio with proper base, leveling, drainage, and maintenance.
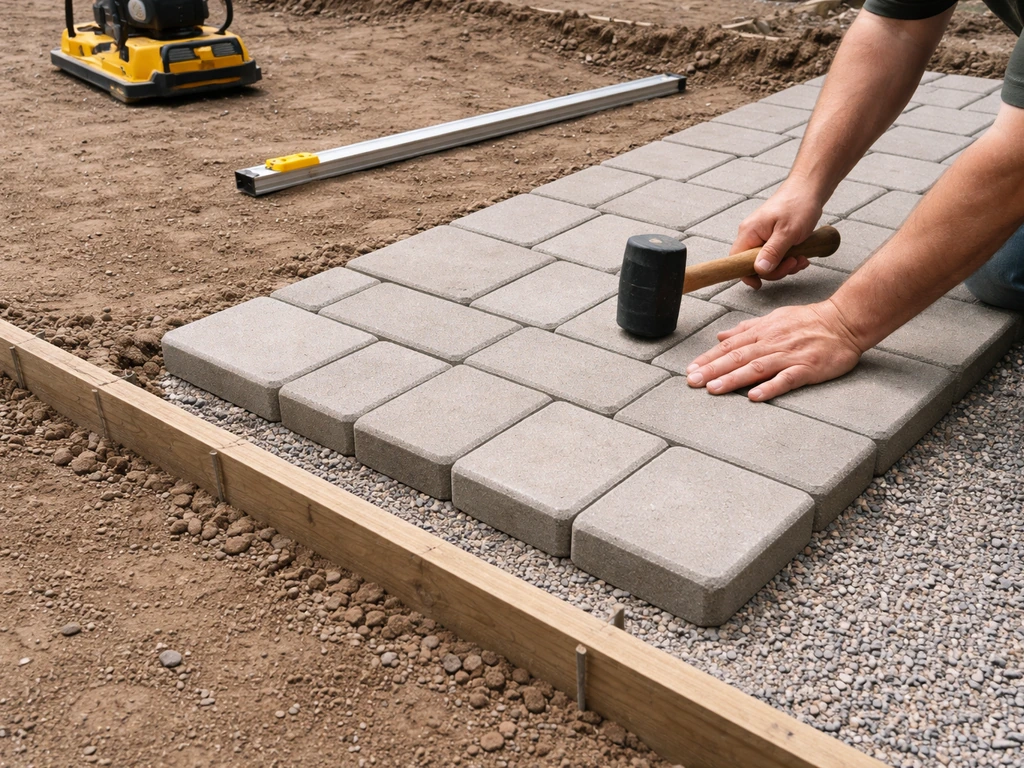
How to Lay Patio Pavers on Dirt: Step by Step Guide
Step-by-step guide to lay patio pavers on dirt, with prep, base layers, compaction, leveling, rubber paver tips, fixes.
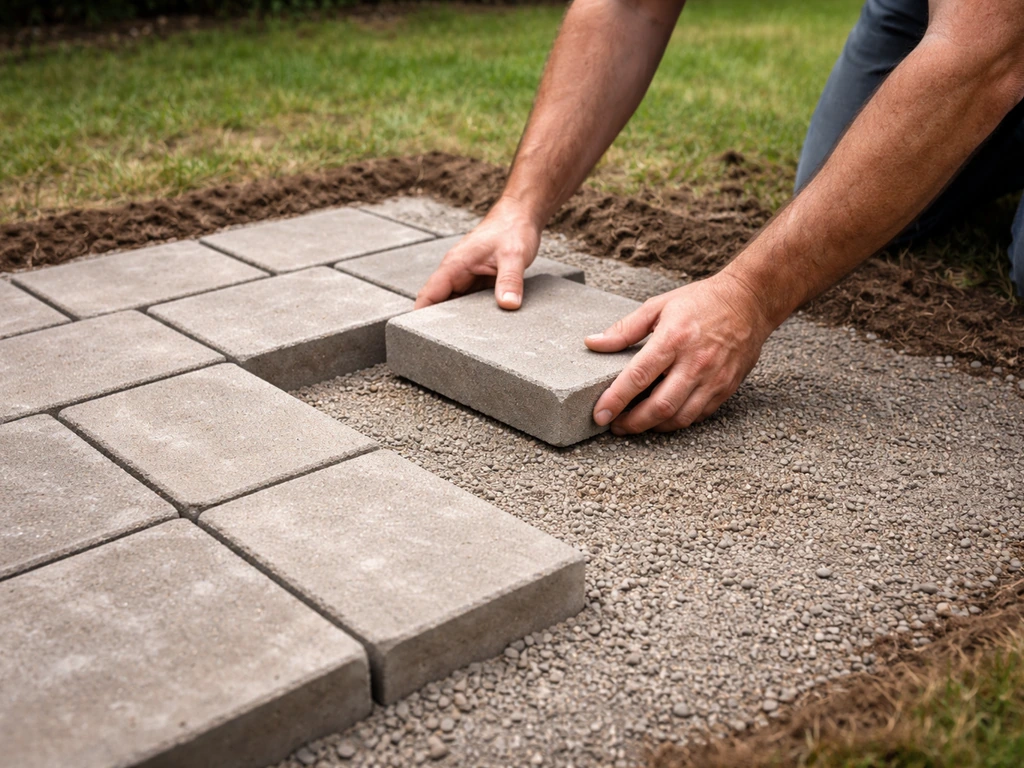
How to Lay Patio Pavers on Grass: Complete DIY Guide
Step-by-step DIY on laying patio pavers on grass, with base prep, leveling, drainage, weed control, and upkeep tips.