You can lay patio pavers on dirt, but not directly on it. Bare dirt alone is too soft and unstable to hold pavers in place long-term. What you're really doing is building on top of the dirt: excavating down, compacting the subgrade, adding a crushed gravel base, then a bedding sand layer, and finally setting your pavers on top. To lay patio pavers on grass successfully, you still have to remove the turf, build the right compacted base, and set the pavers on bedding sand building on top of the dirt. Done right, the result is a solid, level patio that lasts for decades. Done wrong, you get a surface that shifts, sinks, and weeds within a season. This guide walks you through every step so you land in the first camp.
How to Lay Patio Pavers on Dirt: Step by Step Guide

Felix Rowe
18 May 2026
Is it OK to Lay Pavers on Dirt (and When It Won't Work)
The honest answer is: it depends on what's under that dirt. In most residential yards, native soil is workable as a starting point as long as you compact it properly and build the right base layers above it. Where it gets tricky is when the soil itself is problematic. Expansive clay soils, for example, swell when wet and shrink when dry. That constant movement will push and crack even well-set pavers over time. Extremely sandy or loose soils, on the other hand, have almost no load-bearing strength at all.
Here are the situations where laying pavers on dirt is genuinely feasible and where you should think twice before starting.
| Situation | Feasible? | What to Do |
|---|---|---|
| Firm, loamy native soil | Yes | Excavate, compact subgrade, build proper base |
| Moderately sandy soil | Yes, with care | Compact well, use geotextile fabric, add extra gravel base |
| Heavy clay soil | Marginal | Improve drainage, consider professional help for large areas |
| Soft, boggy, or waterlogged ground | No | Fix drainage issues first or install raised system |
| Fill dirt (recently placed) | No | Wait 6-12 months for settling or use engineered fill compacted in lifts |
| Steep slope (over 2% grade) | Limited | Regrade or terrace; slope under 2% is fine for drainage |
A quick test: stomp on the area after a rain. If your foot sinks more than half an inch, the soil has a drainage or compaction problem you need to solve before you do anything else. If the ground stays firm, you're in good shape to start.
One more thing: this guide is for traditional concrete, natural stone, or brick pavers. Rubber patio pavers work differently, and I cover that as a separate method below. If you're comparing approaches, the base build-up here is what separates a durable patio from one you'll be pulling up and resetting in two years.
Site Prep: Clearing, Excavating, Grading, and Drainage
Good site prep is where most DIY patio projects succeed or fail. It's also the part that's easiest to rush, because none of it looks impressive until the pavers are on top. Take your time here.
Step 1: Mark and Clear the Area
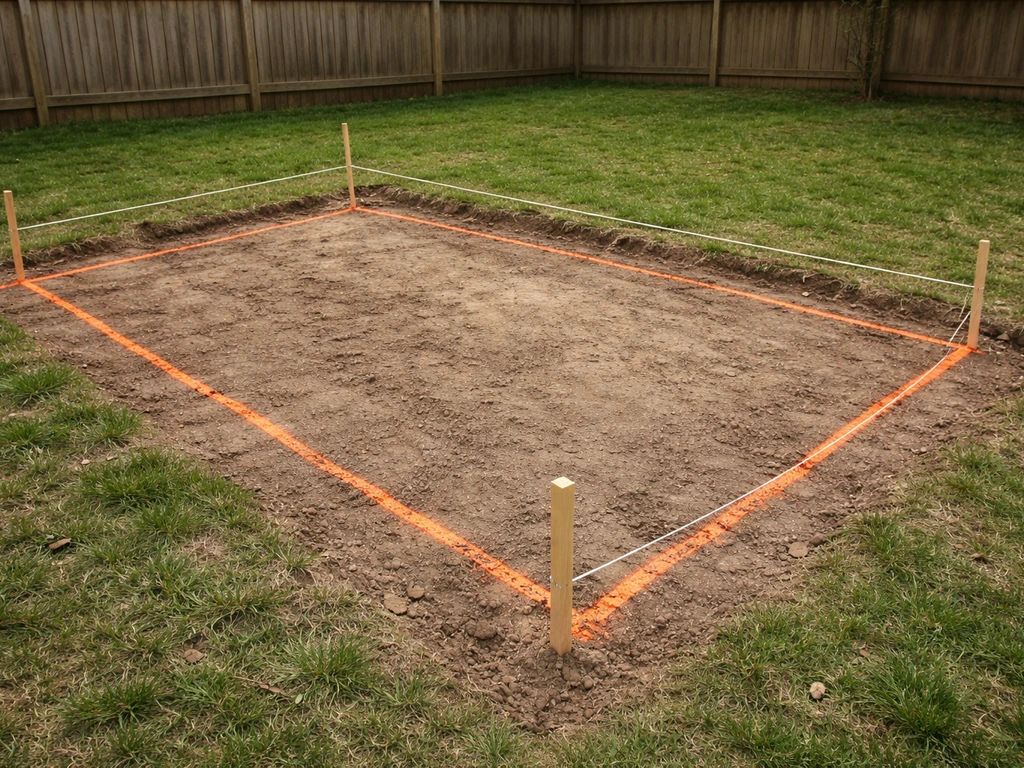
Use spray paint, stakes, or string lines to mark out your patio footprint. Add 6 inches on each side beyond your finished patio edge so you have working room for edging and cutting. Remove all vegetation, roots, and debris from the area. If you're coming from grass, skim it off with a flat spade. If you're coming from grass, skim it off with a flat spade, and if you're aiming for a patio with pavers and grass, you'll plan the grass edges and joint plan accordingly. If you're starting from grass, focus on removing the sod and building the base so the patio stays level and stable over time paver patio on grass. Large root systems need to come out completely; roots that decay underground create voids that cause your surface to sink.
Step 2: Excavate to the Right Depth
Your excavation depth depends on your base thickness plus the thickness of your pavers. For a standard residential patio, you're typically digging 7 to 9 inches below your finished grade. Here's the breakdown: 4 to 6 inches of compacted crushed stone base, 1 inch of bedding sand, and roughly 2.375 inches for a standard concrete paver. Add those up and set your dig depth accordingly. Use a shovel and a laser level or line level strung across stakes to keep your excavation consistent.
Step 3: Grade for Drainage
Your patio needs to slope slightly away from your house: aim for 1/8 inch per foot (about 1% grade). This keeps rainwater from pooling on the surface or draining toward your foundation. Check your slope with a level and a tape measure at multiple points. Get this right at the subgrade level and every layer above it will mirror the same pitch automatically.
Step 4: Address Drainage Problems Before Moving On
If water pools in your yard naturally, or if the excavated area holds water after rain, install a simple drainage solution before you add base material. A perforated drain pipe run to a lower point in the yard, or a layer of filter fabric (geotextile) along the bottom of the excavation, can solve most residential drainage issues. Skip this step and you'll be fighting muddy, shifting pavers for years.
Building the Base: Compacted Subgrade, Gravel, and Sand
The base is the backbone of the whole project. Your pavers are only as stable as what's underneath them, so this section is worth doing by the book.
Compact the Native Soil (Subgrade)
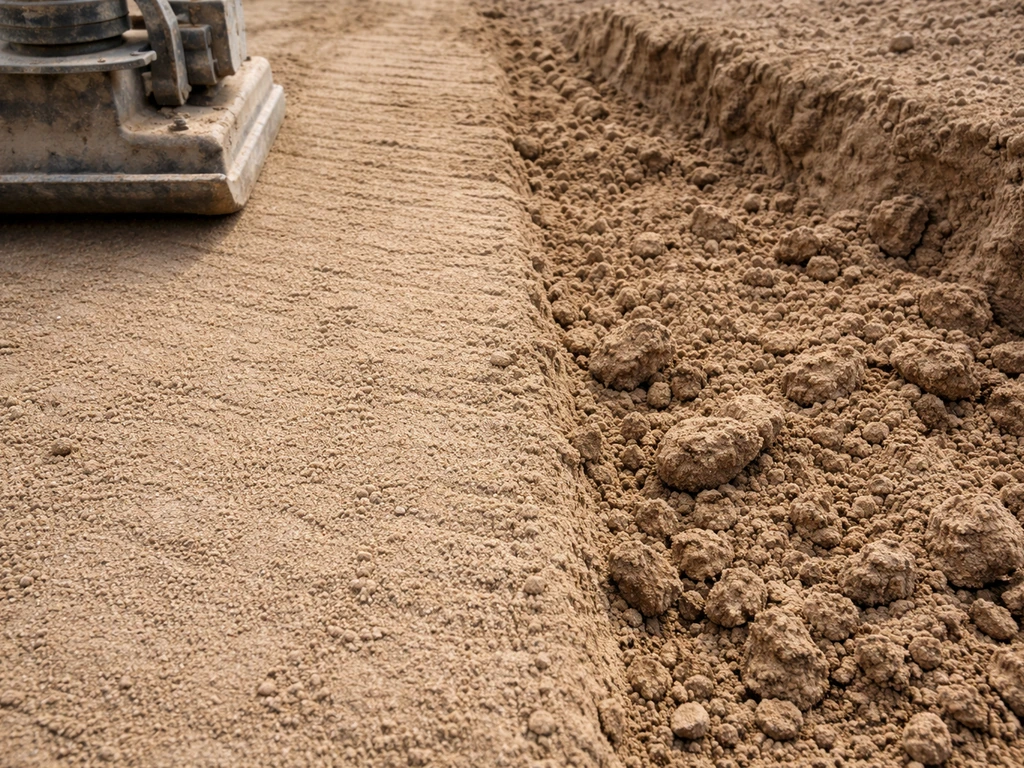
Before you add anything, compact the exposed native soil at the bottom of your excavation. Use a plate compactor with at least a 5,000 lbf rating for this job. A hand tamper is not adequate for anything beyond a very small project; it simply can't deliver the force needed to reach the compaction density you need. For pedestrian patios, you're aiming for at least 95% Proctor density. If you're renting a plate compactor, make sure you're getting the right class of machine for the job, not a light-duty model.
Add and Compact the Crushed Stone Base
Crushed stone (also called processed gravel or road base) is your main structural layer. Use angular crushed stone, not rounded pea gravel. Angular stone interlocks when compacted; rounded stone shifts. A common spec is 3/4-inch crushed stone, but check what your state DOT uses under roads in your area. That's the material the Interlocking Concrete Pavement Institute recommends matching, and it's good advice because it's proven to work in your local conditions.
Add your base material in lifts of no more than 4 to 6 inches at a time and compact each lift before adding the next. Adding more than 6 inches in one go and then trying to compact it results in a poorly compacted layer in the middle, which is almost impossible to detect until your pavers start sinking. For most residential patios, you'll do one or two lifts to reach your target depth. After each lift, compact with your plate compactor in overlapping passes until the stone stops visibly moving under the machine.
Lay the Geotextile Fabric (Optional but Recommended)
Placing geotextile landscape fabric between your native soil and your gravel base does two things: it keeps soil from migrating up into your gravel layer over time, and it helps with drainage. On sandy or loose soils it's especially useful. On firm loam it's optional, but cheap enough that it's usually worth adding.
Screed the Bedding Sand Layer
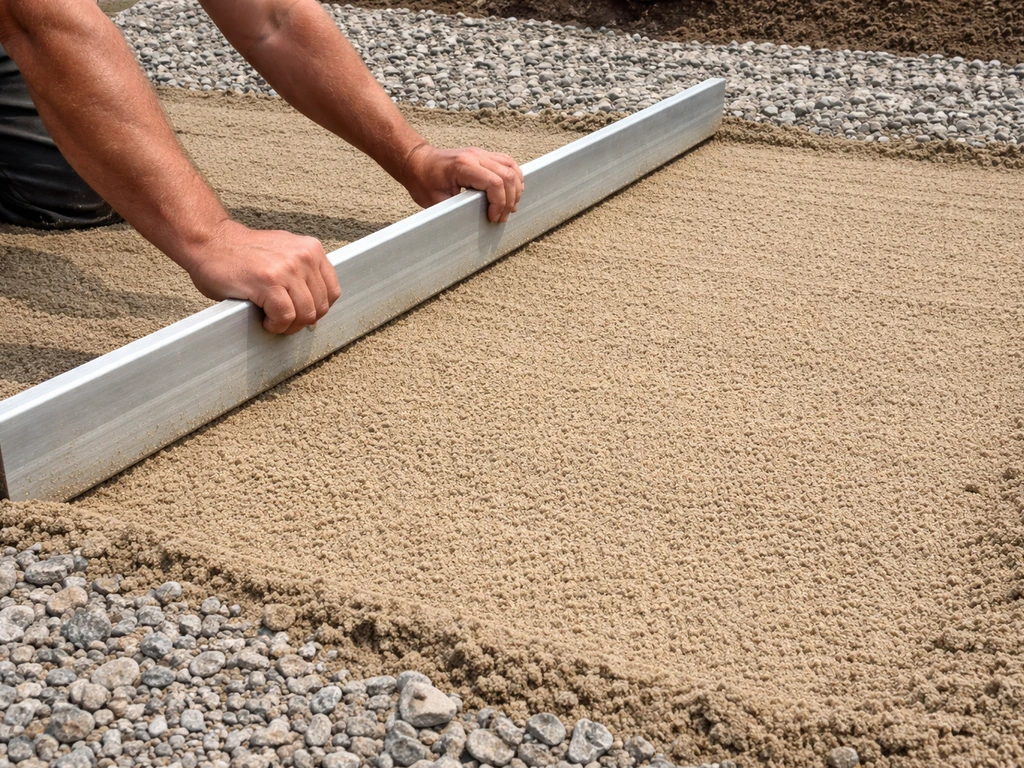
Once your gravel base is compacted and level, add 1 inch of coarse bedding sand (concrete sand, not play sand). This layer lets you make fine adjustments to each paver's height and provides a slightly forgiving surface. Use two lengths of 1-inch conduit pipe laid parallel across the gravel as screed guides. Drag a straight 2x4 across them to create a perfectly flat, 1-inch-deep sand bed. Pull out the pipes and fill the tracks with sand before you start laying pavers. Do not compact the sand bed before laying pavers; it needs to stay loose so the pavers bed into it properly.
Laying the Pavers: Leveling, Patterns, Cutting, and Edging
Start From a Fixed Edge or Corner
Always start laying from a straight fixed edge, your house foundation wall, a permanent wall, or a chalk-snapped line. Work outward from that reference point. Never start in the middle and work outward in all directions. That approach makes it nearly impossible to maintain alignment over a large area.
Choosing a Pattern
Running bond (brickwork offset) and herringbone are the two most common patterns. Herringbone (at 45 or 90 degrees) is actually the strongest choice structurally because it distributes load in multiple directions, which matters on a dirt-based installation where you want every bit of interlock you can get. Running bond is easier to lay and still very effective for pedestrian use. Avoid jack-on-jack (straight grid) patterns; they create long continuous joint lines that allow the surface to rack and shift.
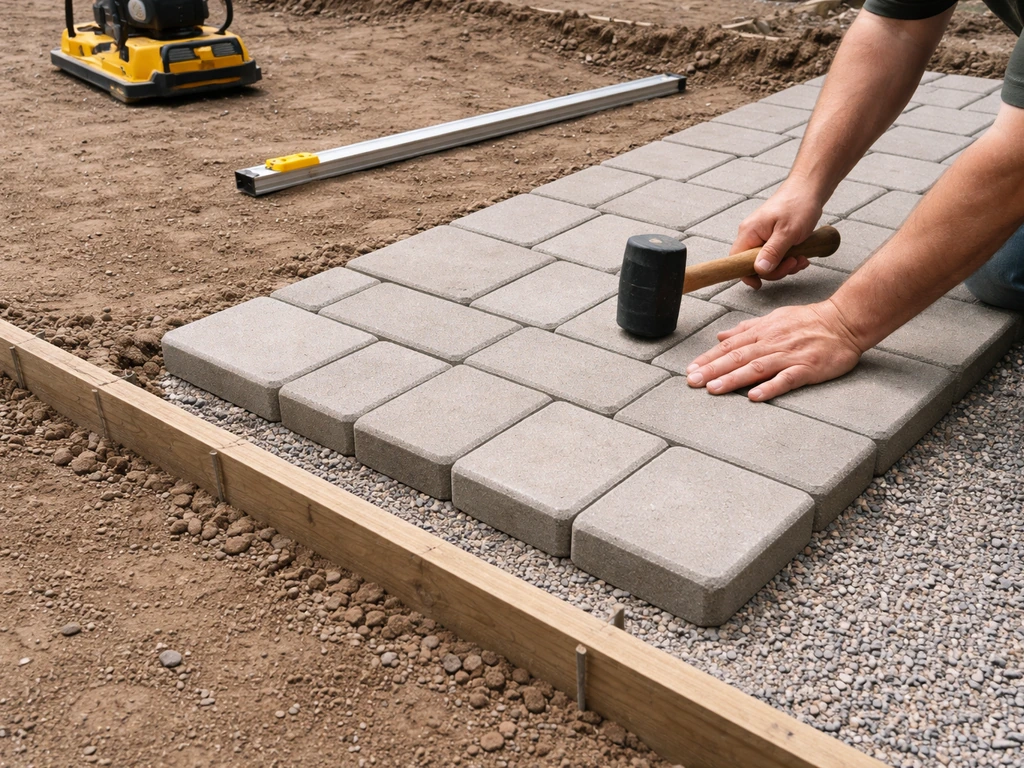
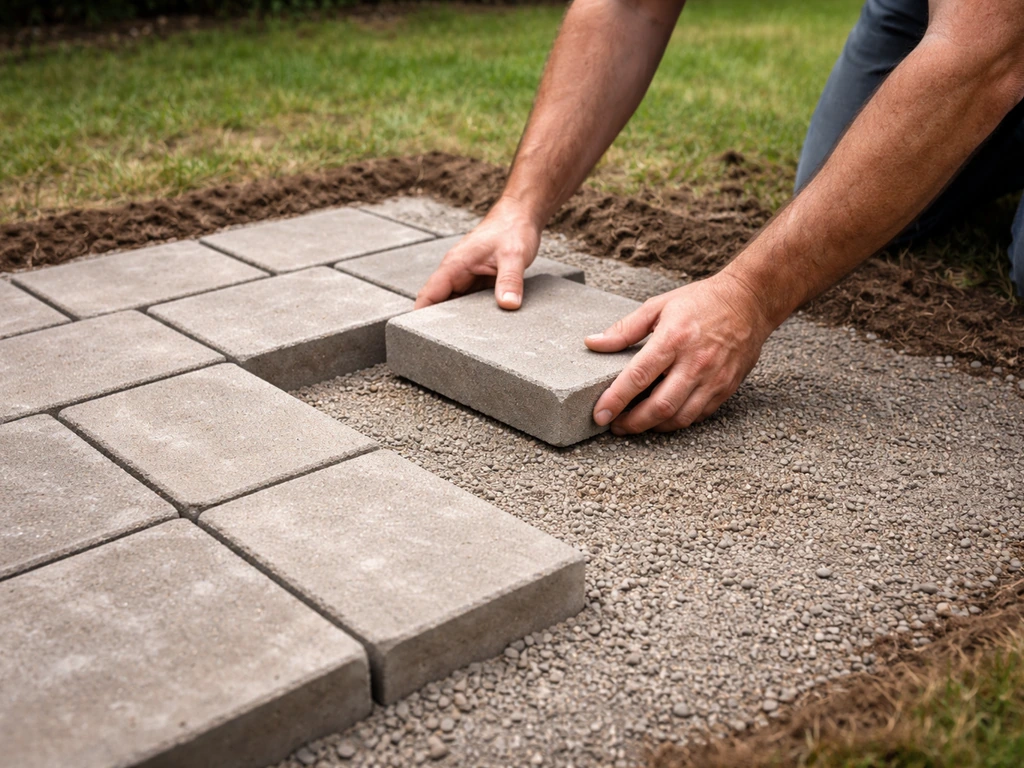
Set Each Paver and Check as You Go
Place each paver gently onto the sand bed. Don't slide them; set them straight down to avoid disturbing the sand. Use a rubber mallet to seat each paver firmly. Check your level constantly: every 4 to 5 pavers, lay a long level or straight edge across several pavers to make sure they're flush with each other. If one is high, lift it out and remove a little sand. If low, add sand. It's much easier to correct as you go than to relay a whole section later.
Cutting Pavers Around Obstacles
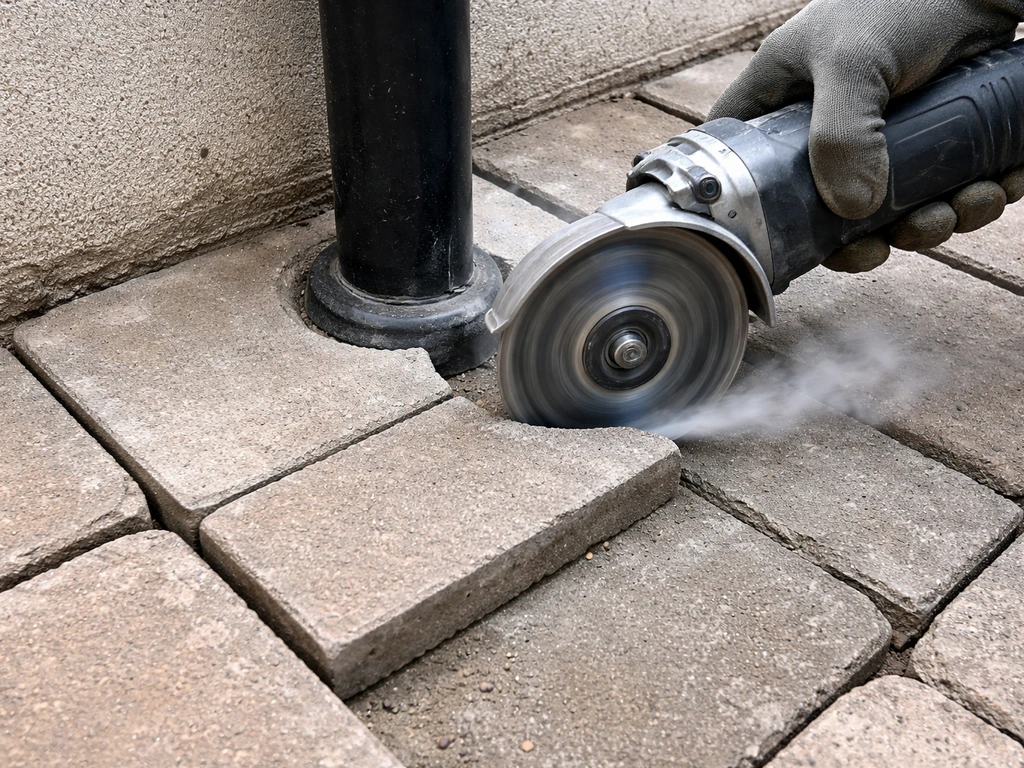
You'll almost certainly need to cut pavers at the edges and around obstacles like downspouts or existing structures. A diamond-blade angle grinder handles curves and notches well. A wet saw or masonry saw gives cleaner straight cuts. Mark your cut line with chalk or a pencil, cut slowly, and always wear eye protection and a dust mask. When cutting around a curve, score the line with multiple small cuts and gradually chip away the waste.
Install Paver Edging Before You Finish
Plastic or aluminum paver restraint edging goes around the entire perimeter of your patio before you fill joints. Without edging, the pavers at the border will gradually spread outward and the whole field will loosen. Spike the edging into the gravel base at 8- to 12-inch intervals using the manufacturer's recommended spikes. The edging should sit tight against the last row of pavers, not gapping or floating above the gravel.
Joint Filling, Sealing, and Final Surface Setup
Compact the Laid Pavers First
Before you add joint sand, run the plate compactor over your finished paver field. Put a rubber pad or protective mat under the plate to avoid scratching the paver surface. This compaction step beds all the pavers into the sand uniformly and helps close any small height variations between individual pavers. Make two to three overlapping passes across the entire area.
Fill the Joints
Sweep dry joint sand (or polymeric sand) over the entire paved surface. Work it into all the joints using a stiff broom. Make several passes from different directions. For basic installations, regular coarse sand works fine and is cheap. Polymeric sand is a step up: it contains binding agents that harden when wet, locking the joints more firmly and resisting weed growth and insect infestation better than plain sand. The trade-off is cost and the fact that you need to apply it on a dry day with no rain in the forecast for at least 24 hours.
Keep in mind that joint sand, especially non-polymeric sand, may need to be replenished over time. The Concrete Masonry and Hardscapes Association (CMHA) notes that with open-graded aggregate (OGA) used for joint-sand and maintenance-focused situations, homeowners may need to replenish joint sand from time to time, making it more maintenance-prone than fully rigid systems joint sand, especially non-polymeric sand, may need to be replenished over time. Rain and traffic gradually erode it from the joints, so plan to check and top up the joints every year or two as part of basic maintenance.
To Seal or Not to Seal
Sealing is optional for concrete pavers but genuinely extends their life and keeps colors looking fresh. If you're using polymeric sand, wait at least 30 days after installation before sealing so the sand can fully cure. Apply a paver sealer with a roller or pump sprayer in a thin, even coat. Two thin coats beat one thick one. Sealers typically need reapplication every 3 to 5 years depending on traffic and weather exposure. Natural stone pavers benefit from a penetrating (impregnating) sealer rather than a topcoat sealer.
Special Case: How to Install Rubber Patio Pavers on Dirt
Rubber patio pavers follow a different logic than concrete or stone. They're flexible, shock-absorbing, and much lighter, which means they don't need the same rigid structural base. That said, you still can't just throw them on bare dirt and call it done.
When Rubber Pavers Make Sense
Rubber pavers are a smart choice for areas around play sets, pool surrounds, or any space where comfort and safety underfoot matter more than a formal hardscape look. They're also easier to install solo, since you don't need a plate compactor or a full gravel base system.
Simplified Base for Rubber Pavers
Here's the process for rubber pavers on dirt, which is genuinely simpler than the concrete paver method:
- Remove all grass and organic material from the area. Rubber pavers trap moisture against organic material and you'll get mold and rot underneath if you leave vegetation in place.
- Grade the soil to slope slightly away from structures for drainage, just as you would for any paver project.
- Compact the native soil with a plate compactor or hand tamper for small areas. Rubber pavers are lighter and more forgiving, so a hand tamper is more acceptable here than with concrete pavers.
- Add 1 to 2 inches of crushed gravel and compact it. This isn't for structure as much as for drainage; rubber pavers need water to drain away from underneath to prevent pooling and shifting.
- For some rubber paver systems, you can then lay the pavers directly. Others recommend a thin layer of coarse sand (about 1/2 inch) to help level the surface.
- Set the rubber pavers in your chosen pattern. Many rubber paver systems have interlocking tabs on the edges; snap them together firmly.
- No joint filling is typically needed. Rubber pavers don't have sand-filled joints. Simply ensure the tabs are locked and the edges are restrained.
Rubber pavers don't need sealing. They do need to be checked periodically for shifting, since they're lighter than concrete and more susceptible to frost heave in cold climates. If a section shifts or lifts, simply pop it back into place and check that the underlying gravel base is still draining well. Compared to laying pavers on grass, where organic decomposition under the surface is a persistent problem, rubber pavers on a compacted gravel bed over dirt perform quite reliably.
Troubleshooting Common Dirt-Base Problems and Maintenance
Even a well-built patio over dirt can develop problems, especially in the first year as everything settles. Here's how to diagnose and fix the most common issues.
Sinking or Uneven Pavers
If individual pavers or a section of pavers sinks below the surrounding surface, the most common cause is insufficient compaction in the base, a void left by a decayed root, or a soft spot in the native soil. To fix it: pry up the affected pavers using two flat bars or paver pullers, inspect the sand and gravel below, add or remove material to correct the level, recompact if needed, and relay the pavers. It's tedious but very doable. This is exactly why a proper base saves you labor in the long run.
Washboarding or Surface Ripple
A pattern of highs and lows across the patio surface usually means the bedding sand layer was uneven to start, or the compaction pass after laying wasn't thorough enough. Pull up the affected section, re-screed the sand bed, relay, and compact again. If the same section keeps developing ripple, check that water isn't channeling underneath from a nearby downspout or grading issue.
Water Pooling on the Surface
Pooling water usually means the slope is wrong. Check your pitch with a level. If the patio drains toward the house or has a low spot in the middle, you'll need to relay the affected section and correct the grade. If the surrounding yard is draining onto the patio from outside, consider adding a channel drain at the patio's low edge.
Weeds Coming Through Joints
Weeds in paver joints are almost universal if you use plain sand. They grow from airborne seeds settling into the joints, not from soil below (a properly installed base stops upward weed growth). Polymeric sand is the best prevention. For existing weed problems, pull them by hand or use a joint-safe weed killer, then refill the joints with polymeric sand to prevent regrowth.
Soft Spots and Poor Compaction
If you notice a zone that flexes or feels spongy underfoot, you have a compaction problem in the gravel base or subgrade. Don't ignore it; it will get worse. Lift the pavers in the soft zone, dig down to the problem layer, recompact, and rebuild. If the soft area keeps returning even after compaction, there may be a drainage issue bringing water into the base. Adding a perforated drain pipe alongside the affected zone often solves it permanently.
Ongoing Maintenance Checklist
- Check joint sand levels each spring and top up any joints where sand has eroded
- Inspect the patio perimeter for edging spikes that have lifted or sections of restraint that have shifted
- Look for any pavers that have risen due to frost heave after winter; these can usually be tapped back down with a rubber mallet
- Reapply paver sealer every 3 to 5 years or when water stops beading on the surface
- Clear the surface of leaves and debris regularly to prevent staining and moss growth
- Redirect any downspouts that drain toward the patio to avoid undermining the base
A patio built properly over dirt doesn't need to be babied, but it does need a quick annual once-over. Catch small issues early and you'll likely never need a major repair. Most homeowners who put in the work upfront find that their pavers settle in after the first year and stay solid for a very long time.
FAQ
Can I lay patio pavers directly on dirt if I tamp it really well?
You should treat bare dirt as a subgrade only, not the setting surface. Even with strong compaction, dirt can shift with moisture changes, and pavers will lose support over time. The stable approach is compacted soil, then a properly compacted gravel base, then a loose bedding sand layer.
How do I tell if my soil is too wet to start excavating?
If the soil smears when you dig or forms a ball when squeezed but won’t crumble into individual grains, it is typically too wet to compact correctly. Wait until the material breaks apart cleanly and compacts without “pumpiness.” If you excavate while it is wet, your base can compact unevenly and later sink.
Do I need geotextile fabric under the gravel base on every patio?
It is most important on sandy or loose soils, where soil migration is more likely. On firm loam it is optional, but it still can help limit upward movement of fine particles and improve drainage. If you skip it, make sure your native soil is well compacted and not pumping fines into the base.
What’s the biggest mistake when compacting the base?
Overfilling and under-compacting the base is the most common issue. Add gravel in 4 to 6 inch lifts and compact each lift fully before adding the next. Trying to compact a thicker layer can leave a weak middle that you cannot see until pavers begin sinking.
Should I compact the bedding sand before laying pavers?
No. Bedding sand must stay loose so pavers can bed into it and minor height adjustments can be made. Compacting the sand makes it act like a rigid layer and increases the chance you will lock in high and low spots.
How much slope should I use, and where do I measure it?
Aim for about 1/8 inch per foot (roughly 1%) away from the house. Measure at the subgrade and again after you build each layer, because you can accidentally change grade during excavation or when spreading gravel and sand.
What should I do if my yard drains toward the patio?
If water is naturally flowing into the patio area, base layers can stay saturated and soften. Correct it before installation with a drainage plan such as a perimeter drain channel at the low edge or a perforated pipe leading to a lower discharge point. If you rely only on paver slope, you may still get muddy movement.
Is angular crushed stone required, or can I use pea gravel?
Use angular crushed stone, not rounded pea gravel. Angular stone interlocks during compaction, while rounded material shifts and reduces base stability. Rounded stone also tends to trap less securely, which can cause differential settlement under traffic.
Can I use a lighter compactor or a hand tamper for a small patio?
A hand tamper is usually inadequate for anything beyond very tiny areas because it cannot reliably reach the compaction density needed under pavers. For a typical residential patio, renting a correctly sized plate compactor is the safer route, and you are aiming for high Proctor density for the base/subgrade.
How do I maintain alignment and avoid a wavy patio surface?
Lock your work to a straight, fixed starting edge (house wall, permanent structure, or chalk line). Avoid starting in the middle and working outward, and check levels frequently every few pavers using a long straightedge so you catch waves early while the sand is still workable.
What’s the best way to cut pavers for tight edges and corners?
For clean straight edges, a wet saw or masonry saw generally produces the best results. For curves and notches, an angle grinder with a diamond blade works well, but mark cuts carefully and cut slowly in multiple passes to reduce chipping.
Do I need edging if I plan to fill the joints with sand?
Yes, you should install restraint edging around the entire perimeter before joint sand. Joint sand does not stop lateral spreading of the paver field, so edging prevents the border row from loosening and creeping outward over time.
Should I compact the pavers after installing them, and when?
Yes, after placing pavers and installing edging, run the plate compactor over the finished surface with a protective pad underneath. This beds pavers uniformly into the sand. Do it before joint sand is fully locked, and do not overdo passes in one spot to avoid disturbing the sand bed.
What’s the difference between polymeric sand and regular joint sand for weeds?
Polymeric sand is designed to harden when wet, improving joint stability and reducing weed growth compared to plain sand. Plain sand usually needs periodic replenishment because rain and traffic wash or erode it from joints over time.
How long should I wait before sealing pavers, especially if I used polymeric sand?
If you used polymeric sand, wait at least 30 days after installation before sealing so the joints and polymer can fully cure. For concrete pavers without polymeric sand, sealing timelines depend on product instructions, but you still want the surface fully dry and clean before applying sealer.
My pavers feel spongy in one area, what’s the first thing to check?
Treat sponginess as a compaction or drainage warning. Lift pavers in that zone, inspect the base for a soft spot or void, recompact, and rebuild as needed. If the problem keeps returning, check whether water is channeling into that area from grading or a nearby downspout.
How do I repair a sinking section without rebuilding the whole patio?
Lift only the affected pavers, inspect beneath the sand and base for voids or soft subgrade, then add or remove base material to restore correct height and slope. Re-screed bedding sand, relay pavers, recheck level across a longer straightedge, and finish by topping joints.
Do rubber patio pavers need the same gravel base and drainage work as concrete pavers?
Rubber pavers are more flexible and lighter, so the base requirements are typically simpler. However, they still need to be installed on a stable, compacted gravel bed, not bare dirt, and they should be checked for shifting, especially in climates with freeze-thaw cycles.
Next Articles
How to Lay Patio Pavers on Grass: Complete DIY Guide
Step-by-step DIY on laying patio pavers on grass, with base prep, leveling, drainage, weed control, and upkeep tips.

How to Use Patio Paver Sand: Step by Step DIY Guide
Step-by-step guide to apply patio paver sand correctly: prep base, set pavers, fill joints, compact, and troubleshoot is

How to Install Patio Pavers in Sand: Step-by-Step
DIY step-by-step how to install patio pavers in sand, from excavation and base prep to leveling, cutting, joint sand and