
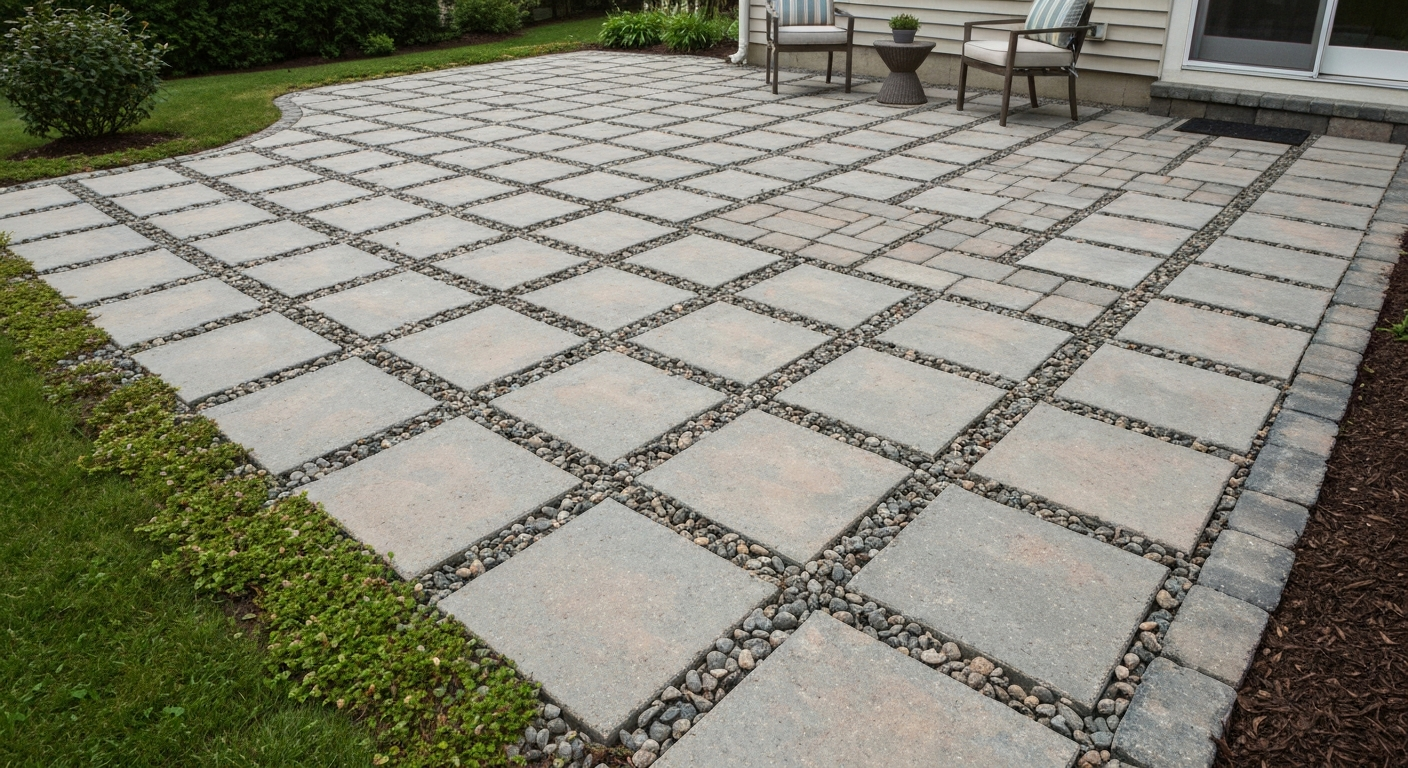
Laying patio pavers with gravel-filled joints is one of the most beginner-friendly and versatile patio methods available to homeowners. Instead of locking joints with mortar or polymeric sand, you fill the gaps between pavers with a loose angular aggregate, crushed stone, decomposed granite, or pea gravel. The result is a naturally draining, attractive patio surface that you can build on grass, compacted dirt, an existing gravel base, or even over concrete. The key to getting it right is understanding that the gravel between your pavers is not a structural shortcut: you still need a properly compacted aggregate base beneath the pavers, a consistent 1-inch bedding layer, accurate slope for drainage, and solid edge restraints. Get those fundamentals right, and the jointing gravel is the easy part.
How to Lay Patio Pavers with Gravel Between: Complete Guide

When Gravel Joints Make Sense (and When They Don't)
Gravel-filled joints are the right choice in specific situations. They work beautifully for a relaxed, cottage-style or naturalistic look where you want plants to creep between pavers. They are also the go-to option for permeable patio designs where stormwater infiltration is a priority, since angular aggregate joints stay open and let rain pass through to the base rather than running off. If your municipality has stormwater requirements or you are installing near a downspout area, the permeable joint system is genuinely useful, not just decorative.
That said, gravel joints are not ideal for every situation. High-traffic areas, driveways, or any patio where you will roll furniture or use a wheelchair benefit more from a stabilized joint. Gravel joints also require more ongoing maintenance: you will replenish aggregate as it migrates, pull weeds more frequently, and deal with some settling over time. If low maintenance is your top priority, polymeric sand wins. If permeability, aesthetics, or budget is the priority, gravel joints are the right call.
Quick Decision Guide: Gravel vs. Polymeric Sand vs. Solid Joints
| Joint Type | Best For | Permeability | Weed Resistance | Maintenance Level | Cost |
|---|---|---|---|---|---|
| Loose angular gravel (No.8/No.9) | Permeable patios, naturalistic designs, DIY-friendly budgets | High | Low | High (replenish, weed) | Low |
| Decomposed granite / quarry fines | Earthy aesthetics, moderate drainage | Medium | Low-Medium | Medium | Low-Medium |
| Pea gravel | Decorative spaces, low-traffic areas | High | Low | High (migrates easily) | Low |
| Polymeric sand | Weed control, ant resistance, cleaner look | Low | High | Low | Medium |
| Mortar / solid grout | Permanent installations, porcelain pavers | None | Very high | Very low | High |
For most homeowners reading this, you are choosing between loose angular gravel joints (maximum drainage, more maintenance) and polymeric sand (lower maintenance, less permeable). The rest of this guide focuses on gravel joints, but I will flag the key differences where it matters.
Gravel and Joint-Fill Options Compared
Not all gravel is equal when it comes to filling paver joints. The material you choose affects drainage, stability, aesthetics, and how often you will be out there topping things up.
Crushed Angular Stone (ASTM No.8 or No.9)
This is the material ICPI and CMHA specify for permeable interlocking concrete pavement (PICP) joints, and it is my top pick for DIY gravel-joint patios too. See Construction of Permeable Interlocking Concrete Pavement Systems (CMHA) and ICPI Tech Spec references for detailed PICP design guidance and joint material recommendations (including use of ASTM No.8/9 open-graded stone). Angular stone locks loosely in place better than rounded aggregate because the jagged edges interlock slightly instead of rolling under pressure. ASTM No.8 (roughly 3/8-inch gradation) and No.9 (slightly finer) are both widely available at masonry suppliers. The angular shape resists migration under foot traffic better than pea gravel, and the open gradation keeps water flowing through. Downside: it is not the prettiest option up close.
Pea Gravel
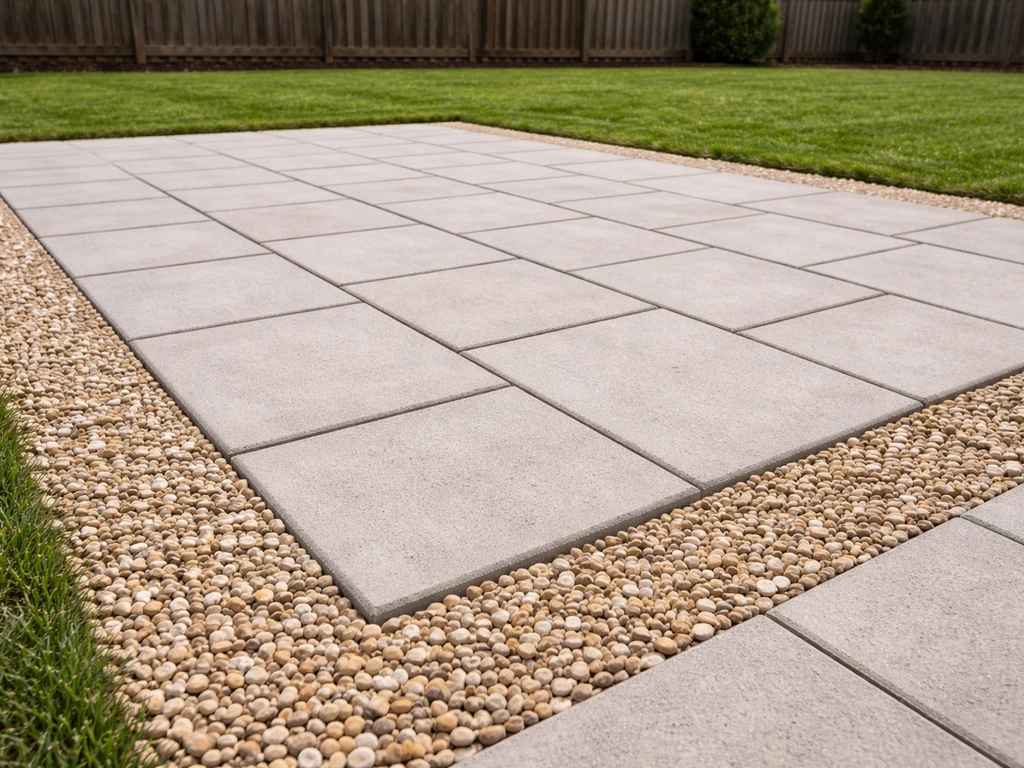
Pea gravel is smooth, round, and very attractive between larger stepping-style pavers or in low-traffic zones. The problem is that rounded stones roll and migrate readily, especially on any slope. You will find it scattered across your lawn within a season if you have kids, dogs, or heavy foot traffic. It is best reserved for accent joints in a decorative patio where the pavers themselves are doing most of the structural work and the gravel is mainly visual.
Decomposed Granite
Decomposed granite (DG) is a popular choice for a warm, earthy, Southwestern aesthetic. Fine-grained and self-compacting to a degree, it fills narrow joints well and gives a tidy finished look. It handles moderate drainage but is not as open as angular stone. In wet climates, compacted DG in joints can crack if it freezes and thaws, so it is better suited to drier or mild-winter regions.
Quarry Fines
Quarry fines (also called stone dust or crusher fines) are the byproduct of crushing stone. They compact firmly, which gives your joints stability and a clean appearance. They are inexpensive and easy to source. The tradeoff is that compacted quarry fines reduce drainage significantly, and they can wash out in heavy rain if joints are shallow. They are a reasonable middle ground for a patio where you want a tidier look than loose gravel but prefer to avoid polymeric sand.
Polymeric Sand (for comparison)
Polymeric sand is worth mentioning even in a gravel-joint guide because many homeowners start with gravel joints and later reconsider. Products like Techniseal RG+ and Alliance Gator MAXX require dry surfaces and joints at the time of application, precise water-activation steps, and a 24-to-48-hour curing window before vehicle traffic. They will haze your pavers if you apply them to damp surfaces or if rain hits within the curing window. Follow the manufacturer's technical data sheet exactly. Done right, they dramatically reduce weed growth and joint erosion. Done wrong, they are a mess to remove.
Everything You Need: Tools and Materials Checklist
Materials
- Concrete pavers (calculate quantity from your design area plus 10% overage for cuts and waste)
- Crushed aggregate base material: 3/4-inch minus compactible gravel or crushed limestone (4 inches deep for pedestrian patios, 6 inches for driveways)
- Bedding layer material: coarse concrete sand (ASTM C33) for standard sand-set, or ASTM No.8 angular stone for permeable/open-graded systems
- Joint-fill aggregate: ASTM No.8 or No.9 angular stone, pea gravel, decomposed granite, or quarry fines (choose based on guidance above)
- Edge restraints: rigid plastic paver edging, aluminum edging, or poured concrete curb
- Galvanized spikes or landscape staples (10-inch spikes for plastic edging, minimum 12-inch spacing)
- Geotextile fabric (optional but recommended over soft or clay-heavy subgrade)
- Marking paint or chalk line for layout
Tools
- Plate compactor (rental: roughly $60-100/day) with neoprene pad attachment for compacting over pavers
- Sod cutter or flat spade for removing grass (sod cutter rental: ~$75/day)
- Excavation: round-point shovel, mattock, or mini excavator for larger jobs
- Screed pipes (two lengths of 1-inch OD conduit work perfectly) and a straight 2x4 or aluminum screed board
- Rubber mallet
- Dead-blow hammer
- Level (4-foot minimum) and line level
- Stakes and mason's string
- Tape measure and chalk line
- Angle grinder with diamond blade or wet tile saw for cutting pavers
- Broom (stiff-bristle for aggregate sweep-in)
- Wheelbarrow and hand tamper
- Bucket and garden hose
Safety Gear
- Safety glasses (non-negotiable when cutting pavers: silica dust is hazardous)
- N95 or P100 respirator when cutting concrete pavers or handling stone dust
- Ear protection when using plate compactor or angle grinder
- Work gloves
- Steel-toed boots
- Knee pads for extended laying work
Design and Planning Before You Dig
Measuring Your Area
Measure the length and width of your planned patio and multiply to get square footage. For irregular shapes, break the area into rectangles and triangles, calculate each section, then add them together. Add 10% to your paver order for cuts and breakage. For the aggregate base and bedding layer, convert square footage to cubic yards: multiply the square footage by the depth in feet (for example, 4 inches = 0.33 feet) and divide by 27 to get cubic yards. A 200-square-foot patio with a 4-inch base needs roughly 2.5 cubic yards of compactible gravel.
Choosing a Paver Pattern
For gravel-joint patios, the pattern you choose affects both the visual look and how naturally the joints fill. Running bond and stacked bond patterns create long, continuous joints that make it easier to sweep gravel in cleanly. Herringbone and basketweave patterns break up the joint lines, which can actually improve interlock strength slightly but make gravel filling a touch more tedious. For a naturalistic look with wide joints (1 inch or more), irregular flagstone-style stepping patterns with larger-format pavers look the most intentional.
Paver Size and Joint Width
Most standard concrete pavers are designed for a 1/8-inch joint when laid in a sand-set system. For gravel joints, you typically want a wider gap: 1/2 inch to 1 inch is a practical range for angular stone or pea gravel. Larger-format pavers (12x12 or 16x16 inches) with 3/4-to-1-inch joints give a bold, modern look. Smaller pavers with narrow joints look more traditional. Always check your specific paver manufacturer's installation guide for minimum joint width requirements, especially for porcelain pavers, which often require spacers and cannot touch each other.
Setting Aesthetic and Functional Goals
Decide upfront whether you want plants growing in your joints (allow wider gaps and fill with DG or fine gravel mixed with a little topsoil), purely decorative gravel that stays put (angular stone, wider joints), or maximum permeability (open-graded angular stone, PICP-style system). Your goal shapes every material decision downstream. If you are building near a fire pit, factor in non-combustible material choices around the pit perimeter. If you are building on a slope greater than 2%, plan your drainage direction carefully before you touch a shovel.
Site Evaluation and Permits
Before any digging, call 811 (in the US) to have underground utilities marked. This is free, legally required in most states before excavation, and potentially life-saving. Wait the required period (usually 2-3 business days) before digging.
Check your local building department about permits. Most municipalities do not require a permit for ground-level patios under a certain size (often 200 square feet), but rules vary widely. A raised patio, one that attaches to a structure, or one in a flood zone may require a permit and inspection. It takes 10 minutes to call and could save you from having to tear out finished work.
Evaluate your soil type. Clay soils drain poorly and are prone to frost heave, which can destabilize your paver base over winter. Sandy or loamy soils are more cooperative. For clay-heavy sites, consider adding an extra inch or two to your compacted base, installing a geotextile fabric between the subgrade and base aggregate, and being precise with your drainage slope. If your soil is extremely soft or waterlogged, consult a landscape contractor before proceeding: you may need a thicker engineered base or a French drain system first.
Setting Grade and Slope for Drainage
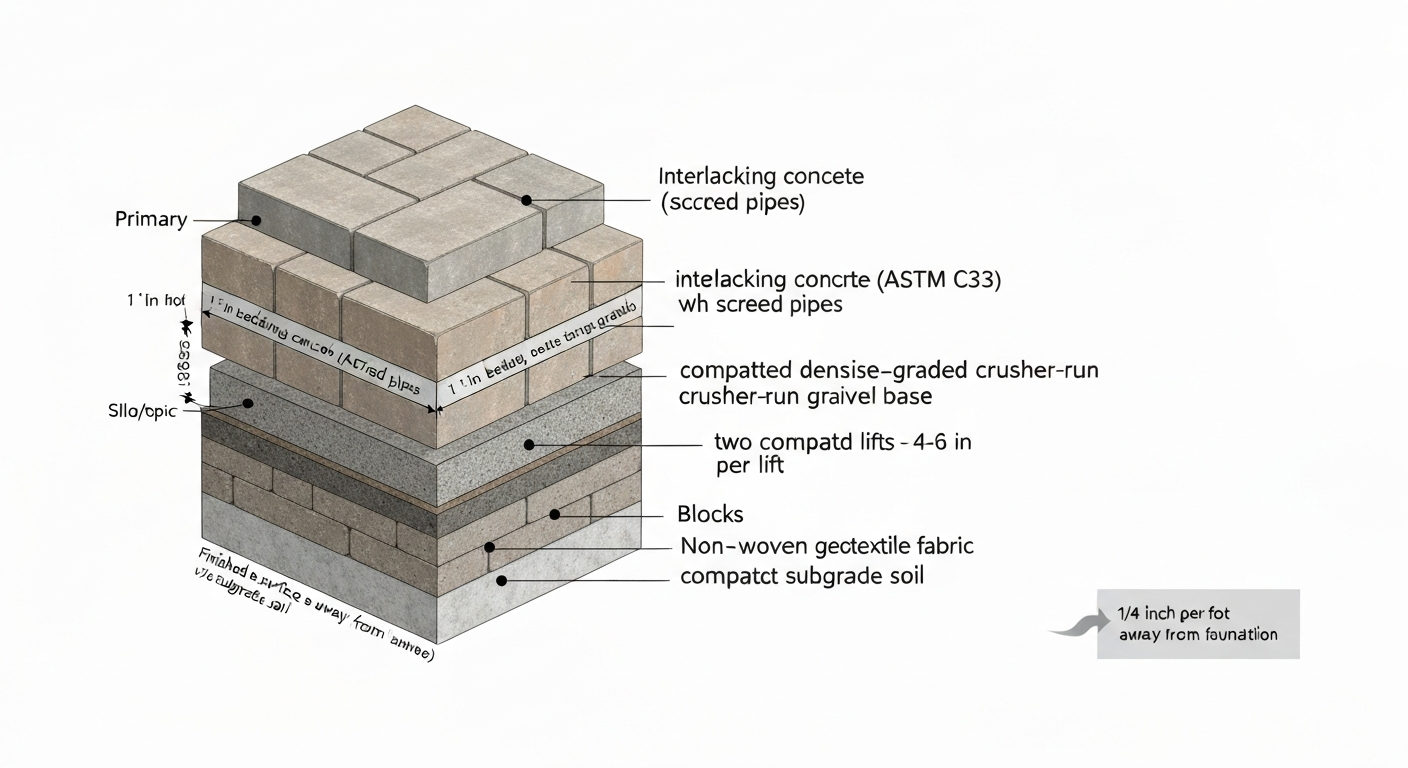
This step is where many DIY patios fail. Without adequate slope, water pools on the surface, works its way under the base, and your pavers start to settle and shift within a few seasons. The industry standard is a finished surface slope of 1/4 inch per foot away from your house or any structure. That is a 2% grade. Over a 10-foot patio, that means the far edge sits 2.5 inches lower than the edge against your house. It sounds like a lot, but you will barely notice it while sitting on the patio.
A minimum of 1/8 inch per foot (1% grade) will work in well-draining soils, but 1/4 inch per foot is the practical sweet spot that reliably moves water off the surface without the patio feeling tilted. Never slope toward your house or toward a foundation.
How to Mark Your Slope
- Drive a stake at the high point of your patio (typically the house-side edge) and a stake at the low point (the far edge).
- Tie a string line between the two stakes at the same height. Use a line level to confirm it is perfectly level.
- At the far stake, lower the string by 1/4 inch for every foot of patio depth. For a 12-foot-deep patio, lower the far end of the string 3 inches below level.
- This string now represents your finished paver surface slope. All your base grading, bedding layer screeding, and paver setting should reference this line.
- For complex or wide patios, set multiple parallel string lines to hold your grade across the full width.
After laying pavers, ICPI and CMHA guidance calls for a finished surface tolerance of plus or minus 3/8 inch over a 10-foot straightedge. Keep a 10-foot level or straightedge on hand throughout laying to catch any high or low spots before you set neighboring pavers.
Edge Restraint Options and Installation
Edge restraints are not optional. Without them, your pavers will slowly migrate outward under foot traffic, and your gravel joints will widen unevenly. This is even more critical with gravel joints than with polymeric sand because loose gravel provides no lateral cohesion between pavers.
Plastic or Aluminum Edging
Rigid plastic paver edging and aluminum edging are the most common DIY choices. Both are easy to install, flexible enough to follow curves, and durable when properly staked. Use 10-inch galvanized spikes spaced no more than 12 inches apart, driven at an angle through the edging stake holes into firm base material. The top of the edging should sit at or just below the top of the paver surface so it is not visible. Cheap, thin plastic edging is the most common failure point I see in DIY patios: pay a little more for beefy 1/8-inch-thick professional-grade edging.
Concrete Curbs
Poured concrete curbs or pre-cast concrete edging are the most permanent and stable option. They are ideal for large patios, any area with significant vehicle overhang, or situations where the patio edge is exposed and visible. Concrete curbs require forming and mixing, which adds time and cost, but they will not budge. Install the curb on compacted base aggregate, let it cure to at least 70% strength (roughly 3 days at 70°F) before placing adjacent pavers.
Mortar-Set Edge Pavers
Another option is to set your border row of pavers in a mortar bed directly on the compacted base, then lay the field pavers in the standard sand or gravel-bed system inside that mortared border. The mortared border acts as a permanent, integrated curb. This is a more advanced technique, but it produces a cleaner look and eliminates visible plastic edging. Use a Type S mortar mix and allow full cure before plate-compacting the interior field.
Tips for Durability with Gravel Joints
With gravel-filled joints, the pressure from lateral paver movement is higher than in a polymeric-sand system because loose gravel provides no cohesion. Make sure your spikes are long enough to reach undisturbed base material, not just the bedding layer. For corners and curves, increase spike frequency to every 8 inches. Re-check your edging after the first full winter: freeze-thaw cycles can lift spikes slightly, and a quick reset in spring prevents gradual migration.
Substrate-Specific Prep: Grass, Dirt, Gravel, and Concrete
Starting on Grass
Laying pavers on an existing grass area is the most common starting point. For step-by-step instructions, see the companion guide 'how to make a patio with pavers and grass'. For a step-by-step guide on how to lay patio pavers on grass, see this detailed walkthrough covering excavation, base prep, and edge restraint installation. Remove the sod completely: do not try to lay base material over grass, as organic material will decompose, causing settling. Strip sod to a depth that gives you room for your base (4 inches minimum), bedding layer (1 inch), and paver thickness (typically 2.375 inches for standard concrete pavers), plus an extra 1/4 inch so your finished surface sits slightly proud of the surrounding lawn. Total excavation depth is typically 7 to 8 inches from existing grade. Related projects where you are installing pavers directly on or over grass without a structural base use a different, simpler approach, but for a long-lasting patio, this full excavation method is the right one.
Starting on Dirt or Native Soil
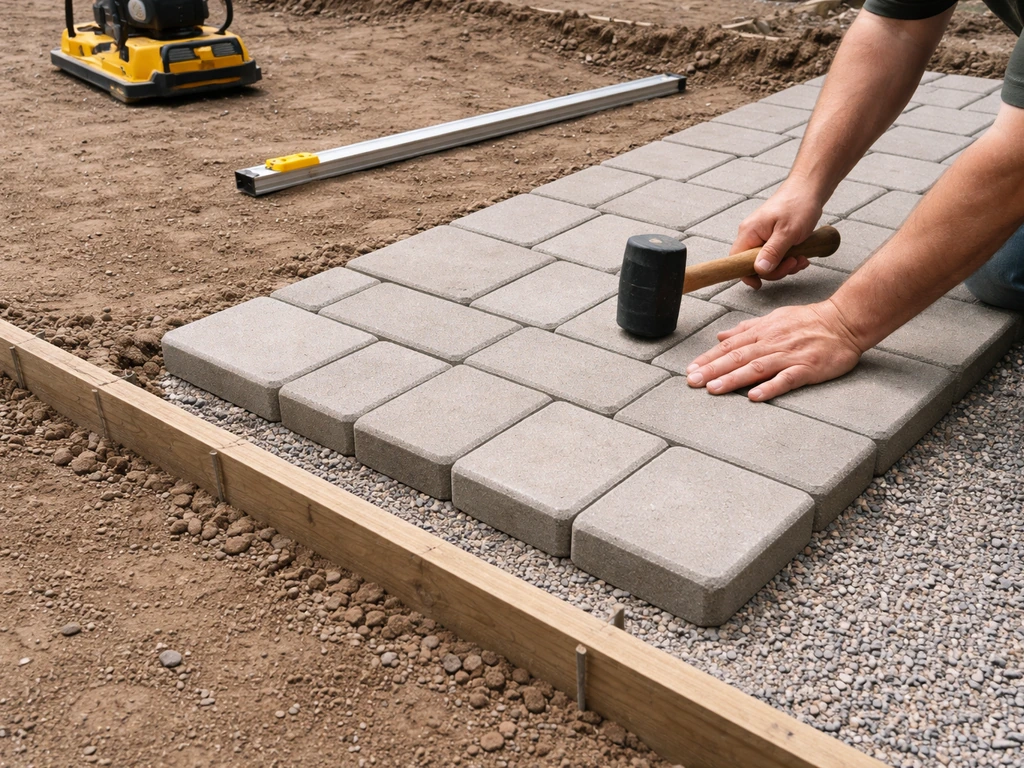
If your area is already cleared of grass or you are working with a bare dirt site, start by evaluating the native soil as described in the site evaluation section. For step-by-step instructions specific to bare soil sites, see our guide on how to lay patio pavers on dirt. Excavate to depth, compact the subgrade with at least 2-3 passes of your plate compactor, then proceed to base installation. On clay-heavy or soft soils, lay a geotextile landscape fabric directly on the compacted subgrade before adding your base aggregate. The fabric prevents the base aggregate from punching down into soft soil over time without restricting drainage.
Starting Over an Existing Gravel Area
If you already have a compacted gravel area (a gravel patio or driveway apron), you may be able to use it as part of your base with some preparation. Check the depth: you need at least 4 inches of compacted aggregate below your bedding layer. Grade the existing gravel to your intended drainage slope, compact it, then add and compact a topping layer of fresh compactible aggregate if the existing surface is uneven. For step-by-step instructions on how to install patio pavers over gravel, see our detailed guide that walks through assessing existing gravel, preparing the base, and laying pavers correctly. Screed your 1-inch bedding layer on top and lay pavers as normal.
Starting Over Concrete
Laying pavers over an existing concrete slab is possible when the slab is structurally sound (no major cracks, no significant heave, no soft spots). The concrete acts as your base, so you skip the excavation and aggregate steps. Screed a 1-inch layer of coarse sand or ASTM No.8 open-graded stone directly on the concrete, set your edge restraints against the concrete perimeter or attached to it with masonry anchors, and lay your pavers. Make sure the existing slab has adequate drainage slope (the 1/4 inch per foot standard) and that adding paver thickness will not create a trip hazard at doorways or step transitions. If the slab is cracked or unlevel, grinding high spots and filling low spots with hydraulic cement before laying gives a much better result.
Building the Base: Step by Step
- Excavate to depth: 7-8 inches below finished paver surface for a standard pedestrian patio (4-inch base + 1-inch bedding + 2.375-inch paver = roughly 7.4 inches, rounded to 7.5-8 inches for comfort).
- Compact the subgrade with 2-3 passes of a plate compactor. The ground should feel firm underfoot with no give.
- Install geotextile fabric if working with clay or soft soil: lay it across the excavated area with 12-inch overlaps at seams, folding it up the sides slightly.
- Add 2 inches of compactible aggregate base (3/4-inch minus crushed stone or crusher run) and compact with 2 passes.
- Add another 2 inches of base aggregate and compact again. Two lifts of 2 inches each compact more reliably than one 4-inch lift.
- Check your slope with your string lines after each lift. Adjust as needed before the final compaction pass.
- The finished compacted base should be firm, consistent, and draining at your target 1/4 inch per foot slope.
Screeding the Bedding Layer
The bedding layer is a critical 1-inch (25 mm) cushion that lets you fine-tune your surface level and gives the plate compactor something to seat the pavers into. ICPI specifies a nominal 1-inch bedding layer for sand-set systems, not to exceed 1.5 inches. Thicker bedding compresses unevenly and causes long-term settlement. For a permeable open-graded system (using ASTM No.8 angular stone as bedding), CMHA/ICPI calls for 2 inches of open-graded stone.
Set two parallel runs of 1-inch OD conduit (pipes) on the compacted base as screed rails, spaced about 6-8 feet apart and parallel to your slope direction. Pour your bedding material between them, then drag a straight 2x4 board across the pipes to level the material to exactly the pipe height. Remove the pipes, fill the channels with hand-placed bedding material, and smooth by hand. Do not step on or disturb the screeded bedding layer before laying pavers. If you do, re-screed that section.
Laying the Pavers
Start laying pavers from a straight edge (usually the house side or a chalk line you have snapped on the screeded bedding) and work outward. Set each paver with a firm press straight down, not a sliding motion that disturbs the bedding. Place pavers tightly or with your target joint width (use a consistent spacer piece of wood or plastic if you want precise spacing). Check your surface regularly with a 4-foot level and your 10-foot straightedge. The ICPI finished surface tolerance is plus or minus 3/8 inch over 10 feet. Any paver sitting high or low relative to its neighbors needs to come up, and the bedding adjusted before you continue.
Use a rubber mallet to set pavers that are slightly high. If a paver sits low, lift it, add a small amount of bedding material underneath, and re-set. Work across the patio in a consistent direction so you are always reaching over unset area, not stepping on laid pavers. Cut pavers for edges using a wet tile saw or an angle grinder with a diamond blade. Always wear your respirator, eye protection, and ear protection when cutting.
Compacting the Laid Pavers
Once you have laid a section of pavers (aim to compact in stages as you go rather than waiting for the entire patio), run your plate compactor over them with a neoprene pad attached to protect the paver surface. Make 4-5 passes in different directions across the section. This seats the pavers firmly into the bedding layer and ensures consistent contact. Do not plate-compact porcelain pavers without specific manufacturer authorization: porcelain can crack under compactor vibration. Check the surface flatness again after compaction. The finished surface after compaction should meet the plus or minus 3/8-inch-over-10-feet tolerance.
Filling the Joints with Gravel
This is the step that makes this whole method unique, and it is simpler than most people expect. Pour your chosen joint aggregate (angular stone, pea gravel, decomposed granite, or quarry fines) over the compacted paver surface. Use a stiff-bristle broom to sweep it into the joints in multiple directions, working the aggregate down between the pavers. Add more material and sweep again. You want the joints filled to within about 1/4 inch of the top surface of the pavers, not flush to the very top (flush-filled joints spill gravel onto the patio surface underfoot). For a step-by-step project checklist and material quantities, see how to make a gravel and paver patio.
For PICP-style open-graded systems, ICPI guidance recommends vibrating the joint aggregate into place using the plate compactor (with pad) after initial sweeping, then topping up and sweeping again. This ensures the angular stone settles fully into the joint depth. Blow off any remaining aggregate from the paver surface with a leaf blower or brush off by hand. Your patio is ready for use immediately with loose aggregate joints, unlike polymeric sand which requires a curing window.
Sealing Options for Gravel-Joint Patios
Sealing is optional for concrete pavers with gravel joints, but it does offer real benefits: it enhances color, reduces efflorescence (the white salt deposits that bleed to the surface over time), and makes the paver surface easier to clean. For gravel joints specifically, do not apply a film-forming sealer into the joints themselves: it will bond the gravel and kill the permeability you designed the system to provide. Apply sealer to the paver surface only, keeping it off the joint material. Use a penetrating (impregnating) sealer rather than a topical film-forming product for best results with permeable-joint systems.
Allow new pavers to weather for at least 30 days before sealing: fresh concrete pavers off-gas and need time to cure. Clean the surface thoroughly before applying any sealer, and follow the manufacturer's temperature and drying requirements. Sealer typically needs reapplication every 3-5 years depending on traffic and climate.
Routine Maintenance
Replenishing Joints
The biggest ongoing task with gravel joints is topping them up as aggregate migrates and settles. Check joint levels each spring and after significant weather events. Sweep in fresh aggregate and broom it into low joints the same way you did during installation. This takes 15-30 minutes for most patios and is the main trade-off compared to polymeric sand.
Weed Control
Weeds in gravel joints are more common than in polymeric sand joints, but manageable. Pull weeds by hand when they are small. Applying a pre-emergent herbicide in early spring and again in early fall will dramatically reduce germination in the joints. Avoid systemic herbicides that soak into the base: they can affect surrounding lawn and plantings. A properly compacted base with geotextile fabric helps, but fine weed seeds still blow into joints from above.
Winter Care
In freeze-thaw climates, concrete pavers handle winter well when the base is properly compacted and draining. Avoid using metal-bladed snow shovels that can chip paver edges: use a plastic blade or rubber-edged snow pusher. Do not use rock salt (sodium chloride) on concrete pavers: it accelerates spalling. Use sand for traction or a paver-safe calcium chloride product in small quantities if absolutely needed. In spring, replenish any joint gravel displaced by frost and re-check your edge restraint spikes.
Troubleshooting Common Problems
| Problem | Likely Cause | Fix |
|---|---|---|
| Pavers settling or sinking | Inadequate base compaction or bedding layer too thick | Lift affected pavers, recompact base, re-screed bedding to 1 inch, reset pavers |
| Pavers shifting laterally | Edge restraints not properly staked or spaced | Re-seat and re-spike edging; increase spike frequency to every 8 inches at corners |
| Joint gravel washing out | Joint aggregate too fine or patio slope too steep | Switch to coarser angular stone; add a geotextile at the base of deep joints |
| Water pooling on surface | Insufficient slope or low spot in the patio field | Identify low point with a level; lift that section, regrade bedding, reset pavers |
| Gravel spreading onto lawn | Joint overfilled or rounded aggregate used | Fill to 1/4 inch below paver surface; switch to angular stone from rounded pea gravel |
| Efflorescence (white deposits) on pavers | Calcium carbonate migrating from new concrete pavers | Normal in year 1; brush off and allow to weather; apply penetrating sealer after 30+ days |
| Frost heave lifting pavers | Base inadequate for frost depth or poor drainage | May need deeper base; ensure proper drainage slope; use geotextile between subgrade and base |
Time and Cost Estimates
A realistic 200-square-foot DIY paver patio with gravel joints takes most homeowners 2-3 weekends of full work days from start to finish. The breakdown is roughly: day 1 for layout, utility marking, and excavation; day 2 for base installation and compaction; day 3 for screeding and laying pavers; day 4 for cutting, compacting, and joint filling. If you are renting equipment, plan your rental days to align with these phases.
| Item | Estimated Cost (200 sq ft patio) |
|---|---|
| Concrete pavers (mid-range) | $300-$600 |
| Compactible aggregate base (4 in.) | $80-$150 delivered |
| Bedding sand or ASTM No.8 | $40-$80 |
| Joint-fill aggregate | $30-$70 |
| Edge restraints + spikes | $40-$80 |
| Geotextile fabric (optional) | $30-$50 |
| Plate compactor rental (2 days) | $120-$200 |
| Wet saw rental (half day) | $60-$100 |
| Total DIY estimate | $700-$1,300 |
| Professional installation (same size) | $2,000-$4,500+ |
DIY savings are substantial. The labor cost of professional installation typically represents 50-60% of the total project cost, which is exactly what you are avoiding by doing it yourself. The material costs above are honest mid-range figures and will vary by region and paver selection.
Variations: Fire Pit Patios, Raised Patios, and Sloped Sites
Fire Pit Patios
When laying a paver patio that includes a fire pit area, use non-combustible materials within 2-3 feet of the pit perimeter. Concrete pavers handle radiant heat reasonably well, but loose gravel joints near a fire pit can accumulate ash and embers: a ring of tightly-set pavers with quarry-fine or polymeric-sand joints directly around the pit zone, transitioning to open gravel joints in the outer patio area, gives you the best of both worlds. Confirm your local fire codes for setback requirements from structures before you place the pit location.
Raised Patios
A raised patio involves building up the grade with retained fill behind a retaining wall before laying the paver field. The base and bedding principles remain identical, but your retaining wall must be engineered for the retained height and soil pressure. For walls over 24 inches in most jurisdictions, a permit and engineering review are typically required. Drainage behind the wall is critical: install perforated pipe and gravel backfill behind any retaining structure to prevent hydrostatic pressure buildup.
Sloped Sites
Sites with a natural slope greater than 2-3% require extra planning. You have two options: step the patio into the slope using level terraces with retaining edges between them, or cut and fill to create a single level pad. Gravel joints work well on gently sloped patios as long as your slope direction is controlled (away from structures) and you use angular stone rather than rounded pea gravel, which will roll down any slope aggressively. Check that your edge restraints at the downslope edge are extra-well-staked to resist any lateral creep.
Stabilizing Gravel Joints vs. Leaving Them Loose
One question I get a lot is whether you should stabilize your gravel joints at some point after installation, essentially converting a gravel-joint patio to a polymeric-sand patio. You can do this: remove the existing joint gravel by blowing it out with a leaf blower and sweeping, allow the joints and paver surface to dry completely for at least 48 hours, and then apply polymeric sand per the product's technical data sheet (dry conditions, no rain in forecast, precise water-activation step). The risk is haze on the paver surface if conditions are not perfect, and you permanently give up the permeability of your original design. It is worth it if weed growth has become a real problem and maintenance is pulling you away from enjoying the patio. It is not worth it just because some joint aggregate shifted in the first season: that is normal and easily remedied with a 20-minute top-up.
When to Call a Professional
Most homeowners can complete a ground-level paver patio with gravel joints independently. But there are situations where professional help makes sense. If your site has severely compressible soil, underground drainage problems, or a slope requiring a retaining wall over 24 inches, the structural and drainage engineering involved can be more than a DIY project should take on without guidance. Similarly, if your project is adjacent to a foundation, in a flood zone, or requires vehicular loading (a driveway or parking pad), ICPI guidance is explicit that base thickness must be engineered for the specific loads involved, not estimated from a DIY chart. Spending a few hundred dollars on a consultation with a licensed landscape engineer for those specific situations can save thousands in failed work.
FAQ
What are the key differences between gravel (open‑graded) joints and polymeric (stabilized) joint materials, and when should I choose each?
Gravel/open‑graded joints (angular stone such as ASTM No.8/9/89) maximize permeability and are recommended for permeable paving systems and stormwater management; they allow water infiltration but will shift, settle, and need periodic replenishment and weed control. Polymeric (stabilized) joint sand bonds when activated by water and reduces weed growth, sand loss, and insect tunnels, but reduces permeability, requires dry application and precise water activation, can haze pavers if misapplied, and can fail if rained on before curing. Choose open gravel for permeable systems or where infiltration and easy joint replacement are priorities. Choose polymeric sand where low maintenance, weed suppression, and joint stability are more important and drainage to the subbase is acceptable. (Sources: CMHA/ICPI PICP guidance; ICPI Tech Spec 5; Techniseal/Alliance Gator TDS.)
Which paver types and joint widths are compatible with gravel‑filled joints?
Concrete and natural stone pavers commonly accept 1/8"–1/2" joints for gravel fills; wider joints (3/8"–1" or more) are easier to keep filled with angular aggregate. Porcelain and some manufacturer‑specified units may require minimum controlled joint widths and often require stabilized/grouted joints—always check the paver manufacturer's installation instructions for minimum/maximum joint widths and allowable joint materials. For permeable systems ICPI/CMHA specify using open‑graded aggregates sized for the joint and bedding (example: No.8 bedding/joint). (Sources: manufacturer guides; CMHA/ICPI.)
What is the definitive tools and materials checklist for a homeowner installing pavers with gravel joints?
Materials: selected pavers; edge restraint products (plastic/metal/concrete/mortar); compactible base aggregate (crushed stone: 3/4" minus or per spec); open‑graded bedding or sand (ASTM No.8 for permeable systems or screeded bedding sand for sand‑set when specified); joint aggregate (ASTM No.8/9/89 or specified polymeric joint sand); geotextile fabric (for weak soils); edging adhesive or spikes; concrete or mortar for certain edge installs. Tools: tape measure, marking paint, string & stakes, leveling grade stakes/laser or transit, shovel, wheelbarrow, plate compactor (with neoprene pad for delicate pavers), hand tamper, rake, screed rails and screed board, masonry saw/wet saw or angle grinder with diamond blade, rubber mallet, broom, jointing plate or vibrating plate for final seating, gloves, safety glasses, ear protection, knee pads, shovel, tamper, and possibly small excavator for larger jobs. Optional: permeable paver plate adapter, pressure washer for cleaning, polymeric sand blower. Include safety gear: eye/ear protection, dust mask, steel‑toe boots. (Sources: manufacturer and industry installation guides.)
How do I decide base and bedding thickness for patios on different substrates (grass, dirt, existing gravel, concrete)?
Follow load, soil strength and drainage goals: - On sound soil for a pedestrian patio: compact subgrade and provide ~4 in. (100 mm) compacted aggregate base; for permeable PICP use minimum 6 in. (150 mm) open‑graded base/reservoir depending on storage requirements. - For weak or frost‑susceptible soils increase base thickness or use geotextile and designed subbase per ICPI/engineer guidance. - Over existing compacted gravel: verify compaction and thickness (replace or add aggregate to meet required compacted depth). - Over concrete: if structural, you can install pavers on a thin mortar/reglet or on a base of bedding mortar/bitumen or use pedestals for raised/exterior porcelain; consult paver and porcelain manufacturer for correct method. For bedding: for sand‑set (non‑permeable) screed to a nominal 1 in. (25 mm) (tolerance ±3/8" over 10 ft); for permeable systems use open‑graded bedding course ~2 in. (50 mm) of No.8 per CMHA/ICPI. For vehicular loads, design base with ICPI tables—typical driveway values are ~6 in. (150 mm) compacted base or greater. Always compact base to required density (often 95% Modified Proctor per spec). (Sources: CMHA/ICPI, Unilock.)
What are the step‑by‑step substrate‑specific preparation sequences I should follow?
Grass/dirt (typical pedestrian patio): 1) Mark area and remove sod/topsoil to required depth (base + bedding + paver thickness + 1/4"/ft slope allowance). 2) Compact subgrade to required density and add geotextile if needed. 3) Place and compact base aggregate to design height (usually 4" for patios, 6" for heavier loads). 4) Install edge restraints. 5) For permeable: place 2" No.8 bedding; for sand‑set: screed 1" bedding sand. 6) Lay pavers, compact, fill joints with chosen material and final compact. Existing gravel: 1) Check existing base depth/compaction; remove fines or contaminated material. 2) Add and compact fresh base aggregate to reach design thickness. 3) Proceed as above. Over concrete: 1) Ensure surface is structurally sound, clean and level within tolerances. 2) Install a separation fabric if required, then either set pavers in a thin mortar bed per manufacturer or use a pedestal system/adhesive edge restraint for raised pavers. 3) Use polymeric joints or edge seal depending on permeability needs and product manufacturer instructions. For each route, set grade/slope (1%–2%) before final bedding and check tolerances. (Sources: CMHA/ICPI, manufacturer guides.)
How do I set grades and slope for drainage to avoid ponding and water against the house?
Set a finished slope of about 1/8"–1/4" per foot (≈1%–2%) away from structures—1/4"/ft (2%) is a common practical target. Stake high and low grade strings or use a laser level and calculate the drop needed over the patio length. Ensure pavers finish slightly (1/8"–1/4") above adjacent drains or inlets to avoid low spots. Provide positive drainage to a channel, dry well, or lawn; avoid directing concentrated runoff at foundations. Conform to local codes for drainage away from buildings. (Sources: ICPI/industry guidance.)},{
Step-by-step: install patio pavers over compacted gravel, tools, base depths, edging, cutting, joint filling, drainage.
Step-by-step DIY guide to build a pea-gravel and paver patio with proper base, leveling, drainage, and maintenance.
Step-by-step guide to lay patio pavers on dirt, with prep, base layers, compaction, leveling, rubber paver tips, fixes.