You can lay patio pavers on grass, but not directly on it. The grass and topsoil underneath need to go first, replaced with a compacted gravel base and a bedding sand layer so your pavers stay level, drain properly, and don't rock or sink over time. If you want the look of grass between pavers, that's a separate approach with its own spacing and groundcover strategy. Either way, doing the base work right is what separates a patio that lasts a decade from one that starts wobbling after the first winter.
How to Lay Patio Pavers on Grass: Complete DIY Guide
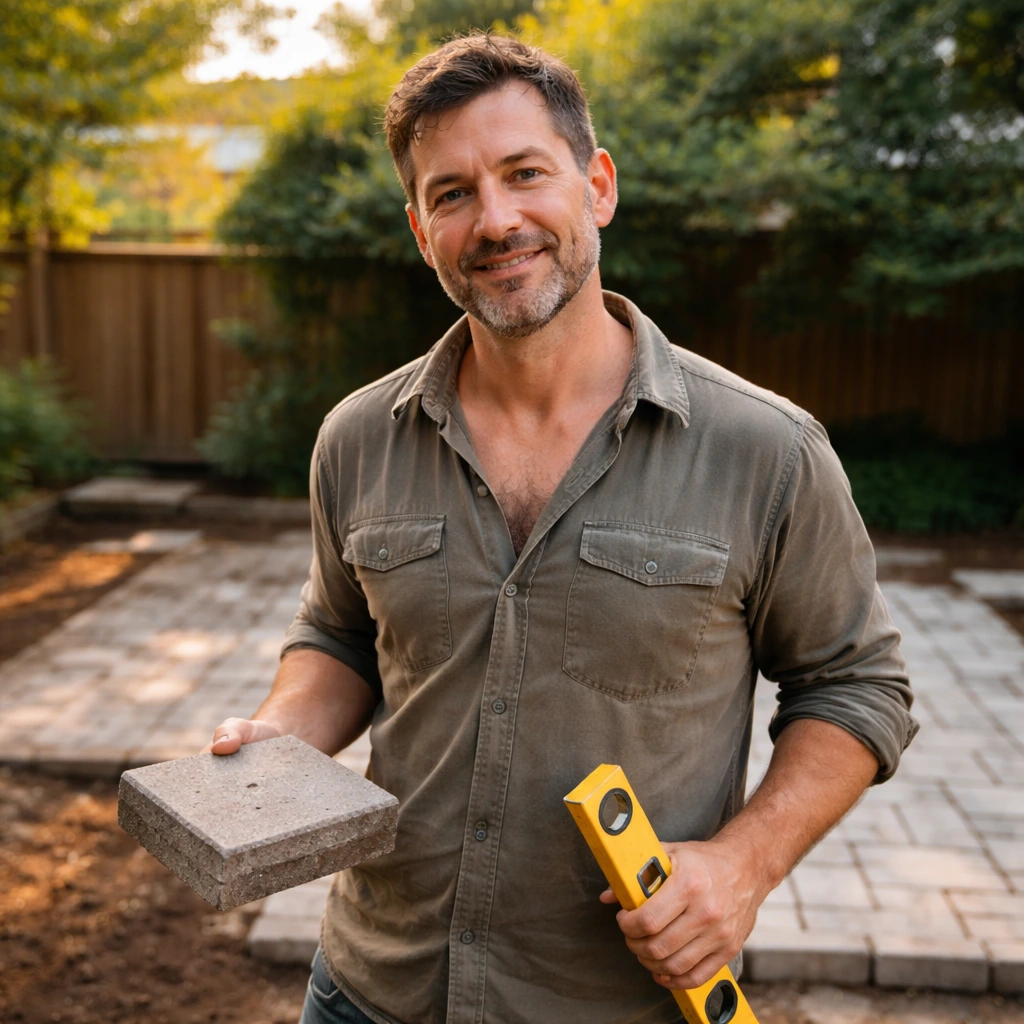
Felix Rowe
5 May 2026
When laying pavers on grass is (and isn't) a good idea
A grass-to-patio conversion is one of the most common DIY paver projects, and for good reason. You're essentially transforming underused lawn into usable outdoor living space. It works well on relatively flat ground with decent drainage, and it's totally manageable as a weekend project if you have the right tools and realistic expectations about how much digging is involved.
Where it gets tricky is when homeowners try to shortcut the process by laying pavers directly on top of turf. Major manufacturers like Unilock are explicit about this: pavers should never go directly on dirt or grass. If you are figuring out how to lay patio pavers on dirt, start with the correct excavation and base instead of trying to set pavers on the soil surface pavers should never go directly on dirt or grass. Without a proper compacted base beneath them, pavers sink unevenly, rock underfoot, and crack under freeze-thaw pressure. The grass and organic material underneath decompose over time, creating soft spots and voids. You end up with a lumpy, dangerous surface within a couple of years.
There are also a few situations where this project deserves extra thought before you start. On heavily sloped ground, you'll need to grade carefully or consider a raised design. On clay-heavy soil, drainage is a real concern and you'll likely need a geotextile fabric barrier and a deeper base. And if your goal is a grass-between-pavers look, that works beautifully in the right climate but requires ongoing maintenance to keep it from looking weedy and overgrown.
- Good candidate: flat or gently sloped yard, decent-draining soil, patio or walkway use (not a driveway)
- Good candidate: you want a defined outdoor space without pouring concrete
- Needs extra planning: clay-heavy or poorly draining soil (add geotextile, deeper base)
- Needs extra planning: significant slope (grade carefully, consider retaining edges)
- Not recommended: laying pavers directly on grass or topsoil without excavation
- Not recommended: areas with standing water after rain (address drainage first)
Site prep on grassy areas: removing sod, leveling, and grading
Good site prep is where most DIY patios succeed or fail. Once your base and slope are dialed in, you can follow a step-by-step guide to make a gravel and paver patio that stays level and drains well. It's unglamorous work, but every hour you spend here saves you from relaying sunken pavers later. Start by marking out your patio area with stakes and string line, then add about 6 inches on each side of your finished dimensions to give yourself working room for edge restraints.
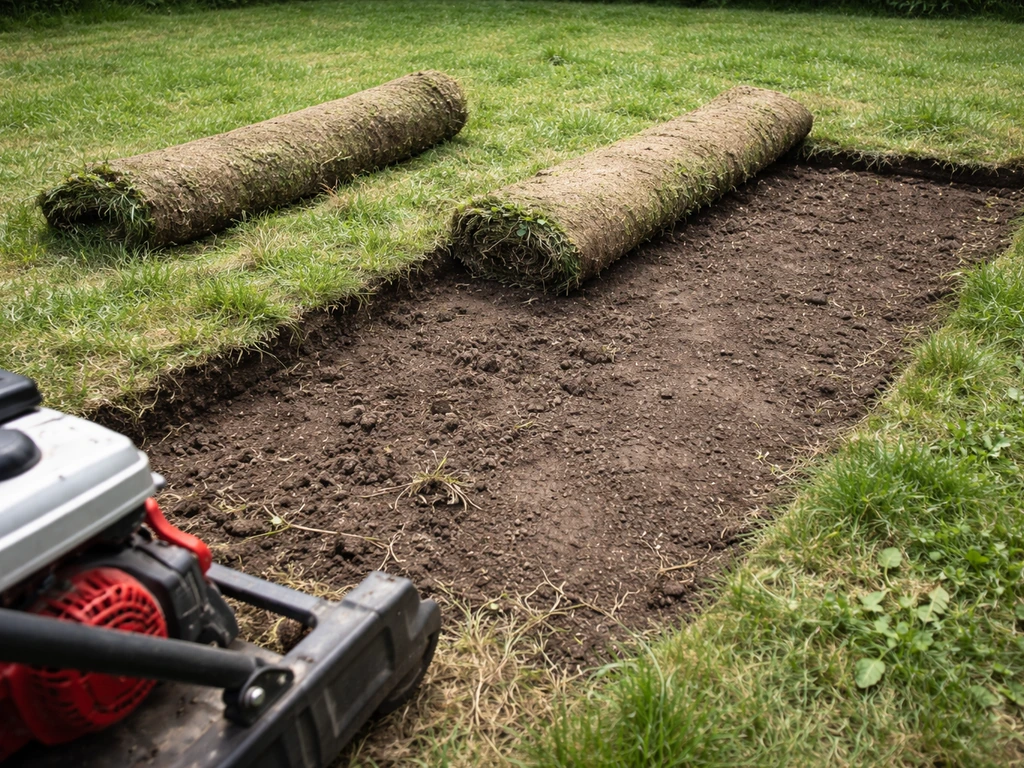
Removing sod and topsoil
Rent a sod cutter if your area is larger than about 100 square feet. For smaller spaces, a flat spade works fine but will wear you out. Cut the sod in strips, roll them up, and set them aside. You can re-use them elsewhere in your yard or compost them. Once the sod is gone, you need to excavate down to firm subsoil. The typical excavation depth for a patio or walkway is 8 to 12 inches total from finished grade, accounting for your gravel base, bedding sand, and paver thickness. On sandier soils that compact easily, you can sometimes get away with the lower end. On clay or soft soil, go deeper.
A common excavation breakdown looks like this: 6 to 8 inches of compacted gravel base, 1 inch of bedding sand, and then your paver thickness (usually 2 to 3 inches for standard concrete pavers). Do that math before you dig so you're not guessing how deep to go.
Leveling and grading for drainage
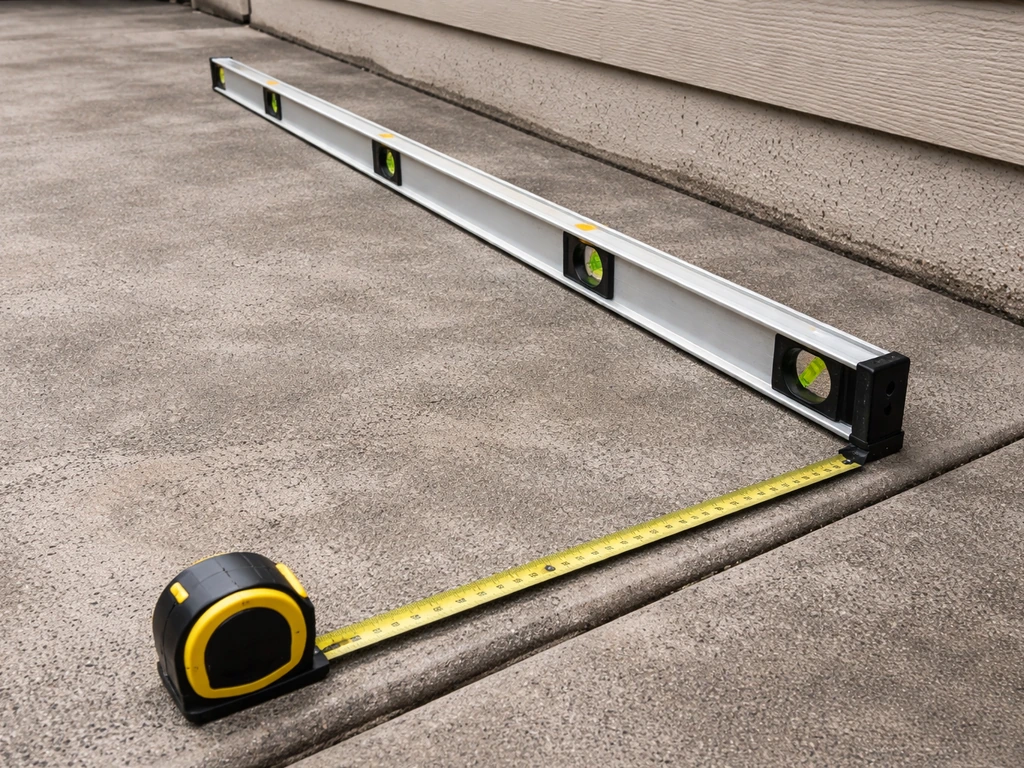
Your patio surface needs a slight slope away from your house to drain rainwater: aim for about 1 inch of drop for every 8 feet of horizontal run. Use a long level and a tape measure to check this as you excavate. Mark the slope on your string lines so you have a reference throughout the project. Don't try to correct major grading issues with your bedding sand layer later. The sand should only be 1 inch thick and is not a leveling tool. Get your slope right at the subsoil level.
Base and drainage over grass: choosing materials and building the base properly
Once you've excavated and have clean subsoil exposed, compact it with a plate compactor before you add anything on top. Then comes the decision that matters most for long-term stability: your base material.
Geotextile fabric: worth using, especially on clay

Before laying your base material, roll out a geotextile fabric (landscape filter fabric) over the compacted subsoil. This acts as a separator, preventing fine soil particles from migrating upward into your gravel base over time. When soil contaminates the base, it loses its ability to compact and drain properly, and your pavers start to shift. Techo-Bloc and Unilock both recommend this step, particularly over clay-heavy ground. It doesn't reduce the base thickness you need, but it significantly extends how long that base performs well. Overlap fabric edges by at least 12 inches.
Choosing your base material
You have two solid options for base material. Crusher run (also called quarry process or compactable gravel) is the most common: it's a blend of crushed stone and stone dust that compacts into a dense, stable layer. Three-quarter inch clear angular gravel is the alternative for sites where drainage is a priority, since it doesn't compact as tightly but allows water to pass through more freely. For most residential patios over grass, crusher run is the better choice for stability.
| Base Material | Best For | Compaction | Drainage |
|---|---|---|---|
| 3/4" minus crusher run | Most residential patios, firm base priority | Excellent, compacts to dense layer | Good |
| 3/4" clear angular gravel | High-drainage areas, permeable patio designs | Moderate, stays looser | Excellent |
How deep and how to compact
For a patio or walkway, your compacted gravel base should be 4 to 6 inches deep at minimum. Unilock references 6 to 10 inches for patios depending on subsoil conditions. Don't dump it all in at once. Add it in lifts of no more than 3 to 4 inches, then compact each lift with a plate compactor before adding more. The ICPI standard targets 98% modified Proctor density for the base, which you achieve through multiple compaction passes. A rented plate compactor does this job well. Make at least two to three passes over each lift, overlapping your lines. A poorly compacted base is the single biggest reason pavers sink and shift, so don't rush this step.
Bedding sand: the final base layer
On top of your compacted gravel, spread coarse bedding sand (concrete sand or chip stone) to a uniform depth of exactly 1 inch. Use screed pipes or rails set to the correct height and drag a straight 2x4 across them to level it out. Do not compact the sand before laying pavers, and do not use it to fix low spots in your base. It needs to stay loose so the pavers can be tapped into it. If your screeded sand has a dip or hump, add or remove base gravel underneath and re-screed.
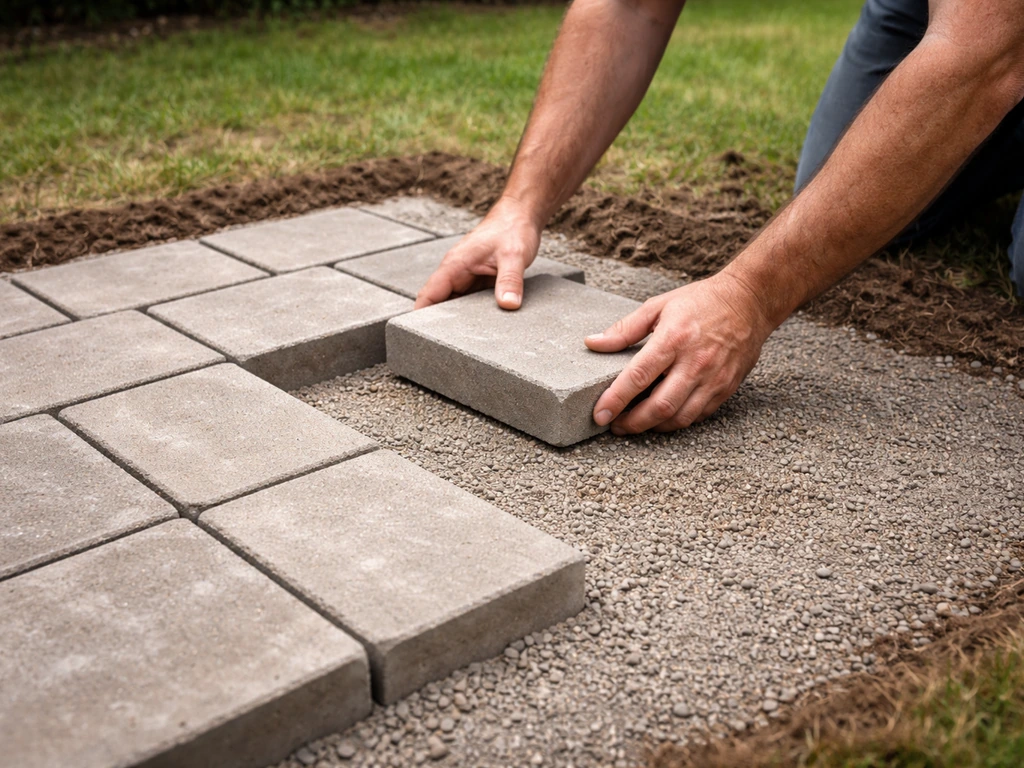
Laying and setting patio pavers over grass (step-by-step)
With your base fully prepped and screeded, you're ready to actually lay pavers. This part is satisfying and goes faster than the prep work.
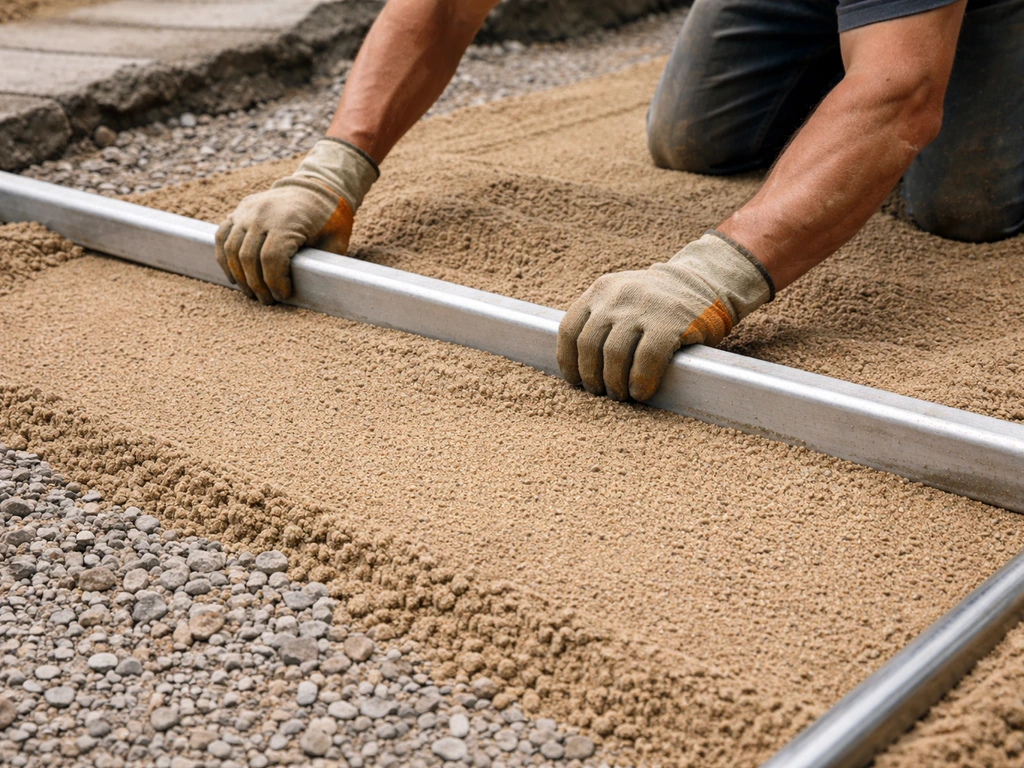
- Start from a straight reference edge: a house wall, a deck, or a string line set to your finished edge. Lay your first row of pavers tight against this reference without stepping on the screeded sand.
- Work outward and across in a consistent pattern. Keep a kneeling board handy so your weight is distributed across already-laid pavers rather than disturbing the sand.
- Set each paver down vertically without sliding it into position. Sliding drags the sand and creates uneven bedding.
- Check for level frequently using a long level across multiple pavers. Use a rubber mallet to tap down any high pavers. If a paver sits too low, lift it and add a bit of sand underneath.
- Maintain consistent joint spacing as you go. Most pavers have built-in spacer lugs, but if yours don't, use 1/4" to 3/8" spacers to keep gaps uniform.
- Keep a string line at your intended finished height and slope as a reference throughout. Check against it every few rows.
- Once all full pavers are laid, mark and cut any border pavers to fit before setting them (see the cutting section below).
- Do a final visual check across the surface for high or low spots before moving to compaction.
Leaving grass between pavers: spacing, ground cover strategy, and weed control
If you want the look of grass growing between your pavers rather than a fully paved surface, the approach is different and the tradeoffs are real. This works best in moderate climates without extreme freeze-thaw cycles, and it genuinely looks beautiful when maintained well. It's also a natural companion to a gravel-and-paver patio design or a patio that blends into the surrounding lawn.
Spacing and setting for grass gaps
For grass to grow between pavers successfully, you need gaps of at least 2 to 3 inches between each paver. To get the grass-and-paver look, focus on keeping the gaps wide enough and maintaining the groundcover as it fills in gaps of at least 2 to 3 inches. This same gravel-and-bedding-sand base method is what keeps the patio stable when you leave gravel in the middle or in the gaps how to lay patio pavers with gravel in between. Narrower gaps won't get enough sunlight and water for turf to thrive. When you set these pavers, you still need a proper base below, but you can reduce the paver density to more of a stepping stone pattern if your goal is a patio-meets-garden aesthetic. Set each paver firmly in compacted sand and check that they're all at the same height so the surface is safe to walk on.
What to put in the gaps
For grass gaps, fill the spaces between pavers with quality topsoil mixed with compost, then seed with a low-growing grass variety or plant a groundcover like creeping thyme, Irish moss, or dwarf mondo grass. Creeping thyme is a popular choice because it's drought-tolerant, handles foot traffic, and smells good when stepped on. If you prefer actual turf grass, use a compact variety like fine fescue or a dwarf tall fescue. Water regularly until established.
Keeping weeds out of the gaps
Weeds are the main headache with a grass-between-pavers setup. The best approach is a two-pronged one: use a pre-emergent herbicide in early spring to knock back weed seeds before they germinate, and hand-pull any that do come through while they're small. A thick, established groundcover is your best long-term weed suppressor because it out-competes weed seedlings for light and nutrients. Avoid post-emergent broad-spectrum herbicides near the paver gaps unless you want to kill your groundcover too.
Cutting, edging, and finishing details
Cutting pavers to fit
You'll almost always need to cut some pavers to fit along edges and around obstacles. A rented angle grinder with a diamond blade works for occasional cuts, but if you have a lot of cuts to make, rent a wet saw (paver splitter or masonry saw). Mark your cut line with a pencil or chalk, make the cut in a single steady pass, and test the fit before setting the piece in place. Always wear eye protection and hearing protection when cutting.
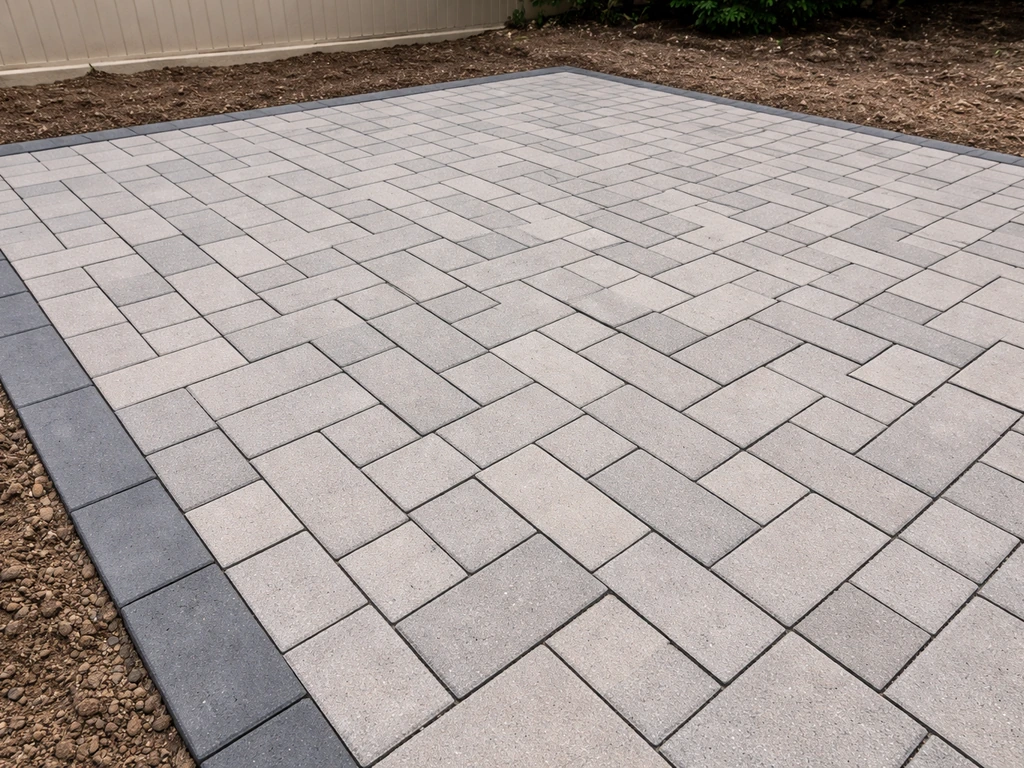
Edge restraints
Edge restraints are not optional. Without them, the pavers at the perimeter slowly migrate outward over time, opening up gaps in the middle of your patio. Plastic paver edging is the most common DIY choice: spike it into the ground along the outer edge of your patio with 10-inch spikes every 12 inches. Metal edging is more durable and looks cleaner but costs more. Install the edging before you do your final compaction and joint filling.
Filling joints and final compaction
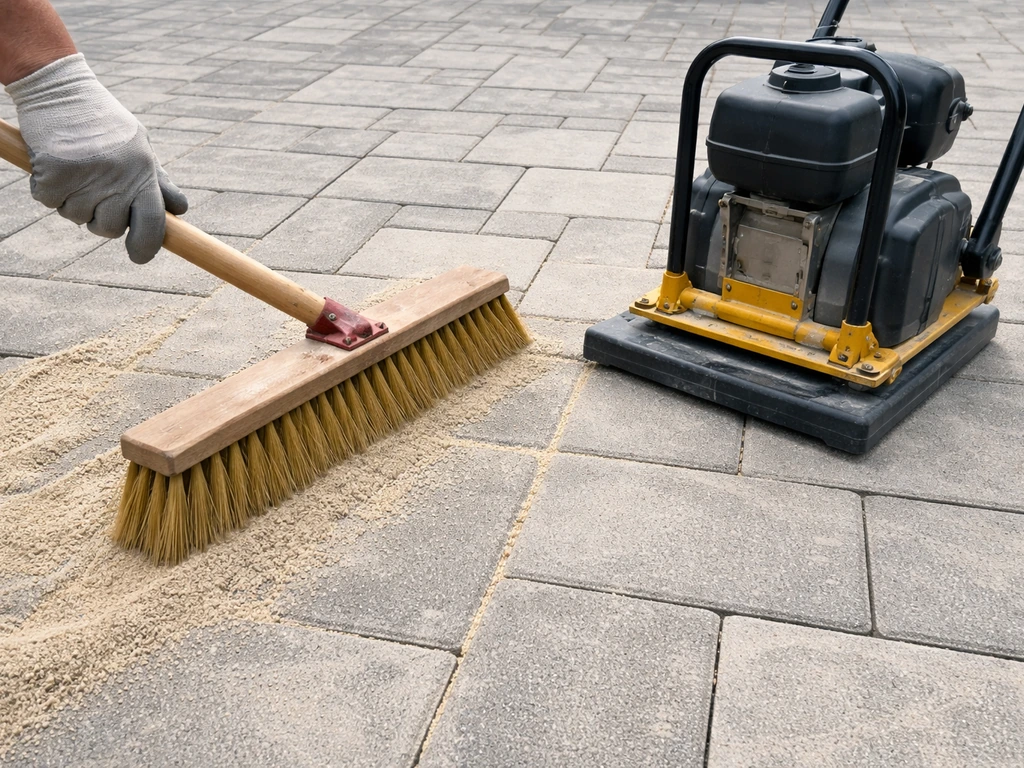
For a patio where you want closed joints (no grass), use polymeric sand. Sweep it dry across the surface, work it into the joints with a push broom, blow off the excess with a leaf blower, then lightly mist with water to activate the binding agents. Polymeric sand hardens in the joints, which significantly reduces weed growth and ant infiltration compared to regular jointing sand. Belgard notes that properly installed polymeric sand can improve joint strength by around 20%.
After filling joints, run a plate compactor over the entire paved surface (put a rubber mat or carpet pad under the compactor plate to protect the paver surface). This final pass settles the pavers into the bedding sand and pushes the joint sand deeper into the gaps. Do one more pass with the leaf blower to clear surface residue, then mist again if using polymeric sand.
Sealing, maintenance, and troubleshooting
To seal or not to seal
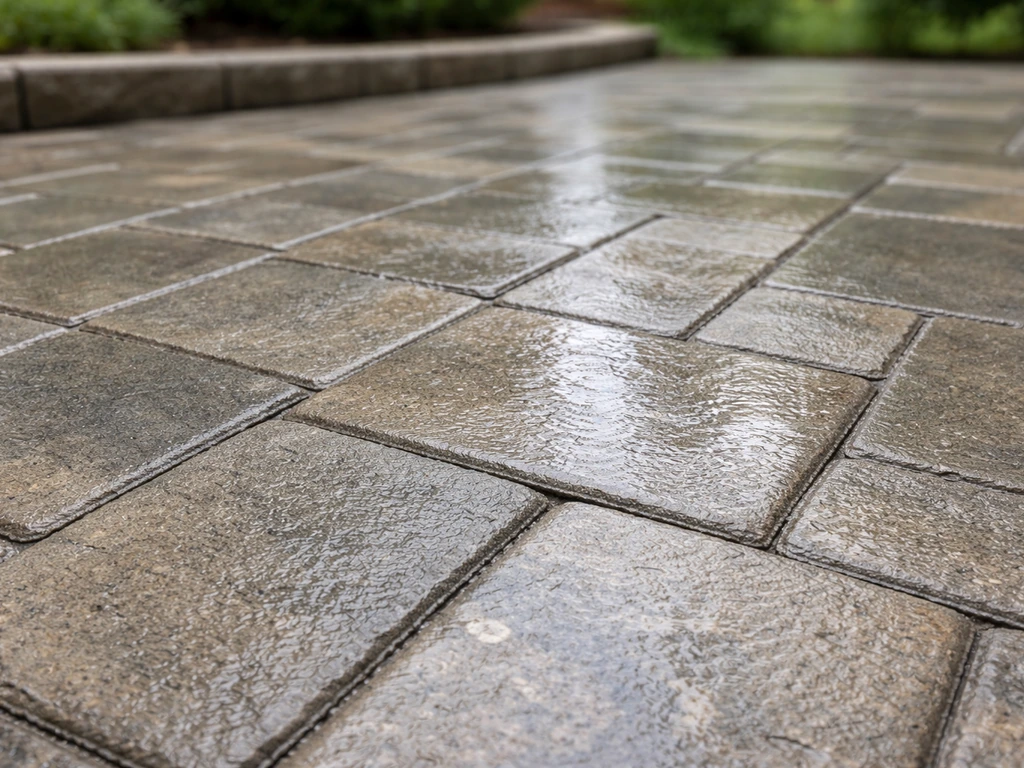
Sealing is optional but worth doing on most residential patios. A paver sealer protects the surface from staining, enhances color, and helps lock polymeric sand in the joints. Wait at least 60 to 90 days after installation before sealing to let the pavers cure and any efflorescence (white mineral residue) to appear and be cleaned off. Use a penetrating or film-forming sealer rated for your paver type. Reapply every 3 to 5 years depending on traffic and sun exposure.
Routine maintenance
- Sweep or blow off debris regularly to prevent organic material from decomposing in joints
- Re-sand joints every 1 to 3 years as polymeric sand gradually wears away
- Apply pre-emergent herbicide in early spring if weeds are a recurring problem
- Check edge restraints each spring; re-spike any that have heaved or loosened
- Clean stains promptly with a pH-neutral cleaner rather than bleach or acid (which can damage sealers and surface)
Troubleshooting: settling, weeds, and uneven spots
If individual pavers start to rock or sink within the first year, the base wasn't compacted enough. The fix is to pull the affected pavers, add and compact more base material in that area, re-screed the sand, and reset the pavers. It's annoying, but it's the right repair. Don't try to wedge shims under a sinking paver.
If weeds are coming up through joints even with polymeric sand, the joint filling wasn't done correctly or has degraded. Clear the old sand out with a pressure washer or hand tool, let it dry completely, and refill with fresh polymeric sand. Make sure you're misting rather than soaking when you activate it.
If your entire patio surface has an uneven feel after the first winter, freeze-thaw heaving is likely the cause. This typically points to drainage issues or inadequate base depth. In severe cases, you may need to lift sections and add drainage or deepen the base. If your patio is in a low-lying area where water pools, address that grading issue first before any repairs.
Your pre-start checklist
- Mark your patio boundaries and calculate square footage
- Determine excavation depth based on paver thickness + 1" sand + 6–8" gravel base
- Rent a sod cutter, plate compactor, and wet saw (or angle grinder)
- Order crusher run gravel, coarse bedding sand, pavers, polymeric sand, and edge restraints
- Remove sod and excavate to correct depth
- Compact subsoil, then lay geotextile fabric
- Add gravel base in 3–4" lifts, compact each lift
- Screed bedding sand to exactly 1" depth
- Lay pavers from a straight reference edge, check level frequently
- Cut border pavers and install edge restraints
- Sweep polymeric sand into joints, compact, mist, and let cure
- Seal after 60–90 days if desired
FAQ
How do I know whether I should excavate deeper or just fix the sand layer if the patio isn’t level?
Decide based on how level your subsoil is after excavation. If the subsoil is already relatively flat and firm, use 6 to 8 inches of compacted base plus your 1 inch bedding sand. If you see soft or pumping areas, increase base depth by adding more compacted lifts, then re-check slope on the subsoil before you place any sand.
Should I use polymeric sand or regular joint sand if I want some weeds or grass to grow between pavers?
It depends on joint width. For closed joints with polymeric sand, keep joints tight and uniform, follow the sweep-and-mist method, and avoid overfilling. For grass-between styles, you typically want intentional gaps of 2 to 3 inches, and you should not try to “bridge” them with joint sand because turf needs soil and light in those spaces.
Can I compact the bedding sand before setting the pavers?
No. The 1 inch bedding sand is meant to be loose, so pavers can be tapped into final position. If you compact the sand, you effectively reduce adjustability and increase the chance that small dips remain, which can lead to rocking pavers after traffic or freeze-thaw.
When is the best time to install paver edge restraints for a grass-to-patio conversion?
Use edge restraints before final compaction and joint filling. Install edging along the full perimeter, spike or fasten it as specified, then do your final plate compaction passes. If you add edging after jointing, the perimeter may have already started to spread, and you will not fully “correct” it later.
What should I do if water still pools on the patio area after I excavate and slope it?
Yes, but only if you design the drainage and base for it. For example, if the patio will funnel water toward a low point near your foundation, you may need a longer slope run, improved subdrain, or a raised patio approach. If water pools after a heavy rain, fix grading before you blame paver quality.
Is geotextile fabric really necessary when laying patio pavers on grass?
Yes, and the goal is to prevent washout. A geotextile barrier is most helpful between subsoil and base, especially over fine or clayey soils, but it does not eliminate the need for correct base depth and compaction. Overlap seams by at least about 12 inches so fines do not migrate through gaps in the fabric.
How can I tell whether my gravel base is properly compacted during a DIY job?
If your plate compactor is getting stuck or leaving ridges, the base may be too wet or the lift is too thick. Let the material dry slightly, reduce lift thickness to about 3 to 4 inches, and make multiple passes with overlapping coverage until the base looks uniformly dense.
Do I need a plate compactor, or can I use a hand tamper to compact the base?
For most DIY patios, rent a plate compactor and keep it for the gravel base compaction, then again for the final settling pass over pavers (with a protective mat). You generally should not rely on hand-tamping because the base needs dense, consistent compaction across the whole footprint.
What is the correct way to repair rocking pavers in a patio built from grass?
If a few pavers rock, identify the low spot underneath and remove only the affected pieces. Pull pavers, add compacted base in that area, re-screed the bedding sand back to about 1 inch loose thickness, then reset the stones and ensure they are flush with neighbors. Avoid wedging shims because they create point failure spots.
How do I confirm I still have the correct slope after I compact the base?
Measure the slope again after you compact the subsoil and after each base lift if possible. The most accurate reference is the string lines marked for final slope, and you should not try to fix slope problems by changing bedding sand thickness, since sand is not a leveling tool.
Why am I still getting weeds, and how do I troubleshoot depending on joint type?
Long-term weed control depends on which design you chose. For closed joints, polymeric sand often helps, but only if you clear and refill properly when it degrades. For grass-between pavers, use pre-emergent early in the season, keep groundcover dense, and avoid soaking polymeric sand because excessive moisture can reduce binding performance.
Next Articles
How to Seal Paver Patio: Step-by-Step DIY Guide
Learn how to seal a paver patio step by step: clean, choose penetrating or wet-look sealer, apply, cure, and maintain.
Do It Yourself Paver Patio Installation: Step by Step
Step-by-step guide to DIY paver patio installation: grading, base prep, paver setting, edging, joint sand, sealing and f
Do It Yourself Patio Paver Ideas: Layout, Prep, Install
DIY patio paver ideas with layout patterns, site prep, base thickness, leveling, edging, and fixing sinking, gaps, weeds