Measure the length and width of your patio area, multiply them together to get square footage, then add a waste factor based on your pattern (10% for straight layouts, 15% for herringbone or diagonal). If you need a detailed walkthrough of how to measure square footage for patio pavers, use the steps above and include a waste factor based on your layout measuring square footage for a patio. That core math handles the bulk of your paver order. But getting it truly right means also accounting for joint spacing, slope, edging, and any special features like a fire pit or steps. Do all of that before you order, and you'll avoid the frustrating (and expensive) scenario of running short mid-project or ending up with a pallet of extras you can't return.
How to Measure for a Paver Patio: Step-by-Step Guide

What you'll need before you start measuring
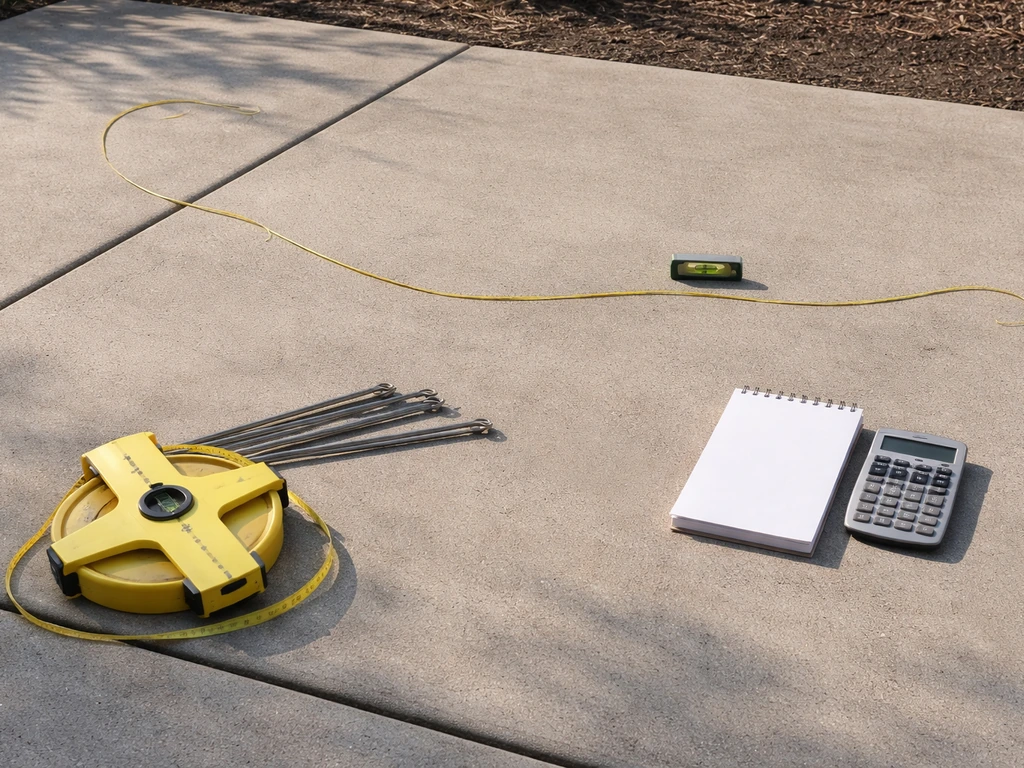
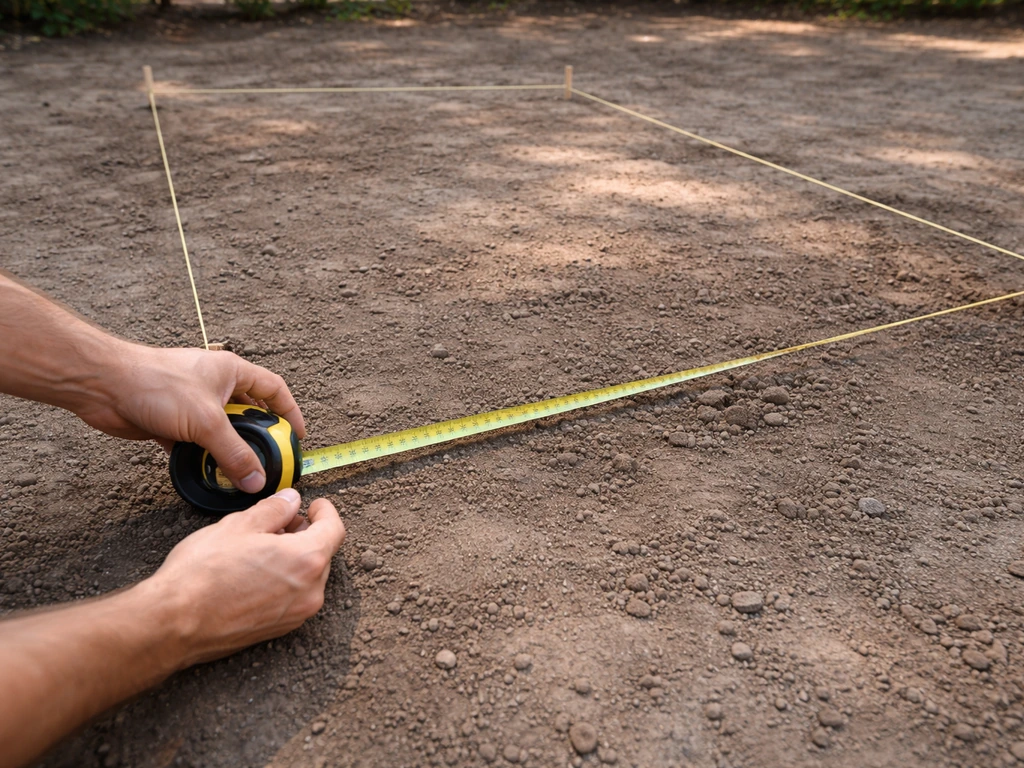
Grab a 100-foot tape measure (a 25-foot tape won't cut it for most patios), some stakes, mason's line or string, a line level or laser level, a notepad, and a basic calculator. If your patio has curves, a garden hose is genuinely the fastest way to define and visualize the shape before you measure it. Sketch the rough footprint on paper first, even if it's just a rectangle with a rounded corner. Having that sketch in hand as you measure keeps everything organized.
Step 1: Gather your dimensions and map the shape
For a simple rectangle, measure the full length and full width at their widest points. Write both down and multiply them together. That's your gross square footage. Easy. Where most people get tripped up is with L-shapes, angled corners, or free-form curves, and that's where a little geometry helps.
For any irregular shape, break the footprint into smaller rectangles or triangles that you can measure individually. For example, an L-shaped patio is just two rectangles overlapping. Measure each rectangle separately (length x width), then add the results. For a triangle, multiply the base by the height and divide by two. Add all the sections together and you have your total area. If you have a curved edge, lay a hose along the curve to define it, then measure across the widest points and treat the curved section as a rough rectangle. You're estimating here, and building in your waste factor later takes care of small inaccuracies.
- Rectangle or square: length × width
- L-shape or T-shape: split into two rectangles, calculate each, add together
- Triangle: (base × height) ÷ 2
- Curved edge: use a hose to outline it, measure the bounding rectangle, then subtract any obvious dead zones
- Complex organic shapes: break into as many simpler sections as needed and total them up
Take measurements in feet and inches, but convert everything to decimal feet before doing math (6 inches = 0.5 feet, 9 inches = 0.75 feet). It prevents calculation errors that are surprisingly common when people mix units.
Step 2: Account for paver size, joint spacing, and your pattern
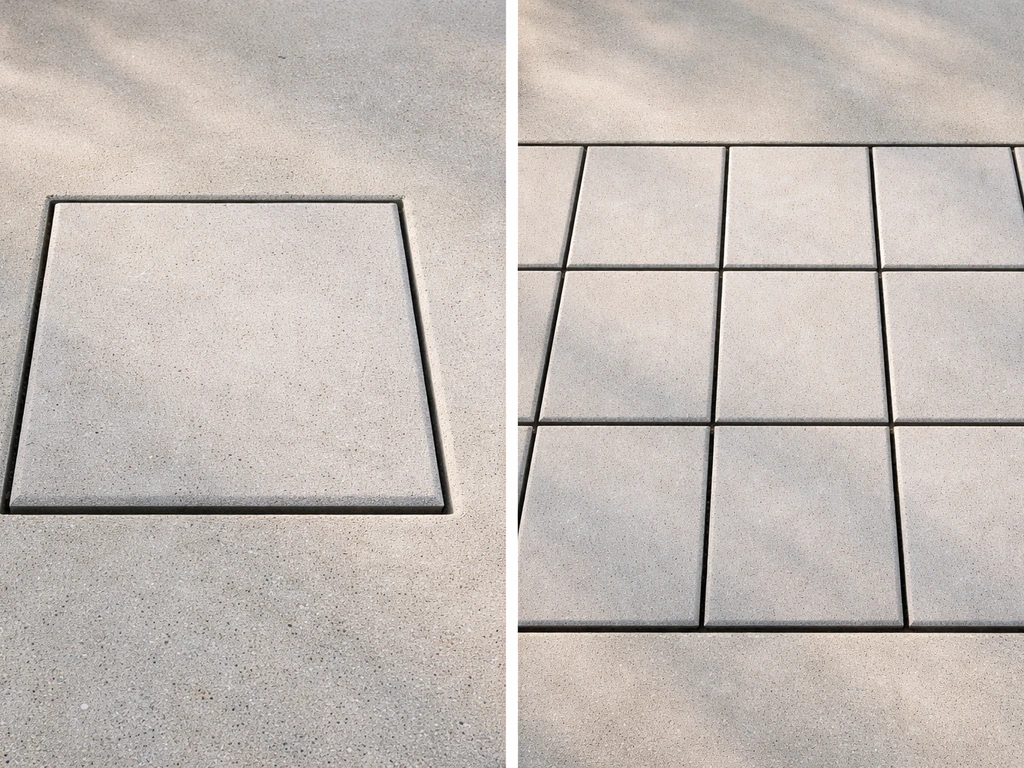
Your paver's face dimensions plus the joint gap between each paver is what actually drives your unit count. A 12x12 paver sitting next to another 12x12 paver with a 1/4-inch joint effectively takes up 12.25 inches of space in each direction. That small difference compounds across a large patio.
The formula to find how many pavers cover one square foot is: 144 divided by ((paver length + joint width) × (paver width + joint width)), with all measurements in inches. So for a 12x12 paver with a 1/4-inch joint, that's 144 ÷ (12.25 × 12.25), which equals about 0.96 pavers per square foot. Multiply that by your total square footage and you have your base paver count before waste.
Joint width matters for polymeric sand quantities too. Most polymeric sand products specify a minimum joint width of 1/8 inch, and coverage per bag changes significantly depending on whether your joints are 1/8 inch vs. 1/4 inch. Use 1/4 inch as your planning figure for concrete pavers since it's the most common recommendation and easier to maintain consistently during installation.
How your pattern changes the waste factor
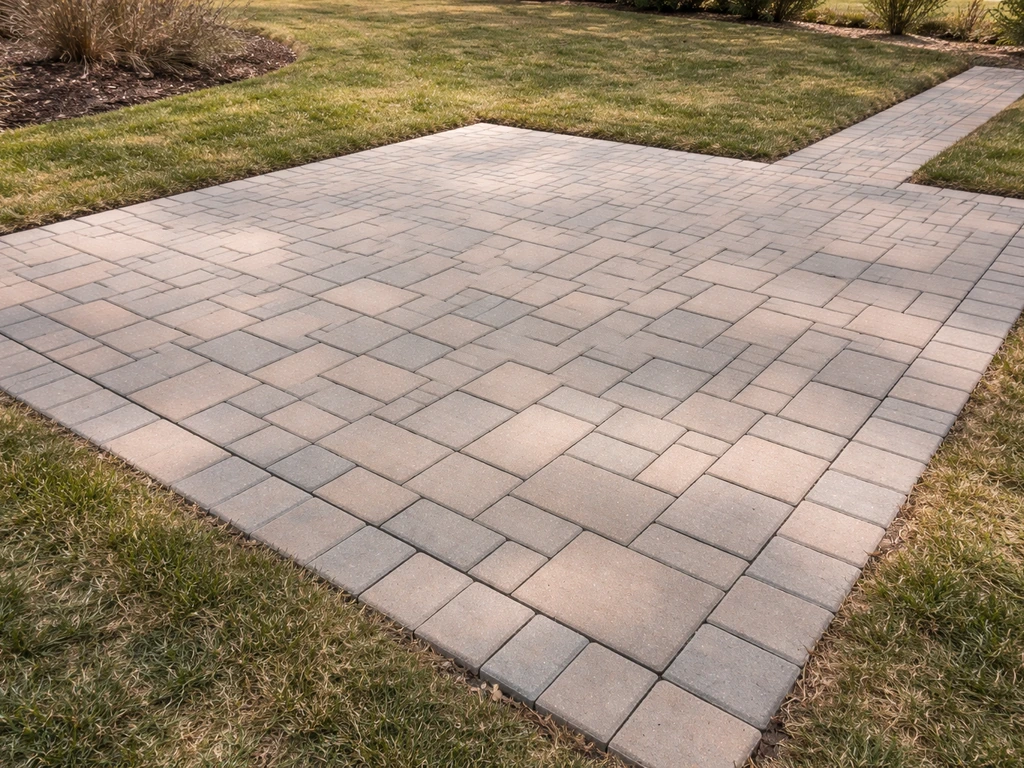
Pattern choice is one of the biggest variables in your materials estimate, and it's the one homeowners most often underestimate. A running bond pattern laid parallel to the house edges requires relatively few cuts. A 45-degree herringbone rotates every paver diagonally, which means every single edge of your patio requires angled cuts. More cuts means more waste.
| Pattern | Recommended Waste Factor | Why |
|---|---|---|
| Running bond (horizontal/vertical) | 10% | Straight cuts at edges only, minimal off-cuts |
| Stack bond (grid) | 10% | Same as running bond, simple geometry |
| Herringbone (90°) | 10–12% | Some angled cuts at borders |
| Herringbone (45° diagonal) | 15% | Diagonal cuts all around the perimeter |
| Diagonal running bond | 15% | Every border paver requires a 45° cut |
| Irregular or free-form shape | 15–20% | Curved and angled edges create high cut waste |
To calculate your final order quantity: (base paver count) × (1 + waste factor). So if your area needs 200 pavers and you're doing a 45-degree herringbone, order 200 × 1.15 = 230 pavers. Round up to the nearest full bundle or pallet, never down. Running out of a specific paver lot mid-project is a real problem because dye lots and manufacturing batches vary.
Step 3: Measure elevation and plan your slope
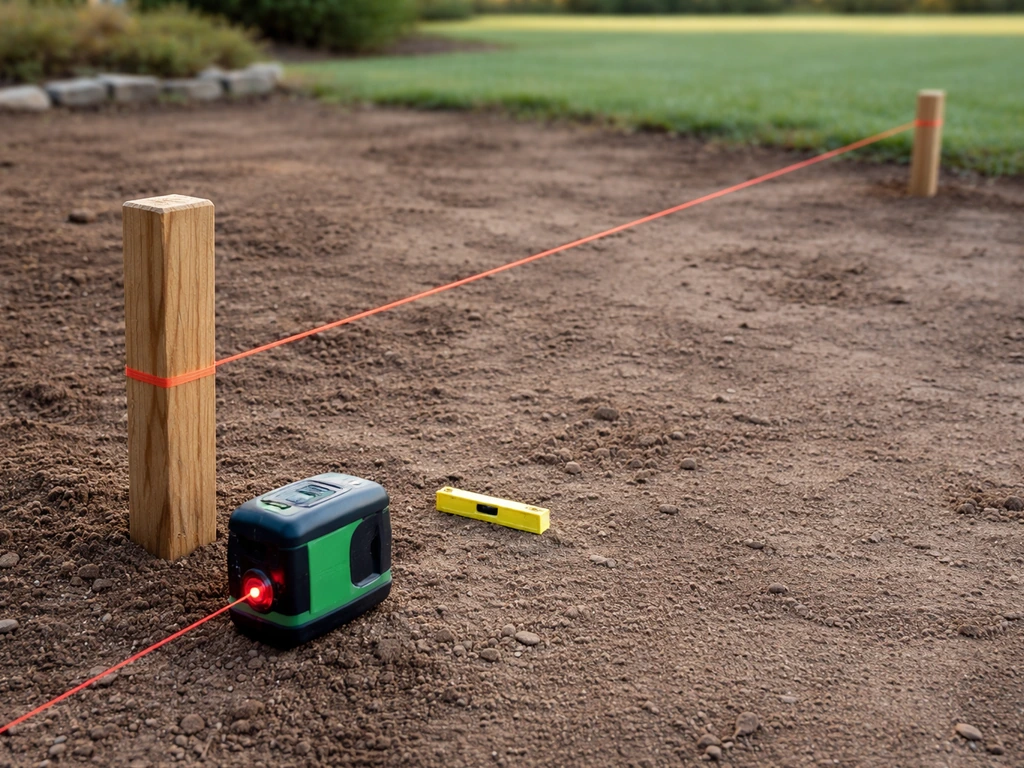
Slope is not optional. A paver patio that doesn't drain properly will develop standing water, heave in freeze-thaw climates, and erode the sand bed underneath. The standard target is a minimum of 1/4 inch of drop per foot of run, directed away from your house or any structure. On a 12-foot-wide patio, that means the far edge sits 3 inches lower than the edge closest to your house.
To measure your existing grade, drive a stake at the high point (usually at the house foundation) and another at the low point (the far edge of the patio). Run a string line between them pulled tight and leveled with a line level. Measure the vertical distance from the string to the ground at the far stake. That tells you how much the ground already drops. If it drops less than your target, you'll need to add more base material at the house end or excavate more at the far end to build in the correct pitch. Your base and bedding sand layers must mirror the finished slope, so measure and plan this before you dig, not after.
The final paver surface should sit approximately 1/8 to 1/4 inch above the surrounding edge restraints to allow for minor settling over time. Factor that into your elevation math when you're calculating base depth. For a standard residential pedestrian patio, a 4-inch compacted base plus 1 inch of bedding sand is the typical starting point, but if you're laying over uneven ground or soft soil, you may need to excavate deeper. If you're installing over existing concrete, your elevation math changes entirely since you're building up rather than digging down.
Step 4: Measure for edging, borders, and special features
Edge restraints hold your paver field in place and prevent lateral spreading over time. To estimate how much you need, simply measure the full perimeter of your patio. Walk the entire outline and add up all sides, including any interior cutouts. Edge restraint is sold by linear foot, so your perimeter in feet is your base quantity. Add 10% for overlaps at corners and any waste from cutting sections to fit.
If you're planning a decorative border row, factor that into your overall layout from the start. A one-paver-wide border running the perimeter changes the dimensions of your interior field. Measure the border as its own separate area (perimeter length × paver width) and calculate that quantity separately, especially if the border uses a different paver color or size. This also affects your interior field dimensions, which in turn affects how cleanly your pattern fits without excessive cuts.
Fire pit areas
A fire pit zone typically means a circular cutout or a dedicated circular pad within the larger patio footprint. Calculate the fire pit area as a circle (π × radius squared) and either subtract it from your total if it's open ground, or calculate it separately if it gets a different paver treatment. The curved edge of a circular feature will require significant cutting, so budget an extra 15–20% waste for any pavers within about two feet of that edge.
Raised patios and steps
A raised patio adds a vertical dimension to your measurement job. You'll need to measure not just the surface area but also the face of each retaining course and any step risers and treads. Steps are typically measured by tread depth (commonly 12 inches for a single paver tread) multiplied by tread width, times the number of steps. Each step riser also needs pavers to face it. Measure each component as its own separate surface and calculate separately. Combining everything into one number leads to ordering errors.
Sloped sites
On a sloped site, your measured surface area will be slightly larger than a flat-plan footprint because you're covering actual slope distance, not just horizontal distance. For shallow slopes (under 1 foot of drop per 10 feet of run), the difference is negligible. For steeper grades, use the actual measured slope length rather than the horizontal distance. This is another reason to measure along the ground surface with a tape rather than relying purely on aerial or plan-view dimensions.
Step 5: Build your materials takeoff
Once you have all your measurements, pull everything into a single list. This is your materials takeoff, and it's what you hand to a supplier or use to verify an online calculator's output. Here's how to structure it:
- Total patio square footage (all sections added together)
- Border/accent square footage (calculated separately if different pavers)
- Base paver count = total sq ft × pavers per sq ft (using your joint-adjusted formula)
- Waste-adjusted paver count = base count × waste factor (1.10 for simple patterns, 1.15 for herringbone/diagonal, 1.20 for complex curved shapes)
- Perimeter in linear feet (for edge restraints, add 10%)
- Base material in cubic yards (area × base depth in feet ÷ 27, then add 10% for compaction loss)
- Bedding sand in cubic yards (area × 0.083 ft for 1-inch layer ÷ 27)
- Polymeric sand bags (refer to manufacturer coverage chart using your joint width and total sq ft)
If you're using an online paver calculator, double-check whether it includes a waste factor or not. Some calculators, like Unilock's, explicitly state that their output does not include overages for cutting waste. Unilock's terms and conditions note that its paver calculator does not include overages for cutting waste, so you'll need to plan for waste separately. That means you need to add your own waste percentage on top of whatever number the tool gives you. Don't assume the calculator handled it.
It's worth noting that calculating how to measure square footage for patio pavers is closely related to, but slightly different from, planning the full materials list. Square footage gives you the foundation, but the takeoff above is what gets you all the way to an accurate order. Similarly, if you're planning specific paver sizes like 12x12 or 16x16 pavers, you'll plug those dimensions directly into the joint-adjusted formula above to get an accurate unit count.
Step 6: Build a layout grid and mark the site
Measuring on paper is one thing. Confirming those measurements on the ground before you order is what separates a smooth project from a mid-build headache. Once you know your dimensions, go outside and mark the actual footprint.
- Drive stakes at every corner of your patio layout
- Run mason's line between stakes to define all edges
- Use the 3-4-5 triangle method to confirm your corners are square: measure 3 feet along one string, 4 feet along the adjacent string, and check that the diagonal between those two points is exactly 5 feet. If it isn't, adjust until it is.
- Measure diagonals across the full rectangle: both diagonals should be equal for a true square or rectangle
- Walk the perimeter with your tape to confirm all dimensions match your paper plan
- Mark the string-line layout with spray paint or flour directly on the ground so you can see the final shape at full scale
With the footprint on the ground, do a dry layout check. Lay a row of pavers along one edge without any base prep, just to see how the spacing works out. This is the moment you'll catch whether your planned border width results in a sliver cut at one end, and you can adjust your starting point or border width now rather than after you've laid 200 pavers. Squaring the layout correctly from the start is critical and worth taking extra time on.
For your layout grid, draw a simple scaled sketch on graph paper (one square = 1 foot works well for most patios). Mark where full pavers fall, where border rows sit, and where cut pieces will appear. This sketch becomes your reference throughout the installation and helps you keep joints aligned row by row. String lines set at regular intervals across the patio mirror this grid on the ground and give you a physical guide to follow as you lay each paver.
Confirm everything before you order
Before you call the supplier, run through this final checklist. It takes ten minutes and can save you hundreds of dollars.
- Total square footage matches your string-line layout on the ground
- Waste factor applied matches your chosen pattern
- Slope accounted for (1/4 inch per foot minimum, directed away from structures)
- Edge restraint quantity based on measured perimeter
- Border/accent pavers calculated separately from field pavers
- Special features (fire pit, steps, raised sections) broken out as separate quantities
- Base and sand quantities calculated from excavation depth, not just surface area
- Polymeric sand quantity based on joint width and total sq ft per manufacturer chart
- Calculator waste factor confirmed (add your own if the tool doesn't include it)
Getting all of this right before you order is genuinely the most important part of a DIY paver project. The installation itself is satisfying and very doable once you're prepared. But showing up at the job with the wrong quantity of pavers, whether that's 50 short or a full pallet over, creates problems that cost real time and money. Measure carefully, build the takeoff methodically, mark the site, and then order with confidence.
FAQ
Should I use paver face dimensions or overall dimensions (including joints) when I count pavers?
Yes. When you calculate pavers, use the actual paver face size plus the planned joint width in each direction. Separately, when you choose polymeric sand quantity, follow the bag coverage chart for your chosen joint width, because coverage is based on expected joint sizes and installation pattern.
What’s the best way to handle rounding and unit conversion so I don’t end up short?
Convert your area to decimal feet as you do now, but also avoid rounding the joint-adjusted formula too early. For example, keep joint width in inches (like 0.25) for the 144 ÷ (A×B) step, then round your final paver count up after applying waste.
How do I measure an L-shape or notch without losing track of which cut goes where?
Measure each side of the footprint and confirm that your layout will end with full pavers on the “long” dimension first. If you have an L-shape or multiple notches, it often helps to pick a primary reference corner (usually the house corner), then treat all other edges as offsets from that corner to keep your cut locations predictable.
Do I calculate a border row separately, or should it be included in the main square footage?
If your patio includes a border row, treat the border as its own area and adjust the interior field dimensions, otherwise your interior takeoff will be slightly off and you may get sliver cuts. A practical check is to add the border width twice (both sides) to see whether the remaining interior width is divisible into whole paver modules plus joints.
How should I measure and estimate waste for tighter curves, like a small rounded patio corner?
For small curved edges, you can approximate the curve by measuring in segments (short straight chords) or using a hose to locate the arc, then plan extra waste near the curve. If the curve is tight (short radius), don’t rely only on a “rough rectangle” estimate, because angled cutting density can increase beyond a typical straight-layout waste factor.
If my patio is sloped, how many grade measurements should I take to make sure drainage is consistent?
When measuring grade, verify slope direction with a straight string line and also check at multiple points across the width, not just one center-to-edge measurement. Uneven subgrade can create low spots even if the average slope matches your target, which you can only catch by taking a few spot checks.
How does the measurement and elevation math change if I’m installing over existing concrete?
If you are installing over existing concrete, you typically cannot “dig to create pitch,” you build up. Measure from the slab up to your desired finished elevation and calculate base and bedding thickness as additions on top. Also check for any moisture issues or surface cracks because they can affect how well the paver system performs.
Do I include the perimeter of cutouts (like planter pockets or fire pit openings) in my edge restraint measurement?
Edge restraint quantity is based on linear perimeter, but interior cutouts and islands count too. If you have both an exterior perimeter and an internal feature (like a planter bed within the patio), add both perimeters before applying the corner overlap allowance.
How do I plan for damaged or unusable pavers during delivery and installation?
Yes, in a practical sense. Even if you keep your paver count accurate by area, you still need enough “overs” to replace any pavers with chips, damage from delivery, or a break during installation. A common approach is to add the extra waste percentage to the paver count, then still keep a small reserve rather than assuming every overage will be usable.
What’s the most reliable dry layout check if I’m using herringbone or diagonal patterns?
Do a dry fit test in the direction where your cuts are most critical. If your pattern is herringbone, run a couple of test rows across the width and length and confirm the diagonal alignment at a reference point. This is where mismatched starting points show up as compounded misalignment.

DIY step-by-step how to install patio pavers in sand, from excavation and base prep to leveling, cutting, joint sand and
Step-by-step guide to install paver patio with sand setting layer, from planning and base to leveling, cutting, joint fi
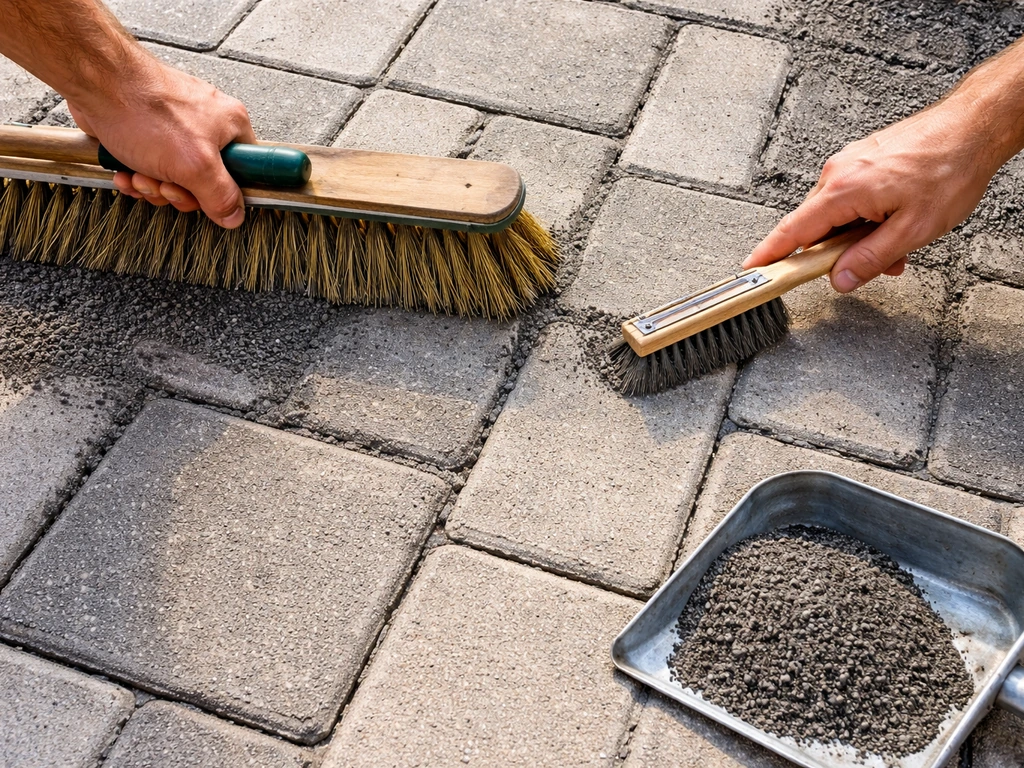
Step-by-step DIY guide to apply polymeric sand between patio pavers, prep joints, spread, fill, and activate without haz