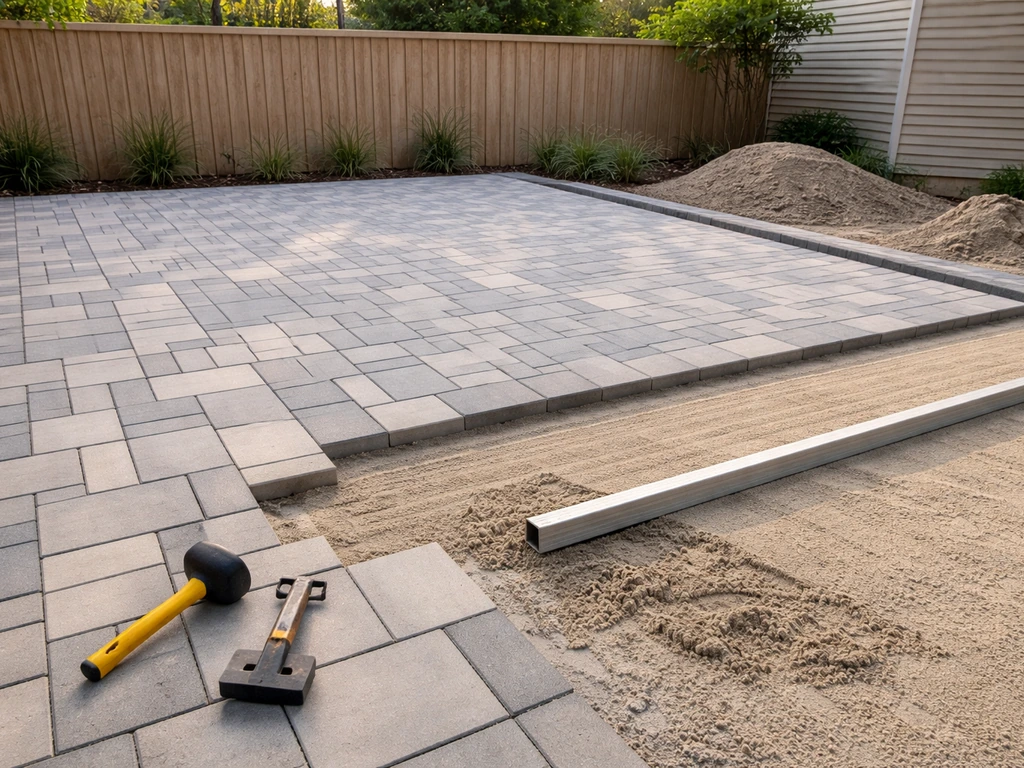
You can absolutely install a paver patio yourself. The full process runs in roughly this order: plan and pick your materials, measure and mark out the area, strip the site down to bare earth, build a compacted gravel base, lay a 1-inch sand setting bed, set your pavers, cut the edges to fit, and finish with joint sand and optional sealing. Done right, a DIY paver patio will stay solid and level for decades.
How to Patio Paving: DIY Step-by-Step Installation

Felix Rowe
14 May 2026
Done wrong, mainly by skimping on the base, it will sink and shift within a few seasons. This guide walks you through every step so you land firmly in the first camp. If you want more guidance beyond the build steps, these paver patio tips can help you plan, choose materials, and avoid common mistakes.
Plan First: Materials, Patterns, and Realistic Expectations
Before you touch a shovel, spend real time on planning. This is where most DIY patios either succeed or quietly fail. The choices you make here affect every step that follows.
Choosing your pavers
Concrete interlocking pavers are the go-to choice for residential DIY projects. They come in consistent dimensions, they're widely available, and manufacturers like Techo-Bloc and Unilock publish detailed installation specs you can actually follow. For a standard patio, 60 mm (about 2. A joint-width tolerance and minimum joint considerations can depend on paver or spacer thickness, as discussed in an ICPI Tech Spec 2-based specification context [60 mm (about 2.
](https://www. cementproductsmfg. com/wp-content/uploads/techspec2. pdf).
375 inches) thick pavers are the norm. If you're building anywhere near a vehicle path or driveway apron, look at heavier-duty options, since some products like Techo-Bloc's Diamond Smooth line are rated for vehicular loads at 100 mm thickness. For a backyard patio, standard residential thickness is plenty. Natural stone (flagstone, bluestone, travertine) looks beautiful but requires more cutting skill and can be inconsistent in thickness, which complicates leveling.
Start with concrete pavers for your first project.
Picking a pattern
Pattern affects both how the patio looks and how structurally sound it is. Running bond (offset rows, like brickwork) is the easiest for beginners and still looks sharp. Herringbone at 45 or 90 degrees is stronger because the interlocking angles resist lateral movement, which is worth considering if you live in a freeze-thaw climate. Basketweave and random ashlar patterns are popular but require more cuts.
If you're designing around a feature like a fire pit, a circular or fan pattern centered on the pit can look stunning, but plan your cuts before you buy material since waste runs higher. As a rule, add 10% to your material estimate for cuts and breakage, and bump that to 15% for diagonal or complex patterns.
Tools and time: be honest with yourself
A 200-square-foot patio is a solid weekend project for two people if the site is straightforward. Expect 1.5 to 2 full days, more if you're renting a plate compactor for the first time or dealing with tricky cuts. You'll need a plate compactor (rent one, don't skip it), a wet saw or angle grinder with a diamond blade for cuts, a long screed board, a rubber mallet, a hand tamper, stakes and string line, a level, and basic hand tools. Safety glasses and work gloves are non-negotiable when cutting pavers.
Measure, Layout, and Get Drainage Right
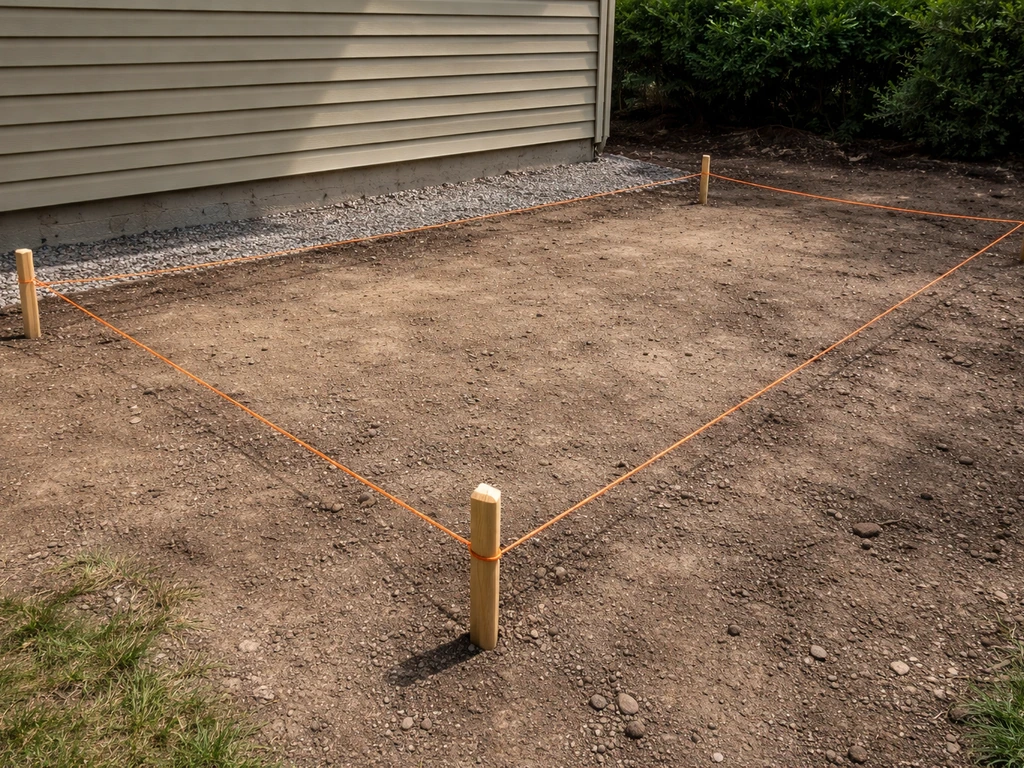
Measure your patio area carefully and mark it with stakes and string line. For a rectangle or square, check that it's truly square by measuring both diagonals: they should be equal. If you're working on an irregular shape or designing around existing features, sketch it on graph paper first and work out your paver count before ordering.
Drainage is the part most beginners underestimate. Your finished patio surface needs a minimum slope of 1/8 inch per foot (about 1%) away from your house or any structure. A 10-foot-wide patio should drop at least 1.25 inches from the house side to the far edge. Set your string lines to reflect this slope before you ever dig. If water pools on a finished patio, it's almost always because this step got skipped or rushed. For sloped yards, you may need to plan for a raised section on one side or a drainage channel at the low edge. Getting your string lines right at this stage makes every subsequent step easier.
Site Prep: Stripping the Ground and Handling What's Already There
Removing grass and topsoil
You cannot lay a stable paver base over grass or organic topsoil. Both compress unevenly and decompose, which causes sinking and shifting. Strip out all grass, roots, and the top layer of organic soil. In most residential yards, you'll excavate 8 to 12 inches below your intended finished surface: roughly 6 to 8 inches for the compacted gravel base, 1 inch for the sand setting bed, and the paver thickness on top. Mark your excavation depth on your stakes and stay consistent. A flat-spade and a wheelbarrow handle most small jobs; for larger areas, renting a sod cutter speeds things up dramatically.
Laying over an existing concrete slab
If you have an existing concrete patio in decent shape (no major heaving or crumbling), you can lay pavers directly over it. The slab acts as your base, so you skip the gravel layer. You'll still need a 1-inch sand bed for leveling, and you need to verify that adding paver thickness won't cause problems with door thresholds, steps, or drainage outlets. Check that the concrete still slopes away from the house correctly. If it doesn't, use the sand bed to adjust slope slightly, but don't rely on sand to fix a badly drained slab. Cracked or heaved concrete usually means there's a drainage or frost issue underneath, and laying pavers over it just delays the same problem resurfacing.
Dealing with uneven or unstable ground
Soft, soggy, or heavily clay-based soil needs extra attention. If you push a stake into the excavated soil and it sinks easily, that ground will continue to compress under load. In these cases, increase your base thickness toward the upper end of the range (8 inches or more) and consider laying landscape fabric between the native soil and your gravel to slow upward migration of fine particles. In areas with significant freeze-thaw cycling, thicker bases matter even more because frost heave is the number one enemy of paver patios. If your soil is consistently waterlogged, address the drainage problem first, whether with a French drain or grading, before installing any hardscape.
Building the Base: The Most Important Part of the Whole Project
If there's one place to not cut corners, it's the base. A paver is only as stable as what's underneath it.
Gravel base: thickness and material
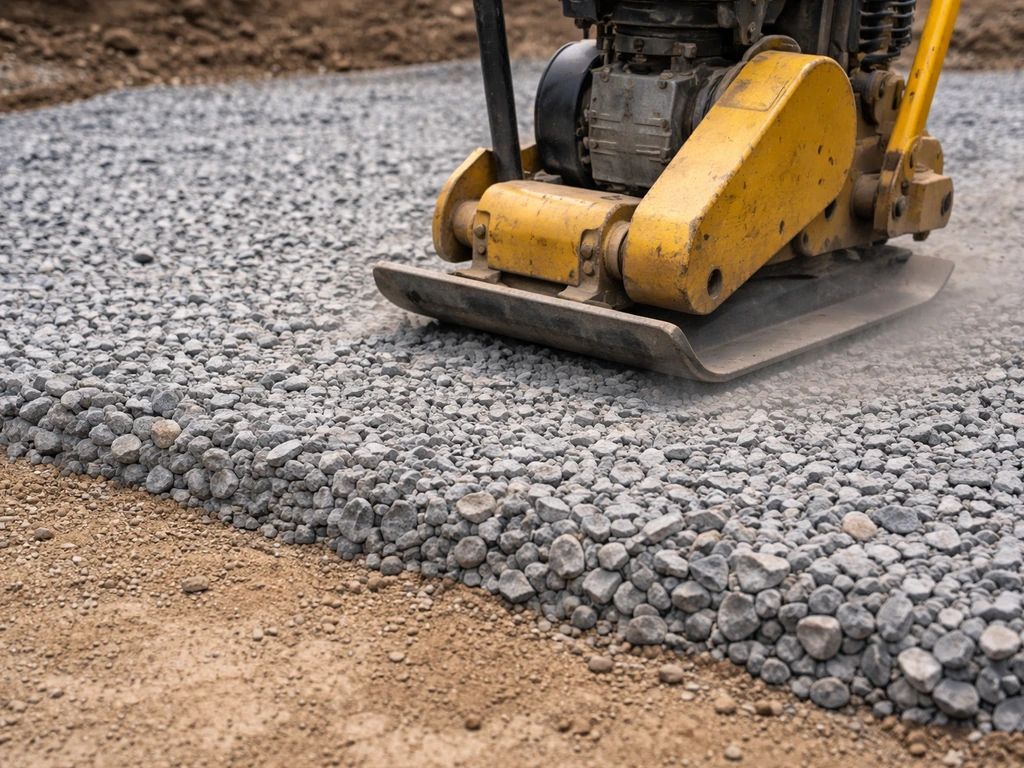
Use crushed angular gravel, typically labeled as crusher run, road base, or Class II base material. Avoid smooth, rounded gravel: it doesn't compact into a firm, interlocked mass the way crushed stone does. For residential patios and walkways, a compacted base of 4 to 6 inches is appropriate for well-drained, stable soils. For softer or poorly draining soils, or in cold climates with hard freezes, go 6 to 8 inches minimum. These ranges align with what manufacturers like blank" rel="noopener noreferrer">Techo-Bloc and Unilock specify for pedestrian installations. When in doubt, go thicker: adding an extra inch of base material costs very little compared to re-doing a sinking patio in three years.
Compaction: do it in layers
This is where a rented plate compactor earns its keep. Add gravel in 2 to 3 inch layers and compact each one before adding the next. A single 6-inch dump of gravel compacted once will not be as solid as three 2-inch lifts each fully compacted. Run the compactor in overlapping passes and go over each area at least twice. The surface should feel absolutely solid underfoot when you're done. Any give or springiness means it needs more passes or the lift was too thick. After compaction, check that your base still reflects the drainage slope you set with your string lines.
The sand setting bed

Once the gravel base is compacted and graded, spread coarse concrete sand (also called sharp sand or bedding sand) over the top. Screed it to a consistent 1-inch thickness using two lengths of conduit or pipe as depth guides and a straight board dragged across them. This is the standard spec: Techo-Bloc, for instance, calls for exactly 1 inch of coarse concrete sand for the setting bed under interlocking concrete pavers. Don't use fine play sand or stone dust for this layer. The 1-inch sand bed is your final leveling opportunity. Once it's screeded smooth and sloped correctly, resist the urge to walk on it before laying pavers.
Installing the Pavers: Setting, Edging, and Cutting
Starting point and setting pavers
Start from a straight, fixed edge, typically the edge closest to the house or a wall. Lay your first course along that reference line, then work outward. Place each paver gently onto the sand (don't slide them, which disturbs the bed) and tap them level with a rubber mallet. Work across the patio keeping consistent joint spacing: most concrete pavers have small built-in spacer lugs, but if yours don't, use 1/8-inch spacers. Maintain your pattern carefully and check level frequently, both across individual pavers and across larger sections with a long straightedge.
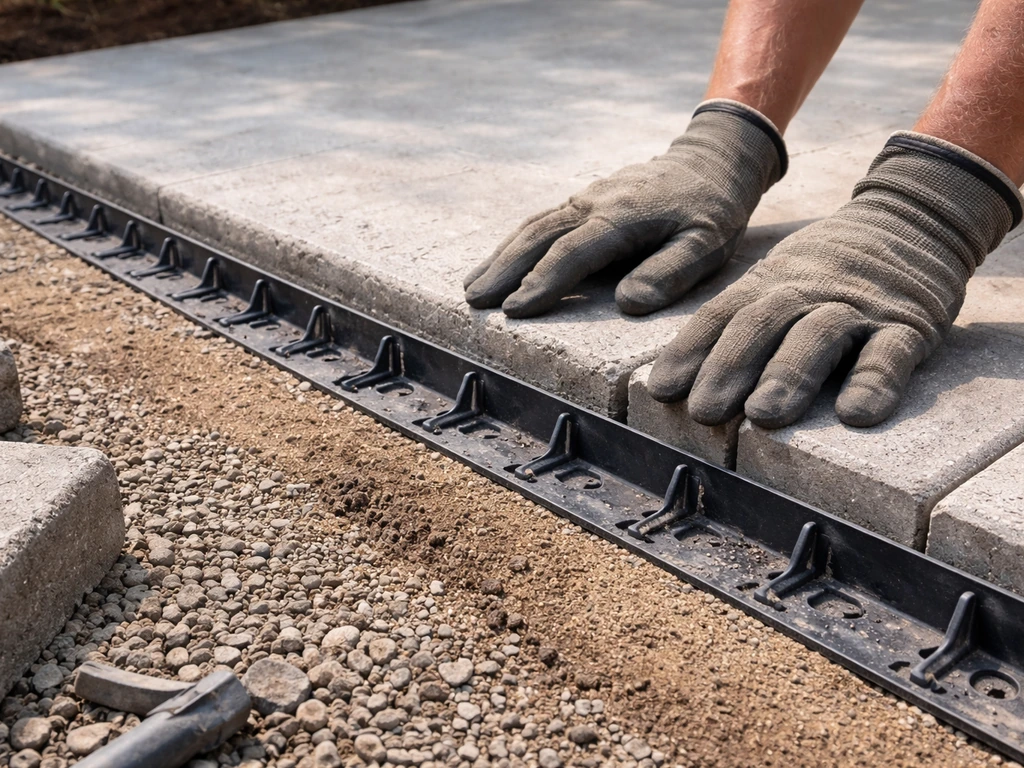
Installing edge restraints
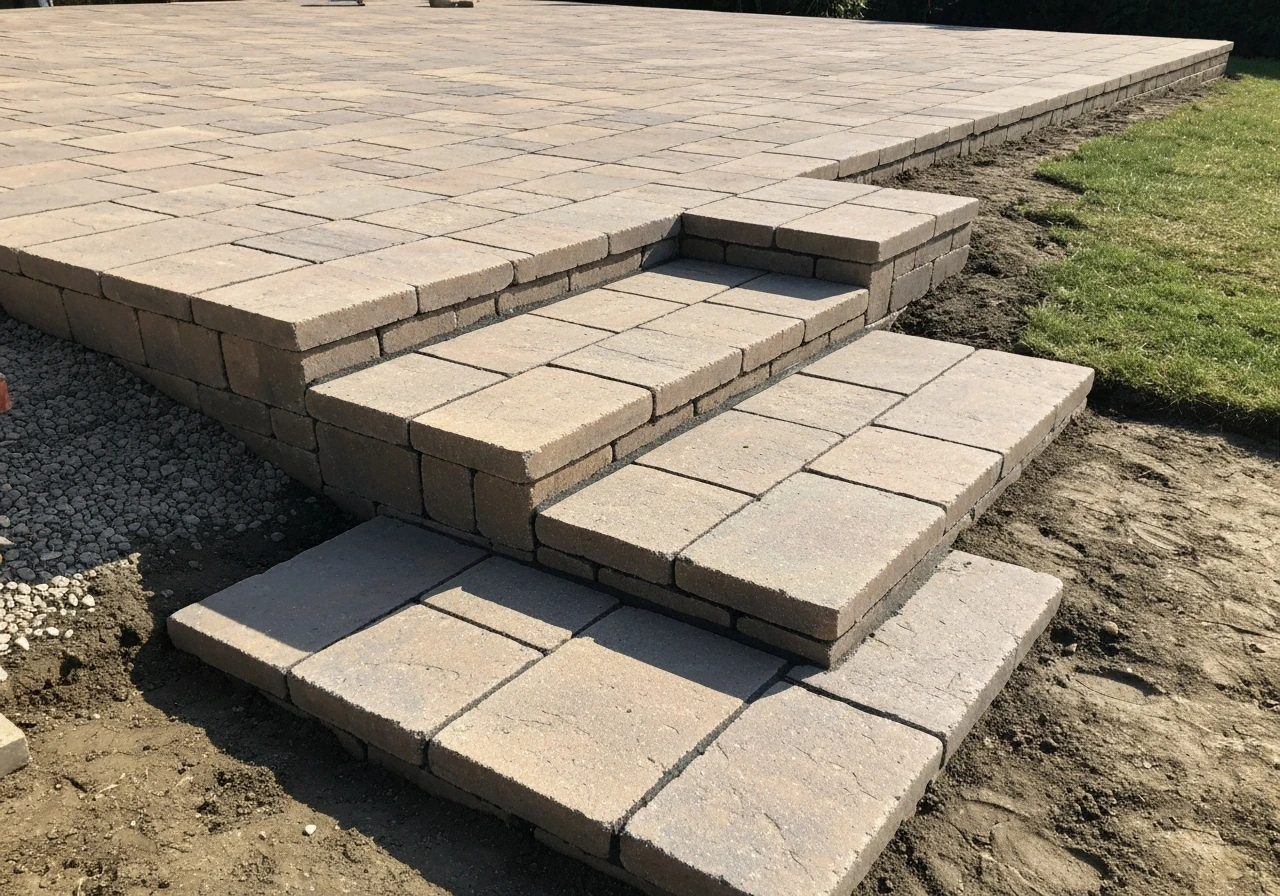
Edge restraints are what keep your patio from slowly spreading outward over time. Install plastic or aluminum paver edging along all perimeter edges before you get to the cut pieces. Spike the edging into the gravel base with the manufacturer's spikes at roughly 12-inch intervals. This is not optional: without edge restraints, even a well-installed patio will creep at the edges within a couple of seasons. If you're building steps leading to the patio or the patio connects to an existing walkway, make sure edge restraints tie those sections together cleanly.
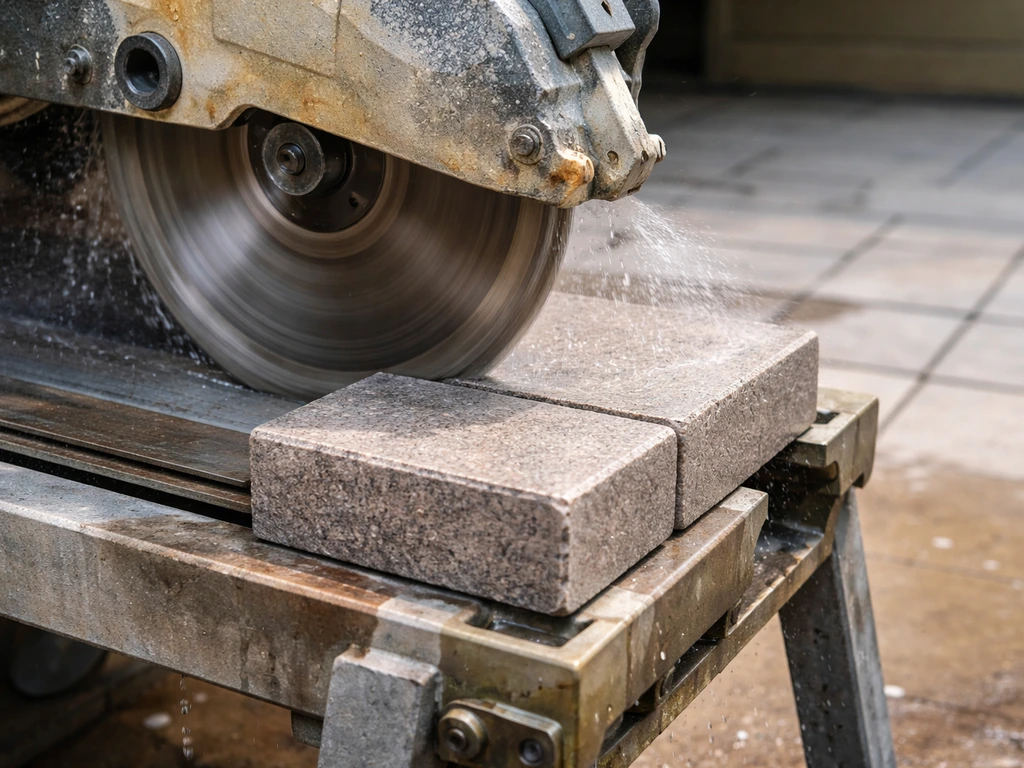
Cutting pavers to fit
Leave the cut pieces for last. Mark each cut piece in place by holding it over its intended spot and scribing a line, rather than measuring and hoping. Use a wet saw with a diamond blade for clean, accurate cuts, especially for anything other than a straight line. An angle grinder with a diamond blade works for straight cuts if you don't have access to a wet saw, but it's slower and dustier. Always wear eye protection and a dust mask when cutting. For curved cuts around features like a circular fire pit surround, a wet saw with a rotating table makes the job much cleaner.
Finishing: Joint Sand, Sealing, and Cleanup
Filling the joints
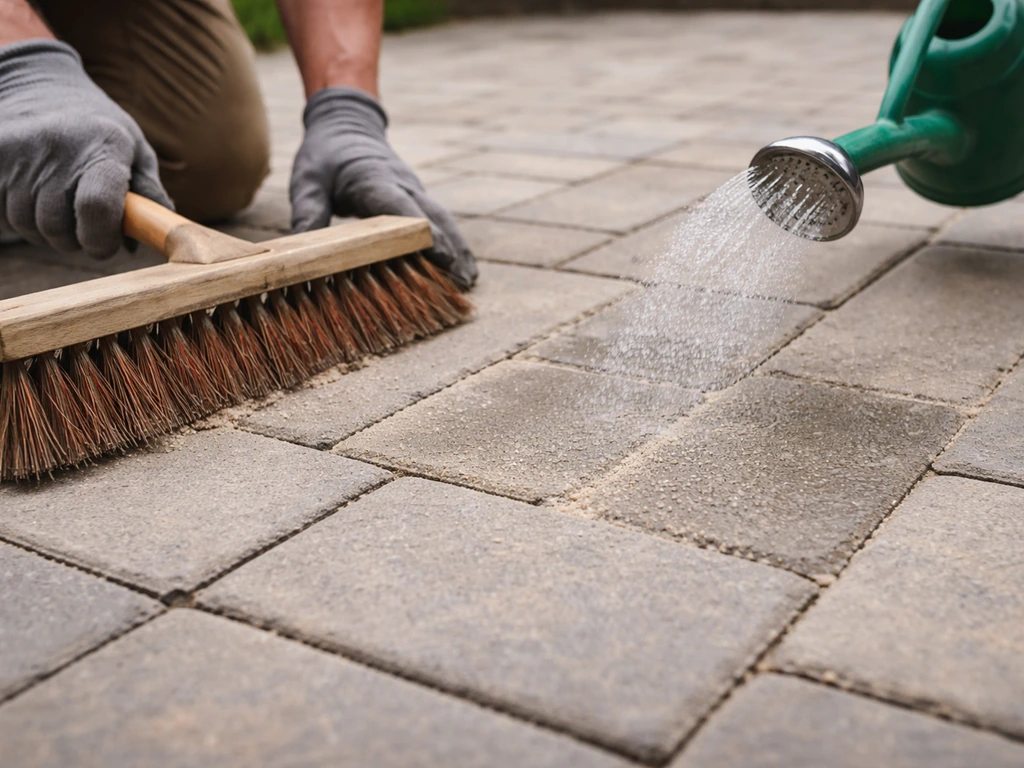
Once all pavers are set and edge restraints are in, sweep polymeric jointing sand across the entire surface. Polymeric sand contains a binder that, when activated with water, sets up firm and resists washing out, erosion, and weed growth. Sweep it into the joints from multiple directions until they're filled to within about 1/8 inch of the surface.
Run the plate compactor over the entire patio one more time (use a rubber pad attachment to protect the paver faces) to set the pavers firmly and drive sand deeper into the joints. Add a second round of sand if needed, then follow the manufacturer's instructions for misting with water to activate the binder. Keep foot traffic off for at least 24 hours while it cures.
To seal or not to seal
Sealing is optional but worth it. A penetrating paver sealer enhances color, protects the surface from staining, and helps the joint sand stay in place longer. Wait at least 60 to 90 days after installation before sealing to let the pavers fully cure and any efflorescence (white mineral haze) work itself out. Clean the surface thoroughly first. Apply sealer on a dry day with temperatures above 50°F. A good sealer typically lasts 3 to 5 years before reapplication. If you're in a harsh freeze-thaw climate, look for a sealer rated for that condition: some concrete paver manufacturers, including Techo-Bloc, specifically highlight freeze-thaw durability in their product specs.
Final cleanup
Blow or sweep off any remaining sand from the paver faces before it sets. Rinse with a garden hose (not a pressure washer at this stage) to remove dust. Step back and enjoy the fact that you just built something that will last 20-plus years if you did the base right.
Troubleshooting Common Problems and Keeping It Looking Good
Uneven or sunken pavers
If individual pavers sink or rock after installation, the most likely cause is an inconsistent sand bed or a soft spot in the gravel base. The fix is straightforward: pull the affected pavers, add or remove sand as needed, re-screed that small area, and reset the pavers. If a whole section has sunk, you may have a base compaction issue underneath. In that case, you'll need to pull a wider area and re-compact the gravel before resetting. Catching this early, within the first year, is much easier than fixing it after five seasons of settlement.
Drainage problems
Pooling water on the surface almost always comes back to insufficient slope. If it's a minor issue, you may be able to pull the low-lying pavers and adjust the sand bed to correct the grade. If the whole patio is flat or pitched toward the house, that's a deeper fix that may require lifting a significant portion and re-establishing slope. Prevention is everything: set your string lines with proper slope before you dig and check your base grade before the sand goes down.
Weed growth in joints
Weeds growing in joints are almost always a sign that the original jointing sand has washed out or was regular sand instead of polymeric. Pull the weeds, blow out the old joint material, and refill with fresh polymeric sand. If weeds keep returning aggressively, a paver sealer applied after re-sanding will help lock the surface and make it much harder for seeds to find a foothold.
Efflorescence and staining
Efflorescence is that white, chalky haze that sometimes appears on new concrete pavers. It's caused by soluble salts moving to the surface as water evaporates and is mostly cosmetic. It often fades on its own within the first year. If it persists, an efflorescence cleaner (diluted acidic solution) applied and scrubbed with a stiff brush, then rinsed thoroughly, will remove it. For oil stains or rust, use a targeted paver-safe degreaser or rust remover rather than bleach, which can affect joint sand.
Routine maintenance schedule
A well-built paver patio is genuinely low maintenance, but 'low' doesn't mean 'none.' Once a year, inspect the joints and top up polymeric sand anywhere it looks low or washed out. Check the edges for any signs of spreading and re-spike edge restraints if needed. Every 3 to 5 years, consider a fresh application of sealer. Avoid using metal shovels directly on the surface in winter since they scratch the paver faces: a rubber-edged or plastic shovel is much gentler. Most ice melt products are safe for concrete pavers, but check the label for any that contain ammonium nitrate or ammonium sulfate, which can damage concrete over time.
When to call a professional
Most residential patio projects are genuinely within DIY reach, but a few situations are worth getting a professional opinion on before you start. Significantly sloped yards where you're considering a raised patio design, areas with persistent drainage problems that suggest underground water movement, or sites near tree roots or retaining walls where ground pressure is complex: these all have higher stakes for getting the base right. There's no shame in hiring out the excavation and base work and then finishing the paver installation yourself. That split approach saves your back and still gives you the satisfaction of laying the pavers.
Quick Reference: Base Thickness by Condition
| Site Condition | Recommended Gravel Base Depth | Notes |
|---|---|---|
| Well-drained, stable soil | 4 to 6 inches compacted | Minimum for residential patios and walkways |
| Soft, clay-heavy, or poorly draining soil | 6 to 8 inches compacted | Consider adding landscape fabric at the base |
| Freeze-thaw climate, any soil | 6 to 8 inches minimum | Thicker base reduces frost heave risk |
| Over existing concrete slab | No gravel base needed | Use 1-inch sand bed directly on slab |
| High-traffic or vehicular area | 8+ inches, use thicker pavers | Check manufacturer load ratings |
Patio paving is one of the most satisfying DIY projects you can tackle because the result is permanent, visible, and genuinely improves your outdoor space. The steps aren't complicated, but they do need to happen in the right order and with real attention to the base. Get that part right and everything else follows naturally.
If you're also planning to add steps leading up to the patio, connecting a wood deck to the paver surface, or building out a patio around a fire pit or raised area, each of those has its own set of layout and structural considerations worth thinking through before you start buying materials.
If you're planning extra features like patio steps, deck transitions, or a fire pit surround, you may also want to review the patio pavers installation guide for more specific layout and base guidance. If you’re adding wood steps leading up to your paver patio, plan the rise, run, and support so the stair and patio stay aligned over time.
If you are adding building steps with patio pavers, plan the tread heights and edge restraints early so the stair section stays stable building out a patio around a fire pit or raised area. For details on how to build and finish those patio paving steps safely and with proper drainage, plan your layout and base thickness carefully.
FAQ
How do I choose the right paver thickness if my patio will be used near a driveway or for heavier foot traffic?
Start by matching the paver thickness to the load zone. Standard 60 mm pavers are usually fine for typical backyards, but if the patio will see vehicle contact or equipment, choose a product rated for vehicular loads (often requiring thicker pavers, for example around 100 mm). If you are unsure, keep the patio strictly pedestrian and stop the paver surface before the driveway apron to avoid overloading the base.
Can I install patio pavers over sand without a gravel base if my yard is mostly level?
No. Sand alone is not a stable structural layer and will compact and shift unevenly, leading to rocking and settlement. The gravel base is what provides the load-bearing and drainage structure, so even on a level site you still need compacted crushed angular gravel in lifts before adding the sand bed.
What’s the correct slope for drainage when the patio is attached to the side of a house rather than directly facing it?
Use the same minimum idea: slope away from structures so water does not migrate toward walls. If the patio runs along a side elevation, set the slope so the higher edge is at the wall and the lower edge is toward the yard. A practical way to do this is to anchor string lines on both the wall side and the far edge at the correct height difference before excavation and grading.
How much joint sand should I plan to add after the first rain or after running the compactor?
Plan on needing additional polymeric sand after the first compaction pass and after initial curing or minor wash-through. Fill joints from multiple directions until they are nearly flush (about 1/8 inch below the surface), then recheck 24 to 48 hours later and top up if joints have settled deeper. Avoid overfilling, since excess sand can create a dusty film and reduce how cleanly the binder activates.
Why do some pavers develop a slight wobble even when the patio looks level at first?
Wobble usually comes from a spot in the gravel base that was not compacted, or from disturbing the sand bed during placement (for example, sliding pavers into position). The fix is local and methodical: lift the affected pavers, correct the base if it is soft, re-screed the sand bed to maintain thickness, then reset without sliding and verify level with a straightedge.
What should I do if my patio is almost square, but the diagonals are slightly different?
Don’t guess with layout. If diagonals are off, adjust the form and string lines before you dig and before you order materials, because the square affects your cut pattern and joint alignment. Measure diagonals again after tightening string, then re-mark the excavation outline to correct the geometry while you still have flexibility.
Is polymeric joint sand required, or can I use regular sand for the joints?
Polymeric sand is strongly recommended because it helps resist washout and limits weed growth by binding the joints after water activation. Regular sand often erodes more quickly, especially with repeated rain or hose watering, and that leads to empty joints where weeds can establish. If you skip polymeric sand, expect more frequent joint maintenance and more weeding.
How do I prevent washing joint sand out during cleanup after installation?
After sweeping polymeric sand and compacting, activation requires controlled misting per the manufacturer’s timing and amount, then no heavy water flow right away. Avoid rinsing with a strong stream until the joints have been activated and the instructions indicate it is safe. If you use a garden hose, keep the water pressure gentle and focus on removing surface dust only, not blasting joints.
Can I seal pavers immediately if rain is forecast?
Wait at least the full cure window before sealing. Sealing too early can trap moisture and prolong efflorescence. If weather is a concern, cover and protect the work area to prevent runoff washing joints, but do not seal until the recommended minimum days have passed and the surface is clean and dry.
What ice melt products are safest for concrete pavers in freeze-thaw climates?
Most common ice melts are compatible, but check the label for ammonium nitrate or ammonium sulfate, since those can damage concrete over time. If you are unsure, use a paver-safe product and avoid rock salt piles that can concentrate brine and accelerate surface breakdown. For the cleanest long-term results, clear ice using a plastic or rubber shovel rather than metal tools.
Do I need edge restraints even for a small patio?
Yes. Edge restraints are what prevent outward spreading and edge settlement, which often starts after the first freeze-thaw cycles and repeated foot traffic. Even a small perimeter can creep if edges are unsupported, so install edging along all perimeter edges before placing cut pieces.
Should I fix efflorescence right away or wait for it to fade on its own?
It’s often cosmetic and may fade within the first year. If you want to speed it up, use a dedicated efflorescence cleaner as directed, then scrub with a stiff brush and rinse thoroughly. Avoid bleach for general stains because it can affect joint material and may contribute to uneven surface discoloration.
When would it make sense to hire out the excavation and base work but DIY the paver setting?
Consider professional help when the yard is significantly sloped, drainage is poor enough to suggest subsurface water movement, or when roots and retaining walls complicate soil pressure and grading. A common compromise is hiring excavation and base shaping with proper compaction control, then doing the paver layout, cuts, bedding sand, and jointing yourself to keep costs down while protecting the most failure-prone step.
Next Articles
Patio Paving Steps DIY Guide: Design, Build, and Finish
DIY guide to design and install patio paving steps with safe tread-riser sizing, drainage, base prep, and troubleshootin

How to Use Patio Paver Sand: Step by Step DIY Guide
Step-by-step guide to apply patio paver sand correctly: prep base, set pavers, fill joints, compact, and troubleshoot is

How to Install Patio Pavers in Sand: Step-by-Step
DIY step-by-step how to install patio pavers in sand, from excavation and base prep to leveling, cutting, joint sand and