Building patio paver steps comes down to three things done right: correct riser and tread dimensions, a solid compacted base under every step, and pavers that are set level and locked in with edge restraints. If you nail those three, you get steps that feel safe underfoot, drain properly, and stay put for years without shifting or cracking. Get any one of them wrong and you'll be releveling or relaying within a season or two. This guide walks you through the whole process, from sketching your design to sweeping in the final polymeric sand.
Patio Paving Steps DIY Guide: Design, Build, and Finish
Felix Rowe
7 May 2026
Step 1: Decide the Step Design and Dimensions
Before you buy a single paver, figure out your geometry. The two numbers that govern everything are riser height (how tall each step is) and tread depth (how far you can place your foot). The IRC caps residential riser height at 7-3/4 inches and sets minimum tread depth at 10 inches with a nosing or 11 inches without one. In practice, the "7/11 rule" is your friend: aim for about a 7-inch riser paired with an 11-inch tread. That ratio feels natural and comfortable for almost everyone.
To figure out how many steps you need, measure the total rise, which is the vertical distance from the bottom landing (your patio surface or grade) to the top landing (your door threshold or upper patio level). Divide that total rise by your target riser height. If your total rise is 21 inches and you want 7-inch risers, you need exactly 3 steps. If the math gives you an awkward fraction, adjust your riser height slightly within the 6- to 7-3/4-inch range until you get a whole number of steps. Every riser in a flight must be the same height, so do this math before you dig anything.
For tread depth, remember you're stacking pavers. A standard concrete paver is 2-3/8 inches thick, so an 11-inch tread might be achieved with a single large-format paver or two smaller ones side by side. Measure your chosen pavers and plan the layout on paper before committing. Wider treads (12 to 16 inches) feel more generous and are easier to drain properly, so if space allows, go wider.
Also decide how wide the steps will be. Match the full patio width if the steps span the whole end, or set a minimum of 48 inches for comfortable two-person use. Sketch the step profile on paper showing riser height, tread depth, and the number of steps. Once your steps are laid out, you will set the tread and riser pattern so the build works cleanly with the patio pavers around it step profile. That sketch will guide every measurement you make during the build.
Step 2: Choose Matching Pavers, Edging, and Layout Pattern
For a clean, finished look, your step pavers should match or complement the pavers you used on the patio field. Most manufacturers sell dedicated step systems where the riser block and tread cap are sized to work together. Techo-Bloc's Steps and Caps system is one popular example where the riser units and cap treads are engineered to hit standard riser heights without cutting, which saves a lot of time. If you're not using a dedicated system, you can build risers from retaining wall blocks and use flat pavers or large-format caps as the tread surface. Either approach works as long as you hit your target dimensions.
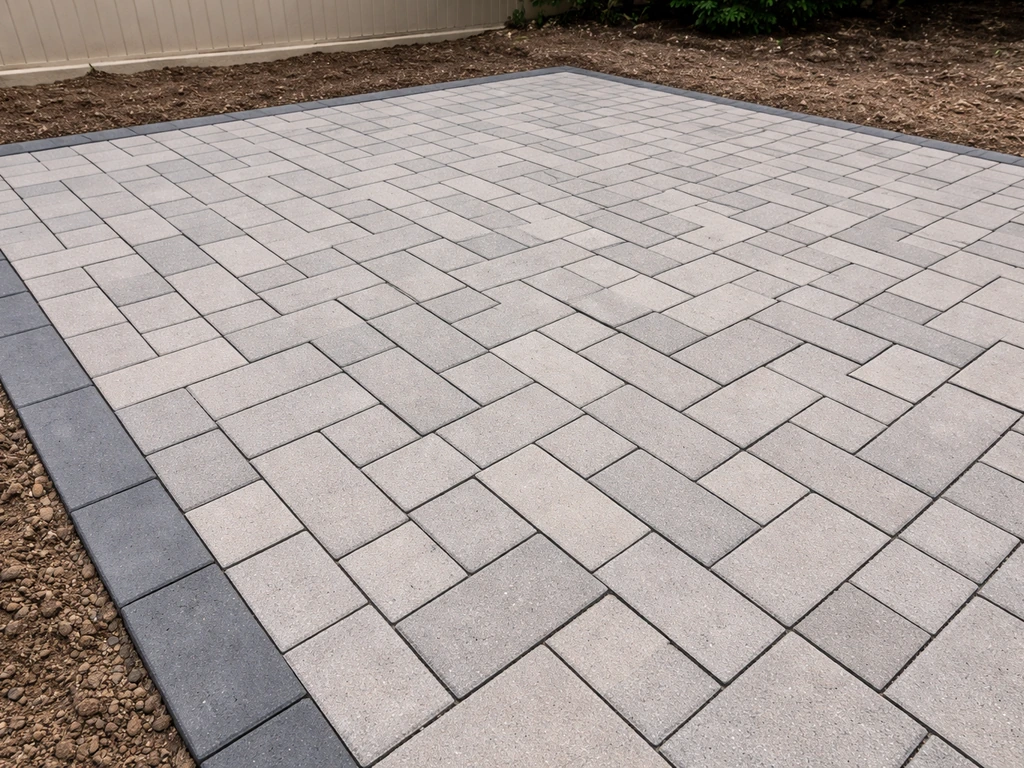
For the tread surface pattern, keep it simple. A single-course running bond (pavers laid parallel to the step front edge) is the most common and cleanest look. Avoid complex herringbone or diagonal patterns on treads because cuts get complicated and tiny paver pieces at the edges are prone to shifting. On the risers, a single-course horizontal stack with pavers cut to height looks sharp and is structurally sound.
Edge restraints are non-negotiable. ICPI guidance is clear: interlocking pavement needs perimeter restraints to prevent lateral movement. For steps, that means restraining both sides of each tread and the base course. Use plastic snap-in restraints (also called paver edging) spiked into the base, or for a more finished look, use cut soldier-course pavers set in mortar at the edges. Timber is not recommended as a paver edge restraint because it shifts and rots over time.
Order about 10% extra pavers beyond your calculated square footage to account for cuts and breakage. For a typical three-step run connecting a patio to a door, figure on a half to a full day of install work beyond the site prep.
Step 3: Site Prep, Remove, Level, and Prep for Base
Good steps start with good ground prep. Clear the area of all vegetation, sod, and organic material. If you're building over grass, strip it down at least 6 to 8 inches below your planned finished surface. Any organic material left in the base will decompose and cause settling, which means uneven risers and cracked treads. If you're building over existing concrete, inspect it for cracks, spalling, and drainage direction first. If you are planning wood steps leading down to a paver patio, treat the base and transition area with the same focus on stable support and proper drainage wood steps to paver patio. You can lay paver steps over solid concrete as long as it's stable and slopes away from the structure.
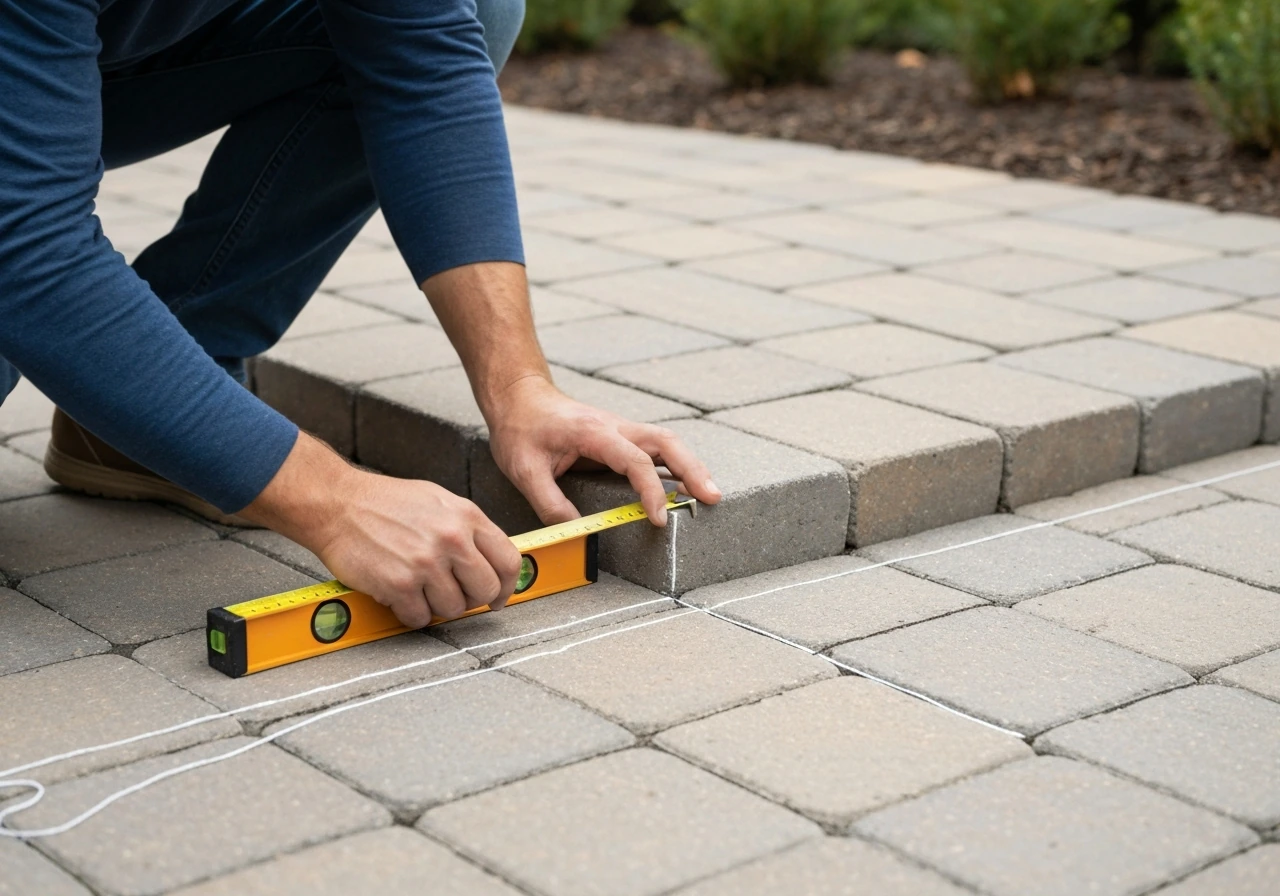
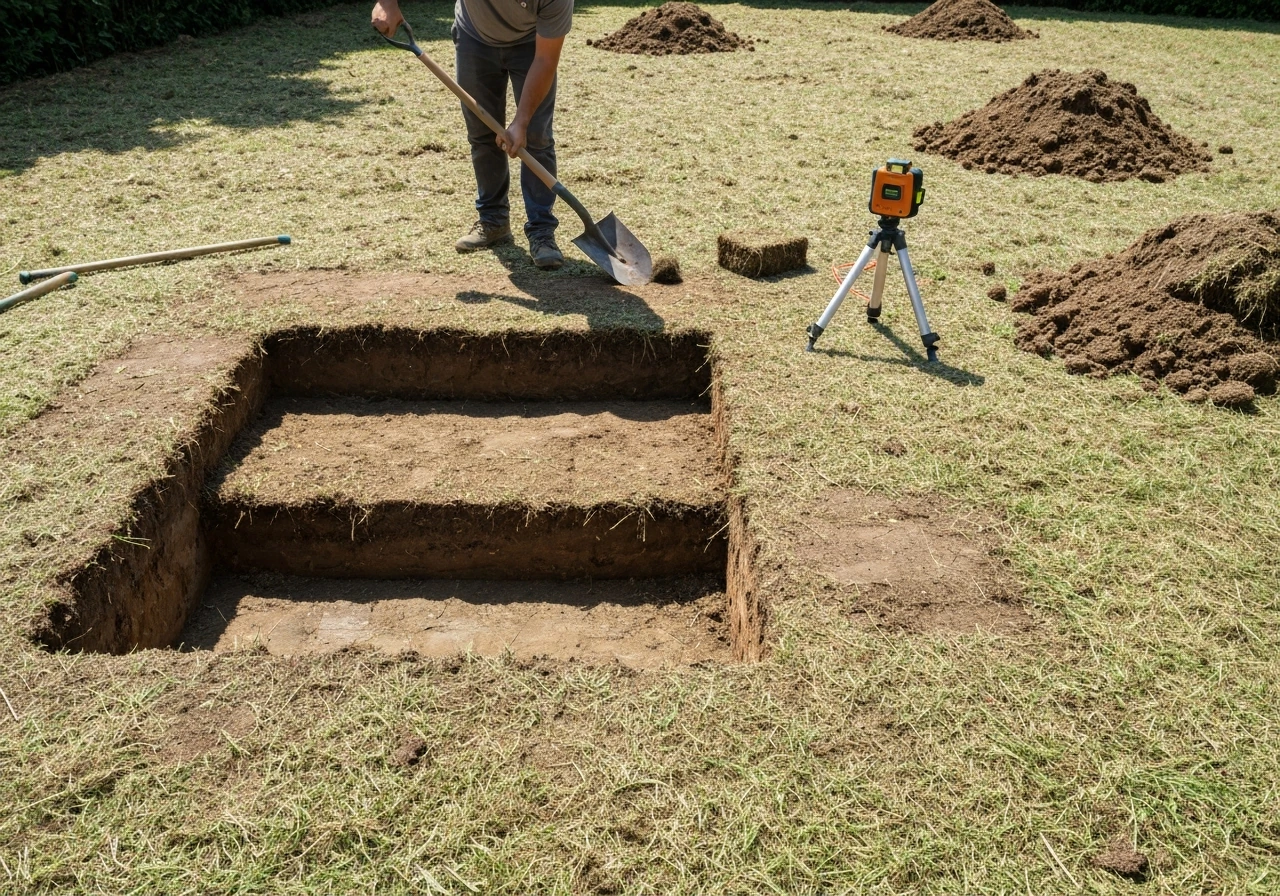
For steps on uneven or sloped ground, excavate each "platform" in a stair-step pattern following the natural grade. The bottom of each excavation needs to be level side to side and front to back before you add base material. Use a long level (4-foot minimum) to check this. Don't try to compensate for an unlevel excavation by varying your base depth, that's how you get inconsistent riser heights later.
Once excavated, compact the native soil with a plate compactor or hand tamper. If the soil is loose or sandy, consider adding a layer of geotextile fabric before your base material to prevent migration. For any step run within 10 feet of the house, the finished surface must slope away from the foundation at a minimum of 1/4 inch per foot (about 2%). Set that slope target now, at the excavation stage, not after you've built the whole staircase.
- Tools needed: spade or sod cutter, wheelbarrow, plate compactor or hand tamper, 4-foot level, tape measure, string line and stakes
- Safety note: call 811 (Dig Safe) before digging to locate underground utilities
- For steps over concrete: clean the surface, check for high or low spots, and plan your mortar bed thickness accordingly
Step 4: Build the Base and Set Height for Each Tread and Riser
The base is the most important part of the whole project. A three-layer system is the standard: compacted crushed gravel (the structural base), a bedding sand layer (the leveling course), and then the pavers. For residential paver steps, a minimum of 6 inches of compacted crushed gravel (3/4-inch clean crushed stone or road base) is the baseline. If you're in a freeze-thaw climate, bump that to 8 to 12 inches to get below the frost line and prevent heaving.
Add the gravel in 2- to 3-inch lifts and compact each lift separately. Dumping all 6 inches in at once and running the plate compactor over it once does not give you adequate compaction. Take your time here. This is the step most DIYers rush, and it's usually why steps shift or sink within a year or two.
Once your compacted gravel base is set, add your bedding sand. ICPI guidelines specify about 1 to 1-1/2 inches (25 to 40 mm) of coarse, washed bedding sand. Screed it level using the 1-inch-deep guide method: lay two pipes or conduit of the same diameter (1 inch works well) parallel on the gravel base, fill the sand between them, and drag a straight board across to create a perfectly flat, uniform sand bed. Then carefully pull the pipes out and fill those channels with sand. Don't walk on the screeded sand before you set pavers.
For steps specifically, you're building upward from the bottom step. Set your bottom riser course first, directly on the compacted base (sometimes mortared in place for extra stability on the first course). Use a level and your target riser height measurement to confirm everything is consistent before you move to the next step up. Build riser by riser, checking height as you go. The goal is that every riser, measured from the tread below to the tread above, hits the same number within 3/8 inch.
If you're using a dedicated step system like Techo-Bloc's Steps and Caps, follow the manufacturer's specific base thickness recommendations because those systems are engineered around certain block heights and base depths. Don't mix and match block systems unless you've verified the heights work together.
Step 5: Install Pavers for Treads and Risers (Including Cuts and Alignment)
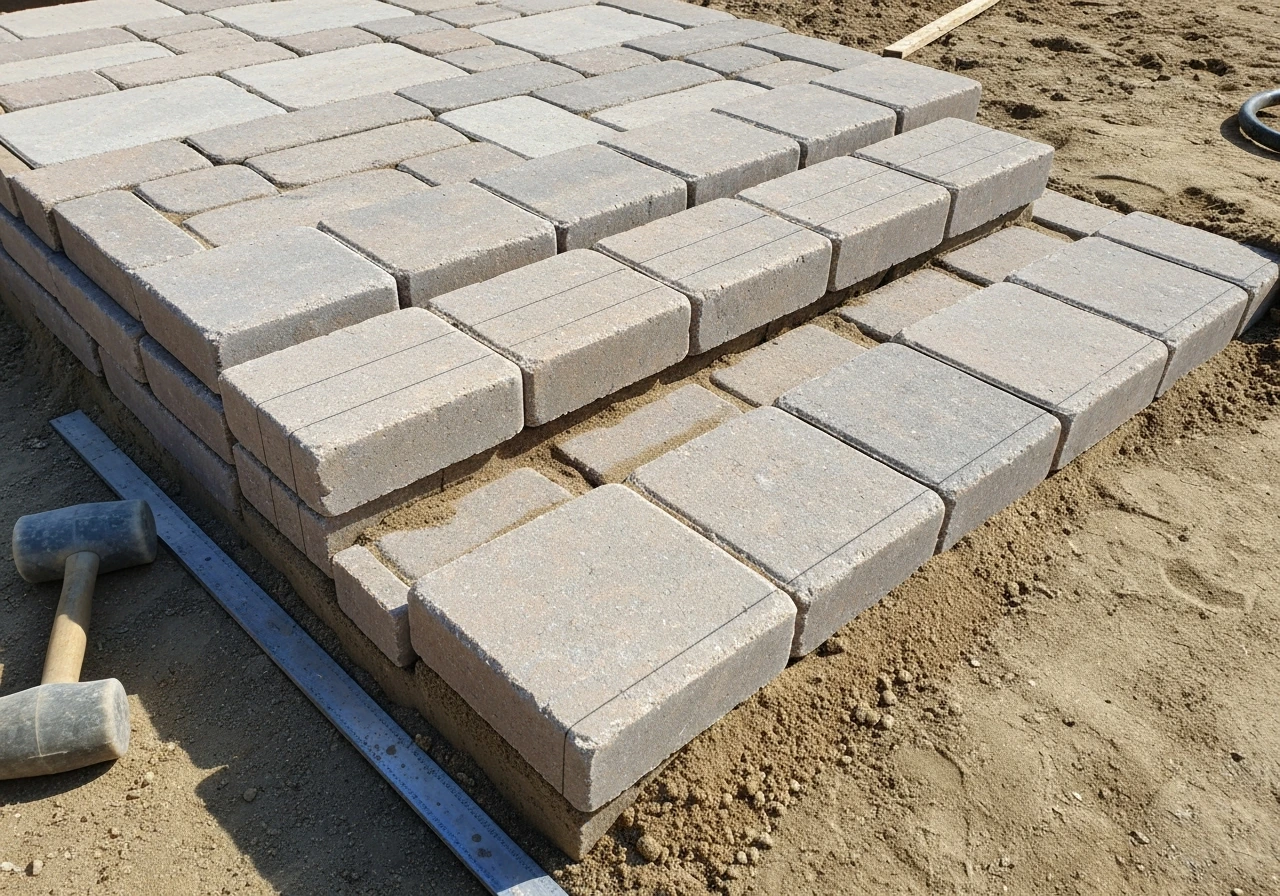
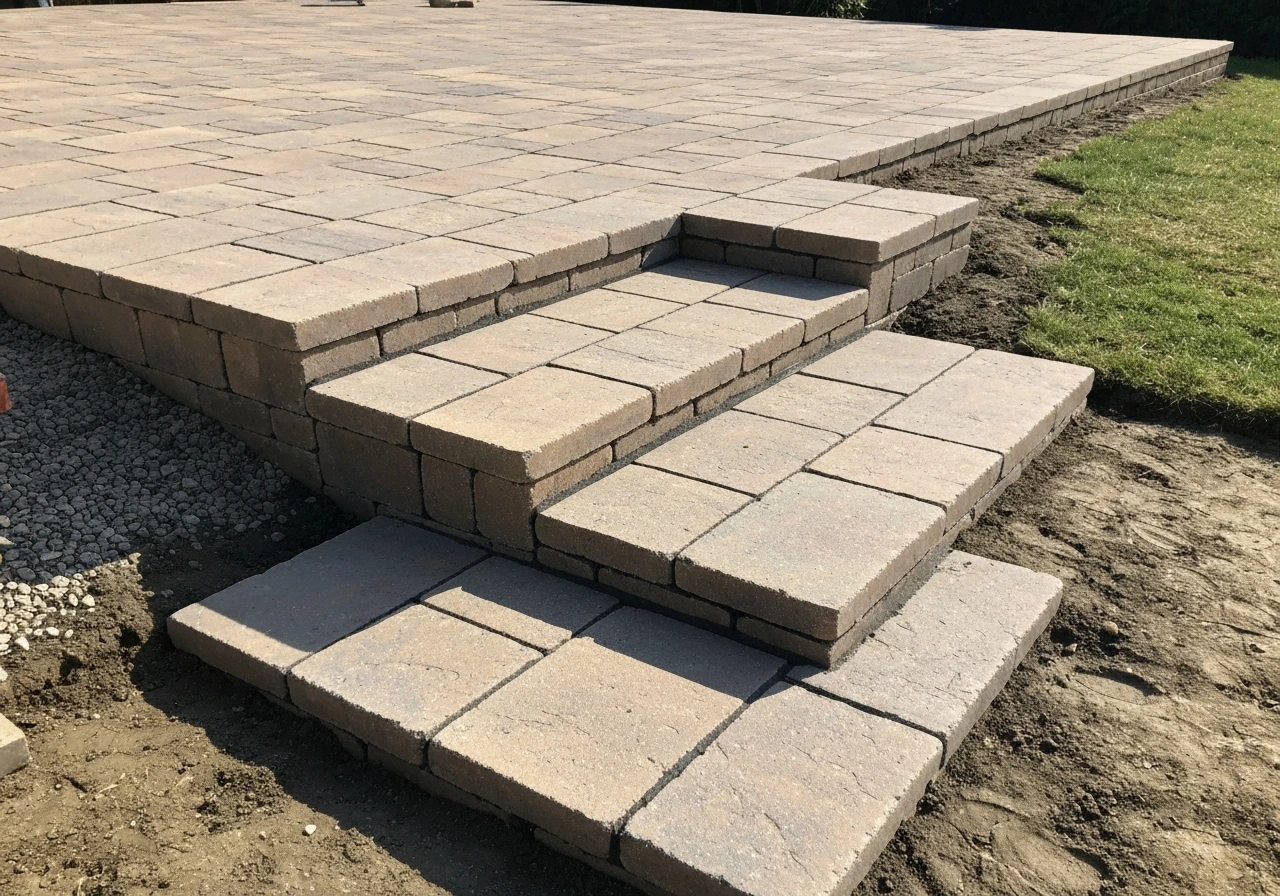
Work from the bottom step up. Set the riser face pavers first, then lay the tread pavers on top of the bedding sand behind them. This sequence keeps the riser face locked in by the weight of the tread and prevents the riser from kicking out over time. Make sure the tread surface overhangs the riser face slightly, typically about 1 inch, to create a nosing. That nosing gives a visual shadow line that defines each step clearly and reduces the chance someone misjudges the step edge.
Start each tread row from the center or from one consistent side and work outward. Use a rubber mallet to set each paver firmly into the sand bed. Every paver should contact the sand across its full base, hollow spots underneath lead to cracking. Set a 4-foot level across multiple pavers frequently to catch any high or low spots early. If a paver is too high, pull it, remove a little sand, and reset it. If it's too low, add a thin layer of sand. Don't use rocks or debris to shim pavers.
For cuts, a wet saw with a diamond blade is the cleanest and most accurate tool. An angle grinder with a diamond blade works for occasional cuts but creates a lot of dust and less precise edges. Mark cut lines with a pencil or chalk on the paver face. Cut larger pavers first as test pieces to confirm your measurement before cutting several at once. The goal is to avoid small slivers of pavers at edges, they break easily and look poor. If you're landing on a sliver, adjust your starting position or pattern to shift the cut location.
Maintain consistent joint spacing (typically 1/8 to 3/16 inch) between all pavers using plastic spacers if needed. Consistent joints are critical for polymeric sand to fill and cure properly. Uneven or overly wide joints (beyond about 2 inches) won't cure correctly and will allow weeds and water infiltration.
If your steps connect to an existing patio surface, the transition point matters. The top tread of the last step should finish flush with or very slightly below the patio surface (no more than 1/4 inch lower) to prevent a trip hazard. Plan this measurement from the very beginning of the project, it's much easier to set the step heights correctly upfront than to adjust at the top after building everything.
Step 6: Finish Details, Joints, Edging, Drainage, Sealing, and Maintenance
Filling the joints with polymeric sand

Once all pavers are set and edge restraints are installed, sweep polymeric jointing sand into all the joints. Make sure the paver surface is completely dry before you start, damp pavers cause the sand binder to activate prematurely and leave a haze on the surface. Pour the sand in heaps and sweep it diagonally across the joints with a push broom, making multiple passes until all joints are filled to within about 1/8 inch of the top. Run a plate compactor over the tread surfaces (not over unsupported edge pavers) to vibrate the sand deeper into the joints, then sweep again to top them off. Finally, activate with a fine water mist following the manufacturer's directions, typically a gentle mist that wets the joints without blasting sand out of them. Products like Quikrete Polymeric Jointing Sand are rated to fill joints up to 2 inches wide and resist weed growth once cured.
Edging and drainage
Secure all edge restraints with the proper spikes at the intervals the manufacturer specifies. For plastic edging, that's usually every 12 inches. Check that restraints are flush with or slightly below the paver surface so they don't create a trip hazard. Walk the perimeter and look for any sections that have bowed or lifted during installation. Correct those now before the polymeric sand cures.
Confirm that tread surfaces drain forward and away from any structure. Even a minimal 1/4-inch-per-foot pitch toward the front of each tread is enough to prevent standing water. Standing water on steps freezes in winter and creates a slip hazard, so don't skip this check. If a tread is dead flat or slightly back-pitched, pull the pavers and add a little sand to the rear edge to re-establish positive drainage.
Sealing
Wait at least 30 days after installation before sealing to allow the polymeric sand to fully cure. Then apply a concrete paver sealer rated for exterior use. Sealer protects against staining, enhances color, and helps the joints resist weed intrusion. Apply with a low-pressure sprayer or roller in thin, even coats on a dry day when temperatures are between 50 and 90 degrees Fahrenheit. Avoid applying sealer in direct hot sun as it can bubble or streak. Reapply every 3 to 5 years depending on traffic and sun exposure.
Ongoing maintenance
- Sweep steps regularly to remove debris and dirt that can break down joint sand over time
- Re-fill any joints that have lost sand in the first year — some settlement is normal
- Check edge restraints each spring; re-spike any sections that have lifted through freeze-thaw cycles
- Reapply polymeric sand or a joint stabilizer if you notice weed growth or joint erosion
- Reapply sealer every 3 to 5 years or when water stops beading on the surface
Step 7: Troubleshooting Common Step-Install Problems and Fixes
| Problem | Likely Cause | Fix |
|---|---|---|
| Steps shifting or moving laterally | Inadequate edge restraints or poor base compaction | Re-spike or replace edge restraints; relay on recompacted base if significant movement has occurred |
| Uneven riser heights | Inconsistent base depth or sand bed thickness under each tread | Pull treads on the affected step, re-screed sand to the correct depth, reset and re-check heights |
| Pavers rocking or hollow sound when tapped | Voids in bedding sand beneath the paver (poor contact) | Pull the paver, add and screed sand to fill the void, reset the paver firmly with a rubber mallet |
| Gaps widening between pavers | Joint sand washing out or degrading; no polymeric sand used | Re-fill joints with polymeric sand; check that surface drainage is directing water away from the steps |
| Tread surface pooling water | Tread is flat or back-pitched toward the riser | Pull the rear row of tread pavers, add a thin sand wedge at the back edge, re-lay with a 1/4"/ft forward pitch |
| Cracked tread pavers | Thin paver on an unsupported void, or freeze-thaw with poor base | Replace cracked pavers; inspect and recompact base; ensure base depth is adequate for your climate |
| Polymeric sand haze on paver face | Sand activated while surface was damp, or excess sand not swept off | Lightly scrub with a diluted polymeric sand haze remover or mild acid wash; apply sealer after cleaning |
| Bottom step sinking | Insufficient base under the bottom riser or unstable native soil | Excavate, add and compact additional base material, relay the bottom course |
One thing worth saying plainly: if your steps are shifting within the first year and you've already confirmed the edge restraints are solid, the problem is almost always the base. Pavers are unforgiving of a weak sub-base. Don't just relay the surface and expect a different result, dig down, recompact, and rebuild. It's more work upfront but it's the only fix that actually lasts.
Realistic Expectations: Tools, Time, and Effort
A three-step run, roughly 48 to 60 inches wide, is a solid weekend project for a capable DIYer. Expect to spend a half day on excavation and base prep, several hours on riser and tread installation, and a couple more hours on finishing and cleanup. Add extra time if you have significant cutting, uneven ground, or if you're doing the project solo. The physical work is real, compacting gravel, hauling material, and setting heavy pavers adds up quickly.
- Plate compactor (rent from a tool rental shop for about $70–$100/day)
- Wet saw or angle grinder with diamond blade
- 4-foot level and line level
- Rubber mallet
- Tape measure and chalk line
- Push broom and garden hose with fine mist nozzle (for polymeric sand activation)
- Wheelbarrow, spade, and safety glasses/ear protection
Material costs vary widely by region and paver type, but budget roughly $15 to $35 per square foot of finished step surface when you factor in base material, sand, pavers, edge restraints, and polymeric sand. Dedicated step-system blocks (like pre-made riser units) cost more per unit but save significant time on cuts and layout. If your total rise is more than about 4 feet (6 or more steps), the project scope grows considerably and it may be worth getting at least one contractor quote to compare.
If you're also tackling the flat patio surface that these steps connect to, the same base principles apply across the whole project, and planning the step geometry and patio surface slope together from the start saves a lot of rework. For more on designing the run from the patio to the door, see paver patio steps to house paver steps. If you also need help with the surrounding patio, use the same approach from our guide on how to patio paving to plan base depth, slope, and joint sand flat patio surface that these steps connect to. The tread and riser installation here connects naturally with the broader process of laying the full patio field and managing transitions to the house, all of which follow the same core logic of good base prep, consistent slope for drainage, and locked-in edge restraints. If you want to extend the work into the rest of the patio, follow this patio pavers installation guide for the same base prep and leveling approach.
FAQ
Can I change the riser heights slightly to avoid re-cutting pavers or matching the patio height exactly?
For safety and appearance, keep every riser within about 3/8 inch of the target, and do your math before excavation. If the top needs a different height to match a door threshold or a patio surface, the better fix is adjusting the tread thickness and the base height plan, not making uneven risers.
What if my total rise does not divide evenly by 7-inch risers, can I still use the 7/11 rule?
Yes, but only by shifting riser height within the allowed range, then recalculating the number of steps. Use the same riser height for the entire flight, and confirm that your tread depth still allows proper foot placement when using your actual paver thickness.
How do I deal with a step run next to a wall or a narrow side where I cannot restrain both sides normally?
Edge restraints still matter. If a side cannot be restrained with standard edging, use an alternative restraint method such as soldier-course pavers on that edge (set in mortar) or a dedicated containment system, and keep the area fully compacted under the tread. Leaving one side free increases the chance of lateral shifting.
Is it okay to use regular sand instead of bedding sand for patio paving steps?
Avoid it. Bedding sand is coarse and washed, it compacts and locks pavers correctly, and it provides the right thickness for leveling. Fine or dirty sand can wash away or prevent proper seating, leading to rocking, cracked pavers, and weak joint fill.
How thick should the bedding sand layer be if my pavers do not sit at the exact height I planned?
Target about 1 to 1-1/2 inches of bedding sand, then adjust paver height by resetting individual pavers with sand removal or addition, not by dumping extra bedding everywhere. If you find you need a lot more thickness, it usually signals a base excavation or slope mistake, not a bedding adjustment fix.
What is the best way to cut avoid slivers on the tread edges?
Dry-fit your layout on paper using actual paver dimensions, then shift the starting line so the cut falls on a full step row that can tolerate it. If you end up with unavoidable slivers, keep them from landing where a foot will land most often by adjusting the tread row alignment.
Can I build the risers from the same pavers I used on the patio field, or do I need a step system?
You can use a step system or a custom approach. Dedicated systems reduce measurement risk because the riser and cap are engineered together, but a DIY build works if you hit consistent riser height and tread depth using measured paver thickness and overhang for the nosing.
Do patio paving steps need joints, or should I minimize them for a cleaner look?
Use consistent joints, typically 1/8 to 3/16 inch. Cutting joints too tight can prevent polymeric sand from filling properly, joints too wide can fail to cure and increase weed growth. Spacers help you keep joint width uniform over multiple steps.
When is it safe to activate polymeric jointing sand, and what if it rains?
Only start when pavers are completely dry and the product label conditions are met. If rain hits the joints before activation, the sand can fail to cure properly. In that case, allow everything to dry fully, then follow the product instructions for redoing the jointing step if needed.
Should I run a plate compactor over the entire step surface after joint sand?
Yes for vibration, but with care. Compact the tread surfaces, keep the compactor off unsupported or edge areas that could shift or crack thin paver pieces, and re-sweep joint sand after compaction to top joints back up to near flush.
How can I tell if my steps have the right drainage without guessing?
Use the level to verify a forward pitch on each tread toward the open area, about 1/4 inch per foot. Then, after a hose test, check for standing water at corners and at the nosing line. If water pools, rework the base or sand at the problem treads instead of relying on joint sand to fix drainage.
Is sealing required for patio paving steps, and can it be done right away?
Sealing is not mandatory, but it can reduce staining and make maintenance easier. Wait at least 30 days for polymeric sand to cure fully before sealing, and apply on a dry day within the temperature range recommended by the sealer manufacturer.
If my steps shift in the first year, what is the most likely cause besides edge restraints?
The base is usually the cause. If compaction was rushed, base depth was insufficient, or organic material remained under the structure, the pavers will settle and joints will open. Fixing the surface often hides the issue temporarily, relaying without rebuilding the base tends to repeat the problem.
How do I make sure the last tread meets the patio surface without creating a trip hazard?
Plan the top transition during layout, aim for the top tread to be flush or slightly lower than the patio surface (no more than about 1/4 inch down). Measure from a consistent reference, then lock in tread heights for every preceding step so you do not end up changing the top at the last minute.
Can I install patio paving steps over existing concrete?
Sometimes, but only if the concrete is stable and drainage is correct. Check for cracks, spalling, and slope direction first, then build with the same base and bedding logic so you are not transferring movement from the concrete into the paver system.
Next Articles
How to Seal Paver Patio: Step-by-Step DIY Guide
Learn how to seal a paver patio step by step: clean, choose penetrating or wet-look sealer, apply, cure, and maintain.
Do It Yourself Paver Patio Installation: Step by Step
Step-by-step guide to DIY paver patio installation: grading, base prep, paver setting, edging, joint sand, sealing and f
Do It Yourself Patio Paver Ideas: Layout, Prep, Install
DIY patio paver ideas with layout patterns, site prep, base thickness, leveling, edging, and fixing sinking, gaps, weeds