
Resetting patio pavers means lifting them out, fixing whatever went wrong underneath, and setting them back down level, stable, and properly jointed. Most sunken spots, rocking pavers, and uneven sections are fully fixable in a weekend with common tools. The key is diagnosing whether the problem is localized (a bad bedding pocket, a single cracked stone) or systemic (base washout, failed edge restraints, widespread settlement) before you pick up a pry bar. Get that diagnosis right and you will not undo work you just finished. For a step‑by‑step walkthrough on how to restore a paver patio, see the detailed guide linked below.
How to Reset Patio Pavers: Step-by-Step DIY Guide & Costs

Felix Rowe
5 Aug 2026
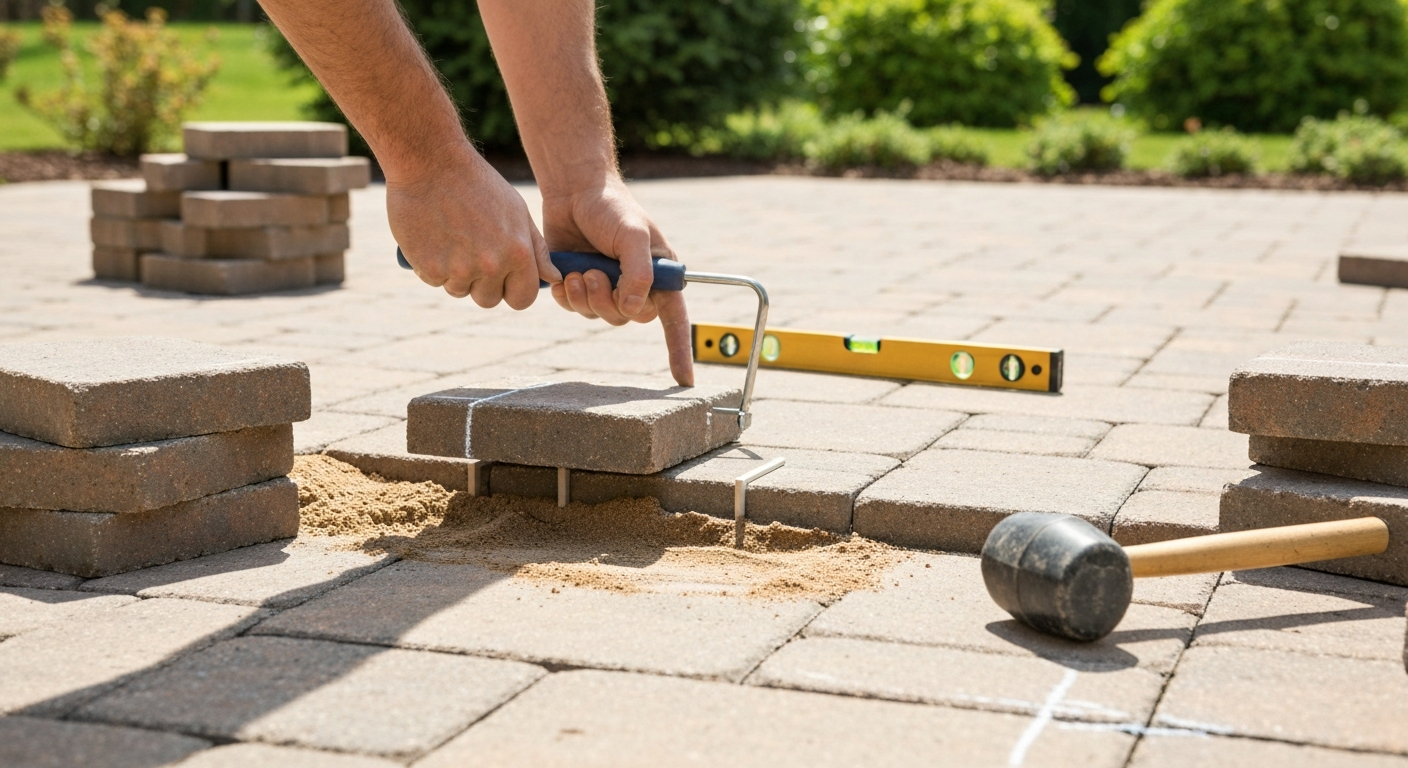
What resetting patio pavers actually means
Resetting is different from replacing. You are not necessarily buying new pavers or tearing out a whole patio. You are lifting existing pavers, correcting the base or bedding layer beneath them, and reinstalling them so the surface is flat, drains correctly, and holds together. The scope can range from lifting two or three stones in an afternoon to relaying an entire section over a rebuilt base. Where you land on that spectrum depends entirely on what your inspection turns up.
Common reasons to reset pavers include frost heave that pushes stones upward in winter, soil settlement or compaction failure that lets them sink, tree root intrusion, water pooling from poor slope, and edge restraint failure that lets a whole section spread and shift. Staining and joint sand loss are usually surface-level issues but can signal deeper drainage problems worth investigating while you are already in there.
Inspection checklist before you touch anything
Walk the entire patio slowly before committing to any repair. This takes ten minutes and will save you from fixing one spot only to discover another problem three feet away. Use a straight 6-foot level, your feet (step on every paver), and your eyes. Here is what to look for:
- Sinking or low spots: lay your level across the surface — any gap greater than about 3/8 inch over a 10-foot span signals a bedding or base problem
- Rocking pavers: step on each paver corner; movement under foot means the bedding sand is either gone or never made contact
- Cracks: hairline surface cracks may be cosmetic, but through-cracks or shattered corners mean the paver needs replacement
- Poor drainage or pooling: water should sheet off at 1–2% slope (about 1/8 to 1/4 inch per foot) away from your house; standing water after rain means the slope is wrong or the base has settled
- Joint sand loss: visible gaps, weeds growing in joints, or sand that has washed completely away will allow pavers to shift — it also points to missing or inadequate drainage
- Edge spreading: gaps opening up along the perimeter mean an edge restraint has failed or was never installed; spreading almost always gets worse before it stops
- Efflorescence or deep staining: white salt deposits or organic staining usually come off with the right cleaner, but widespread staining can indicate water is moving through the base rather than draining away from it
Mark every problem area with chalk or a piece of tape before you start. Photograph the full patio and close-ups of damage. You will reference those photos when you re-lay the pattern.
Tools and materials, complete list for every repair scope
The list below covers everything from a spot repair to a full-area relay. You will not need every item for a small fix, but it is worth knowing what larger scopes require before you start.
| Item | Buy or Rent | Notes |
|---|---|---|
| Paver puller / pry chisel set | Buy | Prevents chipped edges when lifting; flat pry bar also works for concrete pavers |
| Plate compactor (75–100 Hz, ~5,000 lbf force) | Rent | Essential for seating pavers and compacting base lifts; rent for any repair over 5–6 pavers |
| Rubber mallet | Buy | For hand-setting individual pavers before compaction |
| 6-ft aluminum straightedge / level | Buy | Checking surface flatness; also used as a screed rail guide |
| Long mason's level (4 ft) | Buy | Slope verification across sections |
| Hand tamper | Buy | Small-area base compaction where a plate compactor cannot reach |
| Wet tile/paver saw with diamond blade | Rent | Required for cutting concrete or natural stone pavers to fit; continuous-rim blade for porcelain |
| Angle grinder with diamond blade | Rent/Buy | For tight cuts or grinding high spots on base |
| Garden hose / water source | — | Wet cutting, activating polymeric sand, rinsing |
| Stiff push broom and soft-bristle broom | Buy | Sweeping joint sand into gaps |
| Knee pads | Buy | You will be on the ground for hours — do not skip these |
| Safety glasses, hearing protection | Buy | Mandatory; plate compactors are loud and debris flies |
| N95 or P100 half-face respirator | Buy | Required when cutting masonry; OSHA requires dust controls when cutting silica-containing materials |
| Work gloves (cut-resistant) | Buy | Paver edges are sharp |
| Washed concrete sand (ASTM C33) | Buy | Bedding layer; do not substitute mason/ASTM C144 sand |
| 3/4-in crushed stone / Class II base aggregate | Buy | Base repair and rebuilding; depth depends on scope |
| Polymeric joint sand (or regular concrete sand for joints) | Buy | Joint filling; see polymeric vs regular guidance below |
| Aluminum or steel L-edging with 10-in spikes | Buy | Edge restraint repairs; spikes must reach into the compacted base |
| Paver sealer (optional) | Buy | Apply after all repairs are finished and pavers are clean and dry |
| Efflorescence cleaner or diluted muriatic acid (10:1) | Buy | For white salt deposits; test a small area first |
| Weed barrier fabric (for grass/soil installations) | Buy | Only under the base layer, not under bedding sand |
| Chalk line and marking chalk | Buy | Re-establishing pattern lines and reference edges |
| Spray paint or marking flags | Buy | Marking problem areas and edge lines before demolition |
| Wheelbarrow and shovels | Buy/Rent | Moving base material and sand |
Safety, prep, and protecting the work site
Before you dig into base repairs, call 811 (the national utility locate line in the US) or your local equivalent. Utilities can run surprisingly close to patio edges, especially electrical conduit to outdoor lighting. This is free and mandatory. Wait for the locate before any excavation deeper than a few inches.
Cutting concrete or natural stone pavers generates respirable crystalline silica dust, which causes serious lung disease with repeated exposure. OSHA's construction silica rule (29 CFR 1926.1153) requires using wet cutting methods or vacuum dust collection as your primary control. Run water over the blade continuously when using a wet saw, and wear a P100 half-face respirator as backup. Never dry-cut concrete pavers with a grinder unless you have an integrated shroud and vacuum. This is not overcautious, it is the standard your body deserves.
Keep runoff from paver washing, acid cleaning, and concrete slurry out of storm drains. Place a drop cloth or sandbags at drain entry points during cleaning stages. Polymeric sand wash-off and efflorescence cleaner residue are both problems for waterways. Neutralize any acid rinse water with baking soda before it leaves the work area.
- Call 811 before any base excavation
- Wear safety glasses whenever operating a plate compactor, saw, or grinder
- Use hearing protection with a plate compactor — prolonged exposure damages hearing quickly
- Wear cut-resistant gloves when handling pavers; edges are sharp and weight is deceptive
- Wet-cut or use vacuum shroud for all masonry cuts; N95 minimum, P100 preferred
- Contain wash water and acid rinse away from storm drains
- Work with a partner when moving large paving slabs or operating plate compactors on slopes
Diagnosing failure modes and choosing your repair scope
The single biggest mistake I see DIYers make is committing to a repair scope before they understand why the pavers failed. Lifting a sunken paver and dropping it back without fixing the base just means it sinks again in six months. Spend fifteen minutes on diagnosis and you save yourself from repeating the job.
After lifting a few representative pavers in a problem area, look at the bedding sand and base underneath. If the bedding sand is still 3/4 to 1 inch deep and the compacted base below it is firm and does not deform when you push a rod or screwdriver into it, the base is probably fine and you are dealing with a bedding issue only. If the base feels soft, shows erosion channels, or has clearly washed away, you need to rebuild it before re-bedding.
Signs that allow a spot reset (localized fix only): a handful of pavers sunken in one area, stable base below, no edge spreading, and adjacent elevations still level. Signs that require partial or full relay: settlement across more than 5–10% of the patio area, visible base erosion or washout, edge restraint failure causing spreading, drainage slope that has reversed toward the house, or frost heave that has affected entire sections.
Repair strategy matrix
| Symptom | Likely Cause | Recommended Action |
|---|---|---|
| 1–5 pavers sunken, surrounding pavers stable | Bedding sand settled or washed out locally | Spot lift, re-screed bedding sand, reset, compact, rejoint |
| Pavers rocking underfoot, no visible crack | Bedding sand gap or uneven base high spot | Lift, check bedding depth, re-screed to 1-in nominal, reset |
| Individual cracked or shattered paver | Impact damage or freeze-thaw in saturated paver | Remove, source matching replacement, re-bed and reset |
| Wide section sunken or out of plane (multiple rows) | Base settlement or subgrade failure | Partial relay with base inspection and possible base rebuild |
| Edges spreading, gaps opening along perimeter | Edge restraint failure or missing restraint | Lift perimeter row, install/repair edge restraint, reset and compact |
| Water pooling on surface after rain | Slope failure — base settled and inverted slope | Partial or full relay with slope correction to 1–2% |
| White efflorescence deposits | Calcium carbonate migration from concrete pavers | Surface cleaning with efflorescence remover; investigate drainage if severe |
| Green/black organic staining | Mold, algae or mildew in shaded/moist area | Clean with diluted bleach or paver cleaner; improve drainage and consider sealing |
| Joint sand gone, weeds everywhere | Joint sand washed out; no stabilization | Re-clean joints, sweep in polymeric sand, activate correctly |
| Full area settled with drainage issues | Base failure, subgrade compaction inadequate, or frost heave | Full relay: demo, base rebuild, drainage correction, reinstall |
Step-by-step: fixing a sunken spot or low paver area
This covers the most common reset scenario, a localized area where a few pavers have dropped below the surrounding surface. Plan for about 2–4 hours for a 20–30 square foot area, assuming the base underneath is solid. For a full walkthrough on how to replace patio pavers, see this detailed guide. For detailed steps and tools to fix patio pavers, see our step-by-step guide on how to fix patio pavers.
- Mark the affected area with chalk, extending at least one full paver course beyond the visible problem. You almost always need to go a little wider than the low spot.
- Remove joint sand from the surrounding area using a stiff brush. This makes paver edges accessible for lifting.
- Use a paver puller or flat pry chisel to lift pavers one at a time. Slide the tool into the joint at a 30-degree angle and lever the paver up. Stack pavers face-up on a clean surface nearby so you can re-use them.
- Remove all the bedding sand from the exposed area. Scoop it out completely — do not try to top it up over old sand, since the old layer is likely already compromised.
- Probe the base with a screwdriver or rod. If the base is firm and does not deform, you are good to proceed. If it feels soft or spongy, see the base repair section below before continuing.
- Re-screed a fresh 1-inch layer of ASTM C33 washed concrete sand. Use two straight metal pipes or screed rails set at the correct elevation to guide your screed board. The nominal depth is 1 inch (25 mm); never exceed about 1.5 inches (40 mm) or you lose stability.
- Set pavers back into position by hand, starting from a stable edge and working inward. Do not walk on the screeded sand before pavers are placed. Use a rubber mallet to lightly seat each paver flush with its neighbors.
- Use your level or straightedge to check the surface. Adjust individual pavers by adding or removing a small amount of bedding sand beneath them. The surface should be within 3/8 inch of flat over a 10-foot span.
- Rent a plate compactor (75–100 Hz, approximately 5,000 lbf centrifugal force) and attach a rubber or polyurethane protective pad to the base plate. Make 2–3 passes over the reset area to seat pavers into the bedding sand.
- Sweep dry joint sand (or polymeric sand) across the surface and into the joints. Make at least one additional compaction pass to drive the sand into the joints. Sweep and compact until joints are full.
- If using polymeric sand, follow manufacturer instructions exactly for wetting and activation — see the joint sand section below for details.
Step-by-step: stabilizing wobbly or rocking pavers
A rocking paver usually means one of two things: either the bedding sand eroded or compressed unevenly under the paver, leaving a void or high point, or the base surface itself has a high spot that the paver bridges unevenly. Either way, the fix is quick once you lift the paver.
- Before lifting anything, check the edge restraints along the nearest perimeter. If the edge edging has pulled away or bent outward, pavers near it will rock because they have nothing to lock against laterally. Repair edge restraints first (see edge restraint section).
- Lift the rocking paver with a paver puller. Examine the bedding sand: look for a void on one side or a hard lump on another. Both cause rocking.
- Remove the bedding sand under that paver and the immediate neighbors. Inspect the base surface — if there is a high point in the crushed stone, tamp it down with a hand tamper or remove material to flatten it.
- Re-screed fresh ASTM C33 sand to a 1-inch nominal depth. Use a small torpedo level to verify the screed surface is sloped correctly (1–2% away from the structure).
- Set the paver back down, check it with your level against adjacent pavers, and tap it level with a rubber mallet.
- Compact with a plate compactor (rubber pad attached) and refill joints. Check for rocking again by stepping on corners. If it still moves, the bedding depth or base surface needs another adjustment.
Step-by-step: removing and replacing a cracked or damaged paver
A through-cracked or shattered paver cannot be salvaged, it needs to come out. The challenge here is matching the replacement paver: color, texture, thickness, and pattern direction all have to align. If your patio is more than a few years old, find a match before you start demolition, since older products can be discontinued.
- Source your replacement paver first. Bring a sample or photo to your paver supplier. Concrete pavers for pedestrian patios are typically 60 mm (about 2-3/8 inches) thick — confirm the thickness matches before purchasing.
- Remove joint sand from the joints surrounding the cracked paver using a stiff-bristle brush or oscillating tool.
- Use a paver puller or flat pry chisel to lift the damaged paver. If it is shattered in place, work carefully to remove all fragments without disturbing neighboring pavers.
- Inspect the bedding sand and base for damage. A cracked paver from impact usually means the base is fine; a cracked paver from freeze-thaw typically means the bedding was saturated — investigate drainage if the latter.
- Clean the bed area and re-screed fresh ASTM C33 sand at 1-inch nominal depth.
- If you need to cut the replacement paver to fit (for borders, curves, or patterns), use a wet diamond saw. For porcelain pavers, use a continuous-rim or porcelain-rated diamond blade. Keep water flowing over the blade. Wear your respirator.
- Set the replacement paver, check it with a level against all four neighbors, and tap it flush with a rubber mallet.
- Compact with a plate compactor and rubber pad, then sweep joint sand into all affected joints. Compact again and top up joints as needed.
Relaying a small area or matching a pattern
Relaying a section of 20–100 square feet, whether for base correction or to re-establish a damaged pattern, follows the same sequence as a spot fix but requires more attention to pattern alignment and edge restraints. See how to relay patio pavers for a detailed step‑by‑step walkthrough. Budget about half a day to a full day for this scope.
- Photograph the pattern from multiple angles before lifting a single paver. Note the bond direction, offset, and how the pattern terminates at edges.
- Establish a chalk reference line along the most stable, undisturbed edge of the patio. All re-laying works back to this line.
- Remove pavers in the affected zone, working from the outer edges inward. Stack them in order if possible — you will re-lay in roughly reverse order.
- Inspect and correct the base. If the base is sound, tamp it once with a hand tamper or plate compactor before re-screeding. If it has soft spots, undercut and refill with fresh crushed stone in compacted lifts no deeper than 4 inches each.
- Re-screed ASTM C33 bedding sand to 1-inch nominal depth. Set screed rails parallel to your reference chalk line.
- Re-lay pavers from the stable reference edge, matching the original pattern. Keep joints tight and consistent — use a small spacer if needed.
- At the perimeter, check that edge restraints are properly pinned with 10-inch spikes into the compacted base (spaced 10–12 inches on straight runs, 6–8 inches on curves).
- Compact with a plate compactor (with rubber pad), sweep joints full, compact again. Verify the finished surface slope with your level.
Full-area relay and complete restoration workflow
A full relay is a bigger commitment but not beyond a determined DIYer. Expect 2–4 days for an average residential patio of 200–400 square feet, plus a day for base drying if you have to add material. Material costs for a full base rebuild typically run $300–$800 depending on patio size and depth of base required; add labor savings of $1,500–$4,000 compared to hiring a contractor in most US markets.
- Day 1: Mark layout with chalk lines and string lines. Remove all pavers and stack them on pallets or plywood to protect faces. Demo any failing edge restraints.
- Day 1: Excavate to the required depth. For pedestrian patios, you need 4–6 inches of compacted crushed-stone base plus 1 inch of bedding sand plus paver thickness (typically 2-3/8 inches). Total excavation depth is typically 8–10 inches below finished surface.
- Day 1: Inspect the subgrade. If it is soft clay or poorly draining soil, add a layer of geotextile fabric before base aggregate. In frost-prone areas, ensure base depth and drainage are sufficient to prevent water saturation during freeze-thaw cycles.
- Day 1–2: Install base aggregate in lifts no deeper than 4 inches, compacting each lift to at least 95% of Standard Proctor (ASTM D698) for pedestrian areas. Rent a vibratory plate compactor. This step is the most critical — a well-compacted base is why some patios last 30 years and others fail in three.
- Day 2: Verify slope across the compacted base with a string line and level. Slope should be 1–2% (1/8 to 1/4 inch per foot) away from the house and toward a drain or lawn edge. Correct now — you cannot fix slope easily after pavers are installed.
- Day 2: Install edge restraints on all open perimeter sides before screeding bedding sand. Anchor spikes into the compacted base.
- Day 2: Re-screed ASTM C33 bedding sand to 1-inch nominal depth. Do not walk on it once screeded.
- Day 2–3: Re-lay pavers using your pattern photos as reference. Work from one corner or a straight reference edge. Keep joints consistent. Cut border and edge pavers with a wet saw.
- Day 3: Compact installed pavers with plate compactor and rubber pad (2–3 passes). Sweep joint sand into all joints, compact again, top up joints, and do a final compaction pass.
- Day 3–4: Clean the surface, activate polymeric sand per manufacturer instructions if used, allow to cure before use (usually 24–48 hours), then apply sealer if desired after the surface is fully dry.
Special case: raised or sloped patios
Raised patios add height-change complexity, retaining walls, step connections, and drainage all become interdependent. Sloped patios multiply compaction challenges because base material wants to migrate downhill during compaction.
When resetting pavers on a slope, always start compacting from the bottom and work upward. This drives material into itself rather than pushing it downhill. Verify slope direction after each compaction pass with a level. The minimum surface slope for drainage is 1% (1/8 inch per foot), with 2% being the working standard for most residential surfaces.
For raised patios with retaining walls, inspect the wall tie-back or anchor system before resetting pavers at the top. If the wall has moved or cracked, address that first, resetting pavers on top of an unstable wall just means doing the job twice. Drainage behind the retaining wall (weep holes, drainage aggregate backfill) is as important as base drainage under the pavers themselves.
Special case: fire-pit surrounds
The area within 3–4 feet of a fire pit takes repeated thermal cycling, which expands and contracts the base materials and pavers slightly with each use. Over time this accelerates joint sand loss and can cause minor settlement. When resetting fire-pit surrounds, use a heat-stable polymeric sand rated for high-temperature applications, and ensure your base is compacted firmly since loose base material tends to shift more during thermal cycling.
Do not use standard limestone-based flagstone or pavers with high calcium content directly adjacent to a fire pit, they can spall or crack under repeated heat exposure. Concrete pavers with low absorption are more tolerant. Pattern continuity around a circular fire pit requires careful cutting, photograph the pattern before lifting anything, and use a wet saw for any cut pieces within the surround. For chip‑free cuts in porcelain use continuous‑rim or porcelain/ceramic diamond blades and for concrete or stone pavers use thin continuous or turbo diamond blades (wet cutting recommended); see Diamond Vantage / product catalog, porcelain & concrete diamond blade recommendations Diamond Vantage / product catalog — porcelain & concrete diamond blade recommendations. Avoid dry grinding near the pit area; debris settles into the fire area.
Special case: pavers over grass or soil
Pavers set directly on grass or uncompacted soil are a recipe for exactly the kind of problems that bring you here. If you are lifting a patio where this was the original installation method, you have a base-building job ahead of you, not just a re-setting job.
- Remove all pavers and set aside. Remove vegetation, roots, and topsoil down to a stable subgrade — typically 8–10 inches below your intended finished surface elevation.
- Install a non-woven geotextile fabric on the subgrade if the soil is silty or clay-heavy. The fabric goes under the base aggregate, not under the bedding sand.
- Install 4–6 inches of compacted crushed-stone base (3/4-inch minus or road base aggregate) in lifts, compacting each lift thoroughly.
- Install edge restraints before screeding bedding sand.
- Proceed with 1-inch ASTM C33 bedding sand, pavers, compaction, and jointing as described in the main sequence.
Do not use weed barrier fabric under the bedding sand layer. It is often marketed for this purpose but it interferes with drainage and can cause bedding sand to migrate when it gets wet. Weed control in pavers comes from well-filled, stabilized joints, not from fabric under the bedding.
Special case: pavers over concrete
Resetting pavers that were installed over a concrete slab requires a different diagnosis. First, check whether the concrete slab itself is sound: no major cracking, no hollow spots (tap with a hammer, a dull thud means a void), and no signs of significant settlement. If the slab is stable, you have more options.
If the pavers were set in mortar on the concrete and a few have come loose, you can chip out the old mortar, clean the slab surface, and re-set with fresh mortar or construction adhesive rated for exterior masonry. If the pavers were set in sand over the concrete and sections have shifted, you can lift them, remove the sand layer, clean the slab, and re-screed fresh sand. The concrete slab acts as your base in this case, so base-depth requirements are less of a concern, but slope is still critical. Concrete slabs often have inadequate slope for paver drainage, which causes water to sit under the sand layer.
If the concrete slab is cracked, settling, or has major voids, resetting pavers on top of it will not give you a lasting result. You are better off either removing the slab entirely (this requires a demolition hammer and significant effort) or accepting that the surface will need periodic re-setting as the slab continues to move. If cracks in the slab are widening, consult a structural engineer or foundation contractor before investing in paver work.
Base repair, edge restraints, and drainage, the details
Base layer depths and materials
The compacted aggregate base is what everything else depends on. For pedestrian patios, industry guidance calls for 4–6 inches of compacted crushed stone over a prepared subgrade. In cold climates with frost-susceptible soils, lean toward 6 inches minimum and ensure the base aggregate is free-draining so water does not accumulate and freeze. For driveways or areas that see vehicle loads, ICPI guidance calls for 8–12 inches of base depending on loads and soil conditions, that scope almost always warrants engineering input.
Use 3/4-inch minus crushed stone (also called road base or Class II base) for compacted base layers. Pea gravel and rounded river stone do not compact properly and will shift. The bedding layer above the base uses ASTM C33 washed concrete sand at a nominal 1-inch (25 mm) depth, never exceed about 1.5 inches (40 mm) or the surface becomes unstable under load. Do not use mason sand (ASTM C144) for bedding; its finer gradation does not drain as well and can pump out under traffic.
Edge restraints
Edge restraints are what keep the whole system from spreading outward under load. Without them, even a perfectly installed paver patio will gradually open at the joints and shift. Use commercial aluminum or heavy steel L-edging, or poured concrete curbs. Belgard / ICPI installation guide (edge restraint types, spike sizes, anchor into base) specifies common acceptable restraints as poured concrete curb, precast concrete curb, aluminum/steel L‑edging, or heavy polymer edging anchored into the compacted base, and notes typical anchor spike diameters around 3/8 in with spacing about 10–12 in on straight runs and 6–8 in on curves. Plastic snap-together edging sold at big-box stores can work for light-use patios but tends to bend and fail under repeated plate-compactor passes. Anchor spikes should be 10 inches long and embedded into the compacted base (not just the bedding sand). Space spikes 10–12 inches apart on straight runs and 6–8 inches apart on curves.
Compaction targets and procedure
Subgrade and base layers should be compacted to at least 95% of Standard Proctor density (ASTM D698) for pedestrian areas. You cannot verify this without a nuclear density gauge or sand-cone test, but a practical field check is that the surface should not deform or show footprints when you walk on it after compaction. If it still feels springy, compact more. Plate compactor frequency should be in the 75–100 Hz range with roughly 5,000 pounds of centrifugal force, this is what most rental-grade plate compactors in the 200–300 lb class deliver. Seal paver surfaces with a rubber or polyurethane pad on the compactor plate to prevent cracking or scuffing paver faces.
Polymeric vs. regular joint sand, which one to use
This is one of the most common questions I get, and the answer depends on your situation. Here is a straightforward comparison:
| Factor | Polymeric Sand | Regular Concrete (ASTM C33) Sand |
|---|---|---|
| Weed resistance | Good — hardens to resist weed germination | Poor — weeds establish easily |
| Ant resistance | Good when properly installed | Poor |
| Installation difficulty | Higher — must be dry, correct temp, fully activated | Low — sweep in, compact, done |
| Failure risk | Moderate — premature wetting, insufficient compaction, or poor joint prep causes hazing or crumbling | Low — easy to re-apply if lost |
| Cost | Higher ($25–$50 per bag covers ~30–40 sq ft) | Lower ($5–$10 per bag) |
| Repair flexibility | Harder to remove and replace sections after cure | Easy to re-sweep and re-joint |
| Best for | Established, stable patios with consistent joints; final installation after all repairs done | Repairs, temporary fills, patios still settling |
My recommendation: use regular ASTM C33 sand for any repair that involved lifting and re-setting, especially if the patio is still adjusting or you have not addressed all the underlying issues. Switch to polymeric sand after you are confident the base is stable and the surface is truly finished. If you use polymeric sand, follow the manufacturer instructions to the letter, common failure modes are wetting it before compaction is complete, applying it in temperatures below about 32°F or above 90°F, or failing to blow or brush all sand off paver faces before activation.
Cleaning, brightening, and sealing after repairs
Resetting pavers almost always means disturbing joint sand and stirring up efflorescence. Clean the patio before sealing, and clean it well, sealer locks in whatever is on the surface.
For general dirt and grime, a stiff brush and garden hose is often enough. For organic staining (green algae, black mildew), use a diluted bleach solution or an enzymatic paver cleaner, let it dwell for 10–15 minutes, and scrub before rinsing. For efflorescence (white salt deposits), use an efflorescence-specific cleaner or a diluted muriatic acid solution (about 10 parts water to 1 part acid). Always test a small, hidden area first, neutralize with baking soda solution, and rinse thoroughly. Acid can etch some pavers if left too long. For detailed, step‑by‑step techniques and product recommendations on how to brighten patio pavers, see our guide on how to brighten patio pavers.
Sealing is optional but worthwhile if you want to protect color, reduce staining, and inhibit weed growth in joints. Apply sealer only after the patio is completely clean, dry, and cured (at least 28 days after installation for new concrete pavers). Use a sealer rated for exterior masonry and follow manufacturer guidance on application rate, two thin coats beat one heavy coat. Reapply every 3–5 years depending on traffic and sun exposure.
Troubleshooting common problems after resetting
| Problem | Likely Cause | Fix |
|---|---|---|
| Pavers sinking again within weeks | Base was soft and not corrected before re-bedding | Lift again, excavate, rebuild base in compacted lifts, re-bed |
| Polymeric sand crumbling or not hardening | Prematurely wetted, or not compacted before activation | Remove and re-apply; ensure surface is dry and compaction is complete before wetting |
| Paver surface hazing after polymeric sand | Sand not swept off face before activation; water activated residue | Use a haze remover specific to polymeric sand; do not acid-etch |
| Joints refilling with weeds quickly | Joint sand not stabilized; joints not fully filled | Remove weeds, re-fill joints with polymeric sand, compact and activate correctly |
| New paver stands out visually | Color mismatch — new concrete pavers are lighter until they weather | Source closest match available; allow 6–12 months for color to blend |
| Surface water still pools after reset | Drainage slope not corrected during re-bedding | Re-lift the low area and adjust screed elevation to achieve 1–2% slope away from structure |
| Edge restraint pulling away after compaction | Spikes too short or driven into bedding sand, not base | Pull back edge, re-spike with 10-in spikes into compacted base |
Realistic time and cost estimates
| Repair Scope | DIY Time | Approximate Material Cost | Approximate Pro Cost (for comparison) |
|---|---|---|---|
| Spot reset (1–10 pavers, bedding fix only) | 2–4 hours | $20–$60 (sand, joint sand) | $150–$400 |
| Rocking paver stabilization (5–20 pavers) | Half day | $30–$80 | $200–$600 |
| Individual cracked paver replacement (1–5 pavers) | 2–3 hours | $20–$150 (paver + materials) | $150–$500 |
| Small area relay (20–100 sq ft, base repair) | 1–2 days | $150–$400 | $800–$2,500 |
| Full-area relay with base rebuild (200–400 sq ft) | 3–5 days | $500–$1,200 | $3,000–$8,000 |
| Full relay including drainage correction and edge work | 4–7 days | $600–$1,500 | $4,000–$10,000+ |
These are realistic ranges for the US in 2026 and assume you already own basic hand tools. Renting a plate compactor adds $60–$100 per day. Renting a wet saw adds $50–$80 per day. Material costs vary by region and paver type, natural stone and porcelain are significantly more expensive than standard concrete pavers.
Maintenance schedule to prevent future resets
The biggest reason patios need resetting is deferred maintenance, joint sand that washed away over two seasons allowed pavers to shift, which eventually destabilized the base. Staying ahead of it takes less than an hour a year.
- Every spring: inspect the full patio surface for rocking pavers, low spots, and joint sand loss; address small problems before they grow
- Every spring: top up any joints that have lost sand — sweep in fresh joint sand or polymeric sand and compact lightly
- Every fall in cold climates: ensure surface drainage is clear and water is not pooling on the patio before freeze season; trapped water causes heave
- Every 2–3 years: re-inspect edge restraints and re-spike any sections that have shifted
- Every 3–5 years (or as needed): reapply sealer after cleaning
- Immediately after any significant tree root growth or soil disturbance near the patio: check adjacent paver elevations and reset early if needed
When to call a professional
Most paver resets are genuinely DIY-able, and I want you to feel confident giving them a try. That said, a few situations are genuinely better handled by a professional hardscape contractor or structural engineer:
- More than about 30% of the patio surface is out of level or settled — at that scale, a full relay is a major project and rental-grade equipment may not be adequate for the base compaction required
- A retaining wall associated with the patio has cracked, leaned, or shifted — this is a structural issue, not a paving issue
- The concrete slab under paver-over-concrete installations is actively cracking or settling — get a foundation or structural assessment first
- Standing water consistently migrates toward your foundation despite slope corrections — this is a grading and drainage problem beyond the patio itself
- You are in a frost-heavy climate and the entire patio heaves every winter despite adequate base depth — this may require engineered drainage or base redesign
- The project requires permits (some localities require permits for patios over a certain size or within setbacks) — a licensed contractor can navigate this
Calling a pro in those situations is not admitting defeat, it is making a smart call about risk and complexity. The rest of the scenarios covered in this guide are yours to tackle.
FAQ
What is the quick inspection checklist to diagnose paver problems before any work?
Walk the patio and check: (1) extent — localized (a few pavers) vs widespread settlement; (2) stability — wobbly or rocking pavers; (3) base exposure — signs of washout, sand loss or soft spots; (4) edge restraint — cracked/missing edging or spreading; (5) drainage/slope — ponding or slope toward the house (target 1%–2% away from structures); (6) surface defects — cracks, chips, efflorescence, mildew or heavy staining; (7) pattern integrity — offset or areas out of joint; and (8) soil/frost risks — nearby saturated or frost‑susceptible soils. These items tell you if a spot reset is feasible or a larger relay/base rebuild is required.
What tools and materials do I need to reset patio pavers?
Basic tools: rubber mallet, pry bar, paver/lifting tool or suction lifter, flat shovel, wheelbarrow, screed rails & board, 2' level, string line, tape, masonry wet saw or angle grinder with proper diamond blade, plate compactor with neoprene pad, broom, joint brush, garden hose. Materials: ASTM C33 washed concrete (coarse) bedding sand (nominal 1 in after screeding), 3/8"–1/2" joint sand (polymeric or regular), crushed stone base (depth per design, e.g., 4–6" comp. for patios), edge restraint (concrete curb, precast, aluminum/steel edging or heavy polymer), joint sealer (optional), replacement pavers, geotextile and underdrain components if needed, safety PPE (gloves, eye protection, N95/half‑face respirator for silica if dry cutting).
When can I do a spot lift-and-reset versus a full relay or base reconstruction?
Spot reset is appropriate when settlement is localized, the base beneath is intact/compact, edge restraints are sound and drainage hasn't changed. Full relay or base reconstruction is required when you see widespread settlement, base washout or soft base, lost/failed edge restraint, multiple areas out of level, recurring localized failures, or altered drainage. If more than several percent of the patio area is unstable or base failures are visible, plan a full relay and base rebuild.
What are safe step‑by‑step procedures for lifting, inspecting and re‑bedding pavers?
1) Mark the repair area and remove pavers back to a stable edge. 2) Use a paver lifter/suction or pry bar to lift pavers to avoid chipping. 3) Remove bedding sand and inspect the base. 4) If base is sound, re‑screed a nominal 1" ASTM C33 bedding sand using screed rails; do not exceed ~1½". 5) If base is soft, undercut and remove unstable material and reconstruct base in compacted lifts (see base guidance). 6) Re‑lay pavers in the original pattern, keeping joint widths consistent. 7) Compact pavers with a plate compactor and neoprene pad (2–3 passes) to seat them. 8) Brush joint sand into joints, then compact again and top up joints until locked. 9) Clean surface and, if using polymeric sand, follow the manufacturer activation steps.
How do I repair or reconstruct the base and what depths are typical?
For pedestrian patios use 4–6" compacted crushed‑stone base over a prepared subgrade; vehicular areas require 8–12" or engineer design. Remove soft or saturated material, install geotextile if fines are a concern, place crushed stone in 2–3" lifts and compact each to target (industry often specifies ≥95% Standard Proctor for pedestrian). Ensure good drainage away from foundations; add underdrains where saturation or frost‑susceptible soils exist.
How should I handle edge restraints during repair?
Always restore a permanent edge restraint whenever pavers are not bounded by structures. Acceptable restraints: poured concrete curb, precast curb, aluminum/steel L‑edging or heavy polymer edging anchored into the compacted base. Anchor spikes should penetrate into the base (typical spike diameters ~3/8"; spacing ~10–12" on straight runs, 6–8" on curves). Proper edge restraint prevents lateral spreading and future failures.
Next Articles
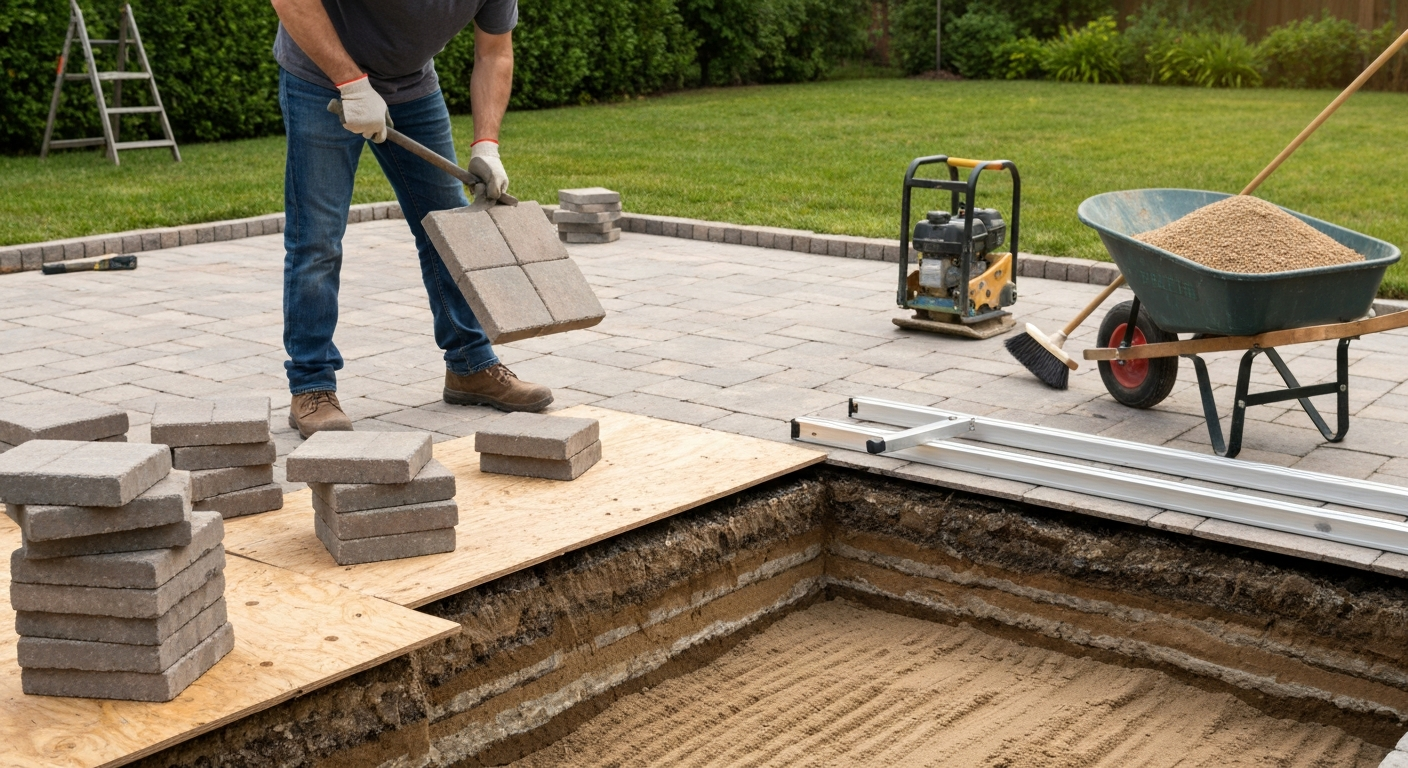
How to Replace Patio Pavers: Step-by-Step DIY Guide
How to replace patio pavers: step-by-step DIY guide with tools, material quantities, costs, and troubleshooting.
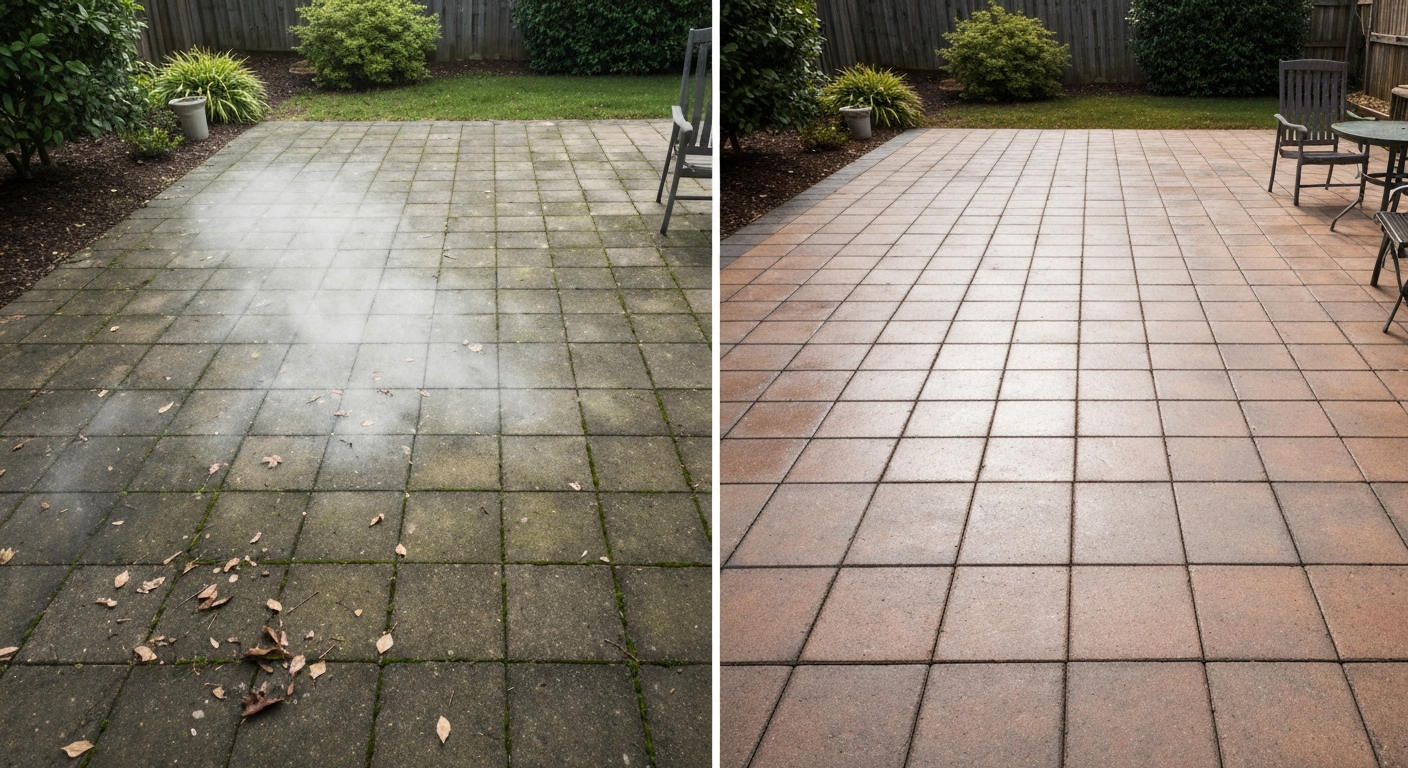
How to Brighten Patio Pavers: Step-by-Step DIY Guide
How to brighten patio pavers: a step-by-step DIY for cleaning, repairs, resealing, and ongoing maintenance.
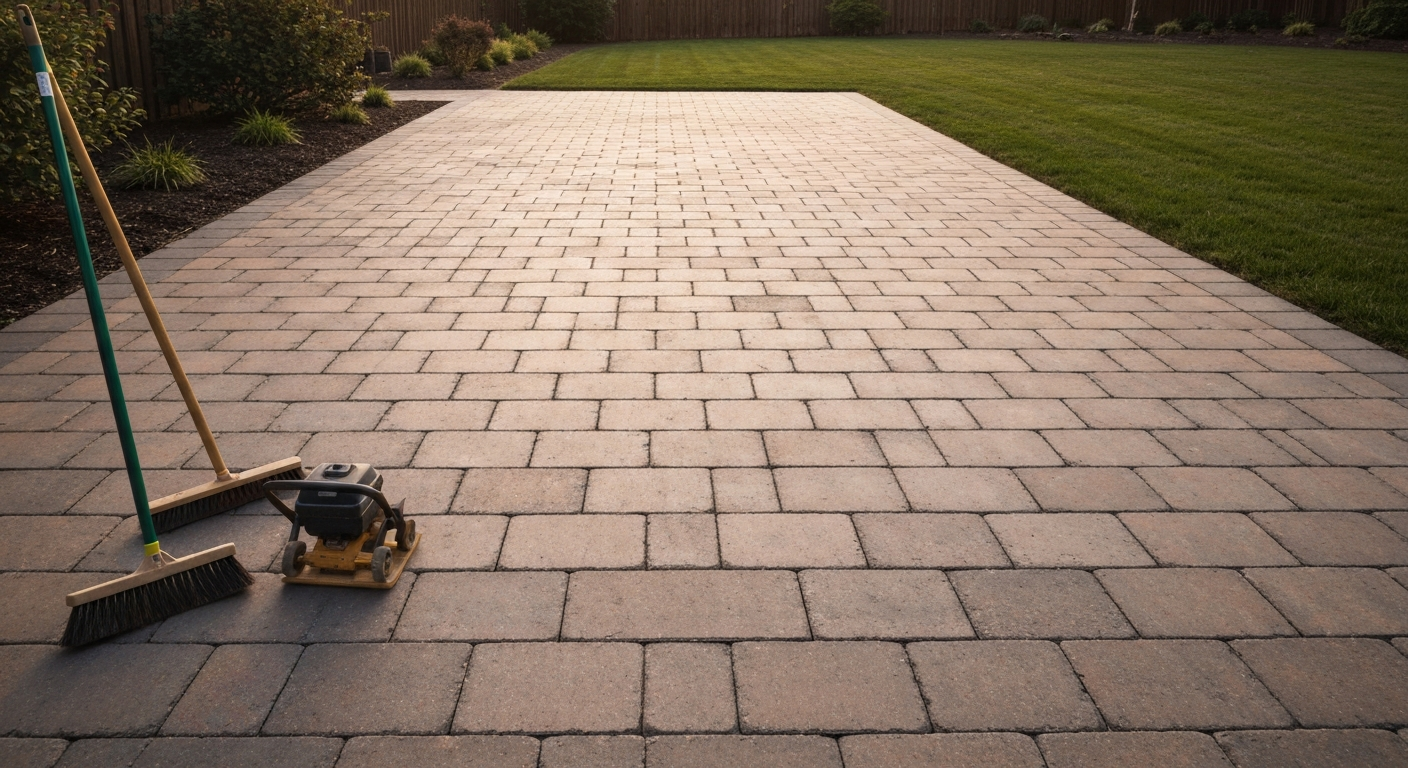
How to Restore a Paver Patio: DIY Steps, Repair vs Replace
How to restore a paver patio: clear step‑by‑step cleaning, reset, relay or replace pavers, tools, costs and decision aid