
You can brighten most patio pavers in a single weekend by cleaning off biological growth, efflorescence, and embedded grime, repairing any loose or broken units, re-sanding the joints, and finishing with a quality sealer. The surface you get back will look close to new, and keeping it that way takes about one afternoon of work per year. The key is diagnosing what actually made your pavers look dull before you start spending money on products, because the fix for algae is completely different from the fix for worn sealer or salt staining.
How to Brighten Patio Pavers: Step-by-Step DIY Guide

Felix Rowe
18 Jul 2026
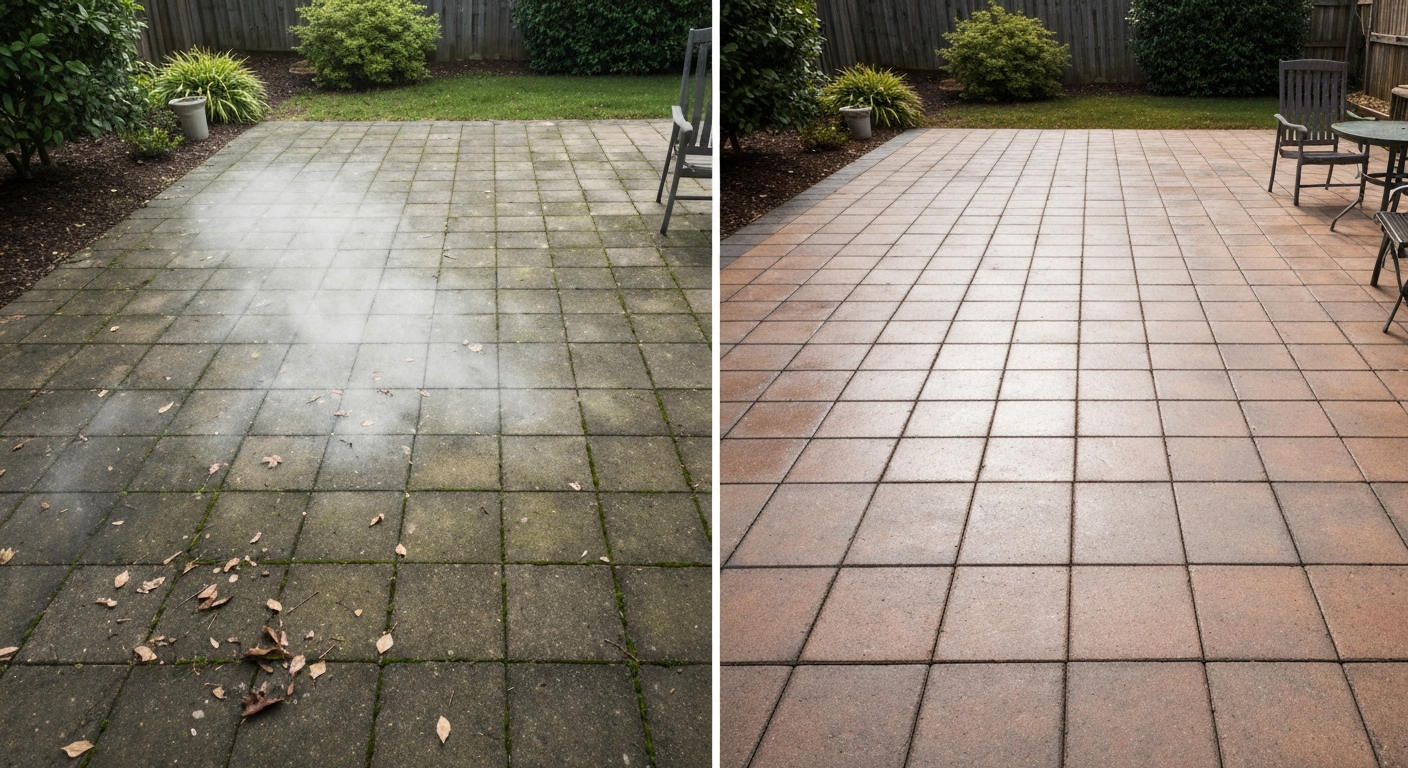
Brighten or fully restore? Figuring out which one you actually need
This guide is aimed at homeowners with pavers that look dingy, faded, or stained but are structurally sound. If your whole surface is clean but just looks flat and color-washed, you probably need a sealer refresh. If you're dealing with widespread organic growth, efflorescence crust, or deep stains, you need a proper cleaning sequence before anything else. If you also have sunken, cracked, or wobbly pavers, you'll need to address those before sealing, otherwise you're locking in the problem. The realistic outcome of a thorough DIY brightening job is pavers that are 80 to 95 percent of their original color and vibrancy. True color restoration beyond that point depends on how long the pavers have been exposed and whether the pigment in the concrete has genuinely faded from UV exposure, which no surface cleaner can reverse. At that stage you're looking at tinted sealers or paver replacement.
If your pavers have significant structural issues, such as widespread sinking, a failed base layer, or heaving from tree roots, brightening alone won't be satisfying. Those situations call for relaying or resetting sections of the patio rather than just cleaning and sealing. For step-by-step instructions on lifting and relaying units, see the guide to reset paver patio. For step-by-step instructions on lifting, re-leveling, and re-laying units, see our guide on how to relay patio pavers. This guide focuses on the brightening workflow, but it does cover light repairs, and you'll find more detail on those larger structural fixes in related guides on this site.
Your prioritized action plan at a glance
Work through these phases in order. Skipping ahead, especially sealing before cleaning is complete and the surface is fully dry, is the most common and most costly mistake DIYers make.
- Diagnose: Walk the patio and identify which type of problem you have (dirt, algae, efflorescence, stains, worn sealer, or structural damage).
- Gather materials: Buy or rent only what your diagnosis calls for.
- Prep the site: Move furniture, protect plants and adjacent surfaces, and do a test patch with any chemical cleaner.
- Pre-clean: Sweep, blow, and remove loose debris.
- Pressure wash: Use the right PSI and nozzle to lift embedded dirt without damaging joints.
- Treat specific problems: Apply biological treatments, efflorescence removers, or stain-specific cleaners as needed.
- Rinse and neutralize: Thoroughly flush the surface and neutralize any acidic cleaners.
- Dry completely: Allow 24 to 48 hours of dry weather before the next phase.
- Repair: Replace broken pavers, relay any sunken units, and repair edge restraints.
- Re-sand joints: Sweep in polymeric or regular joint sand and compact.
- Seal: Apply your chosen sealer in thin, even coats and allow full cure time.
- Maintain: Set a calendar reminder for annual cleaning and a resealing check every 3 to 5 years.
How to diagnose why your pavers look dull
Spend ten minutes really looking at your patio before you buy anything. The cause of the dullness changes everything about your approach.
Dirt and embedded grime
This is the most common culprit and the easiest to fix. If your pavers feel gritty, look uniformly gray-brown rather than a patterned discoloration, and respond to being rubbed with a damp cloth, you're mostly dealing with accumulated fine soil, pollen, and airborne particles ground into the surface. Pressure washing and a general-purpose masonry detergent will handle most of this.
Mildew and algae
Green, black, or dark brown patches, especially in shaded or frequently damp areas, are almost always biological growth. Algae appears as a greenish film or slick coating. Mildew and mold tend to be darker, sometimes black, and may have a slightly fuzzy texture. These are not just cosmetic issues: algae and mildew make pavers dangerously slippery. You need a biocidal cleaner, not just a pressure washer, because the pressure alone won't kill the spores and growth will return quickly.
Efflorescence
Efflorescence is that chalky white haze or crystalline crust that appears on concrete pavers. It's caused by soluble salts migrating to the surface as moisture moves through the paver and evaporates. Light efflorescence sometimes brushes off when dry. Heavier or crusted efflorescence needs a proprietary efflorescence remover or a mild acidic masonry cleaner. Critically, you must not seal over active efflorescence because the trapped salts will cause the sealer to haze, peel, or re-crystallize under the coating.
Oil, grease, rust, paint, and organic stains
These are localized and each needs a specific treatment. Oil stains are dark, often found under where a grill or vehicle parks. Rust stains are orange-brown and typically radiate from a metal object like a furniture leg or downspout. Leaf and organic stains are dark brown or tan patches. Paint is paint. Each of these needs a targeted product before you do any general cleaning, because pressure washing them first can drive them deeper or spread them.
Worn or missing sealer
If your pavers once had a sealer and it's breaking down, you'll often see patchy sheen, flaking, or areas where water no longer beads. The pavers look dull and uneven in sheen rather than uniformly discolored. The fix is stripping the old sealer (if it's failing), cleaning the surface thoroughly, and re-applying. Applying a new coat of sealer over a flaking old one is a recipe for bubbling and peeling.
Structural issues
Sunken, cracked, or rocking pavers aren't a cleaning problem. Check whether individual units are loose by pressing down on them. If a paver rocks or the joint sand is completely gone, the paver needs to be reset. For step-by-step instructions on lifting, re-leveling, and relaying units, see how to reset patio pavers. Widespread sinking usually means a base or drainage issue that needs to be fixed before any surface work. Cleaning a structurally compromised patio just makes it look better for a few weeks before water and movement undo the work.
Materials and tools checklist
Buy or gather these before you start. Having everything on hand prevents mid-project trips to the hardware store, which almost always result in wasted drying time.
| Category | What You Need | Notes |
|---|---|---|
| General cleaners | pH-neutral masonry detergent or dish soap | For general grime; mix per label |
| Biological treatment | Oxygen bleach (sodium percarbonate) or diluted sodium hypochlorite bleach | Oxygen bleach is gentler on plants and joint sand; bleach is faster acting |
| Efflorescence remover | Proprietary efflorescence cleaner or mild acidic masonry cleaner (phosphoric or citric acid-based) | Always test in a small area first; follow label dilution exactly |
| Stain-specific cleaners | Alkaline degreaser for oil; oxalic or chelating rust remover for rust; commercial paint remover for paint; household bleach for leaf/tobacco stains | Treat before general cleaning |
| Absorbent material | Clay-based kitty litter or diatomaceous earth | For fresh oil/grease spills |
| Pressure washer | Gas or electric unit capable of 500–1,500 psi | Borrow, rent, or buy; gas units offer more range |
| Nozzles | 25-degree and 40-degree fan nozzles | Avoid 0- and 15-degree nozzles on pavers |
| Hand tools | Stiff-bristle scrub brush, broom, leaf blower, plastic scraper, bucket | Metal scrapers can scratch |
| Pump sprayer | 1–2 gallon low-pressure pump sprayer | For applying chemical cleaners at low pressure (30–100 psi) |
| Sealer stripper | Appropriate to your existing sealer type (solvent or water-based) | Only needed if old sealer is failing |
| Sealer | Penetrating (matte) or film-forming (gloss/semi-gloss) paver sealer | See sealing section for guidance |
| Joint sand | Polymeric sand or regular dry coarse sand | Polymeric hardens and resists weed germination |
| Replacement pavers | Matching spares from your original project, or close color-match from a supplier | Have 5–10% extra on hand |
| Safety gear | Chemical-resistant gloves, safety glasses or goggles, rubber boots, N95 or P100 respirator | Respirator especially important when using acidic cleaners or strippers |
| Plastic sheeting or drop cloths | Standard painter's plastic | For protecting adjacent plants and structures |
| Garden hose with high-flow nozzle | Standard hose + adjustable spray head | For pre-wetting and rinsing |
| Sealer applicator | Pump-up garden sprayer or lambswool roller | Sprayer for thin coats; roller for thicker film sealers |
Preparing the site and staying safe
Good preparation protects your plants, your house, and you. It also makes the actual cleaning work faster because you're not stopping to move things or deal with chemical drift.
- Remove all furniture, pots, grills, and decorations from the patio.
- Wet down any grass, garden beds, or plants immediately adjacent to the patio before applying any cleaner. This dilutes any chemical that reaches plant roots.
- Cover sensitive plantings with plastic sheeting during chemical application and remove the covers promptly after rinsing is complete so plants don't overheat.
- Tape plastic sheeting over the base of any house siding, wooden posts, or metal surfaces that could be affected by acidic cleaners or strong bleach solutions.
- Check the weather forecast. Avoid applying chemical cleaners in direct hot sun (accelerates drying before dwell time is complete), in temperatures below 50°F/10°C (reduces product effectiveness), or when rain is expected within 24 hours.
- Never mix bleach-based products with acidic cleaners. The combination produces toxic chlorine gas.
- Wear chemical-resistant gloves, safety glasses, and rubber boots whenever working with any cleaner. Add a respirator when using concentrated acidic cleaners, sealers, or strippers.
- Plan your wastewater. Pressure-wash runoff containing detergents, biocides, or chemical cleaners should not flow into storm drains or surface water. Direct it onto lawn or garden soil where it can filter naturally, or collect and dispose of it consistent with your local rules. This is both an EPA guidance requirement and common sense.
Pre-cleaning steps before any water or chemicals touch the surface
This phase takes maybe 20 minutes but saves you an hour of fighting with wet debris and diluted cleaners.
- Sweep the entire patio thoroughly with a stiff broom to remove loose dirt, leaves, debris, and any dry efflorescence crust that brushes off easily.
- Use a leaf blower to clear the joints and surface of fine particles.
- Inspect every paver. Mark any cracked, broken, or noticeably sunken pavers with chalk or a piece of tape so you don't lose track of them during cleaning.
- Identify your stains and their locations. Treat any localized stains (oil, rust, paint, organic) before you run the pressure washer so you're working on a stain that hasn't been diluted and spread.
- Choose a small, inconspicuous test area (about 1 square foot in an out-of-the-way corner) for any chemical cleaner you haven't used on these pavers before. Apply, wait, rinse, and evaluate color and surface texture before committing to the whole patio.
Pressure washing pavers without damaging them
A pressure washer is your most effective cleaning tool, but it's also the easiest way to blow joint sand out of every gap in your patio if you use the wrong technique. The goal is high-volume water flow at moderate pressure, not a narrow jet of maximum pressure.
PSI, nozzle, and distance recommendations
For most concrete pavers, work in the 500 to 1,000 psi range. Industry product data sheets from masonry cleaner manufacturers caution that rinsing pressures above approximately 1,000 psi, especially with nozzles narrower than 15 degrees, can permanently damage the surface texture of masonry. Stick to a 25-degree or 40-degree fan nozzle and keep the wand 8 to 18 inches from the surface. This combination lifts dirt effectively without etching or pitting the paver face.
Technique to protect joint sand
Industry guidance from the Concrete Masonry and Hardscapes Association recommends a low angle of attack: sweep the spray wand parallel or at a shallow angle to the surface rather than pointing it straight down into the joints. When you cross a joint, move the spray along the joint line rather than perpendicular to it. This simple technique dramatically reduces how much joint sand you wash out. Work in sections, overlapping each pass slightly.
When not to pressure wash
Skip the pressure washer if your joint sand is already significantly depleted, if you have pavers that are loose or rocking (the water pressure will shift them), or if you're applying a chemical cleaner that needs to dwell on the surface. In those cases, use a low-pressure pump sprayer (30 to 100 psi) for chemical application and a garden hose at high volume for rinsing. High volume of rinse water matters more than extreme pressure for flushing chemicals off the surface.
Chemical cleaners and biological treatments: choosing and using the right product
Different problems need different chemistry. Using the wrong product either wastes your time or causes new damage. Here's how to match your problem to the right approach.
Algae, mildew, and mold
You have two main options here: oxygen bleach (sodium percarbonate) or sodium hypochlorite (household bleach). Both kill biological growth, but they behave differently.
| Property | Oxygen Bleach (Sodium Percarbonate) | Sodium Hypochlorite (Household Bleach) |
|---|---|---|
| Active ingredient | Sodium percarbonate (releases H2O2) | Sodium hypochlorite (~5.25% available chlorine) |
| Typical mix for pavers | 1–4 scoops per gallon of warm water (follow manufacturer label) | 1 part bleach to 10 parts water (approx. 1:10 dilution) |
| Speed of action | Slower; works over 15–30 minutes dwell time | Faster; kills surface organisms within 5–15 minutes |
| Effect on plants | Gentler; lower risk to adjacent vegetation with thorough rinsing | Higher risk; pre-wet and rinse plants thoroughly before and after |
| Effect on joint sand | Lower; does not degrade polymeric sand binders as aggressively | Can degrade some polymeric sand binders with repeated use |
| Residue/odor | Breaks down to water and oxygen; low residue | Chlorine odor; rinse thoroughly to prevent residue |
| Best for | Routine biological cleaning, lighter mildew, DIY-friendly approach | Heavier algae or mold infestations, faster treatment needed |
| Neutralization needed | No; rinse with water | No chemical neutralizer needed; rinse thoroughly with water |
For either product, apply with a low-pressure pump sprayer or a stiff brush. Allow the product to dwell on the surface, typically 10 to 30 minutes depending on the label and the severity of growth. Do not let it dry on the surface. Scrub with a stiff-bristle brush if growth is heavy, then rinse thoroughly with a garden hose at high volume or your pressure washer at low to moderate pressure. Always follow the specific product label for dilution ratios and dwell times, as formulations vary.
Work in sections on a dry day. Apply the cleaner, let it work, scrub if needed, and rinse each section before moving to the next. This prevents cleaner from drying out on the surface and leaving a residue. Keep children and pets off the surface until it's fully rinsed and dry. If you're working near a lawn, wet the grass before you start and rinse it down again after you finish to dilute any overspray.
Efflorescence
Light, fresh efflorescence sometimes brushes off when dry. Don't wet it first; the dry-brush approach works because you're removing salt crystals before they re-dissolve and spread. For heavier or crusted efflorescence, use a proprietary efflorescence remover or a mild acidic masonry cleaner (phosphoric or citric acid-based). Apply according to the product data sheet using a low-pressure pump sprayer. Acidic cleaners work by dissolving the calcium carbonate salts, so allow the prescribed dwell time (typically 3 to 10 minutes depending on the product). Agitate with a stiff brush, then rinse thoroughly with a large volume of water. After rinsing an acidic cleaner, flush the surface again with clean water to neutralize any remaining acid. Do not apply sealers until the surface is confirmed clean and dry and shows no active white haze returning. If the efflorescence reappears within days of cleaning, there is still moisture moving through the pavers, and sealing at that point will trap the problem.
Oil and grease stains
Blot up or mop up as much free oil as possible immediately. Pour an absorbent material such as clay-based kitty litter or diatomaceous earth over the stain, press it in gently, and leave it for 24 hours or more to draw out as much oil as possible. Sweep it up and dispose of it in regular trash (check your local HHW rules for larger quantities). Then apply an alkaline commercial degreaser or a TSP-type detergent to the stained area, agitate with a stiff brush, and allow dwell time per the label. Rinse repeatedly. Deep-set petroleum stains that have been in the concrete for months or years often require multiple treatments. If the stain doesn't lift after three attempts, replacing those individual pavers may be the most practical solution.
Rust stains
Use a chelating or acid-type rust remover formulated for masonry, typically containing oxalic acid, phosphoric acid, or a proprietary chelating agent. See Oxalic Acid (product & SDS), Alliance Chemical (chelation/acid rust removal reference) for product and SDS guidance, including recommended dilutions, dwell times, and rinsing precautions when using oxalic‑acid rust removers Oxalic Acid (product & SDS) — Alliance Chemical (chelation/acid rust removal reference). Apply it to the stained area only and follow the product's dilution and dwell time instructions carefully. Test in a hidden spot first. Protect adjacent metal fixtures and vegetation. Rinse very thoroughly. Never use straight muriatic acid on pavers unless specifically directed by the product manufacturer, as it can permanently etch concrete surfaces.
Leaf, tobacco, and organic stains
A solution of household bleach applied with a stiff brush, left for a few minutes, and rinsed off works well for tannin-based stains from leaves and organic material. Pre-wet the surrounding area, apply the bleach solution to the stain, scrub, and rinse thoroughly.
Paint stains
Wet paint should be blotted up immediately with rags and disposed of as hazardous waste if it's oil-based. Dried paint requires a commercial paint remover appropriate for the paint type. Apply, allow dwell time per the label, scrape gently with a plastic scraper, and rinse. Very stubborn paint stains may require sanding or grinding, which risks altering the paver surface texture.
Disposal of wastewater and cleaning products
This is worth emphasizing because it's easy to overlook. Pressure-wash water containing detergents, biocides, or cleaning chemicals should not run into storm drains or surface water. EPA guidance on Household Hazardous Waste (HHW) warns that many household cleaners, oils and pesticides are hazardous if disposed of improperly and that pressure‑wash wastewater should not be discharged to storm drains or surface waters EPA guidance on Household Hazardous Waste (HHW) warns that many household cleaners, oils and pesticides are hazardous if disposed of improperly and that pressure‑wash wastewater should not be discharged to storm drains or surface waters.. EPA NPDES guidance is clear on this: cleaning wastewater containing these additives must be directed to pervious ground for natural filtration or contained and disposed of through the sanitary sewer consistent with local regulations. For most residential patios this means directing rinse water onto your lawn or a garden bed away from water features and storm drains. Leftover chemical products should be handled according to your local household hazardous waste program guidelines.
Making repairs before you seal
Cleaning is done, the surface is dry, and now you can clearly see what needs fixing. Any repairs go in before sealer because sealer locks everything in.
Replacing cracked or deeply stained pavers
Slide a flat pry bar or a pair of screwdrivers into adjacent joints and lever the damaged paver up. Set it aside. Inspect the bedding sand layer below: it should be approximately 1 inch (25 mm) deep and level. If the sand is disturbed, re-screed it to the right depth, check that it's compact and firm, and place the new paver in. Tap it into place with a rubber mallet so it sits flush with surrounding pavers. If you don't have exact matching spares, take a paver to your supplier and get as close a color match as possible. Some color variation is normal as pavers weather over time.
Resetting sunken pavers
Lift the sunken paver using the same technique as above. The issue is almost always inadequate or disturbed bedding sand. Add clean, coarse bedding sand to bring the level up, compact it gently, re-lay the paver, and check for level with a straightedge across surrounding pavers. Adjust until flush. If multiple adjacent pavers are sinking, you may have a base compaction or drainage issue underneath, which is a larger project involving lifting a whole section and checking or repairing the compacted aggregate base. Industry standards call for a minimum 4-inch compacted aggregate base for pedestrian patios. If yours is less than that or is compromised, that's worth addressing properly.
Edge restraints
Check that plastic or metal edge restraints around the perimeter are still spiked down and holding the border pavers in place. Loose or missing edge restraints let the patio spread and pavers shift outward over time. Re-spike any loose sections with 10-inch or 12-inch spikes.
Re-sanding the joints
Joints hold the patio together by locking individual pavers against each other. Depleted joint sand leads to rocking pavers, weed germination, and ant infestation. After cleaning and repairs, sweep joint sand into all gaps before sealing.
Polymeric sand is the better long-term choice for most homeowners. It contains a binder that hardens when activated with water, creating a firm, weed-resistant joint. It costs more than regular sand but dramatically reduces future maintenance. Regular coarse joint sand is cheaper and easier to work with, but it washes out more readily and allows weed growth. If you use polymeric sand, follow the manufacturer's instructions precisely: sweep it in, compact the pavers with a plate compactor or hand tamper to vibrate the sand into the joints, blow off all excess from the paver faces, and then wet activate it per the label. Manufacturer guidance (such as from Techniseal) also recommends waiting approximately 30 days after polymeric sand installation before any aggressive cleaning or sealing to allow the binder to fully cure and avoid hazing or bond disruption.
Sealing to lock in the brightness
Sealing is what takes a freshly cleaned patio from looking okay to looking genuinely bright and renewed. It also protects against future staining, UV fading, and biological growth.
Which sealer should you choose?
| Sealer Type | Finish | How It Works | Best For | Reapplication Interval |
|---|---|---|---|---|
| Penetrating/impregnating sealer | Natural/matte look; no sheen | Penetrates the paver surface without forming a surface film; repels water and oil from within | Natural look; lower maintenance; good for textured or tumbled pavers | 5–10 years depending on traffic and exposure |
| Film-forming acrylic (water-based) | Gloss or semi-gloss; enhances color | Creates a clear film on the paver surface; enhances color and gives wet look | Color enhancement; good for smoother pavers; budget-friendly | 2–4 years |
| Film-forming polyurethane/epoxy | High gloss; deep color enhancement | Hard film on the surface; very durable | High-traffic areas; maximum color enhancement; longer lifespan | 4–7 years with maintenance coat |
| Tinted sealer | Varies; adds a color tone | Film-forming sealer with integral pigment | Reviving UV-faded pavers beyond what cleaning alone achieves | 3–5 years |
Always do a test patch before committing. Apply a small amount of the sealer to an inconspicuous area and let it cure for at least 24 hours. Check the sheen level, color change, and whether the finish looks how you want it to look across the full patio. Film-forming sealers that darken the color significantly can look great in the test patch but overwhelming across a large area.
Sealer application and curing
The surface must be completely clean and fully dry before you apply sealer. Industry guidance is unequivocal on this: sealers trap whatever is on the surface, including residual moisture, dirt, and any remaining efflorescence. Apply thin, even coats with a pump-up garden sprayer or a lambswool roller depending on the product type. Two thin coats always outperform one thick coat. Thin coats level out, cure uniformly, and are far less likely to bubble or cloud. Follow the manufacturer's specified drying time between coats, usually 30 to 60 minutes for acrylics in warm dry conditions. Allow the full cure time (often 24 to 72 hours for foot traffic, longer for furniture and vehicles) before using the patio again. Do not apply sealer if rain is forecast within 24 hours.
Keeping your pavers bright: a simple maintenance schedule
The most important thing you can do after brightening your patio is set up a basic annual maintenance routine. A patio that gets even minimal regular attention stays bright much longer and avoids the multi-day restoration project.
| Frequency | Task |
|---|---|
| Monthly (spring–fall) | Sweep off debris; blow joints clear to prevent organic buildup |
| After major storms | Check for displaced or sunken pavers; clear standing water and debris from joints |
| Annually (spring) | Low-pressure wash with a general masonry cleaner; inspect joints and top up sand as needed; check sealer condition |
| Every 2–4 years | Re-apply film-forming sealer when water no longer beads on the surface or sheen is noticeably reduced |
| Every 5–10 years | Full inspection of edge restraints, base condition, and overall level; address any structural issues before they worsen |
Troubleshooting common mistakes
- Sealer turning white or cloudy: most often caused by sealing over a damp surface or over active efflorescence. Strip the sealer, ensure the surface is fully dry and efflorescence-free, and re-apply.
- Joint sand washing out repeatedly: you're either using too high a PSI or too narrow a nozzle angle. Switch to a 40-degree nozzle and lower your pressure. Consider upgrading to polymeric sand.
- Green algae returning within weeks: pressure washing without a biocidal treatment kills the visible growth but not the spores. Use an oxygen bleach or diluted bleach treatment, allow full dwell time, and rinse thoroughly. Consider a sealer with a biocidal additive.
- Pavers look dull even after sealing: the surface likely still had residual dirt or a haze from cleaners when the sealer was applied. Sealers amplify whatever they're coating. Strip and start the cleaning phase again.
- Acidic cleaner left a patchy, lighter tone on some pavers: you left it on too long or didn't rinse fast enough. Light re-application of the cleaner evenly across the affected area, followed by very fast rinsing, can sometimes even the tone. Test first.
- Oil stain not lifting: this is a deep-set stain. Apply absorbent, degrease repeatedly, and if it still doesn't budge after three attempts, replace the paver. It's faster and cheaper than continued effort.
- Efflorescence reappearing within days of cleaning: moisture is still moving through the pavers. Do not seal yet. Investigate the source of moisture (drainage, irrigation, underlying base saturation) and allow the pavers to dry out completely over several weeks before proceeding.
Realistic time and cost expectations
A basic cleaning and sealing project on a 200 to 400 square foot patio typically runs one to two full days of work across two weekends: the first for cleaning and repairs, and the second (after adequate drying time) for sealing. Material costs for cleaning products and a mid-range acrylic sealer for that size patio run roughly $100 to $250 depending on your region and the products you choose. Renting a pressure washer for a day adds another $40 to $80. If you need to replace a handful of pavers and buy polymeric sand, add another $50 to $100. Professional patio cleaning and sealing services for the same size patio can run $400 to $1,200 or more, so even accounting for tool rental, the DIY approach is substantially cheaper.
When to call a professional
Some situations genuinely benefit from professional help, and knowing when to escalate saves you from spending a weekend making things worse.
- Widespread base failure: if more than 15 to 20 percent of your patio is sunken, heaving, or structurally unstable, the scope of lifting, base repair, and relaying is a serious undertaking. A professional hardscape contractor can often do this more efficiently with the right equipment.
- Failing sealer that's deeply embedded or stained: if the existing sealer has failed in a complex, patchy way and standard strippers aren't clearing it cleanly, a professional with industrial stripping equipment and experience will get a better result.
- Stains that have defeated multiple targeted treatments: particularly deep petroleum stains or chemical stains (fertilizer, pool chemicals) that have penetrated deeply into the paver may require abrasive treatment or paver replacement at a scale that benefits from professional assessment.
- Very large patios: projects over 800 to 1,000 square feet are physically demanding for one or two people with rented equipment. Professional crews with wide-deck equipment are meaningfully faster and often more consistent in finish quality at this scale.
What comes next
If after cleaning you find that your patio has more structural issues than surface problems, the next logical step is a more in-depth repair or restoration project. For a step-by-step walkthrough on how to restore a paver patio, see our detailed restoration guide. For step-by-step instructions on how to redo patio pavers, see our dedicated guide on how to redo patio pavers. Lifting individual pavers and fixing the bedding layer, resetting whole sections of a sunken patio, or rebuilding with an improved base are all related projects worth exploring once you've gotten your surface as clean and bright as possible. For step-by-step instructions, consult our detailed guide on how to replace patio pavers. The same foundation work that keeps a clean patio looking great for years is what separates a patio that lasts from one that needs attention every season. Getting the brightening right first gives you a clear picture of exactly what needs structural attention, which makes planning any follow-on work much easier.
FAQ
What are the common reasons patio pavers look dull or faded?
Dirt and surface grime, biological growth (mildew/algae), efflorescence (white salt deposits), surface stains (oil, rust, paint, food), and a worn or degraded sealer. Each cause needs a different diagnostic step because cleaners and treatments vary by problem.
How should I diagnose what’s causing the dullness before I start cleaning?
Start by brushing and wetting a small area. If dirt washes away easily it’s surface grime; green/black film that scrubs off is biological growth; white crusts that flake when dry are efflorescence; localized dark spots may be oil/grease. Test-clean small inconspicuous areas with the mildest method (sweeping, water, oxygen bleach) and progress to stronger treatments only as needed.
What’s the prioritized action plan to brighten pavers safely?
1) Dry sweep to remove loose debris. 2) Remove localized stains (oil, rust, paint) with appropriate spot treatments. 3) Treat biological growth with oxygen bleach or diluted sodium hypochlorite (use correct dilution and protect plants). 4) Rinse and, if needed, use a masonry cleaner or efflorescence product for persistent residues. 5) Repair any structural problems and re-sand joints before sealing. Always start mild and test first.
Which cleaners and mixes are safe and effective for homeowners?
Oxygen bleach (sodium percarbonate) mixes per the product label are safe and effective for general organic stains. Household bleach diluted per institutional guidance (example 1:10 for strong cleaning) can be used for mildew with precautions. For grease use absorbents then an alkaline degreaser. For heavy efflorescence or tough stains use a masonry cleaner or manufacturer efflorescence remover following the PDS instructions. Always test small areas and follow PPE, plant protection, and disposal rules.
What pressure washer settings and techniques should I use to avoid damaging pavers or joint sand?
Use low pressure (roughly 500–1,000 psi for most pavers), a wide fan nozzle (25–40°), keep the wand 8–18 inches away, and spray at a low angle parallel to the surface rather than perpendicular to joints. Avoid narrow (<15°) tips and very high pressures (>1,000 psi) that can etch or dislodge sand. Rinse with large volumes of water to remove cleaners and residue.
How do I remove oil or grease stains effectively?
Blot or scoop up fresh oil, cover the stain with an absorbent (kitty litter or diatomaceous earth) for 24+ hours, sweep up, then treat with an alkaline degreaser or detergent, scrub with a stiff brush and rinse. Deep-set petroleum may require repeated treatments or replacing affected pavers.
Next Articles
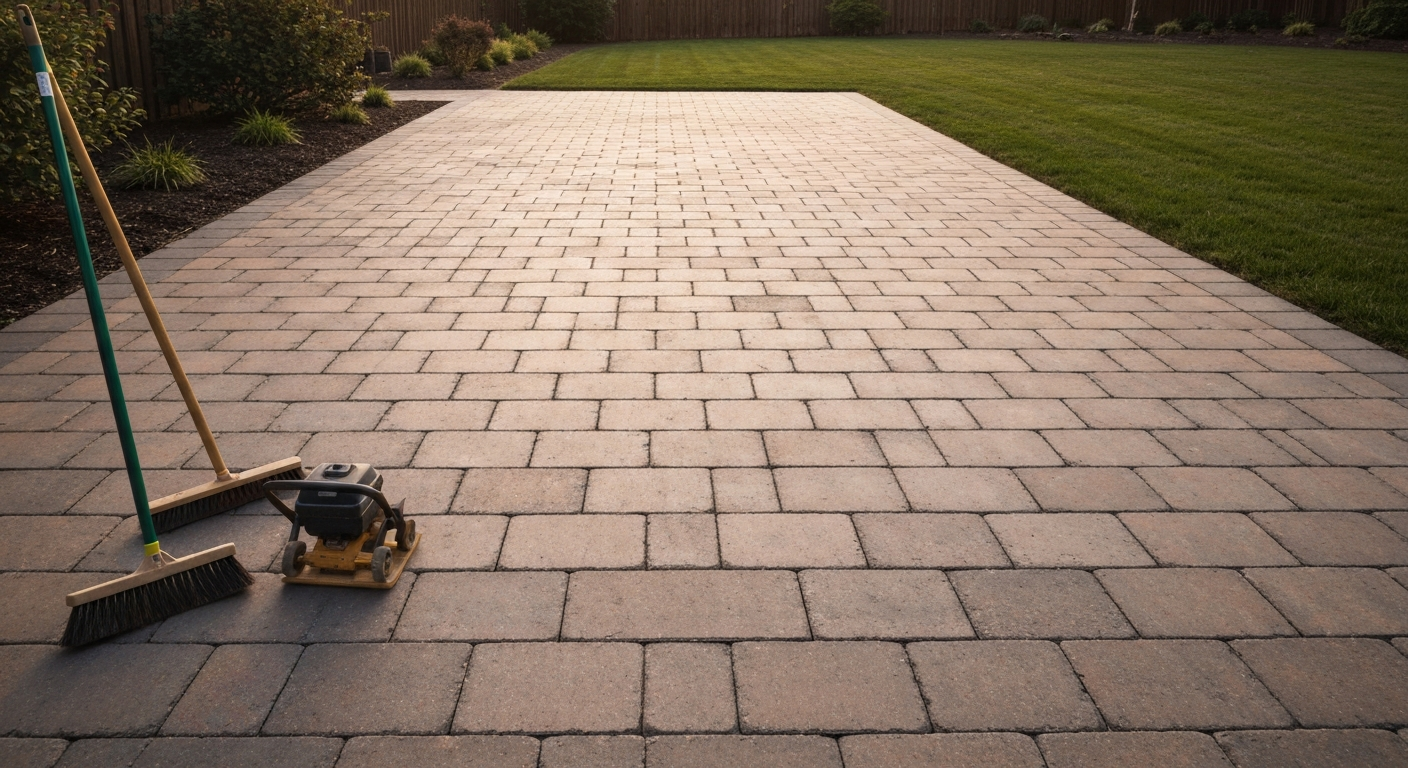
How to Restore a Paver Patio: DIY Steps, Repair vs Replace
How to restore a paver patio: clear step‑by‑step cleaning, reset, relay or replace pavers, tools, costs and decision aid
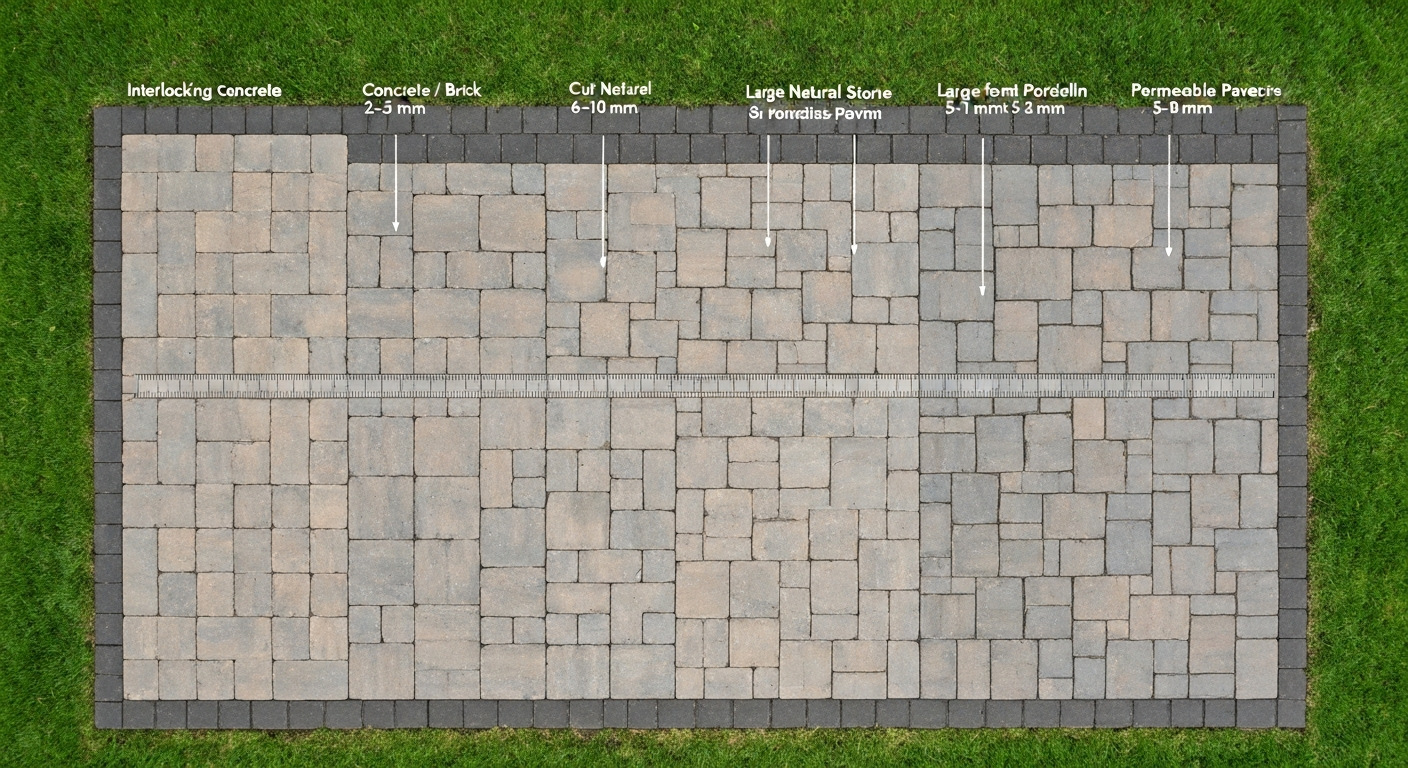
How to Space Patio Pavers: Joint Widths & Finishing Tips
How to space patio pavers: exact joint widths by paver type, step‑by‑step spacing, jointing & finishing tips.
How to Use Quikrete Patio Paver Jointing Sand: Guide & Tips
How to use Quikrete Patio Paver Jointing Sand: step-by-step application, tools, timing, coverage, and care.