
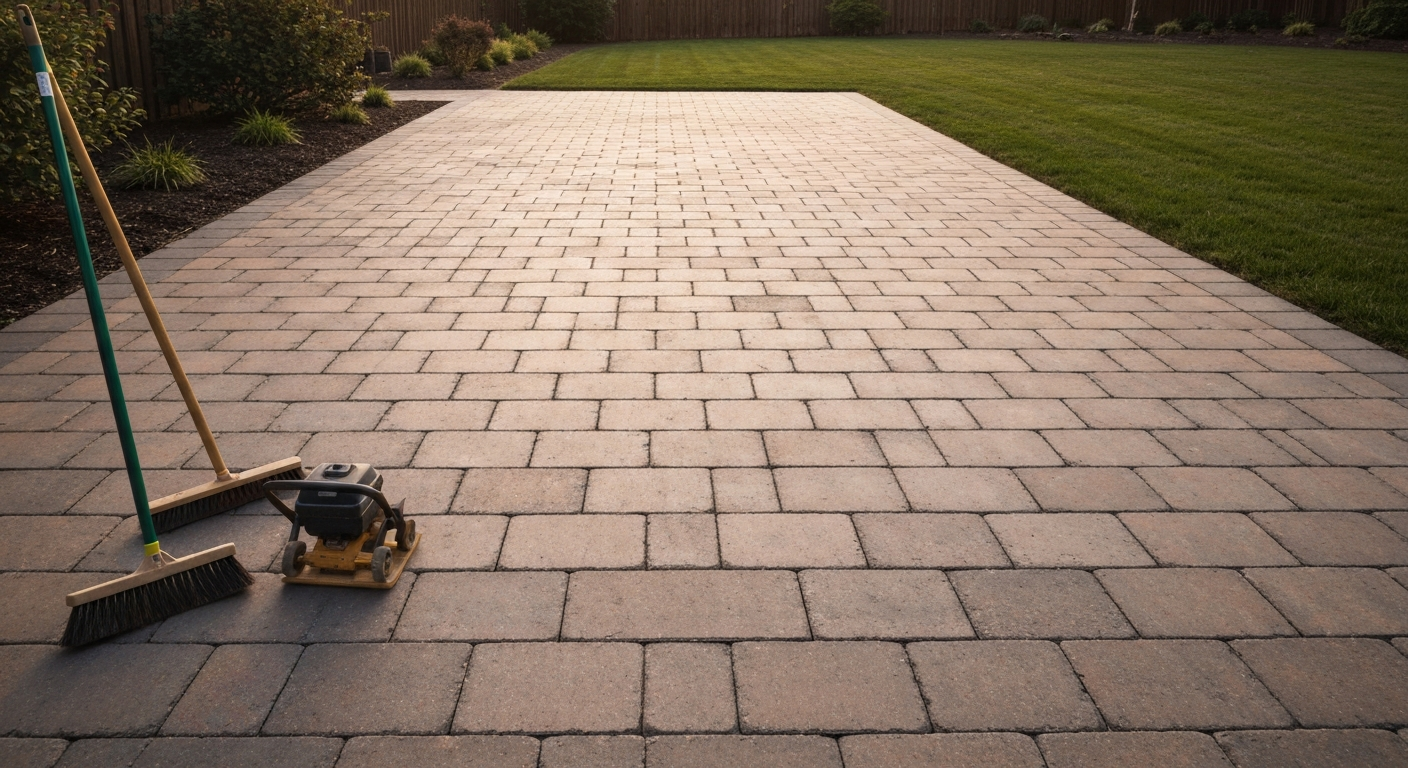
Restoring a paver patio almost always comes down to one of four tasks: cleaning and brightening the surface, refilling the joints, resetting a few sunken or tilted pavers, or relaying a larger section where the base has failed. Most patios that look terrible just need a good clean and fresh joint sand. A smaller number need spot repairs. Full base-out relaying is the minority case. Walk through the assessment checklist below first and you will know exactly which path is yours before you spend a dollar on materials.
How to Restore a Paver Patio: DIY Steps, Repair vs Replace

Felix Rowe
17 Jul 2026
Fast Assessment Checklist: Figure Out What Your Patio Actually Needs
Spend ten minutes on this before buying anything. Grab a notepad and walk the patio systematically, looking for each condition below. Be honest about what you see. Overestimating the damage sends you into a full redo you did not need; underestimating it means you will be back out there in a year.
| What you see | What it means | Likely next step |
|---|---|---|
| Dirty surface, faded color, white haze (efflorescence) | Cosmetic issue only | Clean and brighten |
| Weeds growing in joints, sand mostly gone | Joint erosion, no structural problem | Clean, then re-sand joints |
| One to five pavers lower than neighbors by less than 1 in | Localized settlement, base still solid around it | Lift and reset those pavers |
| More than 5–10 pavers sinking in a defined zone, soft or spongy feel underfoot | Base failure or drainage problem in that area | Relay that section, fix drainage |
| Pavers rocking or shifting when walked on | Bedding sand disturbed or edge restraint failed | Reset pavers, check edge restraints |
| Cracked or chipped pavers (surface only, not sinking) | Physical damage, base is fine | Replace individual pavers |
| Significant frost heave across entire patio, multiple sunken zones | Widespread base failure | Full relay or call a pro |
| Edge pavers spreading outward, pattern opening up | Edge restraint failure | Reset edge restraints, then re-compact and re-sand |
If most of your checks land in the top three rows, you are doing light to moderate restoration work. If you are ticking boxes in rows four through eight across large areas, you are looking at a more involved project closer to a full redo.
Repair vs. Full Redo: A Simple Decision Guide
The line between a targeted repair and a full relay is mostly about how widespread the base problems are. Here is how I think about it.
| Scenario | Recommended path |
|---|---|
| Dirty surface, faded color, missing joint sand but pavers are flat and stable | Clean, re-sand, seal — no lifting needed |
| Fewer than 10% of pavers sunken or uneven, base feels firm elsewhere | Spot-lift and reset only those pavers |
| One defined zone (say, 20–40 sq ft) is soft, sunken, or draining poorly | Relay that section, address base and drainage, blend back in |
| Edge restraints have failed and pavers are spreading in multiple spots | Reset restraints, pull and re-compact border pavers, re-sand entire patio |
| More than 30–40% of pavers are uneven or the base is soft across the whole patio | Full relay is more economical than repeated spot fixes |
| Structural issues: soil movement, tree roots, underground drainage failure | Call a pro for assessment before spending on materials |
One honest note: if you open up a section and find the aggregate base is less than 4 inches deep (the ICPI minimum for pedestrian residential work), or the subgrade is soft and not compacted to spec, adding more sand on top will not fix it. You will be back in the same spot in two or three seasons. In that case, committing to a proper base repair is worth it. The guides on how to relay patio pavers and how to redo patio pavers go deeper on full-section base work if you end up there.
Tools, Materials, and Safety Before You Start
PPE and Safety Notes
None of this work is especially dangerous, but a few hazards are worth taking seriously. If you are cutting pavers, silica dust is the real concern. OSHA's respirable crystalline silica standard (29 CFR 1926.1153) requires wet cutting or local exhaust controls when cutting concrete products. Use a wet-cutting diamond blade saw with a water-suppression attachment, or rent a masonry wet saw from your local equipment dealer. A P100 or N95 respirator as backup is cheap insurance. Safety glasses or goggles are non-negotiable any time you cut, chip, or pressure wash. Knee pads will save you on a full day's work. Closed-toe footwear with good ankle support matters when you are moving heavy pavers and running a plate compactor.
- Safety glasses or goggles
- Hearing protection (for plate compactor and saw use)
- P100 or N95 respirator (mandatory when cutting pavers — wet cutting preferred)
- Cut-resistant or heavy-duty work gloves
- Knee pads
- Sturdy closed-toe boots
Tools List
- Stiff-bristle push broom and leaf blower
- Garden hose with adjustable nozzle
- Pressure washer (1,000–1,600 psi is ideal for DIY; 25–40 degree fan tip)
- Pump sprayer (1–2 gallon) for applying cleaners at low pressure
- Flat pry bar or paver puller
- Dead-blow or rubber mallet
- Level (4 ft minimum) and string line
- Screed rails and screed board (for bedding sand leveling)
- Plate compactor (rent from your equipment dealer — 5,000–6,000 lbf centrifugal force is standard for residential paver work)
- Compactor pad (to protect paver surface during compaction)
- Masonry wet saw or angle grinder with wet-cut diamond blade (for replacement pavers)
- Bucket and sponge
- Stiff-nozzle watering can or garden hose with shower head (for polymeric sand activation)
Materials List
- Paver cleaner or degreaser (concrete-safe, pH-appropriate for your stain type)
- Commercial efflorescence remover (if white haze is present)
- Paver brightener or color enhancer (optional but effective on faded pavers)
- ASTM C33 concrete sand for bedding (do not use masonry sand or stone dust for bedding)
- Polymeric jointing sand or regular jointing sand (for joint refill — choose one, not both)
- Compactable aggregate base material (crushed stone, if repairing a base section)
- Paver sealer: film-forming acrylic or penetrating silane/siloxane (see sealing section for selection guidance)
- Replacement pavers if needed (save extras from original install — bring a sample to match)
- Edge restraint spikes or new plastic/aluminum edge restraint (if edges have failed)
Rental tip: a plate compactor runs about $60–90 per day at most equipment rental yards. If you are only resetting a few pavers and do not need full compaction, you can use a hand tamper instead, though the plate compactor is worth it for any re-sanding job covering more than a small section. Wet masonry saws rent for around $50–80 per day and are far safer than dry-cutting for silica control.
How to Clean and Brighten Patio Pavers
Cleaning first is not just about appearances. blank" rel="noopener noreferrer">CMHA / ICPI Tech Note PAV-TEC-005: Cleaning, Sealing and Joint Sand Stabilization recommends using wide‑spray nozzles at a low angle to avoid directing spray into joints, applying chemical cleaners with low‑pressure pump sprayers (30–100 psi), and rinsing with higher‑flow pressure washers (1,000–4,000 psi) using wide‑fan tips at a safe distance to avoid dislodging joint sand. You cannot properly re-sand, seal, or assess the true condition of your pavers through a layer of grime, algae, and efflorescence. Do this step before any other restoration work. For detailed steps and product recommendations, see our guide on how to brighten patio pavers.
Step-by-Step Cleaning Process
- Clear the surface. Remove all furniture, planters, and debris. Sweep the entire patio with a stiff push broom and blow out loose sand and debris from the joints with a leaf blower.
- Degrease oily areas first. For cooking grease, motor oil, or BBQ drips near a fire pit surround, apply a concrete-safe degreaser with a pump sprayer, let it dwell for 5–10 minutes, then scrub with a stiff brush. Rinse with plain water before moving on.
- Apply efflorescence cleaner if white haze is present. Use a pump sprayer at low pressure (30–100 psi is the CMHA/ICPI guidance) to apply the efflorescence remover. Follow the manufacturer's dwell time exactly. Work in sections of 100–200 sq ft so the product does not dry on the surface. Rinse each section before it dries.
- Pressure wash the surface. Use a 1,000–1,600 psi setting with a 25–40 degree fan nozzle. Hold the wand 12–18 inches from the surface and keep the spray angle low and sweeping. Never point the nozzle directly into joints — this dislodges joint sand and can etch the paver surface. Test your pressure and distance on an inconspicuous corner first.
- Apply paver brightener if restoring color. Paver brighteners or color-enhancing cleaners are applied after pressure washing while the surface is still damp, using a pump sprayer. Follow the product's dwell time, then rinse thoroughly. This step is entirely optional but makes a significant visual difference on older, weathered pavers.
- Neutralize after acid-based cleaners. If your efflorescence remover contained acid (most do), neutralize the surface with a dilute baking soda solution (roughly 1 tablespoon per gallon of water) applied with a watering can. Rinse with clean water.
- Allow to dry fully. For re-sanding and sealing, the surface and joints must be completely dry. In typical summer conditions that means 24–48 hours after the final rinse. In humid or cloudy weather, give it longer. Rushing this step causes sealer adhesion problems and polymeric sand failures.
Troubleshooting: Stains That Won't Come Off
Rust stains need an oxalic-acid-based rust remover, not a general cleaner. Tannin stains from leaves or wood respond to alkaline cleaners. Persistent oil stains sometimes need two degrease-and-rinse cycles. If efflorescence keeps coming back after cleaning, that tells you moisture is still moving through the base, and sealing alone will not stop it. Address the source (drainage, grading, or irrigation overspray) before you seal.
Re-Sanding Paver Joints with Regular Jointing Sand
Regular jointing sand (non-polymeric, dried concrete sand or purpose-made joint sand) is the original fill material in most residential paver patios. It is inexpensive, easy to work with, and completely fine for patios that are stable and not heavily weeded. The trade-off is that it has no binder, so it can wash out in heavy rain and needs occasional top-ups. If you are dealing with persistent weed germination or significant ant activity in the joints, skip ahead to the polymeric sand section.
- Confirm the surface is completely dry and clean before starting.
- Pour dry jointing sand over the cleaned patio surface in several piles and spread it with a stiff push broom, working it diagonally across the joints. The goal is to fill all joints to within about 1/8 inch of the paver surface.
- Compact the patio with a plate compactor (use a rubber or carpet pad on the plate to protect the paver surface). Make two full passes in different directions across the patio. This vibration drives the sand down into the joints.
- Add more sand and broom it into any joints that are still showing gaps after compaction.
- Make a second compactor pass, again using the pad.
- Sweep off all excess sand from the paver surface. Do not leave loose sand sitting on the surface, especially if you plan to seal soon after.
- Lightly mist the surface with a garden hose to help settle the sand. Do not flood the joints.
- Check joints the next day and add a final top-up of sand if any have settled noticeably.
Time estimate: for a typical 200–300 sq ft patio, figure 2–3 hours including setup and cleanup. Cost for jointing sand is roughly $5–15 per 50 lb bag, and most patios need two to four bags for a re-sand.
Re-Sanding Paver Joints with Polymeric Sand
Polymeric sand contains a binder (typically a polymer resin) that activates with water and hardens the joint into a semi-rigid filler. Done correctly, it dramatically reduces weed germination, resists ant tunneling, and holds up better to rain than regular sand. Done incorrectly, it leaves a permanent cloudy haze on your paver surface that is extremely difficult to remove. Read this section carefully before you open a bag.
Step-by-Step Polymeric Sand Application
- Verify completely dry conditions. The paver surface and joints must be bone dry. Check the forecast: you need at least 24 hours without rain after activation, and temperatures must stay above freezing for 48 hours. This is non-negotiable. Polymeric sand applied to damp joints or followed immediately by rain fails badly.
- Remove all old joint sand, debris, weeds, and residue from the joints. A leaf blower and stiff brush work well. Joints should be clean and open to their full depth.
- Pour polymeric sand onto the surface and sweep it diagonally across the joints with a stiff push broom, working in sections of roughly 200 sq ft at a time. Fill joints to within about 1/8 inch of the paver surface — check manufacturer specs as this can vary slightly by product.
- Compact the section with a plate compactor and protective pad. This drives the sand into the joints and removes air pockets. Make two passes in perpendicular directions.
- Add more polymeric sand if needed to refill joints after compaction. Joints should be full.
- Blow off the surface thoroughly with a leaf blower. This is the most important step most people skip. Any polymeric sand residue left on the paver surface will haze permanently when activated. Blow, check closely, blow again. The surface should look completely clean.
- Activate with water using a shower-pattern nozzle (never a jet or pressure washer for this step). Wet the section evenly until the sand is thoroughly saturated, then stop. Follow the manufacturer's specific instructions on wetting volume and timing. Techniseal and most other brands specify wetting in controlled sections, not all at once, so you can manage saturation consistently.
- Allow to cure. Most polymeric sands reach initial water resistance within about 90 minutes in good conditions, but plan for no rain for 24 hours and temperatures above freezing for 48 hours after application.
- Check joints after 24 hours. A properly activated joint will feel firm. If there are soft or hollow spots, you may need to add and re-activate a small amount of sand in those areas.
Common Polymeric Sand Mistakes to Avoid
- Applying to damp or marginally dry joints: results in weak, crumbly set or no bonding
- Skipping or rushing the surface blow-off: causes permanent haze on the paver face
- Using a pressure washer to activate: blows sand out of joints and ruins the joint fill
- Activating in sections larger than 200 sq ft: makes it hard to control moisture uniformly
- Applying when rain is forecast within 24 hours: rain washes out or softens uncured sand
- Not compacting before activation: air pockets in joints lead to cracking and soft spots
- Mixing brands or using leftover partial bags from a different batch: inconsistent set
Cost note: polymeric sand runs approximately $25–45 per 50 lb bag depending on brand and quality. A 200–300 sq ft patio typically uses two to four bags. Premium brands like Techniseal cost more but come with clearer technical data sheets and reliable performance windows.
Sealing Your Paver Patio
When to Seal (and When Not To)
Sealing is optional on a restored patio, but it adds meaningful protection and keeps the surface looking better for longer. The right time to seal is after all cleaning, re-sanding, and any resetting work is complete and fully cured. Do not seal over efflorescence, dirt, or uncured polymeric sand. If efflorescence is a recurring problem on your patio, use a breathable penetrating sealer (silane/siloxane-based) rather than a film-forming acrylic. Film-forming sealers trap moisture below the surface, which worsens efflorescence and causes peeling. Where moisture is not a concern, a water-based acrylic sealer gives excellent color enhancement and surface protection.
Sealer Types Compared
| Type | Appearance | Breathability | Best for | Reapplication interval |
|---|---|---|---|---|
| Water-based acrylic (film-forming) | Wet look or matte enhancement | Low — traps moisture | Dry climates, older pavers needing color refresh | Every 2–3 years |
| Solvent-based acrylic (film-forming) | High-gloss wet look | Very low | Show patios, covered areas | Every 2–3 years |
| Penetrating silane/siloxane (breathable) | Natural look, invisible | High — moisture escapes | Wet climates, efflorescence-prone patios, fire pit surrounds | Every 3–5 years |
Step-by-Step Sealer Application
- Confirm the patio is clean, dry, and free of efflorescence. Surface temperature should be between 50°F and 90°F during application. Never apply sealer in direct hot sun on a summer afternoon — it flashes off too quickly and leaves streaks.
- Check compatibility: if you used polymeric sand, confirm the sealer is compatible with it. Most manufacturers list this on the product data sheet. Incompatible products can dissolve or soften the polymeric binder.
- Apply the first coat with a low-nap roller or pump sprayer, working in sections of 100–150 sq ft. Back-roll any pooling immediately — sealer should be applied thin and even, not thick.
- Allow to dry per manufacturer specs (typically 1–2 hours between coats for water-based acrylics).
- Apply a second thin coat if the product data sheet recommends two coats. Two thin coats always outperform one thick coat.
- Keep foot traffic off for at least 4–6 hours; keep furniture and vehicles off for 24 hours minimum.
- Inspect after curing for any milky or uneven areas. These usually indicate moisture was present in the surface or that the coat was applied too thick.
Sealer cost ranges from about $40–100 per gallon depending on type and brand, with typical coverage of 150–300 sq ft per gallon for a single coat on standard concrete pavers. Budget roughly $80–150 in sealer for a 250 sq ft patio with two coats.
Lifting and Resetting Sunken or Uneven Pavers
This is genuinely satisfying work once you get the hang of it. Most sunken pavers look alarming but are a straightforward fix. For step-by-step instructions, see the guide to fix patio pavers. The key principle from ICPI guidance is that the 1-inch bedding sand layer is not there to correct an uneven base, it is a screeded, uniform layer that just cushions and seats the pavers. If the base itself is uneven or settled, adding extra bedding sand on top is a temporary patch at best. Assess whether you are dealing with bedding sand migration (common) or actual base failure (less common, more involved). For those needing more depth on the full base-repair and relaying process, the guides on how to reset patio pavers and reset paver patio cover that in detail. See our how to relay patio pavers guide for step-by-step instructions on full base repair and relaying larger areas.
- Mark the problem area. Use chalk or masking tape to outline all pavers that are low, tilted, or rocking. Check with a 4 ft level across multiple directions.
- Remove joint sand from the affected pavers. Use a flat pry bar or a dedicated paver puller tool to extract the marked pavers. Work carefully to avoid chipping adjacent pavers. Stack removed pavers face-up nearby.
- Inspect the base. Dig down with a trowel through the bedding sand layer to the aggregate base below. Is the aggregate firm and compact, or soft, loose, or undermined? Is there standing water or obvious poor drainage? If the base is soft over a wide area, this is a section relay job, not a spot reset.
- Fix the base if needed. For a localized low spot caused by base settlement, add compactable aggregate base material, compact it in 2–4 inch lifts with a hand tamper or plate compactor, and bring the base to the correct elevation. Remember the formula: finished paver height minus 1 inch (bedding sand) minus paver thickness = top of base elevation.
- Re-screed the bedding sand. Add ASTM C33 concrete sand and screed it to a uniform 1-inch depth using screed rails. Do not heap extra sand to make up for elevation — if the base is 2 inches low, fix the base, not the sand layer.
- Relay the pavers. Set each paver gently by hand with a small gap on each side, consistent with the surrounding joint spacing. Do not slide pavers into position — place them straight down.
- Compact the reset area. Make two passes with a plate compactor (with protective pad) over the reset pavers and several rows on either side to blend in the repair.
- Refill joints with matching sand (regular or polymeric, matching whatever the rest of the patio uses). Sweep in diagonally, compact again lightly, and top up.
- Check with a level. The reset pavers should sit flush with their neighbors within 1/8 inch or less.
Special Notes for Slopes, Raised Patios, and Fire Pit Surrounds
Sloped patios: re-screeding bedding sand on a slope requires extra care. Work from the low side upward and use sturdy screed rails pinned in place. Check your cross-slope drainage during the base repair, the intent is always to move water away from the house, not pool it. Raised patios: if you are resetting pavers on a raised or elevated patio, inspect the retaining structure and any drainage cores before lifting paving units. A compromised retaining wall changes the scope of the work significantly. Fire pit surrounds: these pavers experience repeated thermal cycling and often show joint erosion and surface spalling faster than the rest of the patio. Use a penetrating sealer (not film-forming acrylic) near a fire pit, and avoid polymeric sand within about 12 inches of the fire ring, the heat can degrade the polymer binder over time.
Replacing Cracked or Damaged Individual Pavers
If you have a paver that is cracked through, spalled, or stained beyond recovery, replacing it individually is straightforward. Remove the joint sand from all four sides, lift the damaged paver, inspect the bedding sand underneath (re-screed if disturbed), and set the replacement paver. If you do not have original spares, bring a sample to a paver supplier for the closest match. New pavers will look noticeably brighter than weathered ones at first, but they blend in after one season of exposure. If color match matters immediately, a paver brightener on the surrounding pavers can help close the gap visually. The guide on how to replace patio pavers goes step-by-step on matching and fitting replacement units if you need more detail on that process.
Fixing Edge Restraints and Drainage
Edge restraint failure is one of the most common causes of spreading, unlevel patios that look far worse than they are. ICPI Tech Spec 3 requires edge restraints to provide at least 1 inch of vertical contact against the side of the paver. ICPI Tech Spec, Edge restraint and bedding guidance (SiteOne PDF) states edge restraints must provide a minimum of about 1 in (25 mm) vertical restraining surface contacting the side of the paver and be set to the correct level before screeding; restraints may be installed before or as pavers are laid depending on restraint type blank" rel="noopener noreferrer">ICPI Tech Spec — Edge restraint and bedding guidance (SiteOne PDF). Plastic spike-in restraints are the most common DIY option and work well when they are properly staked at the manufacturer-recommended intervals (typically every 8–12 inches). If your restraints have pulled away from the paver edges or the spikes have worked loose, the fix is straightforward: pull border pavers, re-seat or replace the restraint, drive new spikes into firm soil, and relay the border row. For a more finished look or heavier use areas, aluminum restraints or a poured concrete edge band are more permanent solutions.
Drainage problems are worth addressing directly during any base repair. If water is pooling on the patio or running toward the house foundation, the surface grade is wrong. Patio pavers should slope away from the house at approximately 1/8 to 1/4 inch per foot. If you are relaying a section, this is the time to correct it. Do not reseal a patio that is graded toward the house and hope the sealer solves the drainage, it will not.
Common Problems and Quick Troubleshooting
| Problem | Likely cause | Fix |
|---|---|---|
| Weeds in joints | Joint sand eroded, seeds germinating in organic debris | Clean joints, apply pre-emergent herbicide, re-sand with polymeric sand |
| White haze (efflorescence) returning after cleaning | Active moisture moving through the base or from below | Find and address moisture source; use breathable penetrating sealer |
| Joint sand washing out repeatedly | Pressure washing too aggressively, no edge restraint, heavy rainfall | Switch to polymeric sand; check edge restraints and surface grading |
| Pavers rocking after re-sanding | Insufficient compaction or bedding sand not properly screeded | Lift, re-screed bedding sand to uniform 1 in, relay and compact properly |
| Haze on pavers after polymeric sand | Sand residue not fully blown off before activation | Try polymeric sand haze remover; mechanical removal is very difficult |
| Sealer peeling or flaking | Applied over damp surface, trapped moisture, or incompatible product | Strip and reapply; correct moisture issue before new application |
| Ants undermining joints | Fine joint sand easily excavated | Remove ant colonies, re-sand with polymeric sand which is harder to excavate |
Realistic Time and Cost Estimates
Restoration scope varies widely, but here is what a typical 200–300 sq ft residential patio restoration costs and takes in time, based on doing the work yourself.
| Scope of work | DIY time estimate | Approximate material cost |
|---|---|---|
| Clean and brighten only | Half day (4–5 hrs) | $30–80 (cleaners, brightener) |
| Clean + re-sand with regular sand | 1 day | $50–120 |
| Clean + re-sand with polymeric sand | 1 full day (plus 24 hr cure) | $100–200 |
| Clean + re-sand + seal | 1.5–2 days total (includes dry time) | $180–350 |
| Spot-lift and reset 5–15 pavers | 3–5 hrs | $20–60 (sand, aggregate top-up) |
| Relay a 40–60 sq ft section with base repair | Full day to day and a half | $100–250 (aggregate, bedding sand, rental) |
| Full patio clean, reset, re-sand, and seal | 2–3 days spread over a weekend | $300–600 depending on patio size |
When to Call a Pro Instead
Most paver restoration is genuinely DIY-friendly and the results are satisfying. But there are situations where a professional assessment or full contractor involvement makes more sense than pushing through it yourself. Call a pro if: the subgrade is unstable or soft over most of the patio and you suspect a drainage or soil failure rather than surface wear; you have a raised patio with signs of retaining wall movement or shifting; tree roots have significantly displaced the base; you have a very large patio (500+ sq ft) with widespread base failure and the full relay cost in time and equipment rental starts to approach contractor pricing; or the patio has been improperly installed from the start with inadequate base depth and repeated DIY fixes have not held. Getting a professional eye on those situations before spending money on materials is always the smarter move.
For everything short of those scenarios, you have everything you need here to take your patio from worn-out to genuinely great-looking. Start with the assessment, commit to the right scope, and work through each phase methodically. The results from a proper DIY restoration last years when the underlying work is done right. For another relevant comparison, see reset paver patio. For another relevant comparison, see how to reset patio pavers.
FAQ
Fast assessment checklist: how do I quickly evaluate my paver patio to decide next steps?
Walk the patio and note: (1) Surface cleanliness—algae, dirt, oil, efflorescence; (2) Joint condition—gaps, washout, weeds; (3) Levelness—localized settled pavers vs. widespread unevenness; (4) Cracked/broken pavers—size and number; (5) Edge restraint condition—loose or missing; (6) Base/drainage signs—standing water, soft spots, rutting near edges; (7) Material type—concrete paver, natural stone or clay (affects cleaners/sealers); (8) Slope / special features—fire pit, raised sections, steps. Use this to choose: cleaning alone; joint re‑sanding; spot lifting/reset; relay area (base fix); or full replace.
Required tools, materials and PPE for a complete DIY paver restoration
Tools: push broom, stiff nylon/bristle brush, leaf blower, pressure washer (1,000–1,600 psi typical for homeowners), pump sprayer for cleaners, plate compactor (5–6 mm lift pad or protective mat), rubber mallet, mason's trowel or joint rake, paver splitter or wet saw (for cuts), shovel, hand tamper, level/straightedge, measuring tape, wheelbarrow, edging stakes. Materials: concrete/ASTM C33 bedding sand, aggregate base (if redoing base), joint sand (coarse masonry sand) and polymeric sand option, paver sealer (film or penetrating type), efflorescence cleaner, degreaser, weed killer/biocide, replacement pavers, edge restraint (aluminum/steel/plastic spikes or poured concrete). PPE & safety: safety glasses, hearing protection, NIOSH‑rated respirator when cutting (or use wet cutting), nitrile/chemical gloves for cleaners, knee pads, steel‑toe footwear, and follow OSHA silica guidance when cutting.
Safety notes and dust controls when cutting or grinding pavers
Prefer wet cutting or use water‑suppression kits on saws to control respirable crystalline silica. If dry cutting, wear a proper respirator (NIOSH N95 minimum; P100 for heavy exposure) and use local exhaust if available. Use eye and hearing protection and heavy gloves. Follow compactor and saw manufacturer manuals for safe operation and two‑person lifts for heavy equipment. Avoid pressure washing directly into joints to prevent sand loss; maintain safe distances and fan nozzles.
Step‑by‑step: cleaning and brightening pavers
1) Remove loose debris with blower/broom. 2) Spot‑treat oil stains with a degreaser; let dwell per product instructions and scrub. 3) Apply a mild detergent or dedicated patio cleaner with a pump sprayer; scrub with a stiff brush. 4) For efflorescence, start with dry brushing, then detergent, then a commercial efflorescence cleaner; test in an inconspicuous area. 5) Rinse thoroughly with a wide‑fan pressure‑wash (1,000–1,600 psi homeowner range, 25°–40° nozzle, 6–24 in distance) and avoid pointing spray directly into joints. 6) Allow to dry 24–72 hours before joint work or sealing. Follow product labels and ICPI/CMHA guidance on cleaner pressures and rinsing.
Step‑by‑step: joint re‑sanding with regular (non‑polymeric) sand
1) After cleaning and drying, remove weeds and loosen remaining sand from joints with a joint rake or stiff brush. 2) Sweep coarse, dry concrete/joint sand into the joints until full. 3) Use a plate compactor over the surface (two perpendicular passes) to seat sand into joints; add more sand and repeat until joints are solid. 4) Brush off excess sand and compact a final time. 5) Keep traffic off for 24 hours. Regular sand does not bind—expect some movement and occasional top‑ups.
Step‑by‑step: polymeric joint sand (activation/curing best practices)
1) Use polymeric sand only on dry pavers and dry joints; check product TDS for temperature and moisture windows. 2) Fill joints completely with dry polymeric sand, compact to settle and leave sand slightly below paver surface. 3) Remove all excess sand from paver faces (leaf‑blow and brush) to avoid staining when activated. 4) Activate in small sections (manufacturer suggests ≤200 sq ft) by evenly misting with a fine 'shower' spray—do not create runoff or wash joints out. 5) Allow the recommended cure time (often initial water resistance in ~90 minutes; protection from rain for 24–48 hours depending on product and temperature). 6) Follow the product PDS exactly for coverage, wetting sequence and cure.
Next Articles
How to Space Patio Pavers: Joint Widths & Finishing Tips
How to space patio pavers: exact joint widths by paver type, step‑by‑step spacing, jointing & finishing tips.
How to Use Quikrete Patio Paver Jointing Sand: Guide & Tips
How to use Quikrete Patio Paver Jointing Sand: step-by-step application, tools, timing, coverage, and care.
How to Use Patio Paver Sand: Step by Step DIY Guide
Step-by-step guide to apply patio paver sand correctly: prep base, set pavers, fill joints, compact, and troubleshoot is