The best patio paver step design for most DIYers is a straight stacked-step layout using full-sized pavers on a compacted gravel base, with each riser sitting between 6 and 7 inches tall and each tread running at least 12 inches deep. If you want to build a paver patio step by step, start by nailing down the dimensions, then prepare the base and set each riser and tread in a consistent layout paver step design. That combination gives you safe footing, clean lines, and a build process you can actually manage over a weekend with basic tools. Whether your patio is raised, sunken, or sitting on a slope, paver steps can bridge it neatly, you just need to plan the geometry first and get your base right. If you're wondering how to build DIY paver patio steps yourself, the key is nailing the base and layout before you cut and set any pavers.
Patio Paver Steps Ideas: DIY Planning and Build Guide

Popular patio paver step designs and layouts
Before you start digging, it helps to know which style actually fits your site and your skill level. Here are the most common patio paver step designs homeowners build, ranked roughly from simplest to most involved.
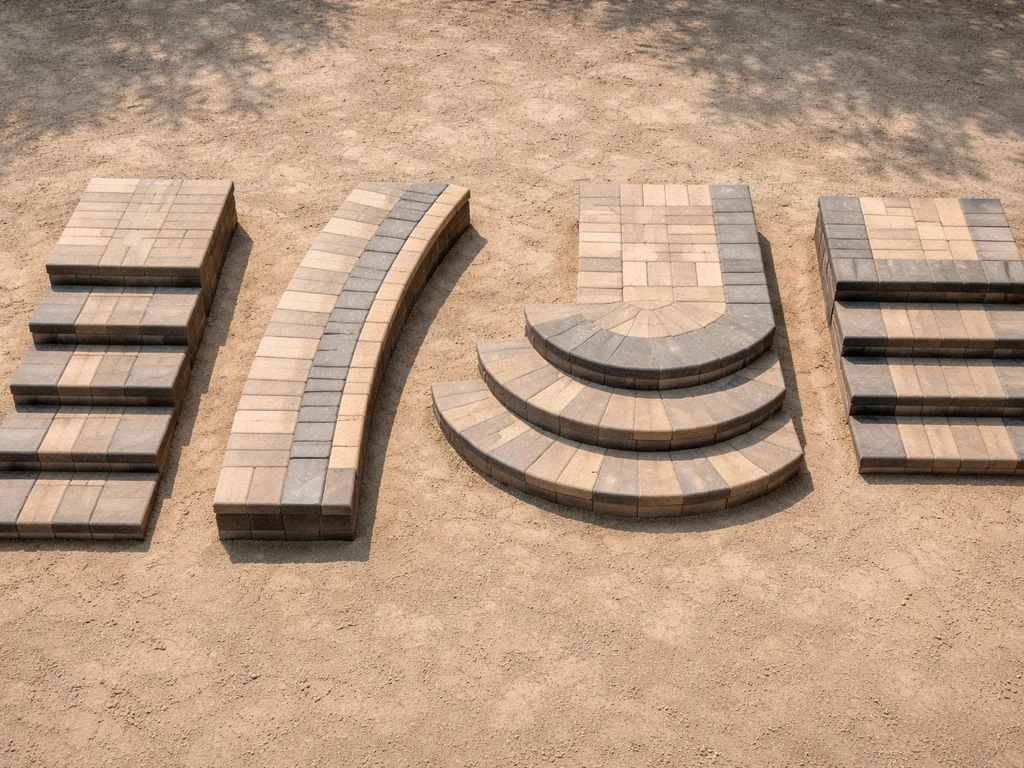
Straight stacked steps
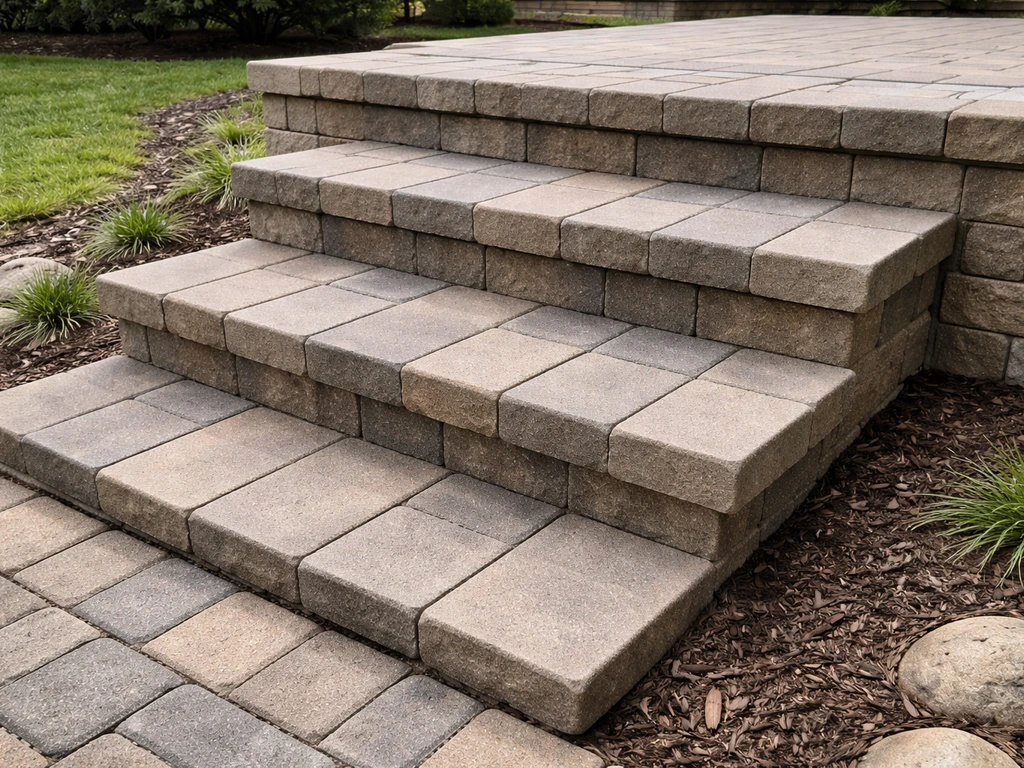
This is the workhorse design, steps that run in a straight line across the front or side of a raised patio. Each step is basically a short retaining wall capped with a paver tread. You stack courses of pavers to build the riser, then lay tread pavers on top with a slight forward overhang (about 1 inch) for visual interest and water runoff. It's the easiest to excavate, the easiest to keep level, and the most forgiving if you make a small measurement mistake. Great for raised patios where the grade drops 18 inches or less.
Wraparound or return steps
A wraparound step extends past both ends of the main stair run and returns back toward the patio on each side, forming a U-shape or wide apron. These look expensive and architectural but add real cutting and corner work. If you want this look, plan for it from the start because the corner miters and returns need to be mapped out during layout, not figured out on the fly.
Curved or radius steps
Curved steps use a radius layout that sweeps out from the patio edge in a gentle arc. They look great with round or freeform patios and soften a formal straight-edged space. The trade-off is significant cutting. You'll be shaping a lot of pavers to maintain consistent joint widths around the curve. This is a realistic DIY project if you're renting a wet saw, but budget extra time and extra pavers (around 15 percent overage versus the standard 10 percent).
Broad landing steps with side wings
This design features one or two deep landing steps flanked by low paver walls or planted side wings. The landings are wide enough to feel like a small patio themselves, which works well for entries where people tend to pause and chat. Structurally it's similar to straight stacked steps, but you're building more horizontal square footage per step.
Floating or garden steps through a slope
Rather than connecting two patio levels, these steps cut through a lawn or planted slope with each tread appearing to float in the grade. You excavate into the hillside, set each tread individually on its own compacted base, and let the surrounding soil or groundcover frame each paver. They're more relaxed in feel, lower in height per step, and work beautifully on gentle-to-moderate slopes. They do need excellent drainage planning since each tread can collect water if not pitched correctly.
Choosing the right step height, tread depth, and overall slope
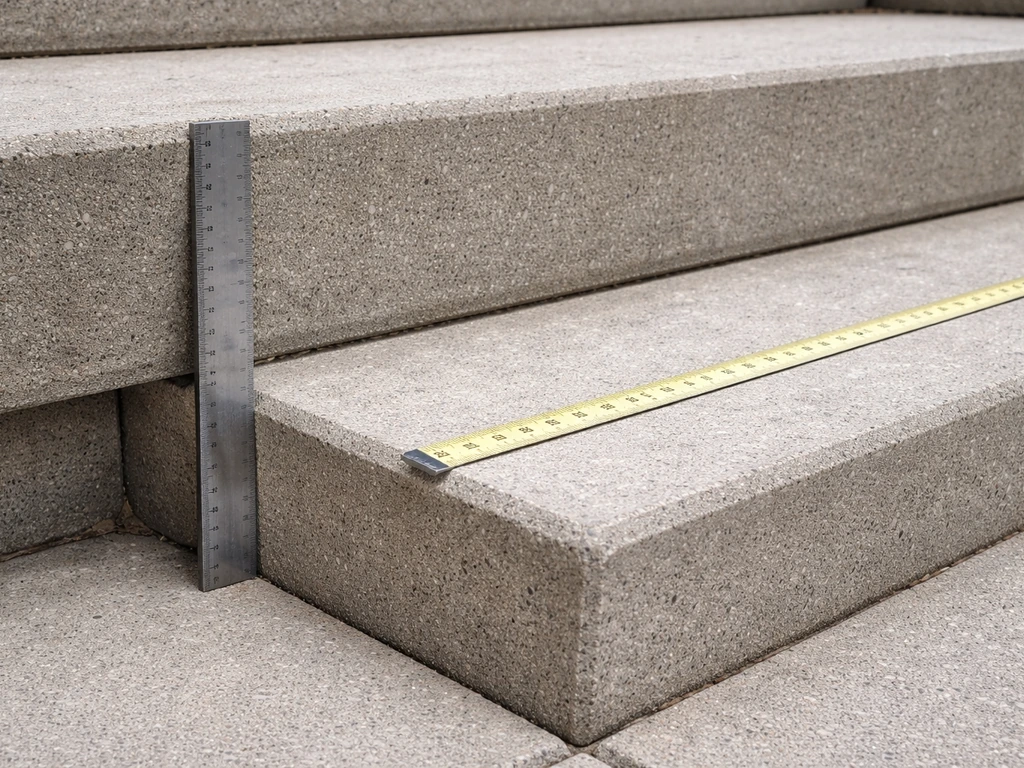
Dimensions matter more here than almost anywhere else in a patio project. Get them wrong and the steps feel awkward, tire people out, or become a tripping hazard. Most residential building codes and standard masonry guidelines land on the same comfortable zone: risers between 6 and 7 inches tall, treads at least 12 inches deep. A tread-to-riser ratio that many builders use as a checkpoint is 2R + T = 26 inches (where R is riser height and T is tread depth). So a 6.5-inch riser works well with a 13-inch tread (2 x 6.5 + 13 = 26).
Consistency is the most important rule. Every riser in a run must be exactly the same height. A half-inch variation is enough to make someone stumble. Measure your total rise (the vertical drop from the patio surface to the lower grade) and divide by your target riser height to get the number of steps. Then check whether the math works out evenly. If your total rise is 14 inches and you want 7-inch risers, you get exactly 2 steps. If you get a decimal, adjust your riser height slightly until it divides cleanly.
| Total Rise | Riser Height | Number of Steps | Recommended Tread Depth |
|---|---|---|---|
| 6–7 inches | 6–7 inches | 1 | 14–16 inches (single landing) |
| 12–14 inches | 6–7 inches | 2 | 12–14 inches |
| 18–21 inches | 6–7 inches | 3 | 12–14 inches |
| 24–28 inches | 6–7 inches | 4 | 12–14 inches |
For the tread surface itself, you want a slight forward pitch: about 1/8 inch per foot toward the leading edge. That's barely noticeable when you're walking but enough to shed water and prevent ice pooling in winter. If you're building floating garden steps on a slope, keep each individual tread level side-to-side but maintain that small front-to-back pitch.
Planning the patio-to-step transition
How your steps connect to the patio depends entirely on what kind of patio you have. Raised, sunken, sloped, and uneven-ground scenarios each need a slightly different approach before you lay a single paver.
Raised patio
A raised patio typically has a defined edge, often retained by a wall or simply graded away. Your steps descend from the patio surface down to the yard. The patio-to-step connection point needs to be planned during patio installation (or retrofitting if the patio already exists). The bottom course of the step structure should sit on the same compacted base as the patio itself, not just on top of existing sod or soft soil. If you're adding steps to an existing patio, you'll excavate down alongside the patio edge and tie the step base into undisturbed compacted ground.
Sunken patio
Sunken patios are surrounded by grade, so steps descend from the yard down into the patio. The transition is essentially reversed: you're cutting into the surrounding slope to create your step excavation. Drainage is the critical concern here because water naturally wants to flow into the low point. Build your base with a slight slope away from the patio on all step treads and make sure your overall drainage plan moves water out of the sunken area before it can pool.
Sloped ground
A sloped yard often means your patio sits at varying heights relative to the surrounding grade. Map the slope with a string line and level before you do anything else. Identify the high point and the low point, calculate your total vertical change, and use that as your rise. Steps built into a slope frequently need more excavation on the uphill side and more fill compaction on the downhill side to create a level pad for each tread.
Uneven or irregular ground (including over grass)
If you're working over grass, uneven terrain, or an area with variable soil conditions, the rule is simple: never lay a step base directly on sod or soft organic soil. Strip all vegetation, excavate to mineral soil, and compact before you do anything else. Uneven ground also makes it tempting to compensate with extra sand under a tread, resist this. PaverSupply’s installation instructions also specify spreading bedding sand to a uniform depth of about 1 to 1.5 inches over the compacted base up to the edge restraint. Sand is a bedding layer, not a leveling tool for big discrepancies. Any unevenness in the base must be corrected at the base level before bedding sand goes down.
DIY installation: site prep, base, and edging for steps

This is where the project actually begins and where most mistakes happen. A good base makes everything else easier. A bad base means your steps settle, crack, and tilt within a season or two. This guide breaks down installing paver patio steps, from base and edging to finishing checks for drainage and safety grip your steps settle, crack, and tilt within a season or two.
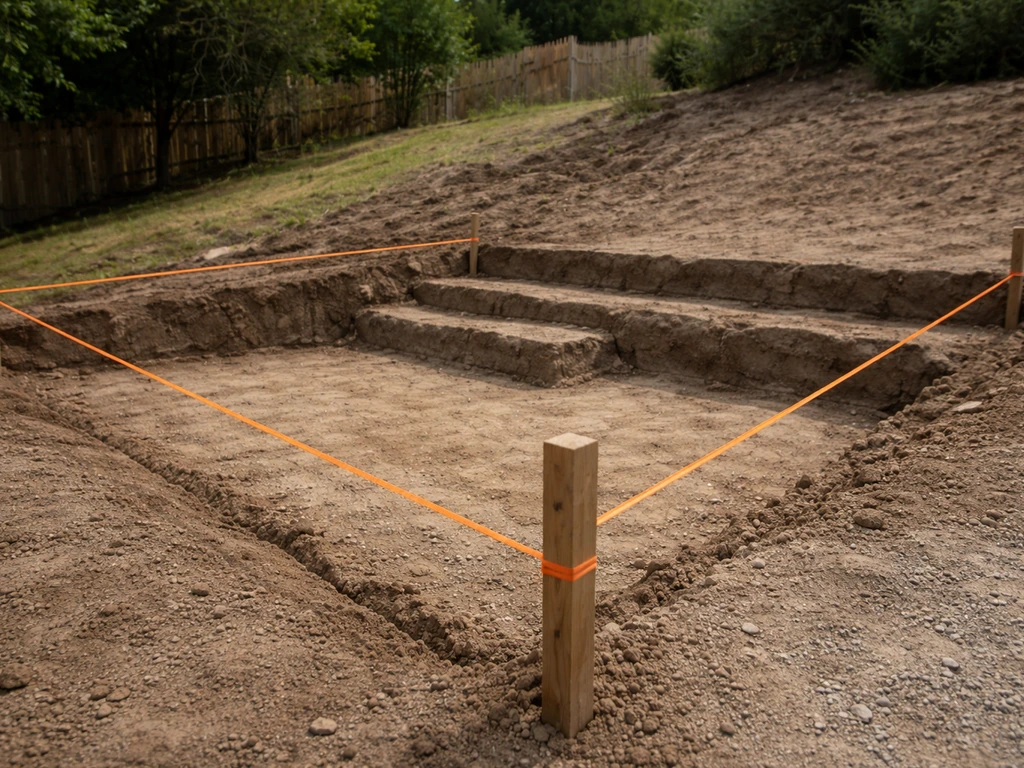
- Mark your step footprint with spray paint or stakes and string. Include the full depth of every tread plus about 6 inches beyond the leading edge of the bottom step.
- Excavate the entire footprint to the correct depth. For most residential paver steps, that means removing sod and soil to a depth of 6 to 8 inches below your finished tread surface (4 to 6 inches for compacted aggregate base, plus 1 inch of bedding sand, plus paver thickness — typically 2.375 inches for standard 60mm pavers).
- Compact the subgrade with a plate compactor. If the soil is soft or clay-heavy, consider adding a layer of geotextile fabric before the gravel to prevent migration.
- Add crushed stone aggregate (crushed limestone or recycled concrete works well) in 2 to 3-inch lifts, compacting each lift before adding the next. Target a total compacted base depth of 4 inches for stable soils or 6 inches for poor drainage or heavy clay.
- For the step risers, you'll build a small retaining structure first. Set your first course of pavers (laid flat or on edge depending on your riser design) on the compacted base. These become the front face of the bottom riser. Check them for level and alignment before proceeding.
- Install edge restraints along the sides of your step run. Plastic paver edging spiked into the base keeps everything from spreading laterally. Steps are under more stress than flat patio areas because of the vertical load, so don't skip the edging.
- Spread bedding sand to a uniform depth of 1 to 1.5 inches over the compacted base. Use screed rails or pipe sections as guides to pull the sand to a consistent depth. Do not walk on screeded sand before laying pavers.
Tools you'll need for this phase: a spade and flat shovel, a wheelbarrow, a plate compactor (rent this, it's worth it), a level, a tape measure, stakes and string line, and screed pipes or straight 2x4 for leveling sand. Budget a full day just for excavation and base work if your step run is more than 4 feet wide or involves 3 or more steps.
Cutting, fitting, and pattern alignment for step lines and corners
Pattern selection for steps isn't just aesthetic, it directly affects structural integrity. The most important rule is that joints should never align vertically between the riser face and the tread above it. Stagger your joints so the tread pavers overlap the riser joints by at least one-third of the paver length. This locks the structure together and prevents individual pavers from kicking out over time.
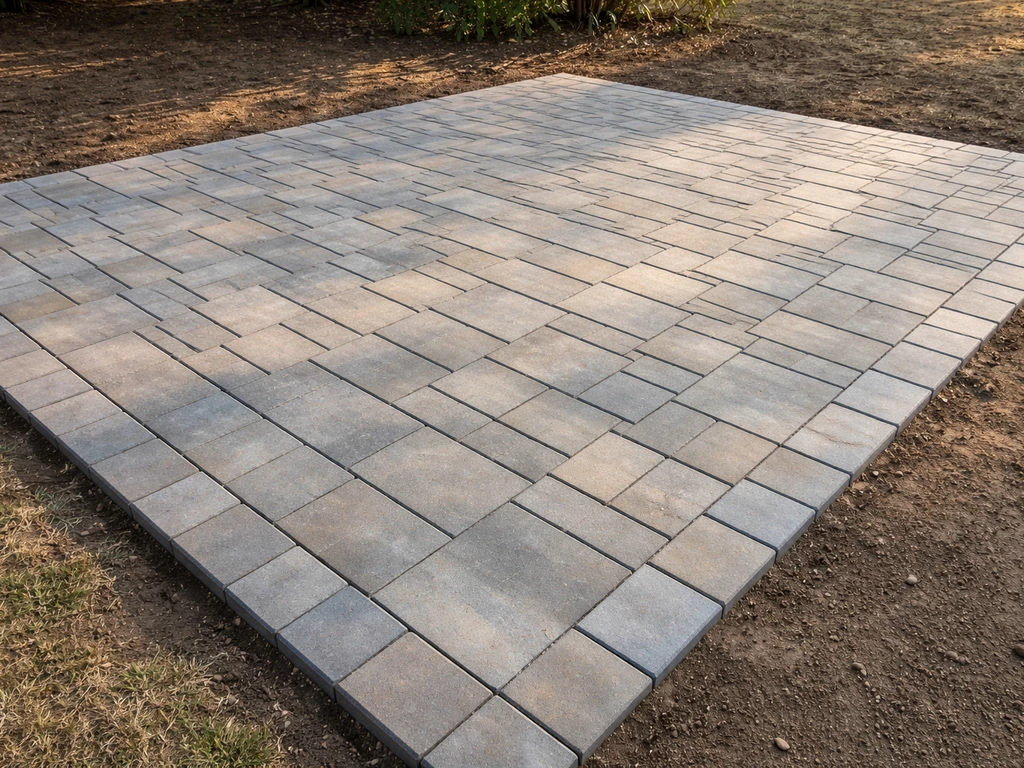
Common tread patterns
- Running bond (offset rows): Easy to cut and lay, great for straight steps, strong joint stagger by default.
- Stack bond (grid): All joints line up — avoid this for structural step applications.
- Basket weave or herringbone: Visually interesting on wide treads, requires more cuts but adds character.
- Single large-format pavers: One paver per tread, minimal cuts, very clean modern look — works best when the tread depth matches the paver dimension exactly.
For cutting, a wet saw (tile or masonry saw with a diamond blade) gives you clean, accurate cuts on concrete pavers. A circular saw with a diamond blade works for straight cuts on thinner pavers but produces a lot of dust, always wear a respirator and eye protection. For curved steps or radius corners, mark your cut line with a pencil on the face of the paver and make incremental cuts rather than trying to freehand a curve in one pass.
Handling corners and returns
Corner and return cuts are where wraparound and L-shaped step designs get tricky. The cleanest approach is a 45-degree miter at external corners so both faces show a finished edge with no raw cut visible. Mark both pieces, dry-fit them before cutting, and check the angle with a speed square. For internal corners (where a step returns back to a wall or patio edge), a straight butt joint with a tight fit is fine since that joint won't be a focal point.
Dry-fit the entire step layout before you set anything in sand. This is the step most first-time builders skip, and it's the one that saves the most headaches. Lay everything out on a flat surface or in place without adhesive, stand back, check the pattern alignment, and mark any pieces that need trimming. Numbering the pavers with chalk as you dry-fit makes reassembly much faster.
Keeping step lines straight
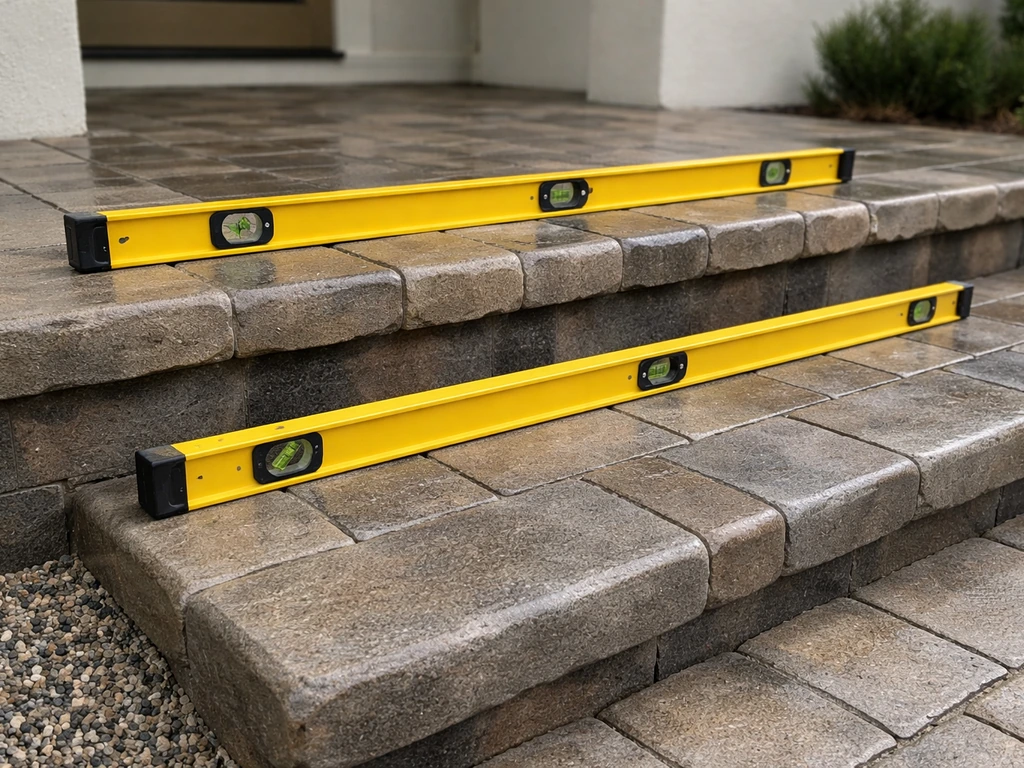
Run a string line along the front edge of each tread course at the correct height. This is your reference point. Every paver should just kiss the string without pushing it. Check your lines every 3 or 4 pavers rather than laying a full row and then checking, small drifts compound quickly. A 4-foot level on top of each tread row also catches any side-to-side tilt before it gets buried under the next course.
Finishing: leveling checks, sealing, drainage, and safety grip
Once all the pavers are set, the finishing steps determine whether your steps look professional and hold up over time. Don't rush this phase, it only takes a few hours but it protects everything you've built.
Final leveling check
Check every tread with a 4-foot level, both along the tread and across it side-to-side. You're looking for a slight forward pitch (1/8 inch per foot toward the leading edge) and a perfectly level reading side-to-side. If a paver is high, tap it down with a rubber mallet. If it's low, lift it, add a small amount of bedding sand underneath, and reset. Never use mortar to fill under a low paver as a shortcut, it doesn't bond properly to dry-laid pavers and will crack.
Jointing with polymeric sand
Sweep polymeric sand into all joints until they're filled to within about 1/8 inch of the surface. Use a plate compactor with a rubber pad over the tread pavers to vibrate the sand down into the joints, do one pass, add more sand, repeat until joints are consistently filled. Then mist the surface with water according to the polymeric sand manufacturer's instructions. This activates a binding agent in the sand that hardens the joints, resists washout, and discourages weed growth. Do this on a dry day with no rain forecast for at least 24 hours.
Drainage considerations
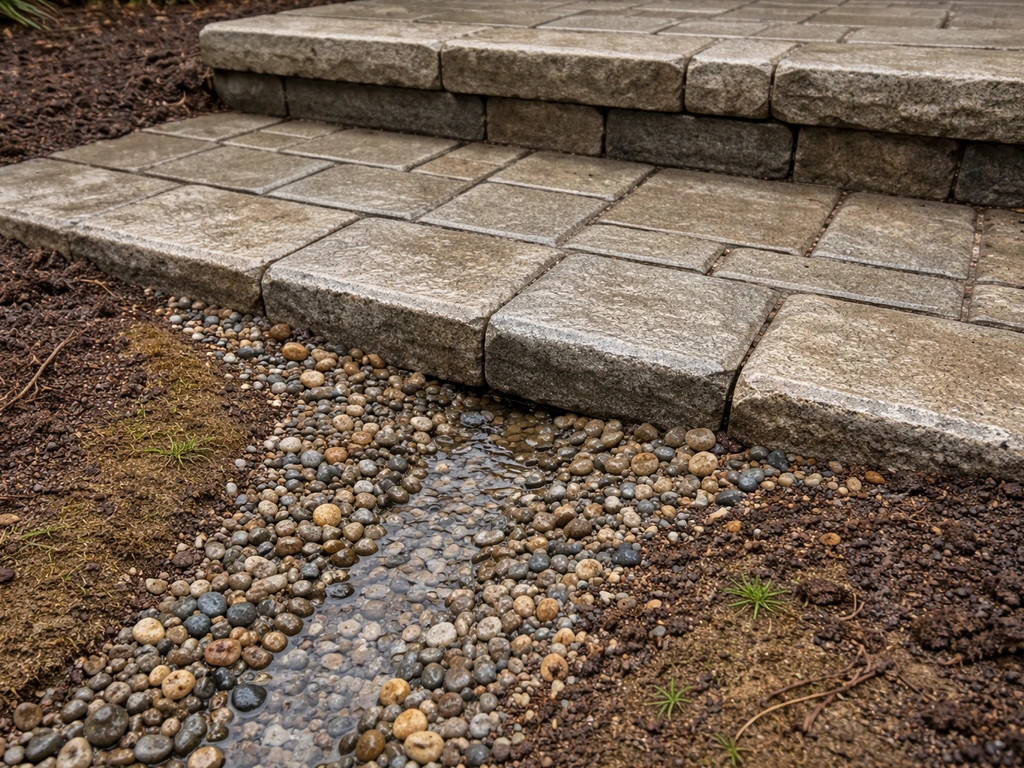
Water is the main enemy of paver steps over time. Make sure the ground-level area at the base of your steps drains away from the structure, not toward it. If water pools at the base of your steps after rain, you'll likely see settling and erosion within a year or two. A simple solution is to extend the compacted base a foot or so beyond the bottom step and slope the surrounding grade away at a minimum of 1/4 inch per foot. For more serious drainage situations (heavy clay soil, high rainfall areas, sunken patios), a perforated drain pipe at the base of the step structure connected to a daylight outlet is worth the extra work.
Sealing
Sealing paver steps is optional but strongly recommended for high-traffic areas and anywhere with freeze-thaw cycles. Wait at least 30 days after installation before sealing, the pavers need time to cure and any efflorescence (white salt deposits) to work its way out. Clean the surface with a paver cleaner, let it dry completely, then apply a penetrating or film-forming sealer with a roller or pump sprayer. A matte or satin finish looks most natural. Reapply every 3 to 5 years depending on traffic and climate.
Safety grip and anti-slip measures
Smooth paver surfaces can be slippery when wet, especially on steps. A few ways to address this: choose a textured or tumbled paver finish for treads rather than a smooth one, apply a sealer with an anti-slip additive (fine silica sand mixed into the sealer), or install thin non-slip strips along the leading edge of each tread. Tread pavers with a brushed or exposed aggregate finish also provide natural grip. If you're building steps for elderly family members or high-foot-traffic areas, a handrail anchored to a low paver wall or post set in concrete beside the steps is worth considering for any run of 3 or more steps.
Realistic expectations: tools, time, and common mistakes
A 2-step straight paver step run (about 4 feet wide) is a solid weekend project for one or two people with basic DIY experience. A 3- to 4-step run with returns or curves is more like a 2-weekend project, especially if you're renting a wet saw and learning as you go. Don't underestimate the excavation and base work, that phase alone often takes as long as the actual paver laying.
- Most common mistake: skimping on the base depth. Four to six inches of compacted aggregate isn't optional — it's what keeps your steps from settling unevenly after the first winter.
- Second most common mistake: inconsistent riser heights. Measure every course before you lock it in. One low course throws off every step above it.
- Third: using bedding sand to fix a bad base. Sand is a bedding material, not a leveling compound. Fix base problems at the base level.
- Fourth: not checking for drainage at the base of the steps before calling the project done. Test it with a garden hose before you clean up.
- Fifth: starting to lay pavers before doing a full dry-fit. Dry-fitting takes an hour and saves a day of rework.
The DIY installation process for paver steps shares a lot of foundation with a full paver patio project, the base layering, bedding sand depth (typically 1 to 1. ICPI’s Tech Spec notes that bedding sand is normally 1 to 1.5 inches thick (25 to 40 mm) for concrete pavers bedding sand depth (typically 1 to 1. 5 inches). Follow the same paver patio instructions for base, bedding sand, and joint filling when you’re building steps as part of a larger patio full paver patio project. 5 inches), compaction, and joint filling all follow the same logic. If you're building steps as part of a larger patio project, plan them together so the base work and edging tie in cleanly from the start. Adding steps as an afterthought to an existing patio is doable but requires more careful integration at the transition point.
When in doubt on dimensions, local building codes are your final authority. Most jurisdictions require permits for structural retaining walls over a certain height, and steps that are part of a permitted patio may need to meet specific riser and tread dimensions. A quick call to your local building department before you start takes five minutes and can save you from having to redo work later. For anything beyond 4 steps or a total rise over 28 inches, it's also worth consulting a landscape contractor for at least a planning conversation before committing to a design.
FAQ
Can I use smaller pavers or only full-sized pavers for patio paver steps ideas?
You can use smaller pavers, but you need tighter joint control because the “lock together” effect depends on how well tread joints overlap riser joints. If you switch sizes, re-check that overlap still covers at least one-third of the tread paver length, and plan more frequent dry-fits to keep tread edges aligned to your string line reference.
What bedding sand depth should I use under the tread pavers on steps?
Use the bedding sand depth that matches the same logic as a patio install, typically about 1 to 1.5 inches. For steps, keep it consistent across every tread course, because extra sand on one side will change height and make the forward pitch uneven. If you need more correction than bedding sand can provide, adjust the compacted base instead.
How do I calculate the number of steps if my total rise does not divide evenly?
Confirm your total rise from patio finished surface to the lower finished grade, then divide by your target riser height. If you get a fraction, adjust the riser height slightly so all risers match perfectly, rather than keeping one “odd” step. Also re-check that the resulting tread depth still lands at least 12 inches so your steps do not feel cramped.
Is mortar ever acceptable for patio paver steps?
Mortar is not recommended for filling under individual pavers as a leveling shortcut because it can crack and break the dry-laid behavior over freeze-thaw cycles. Mortar is only appropriate in limited structural situations, like anchoring a handrail base or certain edging assemblies, and even then it should be specified for that use rather than applied broadly under treads or risers.
How can I avoid weeds and joint washout on paver steps?
The two big drivers are joint fullness and proper compaction after polymeric sand application. Fill joints until the sand is nearly flush but not mounded, compact once, add more sand, repeat, then mist with water only as directed and on a dry schedule. If your drainage is poor and water repeatedly stands at the base, even good polymeric sand can fail faster.
What should I do if I’m building steps on clay soil or a wet site?
Plan for better drainage and more stable base than you would on average soils. Strip to mineral soil, then compact in lifts, and consider extending the base farther beyond the bottom step. On heavier sites or sunken conditions, add a perforated drain pipe at the toe and route it to daylight so hydrostatic pressure does not push the pavers upward or cause joint loss.
How do I maintain a consistent pitch on curved steps?
Keep each tread paver level side-to-side, then maintain the front-to-back pitch by measuring relative to your string line or a simple pitch jig. On curves, don’t rely on visual alignment alone, measure every few pavers, and expect to adjust individual cut pieces so the joint thickness remains consistent while preserving the pitch.
Do I need a handrail on patio paver steps ideas, and when is it worth it?
If you have a run of 3 or more steps, steep total rise, or you’re building for seniors or mobility challenges, a handrail is worth adding even if code in your area is unclear. Anchor it to a stable element like a low wall or posts set in concrete beside the steps, not into loose pavers that can shift with settling.
How soon can I seal paver steps after installation?
Wait at least 30 days so the pavers cure and any efflorescence can dissipate. If you seal earlier, moisture trapped under the surface can lead to blotchiness or hazing. Also make sure joints are fully set from polymeric sand (or fully cured if you used another system) before sealing.
What’s the most common DIY mistake that causes settling on paver steps?
Most failures trace back to the base being laid on sod, soft organic soil, or unevenly compacted ground, often due to skipping thorough excavation and plate compactor passes. Another common issue is trying to correct big height errors with extra sand under a few pavers, which creates local movement when loads and water cycles repeat.
Paver patio step by step DIY guide: plan, prep, base, leveling, edging, pavers, cuts, sand joints, sealing and troublesh

Step-by-step guide to apply patio paver sand correctly: prep base, set pavers, fill joints, compact, and troubleshoot is

DIY step-by-step how to install patio pavers in sand, from excavation and base prep to leveling, cutting, joint sand and