You can build a durable paver patio yourself in a weekend (or two) if you follow the right sequence: plan and measure, excavate and compact, lay a gravel base, screed bedding sand, set your pavers in the chosen pattern, cut the edges, lock everything in with polymeric sand, and seal. Get that order right and you end up with a level, well-draining patio that won't shift or sink. Rush past the base work and you'll be pulling pavers up two summers from now. This guide walks you through every step, including common problem scenarios like grass, uneven ground, concrete, and slopes. Follow these paver patio instructions to plan the base, set the pattern, and finish with joint sand and sealing This guide walks you through every step.
Paver Patio Step by Step: DIY Installation from Start to Finish
Felix Rowe
13 May 2026
Planning and measuring your paver patio
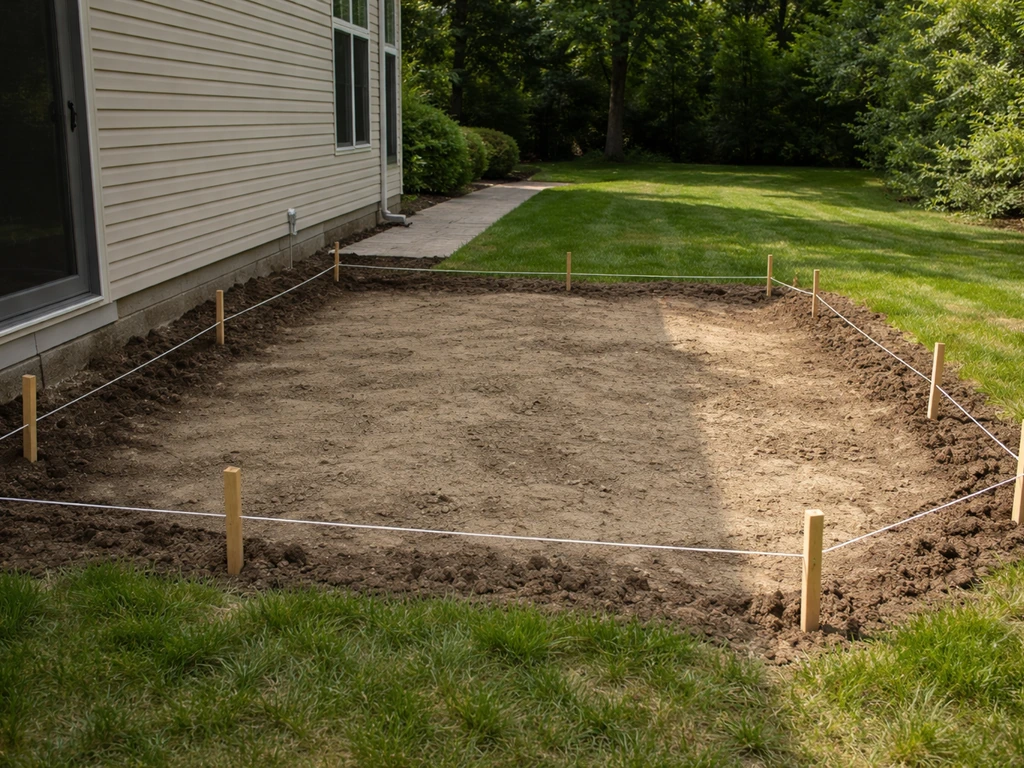
Before you touch a shovel, spend real time on layout. Mark your patio perimeter with stakes and string, then step back and look at it from the house and yard. You'd be surprised how often people change the shape at this stage, which costs nothing now but a lot later. Measure the area carefully and add 5–10% to your paver order to cover cuts and breakage.
The most important planning decision besides size is drainage. Your patio needs to slope away from the house at 1/8 to 1/4 inch per foot. A practical target is about 1 inch of drop for every 8 feet of patio depth. To verify this during installation, tie a string line level at the high side (near the house) and measure the drop at the far edge. That built-in pitch keeps water moving off the surface and away from your foundation.
Also think about how the patio will connect to the house. If you're adding steps down to grade, or building a raised patio, those features affect your excavation depth and total materials. Before you dig anything, call 811 (or your local utility marking number) at least two days in advance to get underground lines flagged. This is not optional.
- Sketch your patio to scale and note the slope direction on the drawing
- Mark corners with stakes, run string lines, and check that corners are square using the 3-4-5 triangle method
- Measure the drop from string line to ground at the far edge to confirm your drainage slope
- Calculate square footage, then add 5–10% for cuts and waste
- Call 811 at least 2 days before excavation to locate utilities
Tools, materials, and product choices
You don't need a contractor's arsenal, but a few tools are non-negotiable. A plate compactor (rent one for about $75–100/day) is the single most important piece of equipment. Hand tamping a base is not adequate for a stable patio. A wet saw or angle grinder with a diamond blade handles cuts. Everything else is basic.
Tools you'll need
- Plate compactor (rental)
- Wet saw or angle grinder with diamond blade
- Sod cutter or flat spade (for grass removal)
- Tamper (hand, for tight spots near edges)
- Wheelbarrow
- Level and long straightedge (at least 6–8 ft)
- String lines and stakes
- Tape measure
- Rubber mallet
- Screed pipes and board (1-inch diameter pipes work well)
- Push broom and leaf blower
- Safety glasses, gloves, knee pads
Materials and products
| Material | What to Get | Notes |
|---|---|---|
| Pavers | Concrete, natural stone, or clay brick | Concrete pavers are most DIY-friendly; consistent thickness makes screeding easier |
| Gravel base | Crushed stone (3/4-in. clean or processed gravel) | 3–4 in. compacted for pedestrian patios; 4–5 in. for heavier use |
| Bedding sand | Coarse concrete sand (not play sand) | Screeded to 1 in. uncompacted; never use fine or masonry sand |
| Edging | Plastic or aluminum paver restraints with spikes | Metal holds better on curves; plastic fine for straight runs |
| Joint filler | Polymeric sand | Choose a brand with clear manufacturer instructions; activates with water |
| Sealer (optional) | Paver sealer (wet-look or natural finish) | Enhances color, slows staining, re-apply every 3–5 years |
| Geotextile fabric (optional) | Non-woven landscape fabric | Useful over soft or organic soils to prevent base migration |
On paver selection: concrete pavers are the most practical choice for a first DIY project. They come in consistent thicknesses, take cuts cleanly, and cost $3–8 per square foot depending on style. Natural stone looks beautiful but varies in thickness, which makes screeding much harder. If you're planning patio steps alongside your patio, matching the paver material keeps the whole project looking intentional.
Site preparation and base removal
This is where most DIYers either nail it or create future problems. The goal is a stable, well-compacted subgrade that won't settle unevenly after your pavers go down.
Removing existing material
If you're starting over grass, rent a sod cutter to strip vegetation cleanly. Remove the sod, then excavate to your target depth. For a standard pedestrian patio you need roughly 7–9 inches of total depth: 3–4 inches of compacted gravel, 1 inch of bedding sand, plus the paver thickness (typically 2.375–3.125 inches for standard concrete pavers). Add about half an inch extra so the finished surface sits just above grade. Mark your excavation depth on your stakes and stay consistent.
Laying over concrete is a different situation. If the existing slab is in decent shape (no major cracks or heaving), you can lay pavers directly on top using a thin bedding sand layer, but you'll lose elevation and may create a tripping hazard at doors and transitions. You also lose the ability to re-grade for drainage. For a long-term result, breaking up and removing the old slab is usually worth it. If you do lay over concrete, check that the slab already drains away from the house and factor the added height into your edge and door thresholds.
Compacting the subgrade
Once you've excavated, run the plate compactor over the entire subgrade. The soil should be slightly moist, not wet: a handful should form a ball when squeezed, then break into a few pieces when dropped from about 6–12 inches. If the soil is too dry, lightly mist it. If it's muddy and your feet sink in, stop and let it dry, or you'll just be compacting wet mush that will settle later. The goal is at least 95–98% compaction density. Rent a soil compaction gauge if you want to verify, but for most residential patios, two passes with a plate compactor on adequately moist soil is sufficient.
If your subgrade is very soft, organic, or filled with old roots, lay a non-woven geotextile fabric over it before adding gravel. The fabric separates the soil from your base aggregate and prevents fines from migrating up and contaminating your base over time.
Base installation: gravel, subgrade, and edging
The base is what keeps your patio level years down the road. Don't rush it. This stage is unglamorous and invisible once you're done, but it does all the structural work.
Adding and compacting gravel
Spread your crushed stone base in 2–3 inch lifts, compacting each lift before adding more. Trying to compact 6 inches all at once leaves the bottom layer loose. For a pedestrian patio, aim for 3–4 inches of compacted base. Use your string lines to check that the gravel surface mimics your finished slope (1/8 to 1/4 inch per foot away from the house). Rake and adjust before compacting so you're not chasing high spots after the fact.
Installing edge restraints
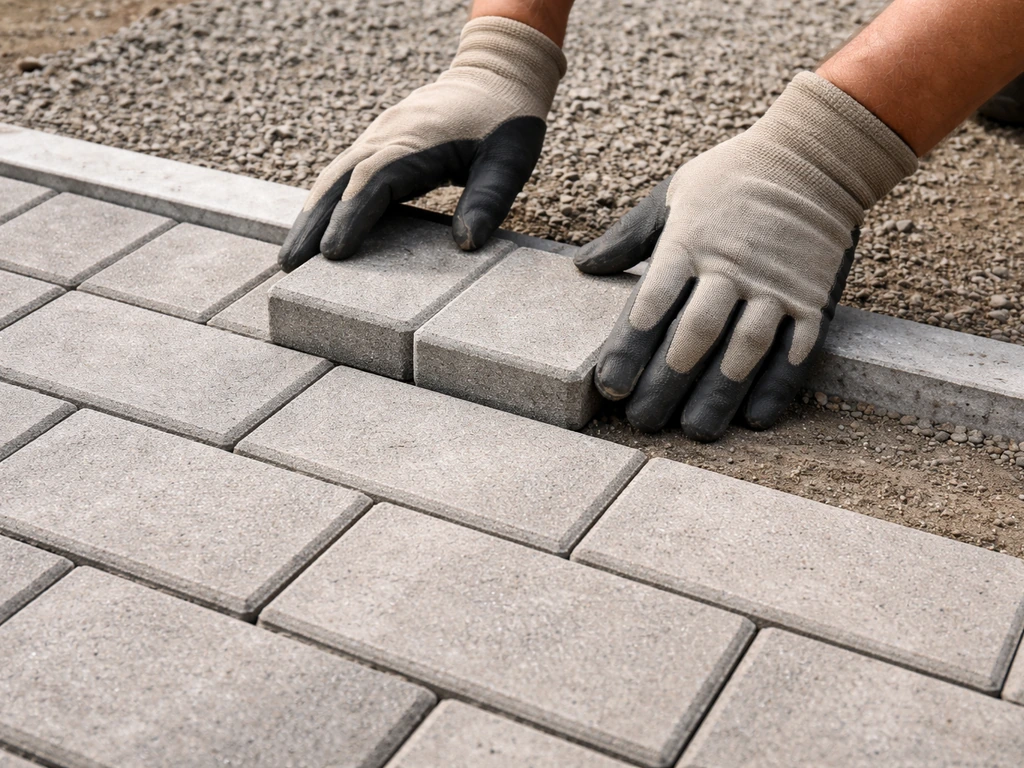
Install your plastic or aluminum edge restraints before you spread bedding sand. Restraints go on the compacted gravel, positioned at the outer edge of where your pavers will sit. Spike them down every 12 inches. This step is critical: without restraints, pavers gradually creep outward under foot traffic, joints open up, and bedding sand escapes. There's no fixing that without pulling everything apart. Set your edging at the correct height to hold the finished paver surface just above grade.
Screeding bedding sand
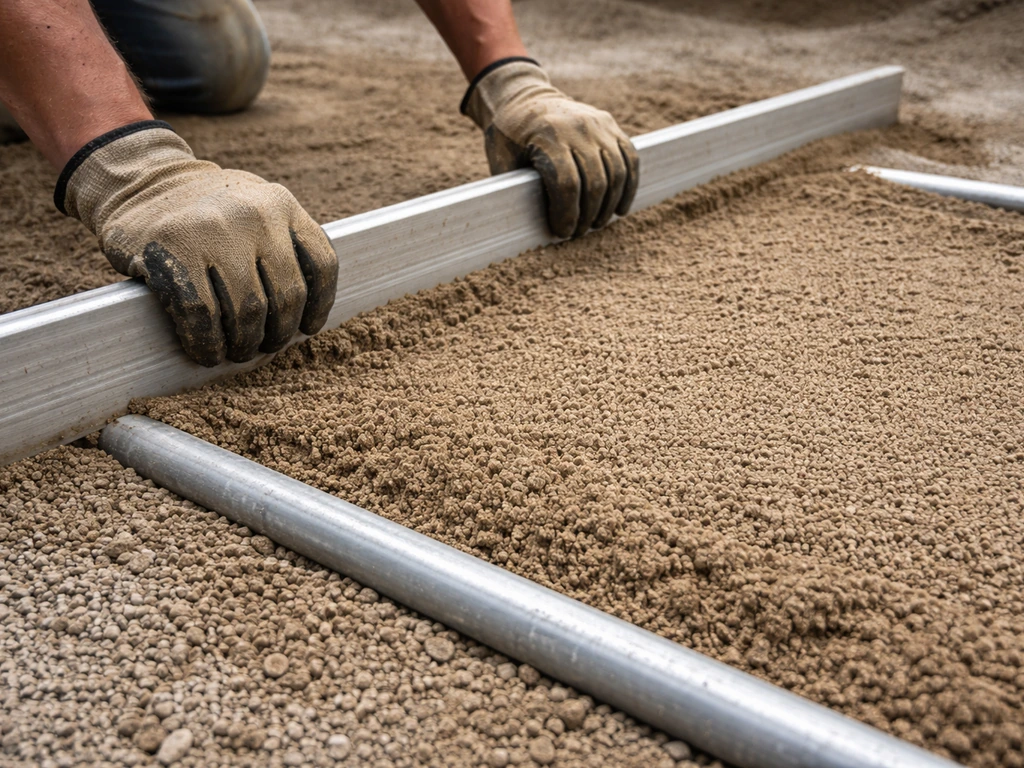
Spread coarse concrete sand over your compacted gravel base to a depth of about 1 inch (uncompacted). Use 1-inch diameter pipes laid parallel across the base as screed guides, set to your desired finished grade. Pull a straight 2x4 across the pipes to level the sand. Remove the pipes and fill the channels with sand, smoothing them out. Do not walk on or disturb the screeded sand surface before laying pavers. Once it's screeded, you start laying immediately.
Keep bedding sand thickness at 1 inch. Going thicker (more than 1.5 inches) creates an unstable layer that compresses unevenly underfoot and causes rocking pavers. Thinner than 1/2 inch and you lose the ability to fine-adjust individual pavers.
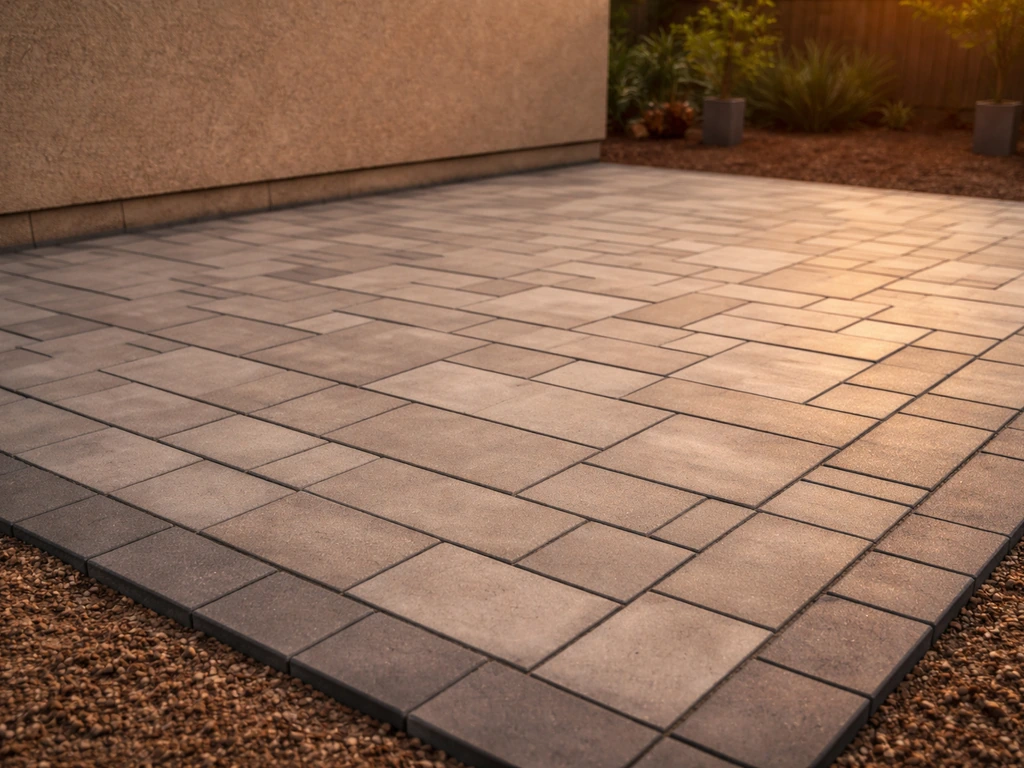
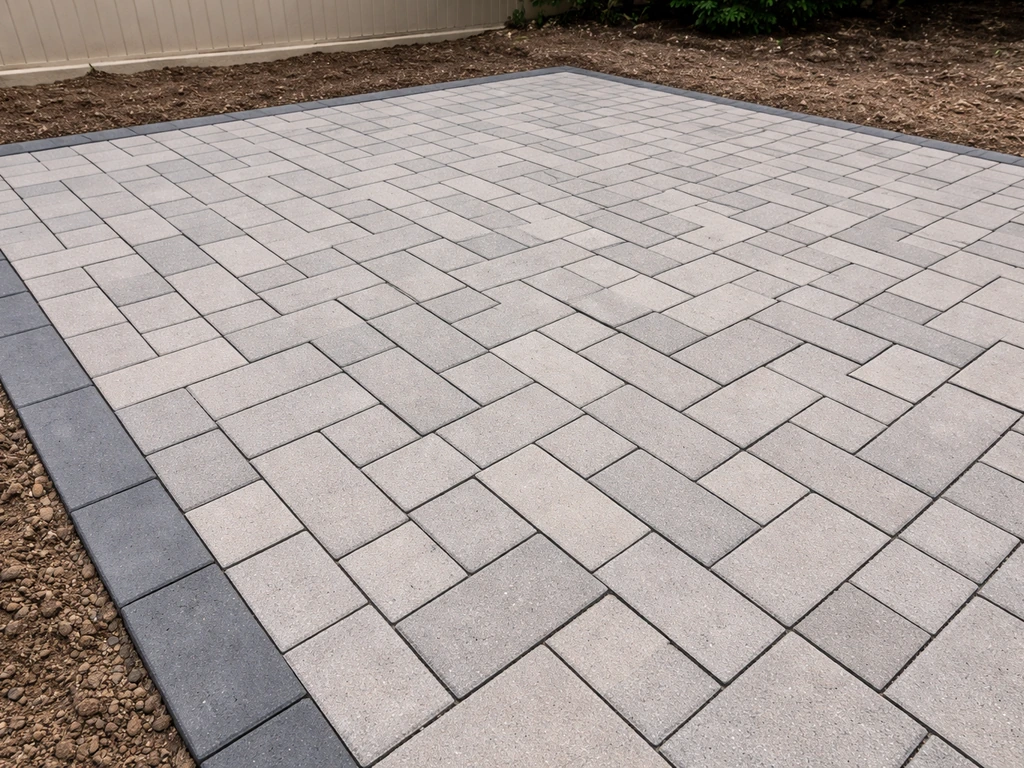
Laying pavers: pattern setup, installation, and cutting
Now for the part everyone is excited about. The key is to start from the right corner, work in a consistent direction, and never disturb your screeded sand as you go.
Choosing and setting up your pattern
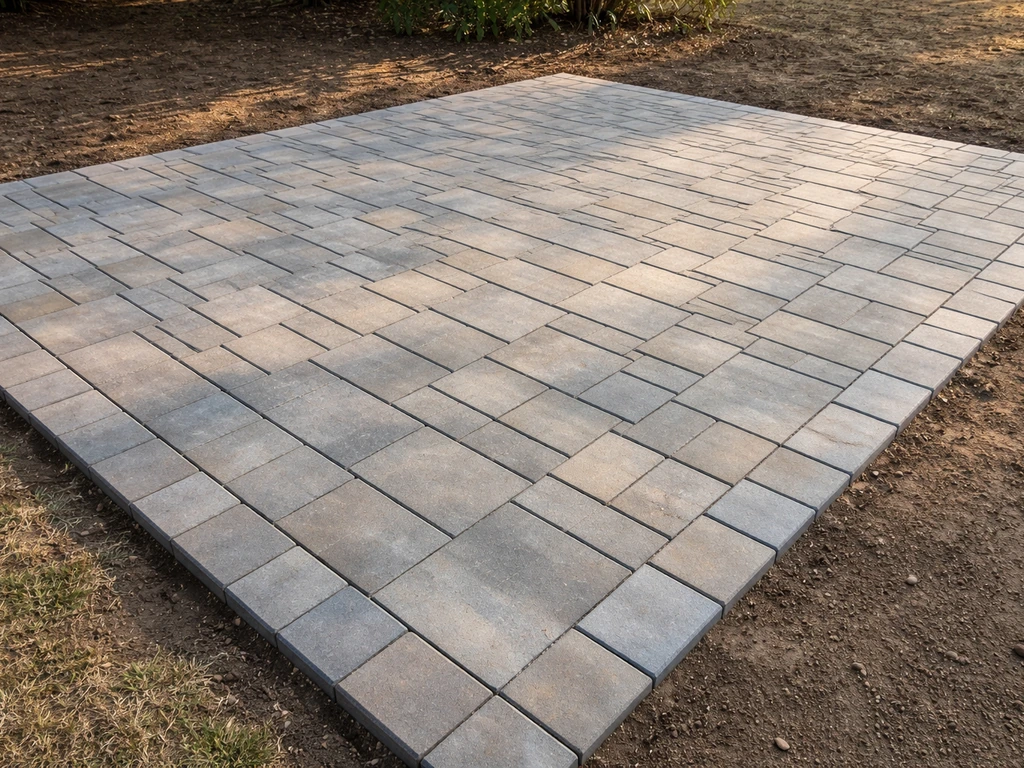
Running bond (rows offset by half a paver) is the most forgiving pattern for beginners and requires fewer cuts. Herringbone at 45 degrees is stronger for areas with wheeled traffic but produces more cuts. Basketweave looks great but is unforgiving if your pavers aren't perfectly consistent in size. Whatever pattern you choose, do a dry run along one edge to check spacing before you start laying in earnest. Most concrete pavers are designed with small built-in spacer nibs, so you don't need to add spacers manually.
Placing pavers
Start at a straight edge or corner, working outward and never kneeling on laid pavers (use a piece of plywood to distribute your weight). Set each paver straight down, not sliding it across the sand, which displaces the bed. Tap each paver lightly with a rubber mallet to seat it. Periodically check your layout with a long straightedge and your level. Minor height differences between adjacent pavers are normal at this stage; you'll address them before compacting. Keep joints tight and consistent throughout.
Cutting pavers for edges and obstacles
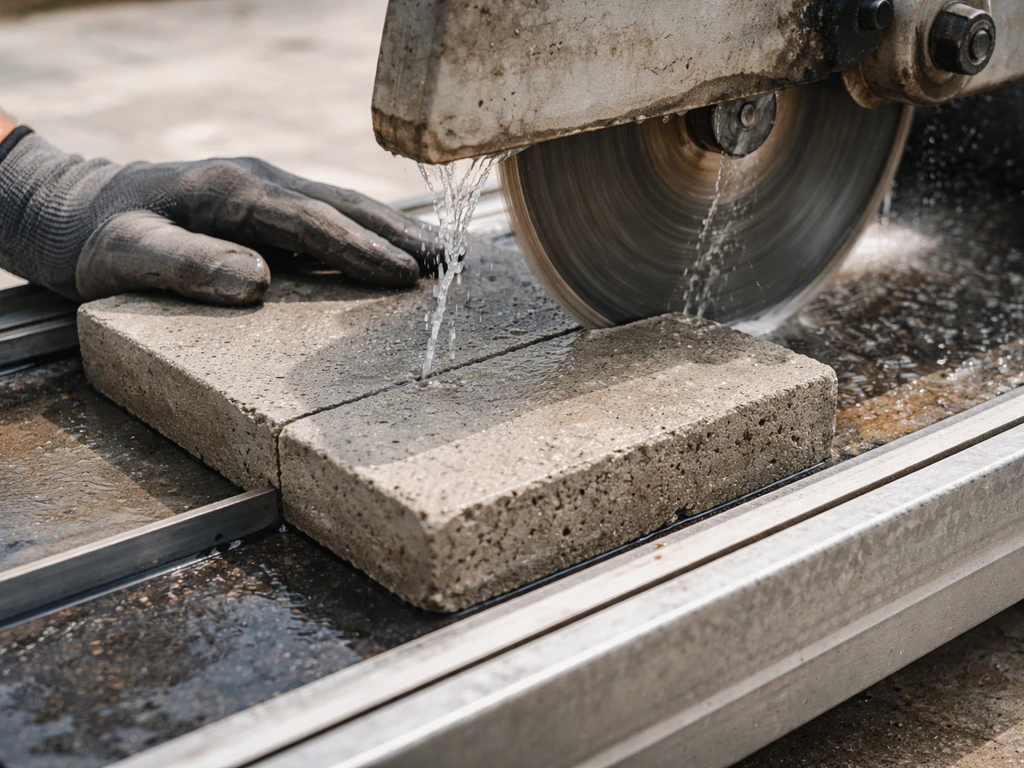
Save all cutting for after you've laid full pavers across the whole area. Mark your cuts with a pencil or chalk line, then use a wet saw for clean cuts or an angle grinder with a diamond blade for quick straight cuts. Wear safety glasses and ear protection. For curves or rounded features like a fire pit area, score the cut line first and make multiple passes. Avoid cuts smaller than about 1/3 of a paver; tiny slivers don't stay stable. Adjust your layout slightly to avoid them.
Finishing details: leveling, joint sand, sealing, and cleanup
Final leveling and compaction
Once all pavers are laid and cut edges are placed, run the plate compactor over the entire surface. Use a rubber or plastic pad under the plate to avoid scratching paver faces. Make two or three passes in different directions. This seats all pavers firmly into the bedding sand and brings the surface to a consistent, even plane. After compacting, check the surface with your long straightedge. Any pavers that are still high can be tapped down; low ones need to come up so you can add a little sand underneath, then reset and recheck.
Applying polymeric sand
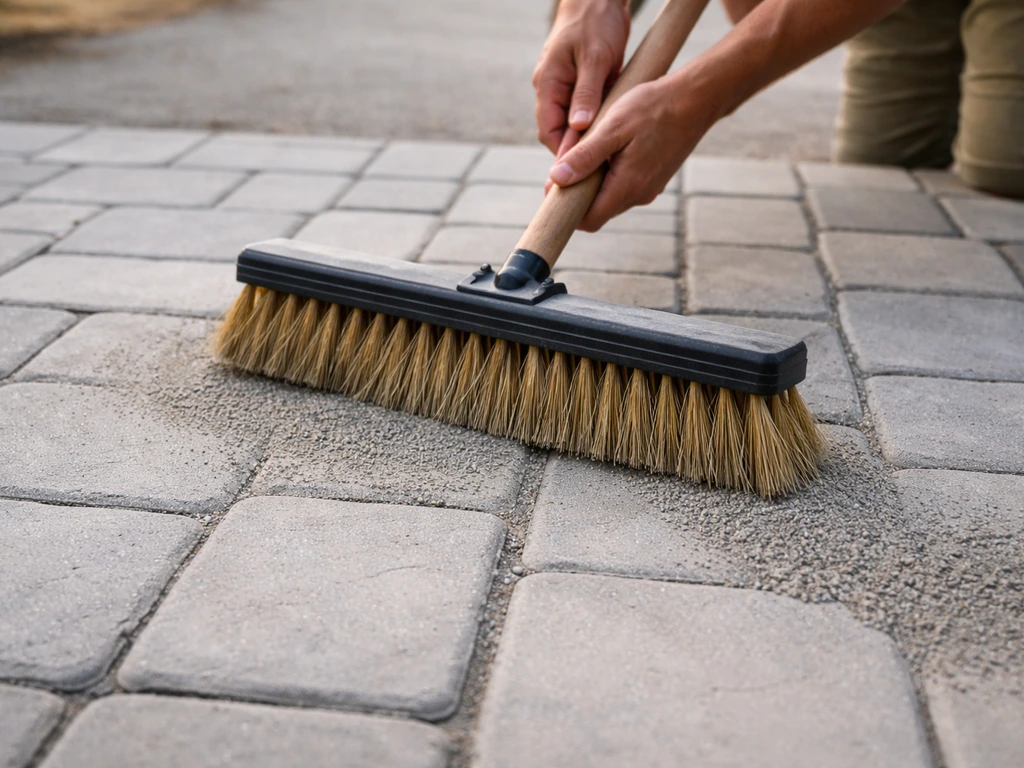
Polymeric sand locks joints and resists weeds, insects, and washout. Application timing matters: the pavers must be completely dry. Never sweep polymeric sand over damp pavers, as it will stick to the surface and cure there permanently. Pick a day when no rain is forecast for at least 24 hours after installation.
- Pour polymeric sand onto the dry paver surface and sweep it into joints with a push broom
- Make multiple passes until joints are filled to about 1/8 inch below the paver face (do not overfill)
- Use a leaf blower on low to remove excess sand from the paver surface, sweeping the nozzle across at a low angle
- Compact again lightly (optional but recommended by most manufacturers) to seat the sand deeper
- Activate with water using a gentle shower setting, not a hard spray or mist — a hard spray washes sand out, and mist doesn't penetrate. Wet the surface, let it absorb, then wet again
- Keep the patio dry for 24 hours while the polymeric sand cures
Sealing
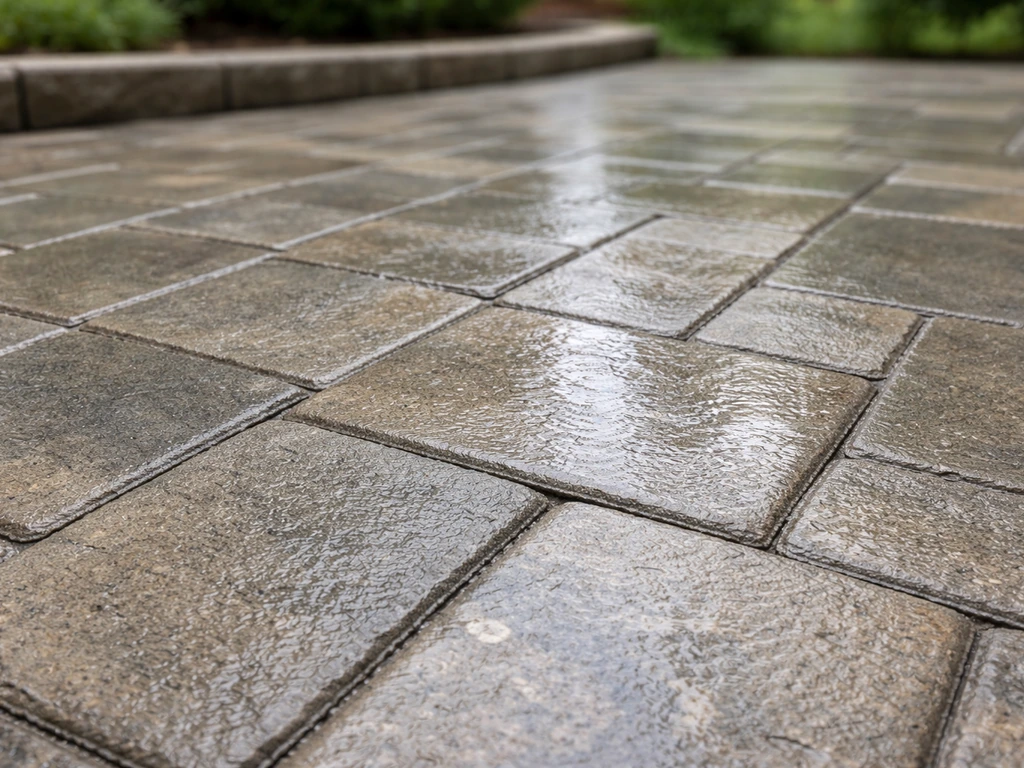
Sealing is optional but worthwhile if you want to protect the paver color, slow staining from leaves and grills, and make future cleaning easier. Wait at least 30–90 days after installation before sealing (check your sealer's instructions) to allow efflorescence to dissipate. Apply with a roller or pump sprayer in thin, even coats. Avoid puddles. Plan to reseal every 3–5 years depending on traffic and weather.
Common problems and how to fix them
Laying over grass or organic soil
Never lay pavers directly over grass or topsoil. Organic material decomposes, causing the base to settle unevenly. Always strip sod and at least 2–3 inches of topsoil, then excavate to your full required depth. If your soil is especially soft or has a lot of organic content, consider going deeper and using geotextile fabric before your gravel base.
Uneven or sloped ground
Uneven ground is actually manageable because you're building a base from scratch anyway. The subgrade doesn't need to be perfectly flat, your gravel base compensates for minor variation as long as you screed the top of your base to the correct slope and depth before screeding sand. On significantly sloped ground, the uphill side of your excavation will be deeper, which just means more gravel there. Keep your string lines as your constant reference throughout.
Laying over existing concrete
If you're paving over a concrete slab, inspect it first. Cracks wider than 1/4 inch or any heaving suggests the slab will keep moving and will telegraph problems into your new paver surface. For a sound slab, you can screed a thin (1 inch) bedding sand layer directly on top and lay pavers as normal, but account for the added height at all transitions. Install edge restraints anchored into the concrete with masonry screws.
Sloped designs and raised patios
A raised patio requires retaining walls or steps to manage the grade change. If you're planning paver steps as part of the project, those get built on their own compacted base, independent of the patio slab, with each step course set in mortar or compacted gravel depending on height and local code. For sloped patios, maintain the 1/8 to 1/4 inch per foot drainage pitch as your minimum; steeper than 1/4 inch per foot becomes uncomfortable to walk on and furniture won't sit level.
Poor drainage after installation
If water pools on the finished surface, it almost always means the drainage slope was missed during base installation. Minor pooling near one edge can sometimes be corrected by lifting those pavers, adding a little extra bedding sand on the low side, and resetting. Widespread pooling usually means the base wasn't graded properly and you'll need to lift a larger section. This is exactly why you check your slope at every stage rather than at the end.
Sunken or rocking pavers
A sinking paver usually means the base wasn't compacted enough, or the bedding sand was too thick and compressed unevenly. A rocking paver typically has a void underneath. Both fixes are the same: pull the paver, check and correct the sand beneath it, and reset. The good news about interlocking pavers versus poured concrete is that individual repairs like this are always possible. Don't ignore rocking pavers; they crack under repeated impact.
Joint sand washing out or weeds growing
If regular sand washes out of joints after rain, the fix is to sweep in polymeric sand and activate it properly. If joints look full but weeds appear, the polymeric sand either wasn't applied correctly, or the product was low quality. Sweep in a fresh layer of quality polymeric sand, compact lightly, and re-activate. Address weeds first with a targeted herbicide before refilling joints.
Edging failures and creeping pavers
If pavers at the outer edge are spreading apart, your edge restraints either weren't spiked into compacted base (they just pulled loose) or they were omitted entirely. Pull the edge pavers, reset the restraints deeper into compacted gravel with more spikes at closer intervals, and relay the edge course. This is a reminder to install restraints on compacted gravel, not on soft soil or sand, which won't hold the spikes.
Layout around a fire pit or obstacle
For a central feature like a fire pit, establish the feature location first, then run your layout lines outward from it so the pattern radiates symmetrically. Dry-lay a full ring of pavers around the feature before committing to your layout to make sure the cut sizes work out evenly. Avoid cuts smaller than 1/3 of a paver around any obstacle.
Building a paver patio is genuinely achievable as a DIY project, and it's one of the highest-return outdoor improvements you can make. The process rewards patience at the base stage and attention to drainage early on. Get those two things right and everything else is just technique that you'll pick up as you go. If you're planning to add steps down from the patio, that's its own process worth planning carefully before you finalize your patio elevation. If you’re planning on installing paver patio steps, treat the step build as its own mini-project so the height and drainage stay consistent with the main patio. If you plan steps from pavers, set them on their own compacted base and match the step height to your patio elevation paver steps. If you need patio steps ideas, plan the number of risers, step width, and how each tread will tie into your patio paver pattern before you set the height.
FAQ
How high should the finished paver patio sit relative to the surrounding yard and door thresholds?
For a typical residential patio, plan for a finished height that lands about 1/2 inch above surrounding grade so water does not wick into the joints. When tying into doors, keep in mind the added height from thick pavers plus bedding sand, and test the height against a level board across the threshold before you lock in the edge restraints.
Can I build a paver patio over hard, rocky, or very soft soil without changing the steps?
Yes, but only with the right soil base. If you have drainage issues or very soft subgrade, use geotextile over the subgrade, then add the specified gravel depth in smaller, compacted lifts. If the grade cannot achieve the required pitch away from the house even after excavation, you may need to redesign the layout or add a drain line.
What if my subgrade feels too wet or too dry when I am ready to compact?
Do not start compaction with a plate compactor if your soil is muddy. The moisture check matters because compaction needs slightly moist, not wet soil. A practical rule, if you can squeeze a handful and it forms a ball then breaks on drop (from about 6 to 12 inches), you are in the right range. If it stays a wet clump or leaves deep ruts, let it dry.
How should I handle stopping and restarting during the bedding sand and paver-laying stages?
If you are forced to extend the job over multiple days, protect the screeded bedding sand and do not leave it exposed long. Keep the sand covered with a thin plastic sheet or tarp to reduce drying and contamination, and re-check thickness and leveling right before laying pavers. Avoid compacting or walking on the screeded surface after you level it.
How can I tell whether polymeric sand was properly activated and fully locked in?
Polymeric sand performance depends on activation. You should apply it only after the pavers are fully dry and the joints are clean, then activate according to the product instructions. If you skip activation or water only lightly, joints can look filled but later wash out, and weeds can appear within joints.
What is the best way to deal with weeds coming back between pavers after the sand was installed?
If you use polymeric sand and weeds still show up, first confirm whether the joints were contaminated before application (dirt, soil, or old sand). Then treat weeds with a targeted herbicide, allow it to work, clean out loose debris from joints, and refill with fresh polymeric sand. Reapply only after the area is dry enough for the product to cure.
When a paver is high or low, should I adjust by adding sand on top or is lifting and resetting the right fix?
If you have to remove and reset a few pavers because they are uneven, lift them carefully, scrape out the disturbed sand, and rebuild to the correct 1-inch bedding thickness. Re-screed the local area to maintain the slope, then reset the pavers and recheck with a straightedge before compacting the whole section again.
What should I do if my cuts at the edge would be tiny slivers?
Yes, but make a plan before cutting. If your layout forces small slivers at the perimeter, you will get instability and a weak edge. A better approach is to shift the layout slightly so the cut line leaves cuts that are at least about one-third of a paver, and keep the outer course aligned and supported by edge restraints.
Which paver pattern is actually easiest for beginners, and which one is best for cars or carts?
Bond patterns affect both strength and layout tolerances. Running bond is more forgiving and usually uses fewer cuts, but you still need consistent joint widths and straight alignment. Herringbone can be stronger for wheeled traffic, but it requires more precise matching and more cutting, so expect more time spent checking lines.
If the outer edge pavers are spreading apart, can I fix it by adding more sand to the joints?
Most of the time, the correct fix for wide movement at the perimeter is to address the restraints and base, not just to add more sand. Edge restraints must sit on compacted gravel and be spiked at appropriate intervals, then the edge pavers are reset to the right height and slope. If you install restraints onto soft soil or bedding sand, the spikes can pull loose.
Do I have to wait before sealing, and what happens if I seal too early?
A good rule is to avoid sealing immediately after installation because trapped moisture and efflorescence can turn into hazy spots. Plan to wait at least the manufacturer’s recommended window, commonly 30 to 90 days, and seal only when the surface is dry and clean. If your patio experiences heavy leaf staining or grill grease, sealing sooner may help protection, but you still need to meet the product’s cure window.
When is it acceptable to install pavers over an existing concrete slab, and when should I remove the slab instead?
On existing concrete, you can lay pavers directly only if the slab is stable, drains away properly, and transitions can be adjusted to avoid tripping. However, if there is cracking, heaving, or poor drainage, those movements will telegraph into the paver surface. In those cases, removing the slab and rebuilding the base is the more reliable long-term approach.
Next Articles
How to Seal Paver Patio: Step-by-Step DIY Guide
Learn how to seal a paver patio step by step: clean, choose penetrating or wet-look sealer, apply, cure, and maintain.
Do It Yourself Paver Patio Installation: Step by Step
Step-by-step guide to DIY paver patio installation: grading, base prep, paver setting, edging, joint sand, sealing and f
Do It Yourself Patio Paver Ideas: Layout, Prep, Install
DIY patio paver ideas with layout patterns, site prep, base thickness, leveling, edging, and fixing sinking, gaps, weeds