The best way to lay patio pavers is to build a properly excavated, compacted gravel base, screed a 1-inch layer of bedding sand on top, then set your pavers with consistent spacing, lock them in with edge restraints, compact the surface, and finish joints with polymeric sand. That sequence, done in the right order with the right depths, is what separates a patio that stays flat and tight for 20 years from one that rocks, settles, and sprouts weeds by the second summer. With the right thickness, base, and a properly sloped layout, you can lay a small paver patio that stays level and drains correctly.
Best Way to Lay Patio Pavers: Step-by-Step DIY Guide

Felix Rowe
3 Jun 2026
This guide walks you through the complete process from first shovel to final seal. Whether you're starting from bare dirt, patchy grass, or an old concrete slab, you'll find the specific guidance you need at every stage, plus troubleshooting for the problems that catch most DIYers off guard mid-project.
Choosing the Right Pavers, Thickness, and Style
For a patio that only sees foot traffic, standard concrete pavers in the 2-inch to 2.375-inch range (50–60 mm) are the right choice. They're widely available, affordable, and strong enough for chairs, tables, grills, and the occasional heavy planter. If any part of your patio will see a vehicle, even just occasional truck parking or a heavy riding mower, step up to at least 60 mm and ideally 80 mm thickness for those zones.
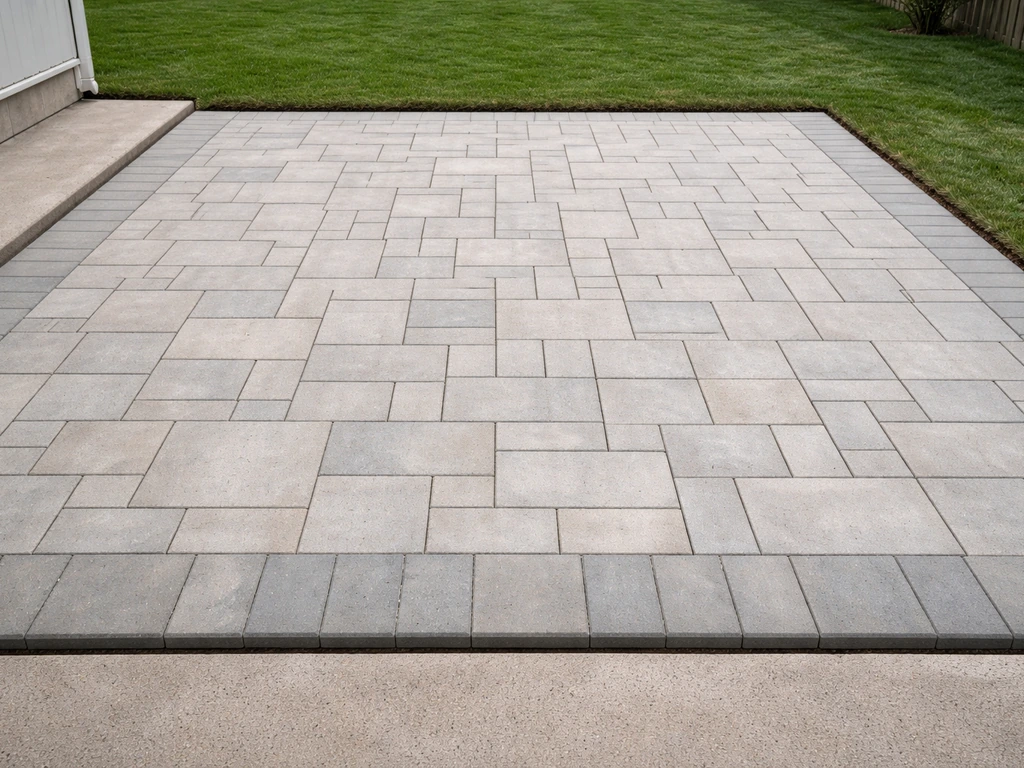
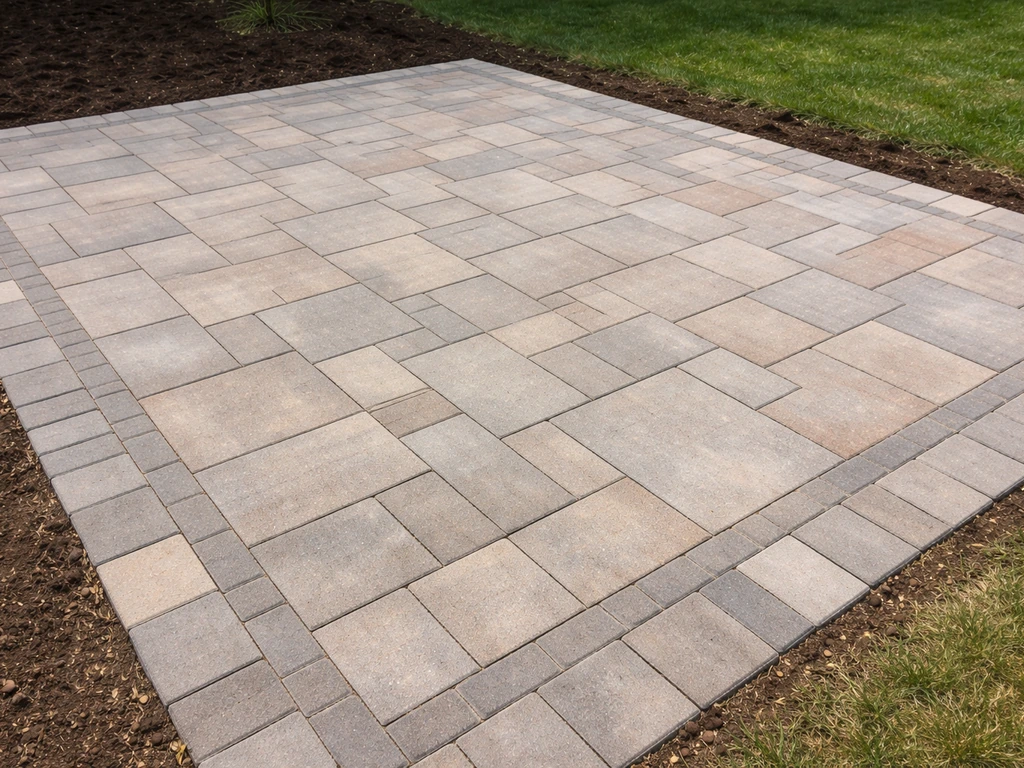
Beyond thickness, think about shape and texture. Rectangular pavers (like the classic 4x8 or 6x9 inch brick shape) are the easiest to lay in clean patterns and cut accurately. Tumbled or textured surfaces hide minor level differences better than smooth ones. Large-format pavers (12x12 or bigger) look stunning but are heavier to handle solo and less forgiving of base imperfections. If this is your first paver project, a mid-size rectangular paver in a running bond or herringbone pattern is the most beginner-friendly combination.
| Use Case | Recommended Thickness | Notes |
|---|---|---|
| Patio / foot traffic only | 2 in – 2.375 in (50–60 mm) | Most common; widely available at home centers |
| Light vehicle approach or driveway border | 2.375 in – 3.125 in (60–80 mm) | Heavier; may need equipment to move large quantities |
| Full driveway or parking | 3.125 in+ (80 mm) | Requires deeper base; consult ICPI specs for your soil |
Natural stone pavers (bluestone, travertine, flagstone) are also an option, but they vary in thickness, which makes screeding and leveling harder. Stick with uniform manufactured pavers for your first DIY project. You can always add a stone accent border once you've got the process dialed in.
Planning Your Layout, Measurements, and Drainage Slope
Before you dig a single shovel of dirt, spend real time on paper. Measure your intended patio area carefully, then add at least 6 inches on all sides for your base and edging. Sketch the layout to scale and count your paver units, accounting for a 10–15% waste factor for cuts and breakage.
The single most important planning decision you'll make is slope. Your finished patio surface needs to drain water away from your house and any structures, not pool in the middle. The minimum you're targeting is a 2% slope, which works out to 1/4 inch of drop per foot of run.
In practical terms, if your patio is 12 feet deep (running away from the house), the far edge should sit at least 3 inches lower than the edge nearest the house. This Old House recommends thinking of it as 1 inch of drop per 4 feet, which lands in the same ballpark. For areas with poor natural drainage, you may also need to run a perforated drainage pipe beneath the base before you backfill.
Use stakes and string lines to establish your layout and slope before excavation. Set your strings at finished surface height, then use a line level or a 4-foot level with a shim to confirm the correct pitch. This is worth doing carefully because every layer of base and sand you add will follow this reference, and fixing a bad slope once the base is in is genuinely painful.
- Minimum slope: 2% or 1/4" per linear foot away from the house
- Mark your layout with spray paint or stakes and string before digging
- Add 10–15% to your paver count for cuts and waste
- Note any low spots in your yard where water already collects — plan drainage around those
Site Prep: Removing Turf, Excavating, and Handling What's Already There

Good site prep is where most DIY patio failures start. Skipping steps here is the reason patios sink, tip, and grow weeds within a year.
Starting from Bare Ground or Grass
If you're working with a grassy or dirt area, strip all vegetation first. Use a sod cutter (rentable for about $75–$100/day) to remove turf cleanly. Don't try to bury sod under your base, it will decompose and cause settling. Once the sod is out, excavate to a total depth that accommodates your base gravel, your 1-inch bedding sand layer, and the paver thickness itself.
For a patio with foot traffic only, that means 4–6 inches of compacted gravel base, plus 1 inch of sand, plus your paver thickness. If your pavers are 2. 375 inches thick, you're digging roughly 7. 5 to 9.
5 inches total below your finished surface grade. Mark that depth on your stakes before you start digging so you have a clear target.
Laying Over Concrete
It is possible to lay pavers directly over an existing concrete slab, and sometimes it makes sense if the slab is flat, structurally sound, and in good condition. You'd use a thin mortar or sand-set overlay system rather than a full excavated base. The catch: if your existing concrete has cracks, heaving, or drainage problems, those issues will transfer straight through to your new paver surface.
Check that the slab's current height won't create a step up into your door threshold once you add paver thickness. For most homeowners with a damaged or poorly draining slab, full removal and fresh installation is the better long-term call. Related projects like laying pavers over uneven ground or on a slope have their own specific base adjustments worth reviewing separately.
Related projects like setting pavers for patio on uneven ground or on a slope have their own base adjustments worth reviewing separately Related projects like laying pavers over uneven ground or on a slope have their own specific base adjustments worth reviewing separately. .
Uneven Ground and Soft Spots
If your subgrade (the native soil at the bottom of your excavation) is soft, wet, or has soft spots, you need to address that before laying base material. Compact the subgrade with a plate compactor before anything else goes in. If you hit an area that stays soft even after compaction, dig it out and fill with compacted gravel rather than trying to build over it. A geotextile fabric laid directly on the subgrade before your gravel base helps separate the soil from the aggregate, which is especially useful on fine or sandy native soils. It won't fix a drainage problem on its own, but it extends the life of your base significantly.
Building the Base: Gravel, Geotextile, and Bedding Sand

Think of the base as the foundation of a house. The pavers themselves aren't what makes a patio stable, the base is. Get this part right and everything else becomes much easier.
- Lay geotextile fabric on the compacted subgrade if your soil is fine-grained, moist, or soft. Overlap seams by at least 12 inches.
- Add crushed stone (also called process gravel or crusher run) in layers no deeper than 3–4 inches at a time. Compact each layer with a plate compactor before adding more. For foot-traffic patios, you want a total compacted gravel depth of 4–6 inches. For driveways or vehicle-use areas, aim for 6–8 inches.
- Check your grade and slope with a long level or laser level after each compacted layer. It's much easier to correct slope in the gravel phase than after sand is down.
- Once your compacted gravel base is at the right height and slope, add approximately 1 inch of coarse bedding sand (concrete sand, not play sand). Screed it flat using a 2x4 or metal screed bar riding on parallel pipes set 1 inch above the gravel surface. Remove the pipes and fill the channels after screeding.
- Do not compact the sand after screeding. Walk off it and go straight to laying pavers. Compacting screeded sand collapses it and makes consistent depth impossible.
A note on tools: renting a plate compactor is non-negotiable for a patio larger than about 50 square feet. Hand tampers are exhausting and simply don't deliver enough compaction force to keep your base stable. Budget around $80–$120 per day for a plate compactor rental. It's one of the most important equipment choices in the whole project.
Laying Pavers: Patterns, Spacing, Edging, and Cutting
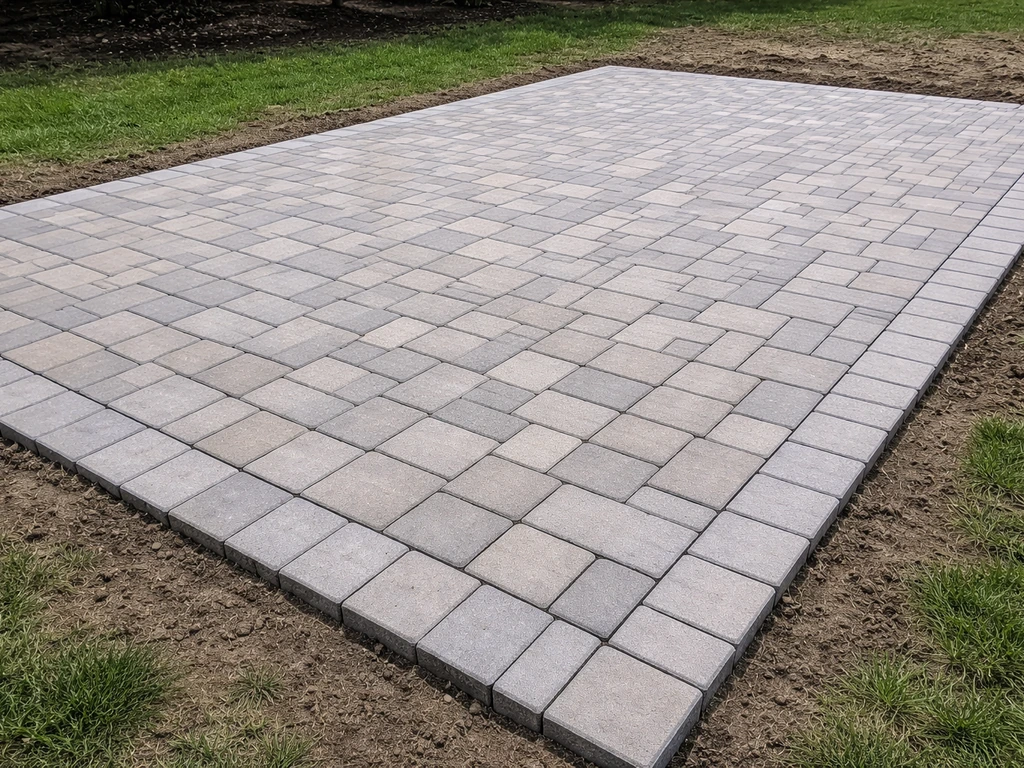
Now comes the most satisfying part. Start laying pavers from a straight reference edge, usually the house wall or a string line representing your most visible side. Follow these steps to learn how to lay pavers for a patio, including base prep, leveling, and jointing so it stays solid for years how to lay pavers for patio. Work forward and sideways from that starting corner, never stepping on your screeded sand as you go. Kneel on the pavers you've already placed, or use a kneeling board to distribute your weight.
Patterns to Consider
Running bond (like a standard brick wall, with each row offset by half a paver) is the easiest to lay and cut, and it looks clean and classic. Herringbone (pavers set at 45 degrees) is stronger under load because the interlocking angles resist shifting, but it requires more cuts, especially at the borders. Basketweave looks great but creates a lot of cut pieces. For your first project, running bond is the smart choice.
Spacing
Most manufactured concrete pavers have small spacer nibs built into the sides that automatically create a 1/8-inch joint. Use them. If your pavers don't have nibs, use plastic spacers. Consistent joint width matters both for appearance and for polymeric sand performance, most products specify a minimum joint width of 1/8 inch (3 mm).
Installing Edge Restraints
Edge restraints go in before your final compaction pass. Plastic paver edging spiked into the ground every 12 inches is the standard DIY solution. It holds the border pavers from spreading outward under load. Without it, pavers creep apart over time, joints widen, and the whole surface destabilizes. Set edging tight against the outside face of your border pavers, then drive the spikes.
Cutting Pavers
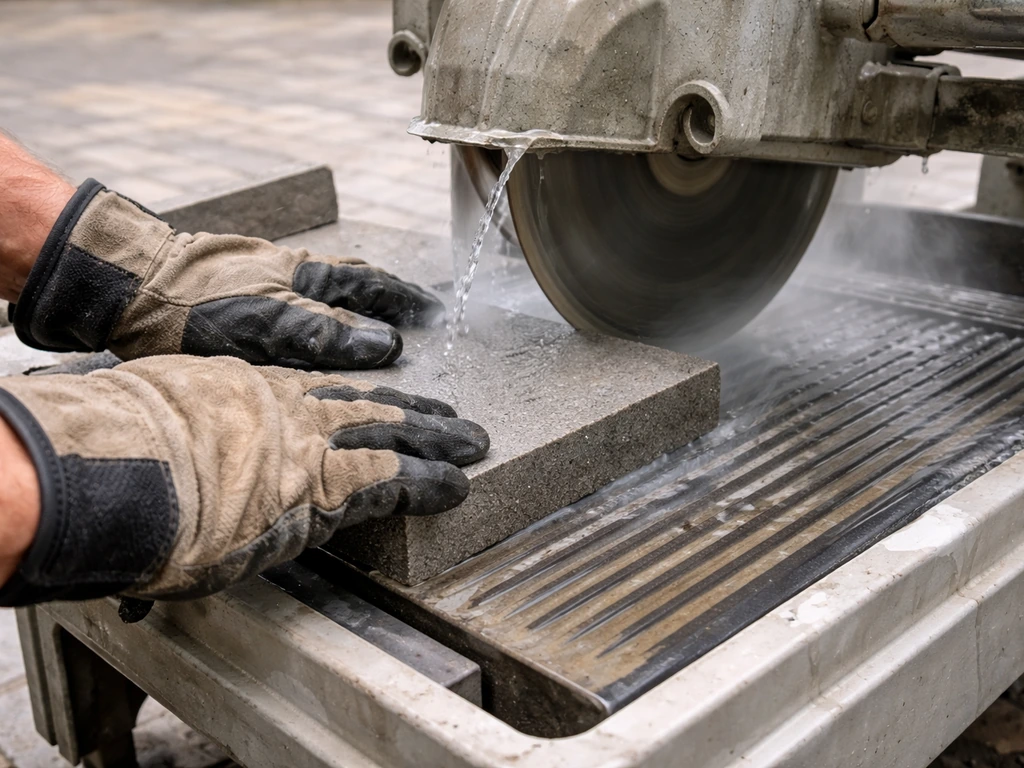
You'll need to cut pavers for borders, angles, and around obstacles. A wet saw with a diamond blade gives the cleanest, most accurate cuts and is the right tool for most DIY projects. You can rent one for around $60–$80 per day. An angle grinder with a diamond blade works for occasional cuts but is harder to control precisely. Mark your cut line with a pencil or chalk, make the cut, and test-fit before placing permanently. Always wear safety glasses and ear protection when cutting.
Leveling, Compaction, and Jointing
Once all your pavers are placed and edge restraints are set, check the surface with a long straightedge or level. Individual pavers should be blank" rel="noopener noreferrer">within about 1/8 inch of their neighbors. If a paver is high, lift it out, remove a little sand, and reset. If it's low, lift it, add a pinch of sand, and reset. Don't try to tap a paver into a low spot with a mallet, you'll just crack it or disturb the pavers around it.
When the surface looks good, run the plate compactor over the entire patio (using a rubber pad or piece of carpet under the compactor plate to protect the paver faces). Make two or three passes in different directions. This seats the pavers firmly into the bedding sand and brings everything to its final height.
Polymeric Sand vs Plain Sand: Which Should You Use?
Plain sand is cheaper, but it washes out with rain, allows weeds to root through, and lets insects burrow into joints. Polymeric sand contains polymer binders that activate when wet, harden as they cure, and create a firm joint that resists all three of those problems. For any patio you're building to last, use polymeric sand. It costs more upfront but saves you from constant refilling and weeding.
| Feature | Plain Sand | Polymeric Sand |
|---|---|---|
| Weed resistance | Poor | Good |
| Washout resistance | Poor | Good |
| Insect penetration | Prone | Resistant |
| Cost | Low | Moderate |
| Ease of application | Simple | Requires dry conditions and careful activation |
| Longevity | 1–3 years before refilling | 5–10+ years with proper install |
How to Apply Polymeric Sand Correctly
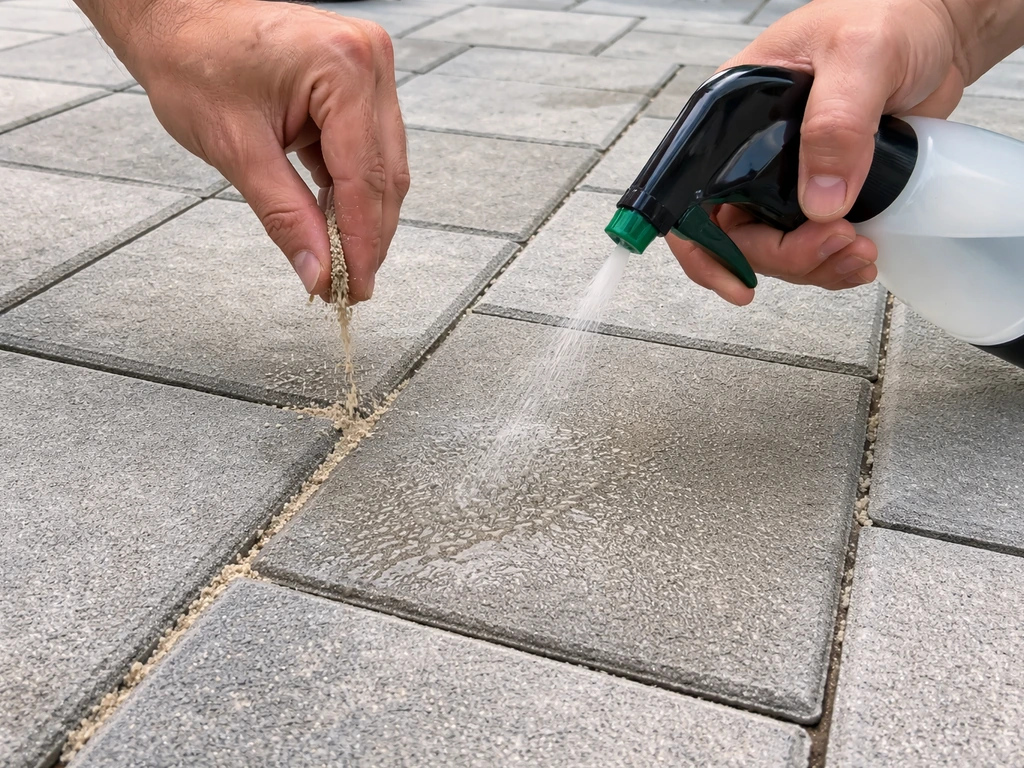
Check the weather before you start. You need at least 24 hours with no rain in the forecast, most brands including Techniseal and Sakrete PermaSand specify this clearly. Temperature must be above 32°F (0°C). Pour the dry polymeric sand over the patio surface and sweep it into the joints with a push broom. Use a leaf blower to blow off the excess sand from the paver faces, leaving the sand level at least 1/8 inch below the top of the paver surface (or to the bottom of the chamfer if your pavers have one). This is important: sand sitting on the paver face will haze and bond there permanently once activated.
Once the joints are filled to the right level and the faces are clean, activate the sand with a fine mist from a garden hose. Work in sections so you don't miss spots. Let it absorb, then mist again. Most products reach foot traffic strength within 24 hours. Keep people off it for that first day, and keep it dry for the first 24 hours after activation. Sakrete PermaSand specifically recommends waiting 72 hours before light vehicular traffic.
Finishing Touches: Cleanup, Sealing, and Ongoing Maintenance
Once your polymeric sand is cured, sweep the entire patio to remove any dust or haze. A light rinse with a garden hose (not a pressure washer at this stage) helps clean the surface. For concrete pavers, you'll likely see some natural efflorescence (white mineral haze) in the first few months, this is normal and typically weathers away on its own.
Should You Seal Your Pavers?
Sealing is optional, not mandatory, but it offers real benefits: enhanced color, easier stain cleanup, and a second layer of protection against weeds and joint erosion. Wait at least 60–90 days after installation before applying sealer so any efflorescence can clear and the polymeric sand can fully cure. Use a paver-specific penetrating sealer or a wet-look film sealer depending on the aesthetic you want. Apply on a dry day when temperatures are between 50°F and 90°F. A roller or pump sprayer works fine for most homeowners.
Keeping Your Patio in Shape Year After Year
- Inspect joints every spring and top up any areas where sand has settled or washed out
- Pull any weeds that do push through before they establish roots in the joints
- Re-seal every 3–5 years or when water stops beading on the surface
- Address any rocking or low pavers as soon as you notice them — small problems become big ones after a winter freeze cycle
- Keep downspouts and gutters directing water away from the patio edge to reduce erosion under the base
Troubleshooting the Problems DIYers Run Into Most
Even a carefully built patio can develop issues. Here's how to diagnose and fix the most common ones without tearing everything out.
Rocking or Wobbling Pavers
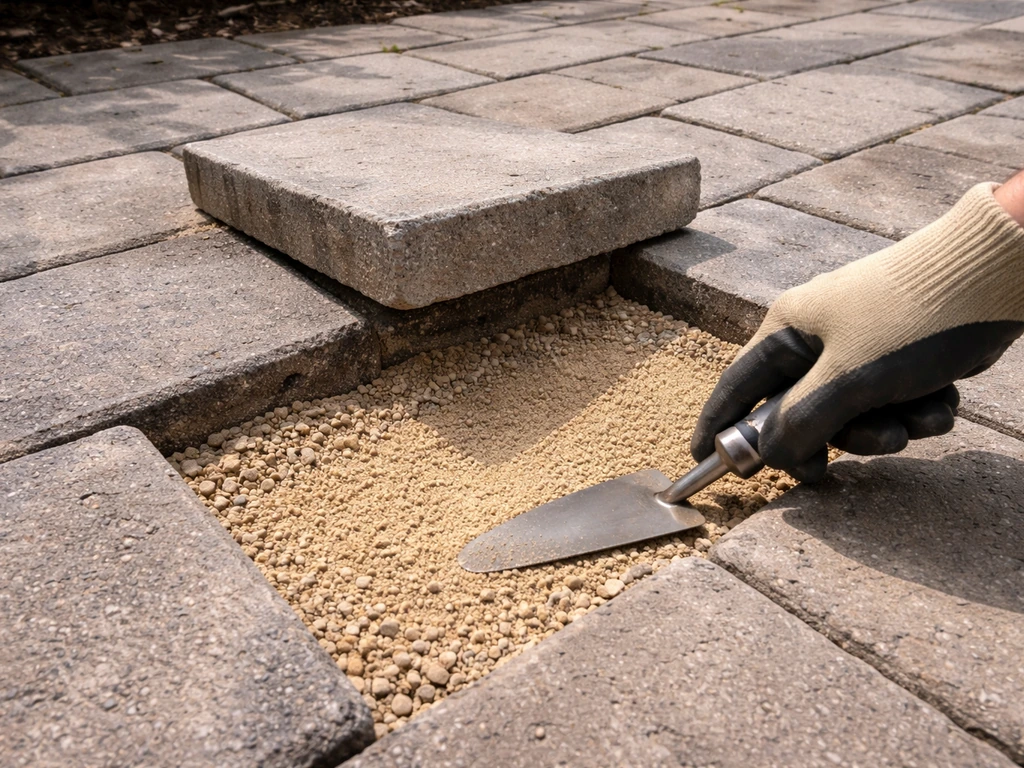
A paver that rocks means the bedding sand beneath it isn't supporting it evenly. Lift the paver out, check whether sand is missing or has shifted to one side, correct the sand level, and reset. If multiple adjacent pavers are rocking, the issue is usually insufficient base compaction beneath the sand, the gravel base has settled unevenly. In that case, lift the affected section, remove the sand, re-compact the gravel, re-screed the sand, and relay the pavers. It's extra work, but it's the only permanent fix.
Low Spots and Settling
If an area of your patio develops a visible dip, water will pool there and accelerate further damage. Lift the pavers in the low area, add compacted gravel or extra bedding sand as needed to bring the level up, and relay. If the settling keeps recurring in the same spot, you likely have a soft subgrade issue (old root decay, buried debris, or poor native soil) that needs more gravel fill and compaction before you rebuild that section.
Weeds Through the Joints
Weeds in paver joints are almost always a sign of inadequate joint filling or the wrong type of joint sand. Plain sand simply doesn't stop weed germination. If you used plain sand and weeds are taking over, your best move is to remove all the joint sand (a stiff brush and a shop vac work well), treat the joints with a paver-safe weed killer, let it dry, then refill with polymeric sand. Going forward, polymeric sand is the right answer for this problem.
Sand Washing Out of Joints
If joint sand keeps washing away with rain, check two things: slope and sand type. If water is pooling on the patio rather than draining off, it's sitting in the joints and eroding them. Address the drainage issue first. If drainage is fine but sand still washes out, you almost certainly have plain sand in there. Switch to polymeric sand, which hardens in the joint and stays put through rain events.
Drainage Problems After Installation
If water pools on your finished patio, your slope isn't sufficient or it's draining toward the house. Minor slope issues can sometimes be addressed by lifting a section and adjusting the base height beneath it. More serious drainage problems may require a channel drain or perforated French drain installed at the low edge of the patio and tied into a discharge point away from the foundation. Don't ignore standing water, it will eventually undermine your base.
Uneven Surface Across Large Areas
If you stand back and see a patio that undulates or has noticeable high and low zones across a large section, the most common cause is inconsistent screeding. The bedding sand wasn't flat before the pavers went down. This is painful to fix after the fact. For a large area, lift the entire section, re-screed carefully using screeding pipes pulled at a consistent height, and relay. For smaller variations of 1/4 inch or less across a 10-foot span, it will often not be noticeable in daily use, save the full re-do for genuine problem areas.
Building a patio paver surface that stays tight, drains well, and looks great years from now comes down to not rushing the base work. The pavers are the easy part. Compact the subgrade, get your gravel base to the right depth, screed that sand flat, use polymeric sand in the joints, and you'll have a patio that outlasts a poured concrete slab with a fraction of the cracking headaches. Take it one phase at a time and you've got this.
FAQ
Can I lay patio pavers directly over my existing concrete slab to avoid excavation?
Yes, as long as the concrete is stable, not heaving, and doesn’t have active drainage or structural cracking. You still need to solve height transitions at doors, steps, and garage thresholds before you lay pavers, because the combined lift (overlay thickness plus pavers plus joint depth) can create a tripping step. Also avoid fastening edging to cracked slabs, since differential movement can loosen borders and cause paver creep.
What’s the best way to fix pavers that are slightly uneven after I’ve laid them?
If you notice unevenness, the safest correction is to lift, adjust sand or base where the problem originates, and relay. Do not try to fix widespread lippage or dips by compacting harder or adding extra sand on top, because the extra sand becomes unstable and can lead to future rocking. For small, localized high or low spots, reset by removing a small amount of bedding sand or adding a pinch, keep joints consistent, then recheck with a long straightedge.
What should I do if I get polymeric sand haze on the paver faces or it doesn’t seem to harden?
Polymeric sand should only be activated once the joints are full and level, with sand kept off the paver faces. If you accidentally activate haze on the face, let it fully cure, then remove residue by brushing and lightly rinsing with water (avoid pressure washing during the first stages). If polymeric sand did not cure properly because it stayed too wet or too dry, the joint can soften and wash out, and you may need to remove the failed sand and refill before it becomes a recurring weed problem.
How much polymeric sand should I leave in the joints, and what happens if I overfill?
For best results, target a joint depth that allows the joint to be filled below the paver face chamfer (if present), not heaped up. Overfilling can lead to haze and permanent staining when activated, underfilling reduces binding strength and lets weeds and insects move in. Use the push broom to sweep sand fully into joints, blow off excess, then verify the joint line is consistent across the patio before misting.
Can I pause a patio paver project for a day or two, and what’s the correct way to resume?
If you have to do part of the job over multiple days, stop in a way that protects the base and screeded sand. Do not leave the screeded bedding sand exposed for long periods, cover it if rain is expected, and avoid walking on it more than necessary once pavers are staged. Before restarting, remove any disturbed sand spots, restore the screed flatness using screeding guides, then proceed from your original reference edge to maintain pattern alignment.
Should I seal the patio, and does sealing change anything about polymeric sand joints?
Skip sealing if the main goal is drainage and long-term joint integrity, since sealers can sometimes alter how polymeric sand tolerates wetting and curing, especially if applied before full cure. If you do seal, make sure you wait the recommended curing window and choose a paver-appropriate penetrating sealer for most concrete pavers. Keep water management in mind, sealers don’t fix standing water, slope issues still need correction.
How do I handle paver patios near landscaping or where sprinklers hit the surface?
If you’re installing near plants, drainage downspouts, or sprinkler zones, consider planning a separation gap and using edging that prevents joint sand migration. Roots and irrigation water can encourage weeds and can erode joints, even with polymeric sand, if water repeatedly runs across the patio surface. Maintain slope so water moves away, and avoid directing sprinklers onto the joint lines during the initial curing period and after.
Why did my polymeric sand wash out after the first rain, even though I followed the steps?
Polymeric sand needs the right moisture condition to activate. If activation happens in heavy wind or direct sun and the joints dry too fast, the sand may not bind well and can wash out during the next rain. If it’s too cold, curing is slower, and activation can be inconsistent. A practical approach is to keep the forecast dry, activate in moderate conditions, mist carefully in sections, and keep foot traffic off until the product’s stated strength timeline.
Do I really need geotextile fabric under the gravel base, or is it optional?
Use geotextile fabric when you have weak or fine native soils, especially sandy or frost-susceptible ground, because it helps separate subgrade from base aggregate. However, it is not a substitute for compaction, correct base thickness, or drainage. If you have persistent soft spots after compaction, you still need to excavate out the problem area, replace with compacted gravel, then rebuild the base layers.
How should I repair a small section that sinks or rocks without redoing the whole patio?
For repairs, lift only the affected area if possible, then replicate the original base and bedding structure. Remove old joint sand completely, correct any rocking cause by re-compacting base and re-screeding sand flat, then refill joints with the same type of polymeric sand used originally. Avoid topping up joints with new sand over loose, contaminated, or partially failed joints, since that creates weak spots that wash out sooner.
What paver thickness should I choose if I expect occasional heavier loads?
It depends on paver type and load expectations. For foot traffic only, typical concrete paver thickness in the low-to-mid 50 mm range is usually adequate, while areas that see heavier loads (vehicle crossings or equipment) need thicker pavers and often more robust base preparation in those zones. If you know a specific future load point (for example, grill cart path), consider strengthening only that strip rather than overbuilding the entire patio.
Next Articles

How to Lay a Small Paver Patio: Step-by-Step DIY Guide
Step-by-step DIY for laying a small paver patio, including base prep, paver cutting, drainage, compaction, edging, and s
Patio Pavers How to Lay Them: Step-by-Step DIY Guide
Step-by-step how to lay patio pavers, including site prep, base leveling, cutting, drainage, fixes for uneven and lippag
How to Lay Paver Patio Stones: Step-by-Step DIY Guide
Step-by-step DIY guide to lay paver patio stones, build the base, prep bedding, level, compact, and finish.