To lay a small paver patio, you excavate 9 to 10 inches deep, compact a 6-inch gravel base in 2 to 3-inch layers, screed a 1-inch bedding sand layer, lay your pavers in your chosen pattern, install edge restraints, sweep polymeric sand into the joints, compact everything one final time, and you're done. That's the whole process. Every step exists to keep the patio from settling, shifting, or pooling water, so skipping or rushing any one of them is where most DIY patios fail.
How to Lay a Small Paver Patio: Step-by-Step DIY Guide

Felix Rowe
1 Jun 2026

Project planning and measurements
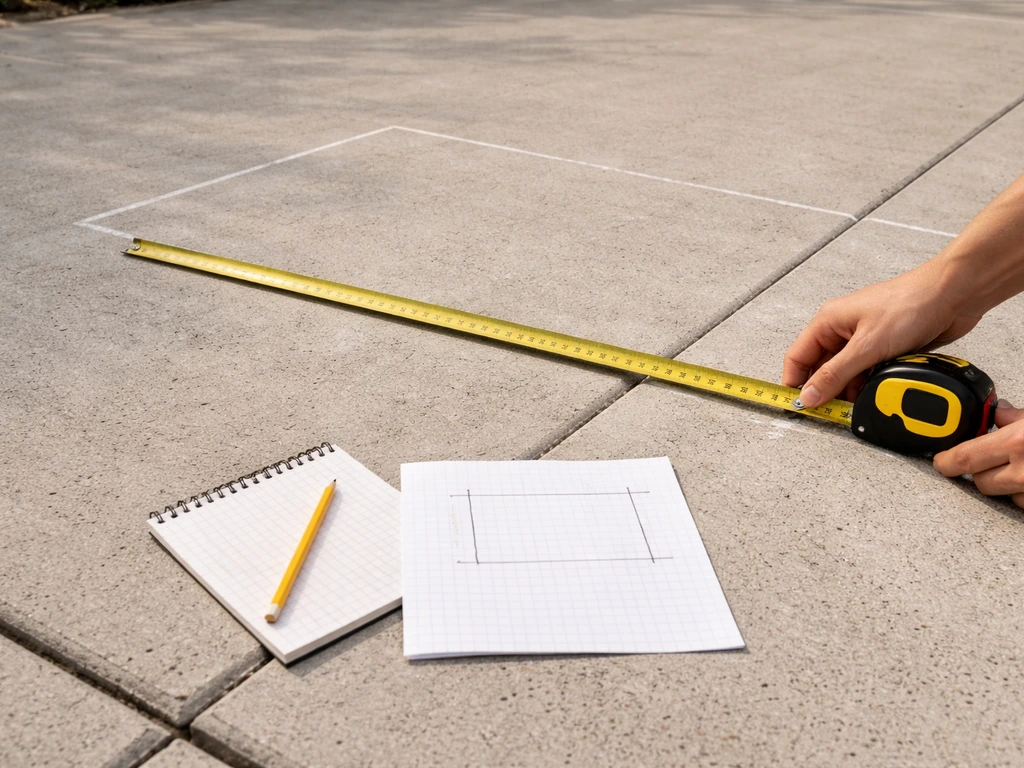
Before you buy a single paver, spend an afternoon with a tape measure and a notepad. Knowing your exact square footage controls everything downstream: how much gravel you order, how many pavers you buy, and how long the whole project takes. A small patio is typically 100 to 200 square feet, which is very manageable for a first-time DIYer over a weekend.
Measure the length and width of the space you want to pave. Multiply those together to get your square footage. Add 10 percent for waste and cuts. For pavers specifically, the formula is: pavers needed equals patio area in square feet, multiplied by 144 divided by (paver length in inches times paver width in inches), then multiplied by 1.10 for waste. A standard 4x8-inch paver, for example, covers 0.22 square feet, so a 120-square-foot patio needs roughly 545 pavers before waste.
For your base gravel, use this formula: cubic yards of gravel equals square footage times (base depth in inches divided by 12), divided by 27. A 120-square-foot patio with a 6-inch base needs about 2.2 cubic yards of compacted gravel. Order about 20 percent extra because compaction reduces volume. Your 1-inch bedding sand layer for the same patio needs roughly 0.37 cubic yards of coarse concrete sand.
Mark your patio outline on the ground with spray paint or stakes and string. Check for square by measuring diagonally corner to corner in both directions: when both measurements match, your layout is square. Also note where the ground slopes, where any structures are nearby, and whether there are buried utilities. Call 811 (in the US) before you dig anything.
- Tape measure, spray paint or stakes and string, and a line level
- Calculator for material estimates (gravel, sand, pavers)
- Utility locator call (811) before any excavation
- Notepad sketch showing patio dimensions, any obstacles, and which direction is downhill from the house
Site preparation: removing grass and leveling uneven ground
This is the part people underestimate the most. Good site prep is what separates a patio that looks great for 20 years from one that shifts and cracks by spring. If you're laying over grass, you need to remove it completely. Don't try to bury it or work around it. Grass and organic material decompose underground, and that decomposition creates voids that cause settling.
Use a sod cutter (rentable for around $60 to $80 per day) to strip the grass in clean rolls. Remove at least 2 inches of topsoil along with it. Then excavate the remaining soil with a flat spade or mini excavator rental until you reach the total depth you need. For a standard residential patio, your total excavation is typically 9 to 10 inches: 6 inches for compacted gravel base, 1 inch for bedding sand, roughly 2.5 inches for the paver thickness, plus 1 to 2 inches of over-excavation for settling and adjustment.
If your ground is uneven, now is the time to address it. Low spots get filled with compacted gravel (never with loose soil). High spots get cut down. If you have clay soil, poor drainage, or you're in a freeze-thaw climate, consider going deeper on the base (up to 8 inches of compacted gravel) and lining the excavation with woven geotextile landscape fabric before adding gravel. The fabric keeps the gravel from migrating down into soft or clay-heavy soil over time.
Once excavated, use a hand tamper or plate compactor to compact the native subgrade. You want a firm, stable floor before any gravel goes in. If the soil feels spongy or you can press your foot in easily, compact more or add the landscape fabric. This subgrade is the true foundation of the whole project.
Building the base and getting the slope right
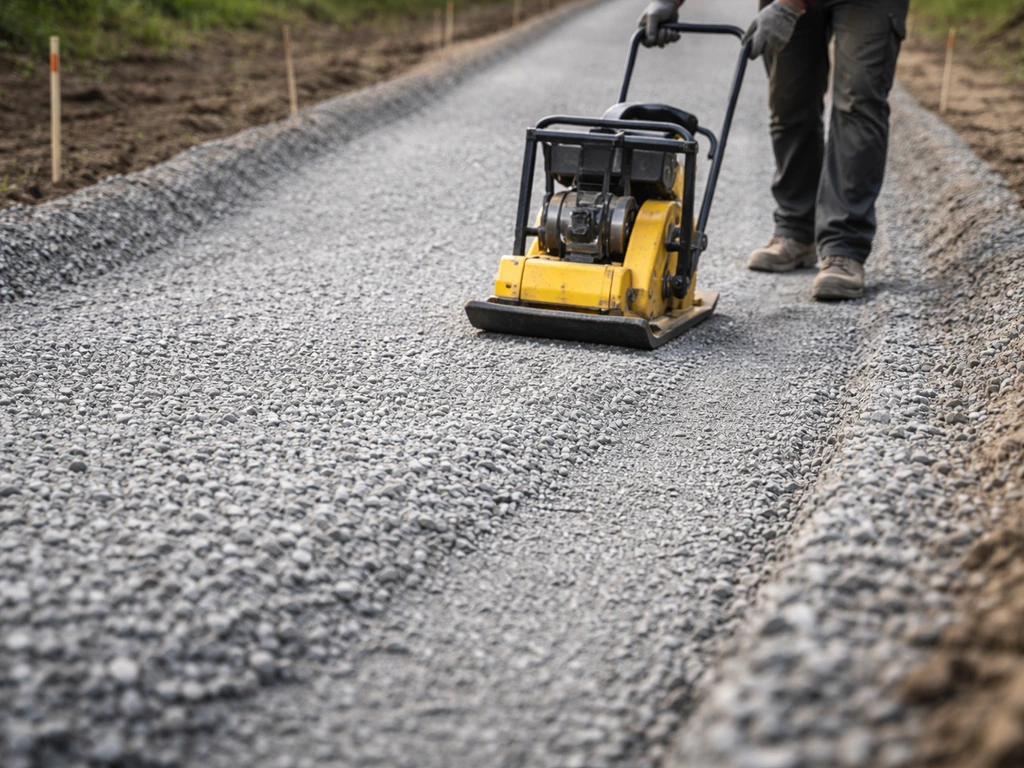
The base is the most critical part of the whole project, and it's completely hidden once you're done. A compacted gravel base handles drainage, distributes load, and prevents the frost heave and settling that ruin patios. Do not skip or shortcut this stage.
Use 1.5-inch processed gravel or 3/4-inch crusher run. These angular, crushed materials compact into a tight, interlocking layer. Pea gravel and round stones don't compact well and should be avoided. Add the gravel in 2 to 3-inch layers, compacting each layer with a plate compactor before adding the next. A plate compactor typically can't compress more than 3 to 4 inches at once, which is why layering matters. For a 6-inch base, you're making two or three passes with the compactor, not one big dump.
While you're building the base, you need to establish your drainage slope. The patio surface must slope away from your house at a minimum of 1/4 inch per foot (that's a 2 percent grade). For a 10-foot-deep patio, that's 2.5 inches of drop from the house side to the outer edge. Set this slope in the gravel base itself, not by tilting your pavers. Use a long level and a tape measure to confirm the slope every few feet as you compact. Any impervious surface within 10 feet of your foundation should direct water away from the structure.
Once the gravel base is fully compacted and sloped, add your 1-inch bedding layer. This should be coarse concrete sand (also called ASTM C33 sand), not fine masonry sand or beach sand. Fine sands allow pavers to rock and shift over time. Use two metal conduit pipes (3/4-inch diameter works well) as screed rails: set them on the base, leveled to your target slope, and drag a straight 2x4 across them to spread a perfectly even 1-inch sand layer. Remove the pipes after screeding and fill the gaps carefully. Do not walk on the screeded sand or disturb it before laying pavers.
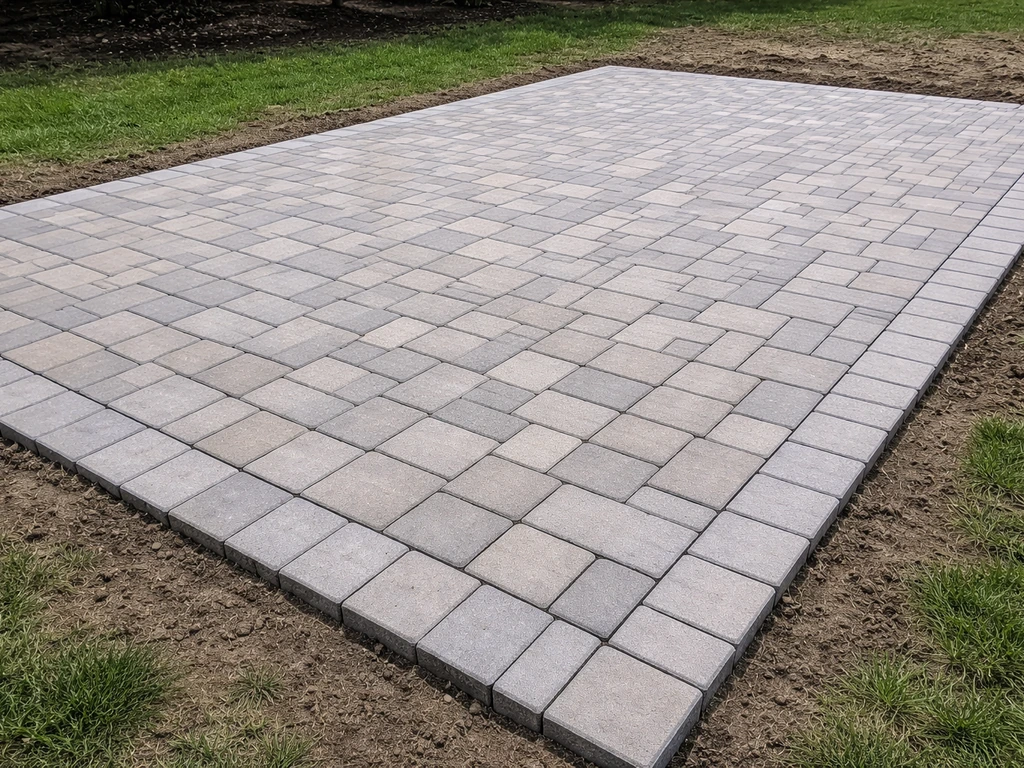
Choosing a pattern and laying the pavers
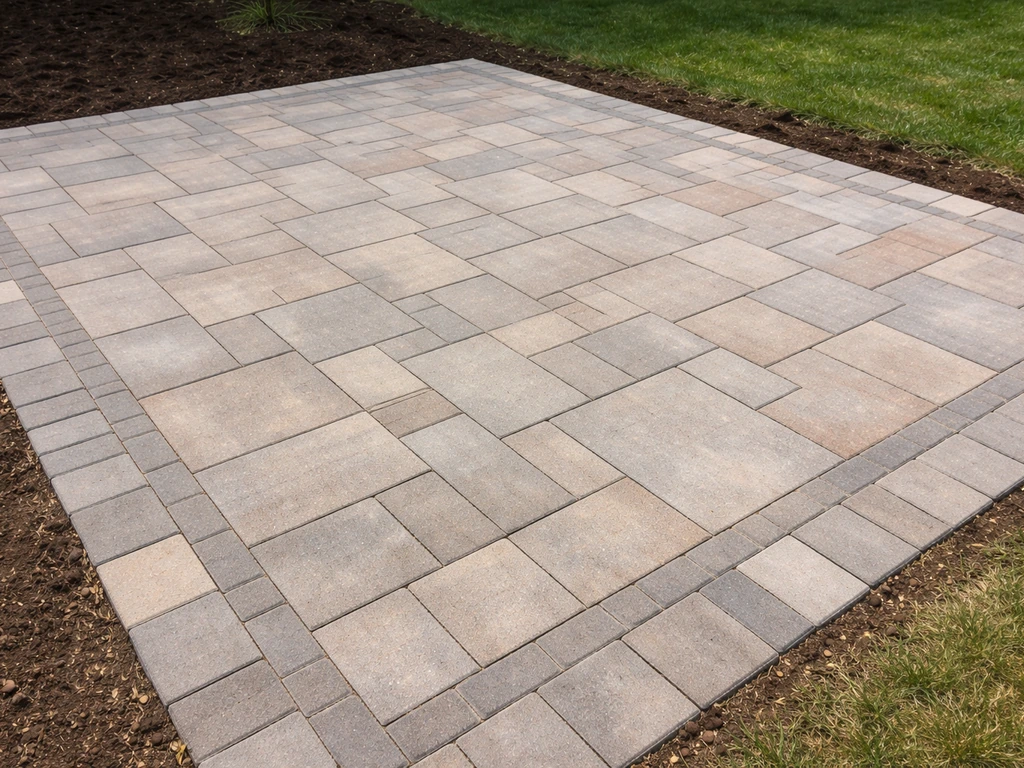
Pattern choice affects both the look and the structural performance of the patio. A running bond or herringbone pattern locks pavers together laterally better than a simple grid, which is why herringbone is the go-to recommendation for driveways and high-traffic areas. For a small backyard patio, running bond (like a brick wall on its side) is the most beginner-friendly and still performs well.
| Pattern | Difficulty | Best for | Notes |
|---|---|---|---|
| Running bond | Easy | Small patios, first-timers | Clean, classic look; rows offset by half a paver length |
| Stack bond (grid) | Easy | Simple square areas | Easier to lay but weakest structurally; requires precise cutting |
| Herringbone (45° or 90°) | Moderate | High-traffic or large areas | Maximum interlock strength; more cuts at the edges |
| Basketweave | Moderate | Traditional or cottage looks | Works best with pavers that are exactly 2:1 ratio (e.g., 4x8-inch) |
| Pinwheel | Moderate | Feature focal areas | Mixes paver sizes; requires careful planning upfront |
Start laying from the most visible corner of the patio (usually a corner nearest the house or a door). Work outward in both directions so cuts end up at the less-visible edges. Set each paver by placing it gently onto the sand, then tapping it down with a rubber mallet using two or three firm strikes. If you want the full step-by-step, follow how to lay paver patio stones for more on setting each unit in the sand and tapping it down correctly. If you want the smoothest finish, adjust each paver so it sits flush with its neighbors before you move on lay pavers for patio. You're embedding the paver into the sand, not hammering it. Keep a consistent gap between pavers: 1/16 to 1/8 inch is typical for most concrete pavers. Use plastic paver spacers if you want uniform joints. Check your level and slope frequently as you work across the surface.
Dry-fit a full row or section before committing to placement. This lets you spot pattern alignment issues, figure out where cuts will land, and adjust spacing before it becomes a problem to fix. If a paver rocks or sits high, lift it and add or remove a small amount of sand underneath. Never use dirt or debris to shim a paver.
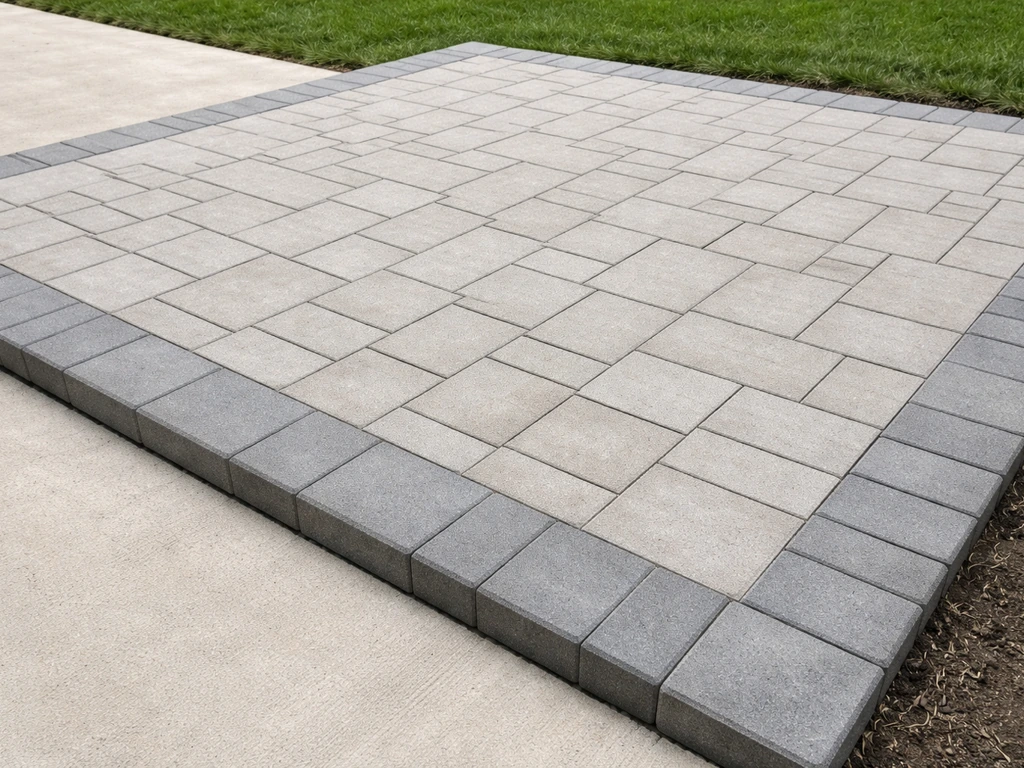
Cutting pavers and installing edge restraints
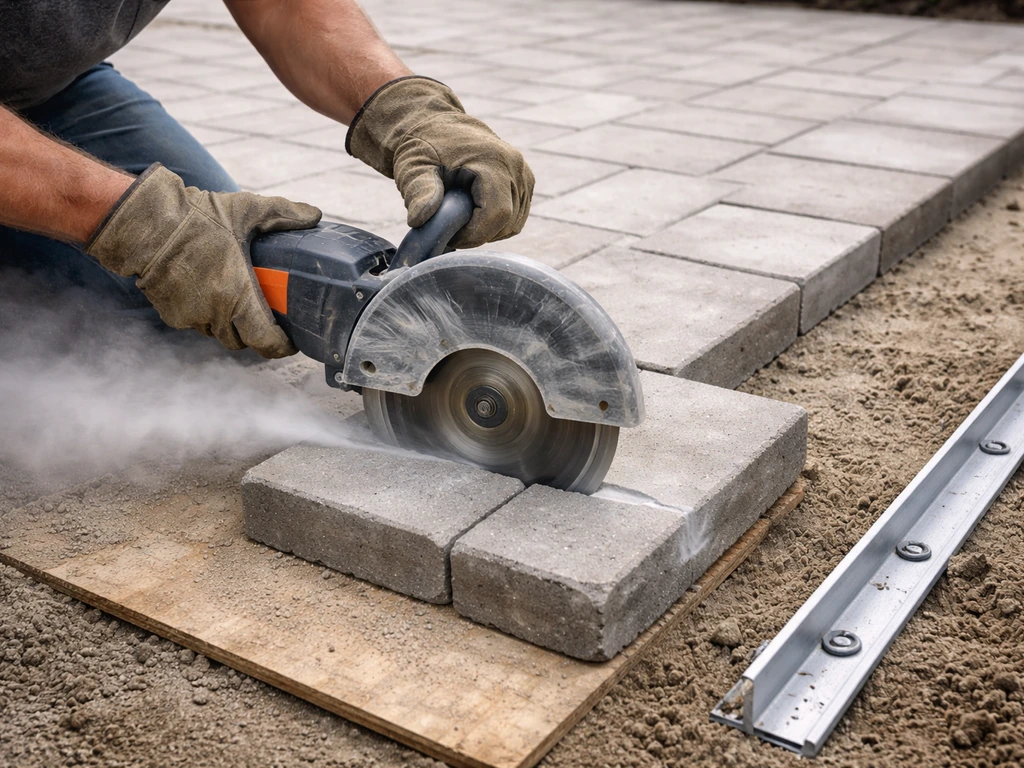
Almost every patio needs cut pavers at the perimeter. You have two main options: a circular saw fitted with a diamond blade, or a rented angle grinder with a diamond blade. For straight cuts on concrete pavers, a circular saw with a dry-cut diamond blade works well outdoors. For curves or tighter shapes, an angle grinder gives you more control. Wet cutting with a tile saw produces cleaner cuts and less dust, but it's a bigger equipment rental if you don't already have one.
Mark your cut line with chalk or a pencil. Score the line first with a shallow pass, then make the full-depth cut. Always wear eye protection and a dust mask when cutting pavers. For a small patio, you might only need 20 to 40 cuts total, so don't overthink the equipment. A rented diamond blade saw for half a day runs about $40 to $60 and handles a small patio easily.
Edge restraints go in after all your pavers are laid. They are what keep the whole patio from spreading outward over time, since the pavers are not mortared down. Use purpose-made plastic paver edging (available at any landscape supply store). Spike it into the ground with metal stakes, driving one stake every 12 inches along straight sections and every 6 inches on curves. Use non-galvanized steel spikes or purpose-made edge restraint spikes, not galvanized fasteners. Alternatively, you can form a concrete edge troweled into a wedge shape along the perimeter, which is more permanent but harder to adjust. Either way, edge restraints are non-negotiable on a sand-set patio.
Joint sand, compaction, and the sealing decision
Once all pavers are laid and edge restraints are in, sweep joint sand across the entire surface and work it into the joints. You have two main options: regular coarse sand (cheap, easier to work with, but can wash out and allow weeds) or polymeric sand (contains a binder that hardens when wet, resists weeds, and resists erosion). For most homeowners building a patio they want to last, polymeric sand is the smarter choice despite costing a bit more.
Sweep the sand in multiple directions with a push broom, filling joints to within about 1/8 inch of the paver surface. Then make one pass with a plate compactor fitted with a rubber or foam pad protector (to prevent scuffing the paver surface). The vibration settles the sand deeper into the joints. Sweep in more sand after compacting, because the joints will have dropped. Repeat until joints stay full.
If you're using polymeric sand, follow the manufacturer's activation instructions carefully. Most products require you to sweep in the sand dry, compact, blow off excess with a leaf blower, and then mist the surface with water to activate the binder. Don't flood it. Let it cure for 24 hours before walking on it and 48 to 72 hours before placing furniture. Polymeric sand is a system-specific product: different brands and paver types may call for slightly different activation steps, so read the bag.
Should you seal the patio?
Sealing is optional but beneficial in most climates. A quality paver sealer enhances color, reduces staining, slows efflorescence (the white salt bloom that appears on new concrete), and can help lock polymeric sand joints. The tradeoff is cost (expect $0.15 to $0.40 per square foot for sealer) and maintenance (most sealers need reapplication every 3 to 5 years). Wait at least 90 days after installation before sealing new pavers: they need time to breathe and for efflorescence to work its way out. If you seal too early, you trap moisture inside and can create a hazy, peeling finish.
If you're in a wet climate, have light-colored pavers, or are near a grill or fire pit where staining is likely, sealing is worth it. If you used dark pavers and don't mind the natural weathered look, you can skip it or revisit the decision later.
Troubleshooting common problems and keeping the patio looking good
Even well-built patios run into issues, especially in the first year. Here's what to watch for and how to fix it.
| Problem | Likely cause | Fix |
|---|---|---|
| Pavers rocking or shifting | Bedding sand layer too thin or wrong sand type (fine sand or beach sand) | Lift affected pavers, re-screed with coarse concrete sand to a consistent 1-inch depth, relay and compact |
| Standing water on surface | Slope insufficient or base graded incorrectly | Check that slope is at least 1/4 inch per foot away from the house; may require lifting sections and regrading base |
| Joint sand washing out | Rain erosion from regular sand, or polymeric sand not activated correctly | Remove remaining sand, re-sweep polymeric sand, activate per instructions |
| Weeds growing in joints | Joint sand not filling joints fully, or using non-polymeric sand | Pull weeds, re-sweep polymeric sand into joints, activate with water |
| Frost heave or settled sections | Inadequate base depth for freeze-thaw climate, or water trapped in base | Lift affected pavers, add and compact more gravel base, relay; add geotextile fabric if clay soil is present |
| Uneven or wavy surface | Inconsistent screeding, or pavers not set to level during installation | Lift and reset individual pavers by adjusting sand underneath; rubber mallet to fine-tune height |
| White powder on paver surface (efflorescence) | Natural salt migration in new concrete pavers | Wait it out (usually resolves in 6 to 12 months), or use an efflorescence cleaner; seal after 90 days to slow recurrence |
Ongoing maintenance: what actually matters
A sand-set paver patio is genuinely low maintenance, but it's not zero maintenance. Once a year, inspect the joints and top up any areas where sand has washed or settled below the paver surface. Re-sweep polymeric sand into low spots and activate with water. Pull any weeds that have found their way in before they establish roots that displace pavers. If you sealed the patio, plan to reseal every 3 to 5 years or whenever water stops beading on the surface.
Clean the surface with a garden hose and a stiff brush for general dirt. For tougher stains (oil, rust, mildew), use a pH-neutral paver cleaner and avoid power washing with high pressure directly into the joints, as this blasts out the joint sand. If you do power wash, re-sweep joint sand afterward.
If a paver cracks or chips (it happens), individual pavers can be lifted and replaced without disturbing the rest of the patio. That's one of the biggest practical advantages of sand-set pavers over poured concrete. Keep a few spare pavers stored somewhere dry after your project finishes, because dye lots change and matching them years later can be tricky.
Realistic time and effort expectations
For a 120 to 150-square-foot patio, expect roughly two full days of work for a first-time DIYer: a day for excavation, base prep, and compaction, and another day for laying, cutting, edging, and sanding. If you want the best way to lay patio pavers for a level, long-lasting finish, follow the base prep and slope steps just as closely as the actual paver placement laying, cutting, edging, and sanding. Renting a plate compactor (about $60 to $80 per day) and a sod cutter makes a real difference in both quality and time. Don't try to rush the base compaction to finish in one day. The extra hours you put into a solid base are the reason the patio is still level in 10 years.
The full project from planning to a walk-on-ready surface usually costs $8 to $20 per square foot in materials for a DIY install, depending on paver type and your region. Concrete pavers sit at the lower end; natural stone and premium manufactured pavers push toward the higher end. The biggest cost variable is the pavers themselves. Everything else (gravel, sand, edge restraints, polymeric sand) tends to total $2 to $4 per square foot combined.
If you've worked through laying pavers in a basic grid or running bond and want to explore more complex installation scenarios like herringbone patterns, raised patios, or working over existing concrete, those techniques build directly on everything covered here. If you want the full step-by-step, start with patio pavers how to lay, beginning with the base and drainage laying pavers. Getting this foundation right first makes all of those variations much easier to handle.
FAQ
Can I lay a small paver patio directly over existing concrete or asphalt?
You can sometimes place pavers over existing flat, sound concrete using a bonded or leveling system, but you generally should not try to lay sand-set pavers directly onto old concrete or asphalt because there is no proper drainage layer. If you do it at all, plan for a bonded underlayment or a mortared/engineered method, and confirm local requirements because freezing climates and surface water can cause spalling or joint failure.
What is the minimum patio thickness and depth I should aim for?
For typical sand-set concrete pavers, the common residential build is around 9 to 10 inches total excavation (base, bedding sand, paver thickness, and some adjustment space). If you change any component size, keep the overall goal the same: enough compacted base for load and drainage, plus a true 1-inch bedding sand layer. If you find you cannot hit the target depth, raising the grade with a thicker base is usually more reliable than reducing compaction or bedding sand.
How do I fix a low spot after I have already laid some pavers?
Lift the affected pavers, remove and replace the bedding sand where the low spot is, and re-screed to restore the surface plane and slope. Do not just add more sand on top of disturbed sand, and do not shim with dirt or debris. Once the sand is corrected, reset the pavers and recheck level and drop every few feet.
How much slope should my patio have if it is small and close to the house?
Use at least 1/4 inch per foot away from the house (about a 2 percent grade). Even for small patios, keep that consistent, and verify the slope in multiple directions if the patio is not a simple rectangle. If the patio is within 10 feet of your foundation and any surface drains toward it, you may need a steeper grade or additional drainage controls.
Can I use round pea gravel instead of crusher run?
Avoid pea gravel and other rounded materials. They do not interlock as well, so they compact poorly and are more likely to shift under load. Use angular, processed gravel such as 1.5-inch base gravel or 3/4-inch crusher run so you can build a stable, locked base in lifts.
Do I really need geotextile fabric if my soil seems okay?
It is not always mandatory, but it is a strong safeguard when you have clay-heavy soils, poor drainage, or freeze-thaw conditions, or if you see soft areas after digging. Fabric helps reduce the migration of fines into the gravel base. If you use it, lay it properly in the excavation, keep the overlap tight, and do not compact directly on wrinkles or debris that create voids.
How do I know if my base is compacted enough?
A quick field check is whether the subgrade and base resist foot pressure and feel firm rather than spongy. If you can sink your boot easily or you see pumping during compaction, you need more passes. For the base, also compact in lifts, because a plate compactor typically cannot compress thick dumps effectively in one go.
Should I tamp the sand layer or just screed it smooth?
Screed it smooth to a consistent 1-inch depth, then avoid walking on it. You do compact later after joint sand is swept in, using a compactor with a rubber or foam pad to protect the pavers. Over-tamping the bedding sand before laying can disturb your grade and make pavers settle unevenly.
What joint width should I leave, and what if my pavers have different spacing?
Typical gaps for most concrete pavers are about 1/16 to 1/8 inch. Use plastic spacers if you want uniform joints, but if your pavers have integral spacing tabs or different design requirements, follow that product’s recommendations. The key is consistency, because tight joints can create difficult expansion behavior, and wide joints can drain sand out faster.
How do I handle polymeric sand if rain is in the forecast?
Do not activate polymeric sand with water if rain is likely to hit before it cures. After sweeping it into joints, you need the specific activation sequence (dry sweep, compact, remove excess, mist lightly, then cure), and rain can prematurely activate or wash out binder. If rain is expected, stage the job so you can complete activation and curing within the product’s recommended window.
Can I walk on the patio right after installing polymeric sand?
Wait until the binder cures per the product instructions. A common recommendation is 24 hours before foot traffic and 48 to 72 hours before moving furniture onto it. Even if it looks set, premature loading can cause joint failure and haze or uneven settlement.
Will sealing trap moisture and cause problems if my climate is humid?
Sealing can be beneficial, but it can also slow evaporation, so timing matters. If you seal too soon after installation, you can trap moisture and worsen efflorescence or create a hazy finish. If you are in a damp climate, ensure proper curing time (often at least 90 days) and choose a sealer meant for your paver type, especially if you used polymeric joint sand.
How do I maintain the patio in winter or freeze-thaw climates?
Keep joints topped up annually, especially after freeze-thaw cycles that can pull sand out of gaps. If weeds appear, remove them early before roots displace pavers. Avoid de-icing salts that can damage certain pavers or accelerate spalling on natural stone, and use products suitable for paver surfaces if needed.
What should I do if I lose joint sand after a season?
Sweep in new joint sand and compact to settle it, then top off again since compaction drops the level. If joints keep emptying quickly, inspect for a drainage or base issue such as an incorrect slope, settlement, or washed-out edges. Replacing sand repeatedly without fixing the cause usually means the patio still has a movement or runoff problem.
Can I replace one cracked paver without redoing the whole patio?
Yes, you can lift the damaged unit and replace it in most sand-set installations. Remove surrounding pavers as needed to access the sand bed, lift the cracked piece carefully, clean out loose sand, then reset the new paver at the correct height with fresh bedding sand. After placement, re-sweep joint sand and re-compact the area, and if using polymeric sand, follow the activation steps for that localized section.
How should I store extra pavers so I can match them later?
Keep spare pavers in a dry, covered area and avoid mixing pavers from different batches if possible. Concrete pavers often vary by dye lot, so note the lot number from the original delivery and buy a few extras at the start. When time comes to replace, match color and texture as closely as you can to the stored pieces.
What is the biggest mistake that causes patio failure in a small DIY project?
The most common issue is skipping or rushing base preparation, especially compaction and drainage slope. Small patios can look level during installation, but if the base is not compacted in lifts or the slope is wrong, water can pool and freeze or the surface can settle unevenly, leading to shifting and cracking over time.
Next Articles
Patio Pavers How to Lay Them: Step-by-Step DIY Guide
Step-by-step how to lay patio pavers, including site prep, base leveling, cutting, drainage, fixes for uneven and lippag
How to Lay Paver Patio Stones: Step-by-Step DIY Guide
Step-by-step DIY guide to lay paver patio stones, build the base, prep bedding, level, compact, and finish.
How to Set Patio Pavers Step by Step for a Solid Patio
Step-by-step guide to set patio pavers: layout, prep, base, bedding, cutting, slope, leveling, compaction, edging, seali