Lay your paver patio stones on a compacted gravel base, screed 1 inch of bedding sand on top, set your pavers with 1/16 to 3/16 inch joints, compact everything with a plate compactor, then lock the joints with polymeric sand. That's the core of it. The steps are straightforward, but the details inside each one, especially the base depth, the drainage grade, and the compaction, are what separate a patio that lasts 20 years from one that shifts and sinks within two seasons. If you're not sure where to begin, this also lines up with the full step-by-step approach in how to lay pavers for patio, starting from the base and working up to jointing. This guide walks you through every phase, including what to do if you're laying over existing concrete instead of bare ground.
How to Lay Paver Patio Stones: Step-by-Step DIY Guide

Choosing your pavers and planning the layout
Before you dig a single shovelful, decide on your paver type and your pattern. These two choices affect everything downstream, from how you calculate materials to how you handle cuts at the border.
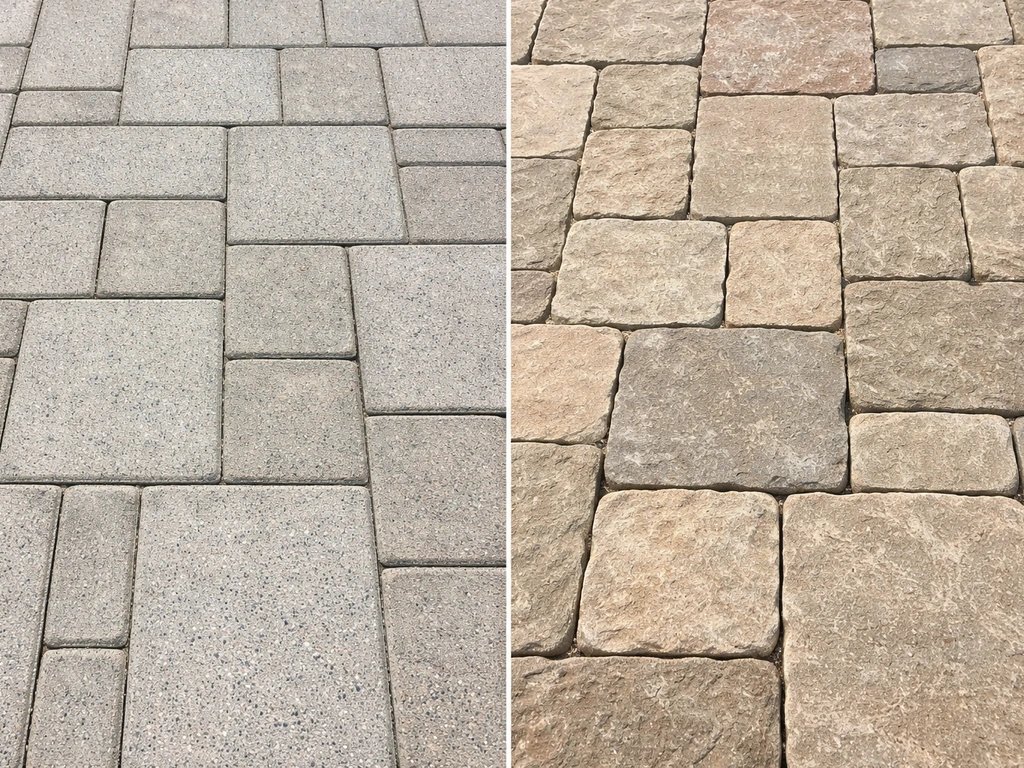
Concrete patio stones vs. natural stone pavers
| Feature | Concrete Patio Stones | Natural Stone Pavers |
|---|---|---|
| Cost | Lower — typically $2–$8 per sq ft | Higher — typically $10–$30+ per sq ft |
| Consistency | Uniform thickness and size; easier to lay level | Varies in thickness; requires more adjustment in bedding layer |
| Durability | Very durable; resists freeze-thaw when quality rated | Extremely durable; granite and bluestone are near-indestructible |
| Appearance | Wide range of shapes, colors, and textures | Natural, unique look; each piece is different |
| Sealing | Recommended to protect color and lock joints | Depends on stone type; some (like travertine) benefit greatly |
| DIY friendliness | Easiest — consistent sizing makes layout predictable | Moderate to harder depending on stone regularity |
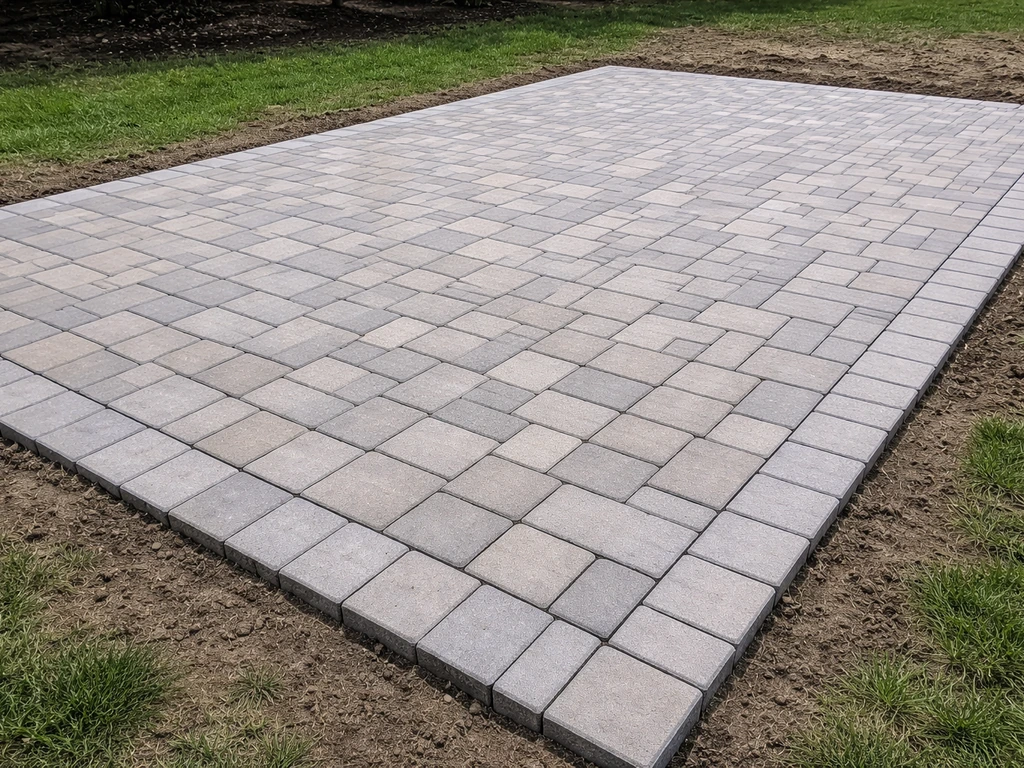
For most DIY projects, interlocking concrete patio stones are the practical choice. They're dimensionally consistent, widely available, and designed to work with the bedding sand and compaction method described in this guide. Natural stone is beautiful but irregular thickness means more fussing with the bedding layer under each piece. If this is your first patio, start with concrete pavers and save the flagstone for round two.
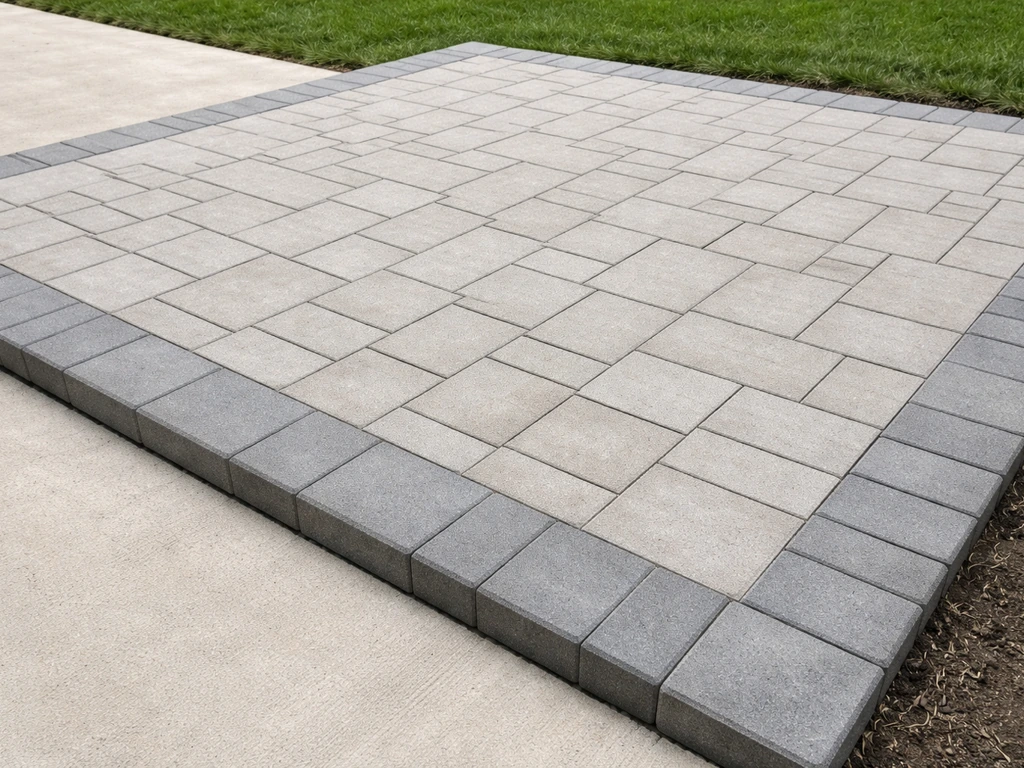
Picking a pattern
The pattern you choose affects both the look and the structural performance of your patio. Running bond and herringbone patterns distribute loads well because the joints never align continuously across the surface. A 45-degree or 90-degree herringbone is actually the strongest pattern for interlocking pavers and is recommended by ICPI for areas with vehicle traffic. For a purely pedestrian patio, running bond, basketweave, or a simple stack bond all work fine. Just know that diagonal patterns (45 degrees to the house) require more cuts at the border. Sketch your layout to scale on paper first, or use a free online paver calculator to estimate quantities and cuts before you order materials.
Tools and materials you'll need before you start
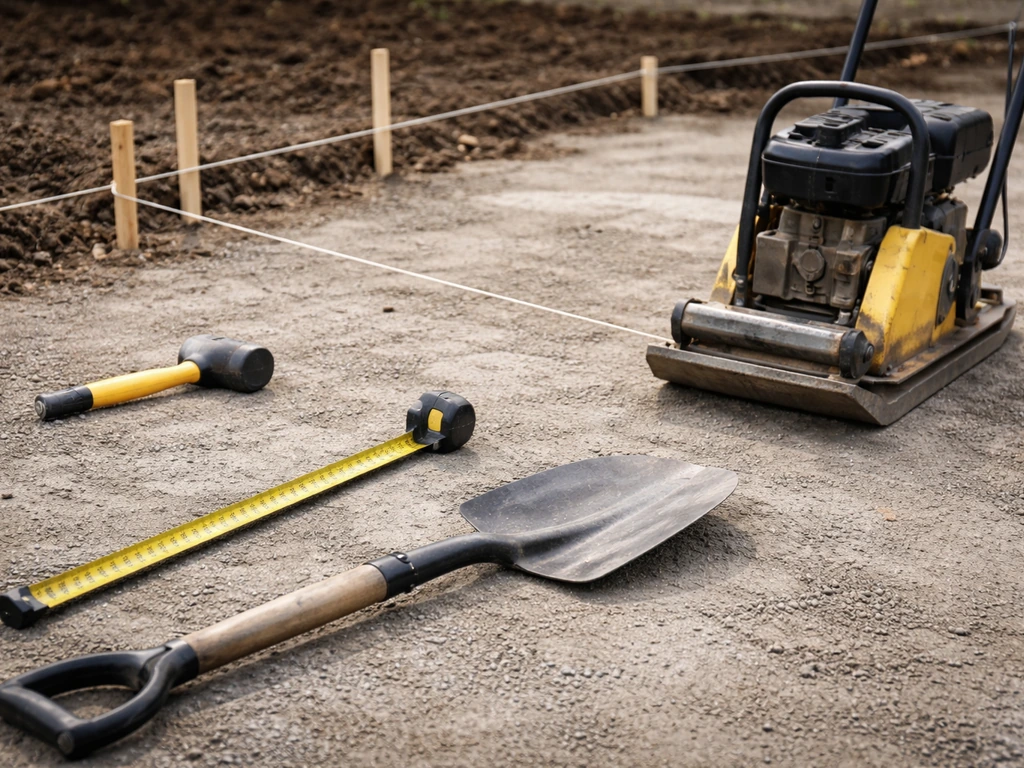
Getting everything on site before you start saves you from making mid-project hardware runs at the worst possible moment (usually when your base is freshly screeded and drying out). Here's what you need for a standard ground-up installation.
Tools
- Tape measure and marking paint or stakes and string line
- Shovel and/or sod cutter for excavation
- Wheelbarrow
- Plate compactor (rent from a tool rental shop — budget $60–$100/day)
- Hand tamper for tight spots the plate compactor can't reach
- Screed rails (1-inch diameter metal conduit works perfectly) and a long screed board or 2x4
- Rubber mallet
- Level (4-foot minimum) and line level or laser level
- Paver saw or angle grinder with diamond blade for cuts
- Broom (stiff bristle for initial sand sweep, soft bristle for polymeric sand)
- Garden hose with spray nozzle for activating polymeric sand
- Safety glasses, work gloves, and hearing protection for cutting
Materials
- Your chosen pavers (order 5–10% extra for cuts and breakage)
- Crushed stone base material (compactible gravel, also called road base or Class II base) — 4 to 6 inches for patios, 8 to 12 inches in freeze-thaw climates
- Coarse bedding sand (concrete sand or ASTM C33 washed sand) — 1 inch depth after compaction
- Plastic or aluminum paver edge restraints with landscape spikes
- Polymeric jointing sand rated for your joint width (most work up to 2-inch joints)
- Geotextile landscape fabric (optional but helpful to prevent base mixing with native soil)
Site prep and building the base, the most important part
Here's the honest truth about paver patios: 90% of failures, sunken spots, rocking stones, drainage pooling, trace back to a bad base. The patio surface you see is just the finish. The base is the actual structure. Don't rush this phase.
Step 1: Mark the area and plan your slope
Stake out your patio perimeter with string lines. Before you excavate a single inch, establish your finished surface height and your drainage slope. Slope the patio away from your house at 1% to 2%, that works out to about 1/8 inch to 1/4 inch drop per linear foot. So a 12-foot-wide patio should sit roughly 1.5 to 3 inches lower at the outer edge than at the house wall. Mark this slope on your string lines now, because every layer you build from here will follow this grade.
Step 2: Excavate to the right depth
Calculate your excavation depth by adding up the layers: paver thickness (typically 2.375 to 3.125 inches for standard concrete pavers) plus 1 inch of bedding sand plus your base depth. In moderate climates, a 4-inch gravel base is often sufficient for a residential patio. In areas with significant freeze-thaw cycles, bump that to 6 to 8 inches. So for a standard paver on a 4-inch base, you're excavating roughly 7.5 to 8 inches below finished grade. Remove all sod and organic material, roots and organic matter decompose and cause settlement. Don't skip this.
Step 3: Compact the subgrade
Once you've excavated, compact the exposed native soil with your plate compactor. Run at least two passes in perpendicular directions. If your soil is clay-heavy or particularly soft, this is where a geotextile fabric helps, it separates the native soil from your base gravel so fine particles don't migrate upward and compromise your base over time. Lay the fabric over the entire excavated area, overlapping seams by 6 inches.
Step 4: Install and compact the gravel base
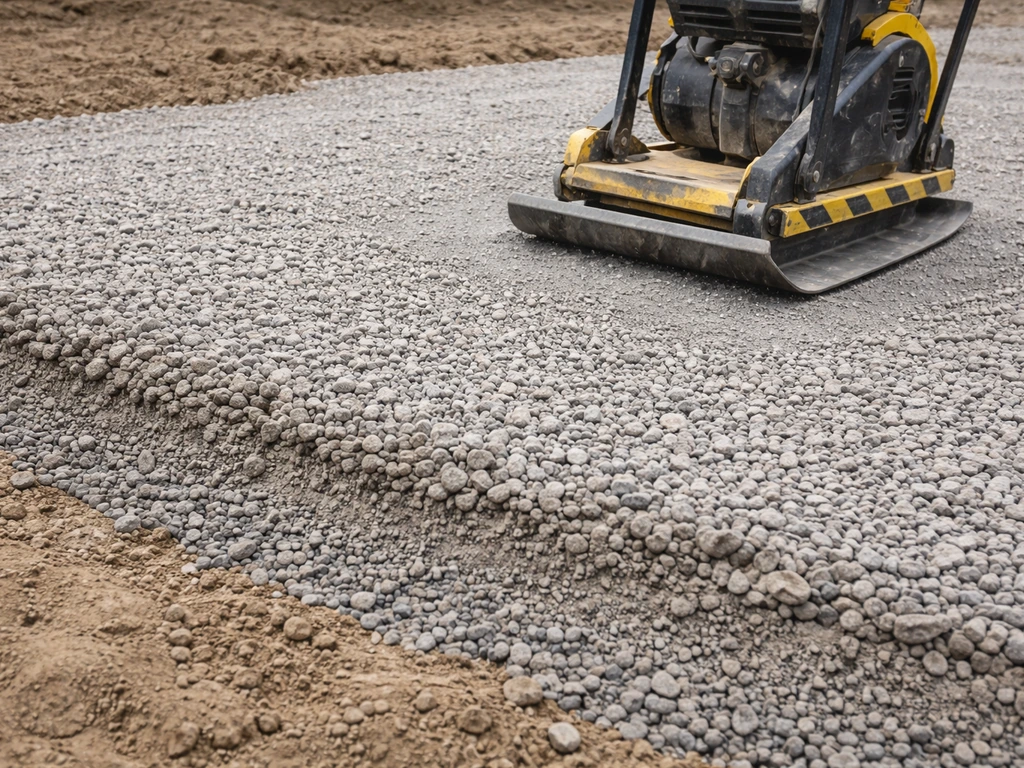
Add your compactible gravel base in 2 to 3 inch lifts, compacting each lift before adding the next. Never dump the full depth in at once and compact it all in one shot, it won't compact properly through the full depth. Run your plate compactor in overlapping rows until the surface feels solid and doesn't shift underfoot. Check your slope grade as you go using a level and your string lines. This is also when you install your edge restraints along at least two sides of the patio (often the house side and one perpendicular edge) to give you a fixed reference for laying your first pavers.
Bedding, placing, and compacting your pavers
With a solid, graded base in place, you're ready for the satisfying part: actually laying the stones.
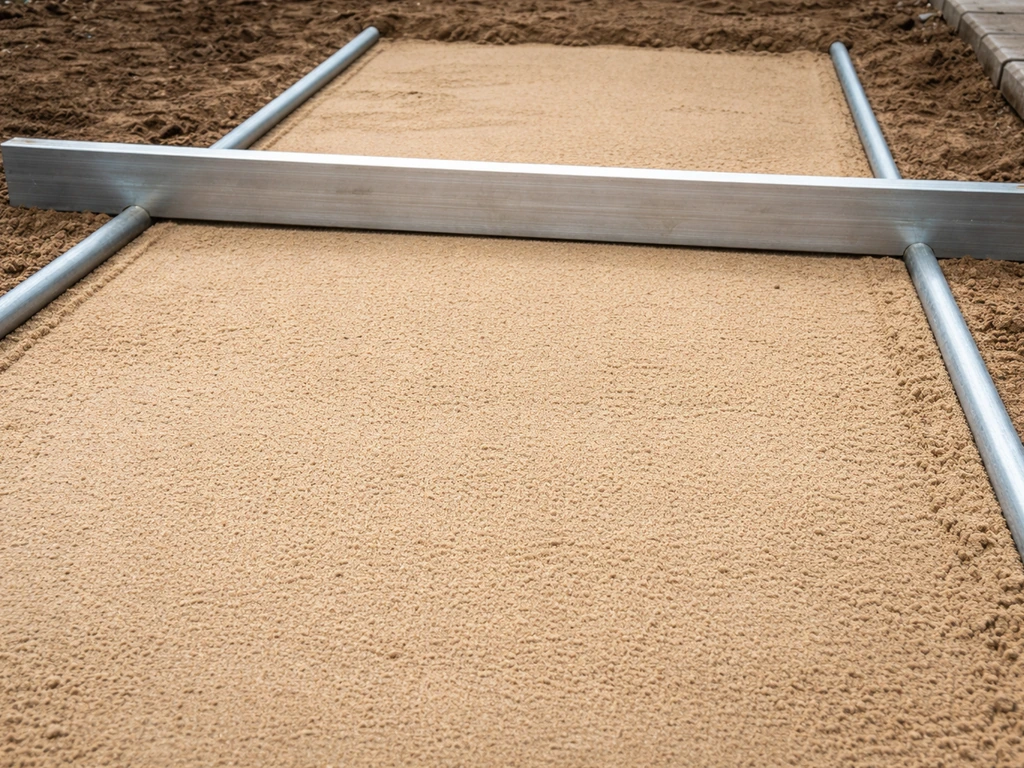
Screeding the bedding sand
Spread coarse bedding sand across your compacted base to a depth of 1 inch. Use 1-inch diameter metal conduit as screed rails, lay them parallel to each other at the intended finished height (accounting for the paver thickness sitting on top), and drag your screed board across them to create a perfectly flat, consistent 1-inch sand surface. Leave your screed rails in place until you've laid enough pavers to work around them, then carefully remove them, fill the channels with sand, and tamp lightly. Do not compact the bedding sand before laying pavers, leave it loose and ready to receive the stones.
Placing the pavers

Start at a fixed 90-degree corner or along a straight reference string line. Set your first paver down firmly without sliding it, sliding disturbs the screeded sand surface and creates low spots. These guidelines for setting pavers on a patio also apply whether you're working with a simple pattern or a more detailed layout set your pavers. Place each subsequent paver the same way, using 1/16 to 3/16 inch joint spacing. An 1/8-inch joint is ideal for load distribution with interlocking pavers, and most concrete pavers have a small built-in spacer nub on the sides to help you maintain consistency automatically. Work from the pavers you've already laid, moving forward, never walk on your screeded sand. Use a rubber mallet to tap pavers level with their neighbors. Check your work with a level every few rows and adjust immediately, since once you're 10 feet in, it's a pain to go back and fix a creeping low spot.
Compacting the paver field
Once you have a section of pavers laid (or the entire field if it's a smaller patio), run your plate compactor over the surface. This is what drives the pavers down into the bedding sand and activates the interlock between them. Make at least two passes in perpendicular directions. Use a rubber pad or compaction pad under the plate to protect paver surfaces from scratching. If you see cracked pavers appearing just behind the compactor, your plate is too heavy for the paver thickness, or you're compacting too aggressively, stop and adjust. After compaction, your pavers should sit roughly 1/8 inch proud of where they started (the bedding sand compacts slightly under them).
Filling joints with polymeric sand
Sweep dry polymeric jointing sand across the entire paved surface, pushing it into the joints with a stiff broom. Make multiple passes until joints are packed full. Before you activate it with water, run your plate compactor over the surface one more time to vibrate the sand deep into the joints. Then top off the joints with more sand and check that the sand sits at least 1/8 inch below the top of the pavers (or at the bottom of the chamfer if your pavers have one). Don't overfill. Then lightly mist the entire surface with water following the product instructions, usually two to three gentle passes to wet without washing sand back out. Techniseal EZSand recommends planning for blank" rel="noopener noreferrer">24 hours without rain for optimal performance, as noted in its technical data sheet. Follow the watering guidance so the water activates the polymeric sand properly without washing the joint sand back out, and allow for bonding or hardening that can begin in about 24 hours under suitable conditions blank" rel="noopener noreferrer">watering the polymeric sand properly. Let it cure for 24 hours before foot traffic and 72 hours before heavy use.
Laying pavers over existing concrete: what to know first
If you already have a concrete slab and want to cover it with pavers, you can absolutely do it, but it's a different process with a few important checkpoints that can make or break the outcome.
What to check before you start
- Is the existing slab sloped away from the house? It must be. If it slopes toward the house or is flat, don't proceed without fixing drainage first — adding pavers on top won't solve a drainage problem, it'll trap water.
- Is the concrete structurally sound? Look for large cracks (wider than 1/4 inch), significant heaving from tree roots, or sections that flex underfoot. Pavers over a failing slab will fail with it.
- Will adding paver height create problems at doorways, steps, or adjacent surfaces? A 2.375-inch paver plus 1 inch of bedding sand adds roughly 3.5 inches of height. Check clearances before committing.
- Is there a basement, cold cellar, or waterproofed area below? If so, adding pavers over concrete may require an impervious rubber membrane beneath the bedding layer to prevent water infiltration into the structure below.
How to lay pavers on concrete
- Clean the slab thoroughly — pressure wash off all dirt, moss, oil, and efflorescence. Let it dry completely.
- Repair cracks wider than 1/4 inch with a concrete patching compound and let it cure.
- If the slab is properly sloped and sound, you can screed 1 inch of coarse bedding sand directly over it and lay your pavers exactly as you would over a gravel base.
- Install edge restraints around the perimeter, anchoring them to the concrete slab with masonry spikes or adhesive if the ground around the slab doesn't allow conventional spiking.
- Lay, compact, and fill joints with polymeric sand using the same process described above. The concrete slab acts as your base — no additional gravel base is needed on top of it.
When not to overlay concrete
Skip the overlay approach if the slab is crumbling, significantly heaved, or drains toward the house. It's also not the right call if your patio is in a heavy freeze-thaw region and you can see the slab has moved significantly over time, the same forces will act on your pavers. In those cases, breaking out the old slab and starting fresh with a proper base gives you a better result and a patio that will last much longer.
Cutting, edging, and finishing the borders cleanly
The border is where a patio goes from looking like a DIY job to looking like professional work. Take your time here.
Measuring and marking cuts
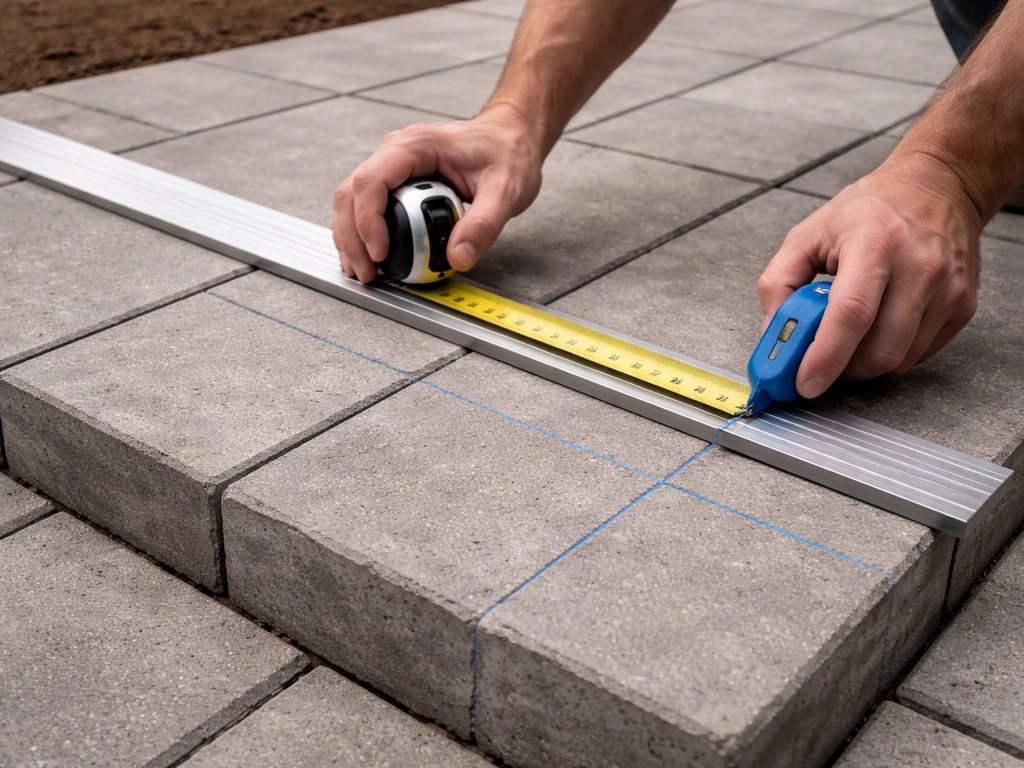
Lay your full pavers across the entire field first before cutting any border pieces. Then measure each gap individually, don't assume they're all the same width, especially on curved or angled borders. Mark cut lines directly on the paver face with a pencil or chalk line. For straight cuts, a paver saw (wet saw with a diamond blade) gives the cleanest result. An angle grinder with a diamond blade works for occasional cuts on site. For curved cuts, score a line with the grinder and use a chisel and hammer to break along it, then clean up with the grinder.
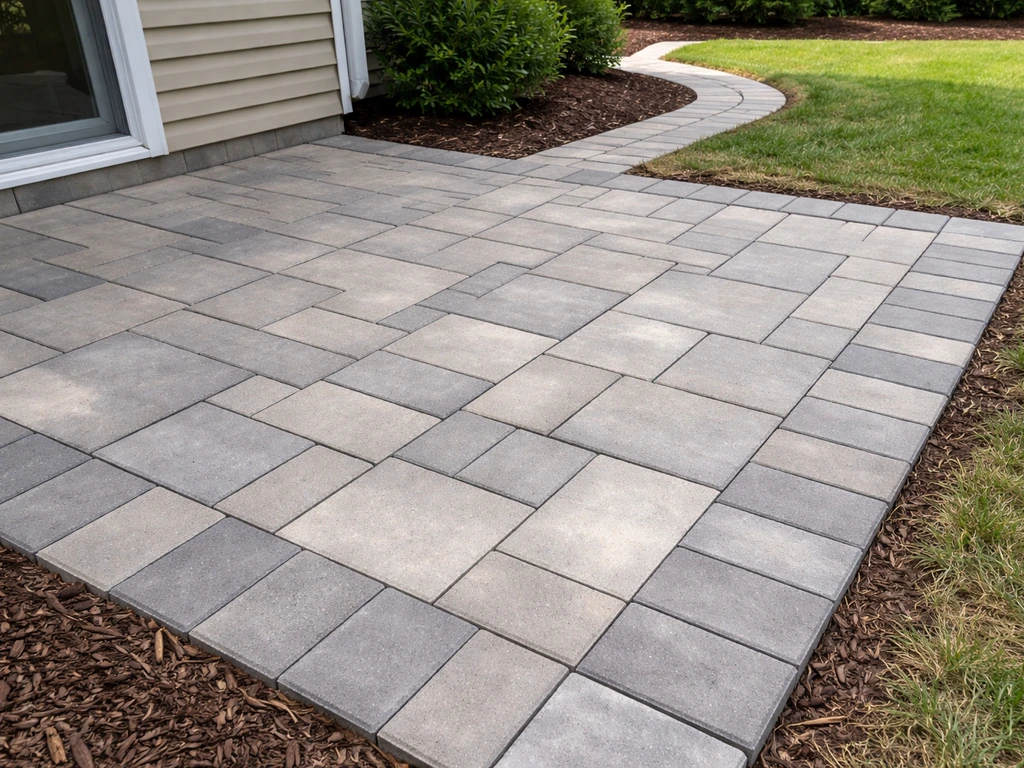
Installing edge restraints
Plastic or aluminum paver edging keeps your entire field from spreading outward under load. Install it snugly against the outer edge of your last full row of pavers, spike it into the base material at 12-inch intervals (or per manufacturer instructions), and backfill against it with compacted soil or gravel. Without solid edging, pavers will slowly migrate outward and joints will open up, this is one of the most common reasons patios look ragged after a few years. If your patio borders a lawn or garden bed, edging also creates a clean line that makes maintenance easier.
Finishing around obstacles
Around posts, drains, or curved features, you'll need custom-shaped cuts. Cardboard templates are your friend here, trace the obstacle shape onto cardboard, cut it out, test it against the gap, and then transfer the shape to your paver. Patience here pays off because a clean fit at a post or drain is the detail that gets noticed.
Sealing, maintenance, and fixing common problems
Should you seal your patio pavers?
Sealing is worth doing for most concrete paver patios, but it's not mandatory for structural performance. What sealing does is protect the paver color from UV fade and staining, help stabilize the polymeric sand in the joints (reducing weed germination and ant intrusion), and make cleaning easier. Wait at least 90 days after installation before sealing so the polymeric sand can fully cure and any efflorescence has a chance to work its way out. Apply sealer when the surface is clean and dry, and temperatures are between 50 and 90 degrees Fahrenheit. Natural stone pavers vary by type, some benefit from sealing (travertine, sandstone), while dense granite typically doesn't need it.
Routine maintenance
- Rinse or sweep the surface periodically to remove debris before it stains or encourages weed growth in joints.
- Reapply polymeric sand to joints if erosion from heavy rain starts opening them up — usually every 3 to 5 years depending on exposure.
- Re-seal every 3 to 5 years or when water no longer beads on the surface.
- In winter, use a plastic snow shovel rather than a metal one to avoid scratching or chipping pavers.
Troubleshooting the most common issues
| Problem | Likely Cause | Fix |
|---|---|---|
| Pavers sinking or settling in spots | Base not compacted thoroughly, or organic material left in base | Remove affected pavers, add and compact more base material, re-screed bedding sand, relay |
| Pavers rocking or loose | Insufficient bedding sand depth, or sand washed out | Remove pavers, add bedding sand to correct 1-inch depth, reset and re-compact |
| Water pooling on surface | Grade not sloped adequately, or a low spot from settlement | Re-establish 1–2% drainage slope; re-level affected pavers |
| Joints filling with weeds | Polymeric sand not properly activated, or joints overfilled above chamfer | Remove vegetation, sweep in fresh polymeric sand, compact and activate correctly |
| White powder (efflorescence) on surface | Natural mineral migration from concrete; common in first year | Brush off when dry; use an efflorescence cleaner; usually diminishes on its own |
| Pavers shifting outward at edges | Edge restraints not installed or insufficiently staked | Add or re-spike edge restraints, push pavers back into position, re-fill joints |
When to call a pro
Most homeowners can handle a standard ground-level patio confidently with this process. Where it makes sense to bring in help: large projects over 500 square feet where renting and operating a full-size compactor and saw is a significant time and logistics challenge, installations on steep slopes requiring complex drainage solutions, or any project that involves structural walls, raised platforms, or a patio over a basement or waterproofed area. Those scenarios add engineering considerations that go beyond a standard DIY install, but the flat ground-up or concrete overlay patio? You've got this.
The fundamentals covered here apply whether you're working through a larger project or laying a small paver patio for the first time. The concepts around base depth, bedding sand thickness, joint spacing, and drainage grade are consistent across patio sizes and styles. Once you've completed your first patio using this method, you'll understand intuitively why each step matters, and the next project goes faster because the process is familiar.
FAQ
How thick should the gravel base be for my patio if I do not know my soil type or frost zone?
Use 4 inches for a typical, non-freezing residential patio, then move to 6 to 8 inches if you have freeze-thaw winters, a sloped site, or soft clay. If your soil feels like it squishes when you step on it, treat it like “soft” and consider adding base depth plus geotextile separation, rather than relying on bedding sand to compensate.
Do I really need geotextile fabric under the gravel base?
It is not required for every site, but it is a strong decision aid when native soil is clay-heavy, very fine, or prone to pumping. In those cases, fabric helps prevent fine particles from migrating into the gravel and loosening the base. If you use fabric, overlap seams about 6 inches and keep gravel free of large organic debris.
Should I compact the bedding sand before laying pavers?
No. The bedding sand should be screeded smooth and left loose. Compaction before placing pavers reduces their ability to seat and interlock, which can lead to rocking stones or height differences. Compact only after pavers are set.
What is the best way to keep the patio from draining toward my house?
Set and verify your slope using string lines before you build layers, and re-check the grade while placing base and while screeding sand. A common mistake is trusting “eyeballed” slope and then ending up flat at the house side, which causes pooling. If runoff is already problem-prone, confirm that your patio edge is lower than the house-side drainage path by the planned amount.
Can I lay pavers directly on sand or thin gravel to save time?
Avoid it. Thin or sandy bases are the fastest path to settlement and uneven surfaces. The bedding sand layer is meant to be a leveling medium, not the structural support. If you want a shortcut, the only acceptable one is skipping extra steps like certain overlays, not reducing base depth or compaction.
What if my pavers start looking uneven before I get to the jointing stage?
Stop and correct early. Tap down high spots with a rubber mallet, and add or remove a small amount of bedding sand only where needed. Do not wait until the patio is complete, because a creeping low spot becomes hard to fix once large areas are locked by the placement pattern and height.
How do I know whether my plate compactor is too aggressive?
Look for cracked pavers appearing right behind the compactor. If you see cracking, your compaction setup is too harsh for the paver thickness or you are compacting too intensely. Use a rubber compaction pad, reduce passes, and switch to a lighter approach until you can vibrate joints without damaging the units.
Should I fill the joints completely with polymeric sand, or is overfilling a problem?
Fill until joints are packed and the sand ends up at least about 1/8 inch below the top of the pavers, or below the bottom of a chamfer if present. Overfilling can wash out during wetting and can stain the surface. Underfilling is also risky because weak joints can lead to movement and weeds.
Can I use regular sand in the joints if I cannot find polymeric sand?
Regular sand will not lock joints the same way. Over time it can wash out or break down, allowing pavers to shift and creating wider joints. If polymeric sand is unavailable, postpone jointing until you can use the right product, or be prepared for more frequent maintenance and re-leveling.
How long should I wait before using the patio, and what happens if I walk on it early?
Let polymeric joint sand cure according to the installation window, typically about 24 hours before foot traffic and 72 hours before heavy use. Walking early can disturb joint sand and create uneven settlement lines, especially in areas that were compacted and still settling.
What should I do if my polymeric sand washes out during watering?
That usually means it was overfilled, wetted too aggressively, or the product was not applied in the correct passes. Keep the mist light and controlled, stop once joints look wet-through, and avoid flooding. If washing occurred, allow it to dry, then re-sweep and re-pack joints as needed, following the product instructions for reactivation.
Do I need to seal the patio after installation?
Sealing is primarily for appearance and maintenance. It is optional for structural performance, but it can reduce UV fading, staining, and can help stabilize polymeric joint sand against weed growth and ant intrusion. If you plan to seal, wait at least 90 days so joint materials cure and any efflorescence has a chance to dissipate.
How should I handle cutting around posts, drains, or irregular shapes?
Use cardboard templates to transfer the exact contour, then test-fit the template against the paver gap before cutting. This reduces “almost fits” pieces, which can leave visible uneven gaps and weak joint conditions. After placement, keep joint spacing consistent on the cut edges so the interlock still behaves as intended.
What is the simplest way to prevent border pavers from shifting over time?
Install rigid edging on at least two sides, snug against the outer face of the last full row, and backfill firmly to lock it in place. A common mistake is relying on the field of pavers to hold the border, which allows outward migration and joint opening. If your patio borders landscaping, edging also helps create a cleaner transition for maintenance.
Is it safe to install pavers over existing concrete if it seems mostly okay?
Only proceed if the slab is stable and not heaving or draining incorrectly. If the concrete is crumbling, significantly moved, or sheds water toward the house, overlaying usually repeats the same problems in paver form. When in doubt, plan on removing the slab and building the base properly.
When should I hire help instead of DIY for a paver patio?
Consider bringing in help for large areas (for example, over 500 square feet) when you would spend too much time operating rented equipment, and for complex drainage solutions on steep slopes. Also treat structural additions like raised platforms, retaining walls, or work over a basement or waterproofed area as “engineering plus contractor” territory rather than basic DIY.
Step-by-step guide to set patio pavers: layout, prep, base, bedding, cutting, slope, leveling, compaction, edging, seali
Step-by-step DIY for laying patio pavers: layout, base prep, compaction, leveling, cutting, jointing, and sealing for dr

Step-by-step guide to apply patio paver sand correctly: prep base, set pavers, fill joints, compact, and troubleshoot is