
You can absolutely build a backyard paver patio by yourself, start to finish, without a contractor. The full process runs in eight phases: plan and measure, gather tools and materials, excavate and grade, build your compacted base, screed a sand setting bed, lay the pavers, finish the joints and edges, then seal. Done right, a 200-square-foot patio takes most DIYers two to three weekends. Done wrong, mainly by skipping base depth or slope, you get a patio that rocks, pools water, and heaves in the first winter. This guide walks you through every phase in order so you don't make those mistakes.
How to Build a Backyard Paver Patio All By Yourself

Felix Rowe
9 Jul 2026
Phase 1: Project Planning and Measuring Your Patio Area
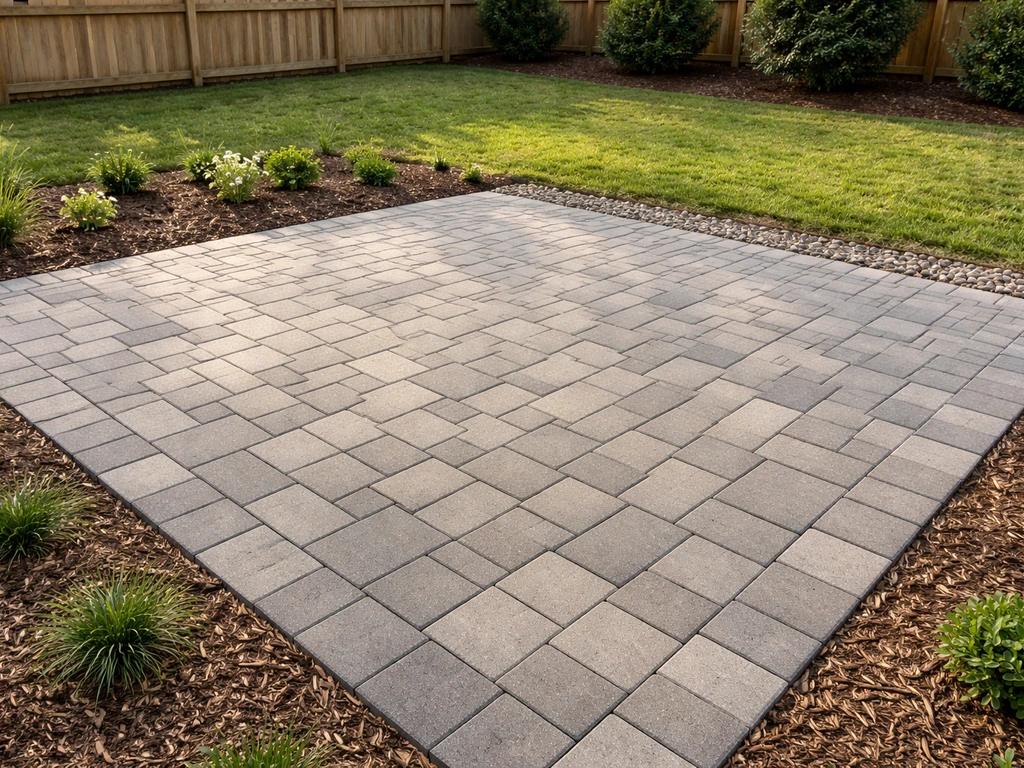
Start with a sketch on paper. Mark your house wall, any door openings, and the rough shape you want. Most backyard patios are rectangular because it simplifies cuts and base work, but L-shapes and curves work fine once you have the basics down. Measure the area carefully and note any slopes, low spots, or obstacles like tree roots or downspouts.
To calculate how many pavers you need, divide your total project area (in square inches) by the face area of one paver, then multiply by a waste factor. Use 1.05 for a simple running bond, 1.10 for herringbone or diagonal patterns, which require far more cuts. For example, a 200-square-foot patio in running bond needs roughly 210 square feet worth of pavers. Order a little extra rather than scrambling for a matching batch later.
Plan your drainage slope into the layout right now, before you touch a shovel. The patio surface needs to fall away from the house at a rate of 1/8 to 1/4 inch per foot (roughly 1 to 2 percent). On a 12-foot-deep patio, that means the far edge sits 1.5 to 3 inches lower than the edge nearest your house. Set that slope in your excavation and every layer above it follows automatically.
Also decide now on your add-ons. A fire pit area changes your layout and may require a non-combustible paver border. A raised patio adds retaining wall blocks and a deeper base at the step transitions. Addressing these decisions in the planning phase saves you from ripping up finished work later. If you are also exploring design ideas or material choices at this stage, do-it-yourself patio paver ideas and stone patio pavers do yourself resources can help you nail down aesthetics before you buy anything. If you want more patio upgrades, start with patio pavers do it yourself tips for patterns, base depth, and finishing choices do-it-yourself patio paver ideas.
Phase 2: Tools, Materials, and What to Rent vs. Buy
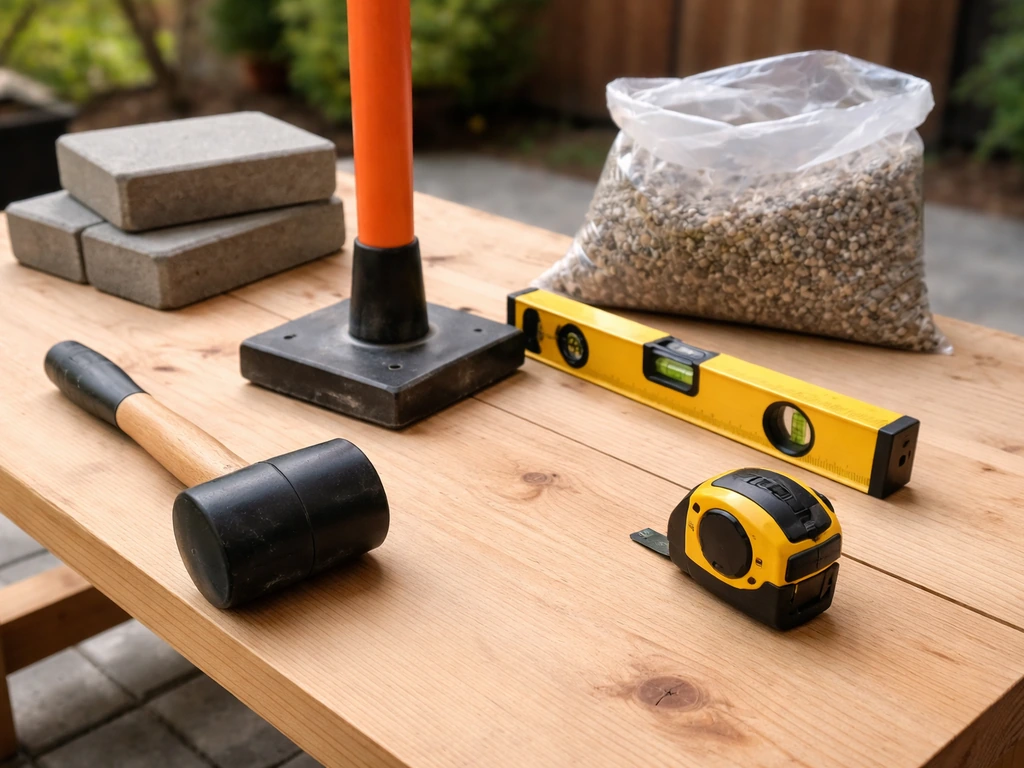
Be honest about your tool inventory before you head to the hardware store. Some items are cheap enough to buy and keep. Others you will use for one weekend and never touch again, which makes renting the smarter call.
Buy these, you will use them again
- Rubber mallet (for setting pavers without cracking them)
- Hand tamper (for small areas near edges the plate compactor can't reach)
- Level (4-foot is ideal; a 2-foot works)
- Tape measure and chalk line
- Mason's string and stakes
- Push broom (for sweeping joint sand)
- Safety glasses, ear protection, and work gloves
- Landscape edging stakes and a mallet
Rent these, not worth owning for a single patio
- Plate compactor (essential for proper base compaction — do not skip this)
- Wet saw or angle grinder with a diamond blade (for cuts)
- Sod cutter (makes excavation much faster if you are removing grass)
- Hand plate compactor for tight spots near edging
Materials checklist
| Material | Purpose | Typical Quantity (200 sq ft patio) |
|---|---|---|
| Compactable gravel base (crushed stone) | Structural base layer | About 2.5 tons for a 4-inch depth |
| Coarse concrete sand (bedding sand) | Setting bed for pavers | About 1 ton for a 1-inch layer |
| Pavers | Surface layer | ~210 sq ft worth (includes 5% waste) |
| Polymeric jointing sand | Lock joints, prevent weeds | Typically 1 bag per 20–25 sq ft |
| Plastic paver edging with spikes | Hold border pavers in place | Perimeter length in linear feet |
| Paver sealer (optional but recommended) | UV and stain protection | Coverage varies by product |
For the standard pedestrian patio cross-section, plan on 4 inches of compacted gravel base, 1 inch of bedding sand, and a paver that is roughly 2-3/8 inches thick. That puts your total build-up at around 7 to 9 inches. Measure down from your finished surface height to know exactly how deep to dig.
Phase 3: Site Prep, Excavation, Grading, and Drainage
Call 811 (the national dig-safe number) before you excavate. It is free, and it is the law. Mark your utility lines first, then outline your patio boundary with spray paint or stakes and string.
Remove all grass and organic material. If you are laying over grass, either rent a sod cutter for a clean result or remove it by hand. Never lay a base over grass or topsoil. Organic material compresses and rots, which causes your patio to sink unevenly. Dig down to the full excavation depth, which for most patios is 7 to 9 inches plus any additional depth needed to match your finished patio height with the adjacent surface.
Grade the excavation floor with your drainage slope built in from the start. Use a long level and your string lines to check that the floor slopes 1/8 to 1/4 inch per foot away from the house. Tamp the bare subgrade with your plate compactor before adding any base material. If you find soft or wet spots, dig them out and fill with additional compactable gravel.
Laying over an existing concrete slab is a different scenario. You can also choose stone patio pavers do yourself even when you are installing over an existing concrete slab, as long as you inspect it carefully first. Inspect the slab first. If it drains properly and has no major cracks or heaving, you can lay pavers directly over it using a thin layer of sand or a dry-mortar mix.
If the slab slopes toward the house or is actively crumbling, it is better to break it out than to build on a bad foundation. Laying over uneven ground requires more careful grading, take extra time leveling the subgrade so your base layer does not need to compensate for major low spots.
Phase 4: Base Installation, Subbase, Compacting, and Setting Bed
This is the most important phase of the entire project. If you want to do this whole project yourself, focus on planning the layout, building the base correctly, and setting the pavers with careful leveling do patio pavers yourself. A beautiful patio laid on a weak base will fail. A plain patio on a solid base will last decades. Do not rush this.
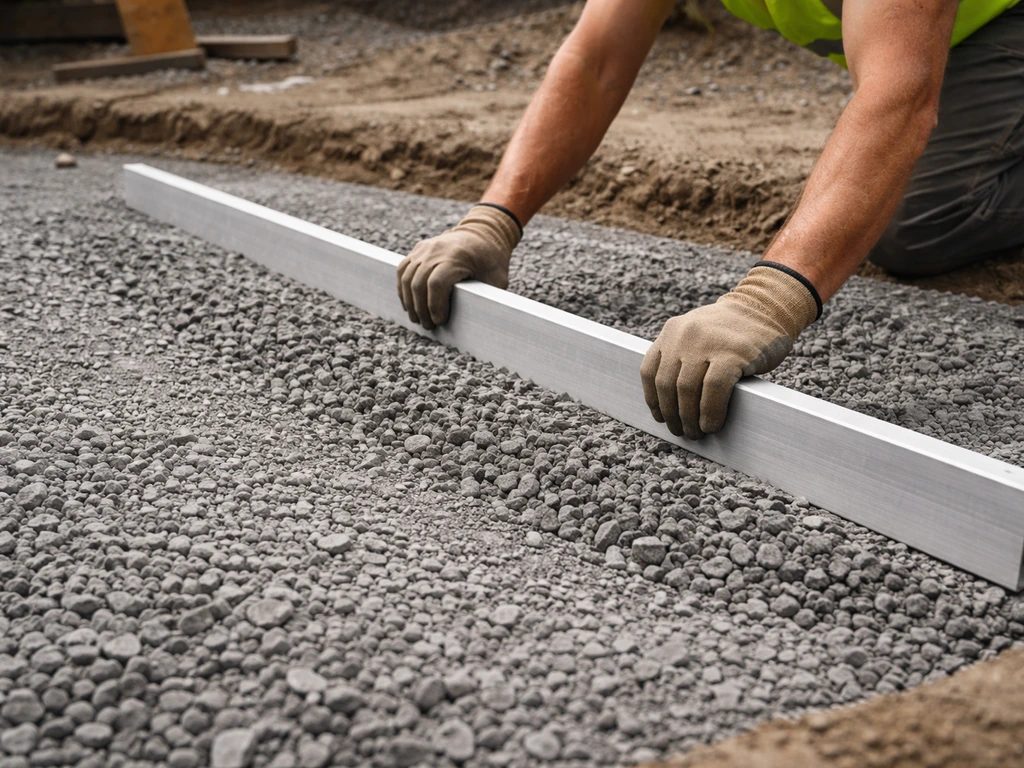
- Pour your crushed stone base in 2-inch lifts, not all at once. Spread 2 inches, compact with the plate compactor in overlapping passes, then add the next 2 inches and compact again. Your target depth after compaction is 4 inches for a pedestrian patio.
- Check your slope after each lift with a level and string lines. Compact base wants to hold its slope well, but verify rather than assume.
- Run the plate compactor over the entire base at least two to three times, once in each direction. Aim for at least 98% compaction — in practical terms, the surface should feel rock-solid underfoot with no give whatsoever.
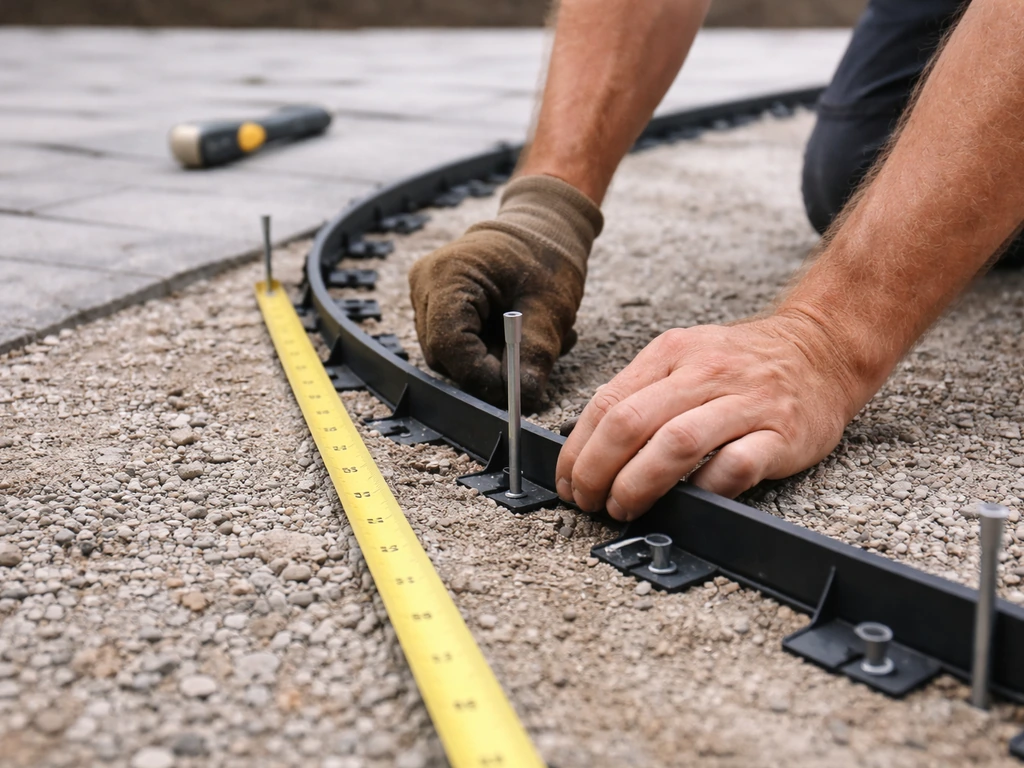
- Install your plastic paver edging around the perimeter now, staked into the compacted base. This holds your border course while you work and keeps the base from spreading when you compact later.
- Spread 1 inch of coarse concrete sand (bedding sand) over the compacted base. Do not compact this layer — it needs to stay loose so you can screed it flat.
- Set two lengths of 1-inch diameter pipe or conduit on the gravel as screed rails, parallel to each other and spaced about 6 to 8 feet apart. Pour sand between them, then pull a straight 2x4 across both pipes to level the sand to exactly 1 inch. Remove the pipes and fill the channels with sand, lightly smoothing by hand.
Do not walk on the screeded sand bed before laying pavers. Every footprint is a depression you will have to fix later.
Phase 5: Laying Pavers, Patterns, Alignment, Leveling, and Cutting
Start laying from a corner or a straight edge, never from the middle. Snap a chalk line as your first alignment guide and keep a mason's string stretched along your work front as you go. Check every few rows against this line, pavers drift surprisingly fast without a reference point.
Choosing a pattern
| Pattern | Look | Cut Complexity | Waste Factor |
|---|---|---|---|
| Running bond | Classic brick rows offset by half a paver length | Low — mostly edge cuts | 5% |
| Herringbone (90°) | V-shaped interlocking rows, very strong | High — every edge is a cut | 10% |
| Herringbone (45° diagonal) | Same as above but rotated — striking look | Very high | 10–15% |
| Basket weave | Pairs of pavers alternating direction | Low to medium | 5–8% |
| Stacked bond | Simple grid, not recommended — joints align and allow shifting | Very low | 5% |
Set each paver by placing it down gently (do not slide it), then tapping it firmly with a rubber mallet. The surface flatness target is plus or minus 3/8 inch over any 10-foot span, check this frequently with your level. Any paver sitting too high means there is too much sand underneath it; remove it, pull a bit of sand out, and reset. Any paver sitting too low means you need to add a small amount of sand beneath it.
Cutting pavers accurately
Save all your cuts for the end. Lay every full paver first across the entire field, then go back and measure and cut the border pieces. Mark each paver with a pencil or chalk, then cut with a wet saw and diamond blade. An angle grinder with a diamond blade works for straight cuts too, though a wet saw gives cleaner results and kicks up far less dust. Always wear eye protection and a dust mask when cutting. Make your cut slightly oversized, check the fit, and trim a second time if needed. Do not force a paver into a gap.
Once all pavers are laid, run the plate compactor over the entire surface (put a piece of carpet or rubber pad under the plate to protect the paver faces). This seats all the pavers firmly and evenly into the sand bed. Check your flatness again after compacting.
Phase 6: Edging, Joints, and Finishing
Securing the edge restraints
Confirm your plastic paver edging is fully staked every 12 inches around the entire perimeter. The edge restraint is what keeps your patio from spreading outward over time. Without it, pavers at the border gradually migrate and the whole field loses tension. Make sure the edging sits flush against the outside face of your border pavers with spikes driven into firm base material.
Regular sand vs. polymeric sand for joints
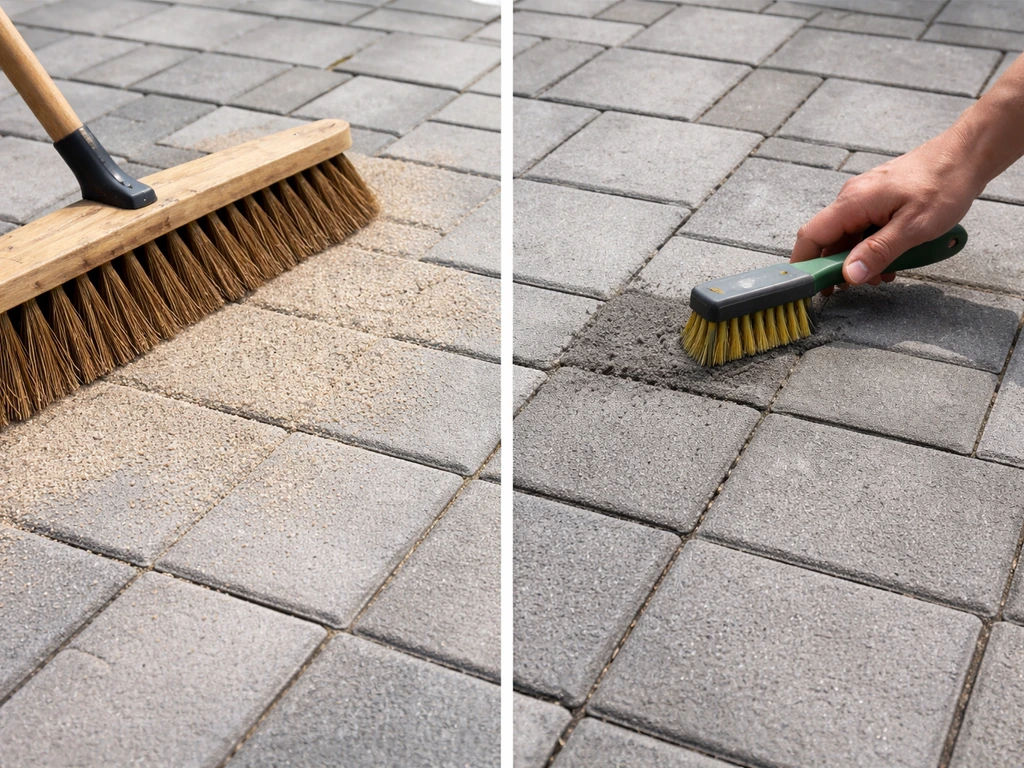
You have two main options for jointing material. Regular coarse sand is cheap and easy but washes out over time, invites weeds, and needs to be topped up periodically. Polymeric sand contains a binder that activates with water and hardens the joint, resisting erosion, weeds, and insects. For a backyard patio you want to last, polymeric sand is worth the extra cost.
To apply polymeric sand: sweep dry sand across the entire patio surface, working it into every joint with a push broom. Pass the plate compactor (with a protective pad) over the surface again to compact the sand deeper into the joints. Sweep again. Blow off all excess sand from the paver faces with a leaf blower set to low, this step matters because any residue left on the surface will haze over when activated.
Then mist the entire patio with water in sections of about 10 by 10 feet, keeping the activation wet until the joints stop absorbing water. Do not overwater. Keep foot traffic off for at least 24 hours and protect the patio from heavy rain for the first 24 to 48 hours while the binder cures.
Sealing the patio
blank" rel="noopener noreferrer">Wait at least 30 days after installing polymeric sand before applying any sealer. This allows the joints to fully cure and lets any efflorescence (white mineral haze) come to the surface so you can clean it off first. Apply sealer in dry conditions with no rain forecast for at least 24 hours. Film-forming sealers enhance color and add surface protection but need reapplication every 2 to 3 years. Penetrating sealers are more subtle but longer-lasting. Either way, one coat is usually enough for a first application, follow the product's specific coverage instructions.
Common DIY Problems and How to Fix Them
Pavers that rock or wobble
A rocking paver almost always means uneven sand underneath it. Pull the paver up (a flat pry bar or two screwdrivers in the joints works), add or remove sand as needed, and reset. If multiple pavers in the same area are rocking, the base likely was not compacted enough in that spot. Pull the pavers and sand in that zone, re-compact the gravel base, re-screed the sand, and relay.
Water pooling on the surface
This is a slope problem. Pull the low area of pavers, add gravel or sand to raise that section, and re-lay. If the entire patio slopes toward the house, the excavation grade was set wrong and there is no easy fix other than pulling a large section up and re-grading. Prevention is the answer here, which is why you set slope in phase one.
Uneven settling after the first winter
Some minor settling in the first year is normal. Significant heaving usually points to inadequate base depth, base material that was not fully compacted, or organic material left in the excavation. Pull the affected pavers, excavate deeper if necessary, compact properly, and re-lay. It is tedious but absolutely fixable by a DIYer.
White haze on pavers after polymeric sand
This efflorescence comes from either mineral bloom from the pavers themselves or polymeric sand residue that was not fully swept off before activation. Wait for the haze to develop fully (usually 30 days), then clean it with an efflorescence cleaner designed for pavers. Apply according to the product instructions, rinse thoroughly, and allow to dry completely before sealing.
Gaps opening in joints after a season
If polymeric sand joints are eroding or separating, either the sand was not activated properly or the binder was diluted by heavy rain before it cured. Clean out the old material as much as possible, sweep in fresh polymeric sand, and re-activate. Make sure the surface is dry and that no rain is forecast before you start.
Bad cuts and chipped pavers
Chips usually mean the blade was dull, the cut was rushed, or you tried to cut too deep in one pass. On a wet saw, let the blade do the work, slow, steady feed. For an angle grinder, score a shallow groove first, then cut deeper. Keep a few extra pavers in reserve for exactly this reason. If a chipped paver ends up in a visible spot, pull it out and replace it while the sand is still workable.
Maintenance and Long-Term Care for Your DIY Patio
A well-built paver patio is genuinely low-maintenance, but it is not zero-maintenance. If you want the best results, follow a do it yourself paver patio installation process that covers planning, base prep, laying pavers, joints, and sealing. A bit of attention each year keeps it looking good and performing well for 20 years or more.
Annual and seasonal tasks
- Every spring, inspect the surface for rocking or sunken pavers and reset them early before settling gets worse.
- Check joints for erosion or weed growth. Pull weeds by hand or use a paver-safe weed killer, then re-fill eroded joints with fresh polymeric sand.
- Sweep the patio regularly to prevent debris buildup and staining, especially under trees.
- Rinse with a garden hose or low-pressure wash. Avoid high-pressure washing directly into the joints — it blasts out the jointing sand.
- In climates with freezing winters, avoid using rock salt on pavers. Use sand or a paver-safe ice melt product instead. Salt accelerates spalling and surface damage.
Re-sanding and resealing schedule
Plan to re-apply jointing sand every 3 to 5 years, or sooner if you notice joints thinning out or weeds taking hold. Polymeric sand lasts longer than regular sand but is not permanent. For sealer, film-forming products typically need reapplication every 2 to 3 years. Penetrating sealers can last 3 to 5 years depending on traffic and climate. Before resealing, clean the surface thoroughly, let it dry completely, and check that joints are in good shape first.
Your next steps, starting today
- Measure your space, sketch your layout, and decide on your patio shape and dimensions.
- Choose your paver style and pattern, then calculate material quantities with waste factored in.
- Call 811 to mark utilities before you dig.
- Rent a sod cutter and plate compactor for your first working weekend.
- Excavate to your full depth, grade for a 1/8-to-1/4-inch-per-foot slope away from the house, and compact the subgrade.
- Lay and compact your gravel base in 2-inch lifts, then screed your 1-inch sand setting bed.
- Install your edge restraints, lay full pavers field-first, then measure and cut border pieces.
- Compact the finished surface, sweep in polymeric sand, activate with water, and keep traffic off for 24 hours.
- Wait 30 days, clean any efflorescence, then apply sealer in dry conditions.
- Schedule a spring check-in each year to catch any settling or joint issues early.
That is the whole project laid out in the right order. Every phase is genuinely doable on your own with a rental plate compactor, a rented wet saw, and a patient weekend mindset. The keys are: set your slope in the ground before anything else, compact your base thoroughly in lifts, keep your sand bed undisturbed until you lay, and do not rush the polymeric sand activation.
Get those four things right and you will end up with a patio that holds up for years, looks great, and cost you a fraction of what a contractor would have charged. If you want fresh styling and layout inspiration, explore do it yourself patio paver ideas for different patterns, edge styles, and finishes.
FAQ
How do I know whether my yard needs more than 7 to 9 inches of excavation for a paver patio?
Use the finished height you need at door thresholds and the height of adjacent surfaces, then account for the exact paver thickness plus bedding sand and compacted base. If you expect heavy loads (like a grill cart or frequent parking), consider adding base depth and compacting in shorter lifts rather than trying to “make up” height with extra sand later.
Can I build a paver patio without a plate compactor if I’m using smaller pavers?
Not reliably. Even for smaller pavers, the base needs uniform compaction to prevent rocking and settlement. If you do not have a plate compactor, renting one is usually cheaper than tearing out pavers after the first winter when voids and soft spots show up.
What’s the best way to handle a patio edge that meets a driveway, sidewalk, or step?
Plan transitions so water still flows away from the house at the same slope rate, and make sure the edging is restrained at the same depth as the base. For step-downs or step-ups, treat them as a separate transition with extra base at the change in elevation so the pavers do not settle differently at the seam.
How much clearance should I leave around the house wall or against fixed features?
Leave space so you can maintain the drainage slope and allow for movement, especially near siding, trim, and downspouts. A practical approach is to keep the patio surface slightly below adjacent thresholds and avoid burying building materials, then integrate any downspout routing with proper grade so runoff does not dump onto the patio.
Should I level the sand bed with a screed board across the whole patio at once?
Avoid “over-screeding” large areas that you cannot lay promptly. Screed in manageable sections and keep the sand surface undisturbed, because walking on it or letting it sit unevenly can create dips that show up after pavers are set.
How tight should the paver joints be for polymeric sand, and what if my joints are too small or too big?
Follow the joint spacing the paver system is designed for, typically using the installed paver’s spacer or the manufacturer’s target. If joints are too small, polymeric sand cannot fully fill and activate. If joints are too big, you may need to adjust your laying technique before jointing to prevent excessive washout or inconsistent activation.
Can I use regular sand in some joints and polymeric in others?
It’s better not to mix them. Different materials wash out or cure differently, and you can end up with uneven weed growth and joint erosion. If you want polymeric durability, commit to polymeric throughout the patio field and along edges where movement and water exposure are greatest.
Why does my patio look fine during the build but develop a slight wobble months later?
Often it’s base compaction failure in a specific area, like near cut edges, under paver corners, or where debris disturbed the subgrade. If rocking appears later, fix it by pulling affected pavers, correcting the base level and compaction, then resetting rather than trying to “top up” sand after the fact.
What should I do if my patio starts collecting water in a low spot after a rainfall?
Treat it as a grade issue, not a jointing issue. Pull pavers from the low zone and adjust the slope by correcting the underlying sand and gravel layers, then re-lay. If the entire patio slopes toward the house, the solution is usually re-grading rather than adding more sand on top.
How can I prevent weeds if my joints still develop gaps or shrink after the first season?
Inspect joints before weeds become established. If you see thinning, broom in fresh polymeric sand and re-activate according to the product instructions. Also check for water pooling at joints, because repeated saturation at specific points accelerates joint breakdown.
Do I need to seal polymeric-sand joint patios, and will sealing interfere with the polymeric binder?
In many cases you seal the paver surface while the polymeric joints cure and stabilize, but you must wait the required cure window before sealing. Sealing too early can trap moisture and leave hazing. If you choose sealer, use a paver- and joint-compatible product and verify it explicitly covers polymeric joint systems.
Is it safe to use a pressure washer on my paver patio after it’s done?
Wait until the joints are fully cured and the sealer (if used) has had time to bond. Afterward, keep pressure moderate and avoid concentrating the stream into joints, because aggressive cleaning can erode jointing sand and pull polymeric material out before it has fully stabilized.
How do I handle pavers around an irrigation line, cable, or outdoor outlet?
Plan routes during the excavation stage so utilities are not buried too shallowly or under unsupported voids. Make sure you maintain required cover for utilities, then build the base around them with consistent compaction so you do not create a weak “patch” that later settles and causes edge failure.
Next Articles
How to Do Patio Pavers Yourself: Step-by-Step DIY Guide
Step-by-step DIY patio paver install: planning, prep, base compaction, leveling, cutting, edging, sand joints, sealing.
How to DIY Paver Patio: Step-by-Step Installation Guide
Step-by-step DIY paver patio guide: prep, graded drainage, compacted base, leveling, cutting, sand finishing, and mainte
Do It Yourself Paver Patio Installation: Step by Step
Step-by-step guide to DIY paver patio installation: grading, base prep, paver setting, edging, joint sand, sealing and f