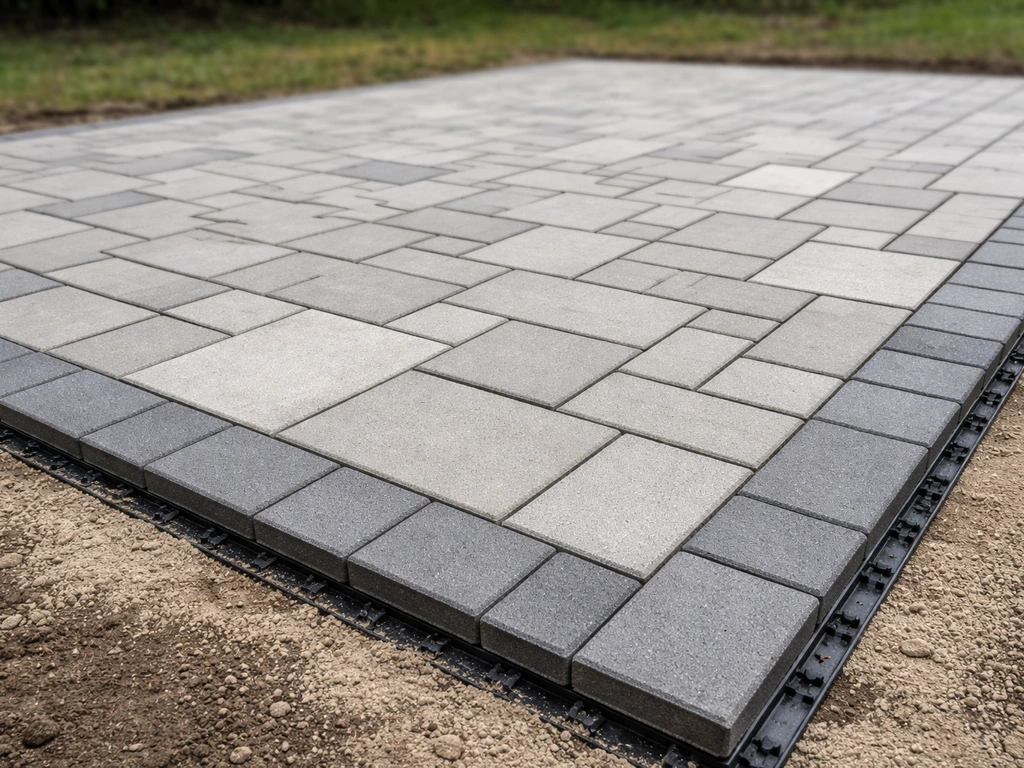
You can absolutely build a paver patio yourself, and it will last decades if you get the base right. The full process goes like this: plan and measure your space, excavate and grade for drainage, compact a 4 to 6 inch crushed stone base in layers, screed about 1 inch of bedding sand, lay your pavers in your chosen pattern, install edge restraints, sweep in polymeric sand, and seal. That's it. The work is physical and takes most people a weekend or two depending on size, but none of it requires special expertise, just patience and a willingness to do each step in order.
How to DIY Paver Patio: Step-by-Step Installation Guide

Felix Rowe
26 May 2026
Planning, measuring, and laying out your patio
Before you touch a shovel, spend real time on planning. A sloppy layout upfront causes problems at every stage after. Start by deciding the shape and rough size of your patio. For most backyard patios, a 10x12 or 12x16 foot area is a comfortable starting point, but go bigger if your space allows, you'll rarely regret extra square footage.
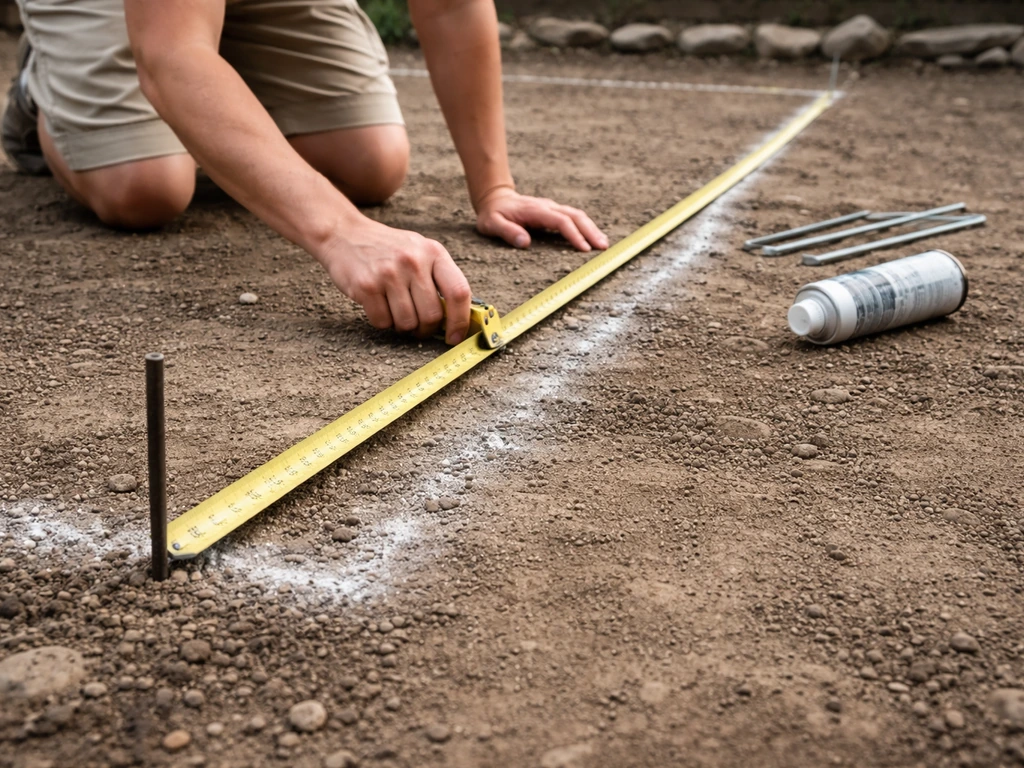
Measure the area with a tape measure and mark the perimeter with spray paint or stakes and string lines. If you're going rectangular, use the 3-4-5 triangle method to confirm your corners are square: measure 3 feet along one side, 4 feet along the adjacent side, and the diagonal between those two points should be exactly 5 feet. If it isn't, adjust until it is. For an L-shape or freeform design, draw it out on graph paper first and transfer the dimensions with stakes and string.
Once your perimeter is marked, calculate how many pavers you need. Measure your total square footage and add 10% for cuts and breakage. Check the paver's coverage information on the packaging (most standard 4x8 inch concrete pavers cover about 4.5 pavers per square foot). It's cheaper to over-order now and return the leftovers than to run short mid-project.
Think about drainage at this stage too. Your patio surface should slope away from your house at a minimum of 1/8 inch per foot (roughly 1%) and ideally 1/4 inch per foot (2%) for reliable runoff. On a 10-foot-deep patio, that means the outer edge sits about 1.25 to 2.5 inches lower than the house-side edge. Plan this into your string line elevations now so you're grading to the right target from the start.
Tools and materials to gather before you start
- Tape measure, stakes, string line, and line level
- Spray paint for marking the ground
- Plate compactor (rent from any equipment rental shop — don't skip this)
- Shovel, spade, and a hand tamper for tight spots
- Wheelbarrow
- Screed pipes (two 3/4 or 1 inch metal conduit pipes work great) and a straight 2x4 for screeding
- Rubber mallet
- Paver saw or angle grinder with a diamond blade for cuts
- Level (4-foot) and a long straightedge
- Safety glasses and work gloves
- Broom and leaf blower
Site prep: excavation, grading, and drainage
This is the part most people underestimate. Getting the site prep right is genuinely the most important factor in whether your patio stays level and drains properly for 20 years or starts heaving and settling after the second winter.
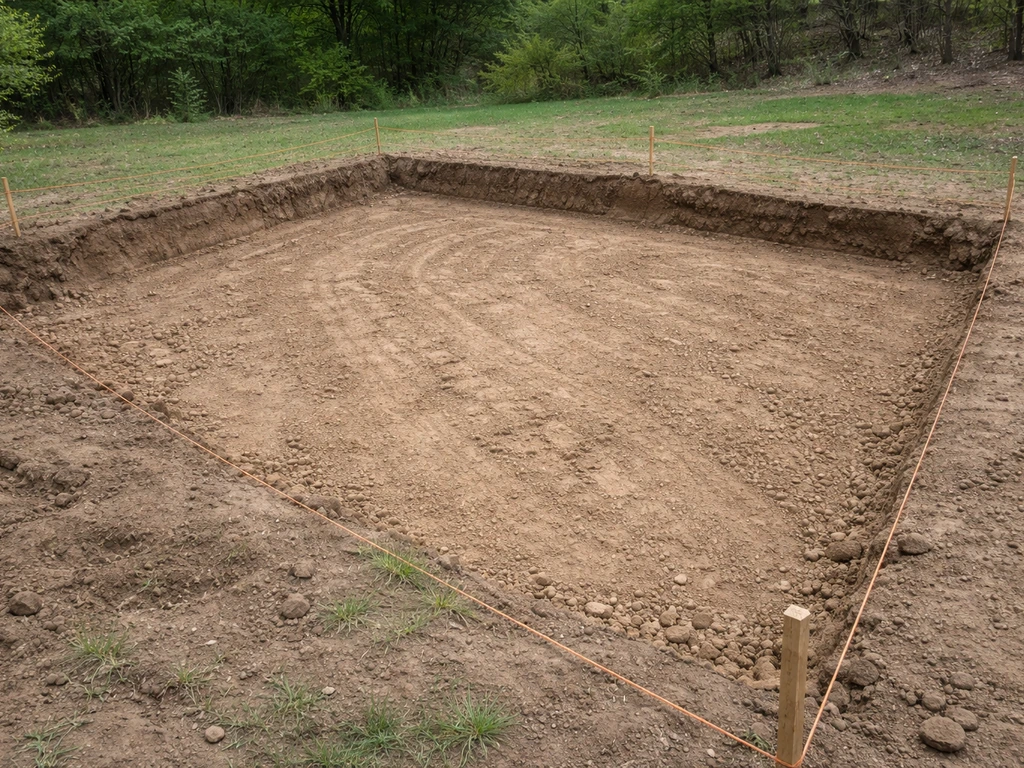
Start by marking your dig area about 6 inches outside your finished patio edge on all sides to give yourself room to work and install edge restraints. If you're trying how to do patio pavers yourself, mark and measure your dig area carefully so the edging and finished height come out right. Then excavate. A standard residential patio needs about 7 to 9 inches of total depth below your finished paver surface: roughly 4 to 6 inches for compacted base, 1 inch for bedding sand, and the thickness of your pavers (usually about 2.375 inches for a standard concrete paver). Add these up based on your specific paver thickness and base plan.
Remove all grass, roots, and topsoil. Organic material will compress and rot under the base, causing settlement. Once you hit subgrade (native soil), compact it with your plate compactor before adding any base material. If your native soil is heavy clay or silty, this is the right time to lay down a geotextile fabric, it separates the base aggregate from the fine soil below, prevents migration, and significantly extends the life of your base layer.
Grade the sub-base to your drainage slope before you start building up. Set string lines at the correct elevations across the dig area using your pre-planned slope of 1/4 inch per foot away from the house. Use these strings as your reference throughout the entire excavation and base-building process. If water pools near your foundation, your patio will eventually work against your house's drainage, so get this slope right now.
For edge details: decide now whether your patio will be flush with the surrounding lawn, slightly raised, or at door threshold height. Each choice affects how much you excavate and where you set your finished elevation. Mark your intended finished surface height on a stake at each corner, you'll reference these throughout the build.
Building the base: the step most DIYers rush (don't)
Your base material should be compactable crushed stone aggregate, usually called Class II base, road base, or crushed limestone depending on your region. This is not decorative gravel and not pea gravel. It needs to be angular and include fine particles (sometimes called "crusher run") so it locks together when compacted. Rounded stones won't compact properly and will shift under load.
The key rule here is compacting in lifts, not all at once. Never dump more than 3 to 4 inches of material and then compact, the compactor can't effectively reach the lower portions of a thick layer. Instead, spread 2 to 3 inches, compact thoroughly with the plate compactor (make overlapping passes in two perpendicular directions), then add another 2 to 3 inch lift and compact again. Repeat until you reach your target base depth of 4 to 6 inches total compacted thickness. Slightly moist aggregate compacts better than bone-dry material, if it's been dry for a week, lightly wet the aggregate before compacting.
After your final base lift is compacted, check your surface with a long straightedge and your level. It should follow your drainage slope consistently across the whole area with no low spots, humps, or soft zones. If you find a soft spot, that's almost always a missed organic patch or insufficiently compacted soil underneath, dig it out and recompact with fresh aggregate.
Now install your edge restraints before you lay bedding sand. Plastic edge restraints (the most common DIY choice) get spiked into the compacted base with 10 or 12 inch landscape spikes. Position them at your finished patio perimeter, following your string lines. These restraints are what keeps your pavers from migrating outward over time, the Interlocking Concrete Pavement Institute is clear that some form of edge restraint is required for any sand-set paver system. Concrete edging is also an option and offers extra holding power if you want it.
Screeding the bedding sand layer
Bedding sand goes on top of your compacted base. Use coarse concrete sand (also called sharp sand or ASTM C33 sand), not mason sand, play sand, or polymeric sand. The purpose of this layer is to provide a fine-tunable surface that conforms to the bottom of the pavers and allows minor leveling adjustments. It's not a structural layer and should not be thick.
Spread sand loosely to about 1 to 1.5 inches. Once screeded and pavers are placed and compacted, it will settle to roughly 3/4 to 1.25 inches. To screed it flat, lay two screed pipes (or metal conduit) parallel across the base, spaced so your 2x4 can bridge them. Set the pipes at the correct elevation (accounting for your paver thickness so the finished surface hits your target height), then drag the 2x4 across them to create a perfectly smooth, uniform sand surface.
Only screed as much sand as you can cover with pavers in a single session. Don't screed the entire patio and walk away for the day, rain, wind, animals, and your own feet will mess it up. Work in sections: screed a strip, lay pavers immediately, move forward.
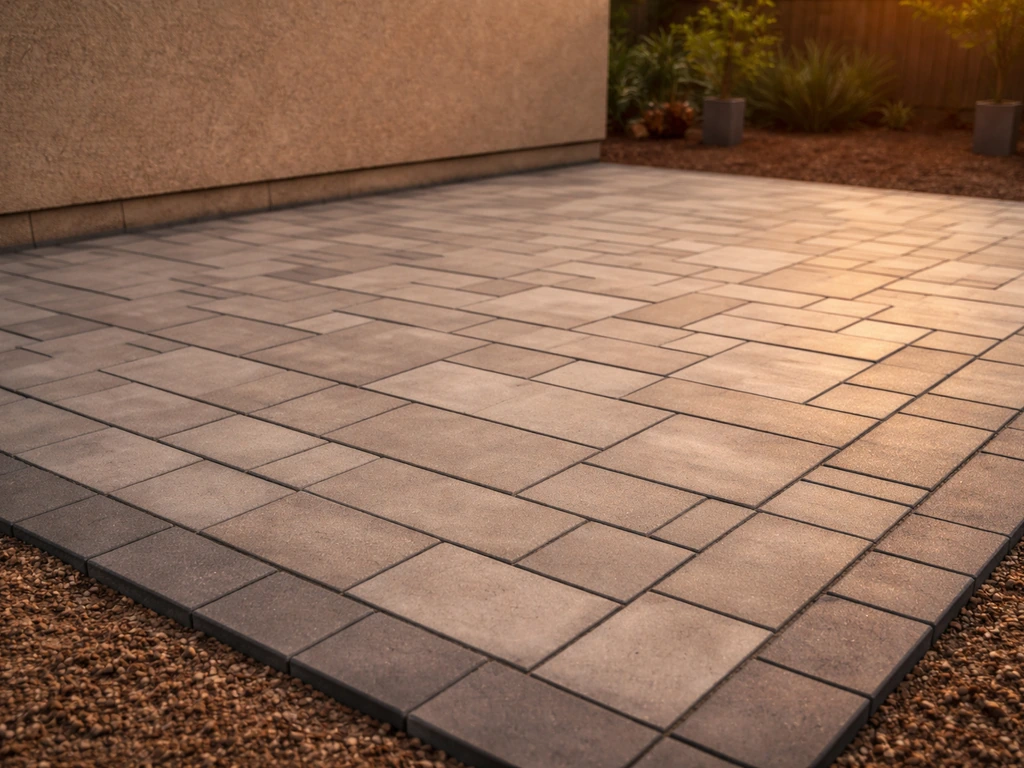
Laying pavers: patterns, leveling, spacing, and cutting
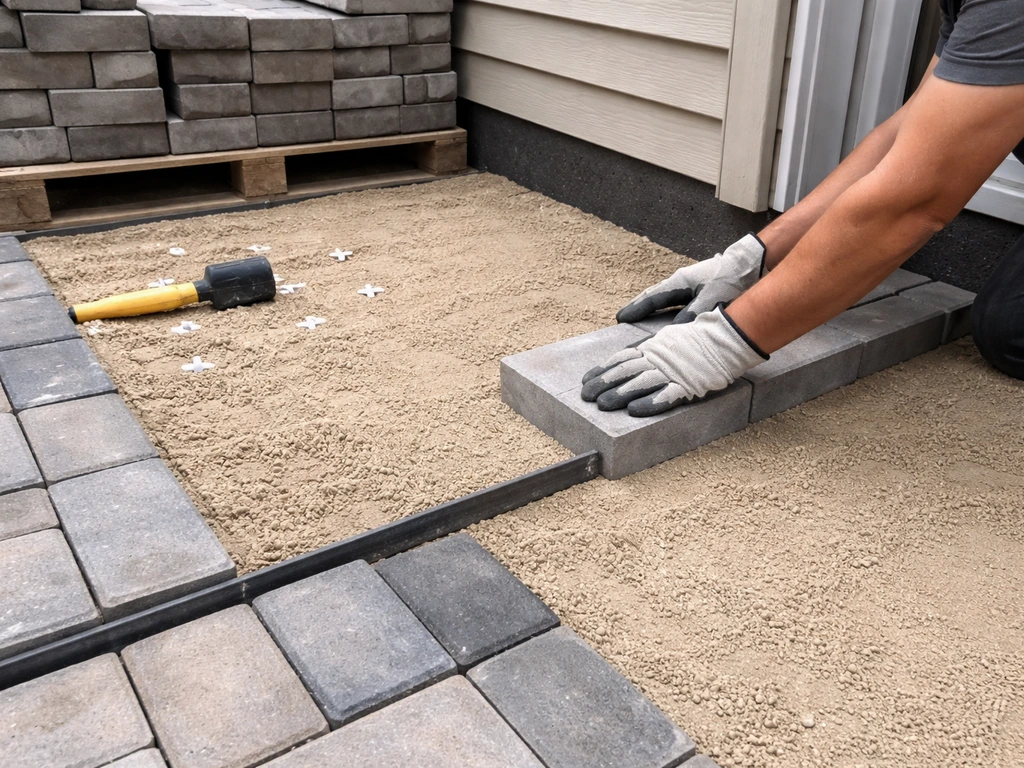
Start laying from the most visible corner (usually the corner closest to the house and main viewing angle) and work outward. Set each paver down without sliding it, place it straight down and butt it against the previous paver. Sliding disturbs the sand bed and causes uneven spots. Most standard concrete pavers have small spacing nubs molded into the sides, giving you an automatic 1/16 inch joint. If yours don't, use paver spacers.
Popular patterns and when to use them
| Pattern | Best For | Cut Difficulty |
|---|---|---|
| Running Bond (brick-style) | Simple rectangular areas, beginners | Low — mostly straight edge cuts |
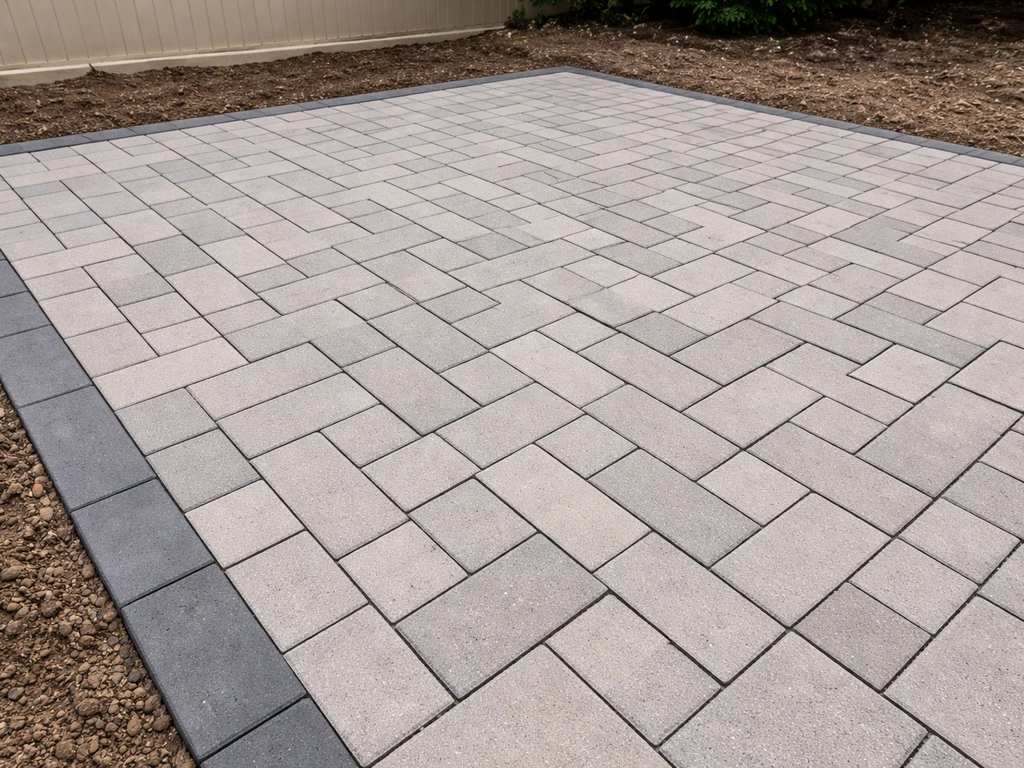
| Herringbone (45° or 90°) | High-traffic areas, excellent interlock strength | Medium — many angled edge cuts |
| Basket Weave | Traditional/formal look, square pavers | Low — minimal cuts |
| Pinwheel / Windmill | Mixed paver sizes, visual interest | Medium |
| Random / Flagstone style | Natural look with irregular or mixed pavers | High — lots of custom cuts |
For a first-time DIY patio, a running bond or 90-degree herringbone pattern is the sweet spot between visual appeal and manageable cuts. If you want a durable, attractive finish, a stone patio pavers do yourself approach can help you choose a pattern and layout that holds up over time 90-degree herringbone pattern. Herringbone is actually the strongest interlocking pattern if your patio will see vehicle loads or heavy furniture.
Keeping things level as you go
Check your work constantly with a 4-foot level and straightedge. Every few rows, lay the straightedge across a run of pavers and check for lippage (one paver sitting higher than its neighbor). A small amount is acceptable, ICPI guidance allows pavers to be set about 1/8 to 1/4 inch high of the target elevation to account for minor settlement after compaction, but you shouldn't have visible lips between adjacent pavers. If a paver sits too high, pull it up, remove a little sand, reset. If it sits too low, pull it up, add a pinch of sand, reset. Use your rubber mallet gently to seat each paver.
Cutting pavers
You'll inevitably need cuts at the edges. A rented paver splitter works for straight cuts on standard concrete pavers, it's fast and clean. For curves or angles, use an angle grinder or circular saw with a diamond blade. If you're doing a lot of cuts (a herringbone border, curves, or a complex pattern), it's worth renting a wet-cut paver saw for the day. Always wear safety glasses and a dust mask. Score the cut line with a pencil first, and if you're making angled cuts, dry-fit before you commit.
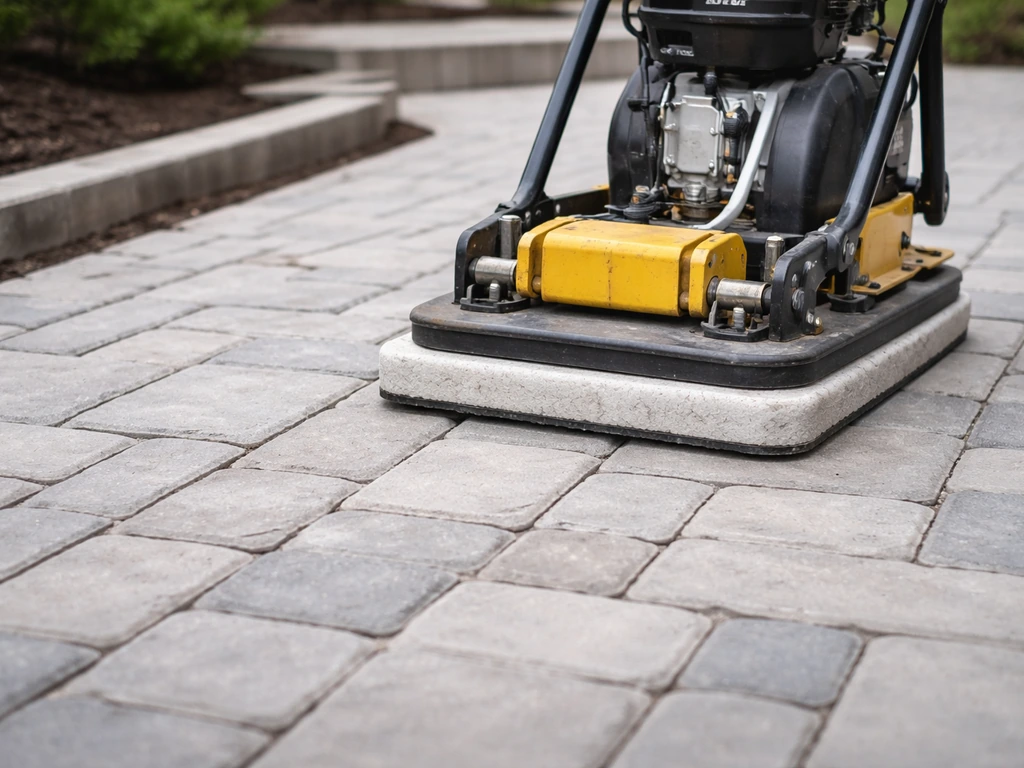
Final compaction of the paver surface
Once all pavers are laid, run the plate compactor over the entire surface, but put a rubber pad or piece of carpet under the compactor plate to protect the paver faces from scratching. Make two passes in perpendicular directions. This seats all the pavers firmly and evenly into the bedding sand. Check levels again after compaction and tap down any proud pavers with the rubber mallet.
Finishing: polymeric sand, sealing, and curb appeal
Applying polymeric sand
Polymeric sand is the material that locks into the joints between pavers and hardens to resist erosion, weeds, and insects. Don't substitute regular jointing sand here, it won't harden and will wash out. Wait until the paver surface is completely dry before starting. If it rained recently, wait at least 24 hours before installing polymeric sand, moisture in the joints can interfere with how the sand sets and can cause a white haze on the surface.
- Pour polymeric sand over the paver surface and sweep it into the joints with a broom, working in multiple directions.
- Once joints are filled, use a leaf blower on low to blow excess sand off the paver faces — do two passes. Getting all residue off the surface before wetting is critical to avoiding white haze.
- Mist the entire surface with water on the shower setting (not a hard stream). The goal is to wet the sand in the joints thoroughly without washing it out. A hard stream will flush sand out of the joints and cause problems.
- Let the surface absorb the water, then do a second light misting.
- Keep foot traffic off the surface for at least 24 hours. The sand will feel firm in a few hours but isn't fully cured for up to 24 hours depending on temperature and humidity.
White haze after polymeric sand is a common frustration. It usually comes from sand residue left on the paver face when water was applied, or from too much water washing fine particles up onto the surface. Lowe’s/Sakrete polymeric sand instructions also emphasize that water activation is critical and that applying too much water can leave a white film that floats out of the joints blank" rel="noopener noreferrer">too much water washing fine particles up onto the surface. If it happens to you, let the surface fully cure for several days, then use an efflorescence cleaner or a diluted acid wash designed for pavers. Scrub and rinse thoroughly. The haze is cosmetic and removable, just annoying.
Sealing your patio
Sealing is optional, but it protects color, helps resist staining, and enhances the finished look. Wait at least 30 to 90 days after installation before sealing to let any initial efflorescence work its way out. If you seal over efflorescence or residue, you trap it in. Clean the surface thoroughly first, remove any oil, stains, or white haze before applying sealer. Use a breathable penetrating or semi-gloss sealer designed for concrete pavers. A non-breathable film sealer can trap moisture under the surface and actually cause more efflorescence over time. Apply with a roller or pump sprayer in thin, even coats.
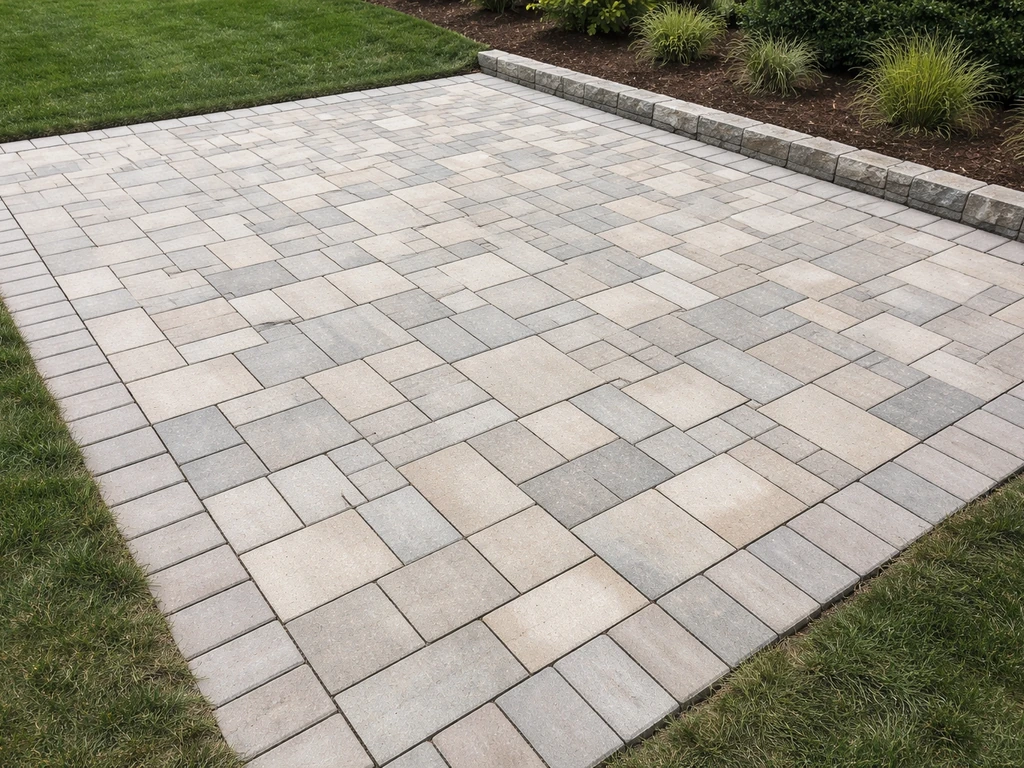
Final curb appeal touches
Backfill the area around the patio edges with topsoil and re-seed or sod to the edge of your restraints. This gives a clean transition and eliminates the trench gap around your patio perimeter. If you have a gap at the house foundation, use polymeric sand or a flexible caulk rated for exterior masonry, don't fill it with rigid mortar, which will crack as the patio and foundation move independently.
Handling tricky real-world scenarios
Laying pavers over grass or bare soil
Never lay pavers directly over grass or existing topsoil, both will compress and decompose, causing your patio to sink and become uneven. Remove all organic material down to subgrade, compact the native soil, then build your base from scratch as described above. There are no shortcuts here that hold up long-term. Geotextile fabric is especially worth adding if your native soil is clay-heavy.
Laying pavers over existing concrete
If you have an existing concrete slab in good condition (no major cracks, no significant settlement, no drainage problems), you can lay pavers over it. The concrete acts as your base, and you only need a bedding layer of coarse sand or a thin-set mortar. Check the drainage slope of the existing slab first, if it drains toward the house, address that before covering it. Edge restraints still need to be secured, usually with concrete adhesive or masonry anchors. One important note: the added height of the pavers plus bedding layer (typically 3 to 4 inches) will raise the finished surface. Make sure door thresholds, step heights, and surrounding grades accommodate this.
Dealing with uneven or sloped ground
Uneven ground is normal, your compacted base is what makes an uneven subgrade irrelevant. The base is what you build flat (or to the correct drainage slope), not the raw ground. That said, if your site has major grade changes, more than 12 to 18 inches of drop across the patio area, you'll need to either cut into the high side, build up the low side with more base material, or consider a raised patio design with retaining walls. A gentle slope across the site is just handled by building your base thicker on the low side and thinner on the high side to hit your target finished grade.
Building a raised patio
A raised patio (one that sits above the surrounding grade, often with a retaining wall or step-down border) adds visual impact and can solve problems on sloped yards. The structure is similar, compacted base, bedding sand, pavers, but the perimeter needs structural support. Retaining walls made from concrete block, natural stone, or a stacked paver system hold the raised section in place. Make sure your retaining wall design can handle the lateral pressure from the fill behind it, and plan for drainage behind the wall (gravel backfill and a weep course) so water doesn't build up and push the wall outward.
Including a fire pit area
If you're planning a fire pit within the patio, you have two options: designate a central area where pavers can be removed when needed and a fire bowl or ring is set directly on the base, or build a permanent in-ground fire pit with a separate foundation. Either way, make sure there's adequate clearance from structures (most fire safety guidelines recommend at least 10 feet from any structure), and don't use standard concrete pavers as fire pit ring material, they can crack or spall from direct heat. Use fire brick or purpose-made fire pit blocks for any surface that contacts flame. Pavers around the pit (but not in direct flame contact) are perfectly fine.
When to genuinely call a professional
Most paver patios are well within DIY range. If you are confident in the basics, this do it yourself paver patio installation guide can help you plan the whole project step by step. But if your site has significant drainage issues that redirect water toward your foundation, if you need a retaining wall over about 3 feet tall, or if you're dealing with a very steep slope (more than a 5% grade across the patio area), getting a professional assessment is money well spent. The paving itself is DIY-able, the civil engineering of drainage and walls is where things can get expensive to fix if done wrong. If you do all the planning, site prep, and base work carefully, you can build a backyard paver patio all by yourself without cutting corners.
Maintaining your paver patio for the long haul
A well-built paver patio is low maintenance, but it's not zero maintenance. Here's what to stay on top of:
- Re-sand joints every few years, or whenever you notice joints looking thin or washed out. Sweep in fresh polymeric sand and re-wet as described above. Shallow joints (flush with the paver surface) are harder to fill and re-sand — try to keep joints slightly below the surface, not completely filled to the top.
- Re-seal every 2 to 4 years depending on traffic, weather, and your sealer type. Clean thoroughly before re-sealing.
- Address weeds early. If weeds appear in joints, polymeric sand has likely degraded in those areas. Pull weeds, clean out the joint, and re-fill with fresh polymeric sand.
- Lift and reset sunken pavers before the problem spreads. A single sunken paver is an easy fix: pry it up with a flat bar, add or remove sand as needed, reset, and compact. Leaving it causes water pooling and accelerates surrounding settlement.
- Watch for efflorescence (white haze) especially in the first year or two. It's normal and treatable with a diluted efflorescence cleaner. It typically fades with weathering and UV exposure over time.
- Sweep and rinse regularly to prevent dirt, leaf stains, and moss buildup. Moss and algae love shaded, damp joints — a mild bleach solution or paver-safe cleaner handles them without damaging the sand.
- In winter climates, use sand or paver-safe ice melt instead of standard rock salt, which can pit and discolor concrete pavers over time.
The biggest maintenance mistake homeowners make is ignoring small problems. A lifted edge here, a thin joint there, left alone, these become larger, more expensive repairs. Spend 20 minutes each spring walking the patio and addressing anything you notice, and it will genuinely look good for 20 to 30 years. That's the real payoff of doing this job properly from the start.
FAQ
How do I make sure my patio drains correctly if my yard slope already drains toward the house?
Use your string line elevation to lock in a slope of at least 1/8 inch per foot away from the house, then verify it after excavation by measuring multiple points with a long level. If you cannot achieve that slope without making the patio too high or too low, plan on addressing site drainage (for example, a regraded swale or a French drain) before you start the base, because adding sand and pavers over an incorrect drainage pattern will eventually create ponding and settlement.
What should I do if my pavers are all the right height, but I see a slight rocking when I step on one spot?
Stop and treat it as a base issue, not a paver fit issue. Lift the affected paver(s), remove a thin layer of bedding sand if needed, then check for soft subgrade or a void in the compacted base. Replace with compacted crushed stone in lifts and re-screed bedding sand, then reset the paver and seat it with a rubber mallet. Skipping the base correction usually leads to the problem returning.
Can I install polymeric sand immediately after sweeping, even if the surface feels a little damp?
Only if the paver surface is completely dry to the touch. If it rained within the last day or the joints look glossy or damp, wait longer, since moisture can prevent proper binding and can increase the chance of white haze. When you do apply, use the minimum water needed to activate the product and avoid heavy spraying that forces fine particles up onto the face.
What’s the correct joint width, and what if my pavers don’t have molded spacing nubs?
If your pavers lack molded jointing, use paver spacers so your gaps stay consistent. Consistent joint spacing matters for locking behavior, visual alignment, and polymeric sand coverage. If the joints are too tight you can starve the joints and have messy cuts, and if they are too wide the joint sand can be overexposed and may erode faster.
Do I need to seal my patio, and how do I avoid trapping efflorescence under the sealer?
Sealing is optional, but if you do it, wait the full curing window after installation, at least 30 days and up to 90 days, and only seal after you have removed any visible white haze or residue. Sealing too early can trap efflorescence and make it harder to remove later, especially if you sealed over leftover dust from cutting or polymeric sand.
How do I handle transitions at a door threshold or step so the patio height doesn’t create a tripping hazard?
Before you finalize excavation depth, test the height stack-up: compacted base thickness (4 to 6 inches), bedding sand (about 1 inch loose), paver thickness (often about 2.375 inches), plus any adjustment you need to maintain slope. Then compare the planned finished surface height to the door sill and step heights, and adjust your target elevation early, not after pavers are installed. If you are close, it is usually safer to slightly lower finished grade than to end up higher than the threshold.
Is geotextile fabric always necessary, or can I skip it on certain soils?
On sandy, well-draining soils, you may get acceptable performance without fabric, but on clay-heavy or silty soils it is especially valuable because it reduces migration of fine soil into the base. If your base layer starts to mix with fines over time, you can lose compaction and get uneven settlement. If you are unsure, adding geotextile is usually a low-risk upgrade compared with redoing a failed base.
Can I lay pavers over an existing concrete slab if it is slightly cracked?
You can, but only if the slab is stable and drainage is correct. If cracks coincide with movement, significant settlement, or water pooling, pavers will telegraph the problem and you risk uneven rocking later. Check that water drains away from the home and confirm the slab does not rock under foot pressure, then plan for the added height (commonly 3 to 4 inches) at doors and nearby landscaping.
What’s the most common DIY mistake that leads to pavers shifting or spreading outward?
Most failures come from weak or missing edge restraint. If the perimeter is not restrained and pinned into the compacted base, the pavers and joint sand can migrate outward when the base moves or when the patio experiences freeze-thaw cycles. Install edge restraints before bedding sand, align them to your string lines, and backfill with topsoil after installation so the edges remain supported.
How often should I inspect and maintain a DIY paver patio to keep it looking new?
Do a quick inspection after winter and again in early spring. Look for lifted edges, gaps that have widened, and areas where weeds start to appear, then address small issues right away by re-leveling and re-sanding joints if needed. A simple 20 minute check each season prevents many repairs from turning into full spot reconstruction.
Next Articles
Do It Yourself Paver Patio Installation: Step by Step
Step-by-step guide to DIY paver patio installation: grading, base prep, paver setting, edging, joint sand, sealing and f
Do It Yourself Patio Paver Ideas: Layout, Prep, Install
DIY patio paver ideas with layout patterns, site prep, base thickness, leveling, edging, and fixing sinking, gaps, weeds
Patio Pavers Do It Yourself: Step-by-Step Guide
Step-by-step DIY patio paver install: plan, prep base, lay & cut pavers, ensure drainage, then compact, sand, seal.