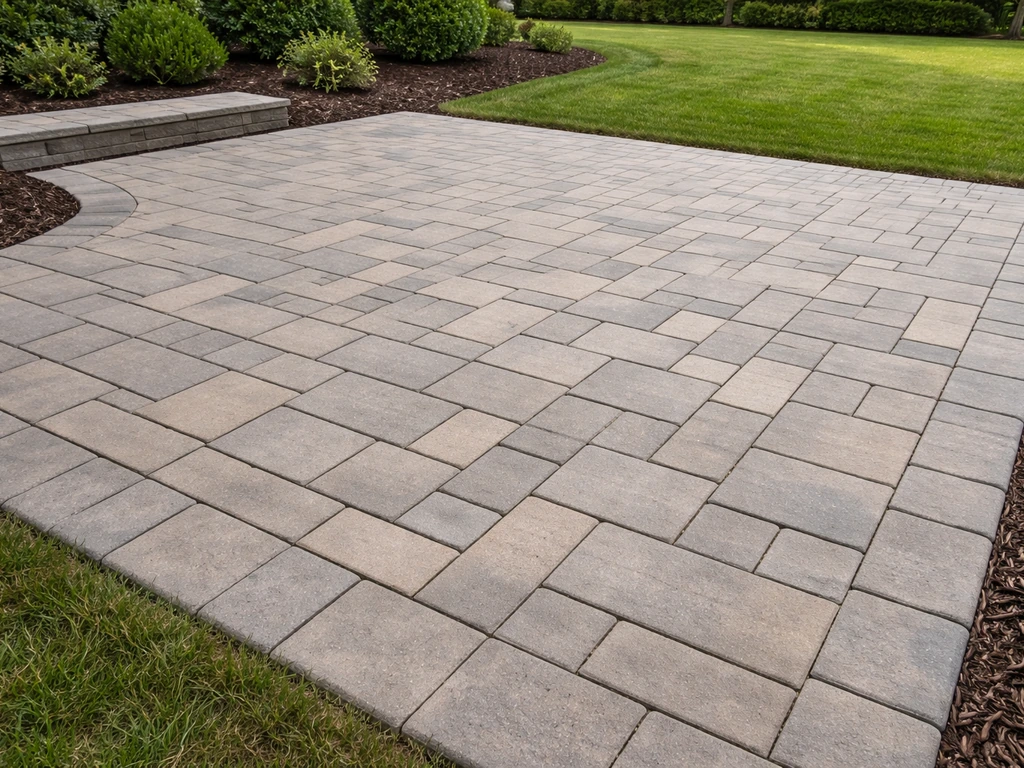
You can build a paved patio yourself over a weekend or two, and the two main paths are poured concrete or interlocking pavers. If you want the step-by-step details for how to build a pavers patio, follow the sections below in order paved patio. Concrete is cheaper upfront (roughly $2,400–$7,200 for a 400 sq ft slab vs. $4,800–$16,000 for the same area in pavers), but pavers are easier to repair, handle freeze-thaw cycles better, and let you go DIY in phases. Either way, the foundation work is the same: excavate, compact, grade for drainage, and build a solid base before you touch a single surface material. Once you have the right base depth and compacted gravel, you can start building the paver surface with confidence using paver base panels how to build a patio with paver base panels.
How to Build a Paved Patio: Concrete or Pavers DIY

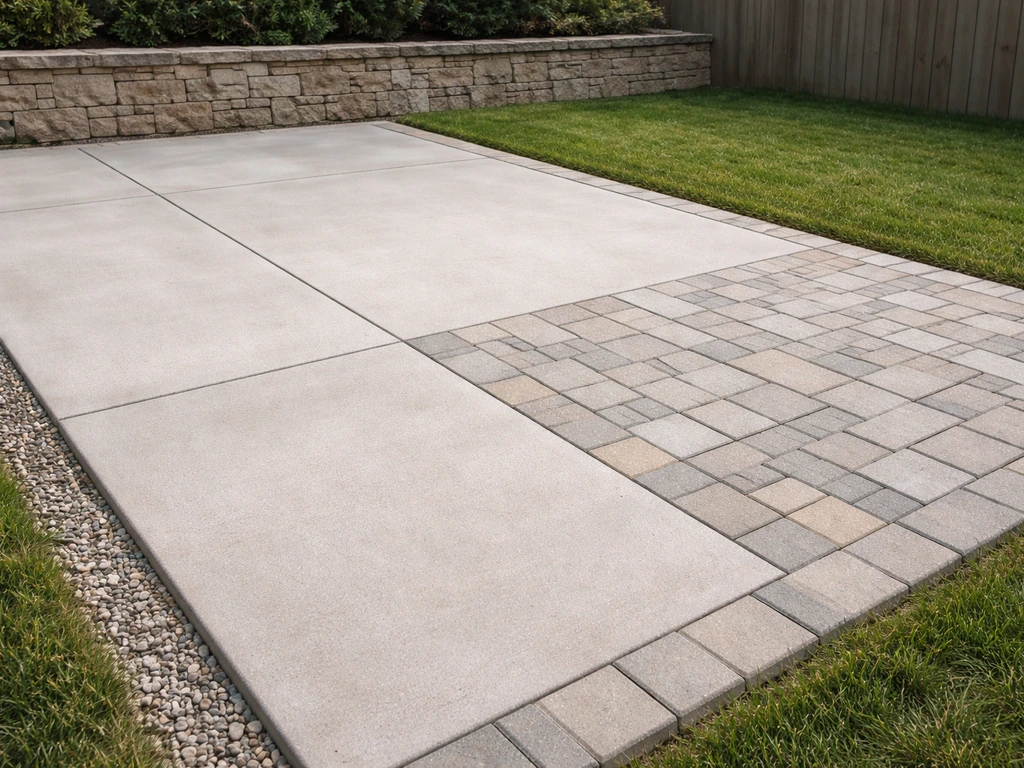
Concrete or pavers: which is right for your patio?
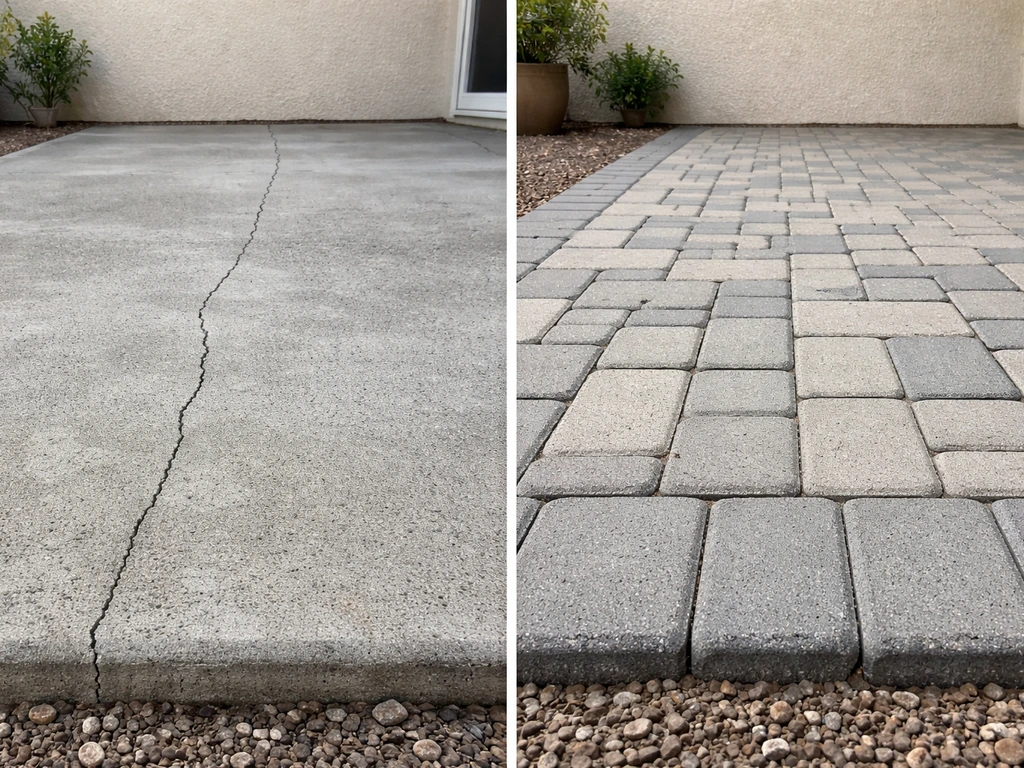
The honest answer is that both work well if installed correctly. Where they differ is in climate resilience, repairability, and upfront cost. In freeze-thaw climates, concrete is more prone to cracking and spalling because moisture seeps into the slab, freezes, and expands from the inside. Pavers flex and move as individual units, so a frost heave that would crack a slab just shifts a couple of pavers that you can lift and re-set. On the flip side, concrete is a single pour: no individual units to settle unevenly, no joint sand to replenish, and a lower material cost if you keep the design simple.
| Factor | Poured Concrete | Pavers |
|---|---|---|
| Upfront cost (400 sq ft) | $2,400–$7,200 | $4,800–$16,000 |
| Freeze-thaw performance | Can crack/spall over time | Flexible; individual units shift and reset |
| Repairability | Difficult; patches show | Easy; lift and relay affected units |
| DIY difficulty | Moderate (timing-critical) | Moderate (labor-intensive but forgiving) |
| Design flexibility | Limited after pour | High; many patterns and colors |
| Long-term maintenance | Seal every 2–3 years; patch cracks | Replenish joint sand; re-level settled areas |
My recommendation: if you live somewhere with hard winters, go with pavers. If you want the lowest cost and a clean, simple look on a stable, well-drained site, concrete is a solid choice. For most DIYers reading this, pavers tend to be more forgiving because mistakes are correctable mid-project, not locked in after a pour sets.
Site planning and measuring before you dig anything
Before you pick up a shovel, spend an hour on planning. It saves you from re-digging, re-grading, or dealing with pooling water next spring. Here is what you need to sort out upfront.
Mark the footprint and check for utilities
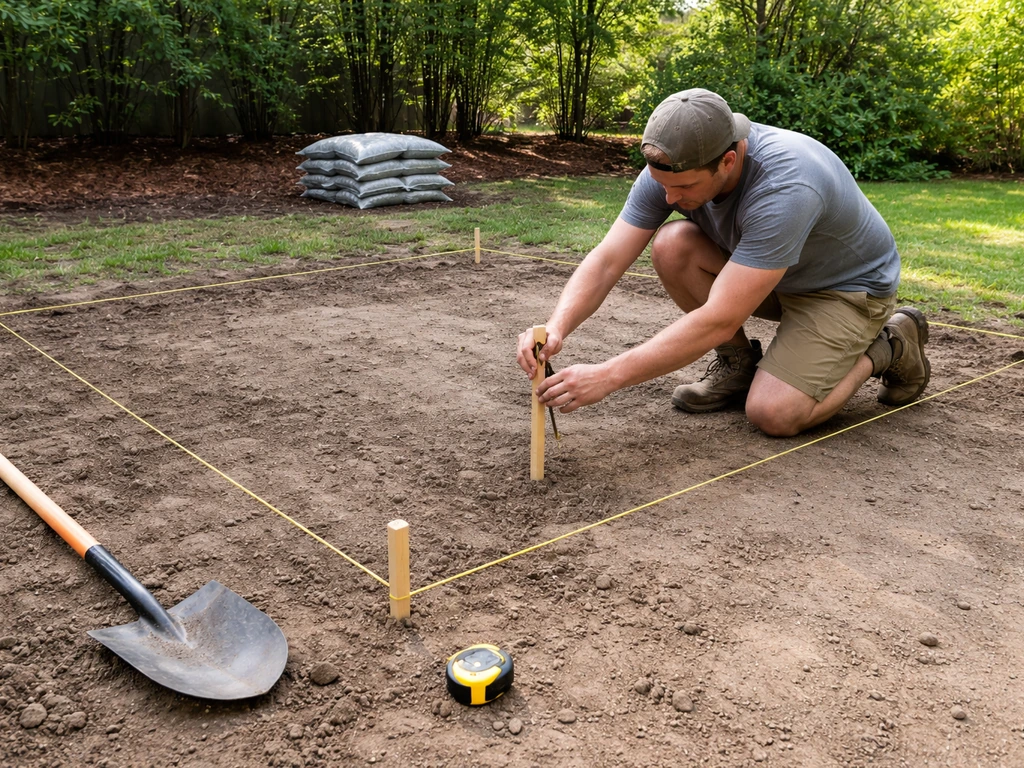
Call 811 (in the US) before any excavation. This is not optional. Once you have clearance, use stakes and string lines to mark the full patio footprint. Walk the perimeter, look for downspouts, utility access panels, and anything you do not want to bury or block. The string lines do double duty later as grade references, so take your time getting them square using the 3-4-5 triangle method: measure 3 feet along one side, 4 feet along the perpendicular, and the diagonal between those two points should be exactly 5 feet.
Set the right slope for drainage
Every patio needs to drain away from the house. The standard slope is 1/8 to 1/4 inch per foot (roughly 1% to 2%). For a 12-foot-deep patio, that means the outer edge sits 1.5 to 3 inches lower than the house edge. Set your string lines to this slope from the start, because the string lines define your finished surface elevation. If water pools against your foundation now, make sure you understand where it will go after the patio is installed. Plan the 'high' edge elevation at the house first, then drop the strings at your target slope toward the yard.
Measure for materials
Calculate your square footage (length x width for simple shapes; break irregular shapes into rectangles). For pavers, add 10% to account for cuts and breakage. For gravel base, figure on 4–6 inches of compacted depth across the full area plus about 6 inches beyond the patio edges on each side. That extra base width matters because it supports the edge restraints and prevents the edges from spreading over time.
Tools and materials checklist
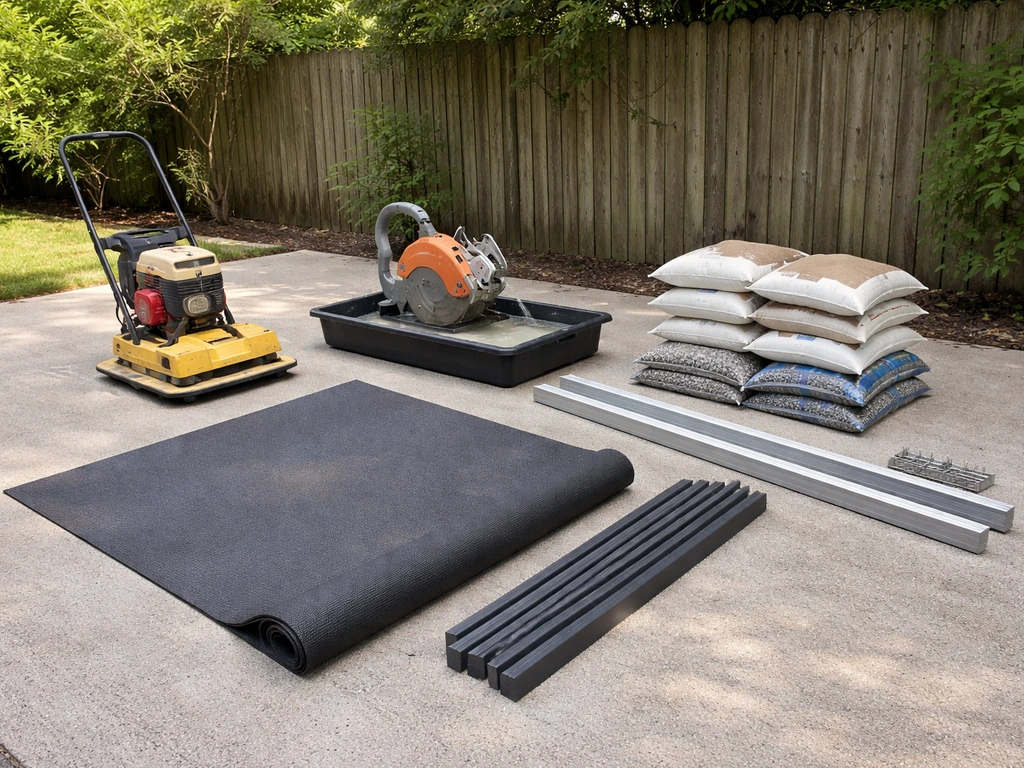
You do not need to own all of this. Rent the plate compactor and wet saw from a tool rental shop for the weekend. The rest is available at any home improvement store.
- Plate compactor (for pavers, look for one rated around 5,000 lbf; also get a rubber or paver protection mat attachment to avoid surface damage)
- String line and line level (or a laser level if you have one)
- Steel stakes (at least 8–10 for layout)
- Shovel and/or sod cutter (for excavation)
- Wheelbarrow
- Tamper (hand tamper for edges where the plate compactor cannot reach)
- Screed pipes or metal rails (1-inch diameter, for screeding the sand bed)
- Rubber mallet
- Tape measure and chalk line
- Angle grinder or wet saw (for cutting pavers or edging)
- Broom (stiff bristle for base, fine bristle for polymeric sand)
- Garden hose with shower-spray nozzle (for activating polymeric sand)
- Pry bar or flat bar (for adjusting individual pavers)
- Safety glasses, work gloves, knee pads
- Crushed stone / Class II road base (4–6 inches compacted depth)
- Coarse bedding sand (1 inch layer; not play sand or mason sand)
- Pavers or concrete mix (depending on your method)
- Polymeric sand or regular joint sand
- Plastic or aluminum edge restraints with spikes
- Geotextile landscape fabric (optional, placed between subgrade and base to prevent soil migration)
- Paver sealer (optional but recommended for long-term protection)
Base prep and leveling: the step most DIYers rush (and regret)
The base is where patios succeed or fail. A patio that sinks, tilts, or grows rocking pavers two years in almost always traces back to inadequate base depth, poor compaction, or drainage problems under the surface. A solid paver patio base with the right gravel depth and compaction is what prevents sinking and rocking over time. Get this right and everything else is manageable.
Excavation depth
Your total excavation depth equals: paver or slab thickness + 1 inch of bedding sand + 4 to 6 inches of gravel base. If you are also planning the foundation layers, focus on proper excavation depth, base thickness, and compaction before you start laying pavers how to lay a paver patio foundation. For a standard 2.375-inch (60mm) paver, that puts you roughly 7.5 to 9.5 inches below finished grade. Mark this depth on your stakes so you know exactly where to stop digging. Go slightly deeper rather than shallower: you can always add base material, but you cannot easily add depth under a finished patio.
Excavating over grass or uneven ground
If you are starting over grass, strip the sod first. A sod cutter rental makes this much faster than a shovel. Remove all organic material from the excavation area because organic matter compresses and decomposes, causing settling later. If your ground is uneven, dig to your target depth at the high spots and fill/compact at the low spots using compactable gravel. Never use loose soil as fill: it will settle. If you hit soft, spongy subgrade (common in clay-heavy soils), you may need to dig an extra inch or two and compact in thinner lifts. This is also the time to lay geotextile landscape fabric on the subgrade if you have soil that tends to migrate upward into the base over time.
Adding and compacting the gravel base
Add your crushed stone or Class II road base in 2 to 3 inch lifts and compact each lift before adding the next. Running a plate compactor over 6 inches of loose gravel in one pass does not give you a truly solid base. Two or three thin lifts, each fully compacted, will. Check your slope with a level and your string lines after compacting each lift. The compacted base surface should mirror your target finished slope. If you spot low areas, add a bit more material and compact again. This is the step that rewards patience.
Working against existing structures or concrete
If your patio ties into an existing concrete step, door threshold, or foundation wall, your finished patio surface elevation is largely set for you. Work backward from that fixed point when setting your string lines. The finished patio should sit at or just below an existing threshold, and the surface should slope away from the structure. Never let the patio surface drain toward the foundation. If you are building against an existing concrete slab, the paver surface typically needs to be flush with or slightly below the existing concrete edge to avoid a tripping hazard.
How to pave a patio with concrete
Pouring a concrete patio is a one-shot process, so preparation and timing matter more than with pavers. Once concrete is mixed and poured, you have a limited window to work before it begins to set. For patios larger than about 100 square feet, seriously consider renting a mixer or ordering ready-mix delivery. Mixing bag after bag by hand for a 400 sq ft slab is exhausting and creates inconsistent results.
- Complete base prep as described above. For concrete, compact the gravel base to a firm, stable surface. You do not need a sand bedding layer for concrete: the slab pours directly onto the compacted gravel.
- Build your forms. Use 2x4 or 2x6 lumber staked around the perimeter of the slab at your finished grade height. Check that the tops of the forms match your target slope (1/8 to 1/4 inch per foot away from the house). Double-check corners for square.
- Install rebar or wire mesh reinforcement for slabs larger than about 10x10 feet. Rebar on 18-inch centers or welded wire mesh placed mid-slab depth adds tensile strength that plain concrete lacks.
- Plan your expansion joints. For patios, place expansion joint material (such as a closed-cell foam strip) anywhere the slab meets the house foundation, steps, or another fixed structure. These absorb movement so the slab does not crack against a rigid edge.
- Mix and pour concrete. Work section by section if the slab is large. Pour to just above form height, then screed across the top of the forms with a long straight board using a sawing motion to level the surface.
- Float the surface with a bull float or hand float to bring cream to the surface and remove screed marks. For outdoor patios, finish with a broom drag (broom finish) before the surface fully sets for traction. Avoid over-working the surface, which weakens the top layer.
- Control joints: use a grooving tool to cut control joints about 1/4 of the slab depth, typically every 8 to 10 feet in each direction. These guide where cracking will occur if it does happen, keeping it neat and manageable.
- Cure the concrete. This is the most skipped step and the most important. Keep the slab moist for at least 3 to 7 days by covering it with plastic sheeting or wet burlap. Alternatively, apply a curing compound immediately after finishing. Rapid drying weakens the surface dramatically.
Do not walk on or load the slab for at least 24 hours, and wait a full week before placing heavy furniture. Concrete reaches most of its design strength at 28 days.
How to pave a patio with pavers
Pavers are more forgiving than concrete because you can adjust as you go. The process has more steps, but each one is straightforward and correctable. Here is how it goes from compacted gravel base to finished surface. For a complete guide, see the full step-by-step process for how to create a paver patio.
Screeding the sand bedding layer
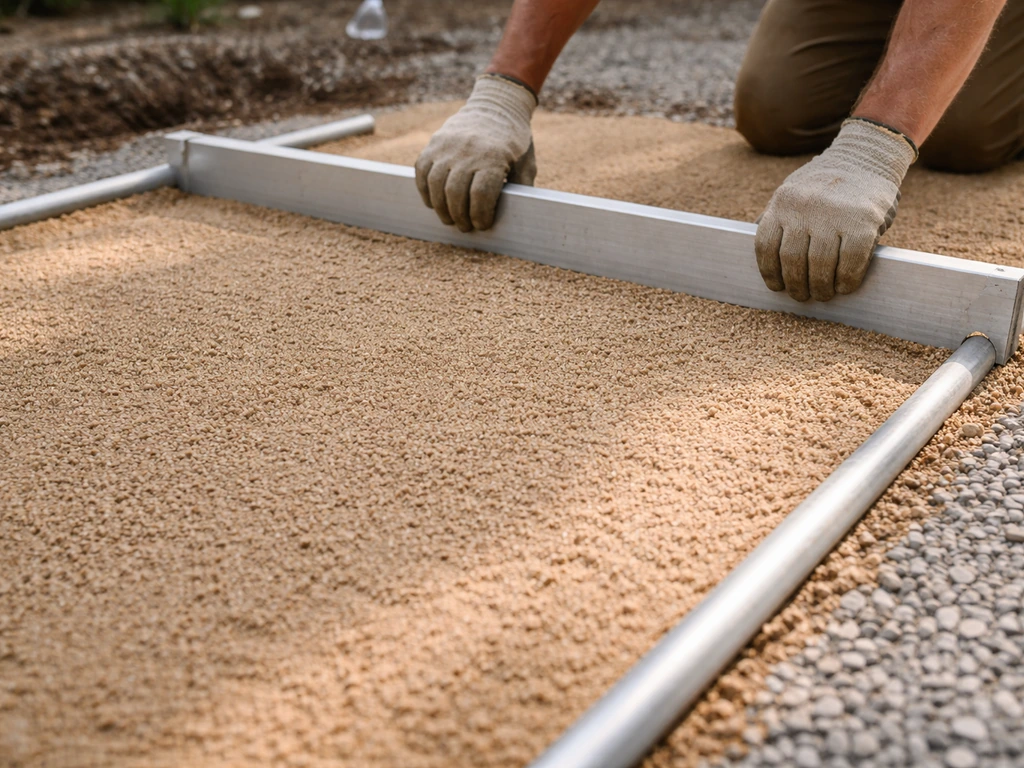
Spread 1 inch of coarse bedding sand (not fine play sand) over your compacted gravel base. Use two metal screed pipes or conduit sections as rails, set at the correct slope matching your string lines. Pull a straight board across the pipes to screed the sand flat and consistent. Pull the pipes out after screeding and fill the channels by hand, then lightly smooth. The key rule here: do not walk on or disturb the screeded sand before laying pavers. Work from a kneeling board placed on laid pavers to avoid footprints. The tolerance at this stage is tight, no more than 1/8 inch variation, because lumps and low spots show immediately in the finished surface.
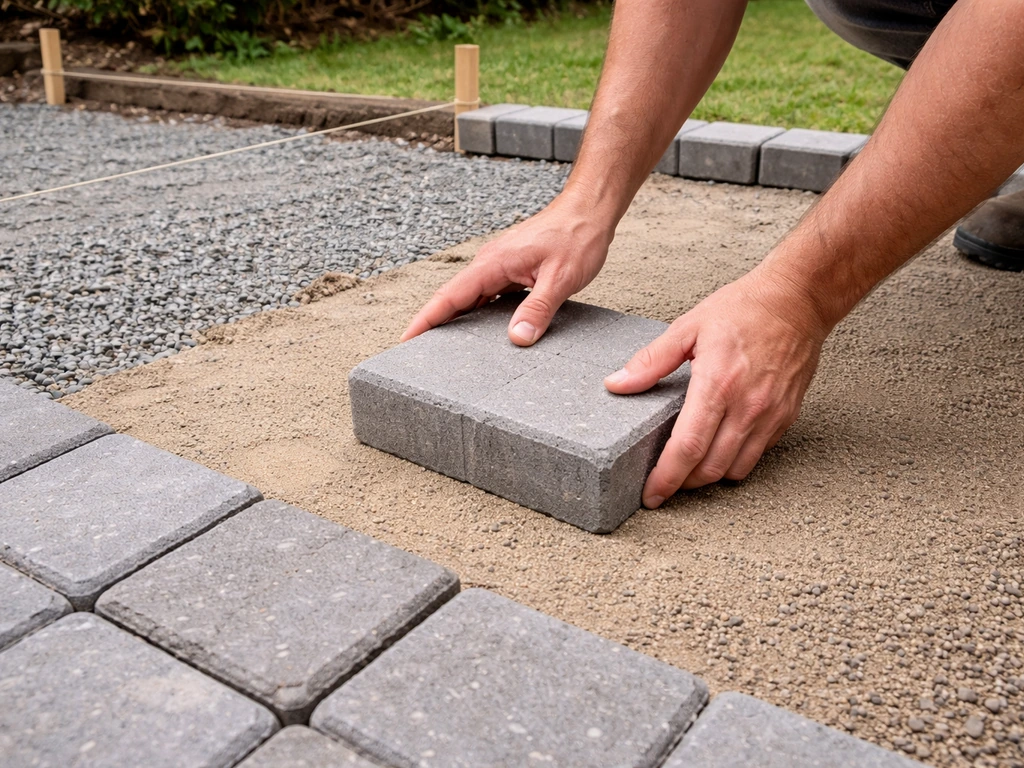
Laying the pavers
Start from a straight edge, typically the house wall or a chalk line. Lay pavers tight against each other in your chosen pattern, setting each one straight down without sliding (sliding drags sand and creates high spots). Tap each paver with a rubber mallet to seat it firmly. Check your string lines regularly to make sure rows stay straight and the surface stays on grade. If a paver is low, pull it and add a pinch of sand. If it is high, pull it and scrape away a little sand. Aim for that 1/8-inch surface tolerance as you go. Build your pattern in manageable sections of 10 to 15 square feet at a time.
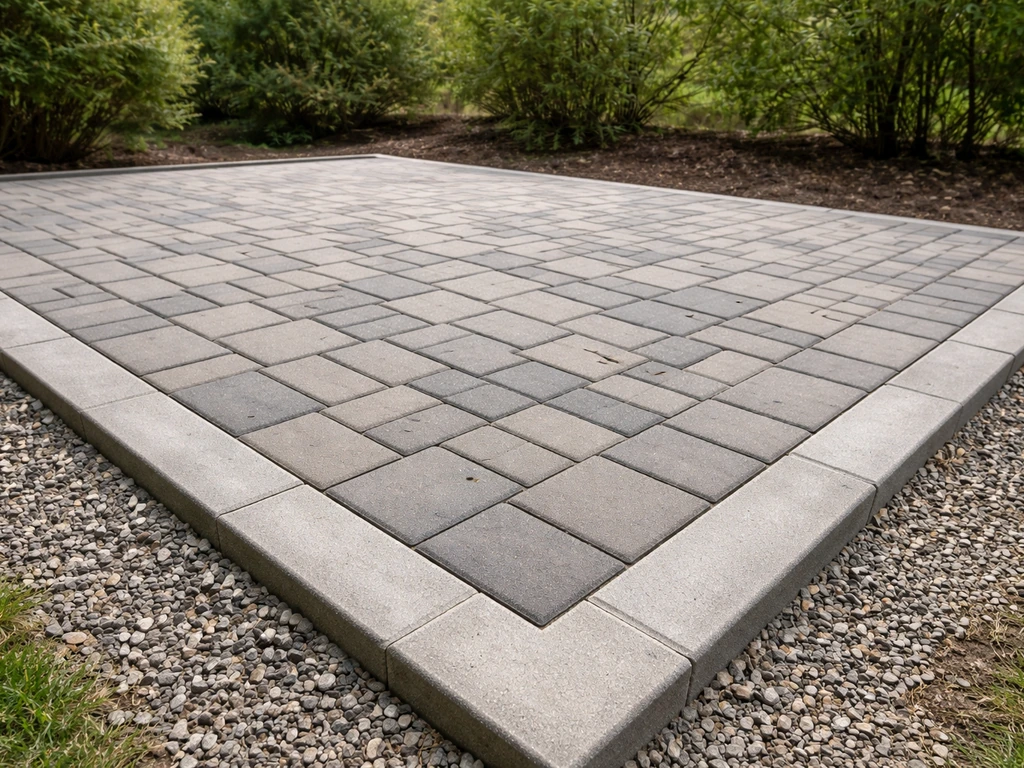
Installing edge restraints
Edge restraints are not optional. Without them, the perimeter pavers slowly spread outward and the entire field shifts. Install plastic or aluminum edging along all exposed patio edges before you fill the joints. Spike the edging into the base material at 12-inch intervals. The top of the edging should be flush with or just below the paver surface so it disappears visually.
Cutting pavers to fit
Save cuts for the end. Lay all full pavers first, then measure and cut the edge pieces. A rented wet saw gives clean, accurate cuts for straight lines and curves. If you are aiming for a round patio using rectangular pavers, plan the pattern carefully so the cuts and curves stay consistent how to make a round patio with rectangular pavers. For straight cuts on basic concrete pavers, an angle grinder with a diamond blade also works. Always wear safety glasses and gloves when cutting. If you are working around obstacles like posts or drain covers, make a paper template first and transfer it to the paver before cutting.
Compacting and jointing
Once all pavers are laid and edges installed, run the plate compactor over the entire surface using a rubber paver protection mat under the plate. This seats the pavers evenly into the sand and locks them together. Then sweep joint sand into all the gaps. For the best long-term results, use polymeric sand rather than plain joint sand. Polymeric sand hardens slightly when wet, resisting weed growth and ant excavation. Sweep it in, then compact again to work the sand deeper into the joints. Repeat sweeping and compacting until the joints are fully packed.
Finishing up and keeping your patio in good shape
Activating polymeric sand
After sweeping and compacting, blow or brush off any excess polymeric sand from the paver surfaces (a leaf blower on low works well here). Any sand left on the surface will haze the pavers once wet. Then wet the patio in sections using a shower-spray setting, not a jet. Work about 200 square feet at a time, wetting for roughly 30 seconds per section. The goal is to saturate the sand in the joints without washing it out. Follow your specific product's instructions carefully, as timing and watering steps vary by brand. Do not do this step during rain or if rain is forecast within 24 hours.
Sealing
Sealing is optional but worthwhile. For pavers, a penetrating paver sealer enhances color, repels staining, and helps the polymeric sand stay stable. Wait at least 60 to 90 days after installation before sealing to let any efflorescence (white salt haze) work its way out. For a concrete slab, a curing and sealing compound can do double duty right after finishing. After that first application, re-seal both concrete and pavers every 2 to 3 years depending on traffic and climate.
Long-term maintenance
A well-built patio mostly takes care of itself, but a few habits will keep it looking good for decades. Check the joint sand once a year and top it off anywhere joints look low or depleted, especially after heavy rain or frost. If you notice pavers rocking, that almost always means the sand base beneath has washed out or settled. Pull the affected pavers, check the base firmness, re-level, and relay. It is a 30-minute fix if you catch it early. In freeze-thaw climates, avoid aggressive de-icing salts on pavers and concrete. Sodium chloride (rock salt) is the least damaging option if you must use something, but sand and a good shovel are always better for the surface. Watch for pooling water on or near the patio: standing water is an early sign of drainage or settling issues that get worse quickly if ignored. SUNDEK’s 2025 Expansion Joints technical PDF describes concrete expansion joints being commonly spaced about 8 to 12 feet apart and cut to roughly one-quarter of the slab depth for the joint treatment it outlines.
When to call in a pro
Most homeowners can handle a straightforward ground-level patio with decent tools and a free weekend. Where it makes sense to bring in help: if your site has severe drainage problems or a high water table, if you need a raised patio with structural walls, or if you are pouring a large concrete slab where a bad mix or timing mistake is costly to fix. The base prep, paver laying, and jointing steps on a standard flat patio are well within DIY reach, and the results are genuinely satisfying.
FAQ
How do I know whether to choose pavers or a concrete slab for my exact site?
Use drainage and stability as the deciding factors. If the ground is already well-drained and fairly stable, concrete is simpler. If your yard tends to shift seasonally, freeze-thaw cycles are frequent, or you want the ability to correct localized issues, pavers are usually the safer bet because individual units can be lifted and reset.
What happens if I do not call 811 before digging?
Digging without utilities clearance risks hitting buried lines (gas, electric, water, telecom). Even if you are confident about where utilities are, many utilities run closer to the surface or laterally than expected. The clearance also helps you plan around cleanouts, access panels, and service routes so you do not have to rework after utilities are exposed.
What if my patio design includes a step down or up from the house or doorway?
Treat the doorway threshold, existing steps, and adjacent concrete edges as fixed elevation points. Set your string lines to create the required slope away from the house while keeping the finished patio flush (or just slightly lower) at the threshold to avoid a tripping edge and to keep water from migrating toward the structure.
Can I install a paved patio directly over old concrete or asphalt?
In most cases, no. Old surfaces often leave a compacted, uneven base and can trap moisture, which increases risk of settling and failure over time. Typically you need to excavate to your target depth, remove organic and loose material, and rebuild the base and drainage layers. If you are unsure, evaluate for levelness and moisture issues before deciding to overlay.
Is 1 inch of bedding sand enough, and what sand should I avoid?
Plan on about 1 inch for pavers, but accuracy matters more than the exact figure. Use coarse bedding sand and do not substitute fine play sand, which can wash or compact differently and contribute to uneven surfaces. Keep the screeded sand undisturbed, footprints included, because lumps and low spots telegraph directly into the finished patio.
How do I prevent pavers from rocking after a few months?
Rocking almost always traces back to an underbuilt or poorly compacted base, or joint sand that was not properly compacted in. Make sure you compact the gravel in multiple thin lifts, verify slope after compacting, install edging restraints, and use polymeric sand then compact it into the joints, followed by correct wetting.
Should I compact after adding the bedding sand?
No, not in the same way you compact gravel. Bedding sand is screeded to grade and then pavers are set into it. You protect the screeded surface from disturbance, then seat the pavers with a compactor using a paver protection mat, which helps avoid forcing sand into an uneven thickness.
How do I handle drainage if my yard slopes the wrong way?
Do not rely on “natural” yard flow. Confirm the water path before installation by identifying where pooled water will go after you set the finished patio elevation. If the direction is toward the foundation or toward low spots, adjust the slope and consider adding drainage solutions (like regrading or drainage improvements) so runoff moves away once the patio is in place.
What should I do if I discover soft, spongy soil in the excavation?
Do not fill with loose dirt and hope for the best. Remove unstable material, dig slightly deeper if needed, and rebuild with compactable gravel in thin, well-compacted lifts. In some soils (especially clay), geotextile fabric can help limit upward movement of fine soils into the base over time.
How do I avoid washout when wetting polymeric sand?
Wet in sections and use gentle shower-spray settings, saturating the joints without flooding the surface. Do not do the step during rain or if rain is forecast within 24 hours, because premature or heavy water can move polymeric sand out of the joints before it sets. Follow the timing instructions for your specific product.
Can I seal pavers right away?
Wait. Sealing too early can trap moisture and contribute to unwanted hazing or reduced performance. A common guideline is to wait about 60 to 90 days after installation before sealing pavers, then reapply every 2 to 3 years based on traffic and climate.
Do I need edge restraints for small patios or only for large ones?
Edge restraints are still important for small patios. Without them, perimeter pavers can creep outward and the pattern can shift even if the field looks stable at first. Use edging on all exposed edges and spike it at regular intervals so the base movement is controlled from the start.
How much extra base should I plan for around the patio edges, and why?
Plan for extra base width beyond the patio footprint, typically adding material on each side, because edge restraint stability depends on supported base. If you only build to the exact footprint, edges are more likely to spread and settle, leading to a gradual change in level and misaligned joints.
What is the safest approach to de-icing on pavers and concrete?
Avoid aggressive salts when possible. If you must de-ice, use sand or a shovel first, and if you choose salt, keep it minimal and prefer sodium chloride over blends that may be more damaging. Overuse can accelerate surface wear and staining, especially where runoff can concentrate around the patio.
Step-by-step DIY how to build a pavers patio: planning, base prep, laying, cutting, patio steps, finishing, and troubles
Step-by-step DIY for building a patio paver surface: plan, slope, excavate, base, pavers, joints, sealing, and troublesh
Step-by-step guide to build a paver patio: layout, base prep, paver installation, edging, drainage, sealing, and fixes f