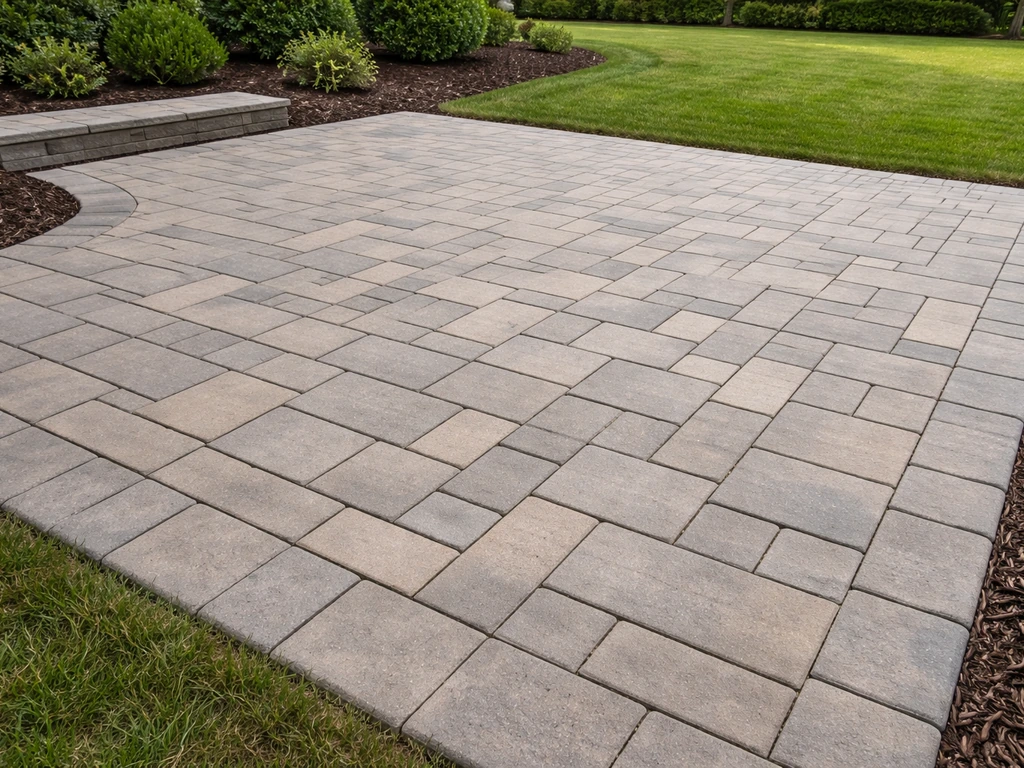
Making a paver patio yourself is totally doable over a weekend or two. If you're looking for a broader starting point on how to create a paver patio, the overview in how to build a pavers patio can help you compare the full workflow end to end.
How to Make Patio Pavers: Build a Paver Patio Step by Step

Felix Rowe
28 Apr 2026
The basic process is: plan your layout, excavate about 8 to 10 inches deep, compact a 4 to 6 inch gravel base, screed 1 inch of bedding sand, lay your pavers in the pattern you want, cut any edge pieces to fit, lock in the edges, sweep in joint sand, and seal if you choose to. For that end-to-end overview, see how to build a pavers patio so you can compare these steps with a complete walkthrough.
If you want a full walkthrough, follow this step-by-step guide to how to build a paved patio from layout through finishing. The details in each step are what separate a patio that stays flat and drains well for decades from one that shifts and puddles after the first heavy rain.
Planning & Measurements
Start by deciding the size and shape of your patio. Sketch it on paper first, even roughly. Standard rectangular patios are the easiest to measure and cut for, while curves and diagonal patterns require more cuts and more material. To make a round patio with rectangular pavers, focus on laying curved lines with consistent joint spacing and plan your cuts so the perimeter stays tight and stable.
Once you have a footprint, measure the length and width in feet and multiply them together for your square footage. Then add a waste factor on top: 5% for a simple straight layout, 10% for a standard running-bond or grid pattern, and 15% if you're doing curves, diagonal herringbone, or a lot of edge cuts. That extra material accounts for cuts, breakage, and the occasional misshapen paver.
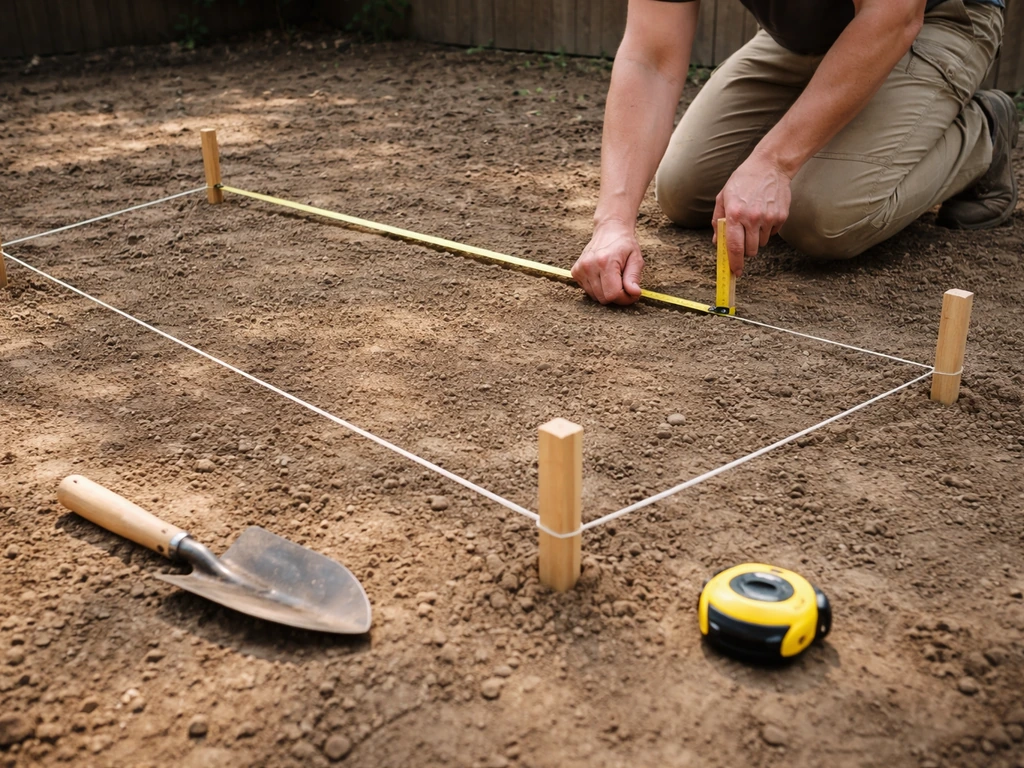
After square footage, work out your excavation depth using this formula: base material thickness plus bedding sand thickness plus paver thickness equals total excavation depth. A typical breakdown is 6 inches of compacted gravel base plus 1 inch of bedding sand plus about 2 3/8 inches of paver thickness, which puts you right around 9 to 10 inches of total excavation. Mark the patio perimeter with stakes and string lines before you dig anything, and check your corners are square by measuring diagonally from corner to corner (both diagonals should be equal for a rectangle).
Also decide at this stage where drainage will go. Water needs somewhere to move. Plan your slope so it runs away from the house and toward a yard, garden bed, or drain. You'll use these string lines later to establish grade, so set them at the correct elevation now, before any soil comes out.
Materials & Tools You'll Need
Paver types
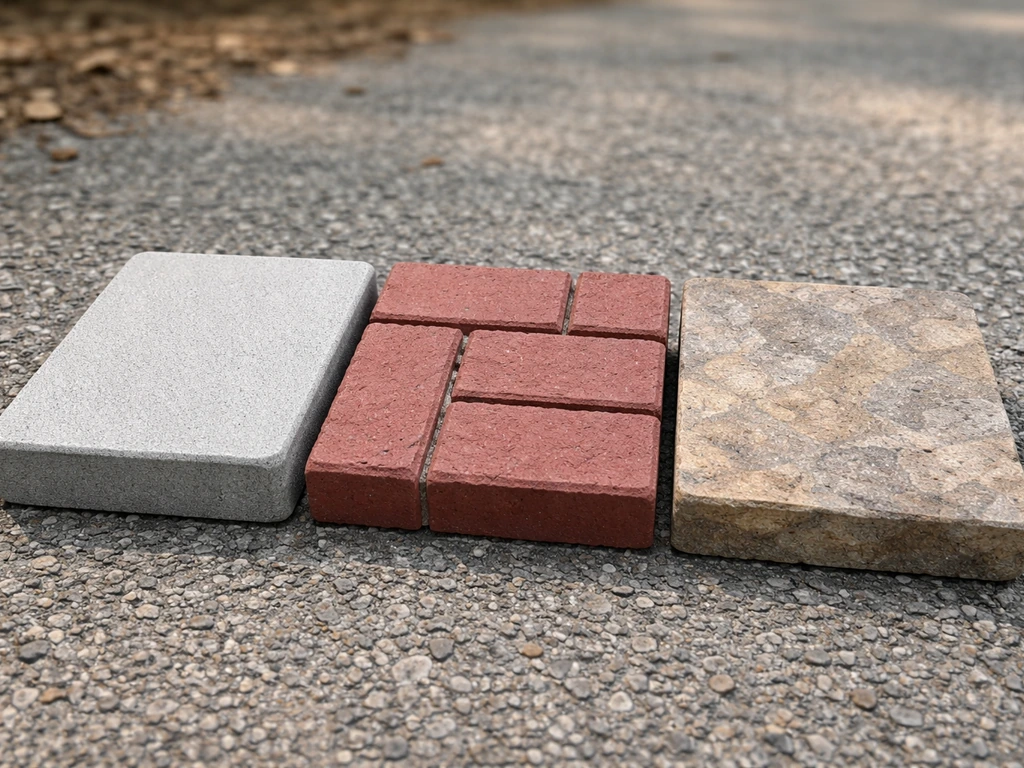
Concrete pavers are the most popular choice for DIYers because they're uniform in size, relatively affordable, and come in a huge range of colors and finishes. Standard concrete pavers are about 2 3/8 inches thick and handle residential foot traffic easily. Natural stone pavers (bluestone, travertine, flagstone) look great but vary in thickness, which makes screeding and leveling harder. Brick pavers are another option, slightly thinner on average and traditional-looking, but require the same base system. For most homeowners doing their first patio, concrete pavers are the practical pick.
Base materials
Crushed angular gravel (sometimes called crushed stone or road base) is your sub-base material. It compacts tightly because the angular edges interlock. Avoid rounded pea gravel, which doesn't compact well and can shift under load. On top of the compacted gravel goes 1 inch of coarse bedding sand, also called concrete sand. This is not fine play sand. Coarse sand screeds properly and drains well. Fine sand holds moisture and can cause efflorescence and weaker joints over time.
Edging and joint sand
Plastic paver edging (the flexible kind designed specifically for pavers) works well for most residential projects. It bends for curves and is pinned down with 10-inch spikes, one every 6 inches. This isn't optional; edge restraints are essential to keeping your pavers from spreading outward over time. For joints, you have two choices: regular coarse sand swept into the joints (less expensive, needs occasional topping off), or polymeric sand, which is mixed with a binding agent and hardens when wetted. QUIKRETE’s data sheet for Patio Paver Sands (#1150) describes using the sand to blank" rel="noopener noreferrer">fill joints between installed pavers. Polymeric sand resists washout, discourages weeds, and is worth the extra cost for most patios.
Tools
- Plate compactor (rent one, don't skip this)
- Sod cutter or flat spade for stripping grass
- Wheelbarrow and shovels
- Long level and tape measure
- Stakes and string line
- Two lengths of 3/4-inch metal conduit or pipe for screed rails
- Straight 2x4 board for screeding
- Rubber mallet
- Paver splitter or angle grinder with a diamond blade for cuts
- Broom and garden hose
Realistically, plan for one full day of prep and excavation, a second day for base work, and a third day for laying and finishing. On a small 10x12 foot patio you might compress this into two full days, but larger projects (over 200 square feet) benefit from splitting up the work so base material can be checked for settlement before you lay pavers on top.
Site Prep & Grading
Laying over grass
Strip the grass first. A rented sod cutter makes quick work of this, or you can use a flat spade. Remove the sod and the top layer of organic soil entirely because organic material compresses and rots, causing the base to sink unevenly. Don't be tempted to just compact the grass down. It won't hold. Haul the removed material away and you're left with exposed subsoil ready for excavation.
Laying over concrete
If you already have an existing concrete slab, you can lay pavers directly over it in some situations, which skips a lot of excavation. The concrete must be in good condition (no major cracks or heaving), and you'll need to adjust your finished height to account for the added paver thickness. You'll still need edge restraints, and drainage needs to be planned carefully since water can't drain through concrete. This approach works best for simple, small patios. For anything larger or where drainage is a concern, a full-base installation is more reliable.
Grading uneven ground
Uneven ground needs to be cut down to a consistent subgrade before you add base material. Use your string lines as a reference elevation. High spots get dug down; low spots get filled with compactable gravel (not topsoil or sand). Once the subgrade is roughly level at the right depth, compact it before adding any base material. A plate compactor run over native soil helps reveal soft spots you may have missed. If you find soft or wet areas, dig them out and fill with compacted gravel.
Base Installation & Compaction
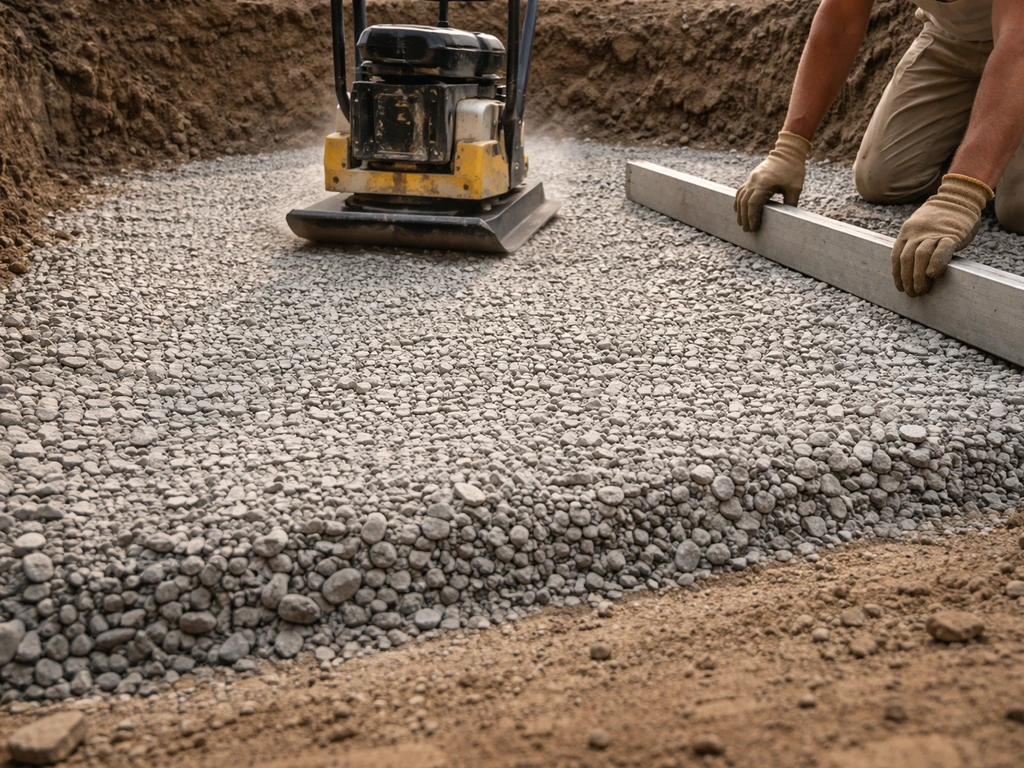
This is the single most important part of the whole project. A bad base means a bad patio, no matter how carefully you lay the pavers. If you are wondering how to build a patio with paver base panels, start by getting this base layer thickness and compaction right before laying any panels or pavers. If you’re planning your patio from scratch, this base step is the key part of how to lay a paver patio foundation.
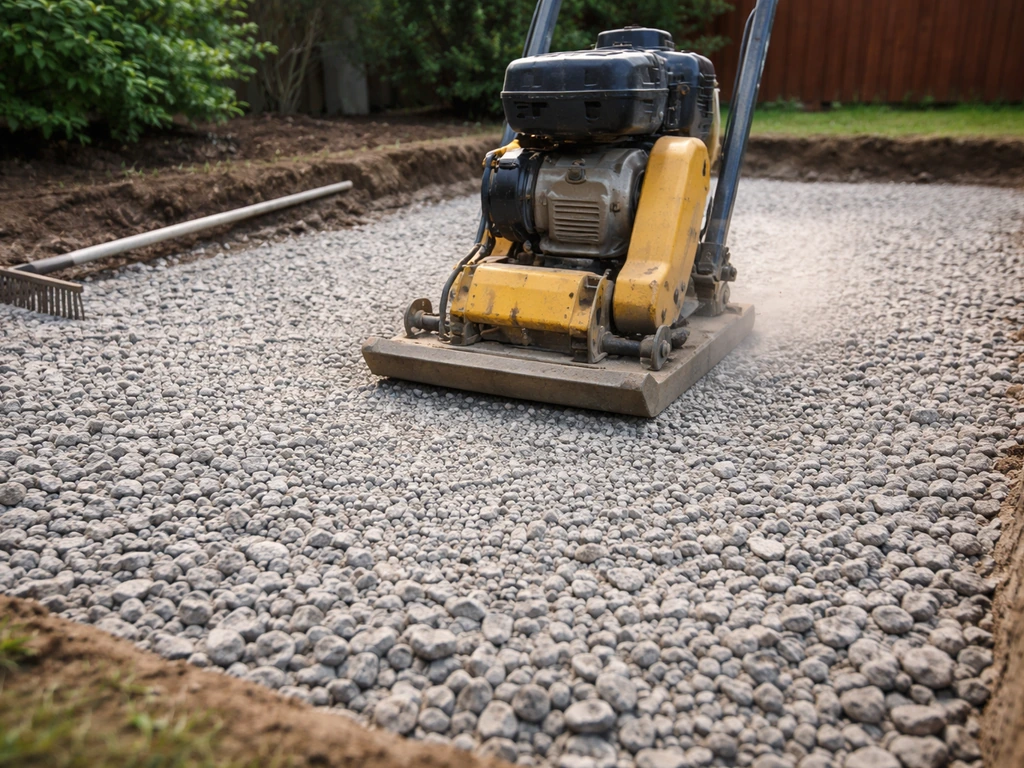
If you want to nail the process from excavation through compaction, this guide explains how to make a paver patio base step by step If you’re planning your patio from scratch, this base step is the key part of. If you’re working from the ground up, follow the steps for building the paver patio base before you set any stones how to make a paver patio base. Aim for a compacted gravel base that's 4 to 6 inches thick. For most residential patios, 6 inches is the right target. Don't dump all your gravel in at once.
Instead, add it in 2-inch lifts: spread 2 inches, compact it, add another 2 inches, compact again, and repeat until you hit your target depth. Three lifts of 2 inches each gives you a solid 6-inch compacted base. Lightly wetting the gravel while you compact helps it lock together.
While you're building up the base, you're also building in your slope. Set your string lines to slope away from the house at 1/4 inch per foot (about 2%). That's the sweet spot for drainage: enough pitch to move water off the surface, not so steep that the patio feels tilted. Check your base surface with a level and a tape measure as you compact each lift. Getting the slope right at the base stage is much easier than trying to compensate with bedding sand later.
Once your final lift is compacted and sloped correctly, spread 1 inch of coarse bedding sand over the entire surface. Use two pieces of 3/4-inch metal conduit laid parallel as screed rails. Set them at the right elevation, then drag a straight 2x4 across them to screed the sand to a perfectly consistent 1-inch depth. Do not compact the bedding sand. You want it firm enough to hold its shape but with enough give that pavers can be tapped level as you lay them. Once screeded, avoid walking on the sand bed; work from a board laid across already-placed pavers if you need to reach farther areas.
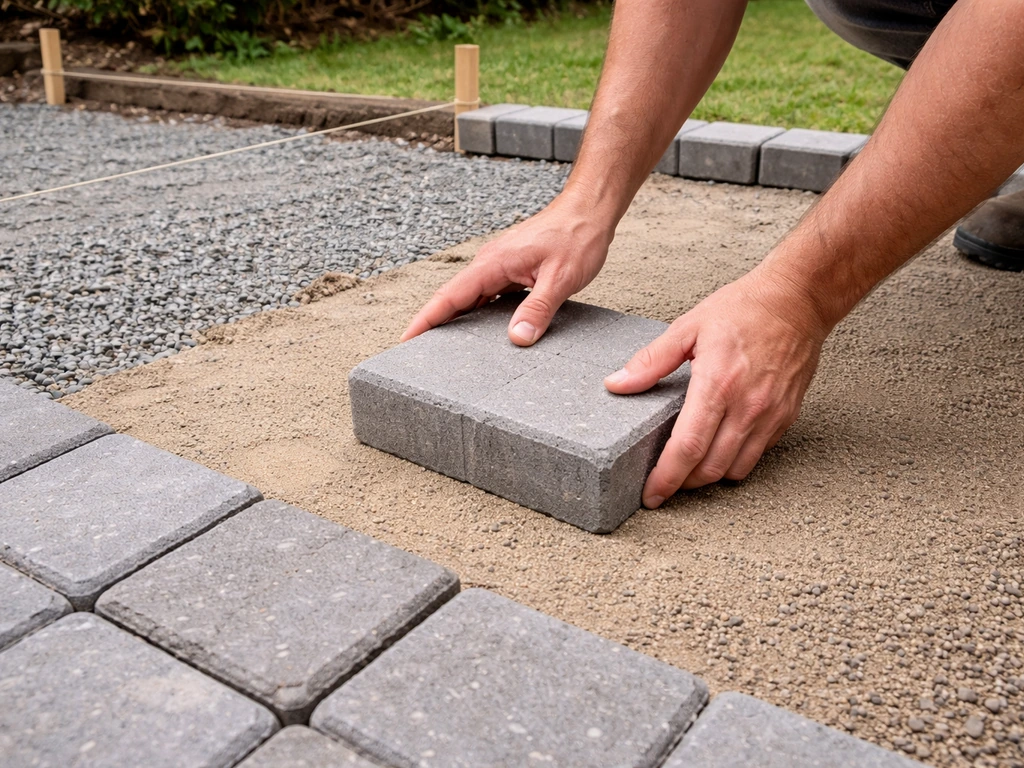
Laying Pavers & Patterns
Start laying pavers from a straight, fixed edge, typically the house wall or a chalk line you've snapped across the sand. Work outward and across so you're always placing pavers on undisturbed sand and kneeling on already-placed pavers (or a board). Set each paver down without sliding it across the sand, press it firmly, and use a rubber mallet to tap it level with its neighbors. Keep joints consistent using paver spacers or by eye if your pavers have built-in spacing lugs.
Common paver patterns include running bond (offset rows, like brickwork), herringbone (interlocking at 45 or 90 degrees), basket weave, and ashlar (random-looking but planned). Running bond is the easiest and works well for simple rectangular patios. Herringbone is stronger structurally because the interlocking angles resist shifting, and it looks great, but it creates more 45-degree cuts at the edges. Diagonal patterns use more material, which is why the 15% waste factor applies to them.
For edge cuts, measure and mark each paver individually rather than assuming all edge pieces are the same width. Cuts can be made with a rented paver splitter for straight cuts, or an angle grinder fitted with a diamond blade for curved or angled cuts. Always wear eye protection and a dust mask when cutting. After all pavers are laid, run the plate compactor over the entire surface (put a rubber pad under the compactor plate to avoid scratching pavers) to seat them into the bedding sand and finalize their position.
Drainage, Slopes & Transitions
The slope range you're aiming for is 1/8 to 1/4 inch per foot. At the low end (1/8 inch per foot), water moves but barely, and any minor settling can cause flat spots where water pools. At the upper end (1/4 inch per foot), drainage is reliable. For most patios attached to a house, slope away from the foundation. If the patio is freestanding in the yard, you can pitch it toward a garden bed or a low point in the lawn.
Sloped sites add complexity. If your yard slopes significantly, you have two options: step the patio down in terraces, or build a raised patio on one side using a retaining wall or extra base fill to create a level surface. Raised patios need special attention to drainage because water can get trapped behind retaining structures. Include a gravel drainage layer and, if needed, a perforated pipe behind any retaining wall to let water escape.
Transitions from the patio to other surfaces (lawn, concrete walkway, steps) need to be clean and stable. Where a paver patio meets a concrete step or walkway, the edge restraint anchors that junction. Where it meets lawn, the edging keeps pavers from creeping into the grass. If you're incorporating a fire pit area, consider centering the pit on a point where pavers meet evenly and plan the patio footprint so the pit sits on a full, stable section of base with no cuts underneath it.
Finishing: Edging, Joint Sand, Sealing & Cleanup
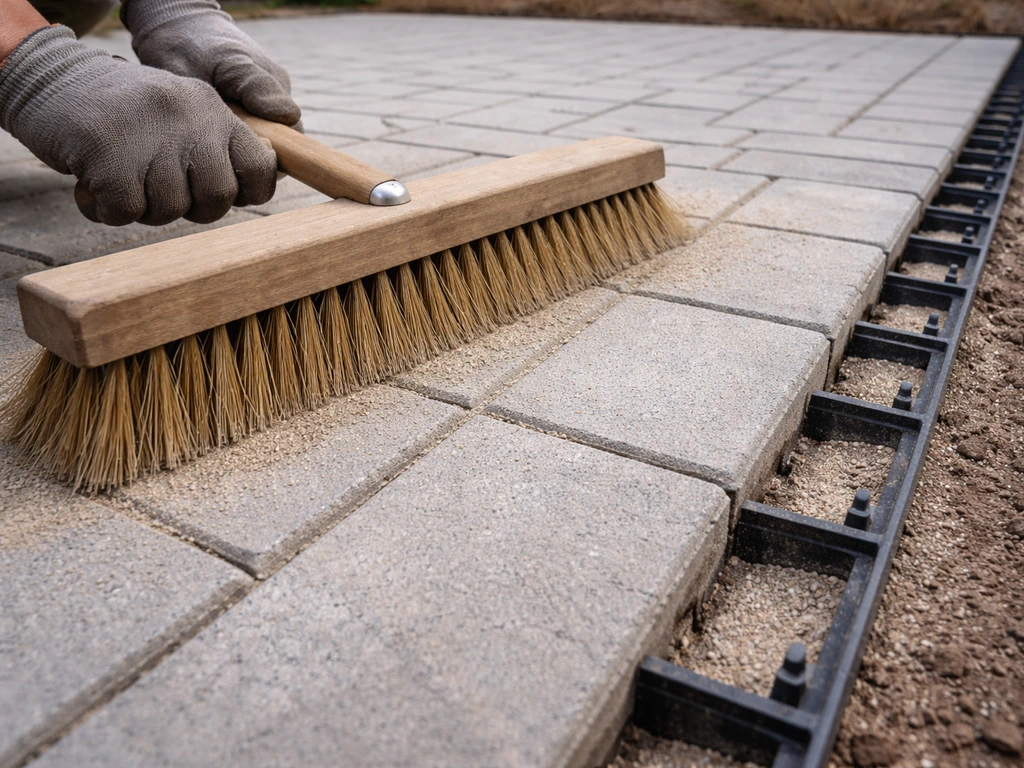
Install your plastic paver edging along all open sides before you fill joints. Push it tight against the last row of pavers, trim to fit, and hammer in the 10-inch spikes every 6 inches. The edging locks the perimeter so the plate compactor and normal use don't push pavers outward. Backfill soil or mulch against the outside of the edging to bury it and make it look finished.
For joint sand, sweep polymeric sand over the surface, working it into the joints with a push broom. Make several passes in different directions. Once joints look full, blow off any excess sand from paver faces with a leaf blower on low (important: sand left on the surface when you wet it will stain). Lightly mist the entire surface with water to activate the binding agent, let it absorb, then mist again. Follow the specific product instructions because activation timing varies by brand. Polymeric sand typically takes 24 to 48 hours to cure depending on temperature and humidity. Don't walk heavily on it during curing.
Sealing is optional but worth doing. It protects color, resists staining, and makes cleaning easier. Wait at least 30 days after polymeric sand installation before sealing (some recommendations go to 60 to 90 days to let everything fully cure and settle). Apply sealer on a dry day with no rain forecast for at least 48 hours, and make sure the paver surfaces are completely dry. Use a roller or pump sprayer, work in manageable sections, and apply thin coats rather than one thick coat. Wait at least 72 hours before driving on sealed surfaces.
Troubleshooting & Maintenance
Common problems and how to avoid them
| Problem | Likely Cause | Fix or Prevention |
|---|---|---|
| Pavers shifting or spreading | No edge restraints, or stakes too far apart | Install plastic paver edging with 10-inch spikes every 6 inches; reset any shifted pavers |
| Lippage (uneven paver surfaces) | Inconsistent bedding sand depth or pavers not tapped level | Screed sand carefully with conduit rails; use a rubber mallet and check level constantly while laying |
| Puddles forming on the patio | Insufficient slope or settled low spots | Build in 1/4-inch-per-foot slope at the base stage; re-level sections that have settled |
| Joint sand washing out | Using regular sand in high-rain or high-traffic areas | Use polymeric sand; re-sweep and re-wet if washout occurs |
| Weeds growing in joints | Organic material in joints or no polymeric sand | Use polymeric sand; apply a paver-safe weed killer and top up joints as needed |
| Efflorescence (white haze on pavers) | Moisture trapped under pavers or poor drainage | Ensure adequate drainage slope and a proper compacted base; use a paver-specific efflorescence cleaner |
| Base settling unevenly | Base added in one thick lift instead of compacted lifts | Lift and relay settled sections; add and compact base material in 2-inch lifts next time |
Ongoing maintenance
A well-built paver patio needs very little maintenance. Sweep debris off regularly so organic material doesn't stain or work into joints. Check joint sand levels each spring and top up wherever it has washed or settled. Re-apply sealer every 2 to 3 years depending on traffic and climate. If a paver cracks or a section settles, the good news is that individual pavers can be lifted and reset without disturbing the rest of the patio. That repairability is one of the real advantages pavers have over a solid concrete slab.
If you notice a section of the patio starting to sink or rock, catch it early. Lift the affected pavers, add and compact fresh base material underneath, re-screed the bedding sand, and relay the pavers. Waiting until the problem spreads makes the repair much larger. Most long-term paver failures trace back to the base, whether it's insufficient thickness, poor compaction, or base material that retained water instead of draining it. Get the base right the first time and the surface will take care of itself.
FAQ
Do I need to add a slope if my patio already sits level after excavation?
Yes. Even if it looks level when you stop digging, set grade deliberately (about 1/8 to 1/4 inch per foot away from the house). Use string lines and check the base surface as you compact each lift, because you cannot reliably “fix” pooled areas by adjusting bedding sand once pavers are down.
Can I use regular sand in the joints or as the bedding layer?
Avoid fine, “play” sand for bedding. Use coarse bedding sand (concrete sand) so it screeds to 1 inch and drains. For joints, regular coarse sand can work but plan on topping it up, fine sand can lock up unevenly and may contribute to efflorescence and weaker joint performance.
What’s the best choice for joint sand, coarse sand or polymeric sand?
Coarse sand is cheaper and easier for DIY, but it washes out faster and requires periodic re-sweeping. Polymeric sand offers better weed resistance and less washout, but it requires careful misting and curing conditions, and you should not use it if you cannot follow the activation steps and timing.
How do I know if my base is properly compacted before laying pavers?
After each gravel lift, compact until the surface looks uniform and doesn’t visibly deform under firm foot pressure. If you detect soft spots after leveling, dig out those areas and replace with compactable gravel, do not patch with topsoil or bedding sand.
Is it okay to compact the bedding sand?
No. Screed bedding sand to a consistent 1 inch depth, leave it un-compacted, and set pavers directly into it so they can be tapped level. Compaction of bedding sand can create high spots and reduce the ability of pavers to settle evenly during leveling.
Do I need to place pavers on undisturbed sand, or can I walk on the sand bed to reach work areas?
Try not to walk on the sand bed. If you must cross it, lay a board over existing pavers and move from there, stepping only on placed pavers or boards so the screeded depth stays consistent.
How should I handle patio edges where pavers meet a walkway, step, or a garage slab?
Treat the edge like a structural line. Ensure edging restraints are installed at the joint and that the transition area has stable support. If the patio meets concrete, water still needs an exit path, so plan the grade so runoff does not get trapped at the interface.
What should I do about drainage if my patio must sit close to a foundation or a low yard area?
Plan drainage first. Set grade away from the house and toward a controllable discharge point (yard, garden bed, or drain). On sloped or constrained sites, consider a terrace or raised patio strategy, and if using retaining elements include drainage provisions like a gravel drainage zone and (when needed) a perforated pipe behind the wall.
Can I install pavers over an existing concrete slab to skip excavation?
Sometimes, but only if the slab is sound and stable (no major heaving or widespread cracking). You still need edge restraints and must adjust the finished height. Also, concrete limits water movement through the base, so be extra cautious about drainage paths and surface runoff.
How much waste should I plan for if I’m cutting a lot of edge pieces or doing a curved layout?
Budget more than you think for complex perimeters. A higher waste allowance (around 15%) is appropriate for curves, diagonals, and frequent edge cutting, because mistakes in measurement, breakage during cutting, and imperfect match pieces are common at boundaries.
What’s the right way to cut pavers for curved or angled edges without ruining the layout?
Measure and mark each edge piece individually, then dry-fit before cutting. Use a splitter for straight cuts and an angle grinder with a diamond blade for angled or curved cuts, and protect against dust with a dust mask and eye protection. Dry-fit helps you avoid widening joints at corners.
After I compact the pavers, do I need to re-check the slope?
Yes. Once pavers are seated and the joints are filled, verify the surface pitch with a straightedge and tape. If you see a low spot, fix it early by lifting and resetting pavers in that area and adjusting base or bedding depth, because later repairs usually expand outward.
How long should I wait before activating and curing polymeric sand, and when can I use the patio?
Follow the product instructions for misting and activation, because timing varies by brand. Typical curing is about 24 to 48 hours depending on temperature and humidity, avoid heavy foot traffic during curing, and do not drive on sealed surfaces for at least 72 hours after sealer application (and for polymeric sand, longer if the weather stays cool or damp).
Will sealing harm joint sand performance or drainage?
Sealing is primarily about stain resistance and easier cleaning, and it is optional. If you seal too soon after joint polymeric sand, you can interfere with complete curing. Wait at least the recommended curing window for polymeric sand, then seal on a dry day so the sealer bonds properly.
What maintenance actually prevents paver patios from sinking or rocking over time?
Keep joints from emptying and restore them as needed. Sweep regularly to remove organic debris, check joint sand levels in spring, and top up washed-out joints promptly. If a section starts to rock, repair early by lifting pavers, adding and compacting fresh base, re-screeding bedding sand, and relaying the pavers.
Next Articles
How to Create a Paver Patio: Step-by-Step DIY Guide
Step-by-step guide to build a paver patio: layout, base prep, paver installation, edging, drainage, sealing, and fixes f
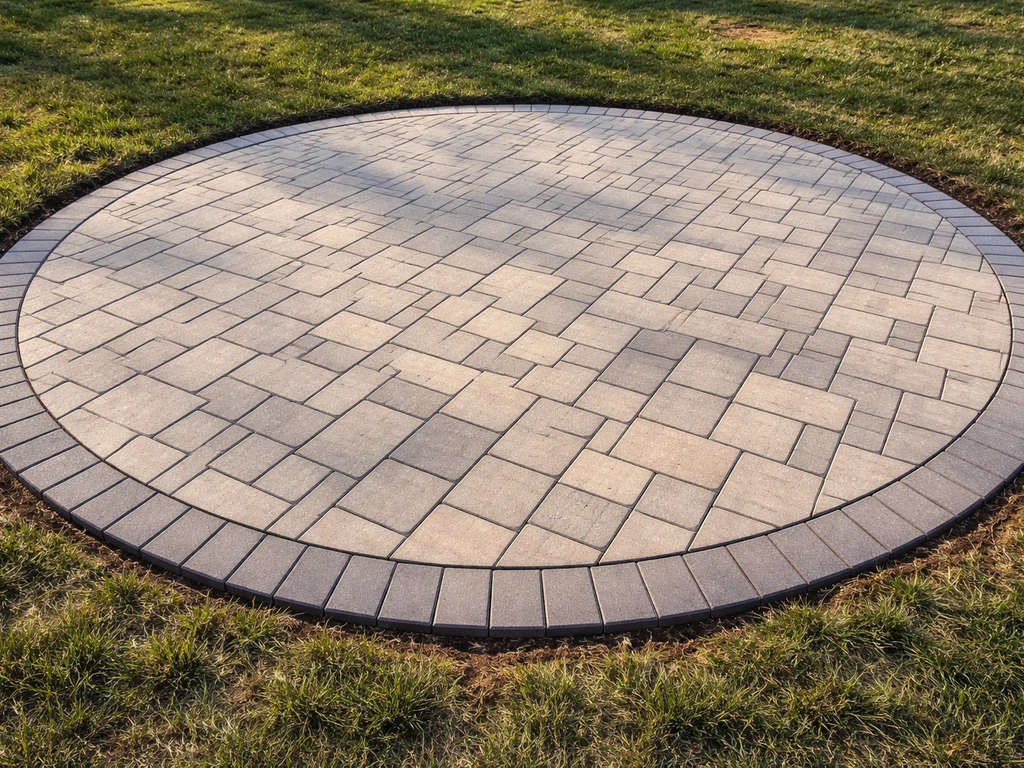
How to Make a Round Patio With Rectangular Pavers
Step-by-step DIY guide to build a round patio with rectangular pavers: layout, prep, cutting, grading, edging, and troub
How to Use Quikrete Patio Paver Jointing Sand: Guide & Tips
How to use Quikrete Patio Paver Jointing Sand: step-by-step application, tools, timing, coverage, and care.