
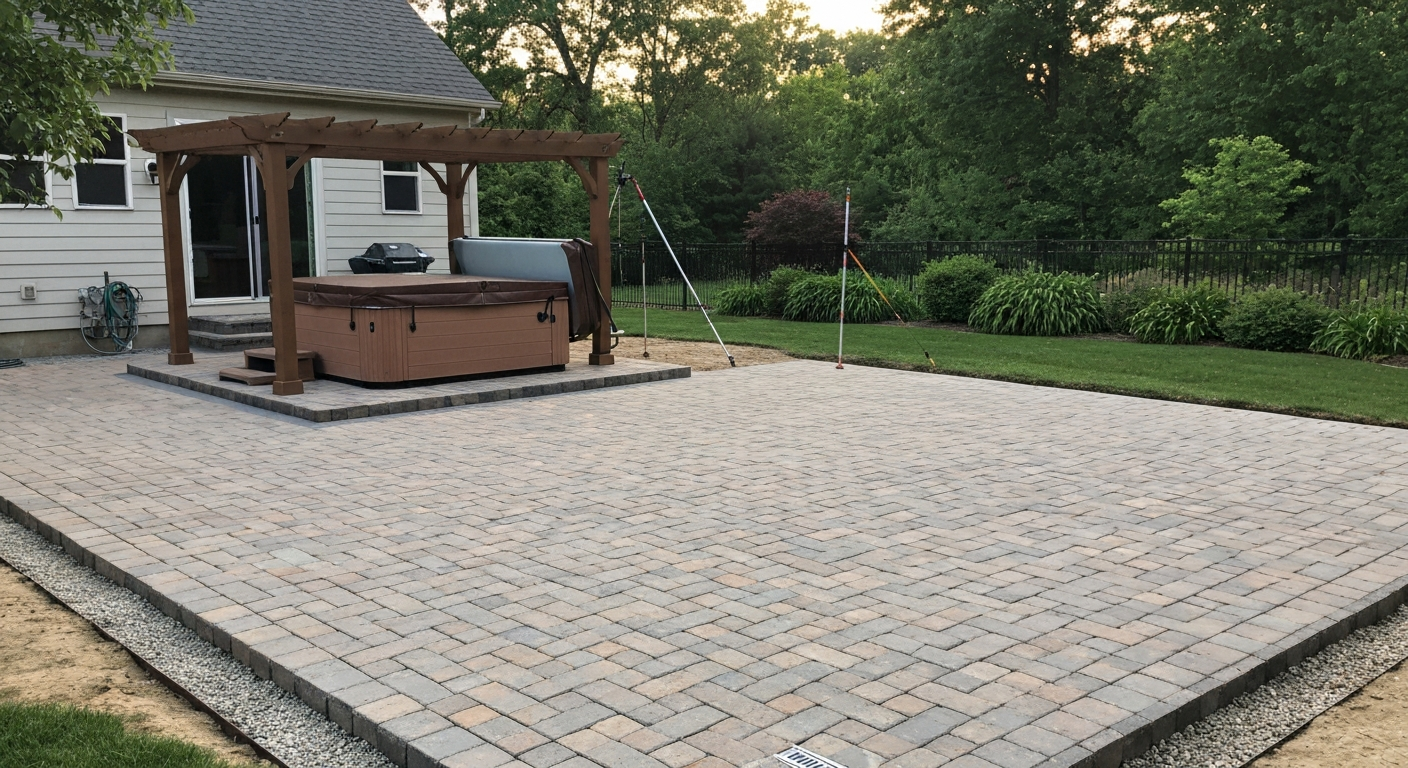
You can absolutely build a paver patio that safely holds a hot tub, but you need to treat it like the structural project it is, not a simple weekend landscaping job. A filled hot tub can weigh anywhere from about 1,800 lb for a small two-person unit to well over 6,500 lb for a six-person model, and larger swim spas push past 18,000 lb. That kind of load demands engineered compaction, the right base depth, proper drainage slope, and edge restraints done by the book. Get those fundamentals right and you will have a stable, beautiful patio that lasts decades. Skip them and you will be watching your hot tub slowly sink into the ground within a couple of seasons.
How to Build a Paver Patio for a Hot Tub: Complete Guide

Felix Rowe
23 Jul 2026
What this guide covers and whether you should DIY it
This guide walks you through every stage of planning and building a paver patio designed specifically to support a hot tub: calculating load, choosing between a concrete pad and a reinforced paver base, site prep, excavation, compaction, laying pavers, jointing, and finishing touches. I also cover permits, utility locates, drainage design, and the integration of features like a gazebo, pergola, or fire pit nearby.
Most capable DIYers can handle a paver patio for a small to mid-size hot tub if they are comfortable operating a plate compactor, renting a skid steer for excavation, and following a systematic process. Where I recommend bringing in a pro: if your filled hot tub exceeds roughly 6,000 lb and you are building over a reinforced paver base rather than concrete; if you have clay or organic soils with uncertain bearing capacity; if you need a structural engineer's stamp for a permit; or if you are on a slope greater than about 5 percent without experience building retaining elements. Pouring the actual concrete pad, if you go that route, is also a job many DIYers prefer to sub out. Everything else in this guide is well within reach if you take it phase by phase.
Quick planning checklist before you do anything else
Run through this checklist before you buy a single paver or rent a single tool. Skipping any item here is how projects stall halfway through.
- Pull the spec sheet for your exact hot tub model. Find the dry weight, water capacity in gallons, and stated filled weight. If the filled weight is not listed, calculate it: multiply water capacity by 8.34 lb per gallon, then add dry weight plus 175 lb per occupant at full capacity.
- Measure the tub footprint precisely (length x width in feet). Divide the total filled weight by that footprint area to get the pounds per square foot (psf) your base must carry. This number drives every base-depth decision.
- Confirm site access: can the hot tub be delivered to the final location? Hot tubs require a clear path at least 3 ft wide and 7 ft tall. Cranes, slides, or special dollies add cost. Know your delivery plan before you finalize patio placement.
- Measure the distance to your electrical panel. A dedicated 240V GFCI circuit is required for most hot tubs; plug-and-play 120V units still need a GFCI outlet. Trench routing for conduit may cross your patio area, so coordinate with your electrician before excavation.
- Check for a gas line if you are considering a gas heater option or a nearby fire pit.
- Contact 811 (Call Before You Dig) to get underground utilities marked. This must happen before any excavation, no exceptions.
- Check with your local building department for permit requirements (see the full section below). Many jurisdictions require a permit for hot tubs and for any hardscape that supports one.
- Confirm your HOA rules if applicable. Some require pre-approval for hot tub installation or patio additions.
- Determine your local frost depth. This controls how deep your base must go in cold climates.
- Plan water fill and drainage: where will the fill hose reach, and where will drainage water go when you drain the tub? Never drain into a storm system without checking local code.
Manufacturer, local code, and utility-locate requirements
Your hot tub manufacturer's site-preparation guide is the single most important document in this project. Every major brand publishes one, and it will specify minimum pad thickness, reinforcement type, setback distances from structures, electrical requirements, and sometimes even concrete psi. For example, many manufacturers state a minimum 4-inch reinforced concrete slab for smaller units, while recommending 6 inches with rebar or wire mesh for larger, heavier models. Some manufacturers will void the warranty if the installation does not meet their site-prep spec. Download yours before you finalize any plans.
On the code side, the IRC (International Residential Code) governs most single-family residential construction in the U.S., and Section R403.1.4.1 requires that footings and permanent supports in frost-susceptible soils extend below the local frost line. That applies to any concrete pad supporting a hot tub. Your local building department may have adopted amendments, so always confirm locally. Many jurisdictions also classify a hot tub as a pool or similar water feature and require a barrier or fence under the same rules that govern swimming pools. Electrical must comply with NEC Article 680. Check all of this before you finalize your design.
Utility locates are not optional and not just a formality. Call 811 at least three business days before any digging. The locate service will mark gas, electric, water, sewer, and telecommunications lines. Mark these flags on your site plan and design your excavation around them. If a utility runs exactly where you planned to place your patio, you may need to redesign or get a permit from the utility company to work near the line.
Load, soil, and drainage basics
Calculating the actual load
Here is the math in plain terms. Take your hot tub's total filled weight (dry weight plus water weight plus occupant weight). Divide that by the footprint area in square feet. The result is your average load in psf. A mid-size six-person hot tub with 400 gallons of water, a 650 lb dry weight, and six occupants at 175 lb each might produce: (400 x 8.34) + 650 + (6 x 175) = 3,336 + 650 + 1,050 = 5,036 lb total. If the footprint is 7 x 7 ft (49 sq ft), that is about 103 psf average. For guidance on converting a concentrated tub load to an equivalent footing area and performing tributary-area calculations, see Deck Footing Calculator / explanation, tributary area and converting concentrated load to footing area Deck Footing Calculator / explanation — tributary area and converting concentrated load to footing area. That is not enormous, but it is concentrated in one spot, so the base under that footprint must be engineered accordingly.
Soil bearing capacity
The IBC Table 1806.2 gives conservative presumptive allowable bearing values you can use when no geotechnical data is available. Sandy gravel and gravel soils can carry 3,000 psf; sand and silty sand soils rate at 2,000 psf; clay and silty clay soils sit at about 1,500 psf. Your engineered base spreads the hot tub load across a wider area so the pressure reaching native soil stays within these limits. If your soil is obviously soft, organic, expansive clay, or you cannot confidently classify it, commission a geotechnical investigation. The IBC Section 1803 actually requires one when soil conditions are uncertain or when you need a higher bearing value than the presumptive numbers allow. This is a case where spending a few hundred dollars on a geotech report can save you thousands in settling repairs later.
Frost depth
In climates where the ground freezes, frost heave is one of the most common causes of paver patio failure. Your base must extend below the local frost line, or you need a frost-protected shallow foundation design with insulation. Frost depths range from a few inches in the Deep South to 48 inches or more in northern Minnesota. Your local building department publishes the required frost depth for your area. Design your total base depth to accommodate it.
Drainage slope
Every paver patio needs to shed water away from your home and away from the hot tub's electrical components. The minimum slope is 1 percent (that is 1/8 inch per foot) but 2 percent (1/4 inch per foot) is more reliable and is what I aim for on every build. That means for every 10 feet of patio length, the surface should drop 2.5 inches from the high side to the low side. Slope away from the house and away from the tub's control panel side. Plan where runoff will go: ideally into a lawn area or a drainage channel, never toward a foundation.
Concrete pad vs reinforced paver base: choosing the right foundation
This is the decision that affects everything downstream, so let me give you a direct comparison. For most hot tubs in the 3,000 to 6,500 lb filled-weight range, a reinforced concrete pad is the most straightforward and most universally accepted solution. Most manufacturers explicitly recommend it. For lighter plug-and-play tubs and for homeowners who prioritize the aesthetics and repairability of a paver surface, a properly engineered interlocking paver base can absolutely work, but it demands more attention to base depth, compaction, and edge restraint.
| Factor | Reinforced Concrete Pad | Reinforced Paver Base (ICPI-guided) |
|---|---|---|
| Typical base depth (below concrete/pavers) | 4–6 in. compacted gravel + 4–6 in. concrete slab | 8–16+ in. compacted dense-graded aggregate (load-dependent) |
| Reinforcement | Wire mesh or rebar per ACI/manufacturer spec | Geotextile + maximum compaction; may add concrete collar at edges |
| Drainage | Requires surface slope; impermeable | Can use permeable jointing sand; surface slope still required |
| Aesthetics | Utilitarian unless pavers are set on top | Full paver finish; wide pattern and color options |
| Repairability | Cracked slabs are difficult and expensive to fix | Individual pavers can be lifted and reset |
| Manufacturer acceptance | Universally accepted; often explicitly required | Check your model's spec sheet; some brands accept engineered base |
| DIY difficulty | Moderate; forming and pouring concrete takes skill | High; compaction and base depth must be done precisely |
| Relative cost | Moderate to high (concrete, forming, rebar, finishing) | Moderate (aggregate, geotextile, compaction equipment rental) |
| Best for | Heavy tubs (6,000+ lb), uncertain soils, warranty peace of mind | Lighter to mid-weight tubs, aesthetics-focused installs, good soil conditions |
My recommendation: if your tub's filled weight exceeds 6,000 lb or if you are building on clay soils, pour a 6-inch reinforced concrete pad with 3,000–4,000 psi air-entrained concrete, wire mesh or #4 rebar at 18 inches on center, and a proper control joint layout. Then, if you want the look of pavers, set pavers on top of the cured slab using a thin mortar-set or dry-lay method with steel edge restraints. This gives you structural integrity plus aesthetics. For smaller tubs on good soil, a properly built ICPI-guided paver base with 10–14 inches of compacted dense-graded aggregate is a solid DIY option. Refer to the ICPI structural manual and installation guidance (comparison of rigid vs flexible bases) for guidance showing engineered interlocking paver bases can be structural when the aggregate base is properly designed and compacted, and for a concise pros/cons comparison versus reinforced concrete pads.
Site assessment and preparation
Before you excavate a single shovelful, spend time reading your site. Walk the area after a rainstorm and note where water pools or flows. Probe the soil every few feet with a 3/8-inch steel rod: you should hit resistance at a consistent depth. If the rod plunges easily past 18 inches in one spot, you may have soft fill or organic material that needs to be removed and replaced. Knock on the soil with a flat spade: clay soils will feel sticky and dense, sandy soils will crumble freely, and organic soils will feel spongy.
Map your site on paper at a consistent scale. Note the house foundation, any downspouts, existing landscaping, the hot tub's planned footprint, and utility marks from your 811 locate. Establish a reference elevation using a builder's level or laser level. Identify your finished surface elevation and work backward to determine how deep you need to excavate after accounting for paver thickness (typically 2.375 in. for a standard 60mm paver), 1 inch of bedding sand, and your aggregate base depth. Mark the perimeter of the patio with stakes and string lines set to the finished grade elevation plus all those layers.
Remove all vegetation inside the marked area. If you are over grass or sod, strip it with a sod cutter rented for about $60–$80 per day and haul it away. Roots from shrubs and trees within the patio zone should be grubbed out entirely because decomposition under your base will create voids and settling. If you are working over an existing concrete surface, assess it for cracks, heaving, and drainage before deciding whether to demo it or build over it (more on that in the build steps below).
Permits, utility locates, and inspections
The permit process for a hot tub patio varies significantly by jurisdiction, but here is the general flow to expect.
- Call 811 at least 72 hours before any digging. This is legally required in every U.S. state. Utilities will mark lines with colored flags or paint within a few days. Respect the marked clearance zones.
- Visit or call your local building department and ask specifically about: a permit for a hot tub installation, any permit for hardscape or patio construction above a certain area or value, and any required barrier or fence permit for a water feature.
- Submit your application with a site plan showing the patio footprint, dimensions, setbacks from property lines and structures, drainage direction, electrical routing, and the hot tub location. Most departments want this drawn to scale.
- Expect to pay a permit fee ranging from roughly $50 to $300+ depending on location and project scope.
- Schedule required inspections. Typical inspection points include: pre-pour inspection (inspector checks base depth, formwork, and rebar before concrete is poured), electrical rough-in inspection (before conduit is buried or covered), and final inspection after installation is complete.
- Do not pour concrete or bury conduit before the relevant inspections pass. This is the single most common permit mistake DIYers make.
- Keep your permit card visible on-site and your approved plans on hand during any inspection.
Inspectors checking a hot tub patio installation will typically verify: base depth and compaction records if concrete is involved, electrical circuit compliance with NEC Article 680 (GFCI protection, bonding, and clearances), barrier requirements if required by local pool/spa code, and proper drainage away from the structure. Being prepared with a checklist and your permit documents makes inspections go smoothly.
Step-by-step build: the full DIY workflow
I have organized this as sequential phases with checkpoints. Do not move to the next phase until each checkpoint is confirmed. This is the system that keeps a project from unraveling.
Phase 1: Excavation
Calculate your total excavation depth: paver thickness (typically 2.375 in.) + bedding sand (1 in.) + aggregate base depth (minimum 8 in. for a paver-only base under a mid-size hot tub, up to 14–16 in. for heavier loads or poor soil) + any additional depth needed to clear frost-susceptible material. Add those up to get your dig depth measured down from your finished surface elevation. For a typical setup supporting a 4,000–5,000 lb tub on sandy soil, you might be excavating 12–14 inches below finished grade.
Excavate the full patio area plus at least 6 inches beyond the paver perimeter on all sides (ICPI requires the base to extend a minimum 6 inches beyond the paver edge). Use a skid steer or mini excavator for larger patios and haul spoils away. Grade the excavated subgrade to the same 2 percent slope you want at the finished surface. Compact the native subgrade with a plate compactor making at least two passes in perpendicular directions.
Checkpoint 1: Excavated subgrade is at the correct depth (verify with story poles), graded to 2% slope, and compacted. No soft spots or organic material remain.
Phase 2: Geotextile and base lifts
Lay a non-woven geotextile fabric over the compacted subgrade, lapping seams at least 12 inches. The geotextile prevents base aggregate from migrating into the subgrade soil while still allowing water to pass through. It is not a substitute for proper compaction but it significantly extends base life on marginal soils. Fold it up the sides of the excavation slightly; you will trim the excess later.
Add dense-graded aggregate base (typically 3/4-inch crushed stone or compactable gravel, sometimes called processed gravel or road base) in lifts no thicker than 4 inches. Compact each lift with a plate compactor before adding the next. Use a 5,000 lb or heavier plate compactor for a hot tub pad, not a lightweight 1,500–2,000 lb unit. Run overlapping passes until each lift feels solid and the plate compactor does not visibly sink into the material. Do not rush this step. Under-compacted base is the single most common cause of paver settling.
Continue adding and compacting lifts until you reach a level approximately 3.375 inches below your finished surface elevation (to account for 1 inch of bedding sand and 2.375 inches of paver). Check depth frequently with a story pole or tape measure referenced against your string lines.
Checkpoint 2: All base lifts installed and compacted. Total base depth meets your load/soil calculation. Top of compacted base is uniform and 3.375 in. below finished grade string lines.
Phase 3: Screeding the bedding sand
Spread a 1-inch layer of coarse concrete sand (ASTM C33 or equivalent) over the compacted base. Do not use stone dust or fine mason's sand for this layer. Set two parallel 1-inch diameter screed pipes on the compacted base as guides and pull a straight screed board across them to create a smooth, uniform 1-inch bed. Screed one section at a time, removing the pipes as you go and filling the channels left behind. Do not walk on the screeded sand before laying pavers, and never compact the sand layer before pavers are on it.
Checkpoint 3: Bedding sand is screeded uniformly to 1 inch depth, smooth, and sloped at 2% away from the house. No footprints or disturbances in the sand.
Phase 4: Installing edge restraints
ICPI Tech Spec 3 makes edge restraints mandatory for sand-set interlocking pavers. Without them, pavers will migrate outward over time under load. For a sand-set paver base, use spiked plastic edge restraint driven into the compacted aggregate base with 12-inch spikes at 12-inch intervals. The spikes must anchor into the aggregate base, not just into native soil. For pavers set over a concrete slab, use steel edge restraints secured with concrete anchors. Install edge restraints on all sides before or as you lay pavers, keeping the restraint at the correct elevation referenced to your string lines.
Phase 5: Laying the pavers
Start from a straight reference line (usually the house side or the most visible edge) and work outward. Lay pavers in your chosen pattern, keeping joints as tight as the paver spacer lugs allow (typically 1/16 to 3/16 inch). For hot tub patios, I favor a herringbone (90-degree or 45-degree) pattern because it interlock more effectively under concentrated loads than a running bond or stack bond pattern. Use a rubber mallet to seat each paver firmly into the sand without cracking it. Do not slide pavers across the sand bed; lower each one straight down.
For cuts along the perimeter, use a wet saw (for precise cuts), an angle grinder with a diamond blade, or a splitter for straight cuts. Always wear eye protection, hearing protection, and a dust respirator when cutting pavers. Mark cuts with chalk before cutting and dry-fit before permanently placing.
Checkpoint 4: Pavers laid across the full area. Check for high/low spots by placing a 4-foot level or straightedge across the surface. Any paver more than 1/8 inch out of plane with its neighbor should be lifted, sand adjusted, and reset.
Phase 6: Final compaction
Run a plate compactor with a paver protection pad (a rubber or neoprene mat attached to the compactor base plate) over the entire paved surface. Make at least two passes in different directions. This seats the pavers firmly into the bedding sand and locks the interlock. For pavers with a textured or tumbled surface, confirm the pad provides adequate protection before making full passes. Do not compact within 6 inches of an unsupported paver edge before edge restraints are installed.
Phase 7: Polymeric jointing sand
Spread polymeric jointing sand over the entire compacted surface and sweep it into the joints with a stiff push broom. Work the sand in multiple passes until joints are filled to within 1/8 inch of the paver top. Compact the surface one more time to settle the sand. Blow or sweep off all excess sand from paver surfaces completely (any remaining sand activated by water will leave a haze). Then lightly mist the entire surface with water from a hose set to a fine spray to activate the polymer binders. Do not use a pressure nozzle and do not flood the surface. Let it cure according to the manufacturer's instructions (usually 24 hours, longer in cool weather) before allowing foot traffic and 48–72 hours before driving or placing the hot tub.
Checkpoint 5: All joints filled, no sand on paver faces, polymeric sand misted and curing. Patio surface slopes uniformly at 2% away from the house. Edge restraints are flush and secure.
Special situations: grass, existing concrete, uneven ground, and slopes
Building over grass: strip sod and excavate to your required base depth. Do not simply lay base material over living vegetation, it will decompose and create voids. If the grass area was previously irrigated, confirm subsurface irrigation lines are removed or rerouted before excavation.
Building over existing concrete: assess the slab first. If it is structurally sound (no large cracks, no significant heaving, properly sloped), you can set pavers directly on top using a thin sand bed or mortar-set method. Use steel edge restraints anchored with concrete screws. The concrete slab carries the structural load, so base depth is the slab itself. If the slab has heaved, cracked significantly, or drains poorly, demo it rather than building over a problem.
Uneven ground: use your laser or builder's level to establish a consistent grade reference before excavation. On uneven sites, some areas will require deeper cuts while others require less excavation, but the finished base surface must be uniformly sloped at 2 percent. Bring in extra aggregate to fill low spots in the subgrade rather than cutting high spots and leaving thin base areas.
Slopes: a grade up to about 2–3 percent is easily accommodated with proper slope management. Grades of 5–10 percent may require a step-down retaining wall at the low edge to hold back the aggregate base. Grades above 10 percent (1 foot of drop per 10 feet of run) generally need a structural retaining element designed by an engineer. On a sloped site, water management becomes even more important: ensure you have a positive drainage path across the entire patio and that water exiting at the low edge is directed to an appropriate outlet, not trapped against the house.
If you go the concrete pad route: quick build overview
Excavate to frost depth or manufacturer-required depth plus 4 inches of compacted gravel base. Install forms at the correct elevation and slope. Lay wire mesh or rebar per your plan (suspend mesh on chairs so it sits in the middle third of the slab thickness, not on the ground). Place control joints in the form layout if the slab is large. Pour 3,000–4,000 psi air-entrained concrete (in freeze-thaw climates), screed to grade, float, and broom finish for traction. Cure for a minimum of 28 days before placing the hot tub. If you want pavers on top, cure the slab fully, then set pavers over a thin sand bed using steel edge restraints as described above.
Integrating a gazebo, pergola, or fire pit
Many homeowners want to add a gazebo or pergola over a hot tub patio for shade and privacy. The key structural consideration is that post footings for any overhead structure must be independent of the paver base and extend to frost depth. For step-by-step instructions on securing overhead structures and properly anchoring posts to a paver surface, see how to anchor a gazebo to a paver patio. Setting a pergola post anchor directly into your paver base is not adequate for a hot tub enclosure in wind or snow-load conditions. The anchoring and footing approach for overhead structures on paver patios is detailed in companion guides on this site covering how to anchor a gazebo and how to build or attach a pergola on a paver patio.
If you want a fire pit near your hot tub patio, pavers are an excellent surface choice because they do not ignite and they handle radiant heat well, but you still need to respect fire-pit clearance requirements (typically a minimum of 10 feet from any structure, combustible fencing, or the hot tub cover and surround). The patio surface under and immediately around a fire pit should use high-temperature-rated pavers or natural stone, since standard concrete pavers can spall under repeated direct flame exposure. See the related guides on building a fire pit patio with pavers and fire pit safety on paver patios for full code and material guidance.
Sealing the patio
Sealing is not required but strongly recommended for a hot tub patio. Water from the tub, spa chemicals, and sunscreen tracked onto the pavers will stain unsealed surfaces over time. Wait at least 60–90 days after installation before sealing to allow the polymeric sand to fully cure and any efflorescence to work its way out. Clean the surface thoroughly, let it dry completely (at least 48 hours of dry weather), and apply a penetrating or film-forming paver sealer with a roller or pump sprayer following the manufacturer's instructions. Expect to reseal every 2–4 years depending on your climate and traffic. Do not apply sealer in direct sunlight or on a hot surface.
Troubleshooting common problems
Settling or sinking pavers
If pavers are settling under or near the hot tub, the most likely culprits are inadequate base compaction, insufficient base depth, or soil movement under the base. Lift the affected pavers, remove the sand bed, add and compact additional base aggregate if needed, re-screed the sand, and reset the pavers. If the settling is widespread and recurrent, it indicates a systemic base or soil problem that may require excavating the entire area and starting over with deeper compaction and possibly a geotextile upgrade.
Drainage problems
Standing water on a paver patio almost always traces back to insufficient slope (less than 1 percent), a low spot created by uneven compaction, or a blocked drainage outlet. Identify the low spot with a level, lift and reset those pavers to restore the slope, and confirm the drainage outlet is clear. If your site has no natural outlet, consider adding a channel drain at the low edge connected to a dry well or daylighted outlet.
Cracking concrete pads
Hairline cracks in a concrete pad are common and are usually cosmetic if they do not allow differential movement. Structural cracks (where one side of the crack is higher than the other, or the crack is widening) are a more serious concern and should be evaluated by a concrete contractor or structural engineer before placing a hot tub over them.
Joint sand washing out
If polymeric sand is washing out of joints, the most common cause is using a pressure washer with too high a pressure setting, activating the sand with too much water during installation, or using a product not rated for the joint width. Refill affected joints with fresh polymeric sand and mist carefully. Future cleaning should use a 1,200–1,500 psi maximum on a pressure washer held at least 18 inches from the surface.
Maintenance and winterizing
Annual maintenance on a hot tub paver patio is straightforward. In spring, inspect the entire surface for heaving, shifted pavers, or open joints and address them early before a small problem becomes a large repair. Sweep out any debris, check that edge restraints are still firmly in place, and top off any joints where sand has settled. Re-seal if the water no longer beads on the surface.
In cold climates, winterizing the hot tub itself is the manufacturer's domain, but the patio needs attention too. Do not use rock salt (sodium chloride) or calcium chloride ice melt on pavers near the hot tub, as these chemicals attack concrete pavers and mortar joints. Use sand or a magnesium chloride-based product rated for concrete if you need traction. Drain the hot tub properly per the manufacturer's guide and direct that water away from the patio to prevent a large volume of water from saturating the base and freezing.
Realistic tool, time, and cost expectations
This is not a one-weekend project. A well-built paver patio supporting a hot tub typically takes two to three weekends for a pair of capable DIYers, not counting time for permit approvals or concrete curing. Here is an honest breakdown:
| Item | Typical Range | Notes |
|---|---|---|
| Permit fee | $50–$300+ | Varies widely by jurisdiction |
| Utility locate | Free (Call 811) | Required; allow 3+ business days |
| Geotextile fabric | $0.15–$0.40 per sq ft | For a 200 sq ft patio, roughly $30–$80 |
| Compactable gravel base (per ton) | $25–$50 per ton delivered | A 200 sq ft patio with 12 in. base needs ~6–8 tons |
| Bedding sand (per ton) | $20–$40 per ton | 1 in. layer over 200 sq ft = ~0.5 ton |
| Pavers (concrete, standard) | $2–$8 per sq ft | Specialty or natural stone runs higher |
| Polymeric jointing sand | $25–$40 per 50 lb bag | One bag per 30–40 sq ft typically |
| Plastic edge restraint + spikes | $0.50–$1.50 per linear ft | Budget for full perimeter plus 10% extra |
| Equipment rental (compactor, saw) | $150–$350 per day | Budget 2 rental days minimum |
| Mini excavator/skid steer rental | $300–$600 per day | 1 day usually sufficient for most patios |
| Concrete pad (if chosen, installed) | $6–$12 per sq ft installed | DIY reduces cost; hire out for heavy tubs |
| Paver sealer | $0.30–$0.80 per sq ft | Applied after 60–90 day cure period |
| Total project estimate (200 sq ft, paver base) | $2,500–$6,000 DIY | Varies heavily by region, soil, and tub size |
These numbers assume you are doing the labor yourself and renting equipment. A fully contracted installation runs roughly double to triple the material costs in most markets. The investment is worth it: a properly built paver patio adds real value to your home and gives you decades of reliable, level support for your hot tub, not to mention a genuinely beautiful outdoor space.
FAQ
How do I determine whether a paver patio can safely support my hot tub or if I need a reinforced concrete pad?
Calculate the hot tub’s total filled weight (water weight = 8.34 lb/gal + manufacturer dry weight + occupant weight). Divide that total by the tub footprint (sq ft) to get average psf. Compare that to your soil’s presumptive bearing capacity (or get a geotechnical report if soils are uncertain). For predictable, heavy or concentrated loads most manufacturers and many builders recommend a reinforced concrete pad (4" minimum for very small tubs on excellent soils; 6" with steel reinforcement is common for larger tubs). A properly engineered paver system can work, but it requires an increased, engineered aggregate base, proper compaction, continuous edge restraint and often greater base thickness. If you have uncertain soils, high psf, or local code requirements, use a concrete pad or consult a structural/geotechnical engineer.
How do I calculate the load (psf) applied by my hot tub?
1) Obtain tub dry weight and water capacity from the manufacturer. 2) Compute water weight = gallons × 8.34 lb/gal. 3) Add estimated occupant weight (use 175–200 lb per person). 4) Total filled weight = dry weight + water weight + occupant weight. 5) Convert to psf = total filled weight ÷ tub footprint area (sq ft). Use that psf to size slab or engineered base and check soil bearing.
What base depth is typical for pavers supporting a hot tub?
There is no single rule — base depth must be project‑specific. For normal pedestrian residential patios ICPI commonly uses 4–12" aggregate base. For heavy concentrated loads like hot tubs you should increase base thickness and compaction; many structural paver designs for heavy loads call for 8–20" of engineered base depending on subgrade strength. Follow ICPI structural design guidance or have a manufacturer/engineer specify base depth for your tub and soil.
Can I install pavers over existing concrete to support a hot tub?
Yes. Pavers over a rigid, well‑constructed concrete pad are acceptable: the concrete provides structural support and the pavers act as a finish. Ensure the slab is adequate for the hot tub load (thickness, reinforcement, condition, and no major cracks). Use appropriate edge restraint and follow ICPI guidance for pavers on rigid bases (steel edging and anchoring details differ from flexible systems). If the existing concrete is marginal, repair or replace it or consider an engineered paver base or new reinforced slab.
What are the essential steps for preparing a paver base under a hot tub?
1) Mark and excavate to required depth (base thickness + bedding sand + paver thickness + clearance). 2) Verify and correct subgrade, remove organic material. 3) Place geotextile if required. 4) Install and uniformly compact dense‑graded aggregate base in 2–4" lifts to high density (mechanical compactor). 5) Install and screed 1" bedding sand (if sand‑set). 6) Lay pavers, compact with plate compactor, and fill joints with polymeric sand. 7) Install continuous edge restraint anchored into the compacted aggregate. For heavy loads, increase base thickness and compaction, and extend the base at least 6" beyond the paver field.
How should edge restraints be built for a hot‑tub paver patio?
Edge restraint is mandatory. For sand‑set (flexible) systems use a continuous rigid edge (concrete curb, heavy polymer/steel edging anchored into the compacted aggregate base). Spikes for plastic edging must be driven into the compacted base, not just soil. For pavers over rigid concrete use steel edging details per ICPI. Make the base extend at least 6" beyond the paver layout to allow secure anchoring.
Next Articles
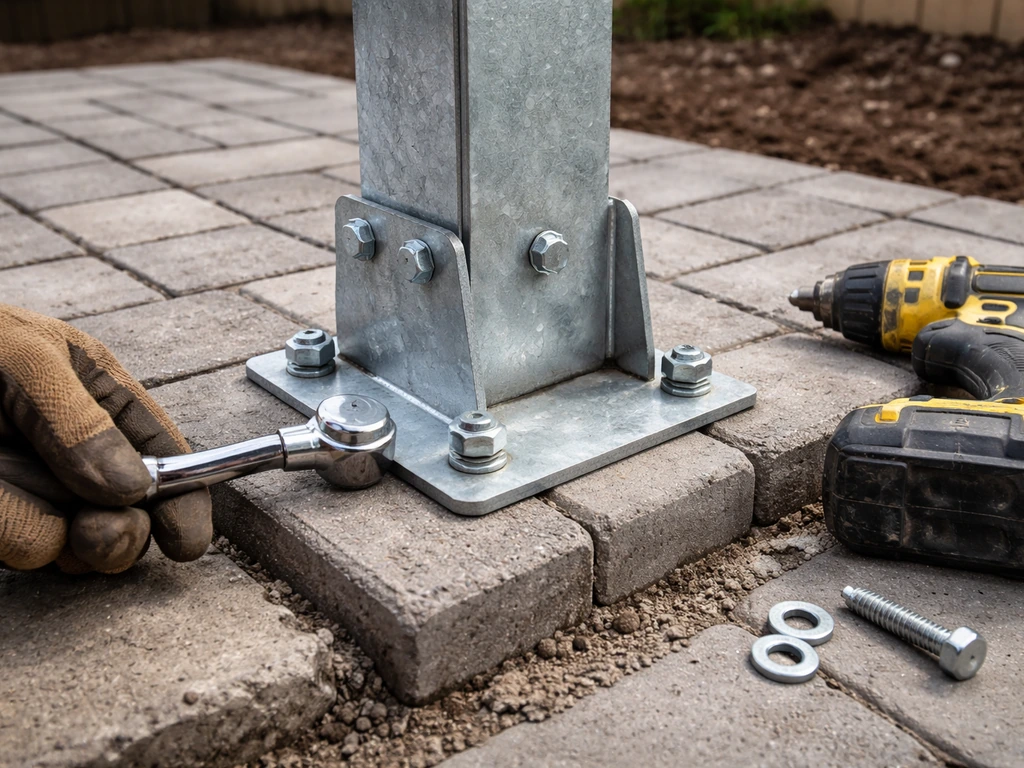
How to Attach a Pergola to a Paver Patio: Secure Anchors
DIY guide to anchor a pergola to a paver patio using post bases and structural footings, avoiding loose posts
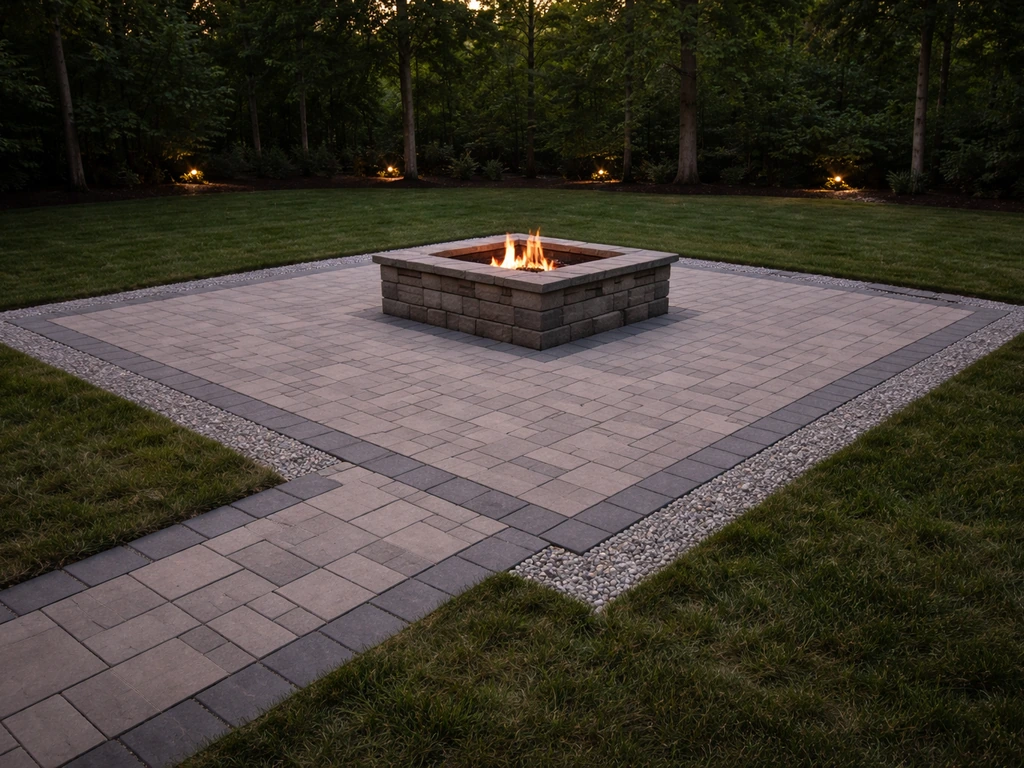
How to Build a Fire Pit Patio With Pavers
Step by step DIY guide to build a square or circular paver fire pit patio, including base, safety clearances, drainage.
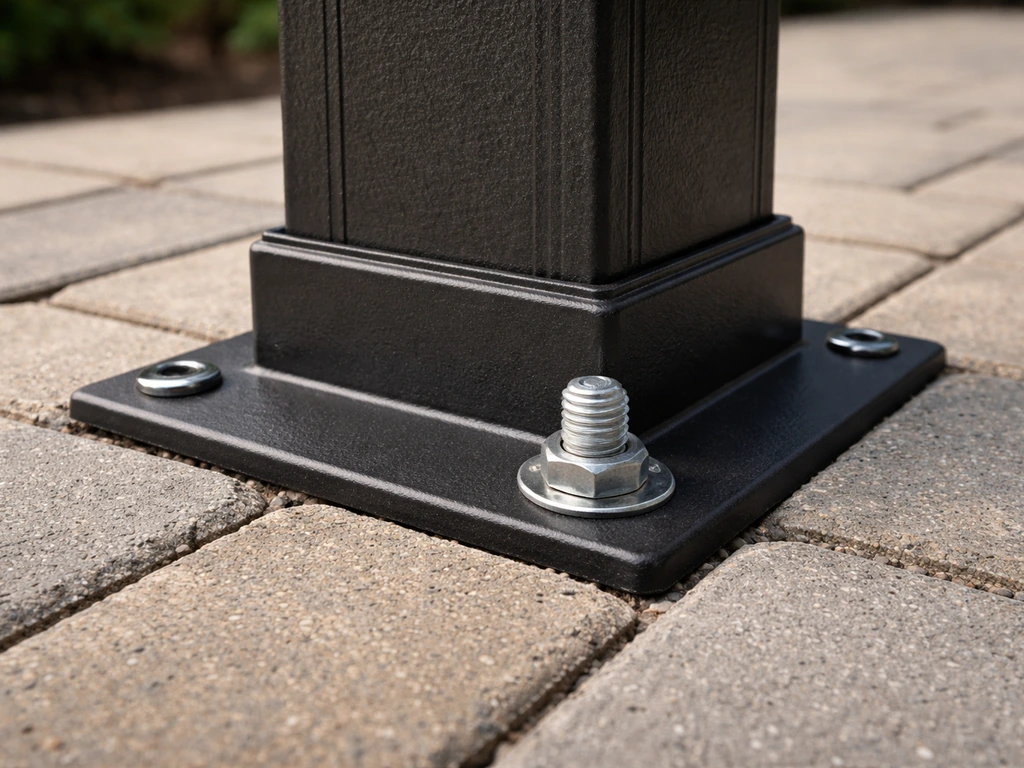
How to Anchor a Gazebo to a Paver Patio Step by Step
Step-by-step DIY methods to anchor a gazebo to paver patios, avoiding cracks, resisting wind, and troubleshooting wobble