You can anchor a gazebo to a paver patio safely, but pavers themselves are not a structural anchor point. The method that actually works depends on whether you can access the ground below the pavers, how heavy your gazebo is, and what your local wind exposure looks like. For most DIYers, the best approach is either a surface-mount anchor bracket secured into a concrete pad beneath the pavers, or a concrete footing poured below each post location. If your pavers can be lifted by hand, you need to go below them. If your base is solid and well-compacted, surface drilling with the right hardware can work for smaller structures.
How to Anchor a Gazebo to a Paver Patio Step by Step

Felix Rowe
13 Jun 2026
Your anchoring options at a glance
Before you pick up a drill, it helps to understand what options actually exist for paver patios. Each one suits a different combination of gazebo size, patio construction, and how much work you're willing to do.
| Method | Best For | Invasiveness | Holding Strength |
|---|---|---|---|
| Surface-mount post bracket on concrete below pavers | Permanent or large gazebos (10x10 ft and up) | Medium — lift and replace pavers | Excellent |
| Poured concrete footings below each post | Larger or permanent structures, high-wind areas | High — excavate below patio | Strongest option |
| Concrete screw anchors drilled into existing concrete slab base | Patios poured over concrete, smaller gazebos | Low — drill only | Good if base is sound |
| Paver anchor brackets (surface clamping) | Temporary or lightweight gazebos in low-wind areas | None — no drilling | Moderate |
| Weight bags or stake anchors | Pop-up or very lightweight canopy-style gazebos | None | Low — not for permanent use |
One important warning before you go further: at least one major manufacturer explicitly states "do not anchor to pavers or pavement slabs because they are not a solid foundation." That guidance is real. A concrete screw drilled into a 2-inch paver is not going to hold a 12x14 gazebo in a 70 mph gust. The goal with every method below is to get your anchor point into concrete or compacted footing material, not just into the paver surface itself.
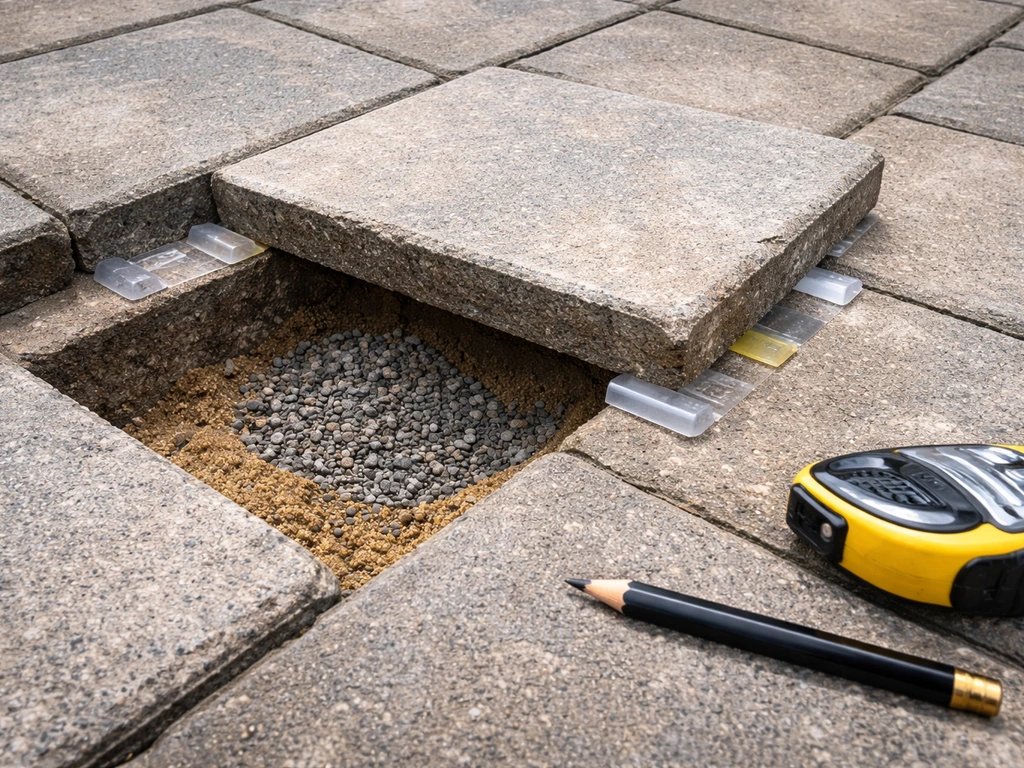
Assess your patio before you do anything else
The single biggest factor in choosing your anchoring method is what's underneath those pavers. A typical residential paver patio has about 4 to 6 inches of compacted aggregate base, a 1-inch layer of bedding sand, and then the pavers on top. Some patios are installed over an existing concrete slab. Others sit directly over poorly compacted soil that shifts every winter. The structure underneath determines everything.
The hand-lift test
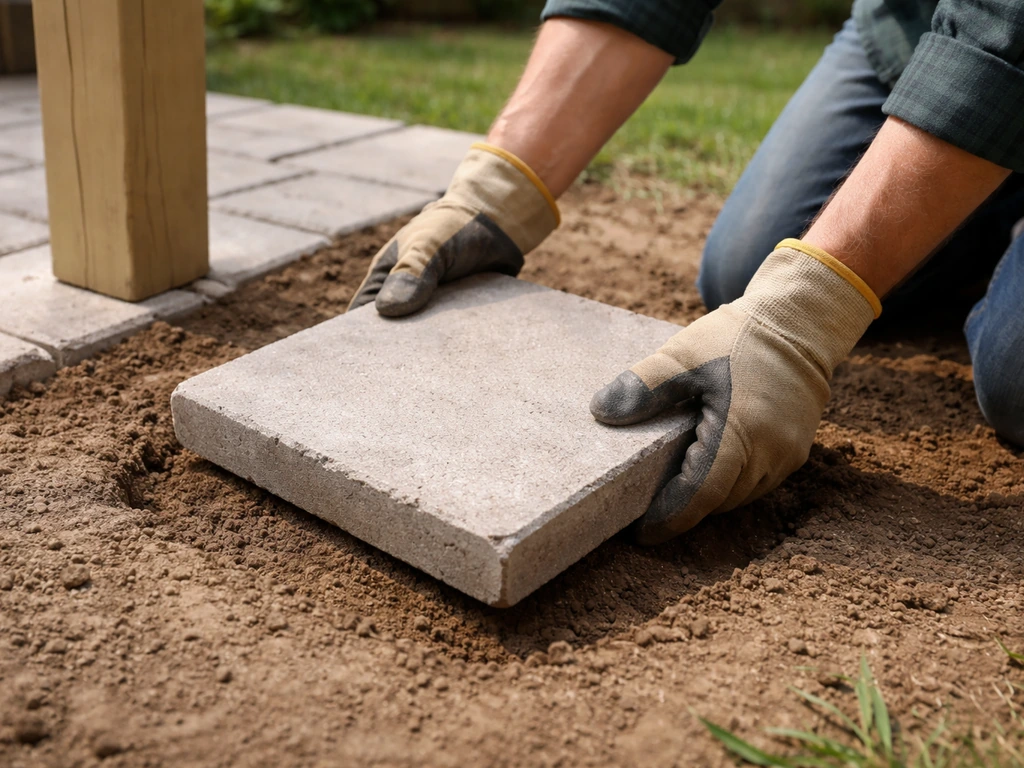
Sojag, one of the larger gazebo manufacturers, recommends a straightforward check: try to lift a paver near one of your planned post locations by hand. If it lifts easily, the base underneath is not solid enough to anchor to without installing a concrete pillar beneath it first. If the paver is firmly bedded and resistant, your base is likely in decent shape. This is a real, practical test and you should do it at each post location before planning anything else.
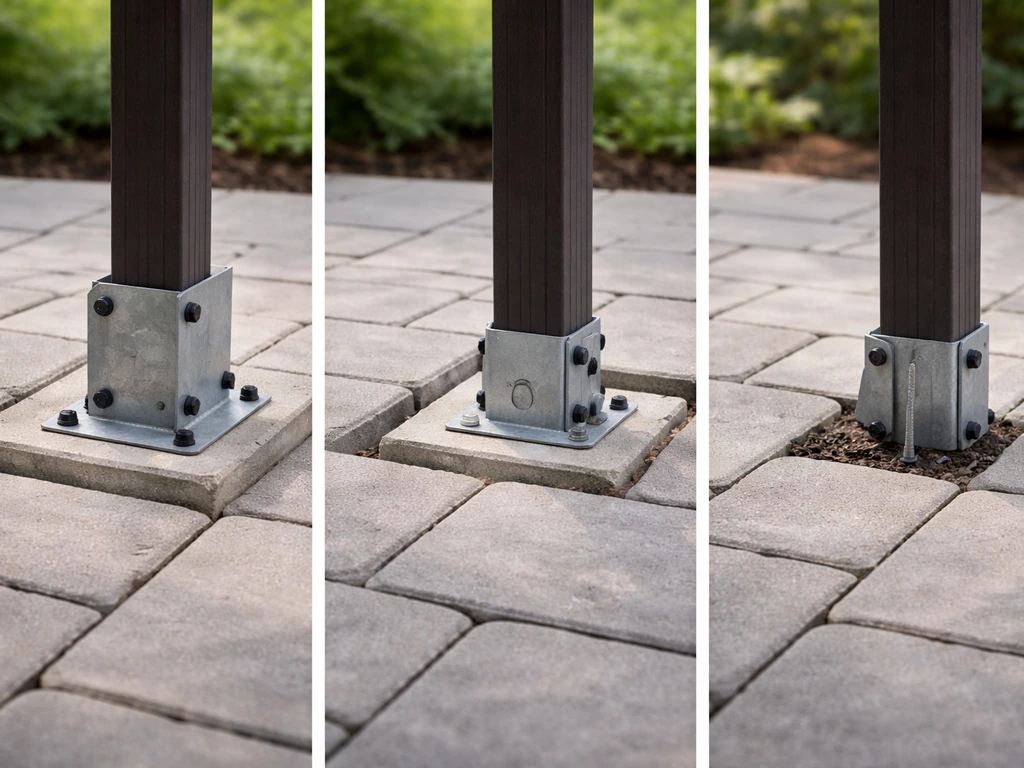
Check the gazebo itself
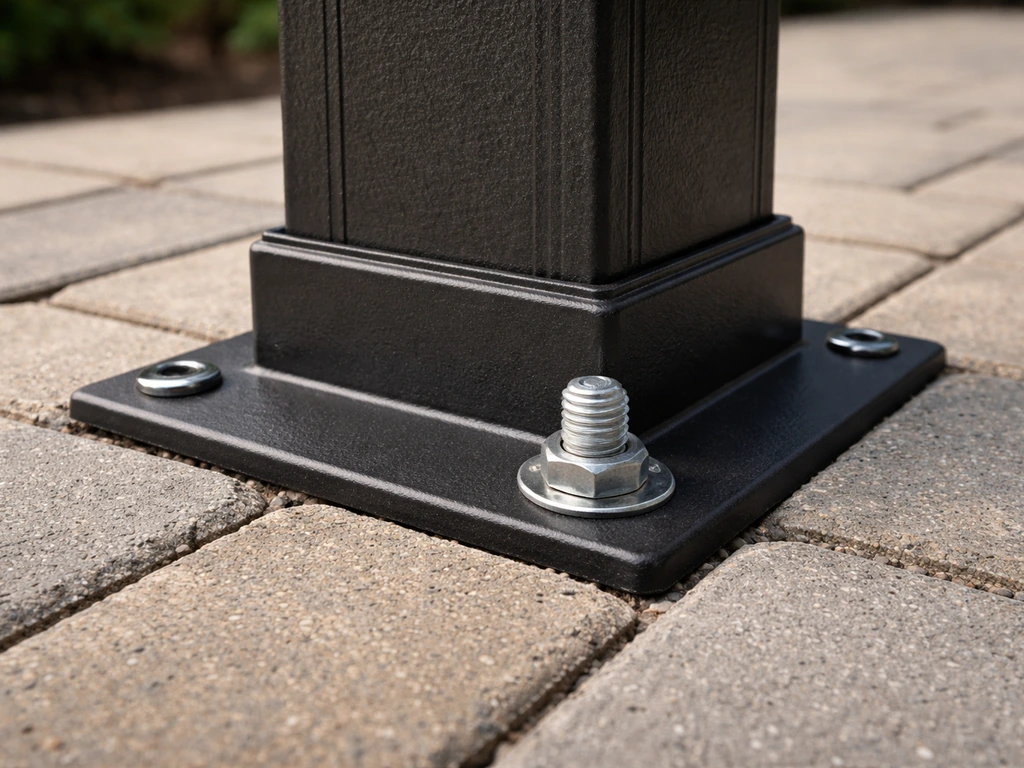
Look at your gazebo's legs and base plate design. Steel-legged gazebos with pre-drilled base plates are easiest to anchor because you can bolt directly through the plate. Wood post gazebos typically use post base brackets that bolt to a concrete surface. Know your post spacing before you assess the patio, because you need to figure out whether your anchor points will land on paver joints, on paver centers, or ideally on a continuous concrete surface.
If you're still planning your patio layout along with a gazebo or other structure like a pergola, it's worth planning the paver pattern so post locations fall in predictable spots. If you plan a pergola on the same paver patio, the key is still getting the posts anchored into concrete or properly compacted footing material, not just into the pavers.
Measure the gazebo footprint and note the wind exposure
A 10x10 soft-top gazebo and a permanent 14x16 hardtop structure are completely different engineering problems. Larger and taller gazebos catch dramatically more wind load. If you're in a coastal area, an open hilltop location, or anywhere regularly seeing gusts above 50 mph, you need to treat this like a structural project, not a weekend accessory install. The ASCE 7 wind maps (available free online) can show you the design wind speed for your exact zip code, which is useful if you're ever unsure whether your setup needs a permit.
Tools and materials you'll need
Your exact list depends on the method you choose, but here's a comprehensive rundown so you can gather everything before you start. Nothing slows a project down like a mid-job hardware run.
- Rotary hammer drill with masonry bits (3/8 in. or 1/2 in. depending on anchor size) — a standard drill will not cut it for concrete
- Diamond blade angle grinder or wet saw (if you need to cut pavers for access)
- Pry bar and rubber mallet (for lifting and resetting pavers without cracking them)
- Post base brackets or paver anchor brackets (match to your gazebo's post size)
- Concrete screw anchors — 1/4 in. x 2 in. is common for lighter gazebos; use 3/8 in. or 1/2 in. for heavier structures
- Expansion anchor bolts or wedge anchors (for thicker concrete bases)
- Fast-setting concrete or hydraulic cement (for filling around footings)
- Torpedo level and 4-foot level
- Tape measure and chalk line
- Masking tape (mark drill locations on pavers before cutting)
- Shop vac (clearing drill dust from anchor holes)
- Caulk or paver joint sand for resealing disturbed joints
- Safety glasses, hearing protection, and knee pads
Budget realistically. A decent rotary hammer drill rental runs about $40 to $60 per day. Post base brackets for a four-post gazebo typically cost $15 to $40 each depending on quality. Concrete screw anchor kits are inexpensive, usually $10 to $20 for a pack. If you need to pour footings, add the cost of tube forms and a few bags of fast-setting concrete. Total materials for a solid permanent installation usually run $100 to $300 depending on what you already own.
How to anchor a gazebo without damaging your pavers
This method works best for gazebos being installed on an existing paver patio where you want to preserve the patio surface as much as possible. It involves lifting pavers at each post location, installing a concrete anchor point or surface-mount bracket below the paver layer, then replacing the pavers around it. It takes more effort up front but it's the most structurally sound option short of pouring new footings from scratch. If you're planning a pergola on a paver patio, the same paver anchoring principles apply.
- Mark your post locations precisely using your gazebo's assembly manual dimensions. Lay out the footprint with stakes and string lines before touching a single paver.
- At each marked post location, carefully remove the paver or pavers using a pry bar inserted at a joint. Work slowly and use a rubber mallet to avoid chipping edges. Set the pavers aside in a safe spot.
- Dig down through the bedding sand and into the aggregate base to a depth of at least 8 to 12 inches. For a permanent structure, go deeper — 18 to 24 inches gets you below the frost line in most northern climates.
- Set a tube form or temporary frame and pour fast-setting concrete to create a small pad or footing at each post location. Embed a J-bolt or anchor bolt at the correct position so it protrudes above finished grade at the height your post bracket requires. Let it cure fully — at least 24 hours, ideally 48.
- Once the concrete has cured, reinstall your post base brackets over the anchor bolts and tighten the nuts fully.
- Replace the surrounding pavers carefully, cutting them to fit around the bracket base if needed. Use a diamond blade wet saw for clean, controlled cuts. Fill any disturbed joints with polymeric sand and compact it in.
- Assemble your gazebo according to the manufacturer's instructions, bolting each post into its bracket securely.
This approach takes most of a weekend for a four-post gazebo. The concrete pour on day one, curing overnight, and bracket/gazebo assembly on day two is a realistic schedule. The advantage is that the pavers are essentially undisturbed visually, and your anchor points are in solid concrete rather than in sand or paver material.
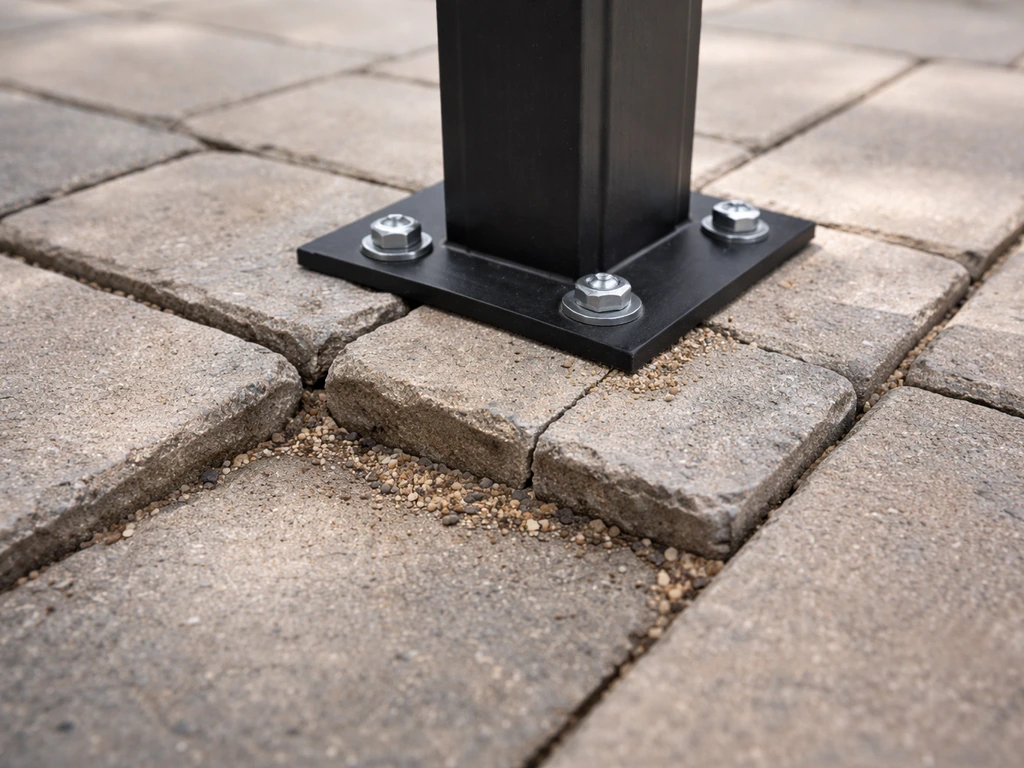
Anchoring with minimal cutting or excavation
If your patio was poured over an existing concrete slab, or if you have verified through a probe or inspection that there's a thick solid concrete base, you have a lower-impact option: drilling directly into the concrete base through the paver surface and using concrete screw anchors or expansion bolts to secure post brackets. This works well for smaller gazebos, covered patios with lightweight structures, and situations where lifting pavers would disturb a large area.
- Confirm that your base is solid concrete using a probe rod or by checking your patio's construction records. If you're uncertain, lift one paver near a post location to inspect.
- Position the gazebo's base plate or post bracket at each post location. Use a chalk line and tape measure to make sure everything is square and matches your assembly manual dimensions.
- Mark your drill points through the bracket holes onto the paver or concrete surface using a marker. Apply masking tape first to reduce the chance of slipping.
- Using a rotary hammer drill with the appropriate masonry bit, drill through the paver and into the concrete base to the depth required by your anchor hardware (typically 2 to 3 inches into the concrete below the paver).
- Vacuum the hole clean with a shop vac. Dust left in the hole dramatically reduces anchor holding strength.
- Drive concrete screw anchors (1/4 in. x 2 in. for lighter gazebos, 3/8 in. for heavier) or expansion anchors into each hole. Tighten to the torque specified by the anchor manufacturer.
- Bolt your post brackets securely. Assemble the gazebo structure and perform a manual wobble check before walking away.
A realistic time estimate for this method is 3 to 5 hours for a standard four-post kit gazebo, assuming you have all materials on hand and the patio surface is accessible. The main risk is cracking a paver during drilling. To reduce that risk, use a sharp bit, start at a low hammer setting, and apply steady moderate pressure rather than forcing it. Drilling at a joint between two pavers rather than through the center of one can also reduce cracking risk, though this depends on your bracket hole pattern.
If your patio does not have a concrete sub-base and sits on compacted aggregate only, this low-impact drilling method is not appropriate for a permanent or large gazebo. Go back to the footing method described above.
How to check wind resistance and leveling after anchoring
Installing the anchor hardware is only half the job. Before you consider the gazebo finished, you need to verify it's actually level and actually secure. These checks take 30 minutes and are worth every bit of that time.
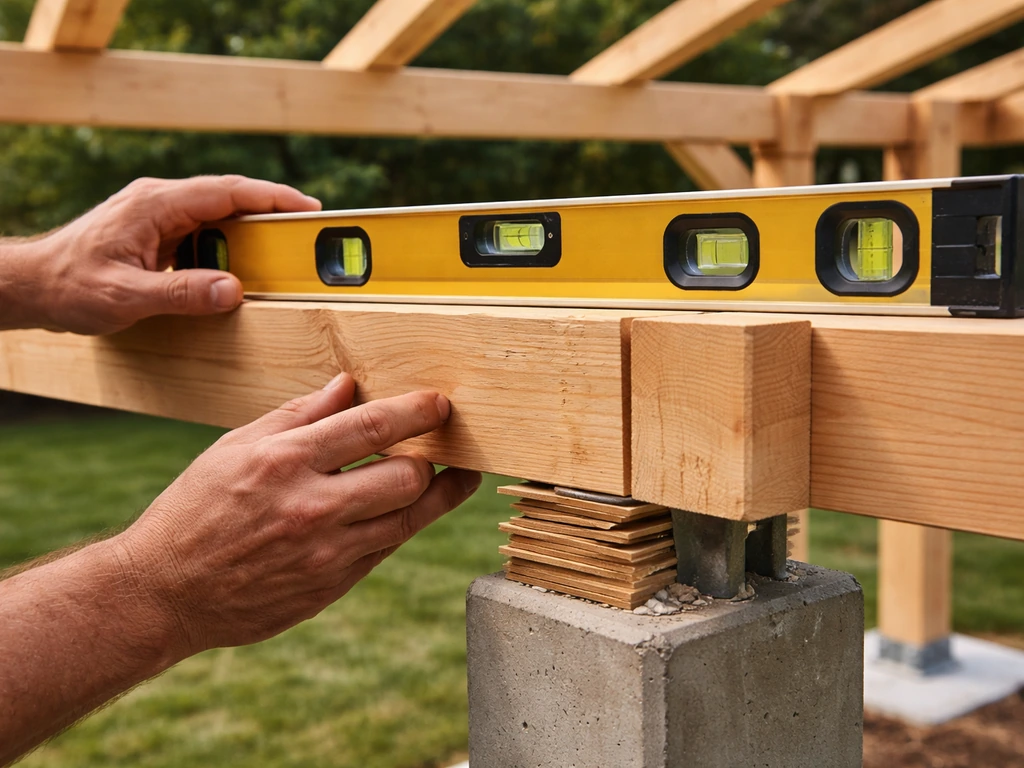
Leveling check
Place a 4-foot level on each horizontal beam and on the top plate of the gazebo roof structure. All readings should be within 1/8 inch across a 4-foot span. If a post is low, shim the base plate with stainless steel shims before tightening the anchor bolts fully. Do not use wood shims, they compress and rot. For a gazebo on a paver patio, small variations in paver height are common, so don't be surprised if you need to adjust two or three post locations.
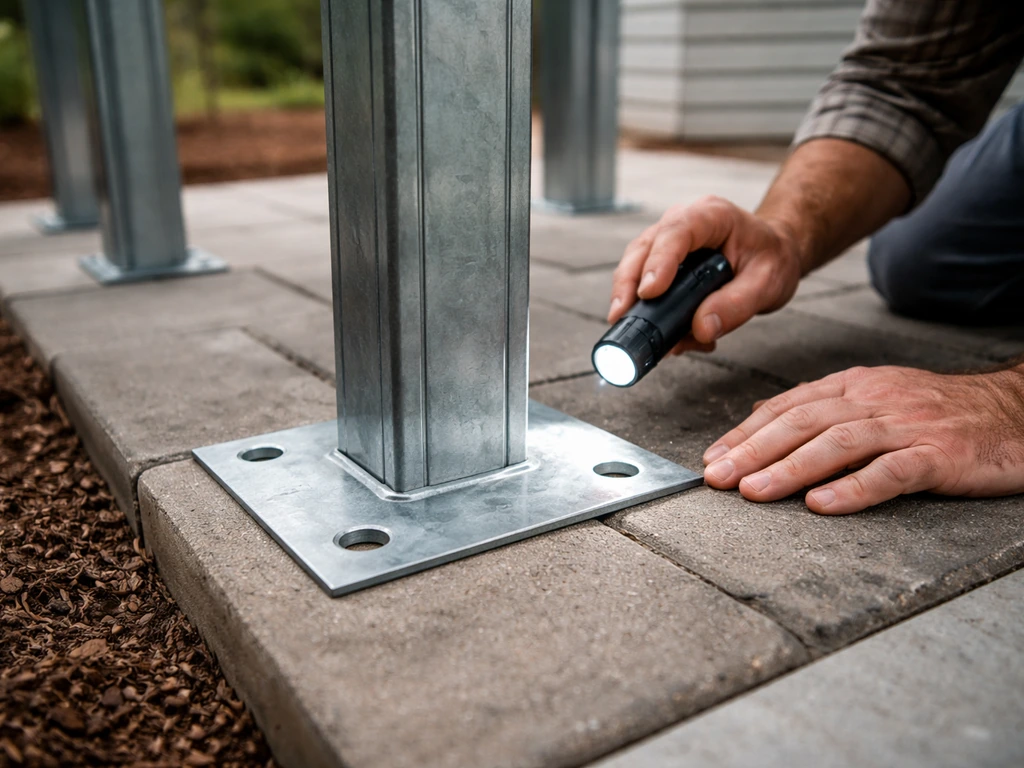
Wobble and wind resistance check
With the structure fully assembled, have someone push laterally on each post from the outside with moderate force, similar to what a sustained wind gust would produce. There should be zero racking movement at the patio surface. If any post base lifts or shifts, that anchor is not doing its job. Check that every bolt is fully tightened, that the concrete anchors are seated properly, and that the post bracket itself isn't flexing because of an undersized fastener. For larger permanent gazebos in areas with design wind speeds above 90 mph, consider cross-bracing or diagonal knee braces between posts as additional lateral support.
Check for water drainage around anchor points
Where you've drilled through pavers or disturbed joints, water can now channel directly into your base layer instead of running off the surface. After your first good rain, inspect each post base area. Water should not be pooling there. If it is, reseal the area around the post base with a paver-compatible sealant and make sure joint sand is fully packed in around disturbed pavers.
Common mistakes and how to fix them
The gazebo wobbles after installation
First, check whether the wobble is in the anchoring (post bases moving relative to the patio) or in the gazebo structure itself (the frame flexing). If post bases are moving, your anchors are either undersized, in the wrong material (sand or paver rather than concrete), or not tightened fully. If the frame is flexing but the bases are solid, the issue is the gazebo's structural connections, go through every bolt in the assembly and tighten according to the manual. Many manufacturers explicitly instruct you to tighten all bolts as a final step, and a lot of DIYers skip it.
Pavers are shifting or cracking around the post area
This usually means the base wasn't compacted properly before the patio was installed, or the gazebo load is concentrated on pavers that lack adequate edge restraint. A residential paver base should be compacted to 95% density with proper edge restraints providing at least 1 inch of vertical contact against the paver face. If the base is soft, you'll need to remove the affected pavers, re-compact or add aggregate, and re-bed the pavers. For post locations specifically, pouring a small concrete collar around the anchor footing helps spread the load and prevent lateral movement.
Water is getting into the anchor hole or under the base plate
Any penetration through a paver surface creates a potential water entry point. Use a concrete-compatible sealant around the perimeter of post base plates. Make sure the base plate sits slightly above the paver surface rather than flush against it, most metal post brackets have drainage holes or a raised profile for this reason. If water is getting into a poured footing, check that the top of the footing is sloped slightly away from the post so water sheds outward.
The drill cracked the paver during installation
Stop drilling and assess whether the cracked paver is still structurally sound enough to hold the bracket, or whether it needs to be replaced. A hairline crack on the surface with the paver still solid below is often fine; a paver cracked in two needs to come out. If you're replacing it, see if you have extras from the original patio installation, paver colors fade over time and a brand-new replacement will likely be noticeably different in tone.
When to call a professional
If your gazebo is larger than 12x14 feet, if you're in a high-wind area (design speeds above 100 mph), if your patio base is visibly damaged or poorly constructed, or if your municipality requires a permit and engineered drawings, get a structural opinion before you proceed. Anchoring a large permanent structure incorrectly is a safety hazard, not just an aesthetic problem.
Keeping it safe and secure over time
Anchoring is not a one-time job. Freeze-thaw cycles, settlement, and accumulated vibration from wind all work to loosen connections over time. Here's what to do after the initial install to make sure your gazebo stays put.
- Inspect and retighten all anchor bolts and structural fasteners every spring, especially after a winter with significant freeze-thaw cycling
- Check paver joints around each post base at least once a year — refill with polymeric sand if joints have widened or emptied out, since wider joints mean pavers have shifted
- Look for rust or corrosion on metal post brackets and anchor hardware after the first winter; coat exposed steel with a metal primer and paint or replace with stainless hardware if corrosion is progressing
- After any storm with gusts above 50 mph, walk the perimeter and check each post base for movement before using the gazebo
- If your gazebo has a fabric or polycarbonate roof panel, follow the manufacturer's guidance on removing panels before major wind events — reducing the wind-catching area dramatically reduces uplift force on your anchors
- Re-inspect caulk and sealant around post penetrations each spring and reapply where cracking or separation is visible
- If you have a neighboring pergola or other structure on the same patio, check that both structures' anchor zones aren't sharing or undermining the same base section
If you're considering adding other features to your paver patio alongside the gazebo, like a fire pit area or a hot tub pad, it's worth thinking through how those structures will affect your patio's base and drainage before you anchor anything. You can also build a fire pit on a paver patio, but you will need to plan for heat, clearances, and a stable base so the pavers and bedding sand do not fail over time fire pit area.
When you plan a hot tub pad on a paver patio, focus on the same anchoring and drainage principles so the pad stays level and secure under load. A fire pit patio built on pavers uses similar site-prep and anchoring principles, so check what’s underneath the pavers before you commit fire pit area. Each added structure changes where load concentrates and where water moves.
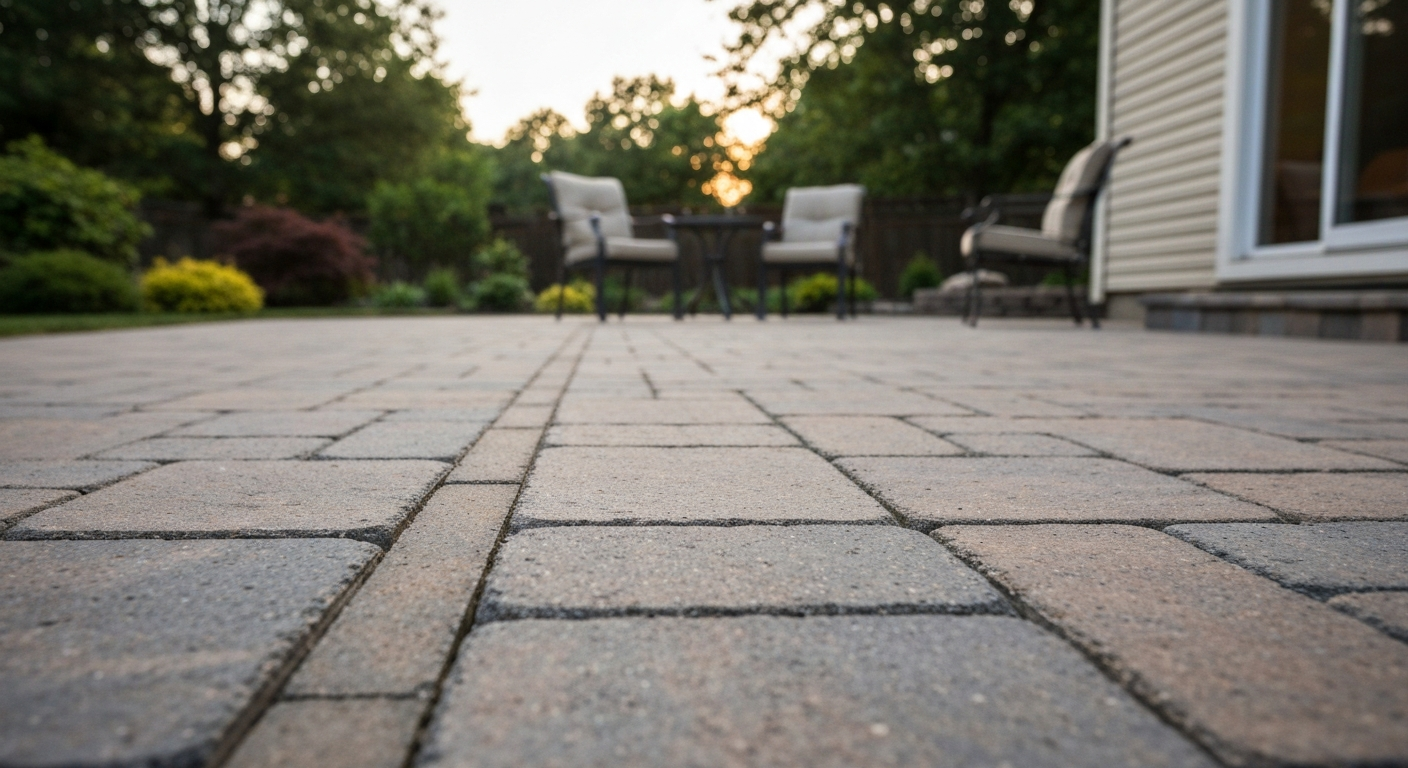
Planning the whole layout before committing to permanent anchors saves you from having to undo work later.
Done right, a properly anchored gazebo on a paver patio is a genuinely satisfying project. You end up with an outdoor structure that's actually secure, a patio that still looks clean, and the confidence that it won't be visiting your neighbor's yard in a summer storm. Take the time to assess your base honestly, choose the method that matches your actual situation, and do the verification steps, and you'll be in good shape. If you're also planning a fire pit patio with pavers, apply the same focus on a solid, compacted base and correct anchoring into concrete or footing material.
FAQ
Can I anchor a gazebo directly into paver joints instead of drilling the pavers themselves?
Often you can place the anchor so the hole is not centered on a paver, but you still should avoid relying on joint sand as the holding medium. If the joint falls over loose bedding sand or a gap between pavers, the fastener can loosen over freeze thaw. If you cannot place the anchor into solid concrete or properly compacted footing material, switch to the below-paver footing or concrete-pad approach.
What if my pavers lift a little when I probe them, but not near every post location?
Treat it as a per-post decision, not an overall patio decision. If any planned post lands where a paver is easily lifted, that location likely needs the footing method (paver lifting to reach concrete/footing) rather than surface drilling. You can sometimes re-route post locations to land on firmer areas, but only if your gazebo base geometry allows it.
Are wedge anchors, expansion bolts, or concrete screws best for this project?
Use the type specified by the post base bracket and the anchor kit instructions, because performance depends on the substrate (solid concrete versus limited thickness or sand). For drilling into actual concrete, expansion bolts or rated wedge-style anchors are commonly appropriate. For pavers or bedding sand, none of these are reliable for a permanent large gazebo. If your substrate is uncertain, you need to verify it before choosing hardware.
How deep do I need to drill when going through the paver layer into concrete?
Drill depth is controlled by the anchor spec, not the paver thickness. You need enough embedment to meet the fastener requirement in the concrete, plus allowance for the paver and bedding layers. Before drilling, measure the combined paver and bedding thickness (or probe carefully), and confirm you are actually reaching concrete rather than stopping in sand.
What should I do if the gazebo base plate sits slightly low or high after leveling?
Shim the base plate with stainless steel shims before fully tightening the anchor bolts. Do not substitute wood shims, because they can compress and degrade. After shimming, re-check level at both the beam and roof top plate, and confirm the frame has no racking movement after tightening.
How can I tell if the wobble is coming from the anchors versus the gazebo frame?
Have someone apply moderate lateral pressure to each post from the outside while you watch the post bases at the patio surface. If the base lifts or shifts relative to the paver, the anchorage is the problem (wrong substrate, undersized fastener, or insufficient embedment/tightening). If bases stay fixed but the frame flexes, retighten and verify all structural connections per the manual, and consider diagonal bracing for higher-wind setups.
Do I need to re-tighten bolts after the first week or after a storm?
Yes, as a practical maintenance step. Wind loads and slight settling can cause minor fastener movement. Re-check torque and snugness after the first few days, then again after any significant storm, especially if your area sees gusts above about 50 mph.
What’s the correct way to handle water sealing around post brackets on a paver patio?
Seal around the perimeter of the bracket base with a concrete-compatible sealant and verify the bracket profile allows drainage (raised base or drainage holes). After rain, inspect for pooling at each post location. If you see water accumulation, the sealant area may be incomplete, joint sand may be washed out, or the footing top may need a slight outward shed depending on the method used.
If a paver cracks during drilling, can I just patch it instead of replacing it?
It depends on how the paver is cracked. A hairline crack that does not compromise the paver’s stability and that remains firmly bedded can sometimes be acceptable. If the paver is cracked through (split) or can move under foot pressure, replace that paver to restore load transfer and prevent the anchor from gradually loosening.
Can I anchor a gazebo if my patio base is mostly over compacted soil or overfilled with sand?
If the patio is not built on a solid, well-compacted aggregate base, surface anchoring and concrete screws into only paver sand are not suitable for a permanent gazebo. In that case you should use the below-paver footing method (pours below each post) or rebuild the patio base to the required density and edge restraint before anchoring.
Do fire pit areas or hot tub pads change how I should anchor the gazebo?
They can. Any additional pad or heavy feature changes where loads concentrate and how water drains through the patio assembly. Plan the full layout first so gazebo posts do not land where the patio base will be disturbed later, and verify that your drainage paths do not route water toward the post bases after you add other structures.
When should I stop and get an engineered or structural opinion?
Get a professional opinion if the gazebo is larger than about 12x14, if the local design wind speed is very high (for example, above 100 mph), if your patio base is visibly degraded, or if your municipality requires engineered drawings or permits for permanent anchoring. Also consider help if you cannot confirm you are anchoring into concrete or properly compacted footing material at every post location.
Next Articles
How to Use Quikrete Patio Paver Jointing Sand: Guide & Tips
How to use Quikrete Patio Paver Jointing Sand: step-by-step application, tools, timing, coverage, and care.

How to Use Patio Paver Sand: Step by Step DIY Guide
Step-by-step guide to apply patio paver sand correctly: prep base, set pavers, fill joints, compact, and troubleshoot is

How to Install Patio Pavers in Sand: Step-by-Step
DIY step-by-step how to install patio pavers in sand, from excavation and base prep to leveling, cutting, joint sand and