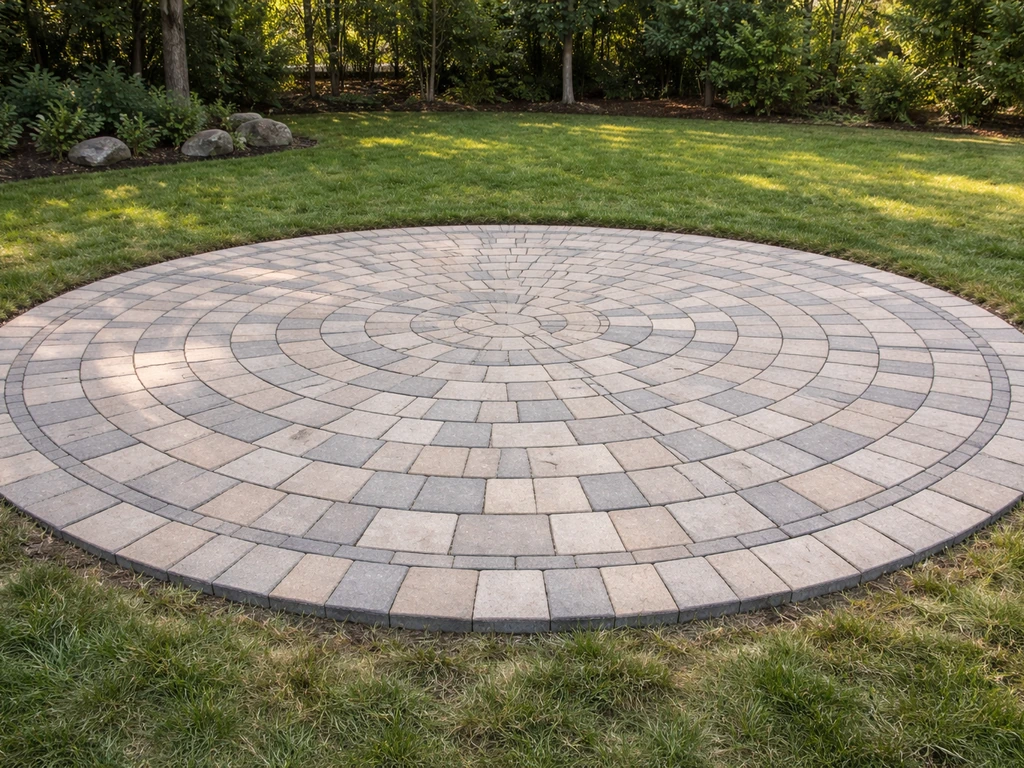
Building a round paver patio comes down to one thing done right: a true circle layout anchored to a solid, properly drained base. Get those two pieces right and everything else, the cutting, jointing, and finishing, falls into place. Mess them up and you'll be chasing wobbly pavers and washing joints for years. This guide walks you through the full process from scratch, including the parts most tutorials skip, like how to keep your circle true as you lay, how to handle curved cuts cleanly, and what to do when things don't go perfectly. If you want the step-by-step basics behind this process, see how to build a concrete paver patio for the full overview from layout to finishing.
How to Build a Round Paver Patio Step by Step DIY

Felix Rowe
12 Jun 2026
Plan the layout and design your circular patio
Before you touch a shovel, spend real time on paper. A round patio is defined by its radius, which is the distance from the center point to the outer edge. Most backyard round patios fall between 8 and 16 feet in diameter (4 to 8 feet radius). A 12-foot diameter patio gives you about 113 square feet, which is comfortable for a small table, four chairs, and a grill. A 16-foot circle hits roughly 201 square feet, which feels generous for entertaining. Pick your diameter first, then figure out how many pavers you need.
For estimating pavers, use this formula: pavers per square foot = 144 divided by ((paver length + joint spacing) x (paver width + joint spacing)). For a standard 4x8 inch paver with a 1/8-inch joint, that's 144 ÷ (8. 125 x 4. 125), which comes out to about 4.
3 pavers per square foot. Multiply by your total square footage and then add at least 10 to 15 percent for waste. Circular layouts waste more material at the edges than rectangular ones do, so bump that up to 15 percent as a minimum. If you're using a radial or fan pattern (where pavers splay outward from the center), the waste can climb to 20 percent because of all the tapered cuts at the perimeter.
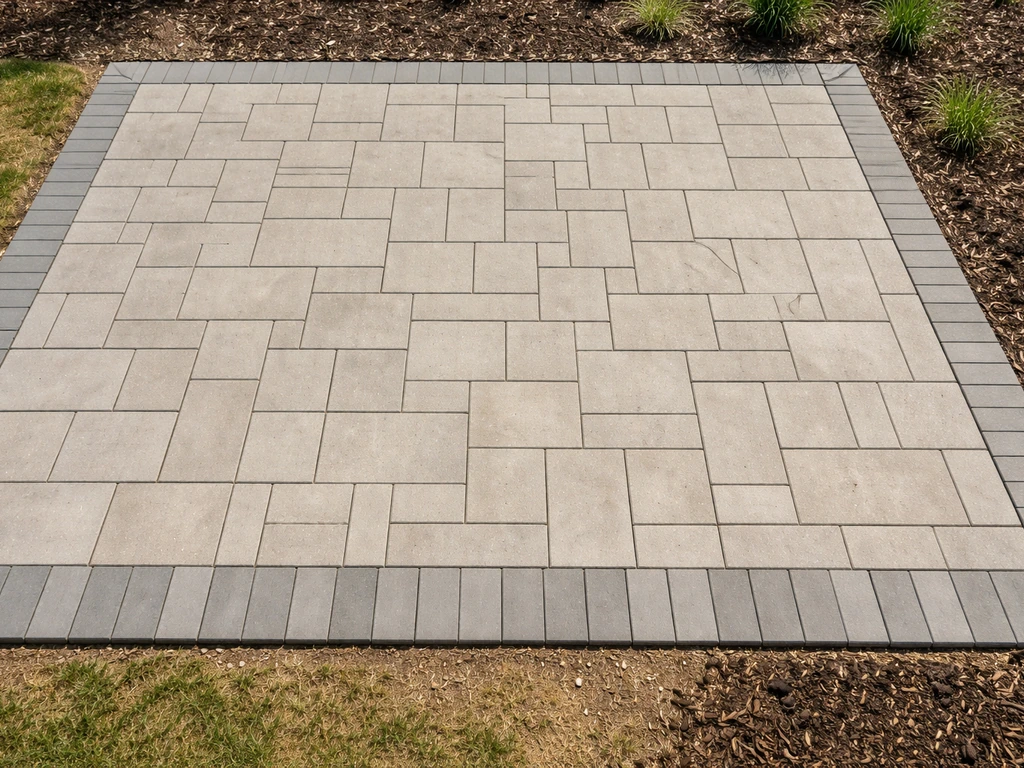
For the pattern itself, you have a few solid options. A running bond or herringbone laid inside a circle works well with square or rectangular pavers and gives a traditional look. A radial or pinwheel pattern, where pavers fan out from a center piece, looks more intentional and suits the round shape beautifully, but it requires more cuts. A basketweave inside a circle also works. Whatever you choose, sketch it out first and mark where the cuts will fall. The perimeter will always need cuts, so plan for it rather than being surprised.
On the design side, this project is closely related to laying a curved patio. If your vision involves a flowing, irregular edge rather than a true geometric circle, that approach has its own layout tricks worth exploring separately. Curved paver patios can follow many of the same base prep and cutting principles, but the layout adjustments are what make them work curved patio. For a true circle, precision is what makes it look intentional rather than accidental.
Tools, materials, and supplies you'll need
Gather everything before you start. Nothing kills a weekend project faster than a mid-dig run to the hardware store.
Tools
- Tape measure and marking paint or spray chalk
- Wooden stake or rebar (center anchor point) and mason's string
- Flat spade and pointed shovel
- Wheelbarrow
- Plate compactor (rent one, don't skip it)
- Hand tamper (for edges and tight spots)
- Level (4-foot and 2-foot)
- Screed board and two 1-inch diameter PVC pipes or metal conduit for screeding guides
- Rubber mallet
- Diamond wet saw (strongly recommended for circular cuts) or angle grinder with a diamond blade for small adjustments
- Safety glasses, ear protection, heavy gloves, and dust mask (N95 or better)
- Broom and push plate for jointing sand
Materials
- Pavers of your choice (quantity calculated above, plus 15 to 20 percent overage)
- Crushed stone aggregate or Class II road base for the sub-base (enough for 4 to 6 inches compacted depth)
- Coarse concrete sand (bedding layer, about 1 inch depth)
- Polymeric jointing sand or regular joint sand
- Flexible plastic paver edge restraint rated for curves, with 10-inch landscape spikes
- Landscape fabric (optional, for weed suppression under base)
- Paver sealer (optional, applied after curing)
A note on renting: a vibratory plate compactor runs about $60 to $80 per day at most equipment rental places. It is absolutely worth it. Trying to compact 4 to 6 inches of aggregate with a hand tamper is exhausting and you won't get the same density. For the wet saw, rental is usually $40 to $60 per day, and you'll make far cleaner, safer cuts than with a dry blade on a circular saw.
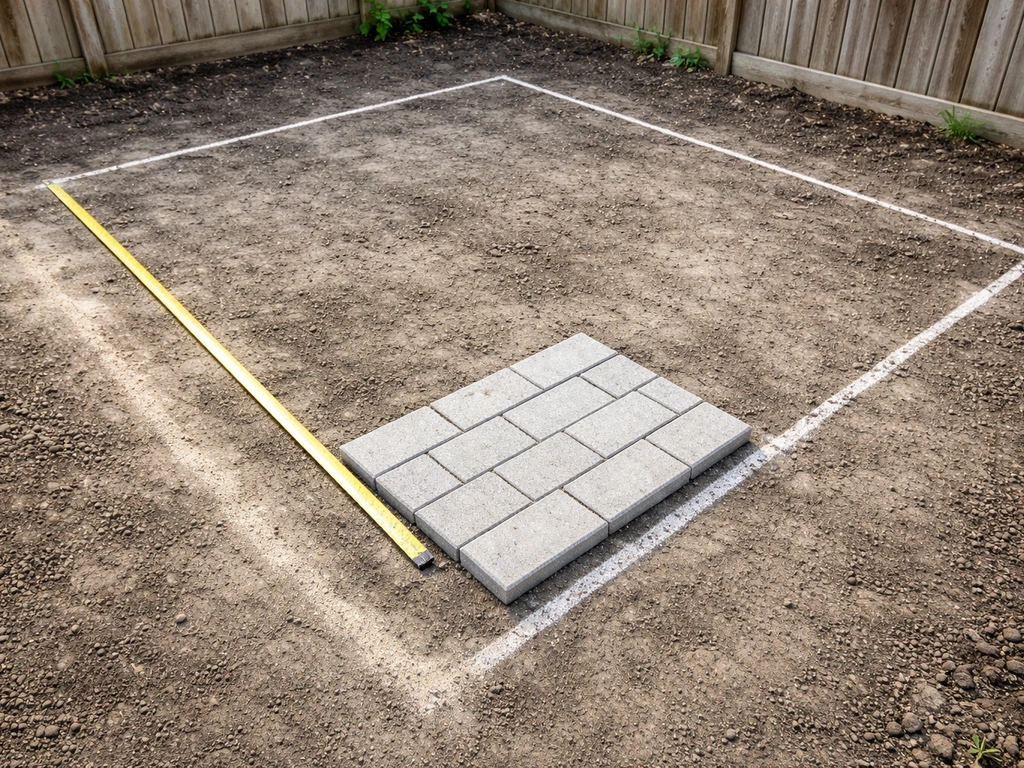
Site prep and base excavation
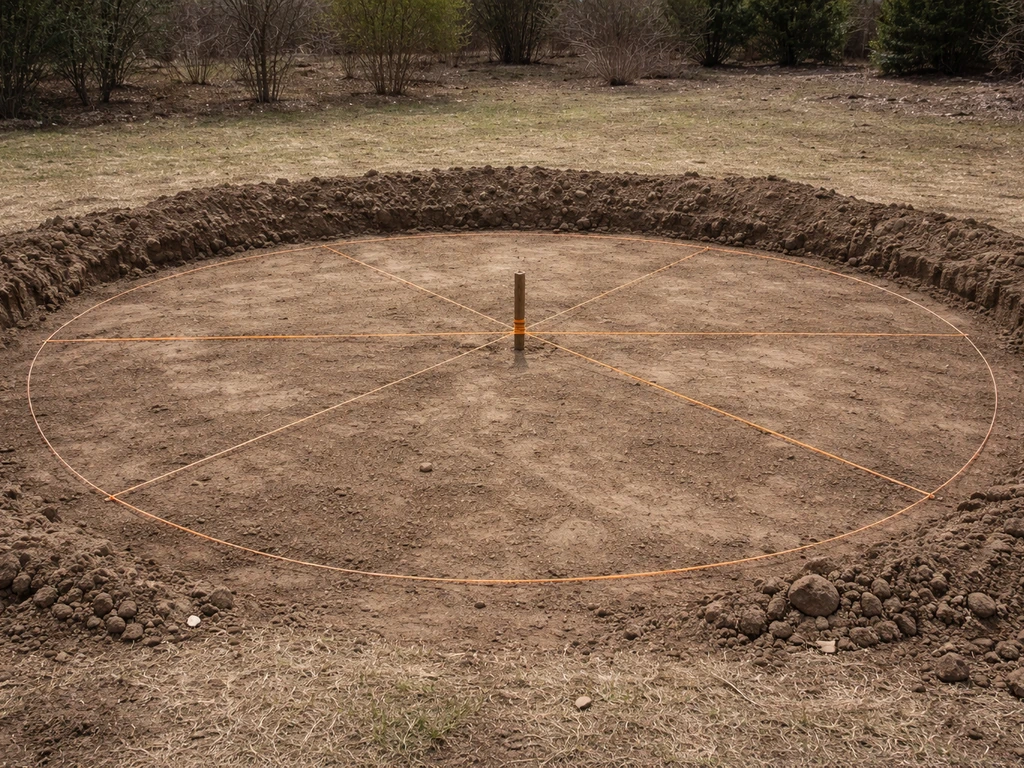
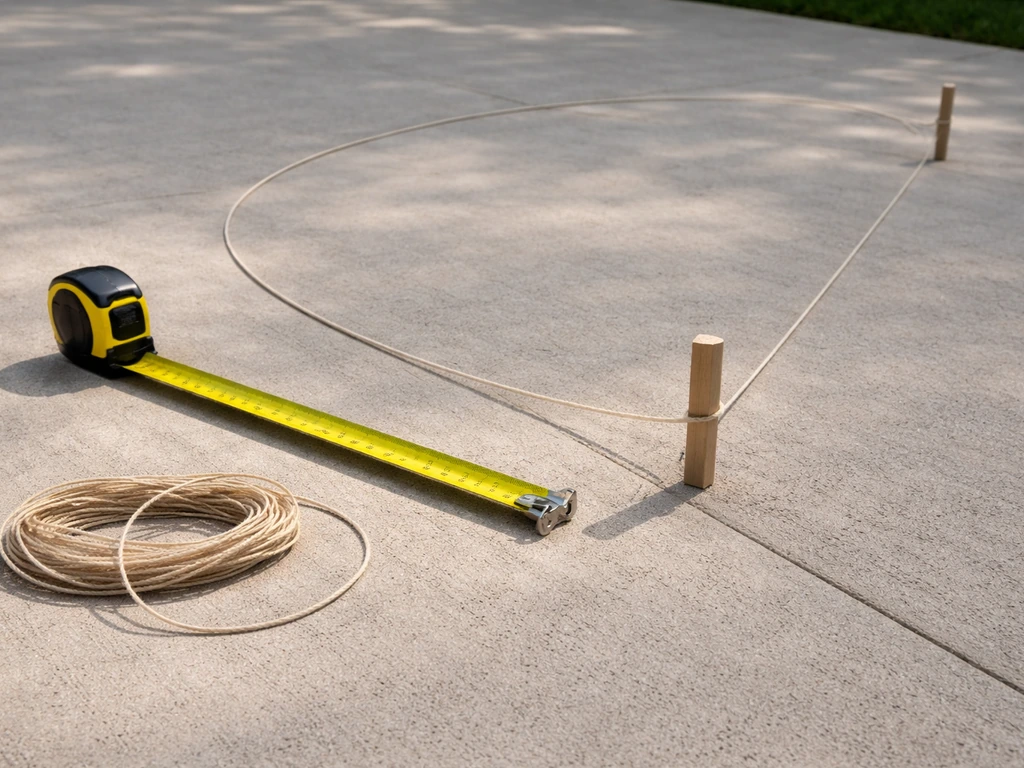
Start by marking your circle. Drive a stake or piece of rebar into the center point of where you want the patio. Tie a string to it at a length equal to your radius, plus 6 to 12 inches for the extended base area (more on that shortly). Walk the string around in a full circle, marking the ground with spray chalk or marking paint. That outer chalk line is your excavation boundary.
Now figure out how deep to dig. For a pedestrian patio, you need 4 to 6 inches of compacted aggregate base, plus 1 inch of bedding sand, plus the thickness of your pavers (typically about 2.375 inches for standard concrete pavers). That adds up to roughly 7.5 to 9.5 inches of total depth below finished grade. Mark that depth on your shovel handle with tape so you're not constantly guessing as you dig.
If you're installing over grass or sod, remove it first. A flat spade slices under the root zone cleanly. Don't try to bury grass under your base; it will decompose, settle, and cause problems. If the ground is uneven, dig to a consistent depth below your intended finished surface grade rather than following the ground contour. The base does the leveling work, not the pavers.
Once you've excavated, check for soft spots. Press your heel into the bottom of the pit. If it sinks easily, you've got loose or wet soil that needs extra attention. In those spots, dig an additional 2 to 3 inches deeper and pack in extra aggregate. Clay-heavy soil drains poorly and can cause heaving in freeze-thaw cycles, so be especially thorough with compaction in clay areas.
Set your drainage slope as you go. The finished patio surface needs to slope away from your house or any structure at roughly 1 inch per 4 feet (about 1 to 2 percent). This isn't noticeable to the eye but it's enough to keep water from pooling. Set string lines across your excavated area at this slope so you have a visual reference as you build up the base layers.
Build the sub-base and bedding layer
Pour in your crushed aggregate and spread it evenly. Don't dump it all at once. Work in 3-inch lifts: add 3 inches, compact, add another 3 inches, compact again. Compacting in layers is what gives you real density. Trying to compact 6 inches all at once leaves the bottom half loose no matter how many passes you make. Make at least two full passes with the plate compactor over each lift, and slightly moisten the aggregate before compacting if it's very dry, which helps the particles bind.
Target a fully compacted sub-base that holds your weight without movement. Once you're satisfied, check your slope with a long level and string lines. Correct any high or low spots now because fixing the base is much easier than fixing the finished patio.
The bedding layer goes on top of the compacted aggregate. Spread coarse concrete sand (not fine play sand, which doesn't compact well) and use two 1-inch PVC pipes as screed guides. Lay the pipes parallel across the surface, set at your desired slope, and drag a straight screed board across them to create a perfectly flat 1-inch deep bed. Pull the pipes out carefully and fill those channels with sand, then lightly smooth them. Do not compact the bedding layer before you lay the pavers. Compacting the sand ahead of time causes it to lose its workability and can lead to uneven settling once the pavers go down.
For a circular patio, screed the bedding sand in sections rather than trying to do the whole circle at once. Screed a quarter or half at a time, lay pavers into that section, then move to the next. This keeps your freshly screeded sand from being disturbed while you work.
Lay out and install the pavers
This is where a round patio gets a bit more technical than a rectangular one, and it's worth slowing down here. The key is maintaining a true circle throughout the installation so you don't end up with a slightly oval or lumpy edge. To learn the overall layout, sizing, and design choices behind a round installation, see our full guide on how to design paver patio true circle.
Setting up your layout reference
Your center stake is still in the ground. Keep it there through the entire installation. This is your control point. For a radial pattern, the center stake is the starting point and every row of pavers fans out from it. For a running bond or herringbone inside a circle, start from the center and work outward in rows, using the center stake to check your radius at every few pavers.
Make a simple trammel jig: a piece of wood or rigid conduit with a nail hole at one end (for the center stake) and a pencil or scribe mark at the radius distance. You can use this to check whether pavers along the perimeter are actually on the circle, or to scribe the cut line onto perimeter pavers. A string line tied to the center stake and pulled taut works for the same purpose, though the rigid trammel is more accurate.
Placing the pavers
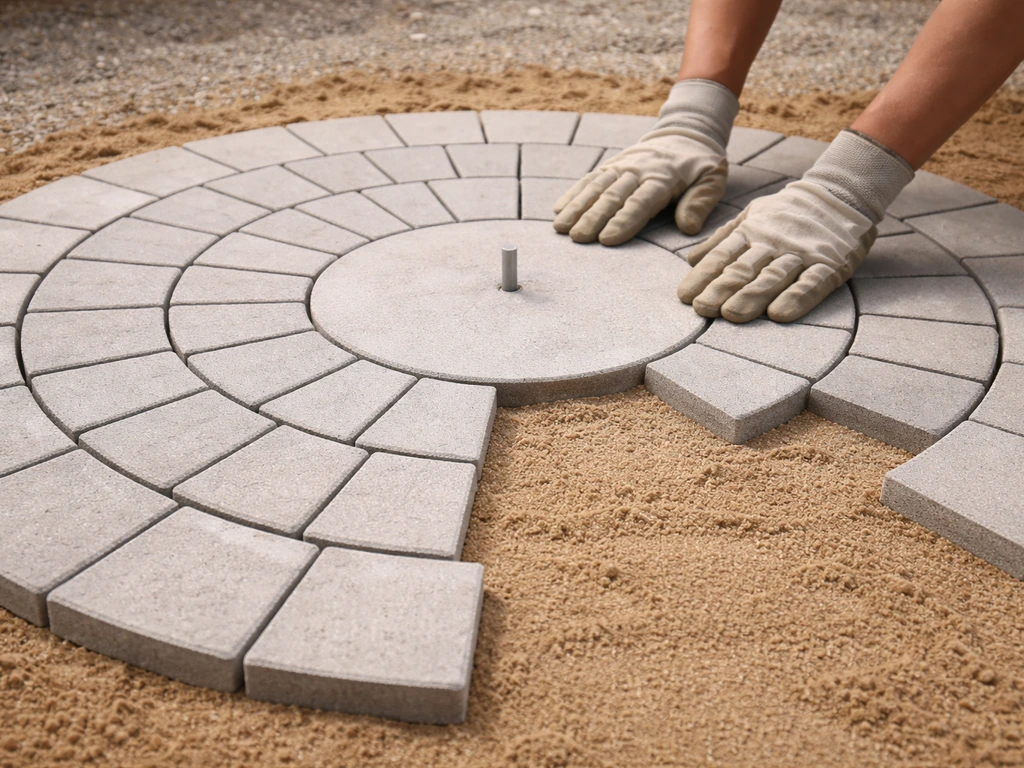
Start at the center and work outward. Set your center paver (or center piece in a pinwheel pattern) first, then build rings outward. Press each paver gently but firmly into the sand bed with your hands, then tap it level with a rubber mallet. Don't kneel on the screeded sand; use a piece of plywood to distribute your weight.
Maintain consistent joint spacing as you go. As you move outward in a radial pattern, the arc of each ring gets longer, which means joints will naturally widen slightly toward the outside. This is normal and expected. Keep interior joints tight (around 1/8 inch) and allow the outer rings to open up a bit, but try not to let them exceed 3/8 inch or the jointing sand won't lock properly. If the gaps are getting too wide, that's a signal to make a cut piece that tightens things back up.
Check for level constantly. Use your 2-foot level across multiple pavers every few rows. Lippage (where one paver sits higher than its neighbor) greater than about 1/8 inch is noticeable underfoot and can be a tripping hazard. If a paver is high, lift it and scrape a little sand out. If it's low, add a pinch of sand underneath. Small adjustments are easy at this stage. They are not easy after compaction.
Cutting, fitting, and finishing the circle edge
The perimeter of a round patio is what separates a professional-looking job from an obviously amateur one. Every paver that crosses the circle's edge needs to be cut to the arc. There's no avoiding it. Here's how to do it cleanly.
Use a diamond wet saw. This is the single most important tool recommendation in this guide for the cutting phase. Diamond wet saw blades give consistently cleaner cuts than dry blades, with far less chipping and cracking. A circular saw with a masonry blade can work for straight cuts but can shatter pavers on curved cuts, especially if you're not moving very slowly and carefully. The wet saw's water cooling keeps the blade and paver cool, which reduces cracking risk significantly.
To mark the cut line on each perimeter paver, lay the paver in its final position (on top of the last full row, overlapping the edge). Use your trammel jig to scribe the circle arc onto the paver face. That scribed line is your cut line. For a gradual arc on a large circle, one straight cut per paver is often close enough. For a tighter curve or smaller radius, you may need to make two angled cuts to better approximate the arc.
After cutting, dry-fit each piece before setting it into the sand. Cut pieces should have at least 50 percent of their body supported by the base, meaning no tiny slivers at the edge. If a cut piece would be less than half a paver, shift your layout slightly to avoid it or use a different size paver for that spot. Tiny cut pieces break easily under foot traffic and look sloppy.
Set cut pieces into the sand bed the same way as full pavers: gentle press, rubber mallet tap, level check. Take your time at the perimeter. This is where the patio's finished look is made or broken.
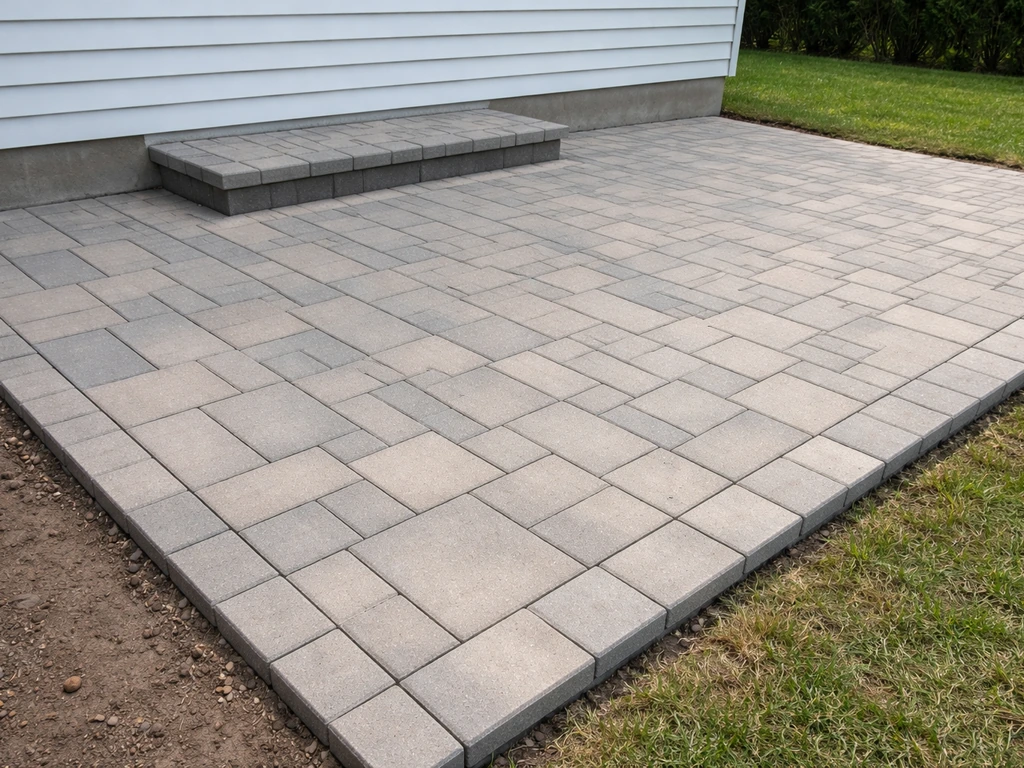
Edge restraints, leveling, jointing, compaction, and sealing
Installing edge restraints
Edge restraints must go in before final compaction. Don't skip this step and don't reverse the order. Without restraints, the compactor will push your perimeter pavers outward and your circle will expand and distort. Use flexible plastic paver edging rated for curves. Flex it around the perimeter of your circle and anchor it with 10-inch landscape spikes every 8 to 10 inches. On the curved sections, tighter spacing (every 8 inches or less) keeps the restraint hugging the arc without gaps or flat spots. The aggregate base should extend 6 to 12 inches beyond the paver edge, giving the spikes solid material to anchor into.
Final compaction
Once all pavers are set and edge restraints are in place, run the plate compactor over the entire surface. Use a protective pad (a piece of carpet or rubber mat) under the compactor plate to avoid scratching or chipping the paver surface. Make two full passes in different directions. This vibration presses the pavers down into the bedding sand evenly and locks them into position. After compaction, do a final level check and look for any pavers that shifted or tilted. Fix them now before adding jointing sand.
Jointing sand
Polymeric sand is the better choice for most round patio installations. It contains polymer additives that bind when activated with water, making the joints resist washout, weed growth, and insect intrusion far better than plain joint sand. Standard joint sand works fine too and is cheaper, but expect to re-sand every year or two as it erodes. Note that polymeric sand is not recommended for heavily textured pavers where it can be difficult to sweep out of the surface texture before activation.
To apply: pour dry polymeric sand over the dry paver surface and sweep it into the joints with a stiff broom. Work it in all directions to fill completely. Then compact again lightly with the plate compactor (with pad) to help settle the sand into the joints. Sweep in another round of sand and compact again if needed.
Once joints are full, blow off any excess sand from the paver surfaces. Then activate the polymeric sand by misting the surface with water according to the manufacturer's instructions. Polymeric Sand Store also recommends sweeping to fill joints completely, compacting the polymeric sand, and then following the watering instructions to activate the polymer for proper binding [Then activate the polymeric sand by misting the surface with water according to the manufacturer's instructions. ](https://polymericsandstore.
com/blogs/news/polymeric-sand-installation-tips). Too much water too fast can wash sand back out of the joints. Do this step when rain isn't expected for at least 24 hours.
Sealing
Sealing is optional but it protects color, reduces staining, and can enhance the look of the pavers. Wait at least 3 months after installation before sealing. Once your pavers are laid and the joints are locked in, you can move on to decorating ideas that match your layout and outdoor space how to decorate a paver patio. This gives natural efflorescence (the white mineral haze that appears on new concrete pavers) time to dissipate. Sealing over efflorescence traps it and makes it look worse. Make sure the pavers are completely clean and dry before applying sealer. Follow the sealer manufacturer's directions for application, and plan to reseal every 3 to 5 years depending on traffic and weather exposure.
Common problems and how to fix them
Even a well-planned round patio can run into issues. Here are the ones that come up most often and how to deal with them.
| Problem | Likely Cause | Fix |
|---|---|---|
| Wavy or oval edge instead of a true circle | Layout drift during installation, center stake moved | Pull the center stake, re-string the radius, identify which pavers are off. Lift and reset them. Prevention is easier than repair here. |
| Paver lippage (one paver higher than its neighbor) | Uneven bedding sand or a lump in the sub-base | Lift the high paver, scrape or add bedding sand as needed, reset and level. Check that the sub-base underneath is solid. |
| Sunken area or soft spot | Inadequate base compaction or water washing fines out of the base | Lift affected pavers, excavate to the sub-base, add and compact fresh aggregate, re-screed bedding sand, and reset pavers. |
| Wobbly individual pavers | Thin bedding sand or a void underneath | Lift the paver, fill the void with sand, compact lightly, reset the paver and check level. |
| Joint sand washing out | Rain or irrigation washing plain sand away, or polymeric sand not activated properly | Re-sweep polymeric sand into joints and activate correctly. For recurring washout in low spots, check that your drainage slope is directing water away, not across the patio. |
| Water pooling on the surface | Insufficient or incorrect drainage slope | This is the hardest fix after the fact. If minor, adding a thin layer of bedding sand and resetting the lowest section can help. If severe, the base slope needs to be corrected. |
| Perimeter pavers cracking at the cuts | Cuts made too thin, or dry blade used causing thermal stress | Replace cracked pieces. Use a wet saw for all future cuts and avoid cut pieces that are less than half a paver in width. |
Most problems trace back to base preparation. If your sub-base is compacted properly, at the right depth, and sloped correctly, the pavers stay level, the joints stay filled, and the circle holds its shape for years. Cutting corners on the base to save a few hours is the most common and most expensive mistake in patio installation.
Realistic expectations before you start
A 12-foot round patio is a solid two to three day project for one person working at a steady pace, or a long weekend with a helper. Most of that time is in the base preparation, not the paver laying. Budget roughly $400 to $800 for materials on a 12-foot circle using mid-range concrete pavers, not counting tool rental.
If you've never done a concrete paver project before, start by building your skills on a simpler rectangular shape first, though a round patio is absolutely achievable for a first-time DIYer who follows the steps carefully. The key advantages of a round patio, no 90-degree corners to square up, a forgiving radial layout, and a naturally finished-looking edge, actually make it a satisfying project to build.
If you want to go deeper on the design side before you start digging, spending time on patio design decisions (scale, paver style, surrounding plantings) will save you from mid-project changes. And if you're looking at skipping some of the excavation work, there are no-dig approaches for certain soft-set installations, though they involve real trade-offs in longevity and stability that are worth understanding before committing. These no-dig approaches can help when you want a paver patio without digging, but the results depend on the surface and the specific soft-set system you choose.
FAQ
How can I tell if my round paver patio is becoming an oval before it’s too late?
For a true circle, build the perimeter off the center control point and measure to that arc while you set the pavers. If you notice the “circle” slowly turning into an oval as you work outward, stop and re-check radius with a trammel jig (or taut string) every few rings, then adjust by shifting pavers slightly before you reach the edge. Once bedding sand and pavers are compacted, you generally cannot fix a distorted circle without lifting and redoing sections.
What should I do if my perimeter cuts result in tiny sliver pavers?
Aim for at least half of each cut paver’s thickness supported by the base, not just “fitting” the gap at the edge. If a cut would become a sliver, shift the pattern slightly (a small rotation or sliding the rings) so the smallest pieces land where you can tolerate them, or use a different paver size at the perimeter. This prevents weak edge pieces that break or rock over time.
Can I build a round paver patio on a sloped yard and keep it from pooling water?
Yes, but only if you first confirm drainage and base depth. The 1 inch per 4 feet slope is for finished surface, so you must set your string lines and base layers to maintain that slope even when you start higher on one side. If you try to “level” the pavers to match the yard, water can pool near the house or structure.
My bedding sand feels firm after I worked on it, should I leave it?
Do not compact the bedding sand before setting pavers, and if it does get compacted or you disturb the surface, scrape it back to a looser 1 inch bed and re-screed. Compacted sand becomes less workable, which increases the chance of uneven settling after installation and makes it harder to correct height differences.
What’s the best way to fix uneven pavers or a shifted section during installation?
If you have to replace a ring or fix an uneven spot later, lift carefully, remove enough sand to address the cause (high spot usually means scraping, low spot means adding and re-screeding), then re-set and re-check the circle using the center stake. After that, compact only after restraints are installed and then re-sweep and re-activate joint sand if you disturb joints.
Will polymeric sand work if my round patio joints vary slightly in width?
Yes, but keep joints behaving as a system. For polymeric sand to lock properly, joints must be filled fully and swept in without leaving voids, and the joint widths should not swing from too narrow to too wide. A practical approach is to keep interior joints consistent (about 1/8 inch) and avoid letting perimeter joints exceed about 3/8 inch, since wide joints can fail to lock and wash out.
How do I minimize the amount of complicated perimeter cutting on a round patio?
Use the wet saw for any curved perimeter cuts, but you can reduce cut complexity by choosing a perimeter that lines up with your paver module. For example, shifting the ring layout by a small amount can sometimes avoid two-piece approximations and reduce the number of very tight arcs. Still, always scribe the cut line with your trammel jig for accuracy, since small layout errors compound at the edge.
What’s the most common mistake with edge restraints, and how do I prevent it?
After compacting and before jointing, verify your edge restraints are tight to the arc and that spikes are anchored into base material, not just into looser top aggregate. Even one loose section can allow outward movement during compaction, which opens gaps and forces rework after you’ve locked the pavers with sand.
How do I maintain accuracy when laying a radial or pinwheel pattern from the center?
If you’re using a radial or pinwheel pattern, the center piece governs everything. Make sure the center stake stays in place and that every fan row references it, not the last row you laid. Checking the radius every few pavers prevents the common problem of “drifting” fans that look fine until the perimeter.
How often should I expect to re-fill or re-activate joints on a round patio?
Plan for a re-sanding cycle based on conditions. With polymeric sand, joints generally resist washout better, but heavy rain, frequent sweeping, and water running across the patio can still erode joints over time. A good decision aid is to keep runoff controlled with the patio slope and avoid spraying a concentrated hose stream directly into the joints.
Next Articles
How to Design a Paver Patio Layout Step by Step
Step-by-step guide to plan, lay out, slope, and set pavers for a durable patio layout, including cuts, drainage, and fin
How to Build a Concrete Paver Patio Step by Step
Step-by-step DIY guide to build a concrete paver patio: layout, base on soil or slab, drainage, pavers, edging, leveling
How to Build a Paver Patio Without Digging: DIY Guide
DIY steps to install patio pavers without digging: prep, level, edge restraint, lay, cut, joint sand, compact and mainta