Designing a paver patio comes down to six connected decisions: what you need the patio for, how big it should be, which pavers you pick, how water drains off it, how deep your base goes, and how you lay the pattern without it drifting. Get those six things right before you touch a shovel and the actual installation becomes straightforward.
How to Design a Paver Patio Layout Step by Step

Felix Rowe
10 Jun 2026
Skip any of them and you'll be relaying pavers in two years because water is pooling or the edge is shifting. This guide walks you through every step in order, with real numbers and honest expectations about time and tools. If you follow the same sequencing, you can work through how to build a concrete paver patio from layout to jointing with fewer surprises This guide walks you through every step.
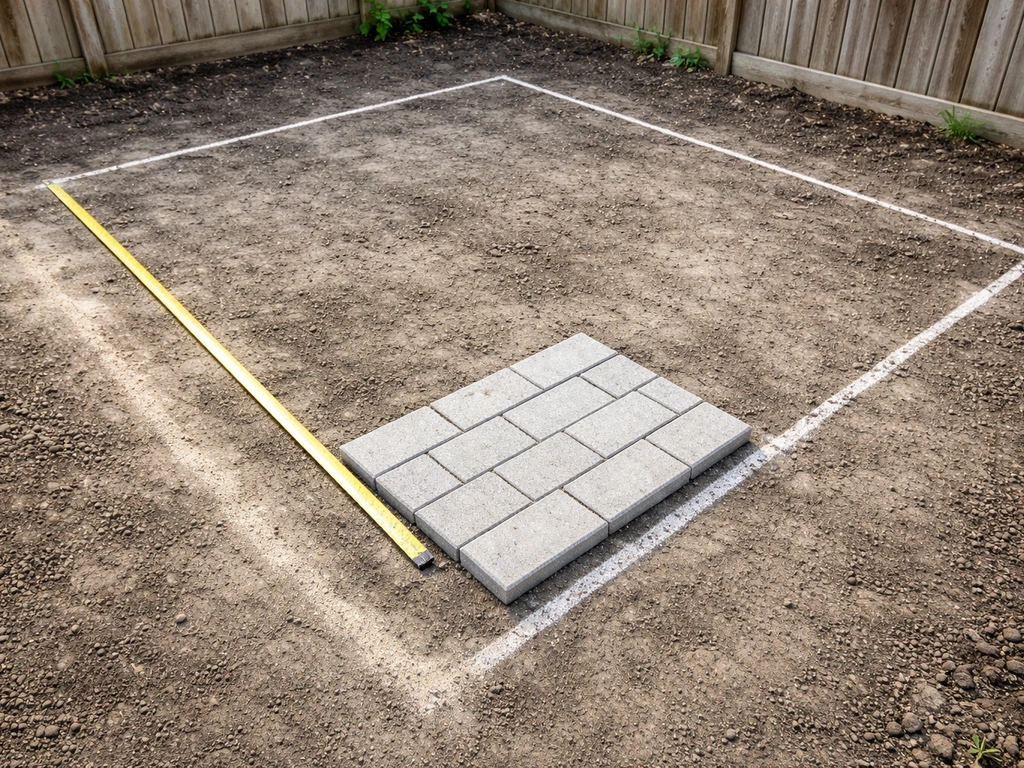
Define the patio goals and measurements
Before you pick a single paver, sit down and answer three questions: What is this patio actually for? How many people will use it at once? And what's the realistic footprint given your yard, setbacks, and budget? A dining patio for six people needs at least 12 by 14 feet just to fit a table and chairs comfortably with room to pull out a seat. A lounge patio can work at 10 by 12. If you're adding a fire pit area, tack on another 10 to 12 feet of diameter, typically kept separate from the main seating zone for safety and comfort.
Once you have a rough size in mind, walk the actual ground and check for three things: obstacles (roots, utility lines, downspouts), the direction slope already runs, and proximity to the house foundation. Your finished patio surface needs to sit at least 1 inch below the home's door threshold and below any siding or stucco to keep moisture from wicking back into the structure. Mark the corners with stakes and stand back. Most people underestimate size at this stage, so if your staked outline looks small, it probably is. Go bigger if the space allows.
Also note the existing ground conditions right now. Is it clay-heavy soil that holds water? Sandy and loose? Existing concrete slab? Each one changes your base plan. Laying over grass is the most common DIY scenario and requires full excavation. Laying over an existing concrete slab is possible if the slab is in decent condition, but it raises the finished height, which affects door clearances and drainage connections. We'll cover both scenarios in the base section below.
Choose paver style, size, color, and pattern
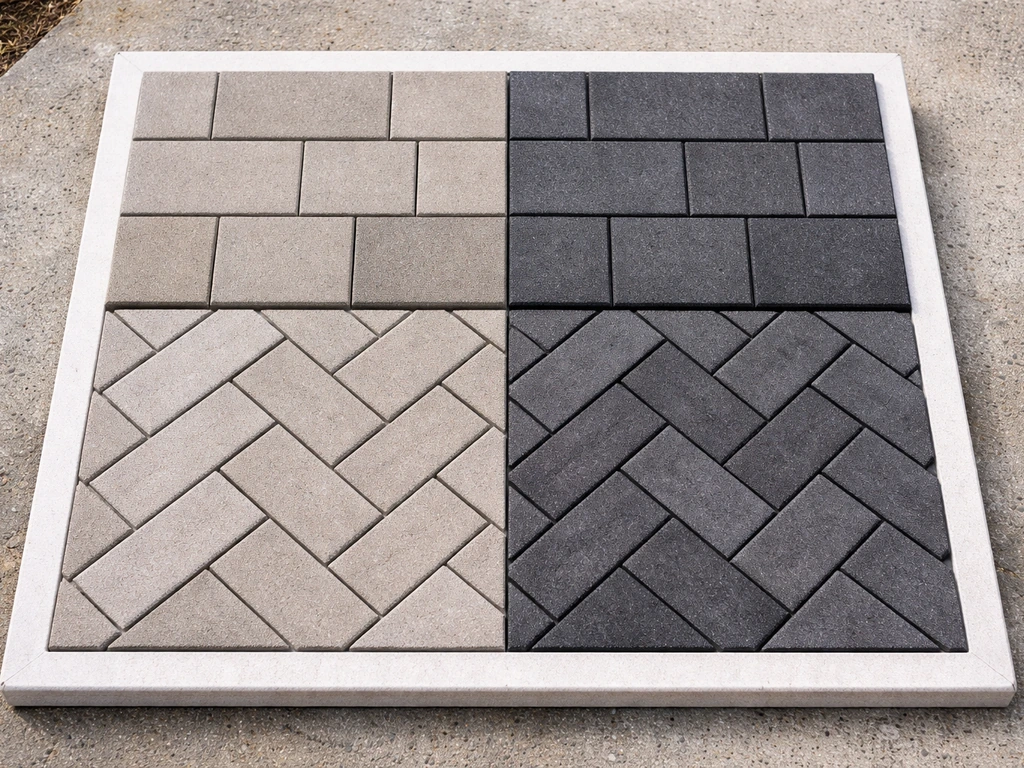
Concrete pavers are the go-to for most DIYers because they're consistent in size, widely available, cost-effective, and easy to cut. The standard residential paver is about 2 3/8 inches thick, which handles foot traffic comfortably. If you're thinking about ever parking a vehicle on part of the patio, step up to 3 1/8-inch pavers in that zone. Natural stone (travertine, bluestone, flagstone) looks beautiful but varies in thickness, which makes screeding your sand bed trickier. For a first project, concrete pavers are the forgiving choice.
For size and color, think about the visual scale of your space. Larger format pavers (like 12x12 or 16x16) make a small patio look bigger and require fewer cuts. Smaller pavers (4x8 rectangles or cobble-style units) give you more design flexibility and work especially well in curves. Color-wise, lighter tones show efflorescence (the white mineral haze that bleaches out in sun) more visibly, but they also keep the surface cooler underfoot in summer heat. Earth tones and charcoals are the most popular and forgiving in terms of aging.
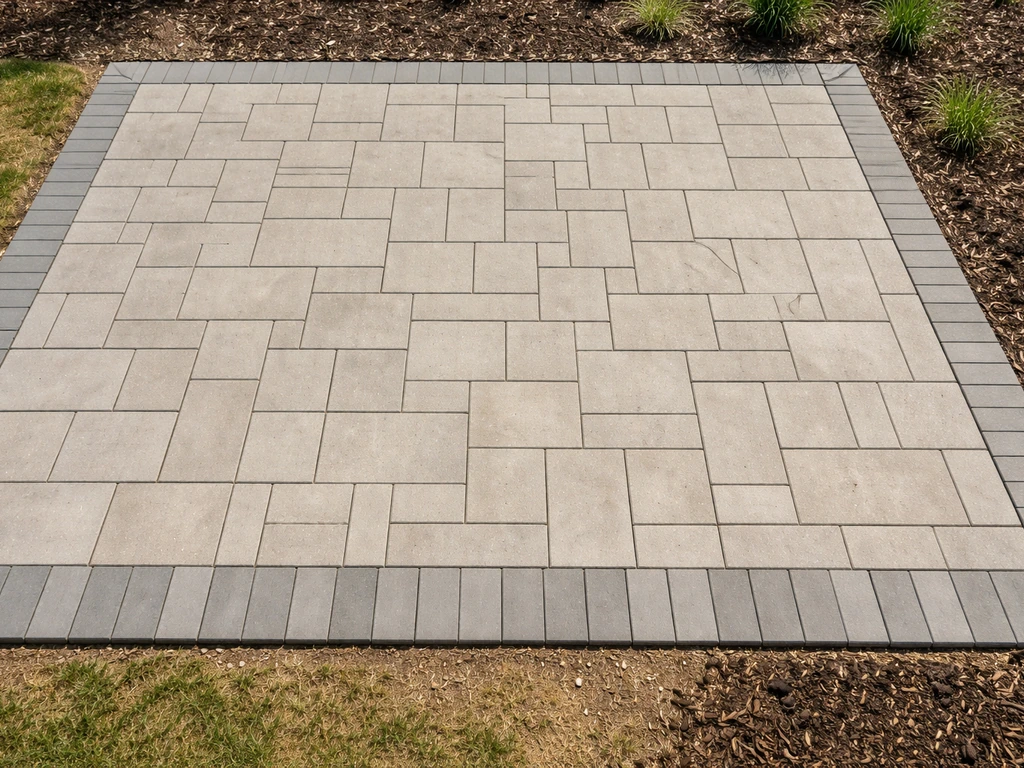
Picking the right pattern
Pattern selection matters more than most people realize, not just for looks but for structural performance and how hard the installation actually is. Here's a quick rundown of the main options:
| Pattern | Difficulty | Best For | Notes |
|---|---|---|---|
| Running Bond | Easy | First-timers, rectangular patios | Straightforward layout, low cut waste |
| Stack Bond (Grid) | Easy | Modern/contemporary style | Requires precise spacing; joints line up and can shift |
| Basketweave | Moderate | Traditional look, square pavers | Works best with square units; layout stays predictable |
| Herringbone (45° or 90°) | Moderate-Hard | High-traffic areas, classic look | Locks pavers together structurally; best pattern for stability |
| Pinwheel/Windmill | Moderate | Mixed paver sizes, focal areas | Needs two paver sizes; adds visual interest |
| Random/Ashlar | Hard | Natural stone look | Requires careful pre-planning to avoid awkward cuts |
Herringbone is consistently recommended by ICPI (the Interlocking Concrete Pavement Institute) for high-use residential patios because the angled layout creates mechanical interlock between pavers, meaning the surface resists shifting under load better than parallel-joint patterns. If you're new to paver work, running bond is the easiest starting point. If you want herringbone, plan for about 10 to 15 percent more cut waste and a bit more layout time.
Layout planning: lines, elevations, and drainage slope

This is the most overlooked part of the design process, and it's where most drainage problems start. You need to plan your finished paver surface elevation before you dig a single inch, because the slope of your patio is set by how deep you excavate and how you position your screed rails, not by intuition once you're in the middle of the job.
The drainage slope rule
Aim for a fall of 1/8 inch to 1/4 inch per foot of patio width, running away from the house. That works out to about a 1 to 2 percent slope. On a 12-foot-wide patio, that means the far edge sits between 1.5 and 3 inches lower than the edge at the house. It sounds like a small number, but if you skip it or get it wrong, you'll have standing water every time it rains. Mark your target elevations at the house-side edge and the far edge with a string line and line level before you break ground.
String lines are your best friend throughout this entire project. Set a primary string line along the house wall at your target finish elevation (remember: finished paver surface should sit at least 1 inch below the door threshold and below any siding). Then run a second string line perpendicular at the far edge, dropping it by your calculated drainage amount. These two strings become your control lines for every elevation decision that follows, from excavation depth to screed rail height. Pull them tight with no sag.
Mapping the pattern on paper first
Before you order materials, sketch your patio footprint on graph paper (or use a free online paver calculator) and map how your chosen pattern lays out within it. The goal is to see where cut pieces will land and whether they'll be awkwardly thin (less than half a paver width at any edge is a headache). If your running bond pattern leaves a 2-inch sliver at one side, shift your layout centerline until you get balanced cuts on both sides. It's far easier to adjust this on paper than to discover the problem after laying 80 percent of the patio.
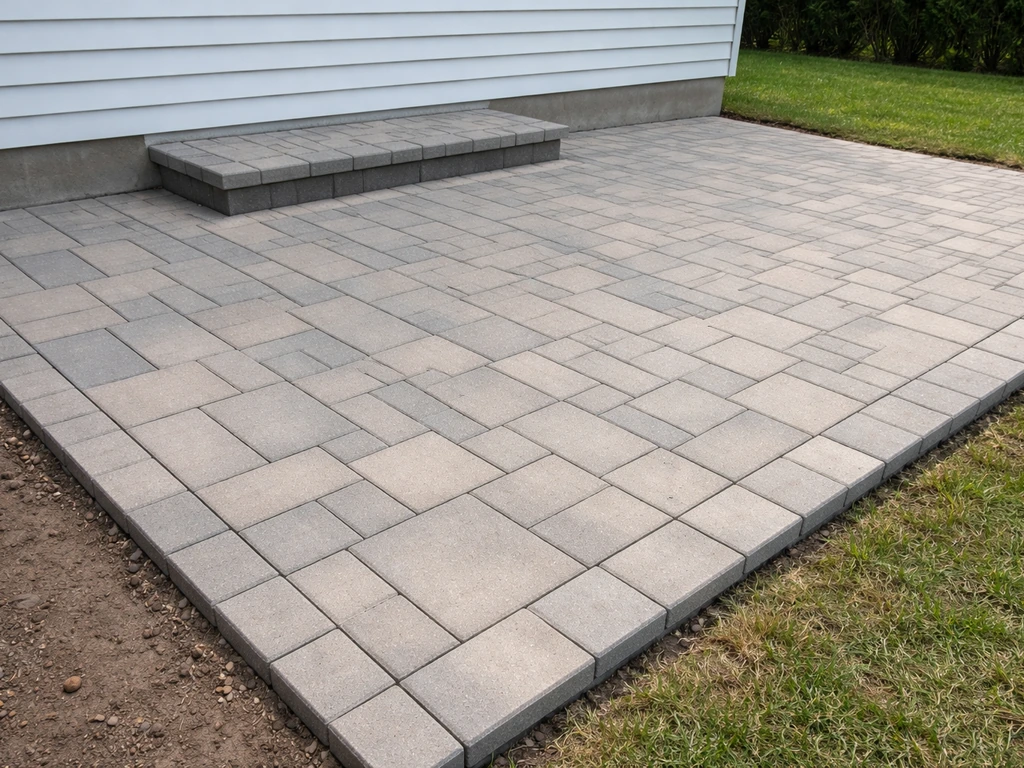
Base and subgrade design for stability
The base is what your patio is actually built on, and it's the part most homeowners underinvest in. Once the pavers are down, decorations like borders, lighting, and planters can help your patio look finished while still protecting the joints and drainage plan decorate a paver patio. A beautiful paver surface on a weak base will sink, shift, and grow weeds through the joints within a few seasons. Do the base right and your patio will look the same in 15 years as it does on day one.
How deep to dig
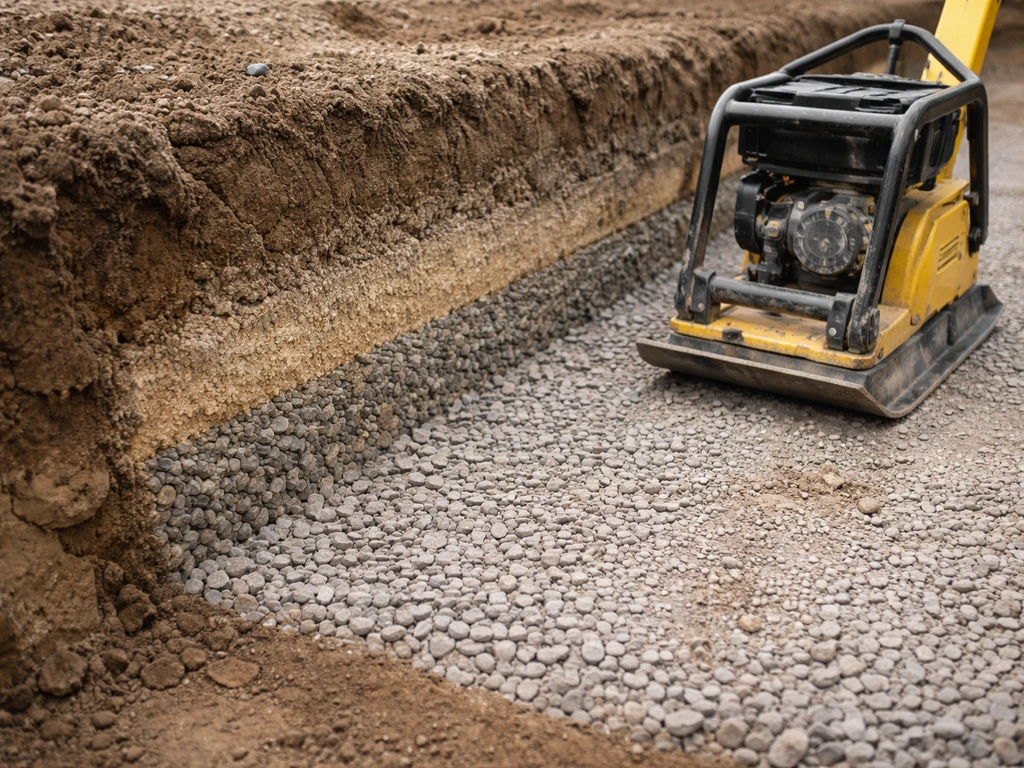
For a standard residential foot-traffic patio, the typical excavation depth is about 7 to 9 inches below your target finished paver surface. That breaks down as follows: 4 inches of compacted crushed stone base (ICPI recommends 4 inches for pedestrian applications, stepping up to 6 inches for residential driveways), plus 1 inch of bedding sand, plus the paver thickness (typically 2 3/8 inches). For ICPI Tech Spec base depths, expect about 4 inches for pedestrian applications, 6 inches for residential driveways, and 8 to 12 inches for vehicular traffic. So: 4 + 1 + 2.375 = roughly 7.4 inches of total section. Round up slightly and excavate to about 8 inches to give yourself a little working room.
On clay soils, which drain poorly and expand when wet, consider adding a layer of geotextile fabric between the native subgrade and your gravel base. It keeps the materials from mixing over time and extends the life of the base significantly. It's a $30 to $50 add for most patios and absolutely worth it. On sandy or well-draining soils, the fabric is less critical but doesn't hurt.
Compaction targets
The subgrade (the native soil at the bottom of your excavation) should be compacted to at least 95 percent Standard Proctor density before you add any base material. In plain English: rent a plate compactor, not just a hand tamper, and make at least two passes over the native soil before you bring in gravel. Add your crushed stone base in 2-inch lifts, compact each lift before adding the next. Skipping compaction lifts is the single most common reason patios sink unevenly in the first few years.
What if the ground isn't level to start?
Uneven ground is normal. You handle it by excavating to a consistent depth relative to your string lines, not relative to the existing ground surface. If one corner of your patio is naturally 4 inches higher than another, you dig 4 inches deeper in that corner so the bottom of your excavation is level (or has your planned drainage slope). This is exactly why you set string lines before you dig. If you're dealing with a significant slope, more than about 12 inches of grade change across the patio footprint, a raised patio or stepped design might be a better fit than a simple flat pour.
Edge restraints and base/bedding material setup
Edge restraints are the unsung heroes of a long-lasting paver patio. Without them, the perimeter pavers slowly migrate outward under foot traffic and freeze-thaw cycles, joints widen, sand escapes, and the whole surface starts to look sloppy within a few years. Install edge restraints every time, no exceptions.
The most common options are rigid plastic, aluminum, or steel channeled restraints that spike into the base at regular intervals. Install them after your base is compacted but before your bedding sand goes down. Spike them every 12 inches along straight runs and every 6 inches on curves to prevent bowing. The restraint should hold the edge of the first and last row of pavers snugly. ICPI guidance is clear that if there's any risk of sand escaping from beneath or between the perimeter pavers, the edge restraint design becomes the critical defense against surface failure.
Setting up the bedding sand layer
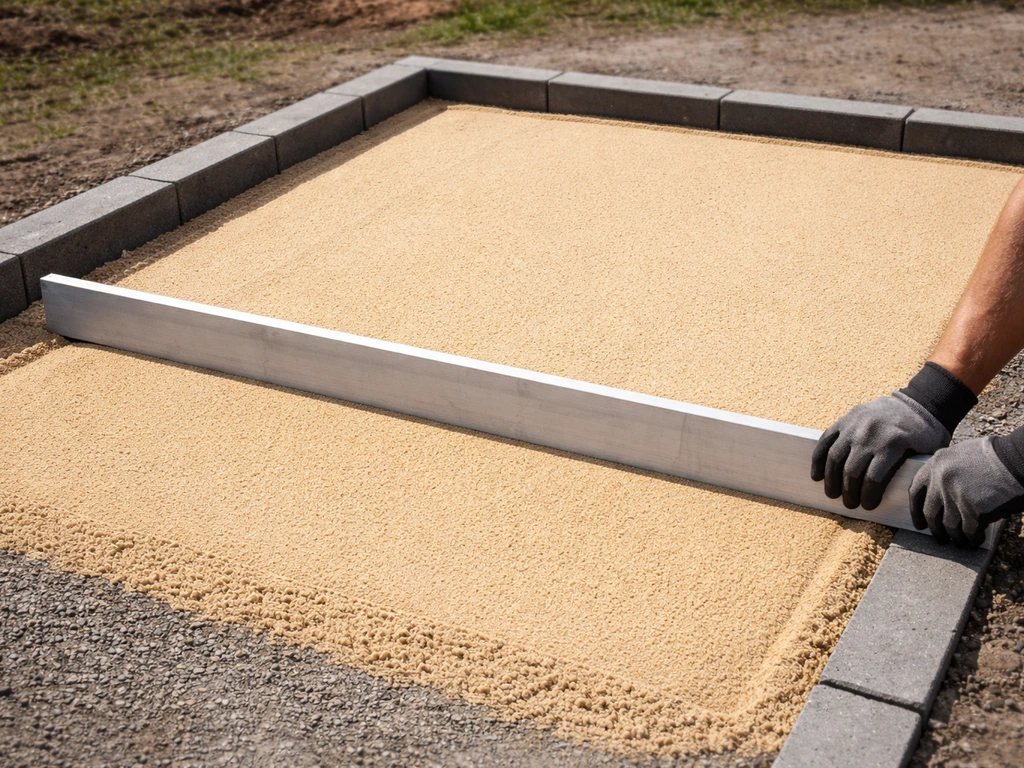
Once your compacted base is in, your edge restraints are installed, and your string lines confirm the right elevations and slope, you're ready to screed the bedding sand. Use coarse concrete sand that meets ASTM C33 specs (your supplier will know what this means). Do not use mason sand or play sand, which are too fine and will compact unevenly. Spread the sand to a consistent 1-inch depth using screed rails (pipes or conduit work well) as guides. Drag a straight board across the rails to level the surface.
One critical rule: do not walk on or disturb the screeded sand before you lay pavers. Every footprint you leave creates a low spot that will show up as a dip in your finished surface. Lay a kneeling board and work forward from the starting edge, placing pavers onto undisturbed sand.
Step-by-step layout and installation sequence
Here's the full installation sequence from start to finish. Follow it in order and you'll avoid the most common layout mistakes.
- Set your control string lines. Mark all four corners of the patio with stakes. Run string lines at your target finished elevation along the house-side edge and the far edge. Confirm your drainage slope (1/8 to 1/4 inch drop per foot away from the house) with a line level or digital level. These strings stay up the entire time you're building.
- Excavate to depth. Dig to roughly 8 inches below your finished string line elevation across the entire footprint. Keep the bottom of the excavation as consistent as possible. Remove all organic material, roots, and soft spots.
- Compact the subgrade. Run a plate compactor over the native soil with at least two full passes. Fill any soft spots with crushed stone and compact again. Do not skip this step.
- Lay geotextile fabric (if applicable). On clay or poor-draining soils, roll fabric across the bottom of the excavation, overlapping seams by at least 12 inches.
- Add and compact the crushed stone base. Spread in 2-inch lifts and compact each lift before adding the next. Target total compacted depth of 4 inches for a foot-traffic patio. Check elevations against your string lines after each lift.
- Install edge restraints. Set along all perimeter edges, spiked into the compacted base every 12 inches (every 6 inches on curves). Confirm they follow your planned patio boundary.
- Screed the bedding sand. Set screed rails to achieve 1 inch of sand at the correct elevation and slope. Spread ASTM C33 coarse sand and pull level with a straight board. Remove rails and fill the grooves with loose sand.
- Establish your starting point and reference edge. Begin at the most visible or straightest edge, usually the house wall or a chalked centerline. For herringbone, set your first paver with careful attention to the starting offset so the angle runs true across the surface.
- Lay pavers. Work forward from your starting edge, placing each paver snugly against its neighbor without sliding it through the sand. Use a rubber mallet to seat each unit. Check level every 5 to 6 rows with a straight board and level. Do not walk on unset pavers.
- Make cuts as you go. Mark cuts as you approach edges or obstacles, and cut before placing. Keep cut pieces larger than half a paver width wherever possible.
- Compact the finished surface. Run a plate compactor (with a rubber or foam pad to protect the paver faces) over the entire surface in two perpendicular passes to fully seat all pavers. Finished surface may end up 1/8 to 1/4 inch above your control line elevations after compaction, which is normal.
- Apply joint sand. Sweep polymeric sand into the joints, compact again, sweep a second time to fill any low spots in the joints. Blow off all surface residue before activating.
- Activate polymeric sand. Mist the surface lightly with water. Do not flood it. Allow to cure undisturbed for 24 to 48 hours before allowing foot traffic.
Cutting details, finishing, sealing, and maintenance
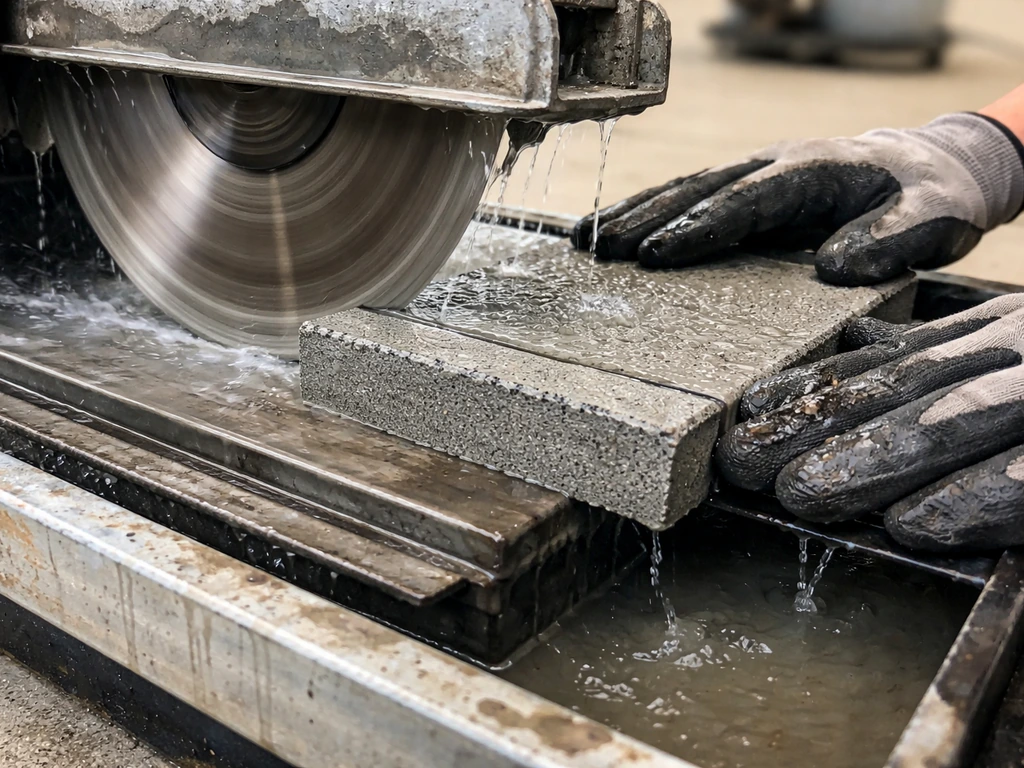
Cutting pavers accurately
For straight cuts, a wet saw (diamond blade) is the cleanest and most accurate option. You can rent one for around $60 to $80 per day. An angle grinder with a diamond blade works for occasional cuts but creates more dust and requires steady hands for accuracy. Always measure and mark each cut piece individually rather than assuming every border paver is the same size. Even a perfectly planned layout has slight variations that add up. Wear eye protection, hearing protection, and a dust mask when cutting.
For curves, score the cut line lightly with the saw and make a series of relief cuts perpendicular to the curve before cutting the arc. This reduces cracking and gives you a cleaner edge. If you're building a fully curved or round patio, plan for significantly more cut pieces and budget extra time accordingly. When you build a round paver patio, you will need extra attention to layout, cutting, and edge restraint so the curve stays locked in place building a fully curved or round patio.
Polymeric sand: the right way
Polymeric sand is the modern standard for paver joints. When activated with water, the polymer binders in the sand harden the joint, resisting washout, weed germination, and ant intrusion better than regular joint sand. Use a product with a joint width range that matches your actual joint size. Most products handle joints from about 1/8 inch up to 1 inch, with an ideal range around 1/8 to 3/8 inch. For example, blank" rel="noopener noreferrer">Techniseal’s SMARTSAND technical data sheet lists a joint width range from 1/16 in up to 1 in, with an ideal joint width around 1/16 to 3/8 in. If your joints are wider than 1 inch because of inconsistent paver spacing, that's a sign to adjust placement before jointing.
The biggest polymeric sand mistake is leaving polymer residue on the paver surface before you activate it with water. That residue dries into a white haze that's very hard to remove. Blow or broom every bit of sand off the paver faces before you mist. A leaf blower on low works well for this. Then mist lightly (not a heavy spray) and leave it alone for at least 24 hours. Foot traffic too soon will disturb the hardening joints.
To seal or not to seal
Sealing is optional for concrete pavers but genuinely useful for prolonging the color, making the surface easier to clean, and protecting the polymeric sand joints. Wait at least 90 days after installation before sealing so the pavers have had time to cure and any efflorescence (white mineral bloom) has had a chance to work itself out. Sealing over fresh efflorescence locks it in. For most residential concrete pavers, a re-seal every 3 to 5 years is a reasonable maintenance expectation, though the actual interval depends on sun exposure, traffic, and the specific product used. Natural stone pavers generally need sealing sooner and more often than concrete.
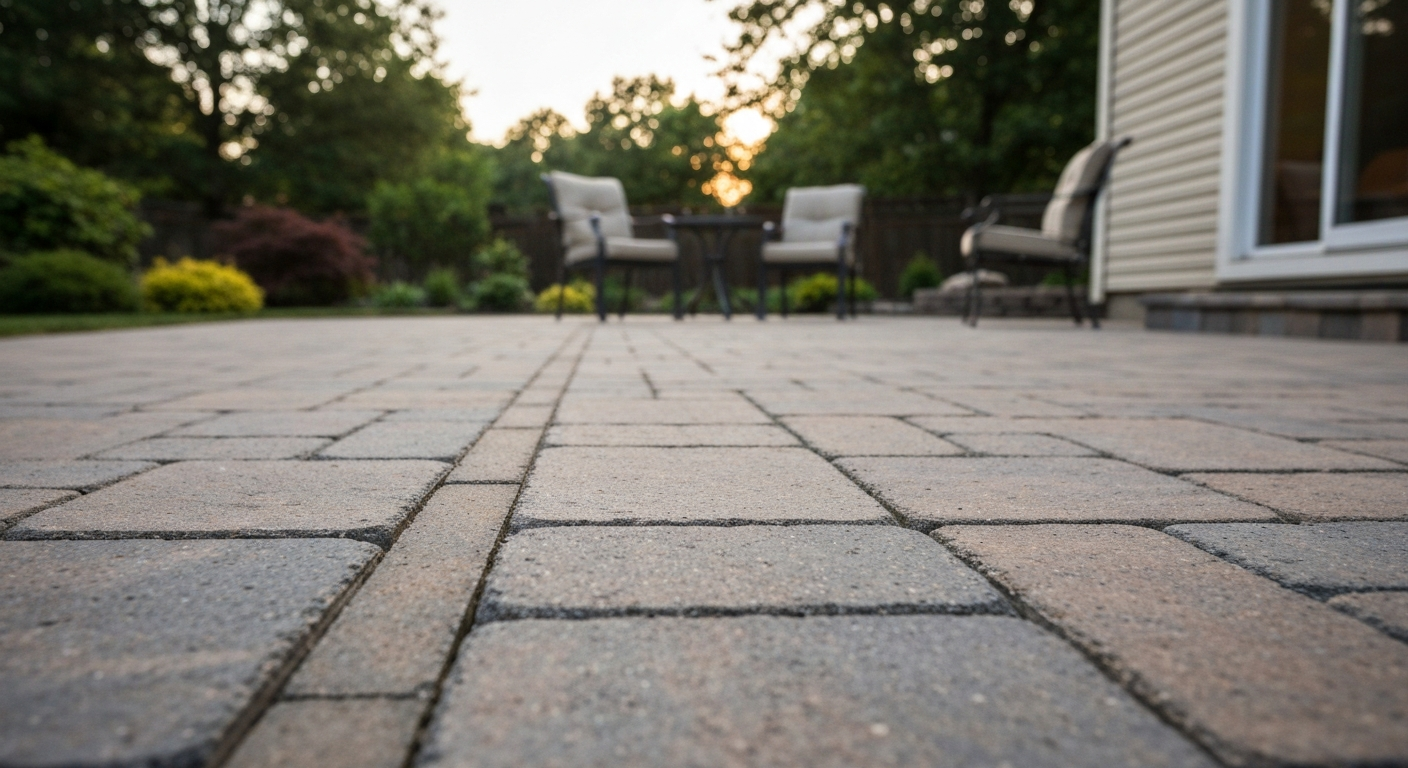
Ongoing maintenance to keep the patio level and clean
Once the patio is in and the polymeric sand has cured, maintenance is genuinely low effort if the base was done right. Expect to top off polymeric sand joints every 3 to 4 years as some material slowly works out over time. If you notice a paver sinking or rocking, pull it early and add a small amount of bedding sand beneath it before it causes a trip hazard or lets water into the joint. That's a 15-minute repair if you catch it early and a much bigger job if you ignore it for a season.
- Rinse the surface periodically with a garden hose to prevent debris buildup in joints
- Pull weeds immediately if any germinate in joints; polymeric sand reduces but doesn't eliminate this
- Inspect the perimeter edge restraints annually for any sections that have lifted or pulled away
- After any hard freeze-thaw winter, walk the surface and check for rocking pavers before spring
- Re-apply polymeric sand to any joints that look thin or have lost material, especially near drains or downspouts
A note on special patio designs
Everything in this guide applies to a standard flat ground-level patio built over native soil. If you're considering a patio without digging (floating over grass or gravel), a raised patio on a slope, a round or curved design, or a patio built directly over an existing concrete slab, each of those has its own specific adjustments to the process. If you’re aiming for how to build a paver patio without digging, pay special attention to leveling, weed control, and how you support the pavers so they don’t shift a patio without digging. The design principles are the same, but the base approach and edge handling differ in ways that are worth understanding before you start.
If your project turns out to be more complex than a flat rectangular patio on reasonably level ground, be honest with yourself about when to bring in a professional for at least the design consultation. Getting the base and drainage right on a challenging site is where most costly DIY mistakes happen. For a straightforward flat patio, though, everything you need is right here. Mark your corners, set your strings, dig to depth, compact the base, and start laying. You can realistically complete a 200 to 300 square foot patio over two solid weekends with one helper and rented equipment.
FAQ
How do I choose the right patio size when I’m not sure how much space seating will really take?
Use a two-step footprint check. First, allocate table clearance (minimum 3 to 4 feet around a dining set so chairs can pull out). Second, add a circulation margin from the house-side, typically 36 inches where people walk most often. If your remaining yard space is tight, consider separating functions (dining vs lounge) into zones instead of forcing one all-in-one layout.
What if my yard already slopes away from the house, but not enough to drain where I want?
Don’t rely on existing slope alone. You still set finished elevations using strings at the house-side and the far edge, then excavate to match that plan. If the required drainage cut would make one end uncomfortably deep, a raised or stepped patio often solves it better than trying to “split the difference” during excavation.
Should I slope the patio in one direction or can I crown it (slope from the center)?
For patios attached to or near a house, a single-direction slope away from the structure is usually simpler to control and easier to match with door thresholds and downspout locations. Crowning can work on freestanding patios, but it often complicates edge restraint and creates tricky low points at joints if your base depth varies.
How do I avoid ending up with tiny sliver cuts along one side of my paver pattern?
Before you excavate, do a quick “edge balance” test on paper. Measure the available width, account for your intended joint width, then rotate or shift the pattern centerline until both edges get reasonable cut sizes (aim for no edge that ends up under about half a paver width). Also confirm your border strategy, if you plan one, because borders change the math fast.
Do I really need a 1-inch drop below the door threshold, or is that flexible?
That drop matters because it protects the doorway from moisture wicking and helps keep surface water from tracking toward the house. If you must deviate, keep the patio level still below any siding or stucco clearance and verify you can maintain your designed slope. Otherwise you risk door clearance issues and drainage reversal during heavy rain.
What base changes if I plan to place a grill, heavy furniture, or park a small vehicle on part of the patio?
Treat high-load areas as zones. The article’s thicker paver suggestion is only part of the fix, you also want a more robust base in those spots (often increased stone depth and more careful compaction). Plan the vehicle or heavy equipment footprint first, then decide where to change paver thickness and where to thicken the base.
Can I lay pavers directly over existing concrete or cracked slabs?
Possible, but only if the slab is stable and not actively heaving or cracking further. Even then, the bigger issue is your finished height, which can conflict with door clearances and drainage connections. If the slab condition is uncertain, remove it or design a base over it with a drainage plan, because trapping water under new pavers can shorten the joint and base lifespan.
How do I know if my soil needs geotextile fabric under the gravel base?
Geotextile is most worth it when the native soil is clay-heavy or prone to water retention and pumping, because separation prevents the base from mixing with subgrade over time. If your soil is sandy and drains quickly, fabric is less critical. But even on sandy soils, fabric can still reduce long-term migration if the ground is frequently disturbed.
What’s the most common compaction mistake people make during the base prep?
Skipping compaction in lifts, especially when gravel depth is added all at once. Compacting should happen after each 2-inch layer, not just once at the end. Also avoid moistening too much (muddy material) or too little (dry, loose material), because both reduce how well the base locks in.
What edge restraint type should I use for a patio with curves?
Curves need closer restraint spacing to prevent bowing, and you generally want restraints that can conform without creating gaps. Even if you choose rigid plastic, the key is installing at tighter spacing on curves (commonly more frequent spikes) and ensuring the perimeter pavers are held snugly so sand cannot escape from beneath.
How much joint spacing should I aim for with polymeric sand?
Pick polymeric sand that matches your installed joint width, then build the layout to stay in that range. A typical target is about 1/8 to 3/8 inch. If your joints exceed 1 inch due to inconsistent spacing or a pattern that doesn’t fit, you’ll likely need to adjust paver placement now, because changing joint width after installation is difficult.
How do I prevent polymeric sand from staining or leaving haze on the paver surface?
Remove all loose sand from the paver faces before misting, then mist lightly. Heavy spray or letting the residual sand sit on the surface before activation is what causes the stubborn white haze. If haze still appears, avoid trying to “scrub it in” right away, focus on cleaning once it has fully set according to the product’s guidance.
Is sealing necessary, and what’s the right timing if I see efflorescence?
Sealing isn’t mandatory, but it can slow fading and make cleaning easier, especially if you want to preserve color. Wait at least 90 days after installation before sealing, and only consider sealing once efflorescence has worked out. Sealing too early can trap mineral bloom and make it persist longer.
What routine maintenance actually prevents the most serious problems later?
Two simple habits help a lot. First, inspect joints periodically (especially after freezes and heavy storms) and top off polymeric sand only where it’s missing. Second, if any paver rocks or sinks, lift it early, add a small amount of bedding sand, and reset it. Early repairs prevent joint widening and water intrusion that later requires base excavation.
How can I plan for weed control and stability if I’m doing a patio without full excavation?
When you don’t dig down to the standard section depth, stability depends heavily on leveling and how you support pavers so they do not shift, and weed control depends on using an appropriate weed barrier strategy. The key design decision is whether the “floating” approach will be stable under foot traffic, because without a proper base section, joint sand and paver edges tend to fail sooner.
When should I stop DIY and get help, even if my patio seems small?
Get at least a design consultation when the site has major grade changes (large elevation differences across the footprint), complicated drainage from downspouts or multiple slopes, or any uncertainty about utility lines and foundation clearances. These are the situations where correct string control, base depth decisions, and edge restraint details are hardest to “fix later.”
Next Articles
How to Build a Concrete Paver Patio Step by Step
Step-by-step DIY guide to build a concrete paver patio: layout, base on soil or slab, drainage, pavers, edging, leveling
How to Build a Paver Patio Without Digging: DIY Guide
DIY steps to install patio pavers without digging: prep, level, edge restraint, lay, cut, joint sand, compact and mainta
How to Use Quikrete Patio Paver Jointing Sand: Guide & Tips
How to use Quikrete Patio Paver Jointing Sand: step-by-step application, tools, timing, coverage, and care.