
Most old patio pavers don't belong in the trash. Depending on their condition, you can sell them, donate them, repurpose them around your yard, or recycle them as crushed aggregate, and even when disposal is the only option, a few phone calls to your local transfer station or a concrete recycler will usually keep them out of a landfill. This guide walks you through every step: deciding whether disposal is even necessary, safely removing and preparing the pavers, estimating how much material you're dealing with, and getting it off your property in the most practical (and legal) way possible.
How to Dispose of Patio Pavers: Step-by-Step Guide for DIY Homeowners

Felix Rowe
24 Jul 2026
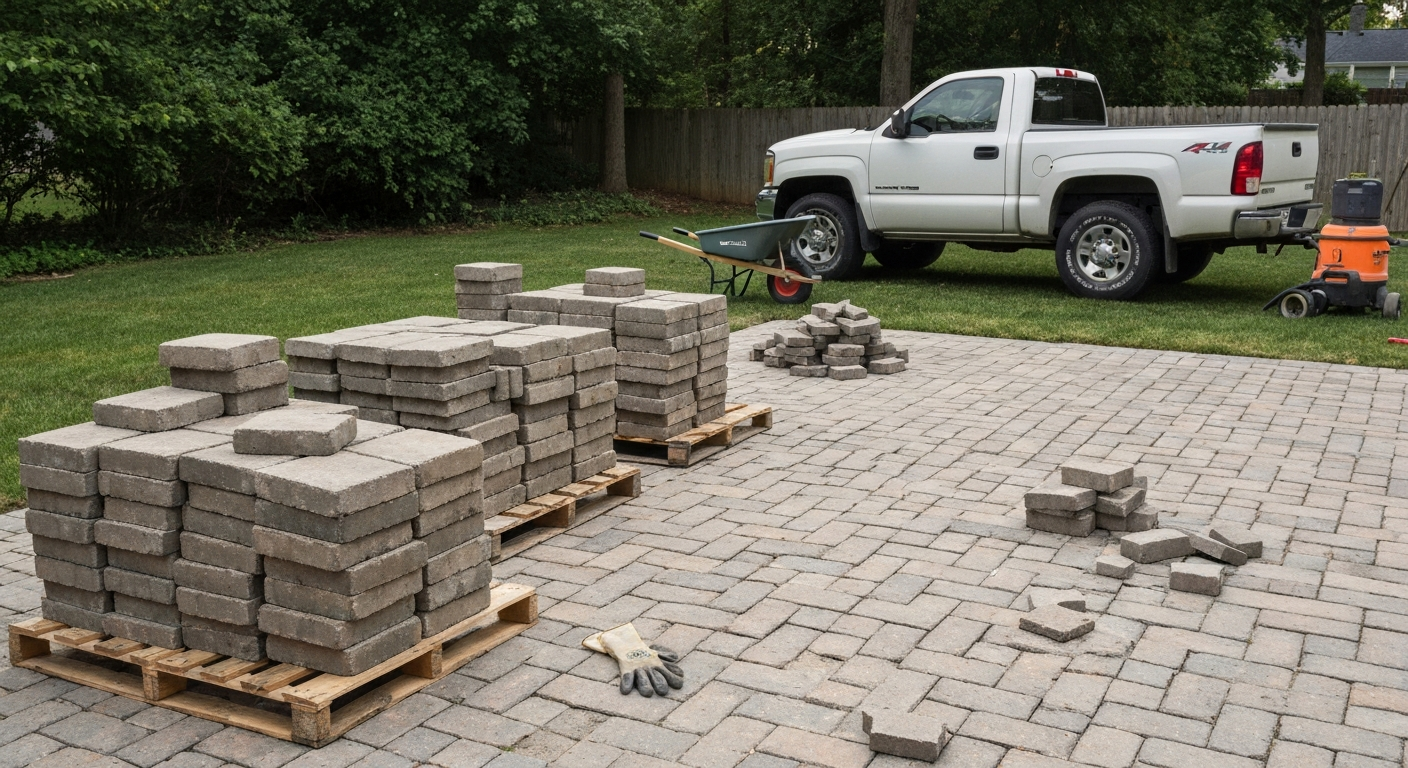
Dispose, repair, or repurpose? Making the right call first
Before you load a wheelbarrow, it's worth spending five minutes figuring out whether you actually need to dispose of anything. A paver that looks like a candidate for the dumpster might just need re-leveling, a fresh joint sand fill, or a good pressure wash. Full disposal makes sense when the surface is beyond practical repair, when you're redesigning the space entirely, or when drainage problems have undermined the base so thoroughly that pulling everything up is the only real fix. In those cases, disposal is the right move. But if you're dealing with a few sunken or cracked pavers after a hard winter, removal and repair will save you time and money.
Quick decision flow: repair, repurpose, or dispose
Work through this checklist honestly. Each question narrows your best path.
- Are fewer than 20% of the pavers cracked, chipped, or sunken? If yes, consider repair rather than full removal — spot-lifting and re-bedding individual units is a weekend job.
- Is the base (compacted aggregate) still intact and draining well? If yes, a full teardown is probably unnecessary.
- Are the pavers still intact, uniform in size, and stackable? If yes, they have real resale or donation value — skip the dumpster entirely.
- Do you have a second project (walkway, edging, raised bed border, fire pit surround) where these pavers could be reused? If yes, set them aside rather than disposing of them.
- Are the pavers heavily stained, crumbled, spalling, or contaminated with oil or sealers? If yes, disposal or crushing for aggregate is likely the best outcome.
- Is the full patio area coming out because of a redesign or drainage overhaul? If yes, proceed to the full removal and disposal steps below.
Safety essentials before you touch a single paver
Removing and cutting concrete pavers isn't dangerous if you gear up properly, but it's easy to underestimate the hazards. The biggest one is silica dust. Cutting, grinding, or even aggressively chipping concrete and stone releases respirable crystalline silica, which causes serious, irreversible lung damage with repeated exposure. OSHA's construction silica standard (29 CFR 1926.1153) sets an action level of just 25 micrograms per cubic meter of air over an 8-hour shift. That's a concentration you can easily exceed with a grinder and no dust control on a calm day. Wet cutting dramatically reduces airborne dust, but creates alkaline slurry you have to manage separately. Dry cutting with a HEPA vacuum extraction system is the other approach. Either way, a respirator rated at least N95 (P100 is better for sustained work) is non-negotiable when any cutting or breaking is happening.
- Safety glasses or goggles: flying chips are the most common injury during paver removal
- Work gloves: heavy leather or cut-resistant; paver edges are sharp and heavy units can shift unexpectedly
- Steel-toed boots: a single 2.5-inch concrete paver weighs roughly 31 lb per square foot — a dropped stack hurts
- N95 or P100 half-face respirator: required any time you're cutting, grinding, breaking, or stirring up dry joint sand
- Hearing protection: angle grinders and wet saws both exceed 90 dB
- Knee pads: you'll spend a lot of time at ground level
One important note on wet cutting with an angle grinder: most corded angle grinders are not approved for wet use. Bosch and other manufacturers explicitly warn against it because of electric shock risk. If you want wet cutting for dust control, use a table-mounted wet masonry saw or a walk-behind saw, not a handheld grinder with water. More on that in the cutting section below.
Tools and equipment you'll need
You won't need everything on this list for every job, but it's worth knowing what each tool is for so you can rent or borrow accordingly. Most of the specialty items (wet saw, plate compactor, pressure washer) are available at any tool rental shop for $50–$150 per day.
| Tool | What it's for | Buy or rent |
|---|---|---|
| Pry bar or paver puller | Lifting the first paver and popping edged units loose | Buy (cheap) |
| Brick hammer or mason's hammer | Controlled tapping and breaking single units | Buy |
| Flat spade shovel | Removing bedding sand and loose base material | Buy |
| Wheelbarrow | Moving pavers and base material to staging area | Buy or rent |
| Shop vacuum (HEPA-rated) | Collecting joint sand and dry cut dust | Rent or buy |
| Wet masonry saw (table or walk-behind) | Straight cuts on many pavers | Rent |
| Angle grinder with diamond blade | Curved or small cuts, dry with dust extraction only | Rent or buy |
| Rotary hammer with plug-and-feather set | Controlled splitting of thicker units | Rent |
| Pressure washer | Cleaning pavers before resale or reuse | Rent |
| Plate compactor | Re-compacting base if reinstalling | Rent |
Step-by-step removal checklist
This sequence keeps the job organized and reduces the chance of damaging pavers you want to save or sell. For a detailed, step-by-step walkthrough, see how to remove patio pavers. Work methodically: rushing the early steps usually means more cleanup time at the end.
- Clear the surface: remove all furniture, pots, and accessories. Sweep the patio clean so you can see edge restraints and joint lines clearly.
- Remove edge restraints: plastic or aluminum edge restraints are typically fastened with spikes. Use a pry bar to lever them up. This frees the perimeter row of pavers and makes the whole field easier to lift.
- Start at a corner or perimeter: slide a pry bar or flat screwdriver into the joint at a corner paver and lever it up. That first paver is the hardest — once it's out, you have a gap to work from.
- Work row by row toward the center (or center outward): either direction works. Consistent rows make stacking and counting easier if you're planning to resell.
- Stack as you go: lay pavers flat in stacks of 4–6, off to the side on a flat surface or pallet. Don't stack more than 8–10 high or they become unstable.
- Collect joint sand separately: use a flat shovel and HEPA shop vac to gather polymeric or plain joint sand. This keeps it out of your base material and reduces cleanup.
- Remove bedding sand: shovel the sand setting bed (typically 1 inch deep) into a wheelbarrow. This material can usually be reused or disposed of as clean fill.
- Inspect and remove the base: check the compacted gravel or crushed stone base for contamination or failure. If it's stable and draining well, you may be able to leave it in place. If it's heaved, contaminated, or compromised by poor drainage, remove it with a flat shovel and wheelbarrow.
- Final cleanup: sweep or vacuum any remaining sand, dust, or debris from the excavated area.
Estimating volume and weight before you haul anything
This step matters more than most people think. Dumpsters have weight limits (usually 2–4 tons for a standard 10-yard container), trucks have payload ratings, and disposal facilities charge by the ton. Underestimating weight is how a $300 dumpster rental turns into a $500 one with an overage fee. Concrete has a density of roughly 150 lb per cubic foot. Using 150 lb/ft³, common homeowner paver thickness weights are: 2.0" ≈ 25.0 lb/ft²; 2.5" ≈ 31.3 lb/ft²; 3.0" ≈ 37.5 lb/ft² (compute = 150 × thickness(ft)). For a solid paver, that translates directly to weight per square foot based on thickness.
| Paver thickness | Weight per square foot | Weight per 100 sq ft | Weight per 200 sq ft |
|---|---|---|---|
| 2.0 inches | 25.0 lb | 2,500 lb (1.25 tons) | 5,000 lb (2.5 tons) |
| 2.5 inches | 31.3 lb | 3,130 lb (1.57 tons) | 6,260 lb (3.13 tons) |
| 3.0 inches | 37.5 lb | 3,750 lb (1.875 tons) | 7,500 lb (3.75 tons) |
To calculate your total: measure the patio's square footage (length × width for a rectangle; break irregular shapes into sections), identify your paver thickness (check leftover pavers or the original product sheet if you have it), then multiply square footage by the weight-per-square-foot from the table above. Divide by 2,000 to get tons, or by 2,400 to get approximate pallet-equivalent loads. Natural stone pavers (granite, bluestone) run slightly heavier: granite flagstone at 2 inches is closer to 30 lb per square foot, using a density of about 165–170 lb per cubic foot. If you're unsure of material, weigh a single paver on a bathroom scale and multiply by unit count.
As a practical benchmark: a pallet of new concrete pavers weighs roughly 2,400–2,800 lb and covers 75–100 square feet. Your demolished pile will be close to that range per equivalent area, though loose stacking adds some volume. A standard pickup truck bed holds about 1,000–1,500 lb safely, so a 200-square-foot patio of 2.5-inch pavers (approximately 6,260 lb) will take four to six truck loads, or one appropriately sized dumpster.
Preparing pavers for transport, sale, or donation
Clean pavers sell. Dirty, sand-crusted ones with no labeling usually get ignored on Craigslist or Facebook Marketplace, even when they're perfectly usable. A half-hour of pressure washing and ten minutes of organization before you list them will make the difference between selling the whole pile and hauling it away yourself.
- Pressure wash both faces: use a surface cleaner attachment or a 25-degree tip at 2,000–3,000 PSI. This removes sand, dirt, efflorescence, and most organic staining. Let pavers dry fully before stacking.
- Sort by condition: separate intact, undamaged units from chipped or cracked ones. Buyers will pay for clean, uniform pavers. Cracked units are still useful for aggregate or crushing but shouldn't be mixed into a 'for sale' pile.
- Stack uniformly on pallets or plywood sheets: stack flat, same orientation, 4–6 layers high. Uniform stacks are easier to count, photograph, and move with a hand truck or pallet jack.
- Measure and record your count and dimensions: a buyer will want to know paver size (e.g., 4×8 inches, 6×6 inches, 12×12 inches), thickness, approximate count, and color. Photograph a stack with a tape measure for scale.
- Label clearly for listings: 'Approx. 120 units, 4×8 concrete pavers, 2.5 inches thick, tan/buff color, used condition, buyer must load and haul' covers everything a serious buyer needs.
- List on multiple platforms: Facebook Marketplace, Craigslist, Nextdoor, and your local Habitat for Humanity ReStore are the highest-traffic channels for used building materials. Many ReStores will arrange free pickup for pallets of usable pavers.
Disposal routes and what each one costs
If the pavers aren't worth selling or donating, you still have several legitimate options before resorting to a landfill. Concrete and masonry are among the most recyclable construction materials, and most metro areas have at least one facility that accepts them.
| Disposal route | Best for | Typical cost | Notes |
|---|---|---|---|
| Sell or donate (Marketplace, ReStore) | Intact, clean, uniform pavers | $0 (or you earn money) | Buyer typically hauls; Habitat ReStore may pick up |
| Repurpose on your own property | Any structurally sound paver | $0 | Edging, walkways, raised bed borders, crushed aggregate |
| Municipal bulky waste or C&D drop-off | Small to mid loads (under 2 tons) | $0–$50 per load | Call ahead; not all accept concrete |
| Concrete/masonry recycler | Any quantity of clean concrete | $10–$30 per ton | Crushed into aggregate; check Earth911 or call local quarries |
| Rental dumpster (10–20 yd) | Full patio teardowns, 200+ sq ft | $300–$600 all-in | Confirm concrete is allowed; weight overage fees apply |
| Contractor haul-away | Large volume or no vehicle access | $200–$800+ | Get quotes; some contractors bundle with demo labor |
| Landfill (general C&D) | Last resort for contaminated material | $50–$100 per ton | Check local regulations; some counties restrict concrete in MSW |
One thing worth checking before you rent a dumpster: many dumpster companies accept concrete but impose a lower weight limit on that container because concrete is so heavy. A 10-yard dumpster rated for 2 tons of concrete is very different from a 10-yard dumpster for general debris rated at 4 tons. Ask specifically about their concrete/masonry policy and the per-ton overage rate before you book.
Environmental and permit considerations
For most homeowners doing a standard patio removal, permits are not required just to dismantle hardscaping. But if your project connects to stormwater drainage or involves significant grading, check with your local building department, some municipalities require a grading or land disturbance permit when you're disturbing more than a few hundred square feet. The bigger regulatory concern for DIYers is actually the wet-cut slurry. When you run a masonry saw with water, the runoff is highly alkaline concrete washwater. The EPA's stormwater Best Management Practices and most local MS4 stormwater programs explicitly prohibit discharging that slurry to storm drains, gutters, or nearby waterways. Keep it at least 50 feet from any storm drain, capture it in a lined container or low-lying plastic sheeting, let the solids settle, and dispose of the solidified material as solid waste. If you're only cutting a few pavers, the volume is manageable. If you're running a walk-behind saw for hours, you'll need an actual containment plan.
Cutting and breaking strategies when you need to resize or split pavers
You may need to cut pavers during removal (to free units that were installed against a wall or curved edge), during repurposing (to fit pavers into a new project), or when breaking oversized pieces down for easier disposal or crushing. There are four main approaches, and the right one depends on how many cuts you need, what tools you have, and whether you're working toward reuse (clean cuts matter) or just breaking material down for disposal (clean cuts don't). For techniques on cutting curved shapes, see how to cut patio pavers in a circle.
Wet masonry saw (table or walk-behind)
This is the most precise and dust-controlled method for straight cuts. A rented table-mounted wet saw handles most homeowner projects well. The diamond blade cuts through even thick pavers cleanly, the water keeps dust down, and you can work quickly once you have a rhythm. It's the right tool if you're making more than 10–15 cuts, preparing pavers for resale with clean edges, or cutting 3-inch-thick or natural stone pavers that would be slow and rough with a grinder. The slurry management requirement applies here, capture and contain all washwater.
Angle grinder with diamond blade (dry, with dust extraction)
An angle grinder with a diamond blade is faster to set up than a wet saw and handles curved cuts, notches, and edge trimming well. Use it dry with a HEPA vacuum extraction attachment, not with water. This is the correct approach for a few edge cuts or irregular shapes. Do not wet-cut with a corded angle grinder, it creates an electric shock hazard that manufacturers explicitly warn against. Dust control here relies entirely on extraction and your respirator, so don't skip either.
Chisel and brick hammer (hand splitting)
A cold chisel or bolster chisel with a brick hammer is the low-tech option for splitting pavers when a rough break is acceptable. For step-by-step guidance on scoring and splitting pavers with hand tools, see how to cut patio pavers with a chisel. Score a line across both faces of the paver, then strike firmly along the scored line. It works reliably for standard 2–2.5 inch concrete pavers and requires no power, no dust management equipment, and no rental costs. You'll get a rougher edge than a saw cut, so it's best for disposal prep, aggregate breaking, or rustic applications where exact dimensions don't matter. Thicker pavers and natural stone are less predictable with this method.
Rotary hammer with plug-and-feather (controlled splitting)
For thicker units or when you need a cleaner split than a chisel produces but don't have a wet saw, plug-and-feather (also called wedge-and-shim) sets work well. For step-by-step guidance on drilling accurate holes for plug-and-feather or anchors, see how to drill into patio pavers. Drill a line of holes along the intended split line with a rotary hammer, insert the metal wedges (feathers) and plug into each hole, then tap them in sequence with a hammer until the stone fractures cleanly along the line. This is more effort than it sounds for 2-inch concrete pavers (a chisel is faster), but it's genuinely useful for splitting thicker natural stone slabs where chisel work is unreliable.
| Method | Best for | Cut quality | Dust control | Cost/day (rental) |
|---|---|---|---|---|
| Wet masonry saw | Many straight cuts, thick or stone pavers | Clean, precise | Wet slurry (must contain) | $75–$150 |
| Angle grinder + diamond blade | Few cuts, curves, notches | Good | HEPA vac + respirator required | $30–$60 (grinder), $15–$30 (blade) |
| Chisel and brick hammer | Breaking for disposal, rough splits | Rough | Minimal dust if not grinding | $0–$20 (tools) |
| Rotary hammer + plug-and-feather | Controlled splitting of thick units | Moderate-clean | Drilling dust; use respirator | $50–$100 |
Practical reuse ideas worth considering before you dispose
Even pavers that aren't worth selling often have a second life on your own property. If you're wondering what to do with extra patio pavers, consider a few easy DIY reuse projects or local donation and recycling options before hauling them away. A handful of leftover or cracked pavers can line a garden bed, form a simple stepping stone path, create a fire pit base, or be crushed into drainage aggregate for a French drain. If poor drainage is an issue, see our guide on how to drain water from patio pavers for solutions like French drains and gravel beds. Broken pieces work as edging for planting areas, they don't need to be pretty to hold soil in place. If you have a gravel driveway or pathway, crushed concrete pavers function well as fill or topping material. These uses aren't glamorous, but they'll save you haul trips and disposal fees.
Realistic cost summary for a full patio teardown and disposal
Costs vary by location, patio size, and which disposal route you choose. These ranges are realistic for a typical 200–400 square foot residential patio as of mid-2026.
| Task or expense | Low estimate | High estimate | Notes |
|---|---|---|---|
| PPE (gloves, goggles, respirator) | $20 | $60 | One-time purchase; respirator filters need replacement |
| Tool rental (pry bar, wet saw, pressure washer) | $75 | $250 | Per day; shop around for package deals |
| Dumpster rental (10–15 yd concrete-rated) | $300 | $600 | Confirm concrete policy and weight limits before booking |
| Concrete recycler tip fee | $10/ton | $30/ton | If hauling yourself; free at some facilities |
| Contractor haul-away (labor + truck) | $200 | $800+ | Highly variable by region and volume |
| Habitat ReStore or donation pickup | $0 | $0 | Free; must schedule in advance |
For a 200-square-foot patio with 2.5-inch pavers, roughly 3,100 lb, or just under 1.6 tons, a homeowner who rents a wet saw for cutting, pressure washes the good pavers for resale, and hauls the remainder to a local concrete recycler in a rented trailer can realistically keep total out-of-pocket costs under $200, and might offset some of that with paver sales. The expensive path is calling a contractor to demo and haul everything on short notice, which can easily reach $800–$1,200 for a job this size.
When to call a pro instead of DIYing it
Most patio paver removals are well within a capable homeowner's reach. You might want professional help if the patio is over 600 square feet and you don't have access to a dump truck or large dumpster, if the pavers were set in mortar over a concrete slab (a very different and more labor-intensive removal), if there are buried utilities or drainage systems running under or near the patio, or if the removal is part of a larger project where coordinated scheduling matters. Getting one or two contractor quotes for teardown-and-haul is always worth the phone call, sometimes the price is lower than expected, and knowing the number helps you decide whether DIY is worth your weekend.
FAQ
What is the first thing I should do before removing patio pavers?
Survey and plan: measure patio square footage, identify paver material (concrete vs natural stone), check for buried utilities, take photos, and locate property lines. Measure length × width to get ft². Note paver thickness (typical 2.0"–3.0") or count units per sq ft from product info if available — you’ll use this to estimate weight and disposal needs. Contact local public works or call 811 if utilities may be present.
How do I estimate the weight of my pavers so I can plan transport/disposal?
Use density-based estimates or manufacturer pallet data. Common concrete density ≈150 lb/ft³. Convert thickness to ft and compute weight/ft² = 150 × thickness(ft). Examples: 2.0" (0.1667 ft) ≈ 25 lb/ft²; 2.5" (0.2083 ft) ≈ 31.3 lb/ft²; 3.0" (0.25 ft) ≈ 37.5 lb/ft². Multiply by patio ft² to get total pounds, then divide by 2,000 for tons. Alternatively, if you have pallets, use weight-per-pallet (often 2,400–2,800 lb) and coverage-per-pallet listed on product sheets.
What step-by-step checklist should I follow to dismantle a paver patio safely and efficiently?
Step-by-step removal checklist: 1) Prep: mark edges, set a staging area, gather tools and PPE. 2) Remove edge restraints (plastic/metal/stone) and straps. 3) Loosen and lift perimeter pavers with a pry bar or paver puller; work row‑by‑row or center‑out. 4) Stack lifted pavers on pallets or in bins for reuse, donation, or hauling. 5) Collect loose joint sand with a stiff broom or shop vacuum (HEPA for dusty work). 6) Remove bedding sand (shovel) and stockpile if reusing. 7) Remove base aggregate if required (shovel, wheelbarrow, mini‑excavator for large jobs). 8) Clean pavers with a pressure washer if keeping or donating; capture wash water/slurry. 9) Load for transport: use pallets, contractor bags, or a rented dumpster. 10) Restore area or prepare for replacement (compact subgrade or install new base). Follow local disposal route selection (see decision flow).
What tools and PPE will I need?
Tools: pry bar or paver puller, flat shovel, wheelbarrow, brick/mason’s hammer, sledge (for stubborn pieces), angle grinder with diamond blade, wet saw rental (for lots of straight cuts), drill and plug/feather tools for splitting, plate compactor (if reinstalling), shop vacuum (HEPA) for dust. PPE: N95 or N100/respirator for silica (or higher where required), safety glasses, hearing protection, gloves, steel‑toe boots, long sleeves, knee pads. For wet cutting also wear slip‑resistant footwear and waterproof protection. Use dust controls (wet cutting or HEPA vac) per OSHA silica rules.
How should I cut or break pavers — what methods are best for different needs?
Cutting method comparisons: - Wet masonry saw (table or walk‑behind): Best for many straight, clean cuts; majority silica control if used wet; rental recommended; creates slurry that must be contained. - Angle grinder with diamond blade: Good for spot cuts, small jobs, and edge trimming; portable; produces airborne dust — use dust extraction or full PPE; generally NOT for wet cutting with electric grinders. - Rotary hammer/drill + plug-and-feather or drilled hole line + sledge: Useful for splitting large natural stone or thick concrete; low tech; produces less fine dust but still dusty. - Chisel & hammer: For small adjustments, thin pavers, or removing joints. Safety/dust notes: prefer wet cutting or vacuum extraction to reduce respirable crystalline silica. Never discharge slurry to storm drains — capture and manage slurry per EPA BMPs.
How do I manage slurry and silica dust to comply with environmental and safety rules?
Dust: use engineering controls first — wet cutting or HEPA‑equipped vacuum per OSHA 1926.1153; wear an appropriate respirator if controls are insufficient. Slurry: capture all washwater and slurry in leak‑proof containers or lined pits; do not discharge to storm drains or soil near waterbodies; allow solids to settle, decant clear water only if permitted, or let solids harden and dispose as construction waste. Follow EPA concrete washout BMPs and local MS4/municipal guidance; when in doubt, bag dried solids and take to C&D recycling or approved landfill.
Next Articles
What to Do With Extra Patio Pavers: DIY Reuse Ideas
Quick DIY ideas to reuse extra patio pavers, from extensions and paths to repairs, storage, matching, and disposal.
How to Remove Patio Pavers: DIY Step-by-Step Guide
Step-by-step how to remove patio pavers safely, clear bedding sand and base, fix edging, prep for relaying or disposal.
How to Cut Patio Pavers Today: Tools, Steps, and No-Saw Options
Step-by-step ways to cut cement patio pavers today, including no-saw options, curved cuts, and rubber paver tips.