
You can install a permeable paver patio yourself over a weekend or two, but you need to build it differently than a standard patio. The key difference is the base: instead of compacted sand and dense gravel, you use open-graded (washed, gap-graded) aggregate layers that hold stormwater in their voids and let it slowly infiltrate into the soil below. Get the base right and the rest of the job follows a familiar rhythm of laying, cutting, compacting, and filling joints. Skip the open-graded base and you have a decorative patio that drains no better than concrete.
How to Install Permeable Paver Patio: DIY Step-by-Step Guide

Felix Rowe
25 Jul 2026
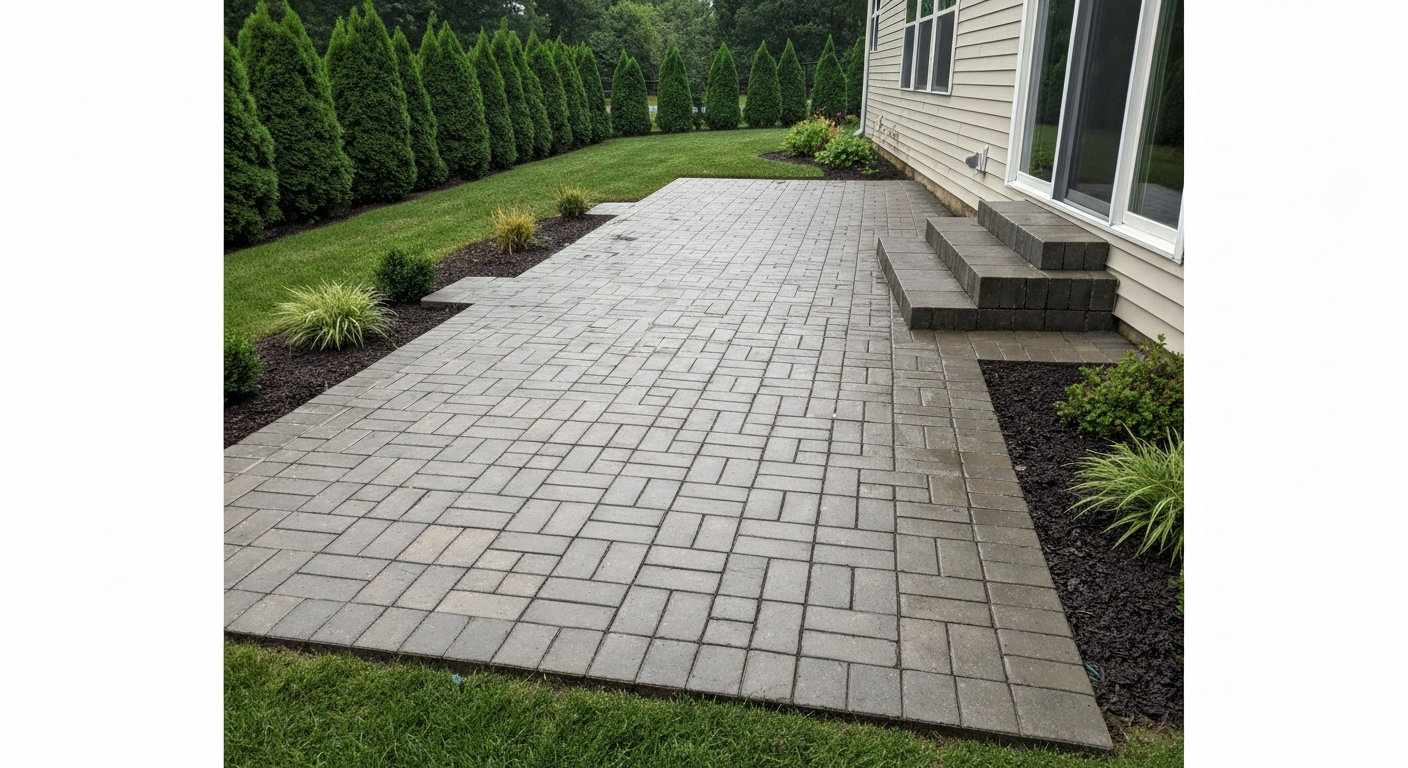
Who this guide is for and what the project actually involves
This guide is written for homeowners with some DIY confidence who are comfortable renting equipment, reading a slope with a level, and doing physical work over multiple days. You do not need prior paver experience, but you should be realistic: a 200-square-foot permeable patio is a solid weekend project for two people. A 400-square-foot patio with edge cutting will more likely run three to four days. The skill level is intermediate. The hardest parts are correctly sizing and sourcing the open-graded aggregate layers, managing slope for drainage, and cutting pavers cleanly along borders.
The broad phases are: plan and permit, evaluate and prep the site, build the open-graded base, lay pavers in pattern, cut borders, compact, install edge restraints, and fill joints. Each phase has checkpoints. If you rush any phase, the ones after it suffer, and settling or clogging problems down the road trace back almost every time to a shortcut in the base.
| Phase | Typical Time (200 sq ft) | Typical Time (400 sq ft) |
|---|---|---|
| Planning, permits, materials sourcing | 3–5 days (inc. wait time) | 3–5 days (inc. wait time) |
| Excavation and subgrade prep | 4–6 hours | 1–1.5 days |
| Geotextile and base aggregate | 3–4 hours | 6–8 hours |
| Laying pavers | 4–6 hours | 1–1.5 days |
| Cutting, edge restraints, compaction | 2–4 hours | 4–6 hours |
| Joint infill and cleanup | 2–3 hours | 3–4 hours |
Permits, codes, and what your neighbors' drainage has to do with it
Most homeowners assume a backyard patio needs no permit. That is often true for small projects, but the threshold varies a lot by jurisdiction. Some municipalities exempt projects under 500 square feet from stormwater review entirely. Others, like communities in the San Francisco Bay Area operating under the Municipal Regional Stormwater Permit (MRP Provision C.3), require Low Impact Development measures for projects creating or replacing 2,500 square feet or more of impervious surface. Because permeable pavers are considered a LID best management practice by the EPA, they can actually help you meet stormwater requirements rather than trigger them, but you still need to confirm your local rules before you dig.
Three things to verify before you start: First, call 811 (the national Dig Safe line) at least three business days before any excavation. Utility strikes are dangerous and avoidable. Second, check with your local building or public works department about permits and stormwater ordinances. Ask specifically about cumulative impervious area rules, because adding a patio to an existing driveway and walkway can push you over a threshold even if the patio alone would not. Third, if your patio is near your house foundation, note that the International Residential Code (IRC R401.3) requires finished grade to slope away from foundation walls, with a fall of at least 6 inches in the first 10 feet. Your permeable patio cannot sit flat against the house and pool water near the foundation, and most local building departments enforce this.
HOA rules are a separate layer. Some HOAs have aesthetic requirements (uniform paver color, specific joint appearance) and some have stormwater language that either encourages or complicates permeable installations. Read your CC&Rs and get any required approvals in writing before you buy materials.
Site evaluation: soil type, slope, and whether your ground will actually accept water
Permeable pavers work best when the native soil beneath them can accept at least some of the water that infiltrates through the base. The standard field method for measuring soil infiltration rate is ASTM D3385 (double-ring infiltrometer), and while you are unlikely to run a formal test as a DIYer, you can do a simple jar or percolation test yourself. Dig a hole about 12 inches deep, fill it with water, let it drain, then fill again and time how long it takes to drop one inch. If it takes more than an hour per inch, your soil is slow-draining (typically clay). That matters because slow subgrade infiltration means you need either a deeper reservoir base to hold water longer, or you need to install an underdrain pipe at the bottom of the base to carry excess water to a safe discharge point.
Slope matters both for drainage and for structural stability. You want a minimum cross-slope of 1% (1/8 inch per foot) across the patio surface so surface water does not pond, and you want to slope away from your house. Two percent (1/4 inch per foot) is a common target and keeps you within ADA accessible-route requirements (maximum 2% cross slope) if accessibility is a goal. If your yard has a steeper natural slope, you can either cut and fill to create a level pad, terrace the site, or design a raised section. Slopes above about 5% usually call for more structural design work and are outside comfortable DIY territory without engineering input.
Soil type also affects your base depth. The FHWA TechBrief on Permeable Interlocking Concrete Pavement (FHWA-HIF-19-021) is clear that base and subbase thickness must satisfy both hydrologic storage and structural loading. For a residential pedestrian patio on reasonably draining soil, a 6-inch open-graded subbase (ASTM No. 2 or No. 57 stone) plus a 4-inch base layer is a common starting point. On slow clay soil, 8 to 12 inches of reservoir depth may be needed. On well-draining sandy soil, you may get away with 4 to 6 inches total base. When in doubt, go deeper rather than shallower.
Designing for permeability: getting the grade and drainage path right
Before you place a single paver, sketch your drainage design on paper. You need to answer three questions: Where does the water enter the patio surface? Where does it go once it infiltrates through the pavers and base? And what happens during a heavy storm when the base is temporarily full?
The EPA classifies permeable pavement into three system types: full infiltration (water goes entirely into the subgrade soil), partial infiltration (some goes into soil, excess exits through an underdrain), and no infiltration (impermeable liner prevents any soil contact, all water exits via underdrain). For most residential DIY patios on normal suburban soil, full or partial infiltration is appropriate. Full infiltration is simpler to build and cheaper; partial infiltration adds an underdrain pipe but handles heavy rain events better. If your patio is directly adjacent to your foundation (closer than about 10 feet), a no-infiltration design with a liner and underdrain is worth considering to avoid directing water toward the footing.
The underdrain is typically a perforated 4-inch PVC pipe laid at the bottom of the base aggregate, sloped at 0.5% to 1% toward a daylight point (a pop-up emitter in the yard, a rain garden, or a storm inlet). Size the overflow outlet generously: a clogged outlet on a full-infiltration system during a 2-inch storm means water has nowhere to go and will back up. For step-by-step instructions on how to install paver patio drainage, consult the detailed how to install paver patio drainage guide. Mark your planned drainage path on your site sketch and physically walk it to confirm there is an unobstructed downhill route.
Choosing your permeable paver type: a comparison that actually helps you decide
There are several legitimate permeable paver options for residential patios, and they differ significantly in appearance, performance, cost, and installation complexity. Here is a practical breakdown.
| Paver Type | How It Drains | Typical Cost (materials only) | Lifespan | Best For | Limitations |
|---|---|---|---|---|---|
| Permeable Interlocking Concrete Pavers (PICP) | Through open joints filled with No. 8 stone; reservoir base below | $5–$15/sq ft | 30–50 years | Driveways, high-traffic patios, formal designs | Requires precise base; joint stone needs occasional recharging |
| Permeable Pavestone / Porous Concrete Pavers | Through the paver face (porous material) and joints | $4–$12/sq ft | 20–40 years | Patios with moderate traffic, formal look | Surface can clog faster than open-joint PICP; harder to DIY-clean |
| Grid / Grass Pavers (plastic or concrete) | Through large open cells filled with gravel or soil/seed | $1–$4/sq ft (plastic); $3–$8 (concrete) | 10–25 years (plastic); 20–40 years (concrete) | Overflow parking, low-traffic paths, eco-friendly look | Less formal appearance; grass cells need mowing and irrigation |
| Resin-Bound Pavers | Through permeable resin matrix bonded to aggregate | $6–$15/sq ft installed | 10–25 years | Smooth decorative surfaces, accessible routes | Typically contractor-applied; UV yellowing on some products; harder to DIY |
| Rubber Pavers | Through gaps between units or perforated surface | $2–$8/sq ft | 10–20 years | Low-traffic, play areas, step pads | Not suitable for primary patio driveways; aesthetic limitations |
For most homeowners reading this guide, permeable interlocking concrete pavers (PICP) are the best choice. They offer the most proven long-term performance, the widest design selection from manufacturers like Techo-Bloc, Unilock, and Belgard, and the clearest installation standards from the Interlocking Concrete Pavement Institute (ICPI). The open joints filled with ASTM No. 8 washed stone provide high surface infiltration rates, and when a joint clogs, you can vacuum and recharge it without replacing any pavers.
Plastic grid pavers make sense if you want a low-cost overflow parking pad or a stabilized gravel path and do not need a formal patio look. Resin-bound surfaces are beautiful and fully accessible but are genuinely difficult to DIY correctly, so consider whether that job belongs in a different column. For step-by-step guidance on resin-bound finishes, see how to install resin patio pavers for proper mixing, spreading, and curing techniques. If you are curious about rubber pavers for a secondary purpose like step pads or a kids' play zone near the patio, that is a reasonable application covered separately. For step-by-step instructions on using rubber pavers in a patio, see a focused guide on how to make a patio with rubber pavers. If you want step-by-step instructions for that material, see our guide on how to install rubber patio pavers.
Materials checklist and how to calculate what you need
Measure your patio footprint in square feet, then add 5% to 10% for cuts and breakage. Use that adjusted number in every calculation below.
- Permeable pavers: adjusted square footage, ordered by the square foot or pallet. A standard pallet covers 80–100 sq ft depending on paver size. Ask your supplier about the exact coverage before ordering.
- Bedding/choke course aggregate (ASTM No. 8 washed stone): 1-inch layer. At 1 inch deep, you need approximately 0.003 cubic yards per square foot, or about 3 cubic yards per 1,000 sq ft.
- Base aggregate (ASTM No. 57 washed stone): typically 4 inches deep for pedestrian patios. At 4 inches, approximately 0.012 cubic yards per square foot, or about 12 cubic yards per 1,000 sq ft.
- Subbase/reservoir aggregate (ASTM No. 2 or No. 3 washed stone): depth depends on your drainage design, typically 4–8 inches. Calculate the same way: multiply depth in feet by square footage, divide by 27 for cubic yards, then add 10% for compaction.
- Geotextile fabric: non-woven separation geotextile goes between the subgrade soil and the bottom of your stone base. Order total square footage plus 10% for overlaps (overlap seams by 12 inches minimum). You do NOT want geotextile between stone layers, as it will clog and defeat the purpose.
- Edge restraints: perimeter linear feet. Plastic or aluminum snap-together edge restraints for pavers are sold in 8-foot sections. Measure your perimeter and add 10%.
- Spiked stakes for edge restraints: typically one spike every 12 inches on straight runs, every 6 inches on curves. Order accordingly.
- Joint infill (ASTM No. 8 washed stone): this fills the open joints between pavers. A 1-inch-wide joint system typically needs about 0.5 to 1 pound of stone per square foot of patio, but your paver manufacturer's installation guide will give an exact joint-opening percentage.
- Perforated drain pipe (if using an underdrain): 4-inch perforated PVC or corrugated HDPE, length equal to your drain run plus a connector to a pop-up emitter or outlet.
- Miscellaneous: paver cleaner (for pre-use cleanup), marking paint or string line, sand or mortar for any fixed edge cuts near the house.
Do not substitute standard crushed limestone or dense-graded gravel for the washed open-graded stone. Dense-graded material fills voids and blocks drainage. Washed, gap-graded aggregate (meaning fines have been removed) is what gives the base its storage capacity. This is the single most common DIY mistake on permeable paver projects.
Tools, rental options, and realistic cost ranges
You do not need to own most of these. Tool rental shops carry almost everything on this list, and a weekend rental typically runs $200 to $400 for the main powered equipment.
| Tool | Own or Rent? | Approximate Rental Cost | What It Does |
|---|---|---|---|
| Plate compactor (walk-behind) | Rent | $80–$120/day | Compacts base layers and seats pavers after laying |
| Rubber paver mallet | Buy (~$25) | — | Sets individual pavers without cracking them |
| Circular saw with diamond blade or angle grinder | Own or rent | $30–$60/day (saw) | Cuts pavers at borders and around obstacles |
| Wet-cut tile/paver saw | Rent strongly recommended | $60–$100/day | Cleaner, safer cuts than dry grinding; worth renting for 10+ cuts |
| Plate compactor with rubber pad attachment | Rent | Included with compactor rental or $10 extra | Protects paver surface during final compaction pass |
| String line and line level | Buy (~$15) | — | Sets your grade and keeps rows straight |
| Long straightedge (6–8 ft) | Buy or borrow | — | Checks flatness of base and paver surface |
| Screed rails (conduit pipe, 1-inch diameter) | Buy (~$10 for two) | — | Creates an even 1-inch bedding layer for the choke course |
| Tape measure, carpenter's square | Own | — | Layout and pattern alignment |
| Wheelbarrow (or two) | Own or borrow | — | Moving aggregate and pavers |
| Sod cutter or mini-excavator | Rent if needed | $150–$300/day (mini-ex) | Removes sod and soil efficiently on larger jobs |
| Hand tamper | Buy (~$30) | — | Compacting tight spots the plate compactor cannot reach |
| Safety glasses, gloves, knee pads, dust mask (N95) | Buy | $30–$50 total | PPE for cutting, lifting, and compaction work |
Total material cost for a 200-square-foot permeable paver patio using mid-range PICP pavers typically runs $800 to $2,000, depending on your paver selection, local aggregate prices, and base depth needed. Add $200 to $400 for tool rentals and $50 to $100 for consumables and PPE. Professional installation of the same footprint would typically run $3,000 to $7,000, so the DIY savings are real, but the labor is yours to contribute.
Safety first: how to protect yourself and your property
Before any work starts, call 811. This is not optional. Underground utilities (gas, electric, water, telecom) can be shallower than you expect, and a shovel through a gas line is a life-safety emergency. In most states, 811 is a free service that dispatches locators within three business days. Do not start digging until all utilities are marked. If your excavation is near a gas or electric line, hand-dig within 18 inches of the marked location rather than using power equipment.
For lifting: pavers are heavier than they look. A standard 4x8x3.1-inch PICP paver weighs about 7 to 10 pounds. A pallet of 80 square feet weighs 800 to 1,400 pounds. Lift with your legs, keep loads close to your body, and use a two-person carry for anything over 25 pounds. Knee pads are not optional on paver work. Your knees will thank you by day two.
For cutting: paver dust contains crystalline silica, which causes serious long-term lung disease with repeated exposure. Always wear an N95 or P100 respirator when cutting, not a paper dust mask. Wet-cut when possible: a wet-cut saw suppresses dust at the source and is the professional standard. If you dry-cut with an angle grinder, do it outdoors with good airflow, wear your respirator, and keep bystanders away. Safety glasses or a face shield and hearing protection are also required during cutting and plate compactor operation.
For compaction: the plate compactor vibrates hard and can walk unexpectedly on loose aggregate. Keep a firm two-hand grip, wear steel-toed boots, and never stand directly in front of or behind the machine while it is running. Keep children and pets away from the work area when the compactor is in use.
Site protection: if your patio is next to lawn or landscaping you want to preserve, use plywood sheets as a path for wheelbarrows to avoid rutting the grass. Cover plants with burlap or cardboard during cutting to protect them from paver dust and debris. If you are working near a downspout or existing drainage pipe, mark it clearly so you do not damage it during excavation.
Step-by-step installation: from bare ground to finished surface
Phase 1: Excavation and subgrade preparation
Mark your patio perimeter with marking paint or stakes and string. For a full walkthrough on how to install a paving stone patio, see the detailed installation guide. Your excavation depth equals the total thickness of all your layers: subbase aggregate + base aggregate + 1-inch bedding + paver thickness. For a typical residential patio with 3.1-inch pavers, 4-inch base, and 4-inch subbase, that is roughly 12 inches of excavation. Add an inch of margin. Excavate cleanly and remove all organic material, roots, and debris from the base. The subgrade should be relatively uniform: no soft spots, no loose fill, no buried debris. If you hit soft spots, remove the soft material and replace it with compacted No. 2 stone before proceeding.
Check your subgrade slope. Use a long level or string line across the excavated area to confirm you have the 1 to 2 percent cross-slope you designed for. Adjust by adding or removing soil as needed. Compact the subgrade with two passes of the plate compactor.
Phase 2: Geotextile and subbase
Roll non-woven geotextile across the entire excavated area, overlapping seams by at least 12 inches. Fold the fabric up the sides of the excavation to contain the stone. The fabric's job is to prevent soil from migrating up into the stone base over time, not to filter the water moving through it. Do not use woven geotextile here, as it clogs far faster than non-woven.
Spread your ASTM No. 2 or No. 3 subbase aggregate in lifts of no more than 4 inches, compacting each lift before adding the next. Check your slope as you go. The finished top of the subbase should mirror the slope of your subgrade.
Phase 3: Base course aggregate
Spread ASTM No. 57 washed stone on top of the compacted subbase. This is your structural base layer. Spread in a 4-inch lift and compact with two passes of the plate compactor. Check for flat spots and low areas with your straightedge and level. The finished surface of the base should be 1 inch plus your paver thickness below your desired finished patio elevation.
Phase 4: Choke/bedding course
Spread a 1-inch layer of ASTM No. 8 washed stone (the same material that will fill your joints) as the bedding course. Use your 1-inch diameter conduit pipes as screed rails: lay them parallel across the base, separated by about 8 feet, and drag a straightedge across them to create a perfectly even 1-inch layer. Remove the conduit pipes carefully and fill the channels with loose No. 8 stone. Do not compact this layer before laying pavers. Do not walk on it unnecessarily. The loose bedding layer is what allows the pavers to be set at precise elevation.
Phase 5: Laying the pavers
Start laying pavers from a fixed straight edge, typically a house wall, a string line, or an existing structure. For a full step-by-step walkthrough, see how to install pavestone patio. PICP pavers are typically designed with built-in spacer nibs that set joint width automatically: you simply lay paver against paver and let the nibs do the work. Follow your chosen pattern (running bond and herringbone are the most common for rectangular pavers; herringbone at 45 or 90 degrees provides better interlock and is recommended for any area that will see even occasional vehicle access). Lay full pavers first, leaving border areas for cuts. Check your alignment and level frequently with a long straightedge.
Work from the laid surface when possible, kneeling on a piece of plywood to distribute your weight. Never kneel directly on the laid pavers near a free edge, as it can disturb the bedding course.
Phase 6: Cutting and edge restraints
Once all full pavers are laid, snap a chalk line or string line along each border and mark the cut line on each paver. Cut with a wet-cut paver saw for the cleanest result and the least dust. Score the line first with a light pass before cutting through. Install your edge restraints along all open edges (edges not bounded by a structure or wall): drive stakes through the restraint's pre-drilled holes every 12 inches on straight runs. Edge restraints prevent the outer pavers from spreading over time, which would widen joints and compromise both the interlock and the aesthetics.
Phase 7: Compaction and joint filling
Attach the rubber pad to your plate compactor and make two to three passes across the entire paved surface. This seats the pavers firmly into the bedding course. After the first compactor pass, pour ASTM No. 8 washed stone across the surface and sweep it into the joints with a stiff broom. Make another compactor pass to vibrate the stone down into the joints, then sweep in more stone and repeat until joints are filled to within about 1/4 inch of the paver surface. Do not overfill: the joint stone should sit slightly below the paver face to allow surface water to enter.
Do not use polymeric sand in permeable paver joints. Polymeric sand bonds with water and is designed to lock joints closed, which is exactly the opposite of what you want here. Standard open-graded No. 8 stone infill keeps joints open and permeable while still resisting weed growth reasonably well.
Special situations: next to the house, over concrete, on slopes, and raised patios
If your patio runs up against your house foundation, managing drainage direction is critical. The IRC requires grade to fall away from the foundation, and a permeable patio that infiltrates water directly adjacent to a footing can create moisture problems in a basement or crawlspace. In this case, use a no-infiltration design: line the excavation with an impermeable HDPE liner and install an underdrain at the bottom sloped away from the house. This keeps the patio looking permeable and handling surface water effectively, while directing all collected water away from the structure. Installing patio pavers against a house is its own detailed topic worth consulting separately for flashing, caulk, and height management near siding or stucco.
Installing over existing concrete is a common scenario. You have two real options: remove the concrete (rent a demolition hammer and haul the rubble) or build over it with a modified design. If you build over concrete, you lose ground infiltration entirely, so you must design for underdrain discharge. The concrete becomes your effective liner. You can still build a permeable system on top of it that handles surface water, directs it to an edge drain, and removes it from the area. However, the structural base depth is reduced because the concrete provides structure, so the reservoir capacity is limited.
On slopes steeper than about 3%, surface water can move laterally across the patio faster than it infiltrates through the joints, especially during a heavy rain. A check dam or step-down edge at the low end of a sloped patio prevents erosion and slows that sheet flow. Design the slope so water moves toward a planted area or rain garden rather than toward a neighbor's property or a street.
Raised patios (built above grade, often retained with a wall) change the drainage design because you are effectively creating a planter-like structure. Drainage must be built into the wall system (through-wall pipes or weep holes) to prevent hydrostatic pressure from building up behind the retaining structure. Raised patios above about 24 inches of retained height often require a structural wall design and may need a permit independent of any stormwater requirement. If you are planning a raised permeable patio with an adjacent fire pit, confirm clearances to combustibles and check whether a gas line or propane connection requires its own permit.
Paver patterns and what they mean for permeability and strength
Pattern choice affects more than looks. Herringbone (both 45-degree and 90-degree) provides the strongest interlock because paver edges never run continuously in the direction of traffic or loading. Running bond (staggered like brickwork) is easier to lay and looks clean but provides slightly less interlock for vehicular loads. For a pedestrian-only patio, running bond is perfectly appropriate. For a patio that will also see a vehicle parked on it occasionally, herringbone is the safer choice.
Joint width also affects infiltration rate. PICP systems are designed with larger joints (typically 3/16 to 3/8 inch or wider depending on the paver model) specifically to maximize surface infiltration. Manufacturers like Techo-Bloc publish the percentage of open area and measured surface infiltration rates per ASTM C1781 (the standard field test method for permeable unit pavement systems) and ASTM C1701 (used for pervious concrete but commonly referenced for comparison). ASTM C1781/C1781M, Standard Test Method for Surface Infiltration Rate of Permeable Unit Pavement Systems (ASTM) is the accepted standard field test method for measuring surface infiltration rate of permeable unit pavement systems and is commonly used for post‑construction acceptance testing of unit paver systems blank" rel="noopener noreferrer">ASTM C1781/C1781M — Standard Test Method for Surface Infiltration Rate of Permeable Unit Pavement Systems (ASTM). Compare those published values to your local design storm intensity if you are sizing for a specific rainfall event.
Maintenance, clogging, and how to keep the system working long-term
Permeable paver systems do not maintain themselves. Unilock's permeable paver maintenance guidance is direct about this: joints clog over time with fine sediment, organic debris, and algae growth, and surface infiltration rate drops as a result. The good news is the solution is straightforward and completely DIY-friendly.
Vacuum the surface with a leaf vacuum or a wet-dry shop vac with a nozzle attachment at least once a year, more often if you have significant leaf fall or nearby bare soil. After vacuuming, recharge the joints by sweeping in fresh ASTM No. 8 stone to replace what was removed. This restores infiltration capacity without any significant cost or skill requirement.
Pressure washing is effective for algae and surface staining but should be done at low pressure (under 1,500 PSI) and directed along the joint lines, not into them. High-pressure washing blows joint stone out and defeats the purpose. After any pressure washing, recheck joint stone levels and top up as needed.
Weeds in permeable paver joints are a more common complaint than in standard pavers because the open stone infill provides a growing medium for wind-blown seeds. Pre-emergent herbicide applied in early spring (before seed germination) is effective and safe for most permeable systems, but confirm with the herbicide label that it is compatible with stone surfaces and will not create runoff concerns in your area. Manual removal works fine too on a small patio.
Settling in specific areas usually traces back to base preparation. If pavers in one zone sink more than surrounding pavers, lift that section, add stone to the bedding course, re-lay, compact, and refill joints. The modular nature of interlocking pavers makes spot repairs straightforward, which is a genuine advantage over poured concrete.
When to call a pro instead of going DIY
Most homeowners can handle a straightforward residential permeable patio. But a few situations genuinely call for professional help, and recognizing them early saves a lot of money and stress.
- Your project exceeds local permit thresholds and requires a stormwater management plan stamped by a licensed engineer.
- Your soil infiltration test shows very slow drainage (clay hardpan) and you need to size an underdrain system for a specific storm event.
- The patio is adjacent to a foundation with an existing moisture or drainage problem: fix the drainage problem first, with professional help if needed.
- The patio involves a retaining wall more than 24 to 30 inches tall, which typically requires structural design and permits.
- You need an ADA-compliant accessible route and must document surface tolerance and slope compliance.
- The site has known contamination, unusual fill, or proximity to a septic system drainfield, all of which introduce infiltration complications beyond DIY scope.
ICPI-trained and certified contractors are the industry standard for permeable paver installation. Manufacturers like Belgard explicitly recommend consulting ICPI resources and using trained installers for complex projects. Finding an ICPI-certified installer for a consultation, even if you plan to do most of the work yourself, is money well spent on any project above about 500 square feet or on any site with drainage complexity.
Common mistakes and how to avoid them
- Using dense-graded gravel in the base: it fills voids and blocks water movement. Always specify washed, open-graded aggregate (ASTM No. 2, No. 57, and No. 8 as specified for each layer).
- Placing geotextile between stone layers instead of only at the soil-stone interface: inter-layer fabric clogs and blocks drainage within a few years.
- Using polymeric sand in the joints: it seals joints closed and eliminates permeability.
- Skipping the slope check at subgrade: pavers cannot correct a flat or mis-sloped base after they are laid.
- Undersizing the base depth for your soil conditions: when in doubt, go deeper. An extra 2 inches of No. 2 stone costs much less than pulling up the whole patio to fix ponding.
- Not calling 811 before digging: this is both a safety risk and a legal requirement in most states.
- Compacting too aggressively on the bedding course before pavers are laid: the loose bedding layer is intentional and must remain uncompacted until pavers are placed.
FAQ
What standards and technical references should I use when planning a permeable paver patio?
Use EPA guidance for permeable pavements as a stormwater best management practice; FHWA TechBrief on Permeable Interlocking Concrete Pavement for design concepts (full vs partial infiltration); ICPI manuals and tech specs for structural and hydrologic design tables; and ASTM test standards for acceptance and site testing (ASTM C1781 for unit pavers surface infiltration, ASTM C1701 for pervious concrete surface infiltration, and ASTM D3385 double‑ring infiltrometer for soil infiltration). Manufacturers’ technical documents (product‑specific installation guides and measured infiltration data) supplement these sources.
How do I determine whether my site can infiltrate stormwater or needs an underdrain or liner?
Measure native soil infiltration with an ASTM D3385 double‑ring infiltrometer or hire a soils pro. Compare measured infiltration to local rainfall intensities and the storage provided by your proposed base. If native infiltration is low, if infiltration is undesirable near foundations or contaminated soils, or if local rules prohibit infiltration, design a partial‑infiltration system with underdrains or a no‑infiltration system using an impermeable liner and controlled outlet per FHWA/ICPI guidance.
How do I size the open‑graded base/subbase (storage) and thickness for a residential patio?
Size to satisfy both hydrologic storage (stormwater capture between paver and subgrade) and structural loading. Use ICPI design tables or Permeable Design software to pick base/subbase thickness based on: expected use (pedestrian only vs occasional vehicle/BBQ trailer), native subgrade CBR/infiltration, and design storm (local rainfall depth/duration). Typical DIY pedestrian patios often use ~8–12 in. of open‑graded subbase (No.2 or similar) over a 2–4 in. No.57 or No.8 bedding layer, but exact thickness depends on soil/infiltration and loading—confirm with ICPI tables or engineer.
What aggregate gradations are commonly used and why?
Commonly specified aggregates: ASTM No.2 (or similar) for subbase/reservoir (coarse, high voids), ASTM No.57 for structural base where used, and ASTM No.8 (open‑graded 3/8" nominal) for bedding/joint material. Open‑graded aggregates provide void space for temporary water storage and allow movement of water down to the subgrade or underdrain. Use washed, angular aggregates per ICPI/manufacturer guidance to ensure interlock and avoid fines that clog voids.
What tests should I plan for during and after construction?
Run pre‑construction soil infiltration tests (ASTM D3385). During construction confirm aggregate gradations and compaction of structural layers with visual checks and spot density if required. Post‑construction acceptance of surface infiltration is typically done with ASTM C1781 (unit pavers) or ASTM C1701 (pervious concrete) to measure surface infiltration rate. Keep records and manufacturer/municipal acceptance documents for permits.
What permits or municipal rules should I check before starting?
Check local building department and stormwater authority. Municipal thresholds for stormwater/impervious permits vary (examples range from ~500 ft² to 2,500 ft² or more); some jurisdictions require plan review even when using permeable paving as an LID measure. Also confirm local setbacks, foundation drainage code (IRC R401.3 finish grade away from foundations), and any right‑of‑way or design standards if work touches public property. Ask about required inspections and maintenance agreements.
Next Articles
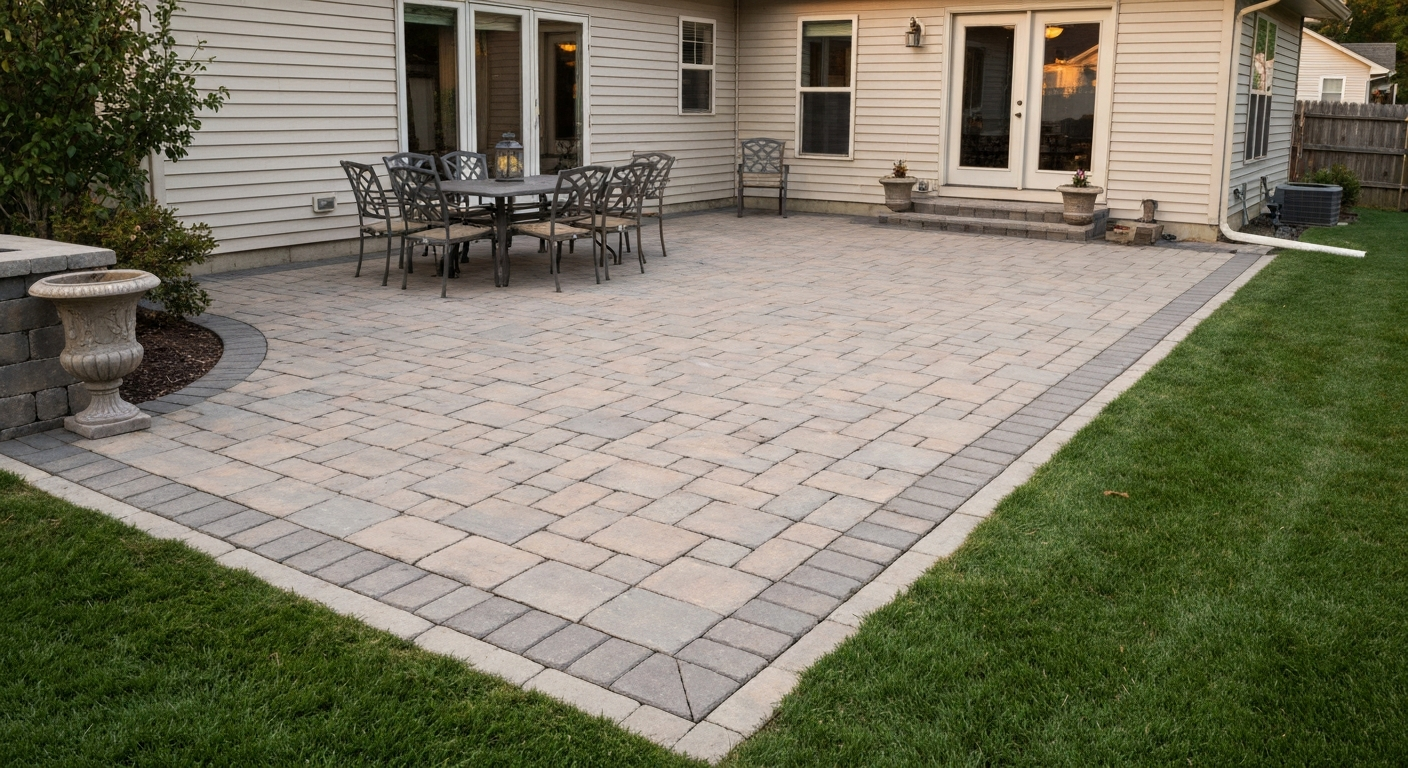
How to Install Pavestone Patio: Complete DIY Step-by-Step
How to install Pavestone patio: step-by-step DIY guide, planning, base prep, laying, jointing, sealing, maintenance.
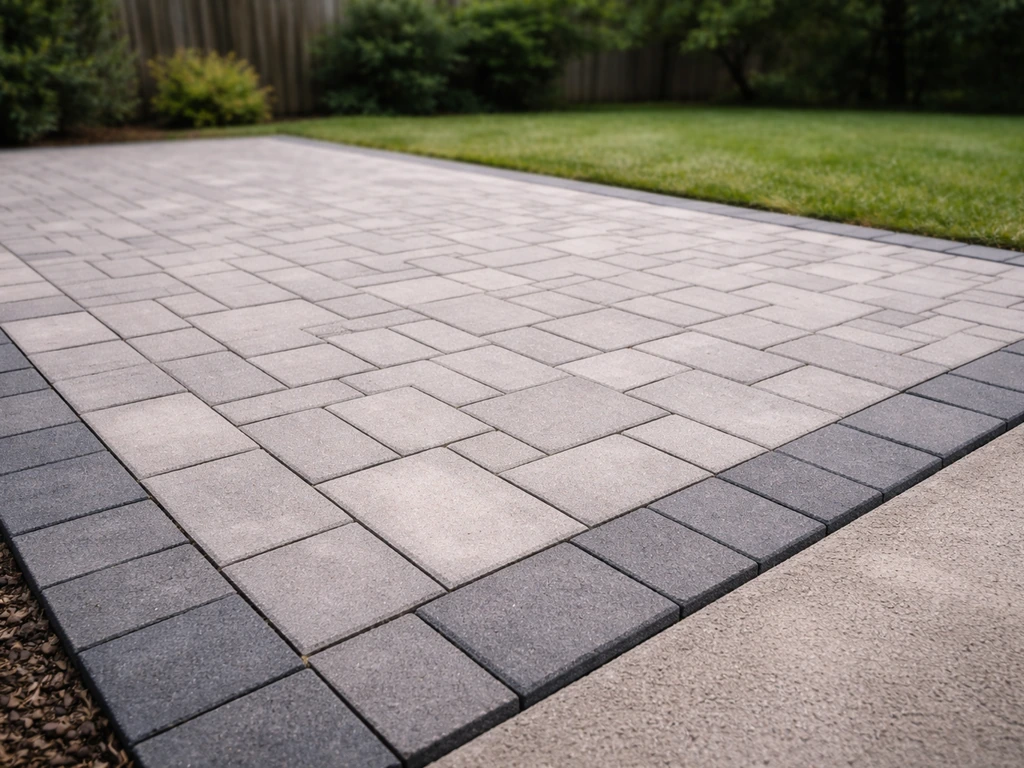
How to Install a Paving Stone Patio: Step-by-Step DIY Guide
Step-by-step DIY guide to install paving stone patio pavers, from prep and base to edging, cutting, sealing, and mainten
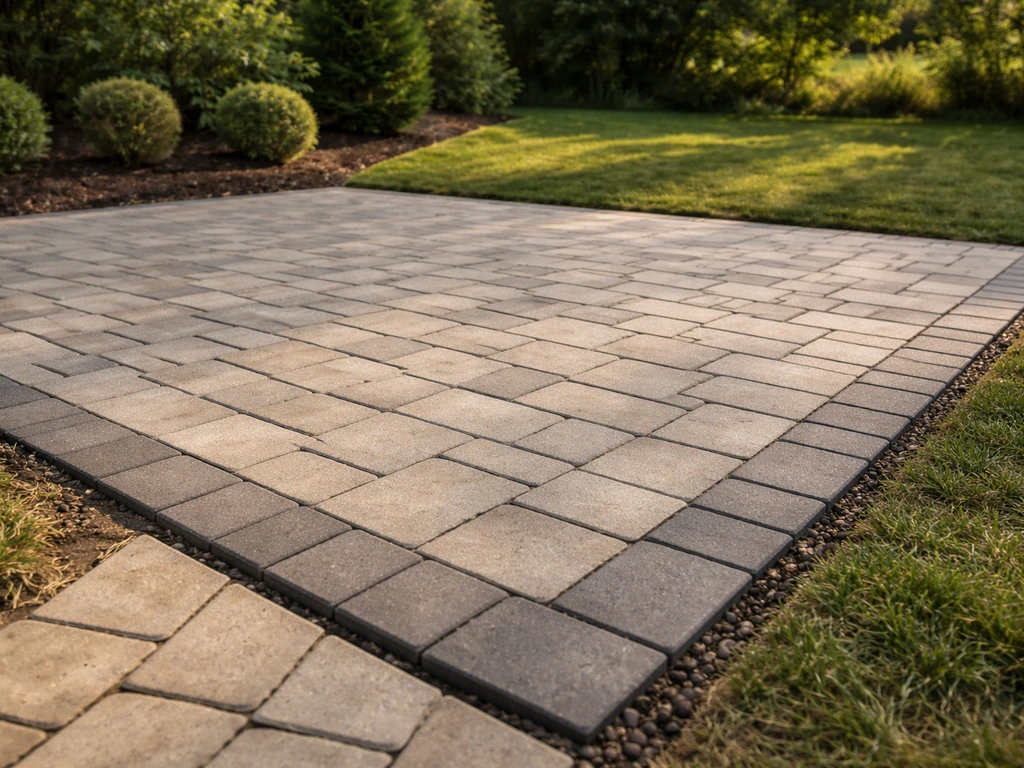
How to Install a Paver Patio: Step-by-Step DIY Guide
Step-by-step DIY guide to install a paver patio: layout, base prep, drainage, set pavers, cut fit, edges, and sealing.