
You can build a patio with rubber pavers in a single weekend using basic tools, a compacted crushed-stone base, and interlocking tiles that click together without mortar. The process runs: mark and excavate the site, compact a 6–8 inch crushed-stone base, screed a 1-inch sand layer, lay the pavers in your chosen pattern, lock the edges, and you're done. Rubber pavers are genuinely one of the friendlier patio materials for DIYers because they're forgiving to cut, light enough to move by hand, and easy to lift and relay if something shifts. That said, getting the base right makes or breaks the whole project, and there are a few substrate-specific wrinkles worth knowing before you start.
How to Make a Patio with Rubber Pavers: Step-by-Step Guide

Felix Rowe
7 Aug 2026
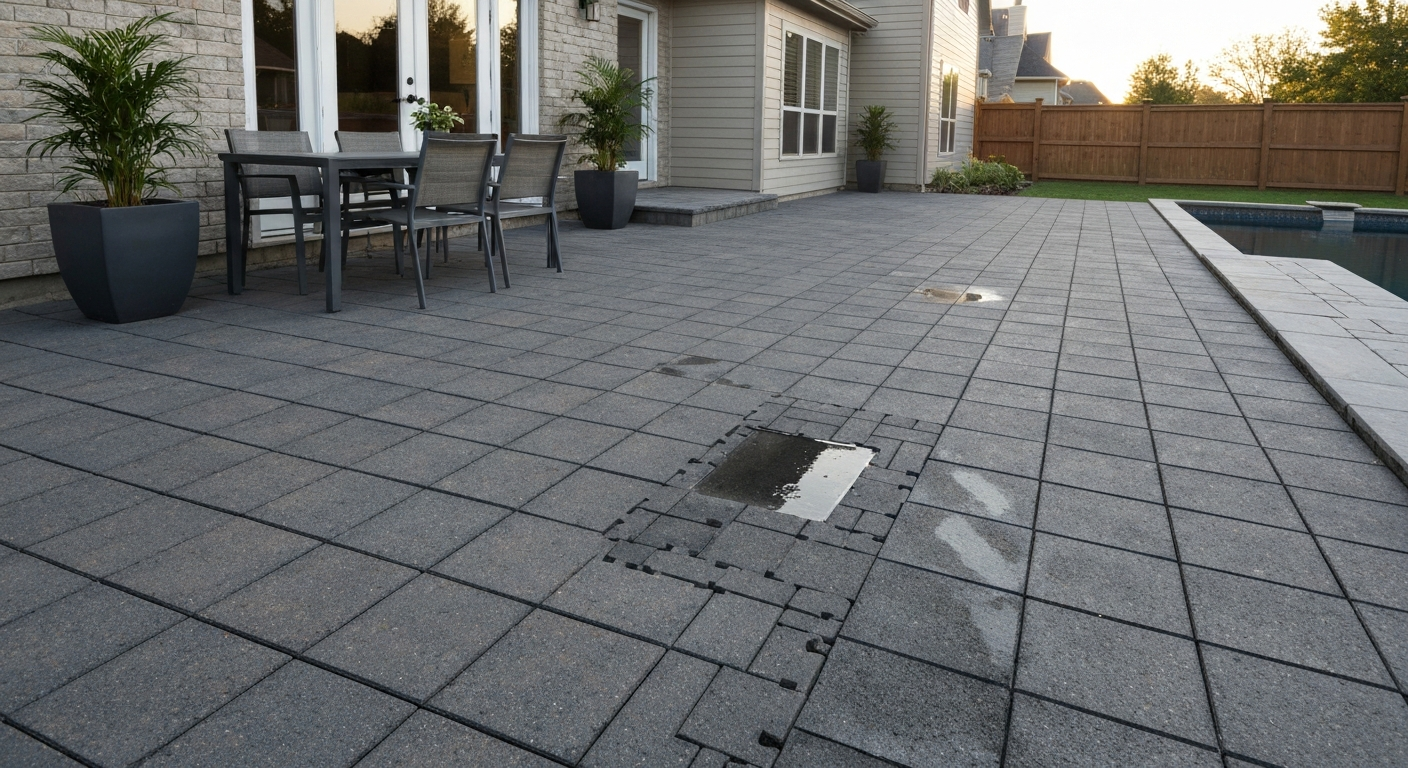
What rubber pavers are and whether they're right for your patio
Rubber pavers are dense tiles made primarily from recycled crumb rubber, typically sourced from shredded tires. The most common DIY-friendly size is 24 x 24 inches at about 2 inches thick, weighing roughly 24 lb per tile (around 6 lb per square foot). They interlock along their edges with tab-and-slot connectors, or they can be glued directly to an existing concrete slab using a urethane construction adhesive. The recycled content makes them an environmentally appealing choice, and their built-in cushion and traction make them genuinely slip-resistant, which matters a lot on surfaces that get wet. For verified slip-resistance claims, look for paver test reports using ASTM E303, Standard Test Method for Measuring Surface Frictional Properties Using the British Pendulum Tester, which is the accepted method for measuring surface traction on walking surfaces ASTM E303 — Standard Test Method for Measuring Surface Frictional Properties Using the British Pendulum Tester.
The honest question to ask before buying rubber pavers is whether they suit the look and use of your specific patio. They work beautifully in functional, high-traffic spaces: around pools, below deck stairs, near play areas, or on rooftop terraces where weight is a concern. If you want a formal, stone-look entertaining patio, concrete pavers or natural stone will serve the aesthetic better. Here is a quick comparison of rubber pavers against the alternatives most homeowners consider.
| Feature | Rubber Pavers | Concrete Pavers | Resin Pavers | Permeable Pavers |
|---|---|---|---|---|
| Typical cost (materials) | $3–$7/sq ft | $2–$8/sq ft | $5–$12/sq ft | $5–$10/sq ft |
| Installed cost (DIY) | $6–$10/sq ft | $8–$15/sq ft | $10–$18/sq ft | $10–$20/sq ft |
| Weight | ~6 lb/sq ft | ~10–12 lb/sq ft | ~4–6 lb/sq ft | ~10–12 lb/sq ft |
| Slip resistance | Excellent (cushioned) | Good (textured) | Good (aggregate surface) | Good (open texture) |
| DIY difficulty | Low–Medium | Medium | Medium–High | Medium–High |
| Drainage | Permeable gaps possible | Requires base design | Surface drainage only | Fully permeable by design |
| Aesthetic range | Functional/modern | Wide variety | Decorative | Functional/natural |
| Freeze-thaw durability | Excellent | Good (quality product) | Good | Good |
| Fire pit compatibility | Not recommended directly adjacent | Yes | Check manufacturer | Yes |
| Best for | Pool areas, play zones, rooftops | Traditional patios, driveways | Decorative patios | Stormwater management areas |
The one category where rubber pavers lose decisively is fire adjacency. Rubber is a combustible material, and the International Fire Code (IFC Section 307) sets recreational fire clearances at a minimum of 25 feet from structures. Even if the fire feature itself meets clearance, placing a rubber paver surface directly beneath or immediately surrounding a fire pit is not safe and voids most manufacturer warranties. If your patio plan centers on a fire pit, consider a hybrid layout: concrete or stone pavers in the fire zone, rubber pavers in the surrounding area. Resin pavers and permeable concrete systems are covered in more depth in their own guides on this site if you want to compare those options directly.
Before you start: permits, safety, and site assessment
Most municipalities do not require a building permit for a ground-level patio under a certain size, but impervious-area rules can trigger a stormwater permit even when a structural permit is not needed. The City of Portland, for example, requires stormwater management review for projects that create or replace 500 square feet or more of impervious surface. That threshold is typical of many jurisdictions. If your patio will be larger than roughly 20 x 25 feet, or if you are in an area with sensitive drainage requirements, call your local planning department before you break ground. It takes ten minutes and can save you from having to tear out finished work.
Call 811 (the national dig-safe line) at least three business days before any excavation. Utility lines are routinely shallower than homeowners expect. While you are doing your site assessment, also check the slope. The ADA Access Board specifies that exterior walking surfaces on accessible routes must not exceed a 1:20 running slope (5%) and should have cross-slopes no greater than 1:48 (2%). Even if accessibility is not a formal requirement for your home, staying near that 2% cross-slope is good practice for drainage and comfort. If your yard slopes steeply, plan for terracing or a raised section rather than trying to fight the grade with a thick base.
Here is when to call a professional instead of going it alone: if the site has standing water after rain (indicating a drainage problem that needs engineered resolution), if the ground is noticeably soft or has fill material that may settle, if you are installing pavers against or near a foundation wall without understanding the drainage implications, or if the area exceeds about 400 square feet and you have no prior base-compaction experience. A one-hour consultation with a landscape contractor can identify structural issues before they become expensive mistakes.
Planning your layout and measuring accurately
Start by staking out the patio boundaries with wooden stakes and mason's line. Measure the length and width, mark any obstacles (downspouts, steps, utility covers), and identify where the edge of the patio will meet the house or an existing structure. If the patio abuts the house, you need a 2% slope away from the foundation for drainage, and the paver surface should sit at least 1 inch below the sill plate or any wood framing. Installing pavers against a house requires careful thought about water management, which is addressed in detail in a dedicated guide on this site. For step-by-step instructions on how to install patio pavers against house, see the dedicated guide on this site (destination id a70caebc-66d3-4b06-af47-06936f61679b). For step-by-step instructions specific to pavestone products, see how to install pavestone patio. For a step-by-step comparison, see our guide on how to install paving stone patio. For step-by-step instructions, see our guide on how to install paver patio.
Sketch the layout to scale on graph paper or a free online tool. Decide on your pattern before buying materials because some patterns, such as a 45-degree diagonal or a pinwheel, generate significantly more cuts and waste. For rubber pavers, a running-bond (offset rows) or simple grid pattern minimizes cuts and works well aesthetically. Mark the center of the patio, because most professional installers work outward from the center to ensure symmetrical cuts at the edges rather than awkward slivers on one side.
Pre-build planning checklist
- Confirm patio dimensions and mark with stakes and string lines
- Call 811 and wait for utility marking (minimum 3 business days before digging)
- Check local permit and stormwater thresholds with your planning department
- Assess site drainage: does water pool here after rain?
- Measure existing grade and plan for 2% drainage slope away from structures
- Decide on paver pattern and confirm it works with your dimensions
- Identify the center of the patio for layout starting point
- Note locations of downspouts, cleanouts, or utility covers that need to be worked around
- Confirm access for material delivery (wheelbarrow path, gate width)
- Order materials with delivery scheduled before installation day
Tools and materials you will need
Tools
- Measuring tape (25 ft minimum) and chalk line
- Wooden stakes and mason's string line
- Line level or laser level
- Spade shovel and flat spade for excavation
- Plate compactor (rent, do not skip this step)
- Hand tamper for edges and tight spots
- Screed rail pipes (1-inch diameter) and screed board (straight 2x4 or magnesium screed)
- Rubber mallet
- Heavy-duty utility knife with hooked or hook-style blades (for cutting rubber pavers)
- Carpenter's square and straightedge
- Wheelbarrow
- Push broom
- Safety glasses, work gloves, and knee pads
- Dust mask or N95 (for cutting and base work)
- Level (4 ft)
- Garden hose or compaction moisture source
Materials
- Rubber interlocking pavers (24x24x2-inch for dry-set compacted-base installs, or ~7/8-inch thick for glued-over-concrete installs)
- Crushed stone aggregate (¾-inch clean crushed stone for base, or open-graded aggregate for permeable design)
- Coarse concrete sand or manufactured sand for the 1-inch leveling layer
- Landscape fabric/geotextile (place under base aggregate to prevent mixing with native soil)
- Plastic edge restraints with 10-inch galvanized spikes (spiked paver edging, continuous run)
- Polymeric sand or fine kiln-dried sand for joints (if pavers have gaps)
- Polyurethane construction adhesive (for glued-over-concrete installs, e.g., LOCTITE PL Premium or equivalent)
- Perforated drain pipe and drain outlet (for solid sub-base installs where water cannot escape downward)
- Optional: paver sealer rated for rubber surfaces to protect color and surface integrity
How to estimate materials and calculate quantities
Getting your material estimate right before ordering saves you an extra delivery fee and the frustration of running short mid-install. Here is a straightforward method that works for most rectangular or L-shaped patios.
Paver count
Calculate the patio area in square feet (length x width). Divide by the area of one paver. A 24x24-inch paver covers 4 square feet, so a 200-square-foot patio needs 50 pavers before waste. Add 10% for a simple grid pattern, 15% for running bond, and 20% for diagonal or complex patterns to account for cuts and breakage. Round up to the nearest full carton.
Base aggregate
For a 6-inch compacted base, use this formula: (Area in sq ft x 0.5 ft depth) / 27 = cubic yards of aggregate. Compacted crushed stone loses about 20–25% of its loose volume during compaction, so multiply your cubic-yard figure by 1.25 to get the amount to order. For a 200 sq ft patio with a 6-inch base: (200 x 0.5) / 27 x 1.25 = approximately 4.6 cubic yards. On slopes or soft soils, go to 8 inches of base: (200 x 0.67) / 27 x 1.25 = approximately 6.2 cubic yards.
Sand bedding layer
The sand layer is 1 inch deep: (Area in sq ft x 0.083 ft) / 27 = cubic yards. For 200 sq ft: about 0.6 cubic yards, or roughly 1,000 lb of coarse sand. Most suppliers sell this in 0.5-cubic-yard increments or 50 lb bags; a cubic yard weighs approximately 1,350 lb.
Edge restraint
Measure the total linear perimeter of the patio. Edge restraint sections are typically sold in 8-foot or 10-foot lengths. Add 10% for corners and overlaps. Spikes are sold separately; plan for one spike every 12 inches in straight runs and every 6 inches around curves.
| Material | Formula | Example: 200 sq ft patio (20x10 ft) | Order amount (with waste) |
|---|---|---|---|
| Rubber pavers (24x24) | Area ÷ 4 sq ft per paver | 50 pavers | 55 pavers (+10% waste) |
| Crushed stone base (6-inch) | (Area × 0.5) ÷ 27 × 1.25 | 4.6 cu yd loose | 5 cu yd |
| Sand bedding (1-inch) | (Area × 0.083) ÷ 27 | 0.6 cu yd | 0.75 cu yd (~1,000 lb) |
| Geotextile fabric | Area + 10% overlap | 220 sq ft | 1 roll (covers 250+ sq ft) |
| Edge restraint | Perimeter + 10% | 66 lin ft | 70–72 lin ft |
| Edge spikes | 1 per 12 in (straight) | ~66 spikes | 80 spikes |
| Polymeric sand (joint fill) | ~2 lb per 10 sq ft | ~40 lb | 50 lb bag |
Realistic time and cost expectations
Rubber paver installation typically runs $6–$13 per square foot when you factor in both materials and labor. As a DIYer, you eliminate the labor portion (which accounts for roughly 50–60% of professional quotes), but you still pay for equipment rental and your own time. A 200-square-foot patio will cost a DIYer roughly $600–$900 in materials and about $100–$150 in equipment rental (plate compactor for a day), landing total project costs around $700–$1,050 before any drainage upgrades or specialty finishes. A professional installation of the same area runs $1,200–$2,600 depending on region and site conditions.
DIY time estimate
| Phase | Solo DIY time | Two-person team | Notes |
|---|---|---|---|
| Layout and staking | 1–2 hours | 1 hour | Includes utility marking wait time (not counted) |
| Excavation (200 sq ft, 8-in deep) | 4–6 hours | 2–3 hours | Manual digging; mini excavator rental cuts this to ~1 hour |
| Base compaction (2 lifts) | 2–3 hours | 1.5–2 hours | Includes spreading and watering each lift |
| Sand screeding | 1–2 hours | 1 hour | Requires care; do not rush |
| Laying and cutting pavers | 3–5 hours | 2–3 hours | Depends on pattern complexity |
| Edge restraint installation | 1 hour | 45 min | |
| Joint fill and final compaction | 1 hour | 45 min | |
| Cleanup and sealing (optional) | 1–2 hours | 1 hour | Sealer application adds dry time |
| Total | 14–22 hours | 9–14 hours | Most DIYers spread this across 2 days |
Two main factors drive cost beyond materials: site conditions and base depth. Soft or clay-heavy soil may require deeper excavation, a thicker base, or even a geogrid layer for reinforcement, adding $1–$2 per square foot. Installing over an existing concrete slab eliminates excavation and base costs entirely, which is one of the most cost-effective approaches if you have a sound slab to work from.
Step-by-step installation: the full workflow
The following steps cover a standard new-ground installation (installing over grass or soil). Substrate-specific variations for concrete slabs and sloped or uneven ground are covered in the sections that follow. Read through the entire workflow before you start, because decisions made in Phase 1 affect every phase that comes after. For a detailed, step-by-step walkthrough on how to install rubber patio pavers, see our dedicated installation guide.
Phase 1: Mark and excavate
Set your string lines at the planned finished height of the patio surface. You need to excavate deep enough to accommodate the base aggregate, the sand layer, and the paver thickness. For a 2-inch rubber paver: 6-inch base + 1-inch sand + 2-inch paver = 9 inches total below finished grade. Excavate to that depth across the entire area plus 6 inches beyond the perimeter lines on all sides (the base should extend under the edge restraints). Remove all sod, roots, and soft organic material. If the native soil is clay or very loose, compact it lightly before placing the geotextile.
Phase 2: Lay geotextile and build the base
Lay your geotextile fabric across the excavated area and up the sides slightly. This stops the aggregate from mixing into the native soil over time, which is one of the most common causes of patio sinking. Spread the first 3-inch lift of crushed stone, moisten it lightly with a hose, and compact it with the plate compactor in overlapping passes. Never compact a lift deeper than 4 inches. Spread the second 3-inch lift, compact again, and check your finished base height against the string line. The compacted base should be roughly 3 inches below your string line (leaving room for 1 inch of sand and 2 inches of paver). Check for a consistent 2% slope away from the house across the entire base surface. This is the most important thing you do on this project: a flat, properly sloped, firmly compacted base is the difference between a patio that lasts 20 years and one that heaves and shifts in two.
Phase 3: Screed the sand bedding layer
Lay two parallel screed pipes (1-inch diameter) on top of the compacted base, running in the direction you will screed. Set them so their tops sit exactly 1 inch above the compacted base surface. Dump coarse sand between and around the pipes, then pull a straight screed board across the pipes to create a smooth, consistent 1-inch sand layer. Remove the pipes, fill the grooves with sand, and smooth by hand. Do not walk on the screeded sand. Work from the far corner toward the exit point of the area so you do not disturb what you have done.
Phase 4: Lay the pavers
Start at the corner nearest the house (or at your established center point for complex layouts). Set the first paver firmly onto the sand by pressing straight down, not sliding it in, which disturbs the sand bed. Connect the interlocking tabs of subsequent pavers as you go. Use a rubber mallet to tap pavers level and to fully seat the interlock tabs. Check every few rows with your 4-foot level to confirm you are maintaining consistent slope. Work in rows across the patio. Set full pavers first, then return to fill the cut pieces at the edges.
Phase 5: Cut and fit edge pieces
Rubber pavers cut easily with a heavy-duty utility knife and a hooked blade. Mark your cut line with chalk or a marker, score deeply along the line with multiple firm passes using the hooked blade, then fold and snap the paver along the score. For curved cuts, score the line, make relief cuts every inch or so perpendicular to the curve, and flex the paver to separate. Always wear gloves and safety glasses when cutting. The crumb-rubber material can release fine particles, so work outdoors or in ventilated space and wear a dust mask. Replace blades frequently; a dull blade drags and tears rather than cutting cleanly.
Phase 6: Install edge restraints
Edge restraints are not optional. Without them, lateral forces from foot traffic, freeze-thaw cycles, and soil movement will push the paver field apart over months. Use continuous plastic spiked edge restraint (or aluminum/steel for curved sections). Set the restraint against the outside face of the border pavers with at least 1 inch of vertical contact against the paver edge. Drive 10-inch galvanized spikes through the restraint holes into the compacted base every 12 inches on straight runs, every 6 inches on curves. On the house side, the patio edge is typically held by the existing structure; use a flexible restraint or a mortar/concrete transition strip to prevent movement there.
Phase 7: Fill joints and compact the surface
Sweep fine kiln-dried sand or polymeric sand into the joints between pavers. Make two or three passes with the push broom until the joints are filled to within about 1/8 inch of the paver surface. Run the plate compactor over the entire field one final time (use a rubber or protective pad under the plate to avoid marking the paver surface). This final pass seats everything firmly into the sand bed and locks the interlock tabs. Sweep in a second application of joint sand after compaction to top off any gaps.
Phase 8: Optional sealing
Sealing rubber pavers is not required, but it does protect the surface from UV fading and makes cleaning easier. Use a sealer specifically rated for rubber or recycled rubber surfaces. Apply after the patio has settled for at least 48 hours and the surface is completely dry. Follow the manufacturer's drying time before foot traffic. Reapply every 2–3 years depending on exposure and traffic.
Installing rubber pavers on different substrates
Over grass or native soil
This is the standard workflow described above. The key addition when removing grass: strip the sod and organic layer completely before laying geotextile. Leaving organic material under the base leads to decomposition and settlement. If the exposed soil is soft or high in clay, compact it directly (using the plate compactor) before installing geotextile and aggregate.
Over existing concrete
Installing rubber pavers over an existing concrete slab is one of the fastest and cleanest approaches, and it eliminates all the excavation and base work. The concrete must be structurally sound: no major heaving, large cracks, or soft spots. Clean the slab thoroughly with a degreaser and pressure washer. Fill cracks wider than 1/4 inch with a concrete crack filler and let it cure. For a glued installation, use a urethane construction adhesive such as LOCTITE PL Premium, applied in a serpentine bead on the back of each thinner paver (typically 7/8-inch thick for glued installs). Press each paver firmly in place and allow the adhesive to cure per manufacturer directions before foot traffic. Read the adhesive Safety Data Sheet before use: urethane adhesives are respiratory and skin sensitizers; use them with gloves and in ventilated conditions. The one drainage issue to address on solid slabs is water entrapment: if water can pool under the pavers, provide perforated drain channels or ensure the slab has an outlet at the perimeter.
On uneven or sloped ground
Moderate slopes (2–5%) can be accommodated by grading the excavated base to match the desired finished slope, then building the crushed-stone base at consistent depth. The challenge is more work in base preparation: each compaction pass must be checked against a sloped string line rather than a flat one. For slopes steeper than 5%, consider terracing the patio into two or more flat levels connected by steps, rather than trying to install a continuous sloped surface. The ADA guidance of 1:20 maximum running slope (5%) is a useful ceiling even for non-accessible patios, both for safety and for the stability of the base. On steep sites, consult a landscape professional before committing to a layout.
Drainage: permeable vs. non-permeable approaches
Standard rubber paver installations with a compacted crushed-stone base are semi-permeable: water can filter down through the joints and into the aggregate base, then slowly infiltrate into native soil. This works well in most residential settings. If your site has heavy clay soil or you are in a region with strict stormwater requirements, you have two better-defined choices.
A fully permeable design uses an open-graded (no-fines) aggregate base as described in ICPI permeable paver guidance and EPA stormwater best practices. The open aggregate stores water temporarily and releases it slowly into the ground. This design requires no perforated drain pipes but does require maintenance to prevent clogging of the joints and base over time, typically annual vacuuming or flushing of the joint material. It is not appropriate in areas with contaminated groundwater risk or very high water tables.
A non-permeable overlay (rubber pavers glued over concrete) sheds all water at the surface and requires the concrete slab to drain effectively. Install perforated channel drains at low points if the slab does not already have slope to a drainage outlet. Directing runoff toward a planted bed or permeable area rather than directly into a storm drain is always a better practice. If your project exceeds the impervious-area threshold in your municipality, a permeable base design may help you stay below permit-trigger thresholds. For step-by-step instructions on how to install paver patio drainage, see our dedicated guide on this site.
Pattern ideas and layout tips
For 24x24-inch rubber pavers, the most practical patterns are: a grid (pavers aligned in both directions, easy to install, minimal cuts), a running bond (pavers offset by half in alternating rows, slightly more effort but more stable), and a diagonal grid (pavers rotated 45 degrees, maximum visual interest but 20%+ more waste). For most DIYers working with rubber pavers in a utilitarian space, running bond is the sweet spot: it looks intentional, resists lateral spreading better than a grid, and does not generate excessive cuts.
Regardless of pattern, snap chalk lines across your sand bed as guides before you start laying. A single row that wanders 1/4 inch over 10 feet creates a visible alignment problem by the time you reach the opposite edge. Check alignment every 4–5 rows and correct early rather than trying to fix drift after 20 rows are down.
Special situations: fire pits, raised patios, and rooftop installs
Fire pit patios
As noted earlier, rubber pavers should not be the primary surface material directly around a fire pit. The International Fire Code requires recreational fires to be at least 25 feet from any structure and portable outdoor fireplaces at least 15 feet away. Beyond the clearance rule, the heat radiating from a fire pit ring is enough to degrade and deform rubber paver surfaces over time. Use a non-combustible material (concrete pavers, natural stone, or gravel) for the immediate fire zone (typically a 5–6 foot radius around the pit), and use rubber pavers for the outer seating or walkway area. Design the transition between materials cleanly using a shared edge restraint that both paver types butt against.
Raised and terraced patios
A raised patio built on a compacted crushed-stone pad above grade requires retaining walls or a solid border structure to hold the base in place. Rubber pavers work fine as the surface layer on a raised pad, but the structural integrity of the terrace depends entirely on the retaining wall system, not the pavers. Use block retaining walls or pressure-treated timber at the perimeter before building the base and laying pavers. Check local codes for retaining wall height limits; walls taller than 4 feet typically require engineering review.
Rooftop and deck applications
Rubber pavers are popular for rooftop terraces and elevated decks because of their relatively low weight (around 6 lb per square foot) compared to concrete (10–12 lb/sq ft). Rooftop installs follow specialized guidance from manufacturers like Versico and WeatherBond and require coordination with the roofing membrane system. The pavers sit on pedestals or directly on the membrane (protected by a separation layer), with drainage flowing under the paver field. Do not attempt a rooftop paver installation without confirming your roof's load capacity with a structural engineer and reviewing the roofing manufacturer's paver compatibility and warranty requirements.
Maintenance, sealing, and repairs
Rubber pavers are low-maintenance but not zero-maintenance. Sweep them regularly to prevent debris from compacting into the joints. Rinse with a garden hose or pressure washer on a low setting; avoid high-pressure concentrated streams that can displace joint sand. Re-top joint sand annually if it has washed or blown out. If a paver is cracked or deeply gouged, you can lift it, clean the sand bed below, and replace just that tile. This is one of rubber pavers' real advantages over poured concrete: individual repair without demolition.
For a patio that is shifting or heaving in a localized area: lift the affected pavers (they come up without tools for dry-set installs), remove and re-screed the sand in that section, check for any base settlement or root intrusion, and relay. If you see widespread heaving after frost, the base depth may be insufficient for your freeze-thaw zone, and adding a thicker base during re-installation is worth the effort.
Common mistakes and how to avoid them
- Skipping the plate compactor: hand tamping alone is not sufficient for a stable base. Rent the compactor.
- Not compacting in lifts: dumping all the aggregate at once and compacting once creates an unstable base with loose material at depth. Compact in 3-to-4-inch lifts.
- Laying over soft or organic soil without removing it: organic material decomposes and causes settlement. Strip it completely.
- Installing without edge restraints: lateral creep will open joints within months. Edge restraints are mandatory.
- Screeding sand too thick: more than 1 inch of sand compresses unevenly underfoot and leads to surface wobble. Stay at 1 inch.
- Walking on screeded sand before laying: disturbs the flat surface. Lay boards to kneel on if needed.
- Ignoring slope away from the house: water that pools against the foundation causes damage over time. Confirm 2% slope during base work, not after.
- Using the wrong adhesive for concrete-overlay installs: standard tile adhesive is not flexible enough for rubber. Use a polyurethane construction adhesive.
- Placing rubber pavers adjacent to a fire pit: heat damages the material and fire codes require setback from combustibles.
- Skimping on joint sand: unfilled joints allow pavers to rock and shift. Fill joints completely and re-top after the first rain.
Complete build checklist at a glance
Use this as your quick reference before and during installation. Check off each step before moving to the next phase.
- Confirm patio size, layout, and pattern; sketch to scale
- Check local permit and stormwater requirements
- Call 811; wait for utility marking
- Calculate and order all materials with waste allowance
- Rent plate compactor and gather all tools
- Mark patio boundaries with stakes and string lines at finished height
- Excavate to full depth (base + sand + paver) plus 6 inches beyond perimeter
- Compact native soil at excavation bottom
- Lay geotextile fabric across entire excavated area
- Spread and compact first 3-inch lift of crushed stone; check slope
- Spread and compact second 3-inch lift; recheck slope (2% away from house)
- Confirm base is at correct height below finished-grade string line
- Set screed pipes and screed 1-inch sand layer
- Remove screed pipes; fill grooves; smooth sand
- Lay first pavers from reference corner or center; use rubber mallet to seat
- Check level and slope every 4–5 rows; correct drift immediately
- Cut edge pieces with hooked utility knife; wear PPE
- Install continuous edge restraints with spikes at correct spacing
- Sweep joint sand into all joints; run plate compactor over field with protective pad
- Sweep second application of joint sand; check all joints are filled
- Apply sealer if desired; wait for full cure before use
- Remove string lines and stakes; clean site
- Inspect finished surface for level, slope, and any rocking pavers; correct before calling it done
FAQ
What primary manufacturer documentation should be collected before writing a publication‑ready rubber‑paver patio guide?
Gather full installation manuals, product data sheets, technical bulletins and warranty terms from major rubber‑paver manufacturers (e.g., Versico, Premiere, Greatmats, WeatherBond). Key items: recommended paver thicknesses and weights, cutting/fabrication instructions, approved adhesives and primers, rooftop/terrace accessory specs, recommended base types, drainage/accessory details, and any manufacturer limitations or warranty conditions.
Which industry standards and technical guides are essential for base, edge restraint and permeable/non‑permeable design guidance?
Use ICPI technical guides (interlocking & permeable paver systems) for base construction, compaction lifts, open‑graded reservoir design and edge‑restraint details. Reference ASTM standards (e.g., D698/D1557 for compaction acceptance) and EPA permeable‑pavement/BMP fact sheets for permeable system design and maintenance tradeoffs.
What regulatory, permitting and safety code sources must be checked?
Review local municipal stormwater and impervious‑area rules (example: Portland SWMM) to determine permit triggers. Consult the International Fire Code (IFC) for fire‑pit clearances and local fire marshal rules. For accessibility/slope limits reference ADA/Access Board guidance. Also collect SDS for adhesives/primers and applicable slip‑resistance standards (ASTM E303 or ANSI A326.3) for safety claims.
Which expert interviews or professional inputs should be sought to validate procedures and edge cases?
Interview: (1) a rubber‑paver product engineer or manufacturer technical rep for product‑specific limits; (2) a landscape architect or hardscape installer for layout, edge restraint and pattern recommendations; (3) a geotechnical engineer or soils lab for infiltration testing/compaction specs on uneven/sloped sites; (4) a structural or roofing engineer for rooftop or raised patio designs; (5) a local building/permit official and fire marshal for code/permit clarifications.
What site testing and data are needed for substrate‑specific workflows (over grass, over concrete, uneven/sloped)?
Collect: soil infiltration/permeability tests (percolation or lab infiltration rate), soil classification (for frost/expansive concerns), existing concrete condition report (crack mapping, flatness, drainage), slope measurements (grade, cross slope), and groundwater/high water‑table info. For slopes, get recommended cut/fill, retaining/edge restraint specs and geotechnical recommendations.
What material property data and safety test results are required (e.g., slip, flame, durability)?
Gather manufacturer test reports or lab data for coefficient of friction (ASTM E303 or ANSI A326.3), compressive/impact performance, UV/aging resistance, thermal expansion, flame/smoke behavior if near fire features, and warranty/life‑expectancy metrics. Include SDS for adhesives/primers and PPE recommendations for cutting/install.
Next Articles
How to Install Permeable Paver Patio: DIY Step-by-Step Guide
How to install permeable paver patio: step-by-step planning, materials, drainage, tools, troubleshooting
How to Install Pavestone Patio: Complete DIY Step-by-Step
How to install Pavestone patio: step-by-step DIY guide, planning, base prep, laying, jointing, sealing, maintenance.
How to Install a Paving Stone Patio: Step-by-Step DIY Guide
Step-by-step DIY guide to install paving stone patio pavers, from prep and base to edging, cutting, sealing, and mainten