
Installing a Pavestone patio yourself is absolutely doable over a long weekend or two if you follow the right sequence: excavate to the correct depth, compact a crushed-stone base in lifts, screed exactly 1 inch of bedding sand, set your pavers tight, lock in permanent edge restraints, and finish with polymeric sand and a plate compactor. Done in that order, with the right base depth for your soil, you'll end up with a surface that drains properly, stays level for years, and looks professional.
How to Install Pavestone Patio: Complete DIY Step-by-Step

Felix Rowe
12 Jul 2026
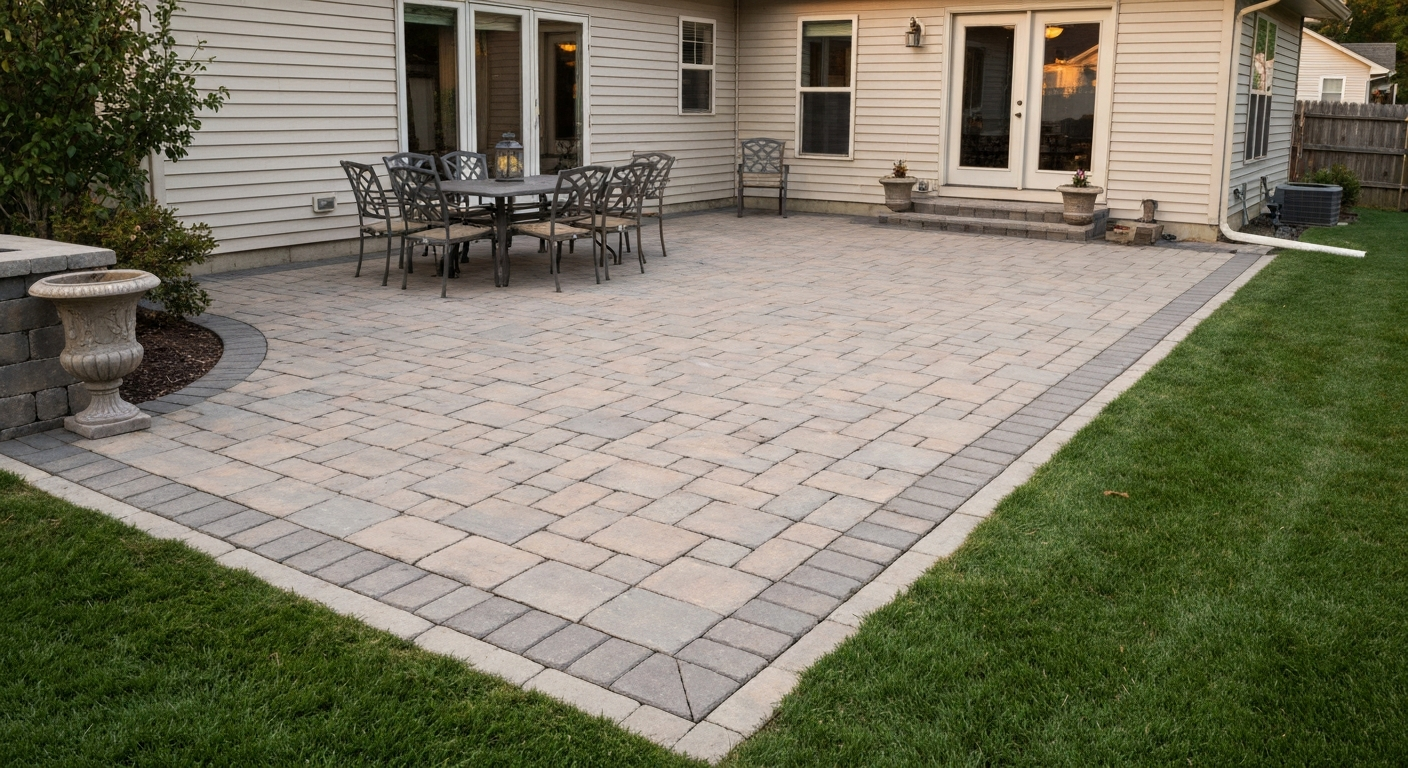
What this guide covers and who should DIY a Pavestone patio
This is a full-process guide that walks you from bare yard to finished patio. For step-by-step visuals and checklists on how to install paving stone patio, see the companion how-to guide. It covers every stage: planning, tools and materials, base preparation for standard soil and over existing concrete, pattern layout, cutting, setting Pavestone units, edge restraints, jointing, sealing, and maintenance. I also address special scenarios like sloped sites, drainage and permeable paver options, patios installed against the house, and alternative paver materials like rubber and resin.
This guide is written for homeowners with basic DIY confidence. You don't need masonry experience. You do need to be comfortable with physical digging, renting tools, reading a tape measure to the 1/8-inch, and following a sequence without cutting corners. If your project is a simple rectangular patio under 300 square feet on reasonably flat ground, you're in excellent DIY territory. Larger projects, steep slopes, or patios immediately adjacent to a foundation wall add complexity but are still achievable with careful planning.
Is this a good DIY project for your situation?
Before you buy a single paver, spend 20 minutes honestly evaluating your site, your budget, and your time. This is where most patio projects go wrong, not in the installation itself, but in the planning gaps that force expensive fixes later.
Size and scope
A typical 12x16-foot patio (192 sq ft) is a realistic solo weekend project if you rent a plate compactor and have a helper for the heavy hauling. A 20x25-foot patio (500 sq ft) is a multi-weekend project that benefits from two people consistently. Scale up material deliveries and rental days accordingly. Anything over 700 square feet starts to feel like a small commercial job, it's still DIY-able, but honest about the time commitment.
Permits and codes
Many municipalities don't require a permit for a ground-level paver patio, but some do, especially if it's over a certain square footage, within a setback from the property line, or attached to a structure. Check with your local building department before you dig. If your patio butts up against the house, you may also need to confirm it doesn't block a foundation vent or alter grading in a way that directs water toward the structure. Getting this wrong after the fact is expensive.
Cost and time expectations
Material costs for a standard Pavestone patio run roughly $8 to $20 per square foot depending on the paver style you choose, base material prices in your area, and whether you need to rent or buy tools. A 200-square-foot patio will typically cost $1,600 to $4,000 in materials. Renting a plate compactor adds $75 to $150 per day. A wet-cut masonry saw adds another $75 to $150. Budget a full weekend (two solid 8-hour days) for a 200-square-foot patio if you've done your prep work in advance, and know that excavation and base compaction consume far more time than the actual paver laying.
Tools and materials checklist
Having the right tools before you start prevents the classic mid-project hardware store run that derails your whole day. Here's what you'll need for a standard sand-set Pavestone patio.
Pavestone units and base materials
- Pavestone pavers in your chosen style (Holland, RumbleStone, or your selected product — confirm thickness from the SKU datasheet, as it affects base and bedding calculations)
- Crushed angular aggregate base (3/4-inch compactable gravel, sometimes labeled as 'road base' or 'Class II base' — not rounded pea gravel)
- Coarse bedding sand (ASTM C33 concrete sand — not mason sand or play sand)
- Polymeric sand for joints (sized for your joint width — confirm the product is rated for 1/16-inch to 3/16-inch joints per Pavestone's spec)
- Geotextile landscape fabric (nonwoven, for separation between subgrade and base — not the cheap woven garden variety)
Edge restraints and fasteners
- Plastic or aluminum paver edge restraint (sized for your paver thickness — typically 3.5-inch or 4-inch spike depth)
- Galvanized or hardened 10-inch steel spikes (not landscape staples — you need structural spikes anchored into the compacted base, not the sand)
- Rubber mallet for spike installation
Layout and measuring tools
- Tape measure (25 ft minimum)
- Mason's line (string line) and line level
- Batter boards (2x4 lumber scraps and stakes)
- Speed square and carpenter's square
- Chalk line
- Marking paint or stakes for utility marking
Excavation and compaction tools
- Flat spade and round-point shovel
- Wheelbarrow
- Plate compactor (rental — must be capable of at least 4,000 lbf / 18 kN at 75–100 Hz per Pavestone's specification)
- Hand tamper for corners and edges the plate compactor can't reach
- Screed pipes (two 1-inch-diameter metal pipes, used as depth guides for the bedding sand layer)
Cutting tools and safety gear
- Masonry saw with diamond wet-cut blade (rental) — always use water suppression when cutting concrete pavers to control silica dust per OSHA 29 CFR 1926.1153
- Safety glasses, hearing protection, work gloves
- N95 or P100 respirator rated for silica dust (required any time you cut or grind concrete pavers)
- Knee pads
- Dead-blow rubber mallet for paver adjustment
Finishing tools
- Push broom for sweeping polymeric sand
- Garden hose with gentle spray setting or backpack sprayer for activating polymeric sand
- Plate compactor with rubber pad attachment (to protect paver faces during final compaction)
- Paver sealer and pump sprayer or roller (optional but recommended)
Estimating how much material you need
Getting quantities right before you order saves you a second delivery charge and prevents running out mid-project. Here's how to calculate each component.
Pavers
Measure the finished patio area in square feet. Add 5% for cuts and breakage on a simple rectangular pattern, 10% for diagonal or herringbone patterns where you'll have more cut pieces along edges. For example, a 200 sq ft patio in a running bond pattern needs approximately 210 sq ft of pavers ordered. Pavestone product pages (and your retailer's datasheet) list coverage per pallet, divide your adjusted area by coverage per pallet to get your pallet count.
Compactable gravel base
For a standard pedestrian patio on firm soil, you need a compacted base depth of 4 inches. See an ICPI/CMHA-based summary of paver base depths (RemodelCalculators referencing ICPI Tech Spec) for standard compacted base recommendations: 4 in. for pedestrian patios, 6 in. for residential driveways, and 8–12 in. for vehicular/streets. Gravel compacts roughly 20 to 25%, so you'll pour about 5 inches of loose material to achieve 4 inches compacted. Calculate volume in cubic feet: area (sq ft) × 0.42 ft (5 inches loose) = cubic feet needed. Divide by 27 to get cubic yards. On soft, wet, or clay-heavy subgrade, increase your base to 6 inches compacted (roughly 7.5 inches loose) and consider a professional soil assessment.
Bedding sand
Pavestone specifies a nominal 1-inch bedding sand layer, not to exceed 1.5 inches. Never use bedding sand to compensate for base depth errors, the spec is explicit on this. For a 200 sq ft patio, 1 inch of sand = 200 ÷ 12 ≈ 16.7 cubic feet, or about 0.6 cubic yards. Most suppliers sell coarse concrete sand by the cubic yard or 50-pound bag. One cubic yard covers approximately 324 square feet at 1 inch deep.
Edge restraint
Measure the full perimeter of your patio in linear feet. Edge restraint sections are typically sold in 8-foot pieces. Divide perimeter by 8, add one extra section for corners and cuts. Don't forget spikes, you'll typically drive one every 12 inches along straight runs and every 6 inches around curves, so buy generously.
| Material | Rule of thumb | Notes |
|---|---|---|
| Pavers | Patio area + 5–10% waste | Use 10% for diagonal/herringbone patterns |
| Compactable gravel base | Area (sq ft) × 0.042 = cubic yards (4 in compacted) | Increase to 6 in on soft/clay subgrade |
| Bedding sand (ASTM C33) | 1 cu yd covers ~324 sq ft at 1 inch | Never exceed 1.5 inches; don't use to correct base errors |
| Polymeric sand | Bag coverage listed on product label (typically 40–80 sq ft per 50 lb bag) | Match joint width to product spec |
| Edge restraint | Perimeter ÷ 8 ft per section, add 1–2 extra | Also calculate spikes: 1 per 12 in on straight runs |
| Geotextile fabric | Patio area + 12 in overlap on all sides | Nonwoven separation fabric only |
Site assessment and planning before you dig
Spend real time on this step, more DIY patios fail because of site planning errors than installation errors. Walk the area at different times of day, after rain, and after dry spells to understand how water moves.
Call 811 before you excavate
In the US, calling 811 at least three business days before digging is required by law in most states. Your utility companies will come mark underground lines, pipes, and cables. Patio excavation typically goes 8 to 10 inches deep, deep enough to hit irrigation lines, buried cable, or in some regions, shallow gas lines. This is a non-negotiable first step.
Measuring and marking the patio footprint
Measure and mark your patio boundaries with marking paint, stakes, or a hose for curved edges. For a rectangular patio, use the 3-4-5 triangle method to confirm square corners: measure 3 feet along one edge from the corner, 4 feet along the adjacent edge, and the diagonal between those two points should measure exactly 5 feet if the corner is 90 degrees. Recheck at each corner before you commit to your layout.
Setbacks and drainage planning
Most local codes require patios to be set back a minimum distance from property lines, typically 5 to 10 feet, but check your municipality. More importantly, plan your drainage before you excavate. For step-by-step instructions on grading and installing drainage for paver patios, see our guide on how to install paver patio drainage. The finished patio surface should slope away from the house at a minimum of 1/8 inch per foot, with 1/4 inch per foot being the widely recommended standard for reliable sheet drainage. Over a 10-foot-wide patio, a 1/4-inch-per-foot slope means the far edge sits 2.5 inches lower than the edge nearest the house. Build this slope into your base, not your sand layer.
Understanding your subgrade
After you mark the area, dig a test hole about 12 inches deep in the center of your patio zone. If you hit solid, well-drained soil or compacted native fill, a standard 4-inch gravel base will serve you well. If the soil is soft, spongy, clay-heavy, or stays wet for days after rain, plan for a 6-inch base and consider adding a perforated drain pipe or French drain at the downhill edge. Frost-susceptible soils in cold climates may require even deeper bases, in USDA hardiness zones 5 and colder, many installers go 6 to 8 inches of compacted aggregate as a standard starting point.
Design decisions: shape, pattern, and transitions
The design you choose affects how much cutting you'll do, how the surface drains visually, and how the patio connects to the rest of your landscape. Spend time here before ordering materials, changing your mind mid-project costs you money in wasted pavers and time in relaying.
Shape: rectangular vs. irregular
For a first paver project, a simple rectangle is the smart choice. It requires the fewest cuts, gives you clean reference lines, and makes quantity estimation straightforward. Curves and irregular shapes look beautiful but require cutting almost every border paver and add 30 to 50% more time to the project. Save the curved edges for your second patio.
Pattern selection and structural strength
Pavestone's Holland and standard rectangular pavers work well in running bond (brick-style, offset joints), herringbone (45° or 90°), and basketweave patterns. Running bond is the easiest to lay and requires the least cutting on rectangular patios. Herringbone at 45 degrees has the highest interlock strength, it resists horizontal shifting most effectively, but generates significant corner cuts along all four edges. Basketweave is visually interesting but has the weakest interlock because many joints line up. For patios that will see furniture, fire pits, or foot traffic, herringbone or running bond are the best structural choices.
Transitions to walkways and the house
If your patio connects to a walkway or steps leading to the house, plan the transition point so full pavers (or close to full) land at the visible connection. Adjust your starting point to minimize awkward slivers at doorways or step edges. Where the patio meets the house foundation, maintain a minimum 1/2-inch gap between the pavers and the foundation wall to allow for drainage and thermal movement, never mortar pavers tight to the foundation. This is especially important if you're installing pavers against the house; that junction needs to drain freely.
Setting up reference lines and layout
Good reference lines are what separates a professional-looking patio from a wavy one. Invest the 30 to 45 minutes here and you'll save yourself hours of re-laying later.
Setting up batter boards
Drive batter boards (simple H-shaped frames made from 2x4 lumber and stakes) 2 to 3 feet outside each corner of your patio. Stretch string lines between the boards, positioning them at finished patio surface height. Use a line level or water level to set the height of each string, and build your 1/4-inch-per-foot slope into the string positions by lowering the downhill strings proportionally. These string lines give you your finished surface elevation and your square reference, everything you dig and build will reference back to them.
Establishing your starting edge
Identify your dominant visual line, usually the edge closest to the house or the longest straight edge. Start your first row of pavers from that line and work outward. For herringbone, find the center of the patio and start from the middle. For running bond, start from the corner that will be most visible and work in both directions. Mark your starting positions on the base with chalk so you don't lose them when the sand goes down.
Preparing the base over grass or soil
Base preparation is the single most important factor in your patio's long-term performance. Shortcut this phase and you will deal with settling, uneven surfaces, and edge failure within a few years. Do it right and your patio will perform for decades.
Calculating excavation depth
Your total excavation depth equals: compacted base thickness + 1 inch bedding sand + paver thickness. For a standard pedestrian patio using Pavestone Holland pavers in 60mm (2.36-inch) thickness with a 4-inch compacted base, that's 4 + 1 + 2.36 = 7.36 inches below finished grade. Round up to 7.5 inches to be safe. Always confirm your specific paver's thickness from the product datasheet before excavating, Pavestone offers pavers in 30mm, 45mm, and 60mm thicknesses, and the difference matters.
Excavation and removing organic material
Excavate the full patio area plus 6 inches beyond the planned paver edge on all sides, the base must extend at least 6 inches past the paver edge to properly support the edge restraint. Strip all sod, roots, and organic material. If you hit soft spots, dig down until you reach stable soil and fill back up with compactable gravel in lifts. Don't leave organic material under the base, it will decompose, compress, and cause settling.
Installing geotextile fabric
Once excavated and the subgrade is roughly graded to your slope, lay a nonwoven geotextile fabric across the entire excavated area, running it up the sides slightly. This fabric separates the subgrade soil from your gravel base, preventing the aggregate from slowly migrating into soft soil beneath it over time. Use a nonwoven geotextile rated for separation (AASHTO M-288 Class 2 or equivalent), not the thin woven landscape fabric from the garden center.
Adding and compacting the gravel base
Add crushed angular aggregate in 3-inch loose lifts and compact each lift with the plate compactor before adding the next. Compact in overlapping passes, changing direction (forward-backward, then side-to-side) for even compaction. Check the surface with a long straight-edge after compaction, you should have a solid, unyielding surface that reflects your intended slope. The base surface should be within 3/8 inch of the intended elevation across any 10-foot span to stay within Pavestone's finished surface tolerance. This is the stage to correct any elevation problems, not the sand layer.
Installing edge restraints before the sand goes down
Here's a step that a lot of DIY guides get wrong: Pavestone's specification explicitly requires edge restraints to be mounted to the finished compacted base, not on top of the bedding sand, and not after the pavers are set. Install your edge restraints now, along the outer perimeter of your planned paver field. Drive 10-inch steel spikes every 12 inches on straight sections. The restraints should be positioned so their top edge will sit flush with or just below the finished paver surface. This gives the pavers a solid boundary from day one.
Screeding the bedding sand
Lay two 1-inch-diameter metal pipes across the compacted base, parallel to each other, spaced 6 to 8 feet apart. These act as depth guides. Pour ASTM C33 coarse concrete sand between them, then drag a straight 2x4 screed board across the pipes to create a perfectly flat 1-inch sand layer. Lift the pipes carefully after screeding each section and fill the channels with sand, lightly smoothing by hand. Do not walk on the screeded sand, any footprint means re-screeding that section. Work from a kneeboard or lay temporary walking boards as you go.
Installing over existing concrete
Installing Pavestone pavers over an existing concrete slab is a legitimate approach when the slab is sound, reasonably level, and well-drained. Inspect the slab carefully: it must have no actively shifting cracks, no significant frost heave, and adequate slope (at least 1/8 inch per foot away from the house). If the slab is cracked badly or buckled, your best long-term result comes from removing it and starting fresh with a compacted aggregate base.
On a sound slab, you still need to screed a 1-inch bedding sand layer and install edge restraints anchored into the slab perimeter (use masonry anchors). The major constraint is finished height: adding pavers over a slab raises your patio surface by the paver thickness plus 1 inch of sand, which can create a trip hazard at doorways or steps. Measure carefully before committing. Also note that drainage performance depends entirely on the existing slab's slope, pavers on a flat slab will pool water regardless of how well they're installed.
Handling uneven ground and slopes
Sloped sites require more thought in the planning phase but are fully manageable for a DIYer. The key principle: build your slope into the base, not into variable sand depths. If your yard slopes significantly, you have two practical options. First, excavate deeper on the high side to create a flat base and use retaining on the low side, essentially cutting into the slope. Second, build up the low side with additional base material to create a terraced effect. Either way, maintain your consistent base compaction and your 1-inch sand layer across the whole surface.
On very steep slopes (more than 6 inches of drop over 10 feet), consider whether a raised patio with retaining walls might be the better design solution. A raised patio with proper drainage behind the retaining wall is more structurally sound than trying to run a sand-set patio across a dramatic grade change. The drainage behind any retaining element is critical, use clean gravel backfill and a perforated drain pipe to prevent hydrostatic pressure buildup.
Laying the Pavestone pavers
With your base compacted, sand screeded, and edge restraints in place, the actual paver laying is the most satisfying part of the project. It's also where most of the visible quality is determined.
- Start at your reference corner or center line and work outward in both directions. Set full pavers first, saving cuts for last.
- Place each paver by setting it down vertically against the adjacent paver, then pivoting it flat — this prevents disturbing the screeded sand surface.
- Maintain joint widths of 1/16 to 3/16 inch (2–5 mm) as specified by Pavestone. Use paver spacers if needed for consistency. No more than 5% of joints should exceed 1/4 inch.
- Check your running lines every 5 to 6 rows with a string line or long straightedge. Correct small drift early — it's nearly impossible to fix once 50 pavers are down.
- Do not stand or kneel on the screeded sand ahead of where you're working. Use a kneeling board that distributes your weight across set pavers.
- Keep pavers from the same pallet mixed with pavers from other pallets to distribute any slight color batch variations across the surface.
- Leave cutting to the end. Mark all the cut pavers with chalk as you go, then make all your cuts in one session to minimize saw setup time.
Cutting pavers: technique and safety
Use a rented walk-behind masonry saw with a diamond wet-cut blade for all cuts. Wet cutting dramatically reduces airborne silica dust, a real respiratory hazard. Even with a wet saw, wear your N95 or P100 respirator, safety glasses, and hearing protection every time you run the saw. OSHA's construction silica standard (29 CFR 1926.1153) requires dust controls when cutting concrete masonry, and wet cutting is the primary engineering control. See OSHA Respirable Crystalline Silica Final Rule (29 CFR 1926.1153) for the standard's requirements, including Table 1 prescribed controls (wet cutting, HEPA‑filtered local exhaust) and when employers must perform exposure assessments and provide respirators. If you must cut dry for any reason, use a tool with a HEPA-filtered dust shroud. Mark your cut line with a pencil or chalk, score lightly on the first pass, then cut to depth. For curved cuts or notches, use a 4.5-inch angle grinder with a diamond blade for freehand shaping, still with water or HEPA controls.
Compacting and jointing
Once all pavers are set and cuts are in place, it's time to vibrate the pavers into the bedding sand and fill the joints. This step is what locks everything together and is not optional, skipping compaction leaves you with a surface that will shift and settle unevenly.
- Attach a rubber pad (paver protection pad) to your plate compactor before running it over the pavers — bare metal plates will crack or chip Pavestone units.
- Make the first 2 passes over the full paver surface to seat the pavers into the bedding sand.
- Pour polymeric sand over the surface and sweep it into the joints with a push broom. Work it into the joints until they are full to within 1/8 inch of the paver top.
- Make 2 more compactor passes to further seat the pavers and work the sand deeper into joints.
- Add a second pass of polymeric sand if joints aren't fully filled, then make a final 2 passes with the compactor — 4 to 6 passes total per Pavestone's specification.
- Blow or brush off any excess polymeric sand from the paver faces before wetting — sand left on the surface can cause haze when activated.
- Activate the polymeric sand by misting the surface gently with a garden hose. Do not use a full stream — it will wash sand from the joints. Allow to cure per the polymeric sand manufacturer's instructions (typically 24 hours before foot traffic, no rain for the first 24–48 hours of cure).
Check your finished surface tolerance with a 10-foot straightedge after compaction: Pavestone's specification calls for ±3/8 inch (±10 mm) over 10 feet. Any high spots or low spots greater than that indicate a base or screeding error that the sand didn't fully absorb. Minor variations are normal and acceptable, significant ones warrant investigation before you call the job done.
Permeable paver options: when and how
If your municipality has stormwater management requirements, your site is in a flood-prone area, or you simply want to minimize runoff, permeable interlocking concrete pavement (PICP) is worth considering. Pavestone and other manufacturers offer permeable paver units designed specifically for open-joint installations that allow water to pass through the surface and into an open-graded aggregate reservoir beneath.
PICP systems differ from standard sand-set patios in several important ways. For step-by-step instructions on how to install a permeable paver patio, see our detailed guide. The base is an open-graded crushed stone reservoir (not dense-graded compactable gravel) sized to store the volume of water from your design storm. Joints are filled with clean, angular aggregate (typically 2mm to 6mm chip stone), not sand. Geotextile placement is strategic, it prevents soil infiltration at the bottom of the reservoir without blocking vertical drainage. The installation is governed by ASCE/ICPI Standard 68-18 and the CMHA/ICPI PICP manuals, which are worth downloading if you go this route. The EPA and FHWA recognize PICP as a recognized green infrastructure stormwater management practice, which matters if you're seeking local stormwater credits or permits.
A key pre-design check for PICP: measure your subgrade's infiltration rate (ASTM D3385 or C1781 test methods) to confirm the soil can accept water at a useful rate. Heavy clay soils with very low infiltration rates may require an overflow outlet pipe designed into the base. Don't skip this step, a permeable patio installed over effectively impermeable clay will saturate and fail faster than a standard patio on the same site.
Special installation scenarios
Installing pavers against the house foundation
Patios that connect directly to the house need careful attention to water management. The patio surface must slope away from the foundation (minimum 1/4 inch per foot) and the gap between pavers and the foundation wall must be maintained, never mortar pavers tight against the foundation. That gap allows drainage and accommodates thermal movement. If you're adding a patio against the house, also check that your excavation and base don't undermine any existing footings and that you're not covering exterior drainage tiles or weeping systems installed around the foundation.
Integrating a fire pit or raised area
Fire pits built with Pavestone RumbleStone or similar units can be integrated into a paver patio with careful planning. The fire pit base needs its own compacted foundation, don't rely on the patio base alone to support the weight of a built-in fire ring. Plan the fire pit location before you set pavers and leave a cut-out in the paver field for the pit base. For raised patio sections, use a retaining wall system to define the elevation change, ensure proper drainage behind the wall, and tie the raised section's base into the lower patio's base for structural continuity.
Rubber and resin pavers: a different process
Rubber pavers (typically made from recycled tires) and resin-bound pavers have entirely different installation requirements from concrete Pavestone units. Rubber pavers for ground-level outdoor use are often interlocked mechanically or adhered with a two-part polyurethane or epoxy adhesive. On non-penetrable surfaces like concrete or asphalt, manufacturers like RubberForm recommend specific two-part epoxy adhesives rather than spikes. Rubber pavers don't require plate compaction, the compaction step would damage them. They do need a flat, stable base (sand-set or direct-to-concrete), and joints are typically self-sealed by the rubber material itself. For a detailed walkthrough on how to make a patio with rubber pavers, including substrate preparation, adhesive selection, and installation tips, see our dedicated guide on that topic.
Resin-bound paving is a different system entirely, an aggregate and resin mixture poured and troweled over a prepared base. It's more of a surfacing product than a unit paver. It requires a sound, flat substrate (typically concrete or asphalt), specific mixing ratios, and application conditions (temperature and humidity windows specified by the manufacturer). Both rubber and resin systems are legitimate options for specific applications (especially accessible surfaces and pool surrounds), but they require reading and following their own manufacturer installation instructions carefully rather than adapting concrete paver guidance.
Sealing your Pavestone patio
Sealing is optional but recommended, especially for light-colored Pavestone products that are vulnerable to staining from food, sunscreen, and organic debris. Wait at least 90 days after installation before sealing, the pavers need time to allow any efflorescence (natural calcium carbonate bloom) to work its way out. Sealing over active efflorescence traps it and creates a persistent white haze.
You have two main sealer types to choose from. Film-forming sealers (acrylic or polyurethane) create a surface coating that can enhance color and sheen, the 'wet look' or 'natural look' finishes. They require periodic recoating as the film wears, typically every 2 to 3 years. Penetrating sealers (silane or siloxane chemistry) soak into the paver surface and provide hydrophobic protection without significantly changing the paver's appearance. They last longer between treatments (3 to 5 years typically) and don't create a film that can peel. ICPI Tech Spec 5 recommends following manufacturer instructions for sealer selection and reapplication intervals. Whichever type you choose, test it on a spare paver first, once a film-forming sealer is applied to the full surface, you're committed to that look until it wears off.
Pavestone's warranty: what it covers and what it doesn't
Pavestone offers a limited manufacturer's warranty that covers merchantable quality of the product itself, meaning the pavers will meet their specified dimensions and structural properties when installed per instructions. The warranty covers replacement or refund of defective product but expressly limits consequential damages (meaning they won't cover labor costs to reinstall if something goes wrong). Claims must be submitted in writing to Pavestone LLC. The warranty does not cover installation errors, base failures, or damage from improper use. This is standard for manufactured paver products and is another reason to follow the installation spec precisely, if you ever need to make a warranty claim, documented adherence to Pavestone's specified base, bedding, and joint requirements strengthens your case significantly.
Routine maintenance to keep it looking great
A properly installed Pavestone patio needs very little ongoing work. Sweep off leaves and debris promptly, organic material left to decompose stains pavers and accelerates joint sand erosion. Reapply joint sand (polymeric or kiln-dried) to any joints that show erosion after winter freeze-thaw cycles or heavy rain. Don't use metal snow shovels on pavers, a rubber or plastic blade prevents surface chipping. Avoid deicing salts when possible; calcium chloride is less damaging than rock salt, but frequent applications of any deicing chemical will erode polymeric sand joints and can cause surface spalling over time.
Inspect the edges annually. If you notice edge pavers tilting or shifting, it almost always means an edge restraint spike has worked loose, pull the affected pavers, reset the restraint, drive new spikes, and re-lay. Catching edge issues early prevents a cascade of shifting pavers throughout the field. For staining, a mild pH-neutral paver cleaner handles most organic stains. Oil stains require a degreaser formulated for concrete. Never use bleach directly on Pavestone products without checking the manufacturer's guidance, some formulations can affect surface color.
Troubleshooting common problems
| Problem | Likely cause | Fix |
|---|---|---|
| Pavers settling in one area | Inadequate base compaction or organic material left in subgrade | Remove affected pavers, excavate, remove organics, compact fresh base material, re-screed and relay |
| Surface water pooling | Insufficient slope or low spot in base | Remove pooling-area pavers, adjust base elevation, re-screed and relay with corrected slope |
| Edge pavers shifting outward | Edge restraint spike has loosened or restraint was set on sand instead of base | Pull edge pavers, reset and re-spike edge restraint on compacted base, relay pavers |
| Joint sand washing out | Polymeric sand not properly activated, or installed before rain cure was complete | Remove remaining loose sand, refill joints with new polymeric sand, activate carefully and protect from rain for 48 hours |
| White haze on paver surface | Efflorescence (natural calcium bloom) or polymeric sand haze from improper cleanup | Use an efflorescence cleaner (pH balanced) and gentle scrubbing; for sand haze, use a polymeric sand haze remover per manufacturer instructions |
| Uneven cuts or chipped edges | Blade worn, cutting too fast, or cutting dry without water suppression | Replace diamond blade, slow the cut feed rate, ensure water supply is running continuously |
| Patio surface out of tolerance (more than 3/8 in over 10 ft) | Base not properly graded before sand screed | Identify high/low areas with a straightedge, remove pavers, correct base elevation, re-screed and relay |
When to call a professional
Most homeowners can complete a standard Pavestone patio without professional help. But a few situations genuinely call for at least a professional consultation. If your soil test reveals very poor drainage or the subgrade is unstable (soft, continuously wet, or frost-heaved), a geotechnical opinion on base design is worth the cost. If your patio is within 5 feet of a foundation, adjacent to a retaining wall, or requires significant grade change, a landscape contractor or engineer can confirm the design won't direct water toward your foundation or undermine existing structures. And if you're in a jurisdiction that requires a permit and inspection, the inspector's checklist is actually a useful quality guide, build to it.
The goal of this guide is to give you the knowledge to do this right the first time. A Pavestone patio installed on a properly compacted base, with correct slope, tight edge restraints, and activated polymeric sand joints, will look great and last 20 or more years with minimal maintenance. That's a real, achievable result for a capable DIYer who takes the preparation seriously.
FAQ
What are the first planning steps before installing a Pavestone patio?
Measure the area, decide shape and pattern, confirm local codes and setbacks, locate underground utilities, pick Pavestone SKU (thickness/dimensions) and permeable vs. solid installation, and calculate material quantities. Plan slope (away from house) of 1/8–1/4 in./ft (≈1–2%) and drainage outlets. Allow time for site prep and at least one helper for larger projects.
What tools and materials will I need for a DIY Pavestone patio?
Basic tools: tape measure, string/stakes, level/laser level, plate compactor (low‑amplitude 4,000 lbf+), wheelbarrow, shovel, rake, screed rails/boards, rubber mallet, broom, masonry saw (wet diamond) or grinder with dust control, tampers, edging spikes. Materials: Pavestones (confirm SKU thickness), crushed-stone base (AASHTO No.57/modified), bedding sand (ASTM C33) screeded to nominal 1 in., kiln‑dried joint sand or polymeric sand (follow manufacturer instructions), edge restraint (plastic/metal/ concrete curb), geotextile and open‑graded reservoir if permeable system, concrete/epoxy for special anchors, sealer (optional). PPE: eye, hearing, gloves, dust/respirator when cutting.
How deep should the base be for a patio?
Follow ICPI guidance: typical pedestrian patios on normal subgrade need 4 in. compacted aggregate base; increase to 6 in. or more on weak, wet, or frost‑susceptible soils. For permeable pavers, design an open‑graded reservoir sized to storage requirements per CMHA/ICPI and subgrade infiltration rate. Always compact base in lifts to specification and extend base past edges at least 6 in.
How do I prepare different site scenarios (over grass, over concrete, sloped sites)?
Over grass: remove turf and topsoil to required depth, compact subgrade, add and compact crushed aggregate base. Over sound concrete: verify slab is level, uncracked, and drains; install edge restraint anchored to compacted substrate, add screeded bedding sand (nominal 1 in.)—do not use bedding sand to correct base elevation deficiencies. On sloped sites: set grade for desired slope (1/8–1/4 in./ft away from house), use retaining walls or steps for large grade changes, and ensure edge restraints are tied into base. For very uneven or weak subgrades, excavate and replace with structural aggregate base; consider geotextile stabilization.
What are the Pavestone bedding and joint requirements I must follow?
Pavestone specifies a screeded bedding sand layer nominally 1 in. (25 mm), not to exceed 1½ in.; bedding sand must sit on a compacted base (do not use it to correct base elevation). Joint widths should be 1/16–3/16 in. (2–5 mm), with no more than 5% exceeding 1/4 in. After laying, vibrate pavers with a plate compactor (4,000 lbf at 75–100 Hz recommended) and make 4–6 passes while sweeping dry joint sand into joints.
How do I install a permanent edge restraint correctly?
Install edge restraints anchored into the compacted base (not on top of the bedding sand) so the base extends at least 6 in. past the paver edge. Use manufacturer‑recommended spikes or concrete/stone curb for heavy loads. Edge restraints must be set to final elevation of the base to prevent paver movement and edge failure.
Next Articles
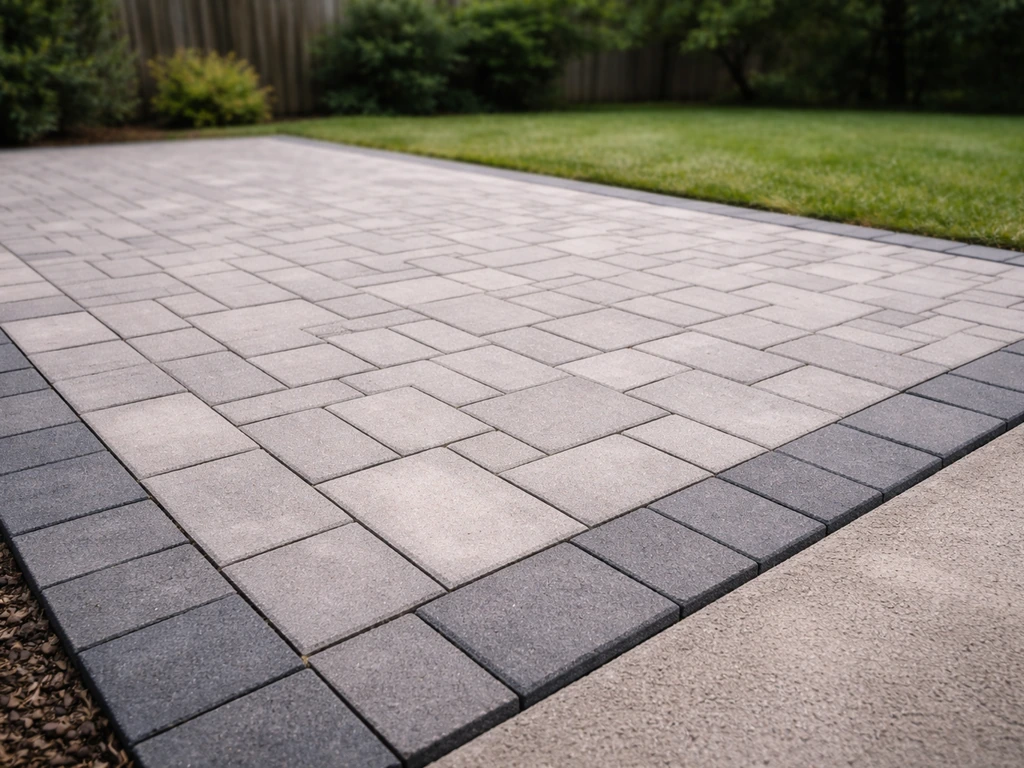
How to Install a Paving Stone Patio: Step-by-Step DIY Guide
Step-by-step DIY guide to install paving stone patio pavers, from prep and base to edging, cutting, sealing, and mainten
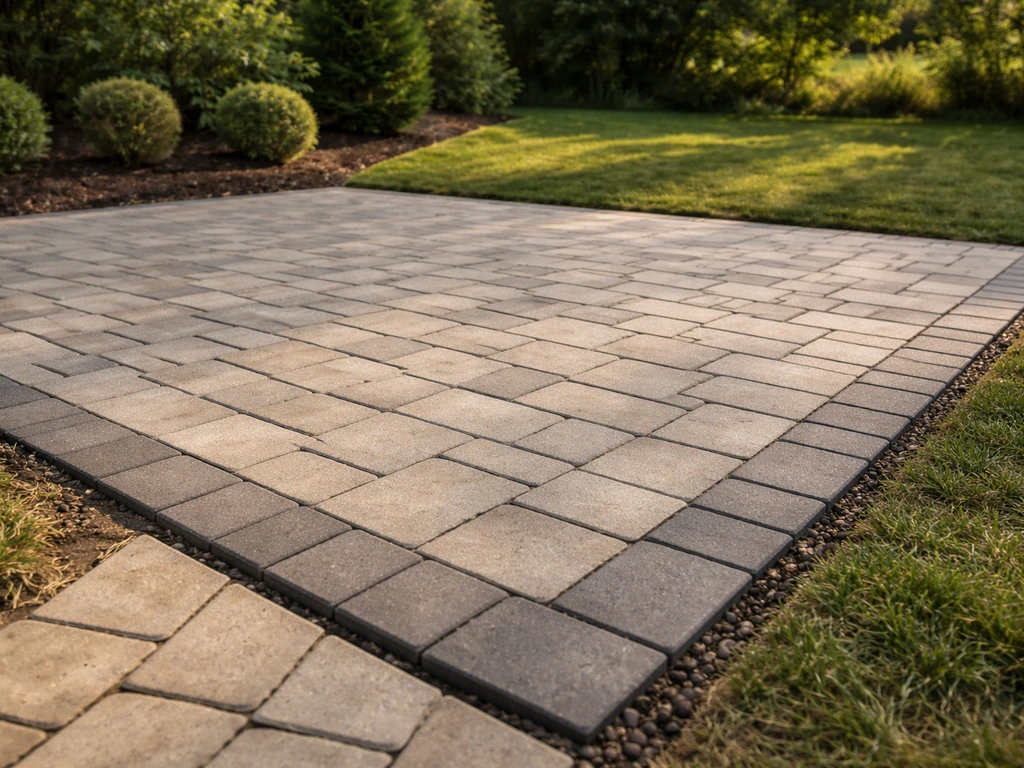
How to Install a Paver Patio: Step-by-Step DIY Guide
Step-by-step DIY guide to install a paver patio: layout, base prep, drainage, set pavers, cut fit, edges, and sealing.
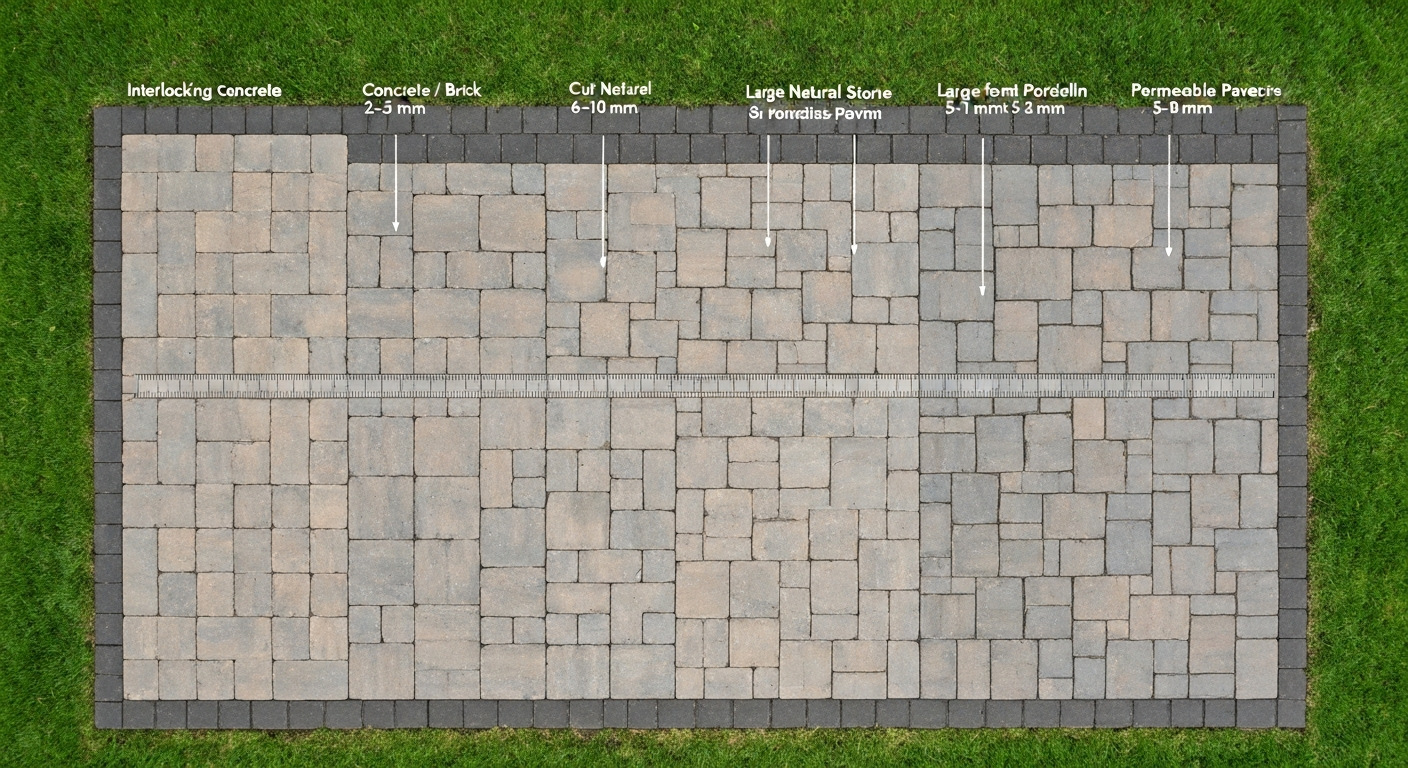
How to Space Patio Pavers: Joint Widths & Finishing Tips
How to space patio pavers: exact joint widths by paver type, step‑by‑step spacing, jointing & finishing tips.