Prepping for a paver patio comes down to six things done in the right order: plan and mark your footprint, clear whatever is currently there, dig to the correct depth, compact a gravel sub-base, add a level sand bed, and check drainage before a single paver touches the ground.
How to Prep for a Paver Patio: Full DIY Checklist

Felix Rowe
2 Jun 2026
If you are trying to do it on a budget, focus on the inexpensive steps first and keep your materials choice aligned with your site conditions Prepping for a paver patio comes down to six things. If you are still figuring out the basics, start by reviewing what you need to make a paver patio, including the key materials and tools prep for a paver patio.
If you are wondering what you need before you start, these six steps cover the core materials and prep work for a solid patio base Prepping for a paver patio comes down to six things done in the right order. Get these steps right and your patio will stay flat and drain well for decades.
Rush or skip any of them and you are looking at sunken pavers, pooling water, and a redo job that costs more than doing it correctly the first time.
Planning and measuring your patio footprint
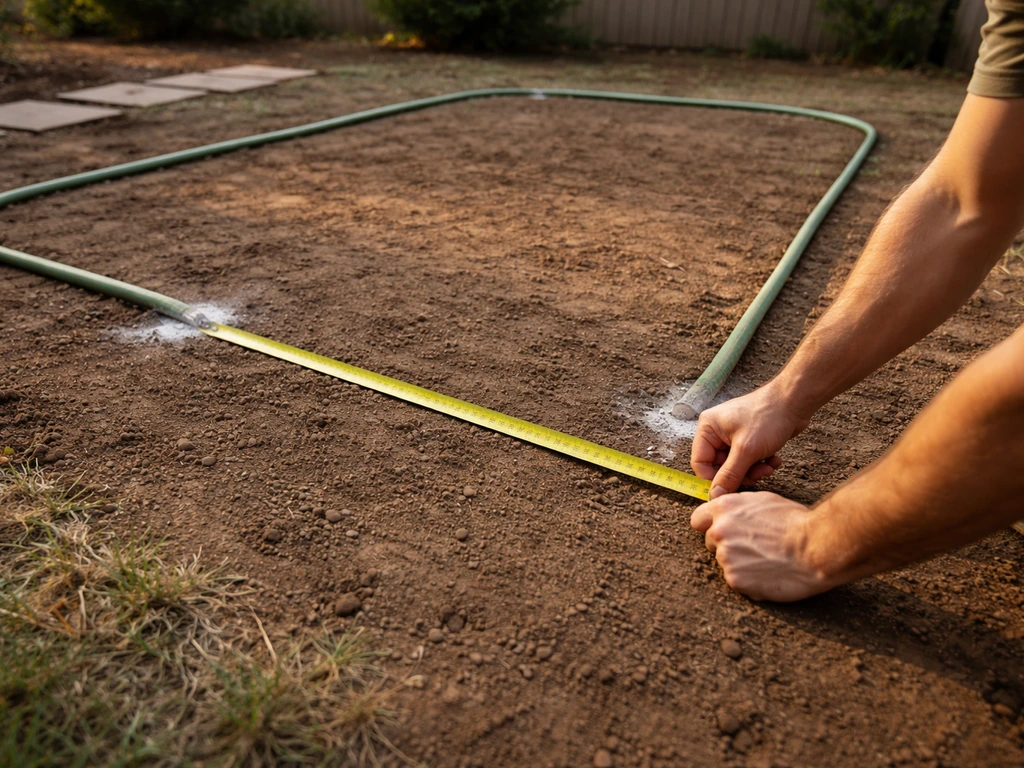
Before you pick up a shovel, spend real time with your measurements. Most DIYers undersize their patios the first time around, so pull out a garden hose or spray paint and actually walk around the space with outdoor furniture in place. A comfortable dining setup needs at least 12 x 12 feet, and a full outdoor living room pushes 16 x 20 feet or more. Get those dimensions locked in before you order anything.
Once you have your shape and size, call 811 (the free dig-safe line in the US) at least three business days before you break ground. Buried utility lines are not rare, and a shovel through a gas line or irrigation conduit turns a weekend project into an emergency. After clearance, mark your full perimeter with marking paint or stakes and string. This outline is your guide for every step that follows.
While you are planning, think about whether you need a permit. Most municipalities do not require one for a ground-level paver patio, but anything tied to a structure, raised more than a few inches, or large enough to qualify as impervious surface may trigger local rules. A quick call to your building department takes five minutes and saves real headaches.
Also factor in your paver size here. Standard concrete pavers run 3 5/8 inches, 4 inches, or larger, and typical joint spacing falls between 1/16 and 3/16 inch (2 to 5 mm). If you plan your footprint dimensions around your paver size, you minimize cuts at the edges. This is a small detail at the planning stage that saves hours of work at the end.
Clearing and handling existing surfaces
What you are starting with determines how much work this phase takes. Here is the honest breakdown for the three most common scenarios.
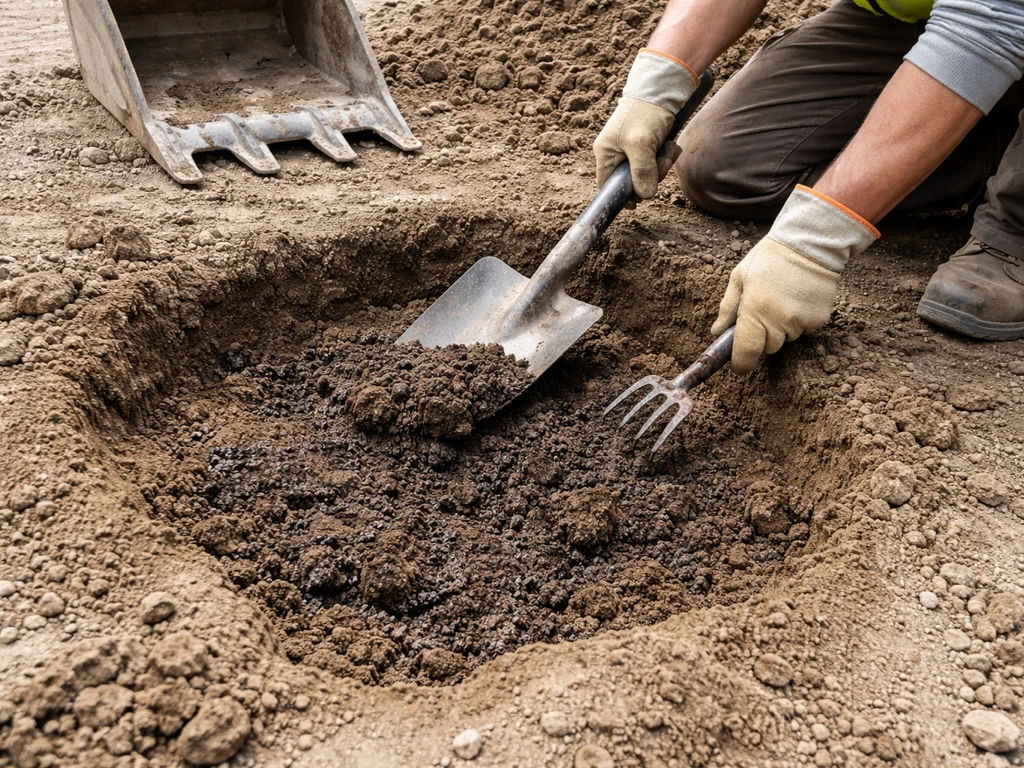
Laying over grass or bare soil
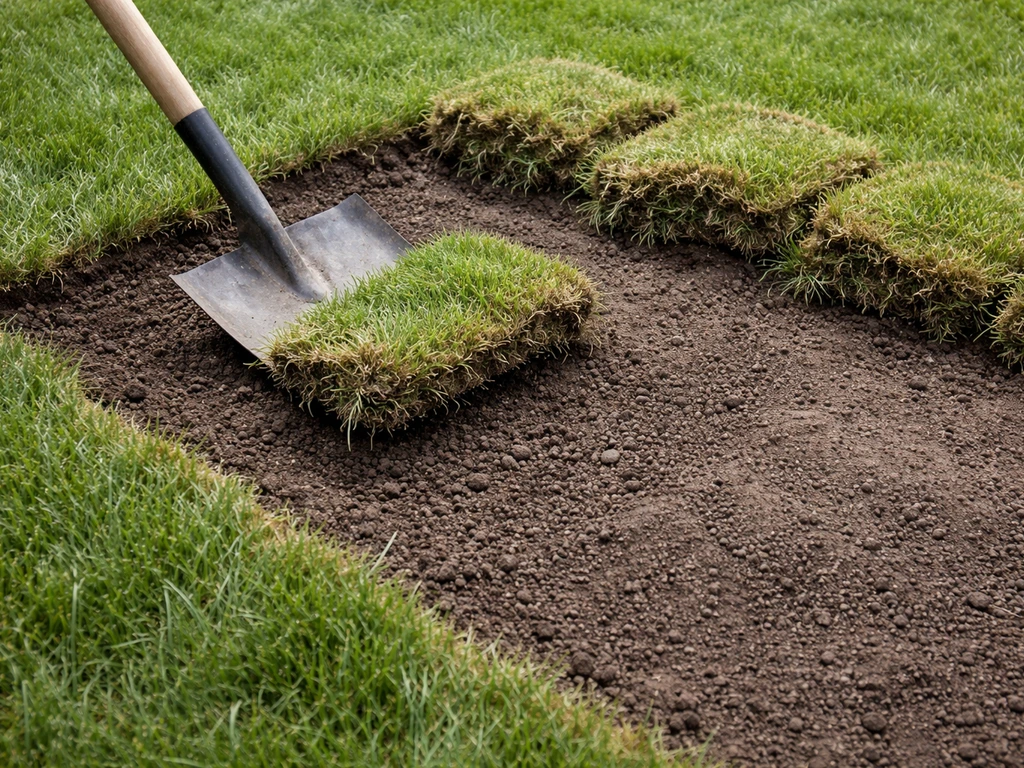
This is the standard starting point. Strip the sod and topsoil completely. Do not bury it, do not compact grass into the sub-base, and do not try to skip this step. Organic material breaks down over time and causes your base to sink unevenly. A sod cutter (rentable for around $70 to $100 per day) makes this fast and clean. For smaller areas a flat spade works fine. Remove at least the top 2 to 3 inches of sod and organic matter, then add that depth to your total excavation target.
Dealing with an existing concrete slab
You have two real options here. If the slab is in good shape, level, and draining properly, you can lay pavers directly over it using a thin mortar-set or sand-set approach, but you need to account for the added height at doorways and transitions. If the slab is cracked, heaved, or draining toward the house, remove it. Leaving a bad slab under your pavers just transfers the problem upward. Concrete removal typically runs $2 to $6 per square foot for a contractor with a jackhammer and dumpster, or you can rent a demolition hammer and haul pieces yourself. Either way, once concrete is out, treat what remains underneath like bare soil and follow the standard sub-base process.
Uneven ground and sloped areas
Uneven ground is common and totally workable as long as you address it in the sub-base rather than trying to compensate in the sand layer. You can build up low spots with compacted gravel during the sub-base phase and cut down high spots during excavation. For steeply sloped sites or raised patio designs, you will likely need a retaining wall or step system at the edges, plus a more aggressive gravel base to handle drainage. Those projects add time and material cost but are still well within DIY territory if you plan carefully.
Excavation depth and leveling for a stable base
Getting excavation depth right is probably the single most important prep decision you will make. Dig too shallow and your base compresses and shifts. Dig too deep and you are adding unnecessary material cost. Here is how to calculate your target depth:
| Layer | Typical Depth | Notes |
|---|---|---|
| Compacted gravel sub-base | 4 inches (standard) / 6–8 inches (heavy use or soft soil) | Increases for driveways, fire pits, or poor native soil |
| Bedding sand | 1 inch (25 mm) | ICPI nominal guidance; do not exceed or you lose stability |
| Paver thickness | 2 3/8 to 3 1/8 inches (typical) | Varies by paver; measure yours before digging |
| Total excavation (standard patio) | 7 to 8 inches below finished grade | Add or subtract based on paver thickness and site conditions |
Mark your target depth on your stakes before you dig, and check frequently with a tape measure as you go. A common mistake is eyeballing depth and ending up with inconsistent spots across the area. Inconsistent depth means inconsistent compaction, which means uneven pavers. Take the extra two minutes to check.
Once you hit your target depth, rake the subgrade as level as possible and look for soft spots. Anywhere your foot sinks noticeably is a problem you need to fix before adding gravel. Dig out soft spots an extra 6 inches, fill with gravel, and compact in layers.
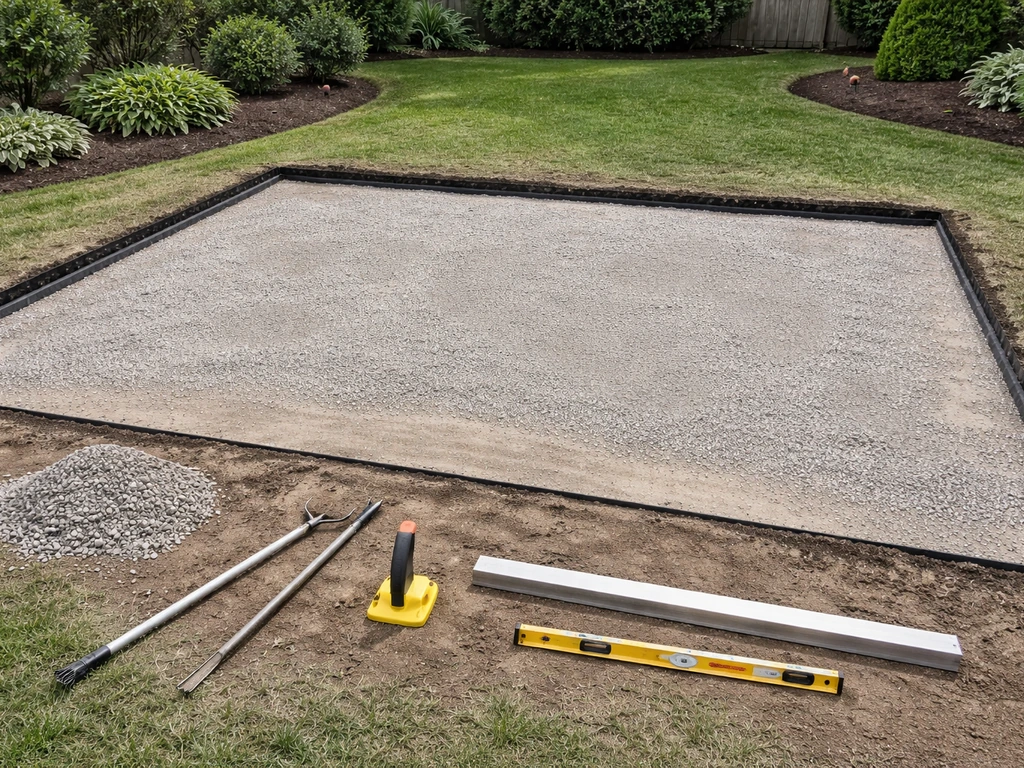
Base and sub-base materials plus compaction
A properly built base is what separates a paver patio that lasts 20 years from one that sinks in five. Once you are past excavation and compaction, the next step is to confirm your drainage and then prep ground properly for a patio paver base before you start setting pavers properly built base. You need two distinct layers: a compacted crushed stone sub-base and a screeded bedding sand layer on top.
Choosing the right gravel
Use compactable crushed stone, typically called Class II base, road base, dense-grade aggregate, or crusher run depending on your region. These angular crushed stone mixes compact tightly and drain well. Do not use pea gravel, river rock, or any smooth rounded stone for the sub-base. Those materials never lock together and will shift under load. For most residential patios, 3/4-inch crushed stone or a 3/4-inch minus blend (which includes fines) compacts best.
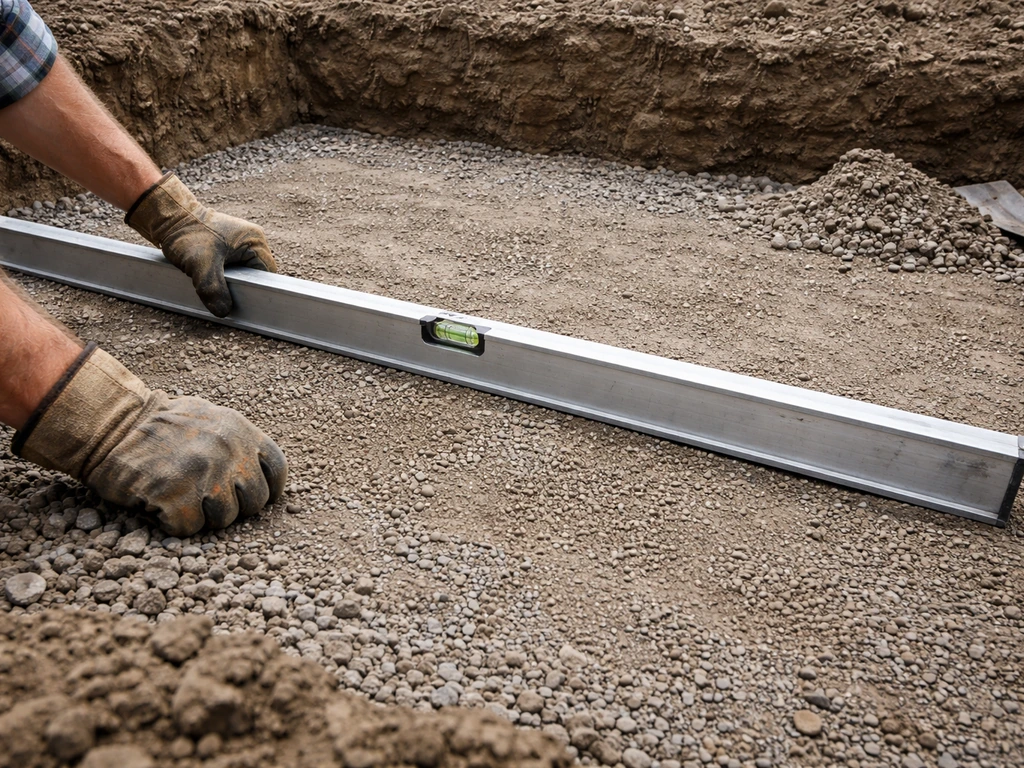
Compaction: the step most people rush
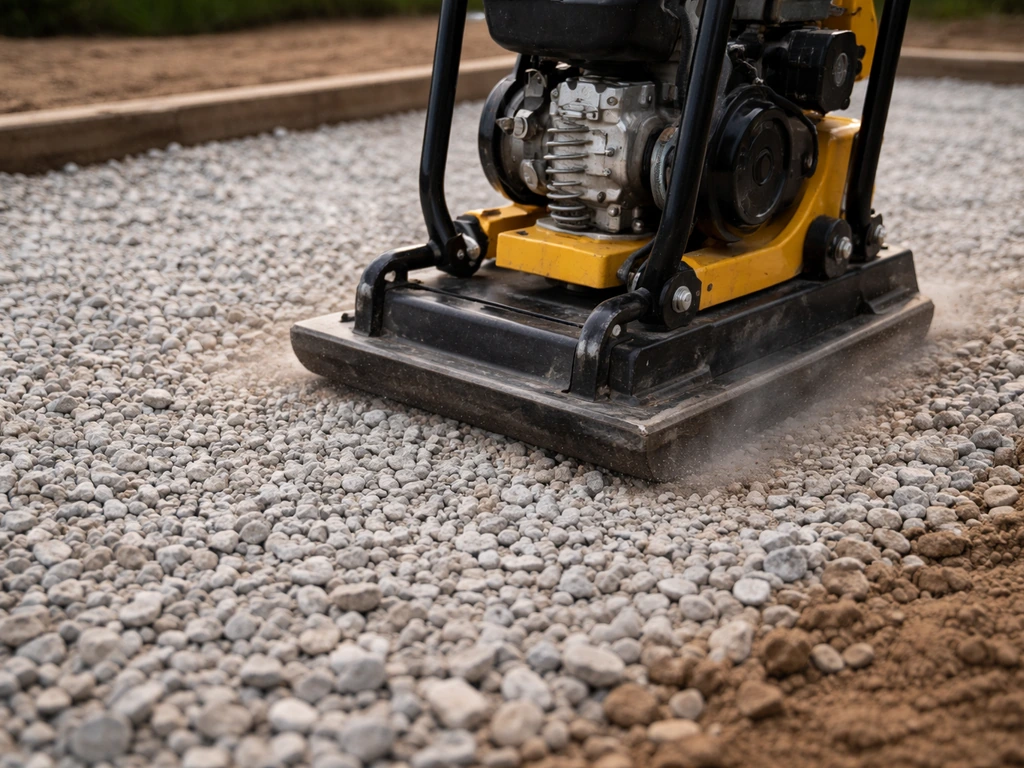
Compact gravel in 2 to 3 inch lifts, not all at once. Pour in a layer, wet it lightly if it is dry, run a plate compactor over it in overlapping passes, and then add the next layer. A plate compactor rental runs about $80 to $120 per day and is non-negotiable for anything larger than a small garden stepping stone path. Compact until the surface no longer moves or deflects when you walk on it. For a standard 6-inch sub-base, you are looking at two or three compaction passes across the entire area.
For areas that will support heavier features like an outdoor fireplace or fire pit, increase your sub-base to 8 inches of compacted gravel, and consider whether the native soil underneath needs any stabilization. Fire pits concentrate a lot of weight in a small footprint and deserve extra base prep.
Adding the bedding sand layer
After the gravel is compacted and firm, add coarse concrete sand (not fine play sand, not polymeric sand at this stage). The ICPI nominal bedding depth is 1 inch (25 mm). This is a firm recommendation, not a suggestion. More sand sounds like it would help level things, but a thick sand bed actually compresses unevenly under paver weight, which is exactly what you are trying to avoid. Spread sand across the area and use two parallel pipes or conduit as screed rails to drag a straight board across and create a perfectly flat, 1-inch deep surface.
Drainage, slope, and edge stability before pavers
Drainage is not optional. Water that pools on or under your patio is the number one cause of long-term paver failure. Every paver patio needs a slope of at least 1/8 inch per foot (about 1 percent grade) away from any structure. A 10-foot-deep patio should drop at least 1.25 inches from house to outer edge. Build this slope into your excavation and maintain it through every layer so your finished surface reflects the correct grade.
Check your grading with a 4-foot level and a tape measure before you lay sand. If the slope is wrong at the gravel stage, fix it there. Do not try to create slope in the sand layer alone. That approach leads to uneven sand depth, which undermines the stability you just worked to build.
Edge restraints go in before you set any pavers. Plastic or aluminum paver edging, staked into the compacted gravel base (not just the soil), holds your perimeter pavers in place permanently. Without edge restraints, the outer pavers gradually migrate outward over years and the whole field of pavers loses its tightness. Drive stakes every 12 inches along straight runs and every 6 inches around curves. If you are tying into an existing concrete curb, driveway, or wall, that solid edge serves as your restraint on that side.
Layout, string lines, and sand bed prep
Once your sand bed is screeded and your edge restraints are in, set up your layout string lines. These guide your pattern and keep your rows running straight across the full patio. Drive two stakes outside opposite ends of the patio and stretch mason's line between them, pulled tight. For larger patios, run lines in both directions and check that your corners are square using the 3-4-5 triangle method: measure 3 feet along one string, 4 feet along the perpendicular, and the diagonal between those points should be exactly 5 feet. Adjust until it is.
Lay a dry test row of pavers along your string line before you commit to anything. This lets you see how your pattern works with your space dimensions and where cuts will fall. Cuts at the edges are fine and expected, but you want to avoid ending up with slivers narrower than half a paver width. If your dry run shows that problem, shift your starting point a few inches and re-check.
Do not walk on the screeded sand bed once it is ready. This sounds obvious but is easy to violate in an excited moment. Use a kneeling board or piece of plywood to distribute your weight as you start laying pavers, and never set the board on the sand surface without thinking about where your weight is going.
Prep troubleshooting and pre-lay checklist
Even with careful prep, problems come up. Here is how to handle the most common ones before you start laying pavers.
Soft spots in the subgrade
If you find areas that feel spongy or that your plate compactor sinks into, dig them out. Soft spots usually mean organic material, old roots, or saturated clay. Remove the problem material, fill with compacted gravel in 2-inch lifts, and test again. If a large area is consistently soft and wet, you may have a drainage problem in the underlying soil that needs a French drain or perforated pipe solution before you build on top of it.
Inconsistent excavation depth
Set up a transit level or use a water level across your excavation to spot high and low areas. High spots get dug down; low spots get filled with compacted gravel (never loose soil). Check depth at a grid of points across the area, not just the edges. Corners and center points are the spots most often missed.
Poor drainage or flat grade
If your site is nearly flat and you cannot create adequate slope away from the house by grading alone, consider adding a channel drain at the outer edge of the patio. These linear drains catch surface water before it pools and route it to a safe outlet. They add cost but are much easier to install during prep than after the pavers are down.
Debris and leftover material in the base
Any organic debris, root fragments, or old landscape fabric left in the sub-base will decompose and create voids. Pull it all out. Old landscape fabric is especially sneaky because it can look solid but block proper compaction and drainage. Remove it completely rather than burying it under gravel.
Pre-lay checklist before your first paver goes down
- Utility lines marked and cleared (811 called at least 3 business days prior)
- Full perimeter staked and marked at correct dimensions
- Sod, topsoil, and organic material fully removed
- Excavation at target depth (typically 7 to 8 inches below finished surface) and consistent across the entire area
- Native subgrade firm with no soft spots
- Compacted gravel sub-base at correct depth, built up in 2 to 3 inch lifts, no movement underfoot
- Drainage slope of at least 1/8 inch per foot away from structures confirmed with level
- Edge restraints staked into the gravel base along the full perimeter
- Bedding sand screeded to 1 inch (25 mm) depth, flat and undisturbed
- String lines set and corners checked square with 3-4-5 method
- Dry run of first paver row confirms pattern alignment and minimizes small edge cuts
- Kneeling board or plywood ready to protect the sand bed during laying
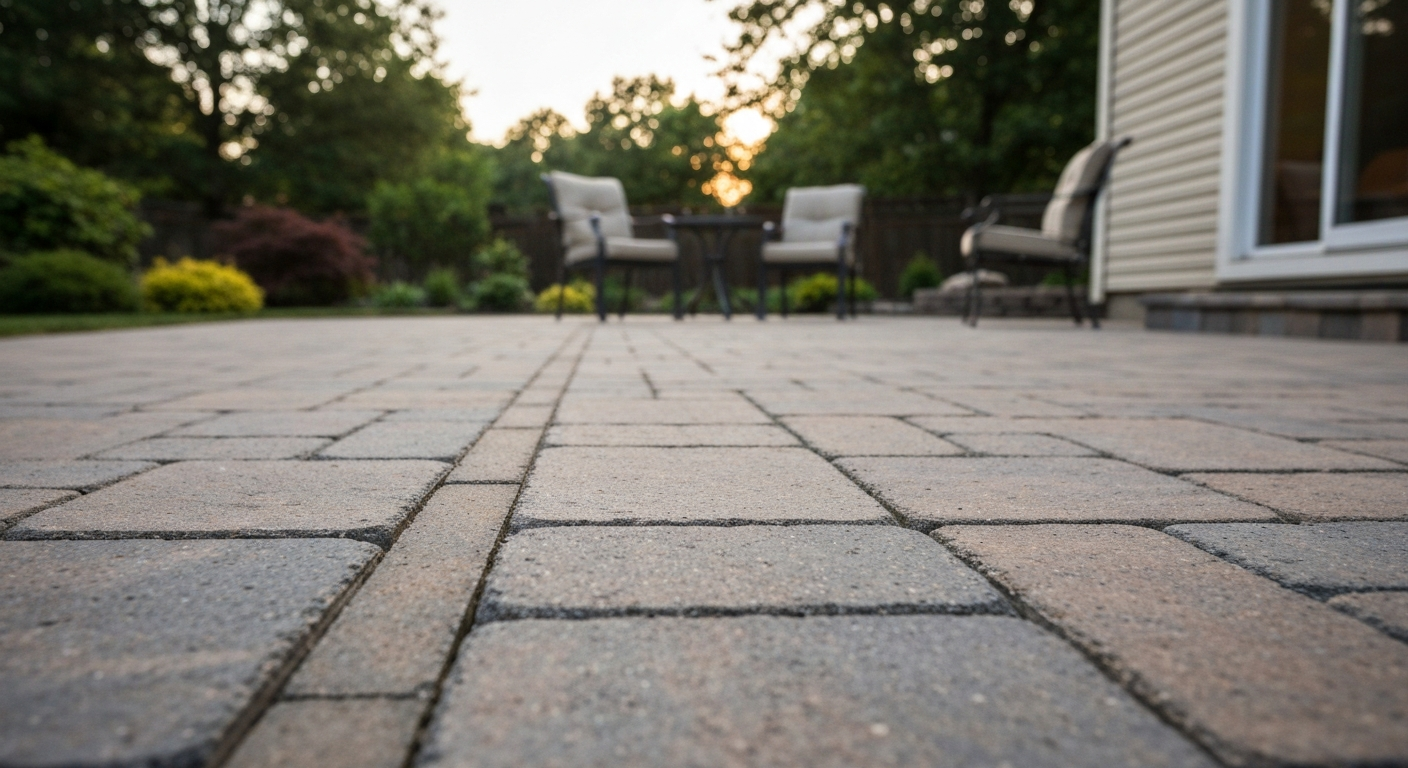
If you can check every item on that list, you are genuinely ready to start laying pavers. The prep phase is where most DIY patios succeed or fail, and working through all of it carefully is what makes the actual laying phase feel almost easy. Now that your sub-base, drainage, and leveling are set, you can move on to the actual paver installation steps for your patio project how to bid a paver patio. Once you get to that point, you can shift your focus to pattern layout, cutting, and eventually joint sand and sealer. The hard work is already done.
FAQ
Do I need to excavate deeper for thicker pavers or different base heights?
Usually yes. Base depth should match your expected loads and local recommendations, not just paver thickness. If you increase base thickness (for example, heavy features), recalculate total excavation depth so the finished patio lands at the right height for doors and transitions.
Can I use landscape fabric under the crushed stone to stop weeds?
In most DIY paver base builds, no. Fabric often blocks drainage and can interfere with compaction. If weed control is needed, use a purpose-built solution that does not impede water movement, or focus on removing all organic material before the sub-base.
What’s the best way to confirm compaction before adding bedding sand?
Perform a simple proof test: after compaction, walk across the surface and look for visible movement or rutting. Also re-check depth in a grid with a tape measure, because an area that compacts more later can create low spots that show up as uneven pavers.
How do I keep the slope consistent if my yard changes elevation?
Build the slope into excavation and gravel, then maintain it during bedding sand screeding. Don’t try to “fix it” by adding extra sand at the end, since sand can compress and create uneven joints and rocking pavers.
Should I water the gravel sub-base before compaction?
Lightly, only if it is dry enough that compaction will not “lock” the material. Over-wetting can lead to pumping, soft spots, and voids. After compacting, the surface should feel firm and not yield under a normal walking test.
How far should drainage slope drop if I’m extending a patio from the house?
Use at least 1/8 inch of fall per foot away from the structure (about 1 percent). For example, a 12-foot run should drop at least 1.5 inches from the house to the outer edge, then verify it with measurements at multiple points.
What if my patio is adjacent to an existing driveway or curb, should I match heights?
Plan transitions early. If you tie into concrete, use edge restraints that lock into that solid boundary, and confirm finished patio elevation before setting pavers so you do not create a trip edge or incorrect water flow.
Can I install pavers on top of compacted dirt if I keep the sand thick?
No. A thicker sand bed will compress unevenly, and it can’t replace the structural role of a compacted crushed-stone sub-base. If you skip the gravel layer, expect shifting and settlement that turns into rocking pavers and poor drainage.
How do I prevent slivers and tiny edge cuts after my layout is set?
Do a dry test row and check edge cut widths before you commit. If you get slivers narrower than about half a paver, shift the starting offset by a few inches so cuts land more evenly and you maintain a stronger, more consistent pattern.
Is polymeric sand okay for the bedding layer under pavers?
No. Use coarse, non-polymeric bedding sand for the base leveling layer. Polymeric sand (when used at all) is typically for joints after pavers are fully installed, and using it under pavers can trap moisture where you need the system to drain.
What should I do if I discover a soft spot after the sand is screeded?
Remove the pavers around the area and dig back to address the sub-base cause. Softness usually means organic material, roots, or saturated soil. You need compacted gravel in corrected lifts, then re-screed that section, because fixing it with sand alone will not stabilize the base.
Do I need edge restraints everywhere, even on sides that end with plants or a fence?
Yes, perimeter stability still matters. Edges that face soil, planters, or landscape beds can shift if not restrained. If a solid structure is on one side (like a curb or wall), that can act as a restraint, but most other sides still need proper edging.
When should I plan for a French drain or channel drain?
If you cannot achieve the required fall by grading, or you notice persistent wet areas during prep, design drainage now. Installing a drain during excavation is typically far easier than trying to add it after pavers are down, because the base and slope already need to be consistent.
Can I work alone and still do the prep correctly?
You can, but prep steps like excavation depth checks, moving gravel in lifts, and plate compactor passes are much easier with at least one helper. A second person also helps spot grade errors early, especially when checking a grid of depth points across the patio.
Next Articles
How to Use Quikrete Patio Paver Jointing Sand: Guide & Tips
How to use Quikrete Patio Paver Jointing Sand: step-by-step application, tools, timing, coverage, and care.

How to Use Patio Paver Sand: Step by Step DIY Guide
Step-by-step guide to apply patio paver sand correctly: prep base, set pavers, fill joints, compact, and troubleshoot is

How to Install Patio Pavers in Sand: Step-by-Step
DIY step-by-step how to install patio pavers in sand, from excavation and base prep to leveling, cutting, joint sand and