Installing paver patio steps comes down to getting three things right: consistent geometry (rise and tread depth), a compacted base that won't shift, and proper drainage so water never pools on or behind the steps. Getting the base, drainage, and geometry right is the core of a diy paver patio steps project too. Nail those three, and you end up with steps that look great and stay safe for years. Rush any one of them and you'll be relaying pavers within a season.
Installing Paver Patio Steps: DIY Step-by-Step Guide

Felix Rowe
31 May 2026
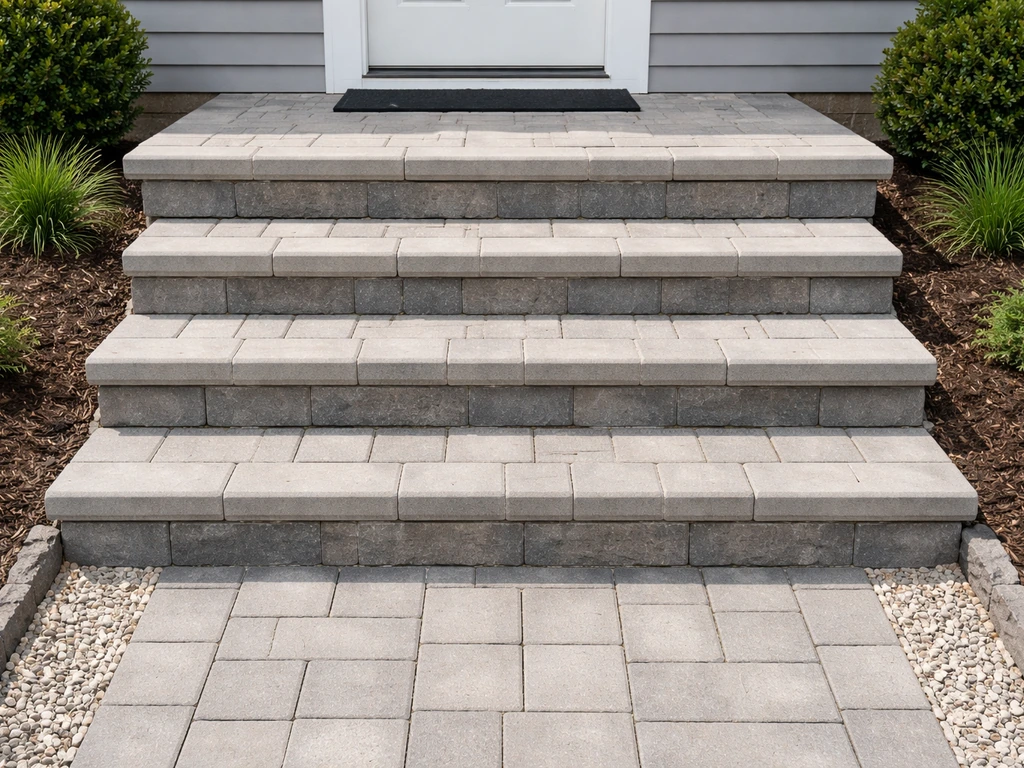
This guide walks you through the full process from measuring your total rise to sealing the finished surface. Whether you're building steps down from a raised patio, transitioning off a slab, or dropping from a back door to grade, the core process is the same. If you want step-by-step guidance on how to build patio steps from pavers, focus first on measuring, base preparation, and drainage. If you want ideas for different shapes, riser styles, and layouts, explore patio paver steps ideas before you finalize your measurements. Expect to spend a weekend on a straightforward three-to-five step run, more if you're dealing with uneven ground or a lot of cutting.
Planning and Measuring Your Patio Step Layout

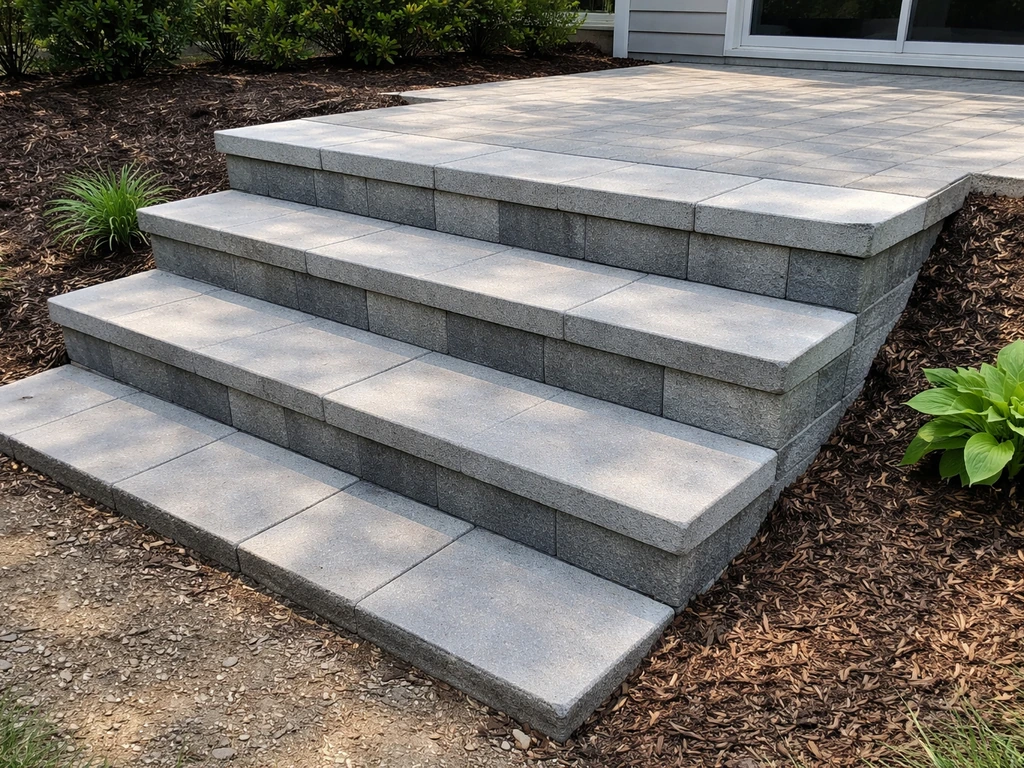
Before you touch a shovel, measure your total rise. That's the vertical distance from the finished patio or door threshold down to the landing surface below. Measure it in inches, because every calculation hangs on this number.
Outdoor step geometry is more forgiving than indoor stairs, but you still want to land in a comfortable range. Target a riser height of 5.5 to 7 inches and a tread depth (the part you actually step on) of 12 to 18 inches. A common sweet spot that feels natural to most people is a 6-inch rise and a 14- to 16-inch tread. If you're building steps that serve as a primary egress, the IRC sets a hard ceiling of 7.75 inches maximum riser height and a minimum tread depth of 10 inches, so keep those numbers in mind if your local inspector might be involved.
To find your number of steps, divide total rise by your planned riser height. For example, a 30-inch total rise divided by a 6-inch riser equals 5 steps. If the math doesn't divide cleanly, adjust your riser height slightly rather than ending up with one oddball step that's taller or shorter than the rest. Even small inconsistencies in step height create a trip hazard, because your foot expects the same rise every time.
Sketch out your plan on paper before ordering materials. Note the number of steps, the riser height, the tread depth, and the overall width. Width is a personal choice, but anything under 36 inches starts to feel cramped. For a main entry, 48 to 60 inches is a comfortable target. Also decide now whether you want a single paver tread or a double course, since that affects both your material list and your base depth.
Tools and Materials to Gather Before You Start
- Tape measure, line level, and a 4-foot level
- Stakes and mason's string
- Shovel, tamper, and plate compactor (rent one if you don't own it)
- Rubber mallet
- Circular saw or angle grinder with a diamond blade, or a wet-cut concrete saw for heavy cuts
- Safety glasses, ear protection, and a dust mask (N95 minimum when dry-cutting)
- Landscape fabric / geotextile
- Crushed stone aggregate (road base or Class II base rock)
- Bedding sand (coarse concrete sand, not play sand)
- Pavers for treads and risers (concrete, natural stone, or porcelain)
- Manufactured edge restraints and 10-inch steel spikes
- Polymeric sand
- Paver sealer (optional, depending on your paver type)
Site Prep and Getting the Ground Ready
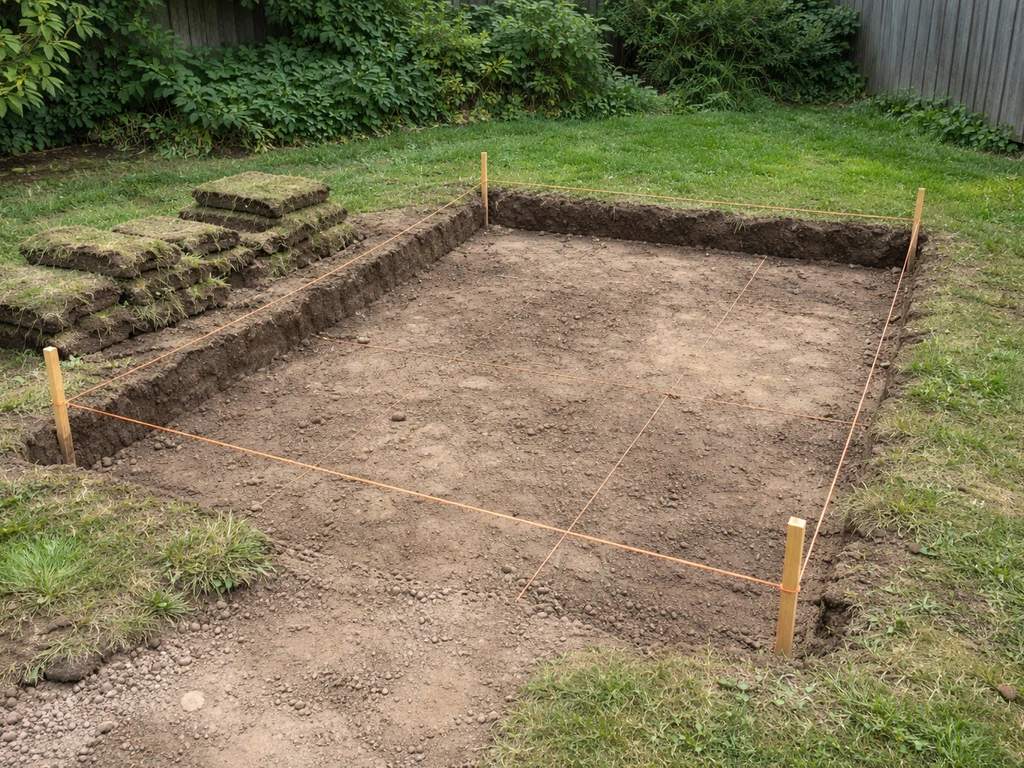
Mark out the full footprint of your steps with stakes and string, including the bottom landing. Then strip everything out of that zone. If you're working on grass, cut out the sod and remove it. If there's an old concrete pad or crumbling step structure in the way, demo it now. You want clean, undisturbed native soil as your starting point.
Uneven ground is one of the most common things DIYers run into, and it's not a problem as long as you address it in the base rather than trying to compensate with the pavers themselves. If your grade drops away steeply, you may need to build up the lower steps more aggressively. If the ground rises partway through, excavate more on that end. The goal is a consistent, compacted foundation under each step.
Drainage is not optional. Water that doesn't shed away from your steps will eventually freeze, thaw, erode, and shift your base. The finished tread surface should slope forward, away from the house, at a minimum fall of about 1:80. In practical terms, that means roughly 8 to 10 millimeters of drop across a 600mm (about 24-inch) wide tread. It sounds small, but it's enough to move water reliably. Build this slope into your base from the start, not as an afterthought.
If you're tying new steps into an existing concrete slab or patio, check whether the slab is structurally sound. Spalling or cracked concrete should be patched or, in bad cases, broken out where the steps will bear. You can set paver steps against a slab edge, but your base needs to be independent and fully compacted on its own, not relying on the concrete for structural support.
Building the Step Foundation: Footings, Edging, and Compacted Base
This is the phase most DIYers underestimate, and it's the reason paver steps shift or sink within a few years. A solid foundation is not a shortcut step.
Excavate to the right depth for your region and use case. For typical residential paver step applications, plan on removing 7 to 9 inches of material below finished grade. In colder climates with significant freeze-thaw cycles, going to 11 to 12 inches of total base depth is smart insurance. The heavier the use (frequent foot traffic, heavy users), the deeper the base should be.
- Lay geotextile fabric across the excavated area, overlapping seams by at least 12 inches. This separates your base rock from the native soil and keeps fines from migrating up and destabilizing the aggregate over time.
- Fill with crushed stone aggregate (road base) in 2- to 3-inch lifts. Compact each lift with a plate compactor before adding the next. The aggregate should reach 95% compaction density. If you press your foot into it and nothing moves, you're in the right ballpark.
- Install your manufactured edge restraints on top of the compacted base before laying bedding sand. Secure them with 10-inch steel spikes driven into the base every 12 inches or so. Do not rely on soil backfill as an edge restraint; it will shift and your step faces will follow.
- Spread a 1- to 1.5-inch layer of coarse bedding sand over the compacted aggregate, screeded level. Do not compact the sand layer before placing pavers. Leave it loose so the pavers can settle into it slightly during final compaction.
- Check your slope across the sand bed before you start laying. This is your last easy chance to adjust the forward pitch of each tread.
For raised patios or sloped yard designs, you may need to step your base down in terraced sections. Each step platform needs its own fully compacted base segment. Think of each tread as a mini patio that happens to sit slightly lower than the one behind it. That mental model helps you build each section independently and correctly.
Installing and Setting the Paver Steps
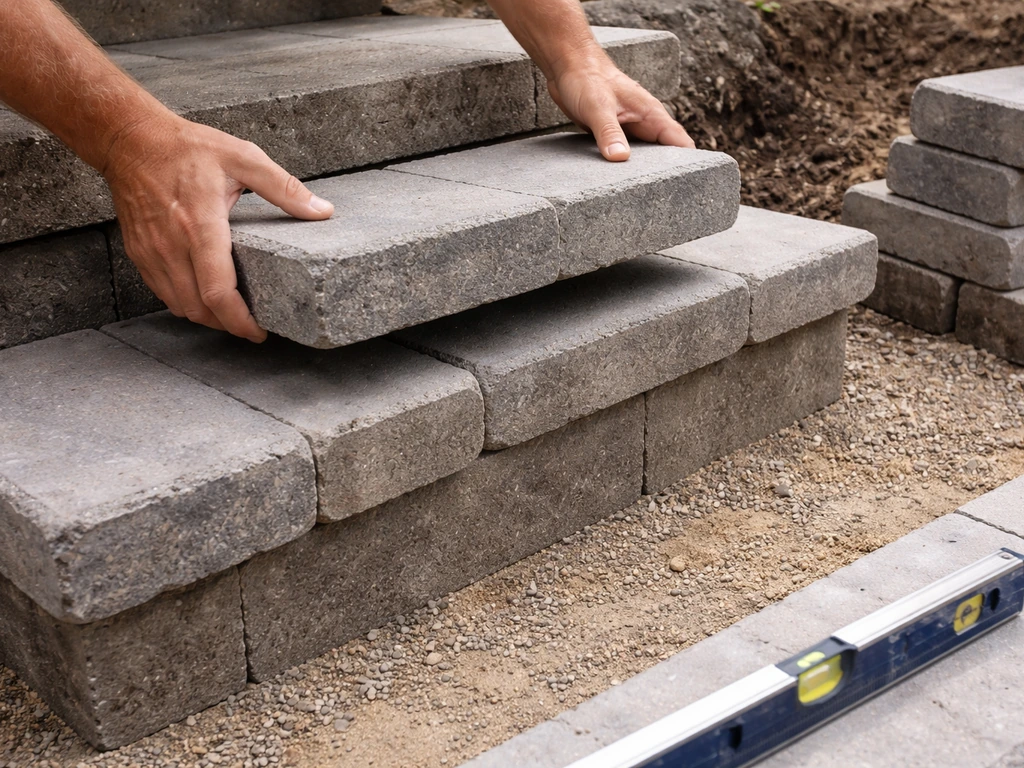
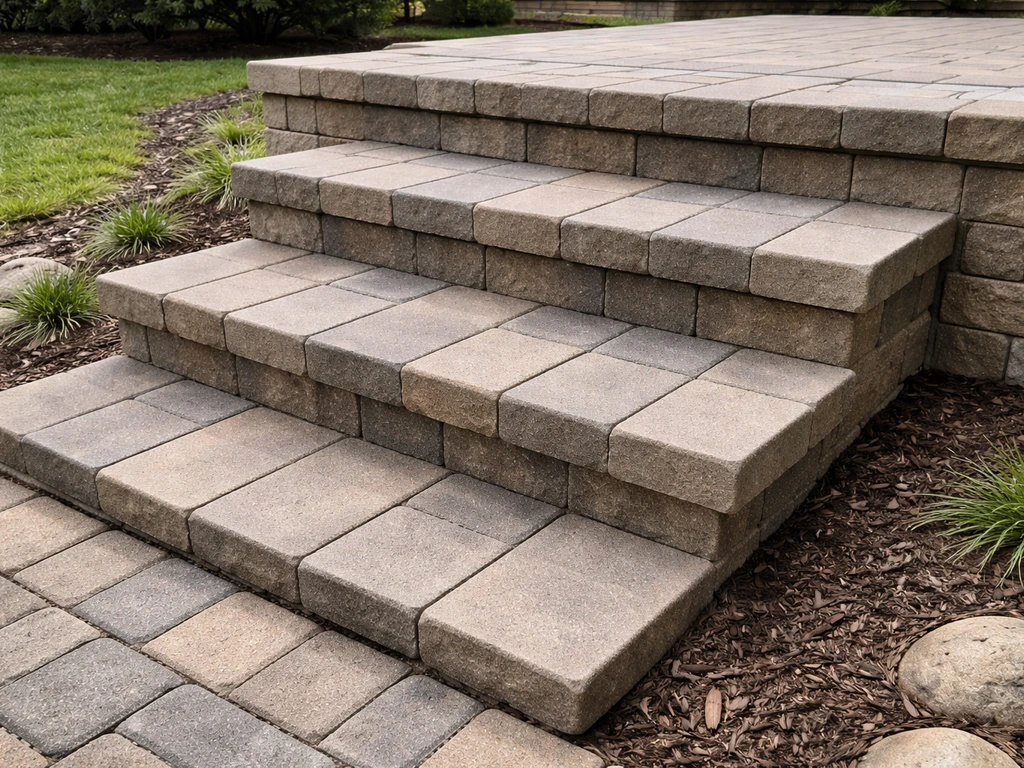
Start at the bottom step and work your way up. This lets each course lap over the back of the one below it, which locks the risers in place and prevents forward movement over time.
Setting the Risers
Set your riser pavers first on each step. These are the vertical-face pavers that define the step height. Place them on the compacted base (not on bedding sand, so they don't sink) and check them for level across the width. If you're using concrete or natural stone pavers as risers, a layer of mortar or construction adhesive at the base edge adds extra holding power, especially on the bottom step where impact from foot traffic is highest.
Laying the Treads
With risers set, lay your tread pavers on the bedding sand behind each riser. ICPI guidance also covers bedding and joint sand, emphasizing using the right sand role and selection for interlocking concrete pavers bedding sand behind each riser. Set each paver down rather than sliding it, which disturbs the sand bed. Tap each paver with a rubber mallet until it's level with the surrounding units and sitting about 1/4 to 3/8 inch above its final target height (it will settle slightly during compaction). Use your level constantly. A tread that's high in the back will pool water. A tread that's tilted sideways looks wrong and wears unevenly.
Run a string line across the front edge of each tread to keep your step faces consistent. It's easy for individual pavers to creep forward or back as you're placing them. The string keeps the whole course honest.
Checking Your Work at Each Course
After laying each full step (riser plus tread), stop and check three things: the riser height matches your plan, the tread depth is consistent, and the tread surface slopes forward. Fix problems now. Once you've got multiple courses built on top of a mistake, correcting it means taking apart everything above it.
Cutting, Fitting, and Finishing the Details
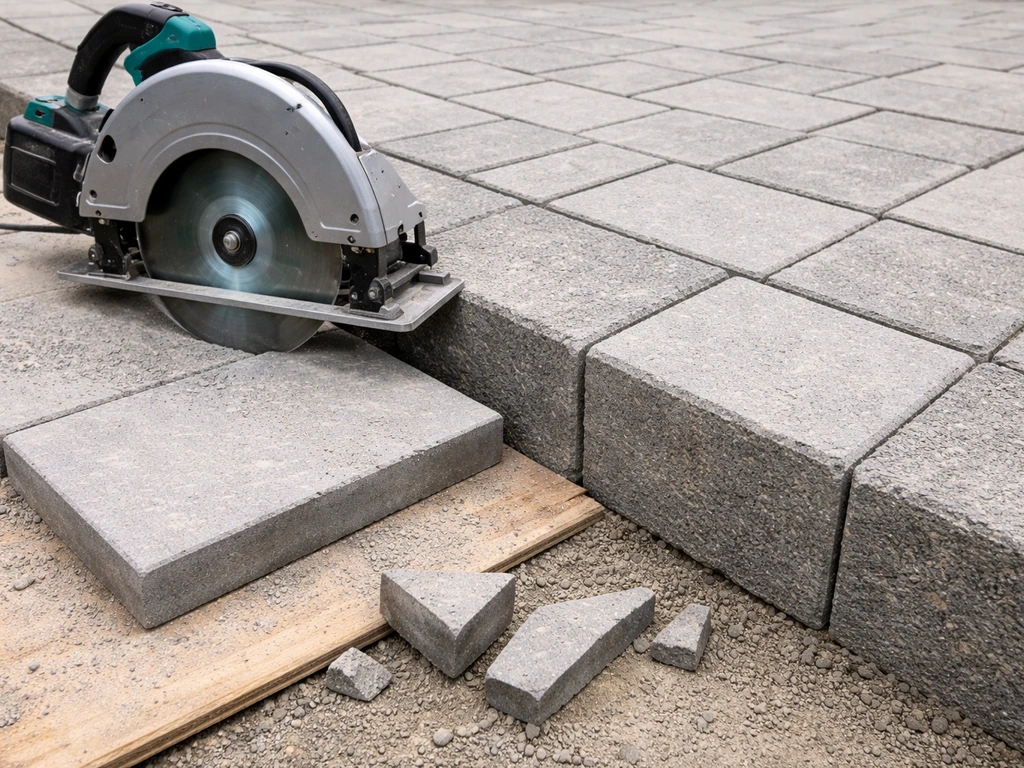
Rarely does a step installation go in entirely without cuts. You'll almost certainly need to trim pavers for the ends of treads, to fit around existing structures, or to tighten up a riser face.
For straight cuts on concrete pavers, a circular saw or angle grinder fitted with a diamond blade works well for most DIY projects. For porcelain pavers or natural stone, a wet-cut diamond blade dramatically reduces dust and gives a cleaner edge. A dedicated concrete wet saw (available at most tool rental shops) is the cleanest option when you have a lot of cuts to make. Whatever you use, wear safety glasses, ear protection, and a dust mask. Dry-cutting concrete or stone generates silica dust, which is a serious respiratory hazard.
Mark your cuts with a pencil or chalk line and score the paver lightly before making the full cut. For curved cuts or inside corners, make a series of straight cuts to nibble away the material, then clean up the edge. When fitting cut pavers next to full ones, aim for consistent joint width (typically 1/8 to 3/8 inch). Gaps that wander or joints that are too tight both look sloppy and complicate jointing later.
Once all pavers are placed and you're happy with the layout, run the plate compactor over the tread surfaces (not over unsupported step edges) to seat everything into the bedding sand. This is the final compaction pass. If any paver drops too low after compaction, pull it, add a little sand underneath, and reset it.
Jointing, Sealing, and Keeping Your Steps Looking Good Long-Term
Filling the Joints with Polymeric Sand
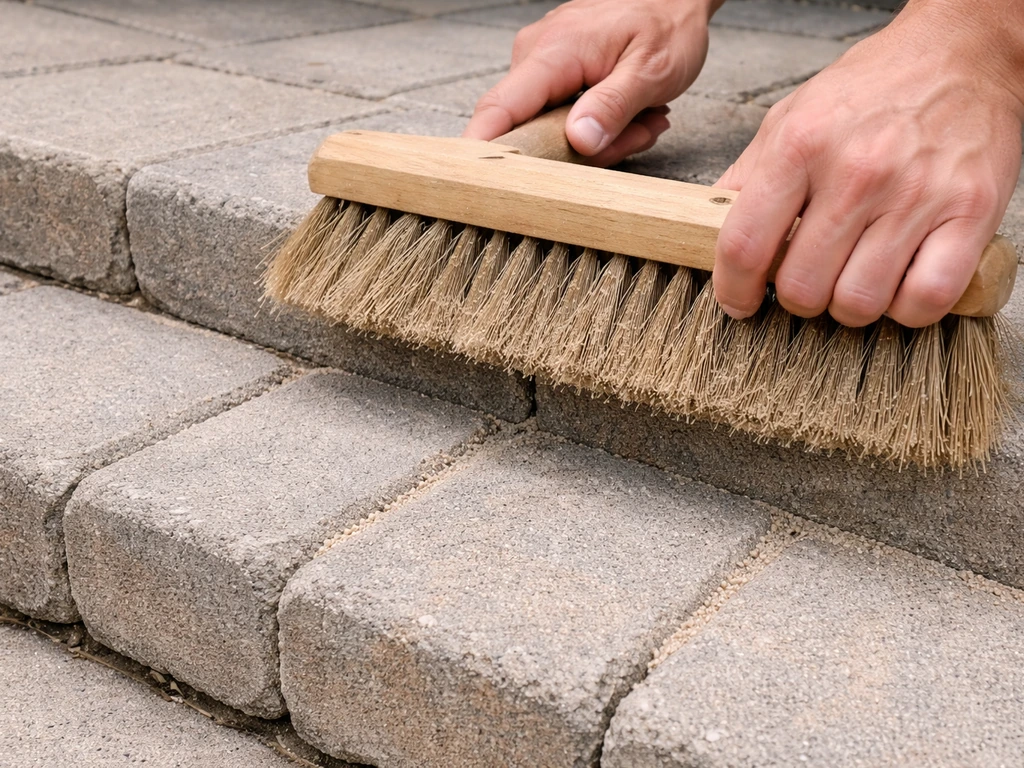
Polymeric sand is the right choice for paver step joints. It activates with water and cures into a firm, cohesive material that resists weeds, insects, and erosion. For most interlocking concrete pavers, a joint width between 1/8 inch and 1/2 inch works with standard polymeric sand products. Check your specific product's data sheet for its acceptable range before you start.
- Make sure the paver surface is completely dry before applying polymeric sand.
- Pour sand over the surface and sweep it into the joints with a push broom. Work in multiple passes, making sure joints fill from the bottom up.
- The finished sand level should sit at least 1/8 inch below the top of the paver surface (or below the chamfer edge if your pavers have one). A joint that's overfilled will haze the paver surface when it cures.
- Compact gently with the plate compactor (use a rubber pad or compactor pad to protect the paver surface) to vibrate sand deeper into the joints, then sweep and top up again.
- Lightly mist the surface with water according to your product's instructions. Don't flood it. The goal is activation, not washing the sand out.
- Keep foot traffic off the steps for at least 24 hours while the sand cures.
Whether to Seal and When
Sealing is optional but worthwhile for concrete pavers and natural stone that are exposed to heavy use, staining, or harsh winters. It enhances color, protects against staining, and makes future cleaning easier. The timing matters: don't seal new pavers until they're at least 3 months old, and don't seal until any efflorescence (the white mineral bloom that sometimes appears on new concrete pavers) has completely cleared. Sealing over efflorescence locks it in. Apply sealer only to a clean, fully dry surface. Following the manufacturer's instructions exactly matters more here than in almost any other step. Two of the most common sealant failures are applying too soon and getting rained on before the sealer cures.
Common Problems and How to Fix Them
| Problem | Likely Cause | Fix |
|---|---|---|
| Uneven step heights | Riser pavers set at inconsistent heights | Pull and reset risers; check each one with a level before setting treads on top |
| Shifting or rocking tread pavers | Base not compacted enough or bedding sand too thick | Lift affected pavers, re-compact base, adjust sand depth, reset and re-compact |
| Water pooling on treads | Insufficient forward slope built into base | Lift tread pavers, add a thin sand wedge to the back edge to restore pitch |
| Gaps opening between pavers | No edge restraints or soil used as restraint | Install proper manufactured edge restraints and re-fill joints with polymeric sand |
| Misaligned riser faces | No string line used during installation | Small adjustments can be made by tapping; larger shifts require resetting the riser course |
| Polymeric sand washing out | Applied to wet surface or not cured before rain | Remove remaining loose sand, let surface dry fully, reapply correctly |
Ongoing Maintenance
Paver steps are low maintenance, but not zero maintenance. Each spring, walk your steps and look for any pavers that have shifted, joints that have eroded, or edge restraints that look like they're moving. Catch these small issues early and they stay small. Sweep or blow debris off the steps regularly so it doesn't decompose into the joints and give weeds a foothold. If you sealed your steps, plan on reapplying sealer every 3 to 5 years depending on traffic and sun exposure. Joint sand can be topped up at any time if erosion or settling has lowered it; just make sure the surface is dry when you do it.
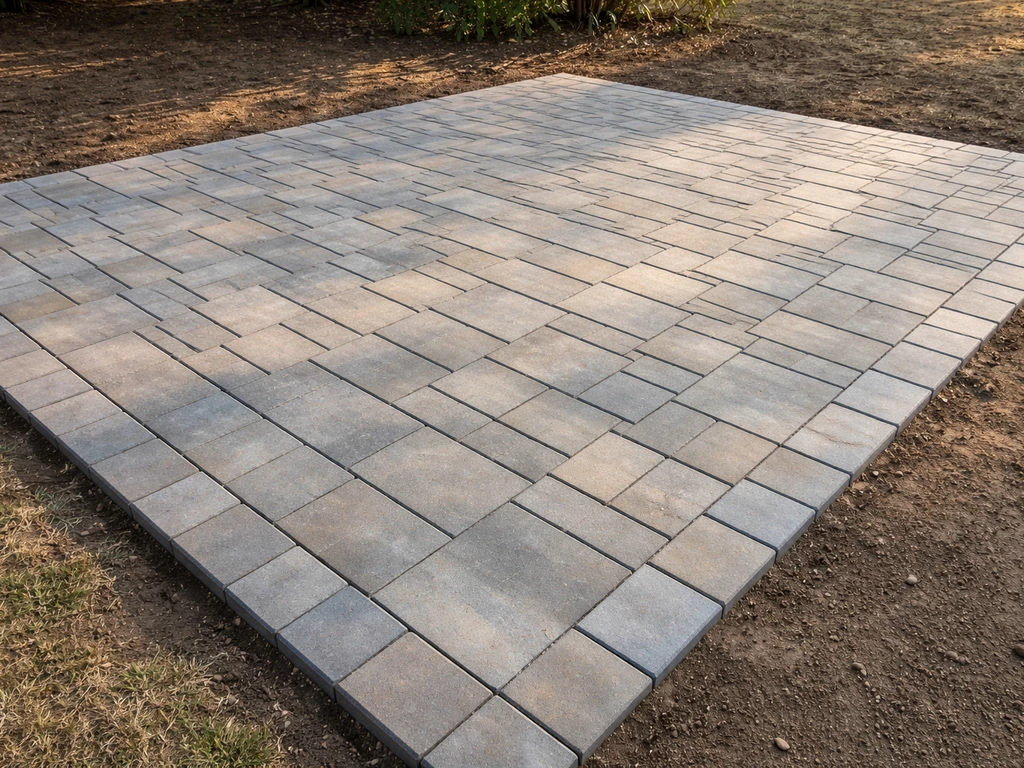
If you're planning this project as part of a larger patio build, the step installation process connects directly to the broader site prep and base work that goes into the whole patio surface. If you're planning this project as part of a larger patio build, follow the same paver patio step by step approach to connect the step install with the patio site prep and base work for the whole surface. Getting familiar with the full paver installation process before you start will help you see how the steps integrate with the rest of the design, especially on raised patios or sloped sites where grade changes affect everything.
Done right, paver patio steps are one of the most satisfying DIY hardscape projects you can tackle. The geometry makes sense once you measure it out, the base work is labor-intensive but straightforward, and the finished result holds up for decades with minimal attention. Take it one step at a time (literally), check your levels constantly, and don't skip the base preparation. That's where the project is really won or lost.
FAQ
How do I correct a step that ends up a little too tall or too short before I finish all the courses?
A small deviation is usually fine, but avoid “one oddball step” that is noticeably taller or shorter. After you’ve laid the risers for a step, measure the riser height at both ends and in the middle (use the same reference point on the base). If the top of a riser is off, fix it by adjusting bedding under that riser and re-level the tread, because once the treads are set you cannot correct the inconsistency without redoing work above it.
Can I set paver risers on bedding sand, or does it have to be compacted base?
For exterior step runs, you generally want a compacted base that supports pavers without relying on bedding sand as structure. Use bedding sand only for the tread paver surface bed behind the riser, and place riser pavers directly on compacted base, not on loose sand. If you set risers on sand, they can sink at the back or tilt, and your tread slope and drainage will drift over time.
What’s the right way to build paver patio steps when the yard is terraced or has a big grade change?
Yes, but only if the landing and step platforms are built as fully independent compacted sections. The key is ensuring each platform has its own compacted base and its own drainage slope path. If you “bridge” the base between levels, you’ll likely get differential settlement and cracking or shifting at the interfaces.
Do I need to slope the bottom landing, or is drainage only about the tread faces?
Do not treat the bottom step landing as optional. Water often collects at the lowest area because it is where flow concentrates. Make sure the bottom landing is excavated, leveled, and sloped the same way as the treads, and keep the drainage direction consistent away from the house.
What should I check if my paver patio steps look level but water pools on the treads?
If the tread surface looks fine but water still pools, the cause is often an inconsistent slope, not total “pitch” that is too low. Re-check slope across the width and in the direction of flow, then verify that the risers are all at the same planned height. A slightly high back edge on one side can trap water even if the overall rise and tread math is correct.
Where exactly should I run the plate compactor during installing paver patio steps, and how do I prevent edge damage?
Avoid compacting on top of unsupported edges. Use the plate compactor only on stable tread surfaces, and keep the compactor movement controlled so it seats pavers without “walking” them. If you see a paver drop after compaction, pull it, add a small amount of base or sand underneath (depending on where it sits), then reset and recheck height.
How do I know my joint width is compatible with polymeric sand on step installations?
For polymeric sand joints, you must have the right joint width and completely dry pavers when you apply it. If joints are too tight, polymeric sand can’t fill properly and washout or weed growth increases. If joints are too wide for your product, you can get weak or inconsistent curing, so confirm the acceptable range for the specific polymeric sand you’re using.
What’s the best way to handle a single shifted paver step later without redoing the whole run?
If you need a “repair later” option, plan for it by leaving accessible joints and ensuring edge restraints are tight. Replace individual pavers by pulling the affected tread or riser unit, removing and replacing joint sand where it disturbed, and re-compacting the local area. If the base has shifted, just resetting pavers on sand will not last.
What are common sealing mistakes that cause paver patio step failures?
Don’t seal too early, and don’t seal if there is active efflorescence. Also, ensure the surface is truly dry, and protect joints and drainage paths from excess sealer that can inhibit proper joint stability. Many failures come from sealing while trapped moisture remains, or applying sealer over dusty pavers that prevent proper bonding.
What maintenance should I do each spring to keep installing paver patio steps safe and level?
In the first season, the goal is quick detection. Each spring, look for rocking pavers, eroded joint sand, and signs that edge restraints have moved. If you see a small settlement, top up joint sand once the surface is dry, and avoid washing debris into the joints. Reapply sealer on the schedule you choose only after confirming joints and pavers are in good condition.
If my design is close to code limits, how do I make sure it still passes inspection for egress use?
For egress steps, follow your local code, but the common practical takeaway is to keep risers consistent and avoid exceeding the typical maximum riser height used by inspectors. Even if your design is slightly outside ideal comfort, the bigger risk is inconsistency between steps. When in doubt, measure and verify every riser before setting any treads, then re-check after compaction.
Next Articles
How to Build Patio Steps from Pavers: DIY Guide
Step-by-step DIY guide to build patio steps from pavers, from measuring and base prep to cutting, leveling, and sealing.
Patio Paver Steps Ideas: DIY Planning and Build Guide
DIY patio paver steps ideas with layouts, step dimensions, drainage, and prep tips to build safe, level paver stairs.
Paver Patio Step by Step: DIY Installation from Start to Finish
Paver patio step by step DIY guide: plan, prep, base, leveling, edging, pavers, cuts, sand joints, sealing and troublesh