Installing a paver patio is a completely doable DIY project if you follow the right sequence: excavate to the correct depth, build a compacted gravel base with a 1.5–2% drainage slope, screed a 1-inch sand bedding layer, lay your pavers in the pattern you want, lock in edge restraints, sweep in jointing sand, and seal after about 30–90 days. Miss any one of those steps and you'll be dealing with sunken pavers, puddles, or shifting edges within a season or two. Get them right and you'll have a patio that lasts 20-plus years with minimal upkeep.
Paver Patio Instructions: Step-by-Step Installation Guide

Felix Rowe
11 Jun 2026
Planning and Design Choices
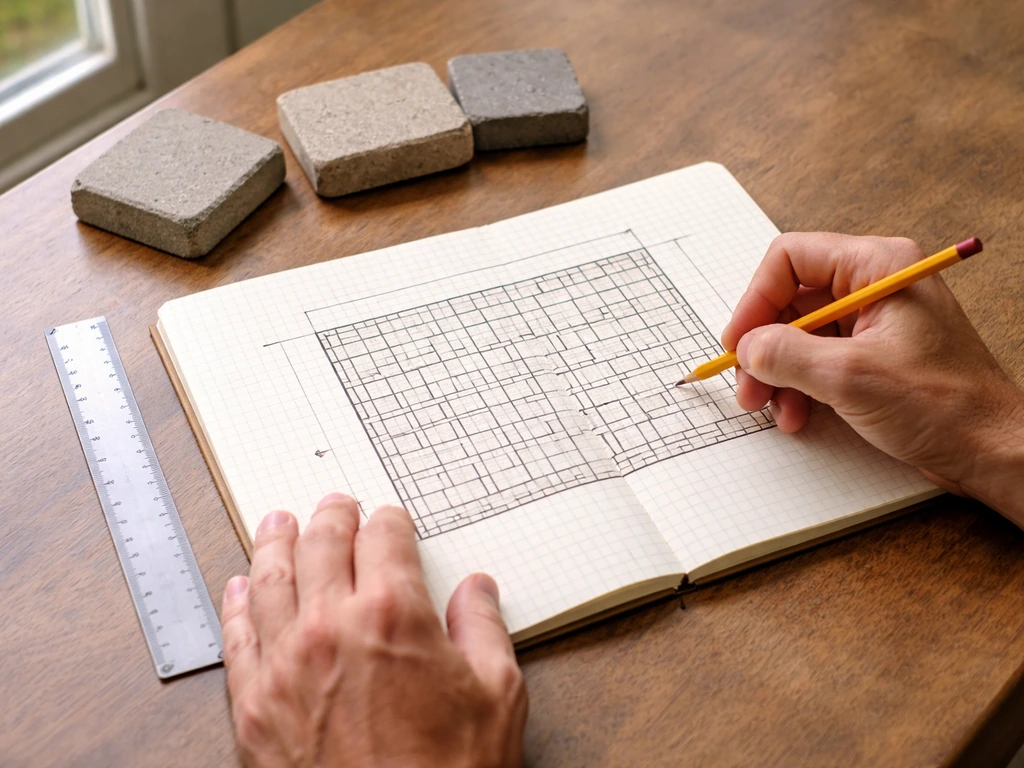
Before you touch a shovel, spend real time on planning. The decisions you make now affect every step that follows. Start with size and shape: sketch your patio to scale on graph paper and mark where furniture, a fire pit area, or a grill station will sit. A 12x16-foot patio is a practical starting size for most backyards, but measure your actual outdoor living habits, not just your yard space.
Choose your paver type based on your budget and the look you want. Concrete pavers are the most affordable and come in hundreds of colors and shapes. Natural stone (bluestone, travertine, flagstone) costs more but offers a premium finish. Porcelain pavers are increasingly popular for their durability and low maintenance, though they require a wet saw to cut cleanly. Brick pavers have a classic look but can be harder to source in matching replacement pieces years later.
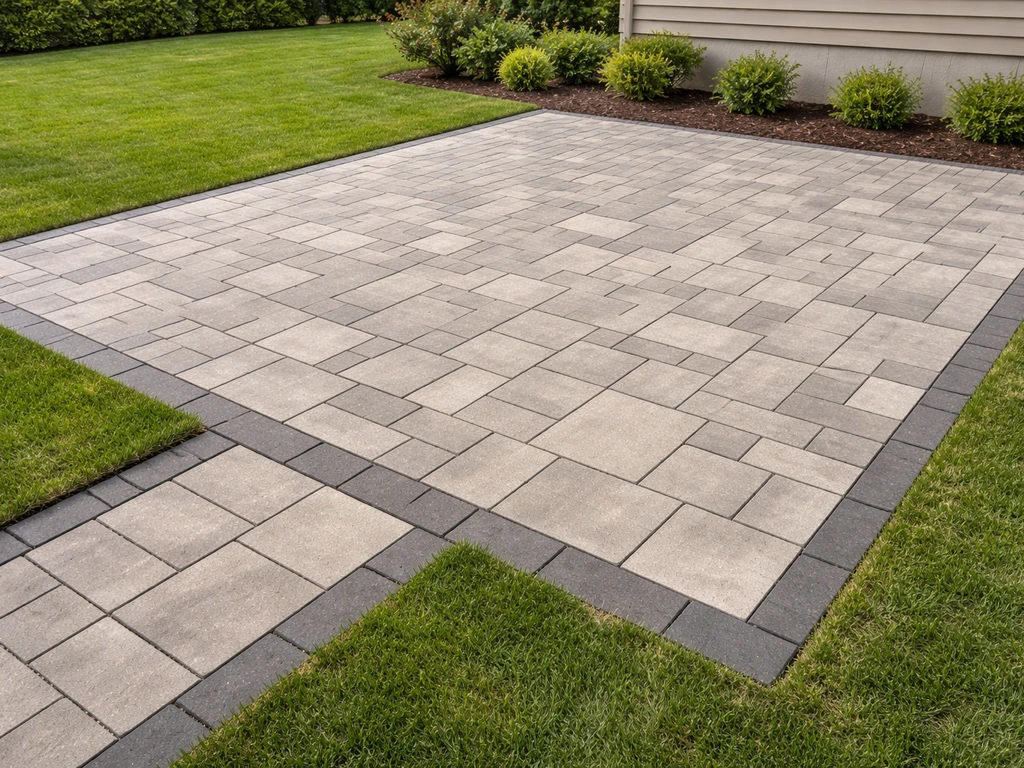
Pick your pattern before you order materials, because the pattern affects how many cut pieces you'll need and how much waste to budget for. Running bond (offset rows like brickwork) is the easiest for beginners and minimizes cuts. Herringbone at 45 or 90 degrees is more complex but gives excellent interlocking strength. Basketweave and random flagstone layouts are great for a casual look. As a rule, add 10% to your square footage for standard patterns and 15% for 45-degree herringbone, which generates more cut waste at the edges.
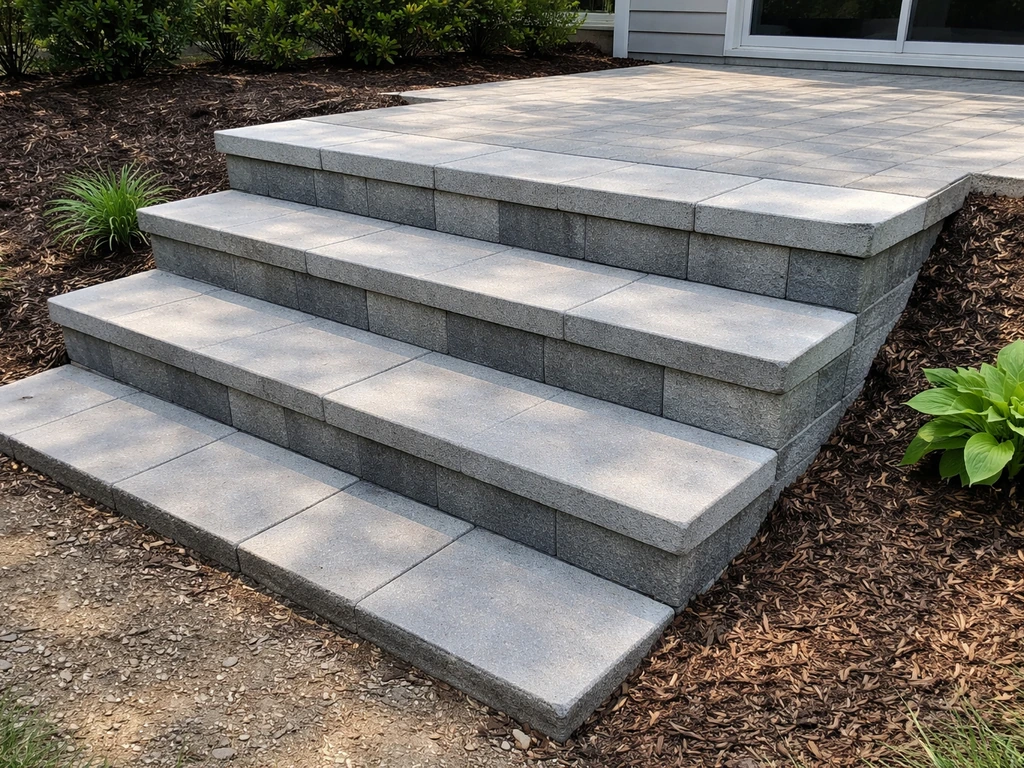
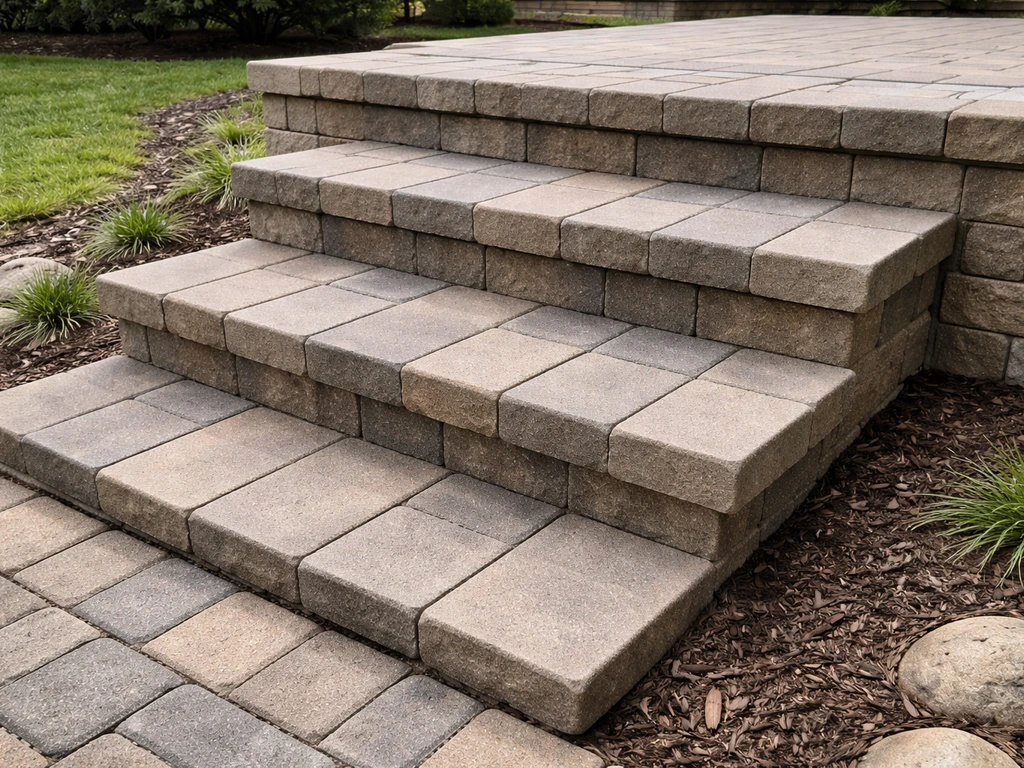
Also decide now about steps, raised sections, or fire pit zones. These variations need their own planning. A raised patio requires retaining walls or step structures, and a fire pit area often benefits from a separate ring of pavers or a non-combustible center. If you need a smooth transition, follow a paver patio step by step process for the best results on those raised or stepped areas.
If you're planning built-in paver steps down from a door or deck, check out the specifics on how to build patio steps from pavers, since they involve their own base and riser calculations that go beyond the flat patio instructions here. This patio paver steps ideas guide can help you plan the risers, base layers, and transitions so the steps blend smoothly with the rest of your patio.
Measuring and Ordering Materials
Calculate your patio square footage, then use that number to figure out how many pavers, how much gravel base material, and how much bedding sand you need. For a standard patio, you'll need roughly 4–6 inches of compacted gravel base (up to 8 inches on clay or silty soils), 1 inch of bedding sand, and your pavers on top. That means your total excavation depth will typically be 7–10 inches below finished grade. Write these numbers down and keep them with you at the hardware store.
Site Prep and Excavation
This is the phase most DIYers underestimate in time and effort, and it's also where most long-term problems begin. Good site prep is boring and physical, but it is the entire foundation of a patio that doesn't fail.
Call Before You Dig
Before any digging, call 811 (in the US) to have underground utilities marked. This is free, takes a day or two, and prevents a genuinely dangerous situation. Don't skip it.
Laying Over Grass
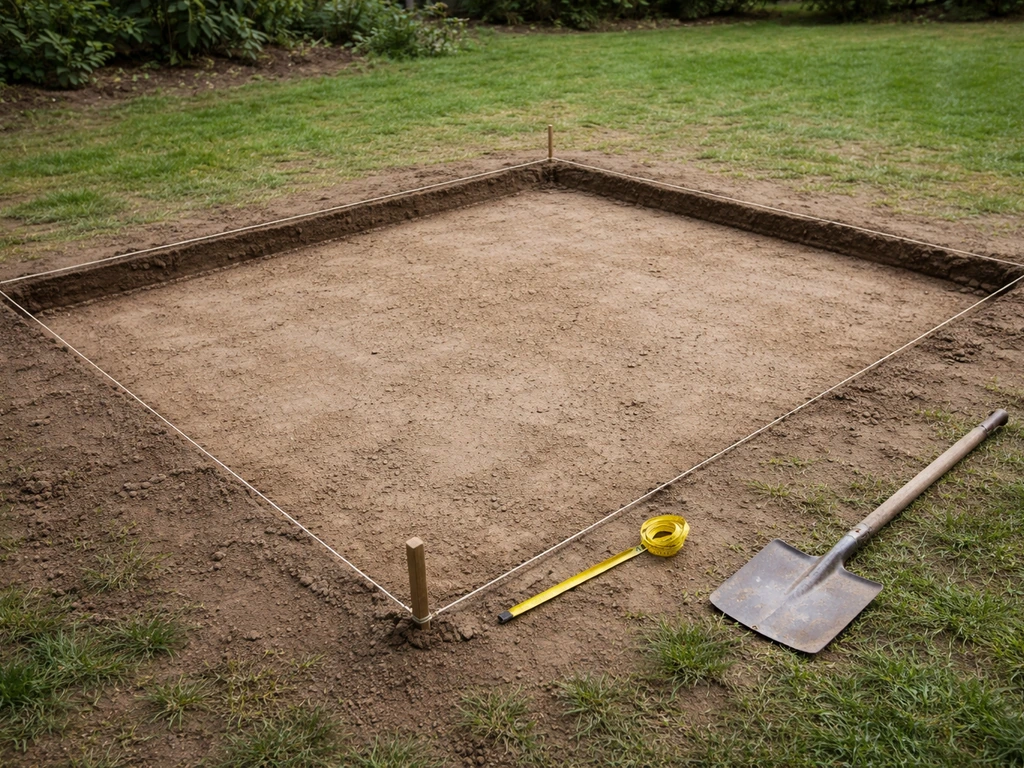
The most common starting scenario: you have a lawn and want a patio. Mark your patio perimeter with spray paint or string lines and stakes. Use a sod cutter or flat spade to strip all grass and organic material from the area, extending about 6 inches beyond your finished edge on all sides to give yourself working room. Don't skip the grass removal and just bury it under gravel. Organic material decomposes, and decomposing material creates voids that cause pavers to sink and shift.
Working Over or Near Concrete
If you have an existing concrete slab, you have two options: remove it or lay over it. Laying pavers directly over a concrete slab is possible if the slab is structurally sound, has no major cracks or heaving, and you can set the finished paver height without creating a trip hazard at doors or existing grade. In this case, you skip excavation and instead use a thin mortar-set or pedestal system. If the slab is cracked, heaved, or draining poorly, remove it. Leaving a bad slab underneath will transfer its problems into your new paver surface.
Dealing with Uneven Ground
Uneven ground is normal and nothing to fear. You correct it during excavation and base building, not by shimming individual pavers. Set your string lines at finished paver height first (more on this below), then excavate to a consistent depth below those lines. Low spots will need more base material; high spots will need more digging. The goal is a uniformly deep excavation that mirrors your intended finished surface, not a perfectly flat hole.
Excavation Depth and Slope
Set your string lines with the correct drainage slope built in before you dig. You want a slope of roughly 1/8 to 1/4 inch per foot (about 1. Mutual Materials recommends a similar slope tolerance for sand-set paver installations, allowing about 1/8" to 1/4" per foot for water runoff [slope of roughly 1/8 to 1/4 inch per foot (about 1. ](https://www.
mutualmaterials. com/installation-guides/paver-installation-instructions/). 5–2%) away from any structure like your house. Techo-Bloc's installation guidance uses increments of 3/16 inch per foot as a practical grading approach when working in stages.
This translates to about 1. 5 inches of drop for every 10 feet of patio. Make sure that slope goes toward the yard, a garden bed, or a drain, not toward a neighbor's property or a low point that will flood.
Excavate to a depth that accommodates your base material plus 1 inch of bedding sand plus your paver thickness. For most concrete pavers (about 2.375 inches thick) on a standard residential patio, that means digging 8–11 inches below finished grade. Once excavated, compact the native subgrade with a plate compactor before adding any base material. If the soil is loose or soft, compact it in passes until it's firm and doesn't give underfoot.
Base Construction, Grading, and Compaction
The base is what keeps your patio level for decades. Spend as much time here as you need, because this is genuinely the most important phase of the whole installation.
Choosing and Adding Base Material
Use crushed stone (also called road base, Class II base, or processed gravel) rather than round pea gravel or plain stone dust. Crushed stone compacts into a solid, interlocking mass. Round stone rolls and shifts. A blend of crushed stone graded to include fines (sometimes called 3/4-inch minus or crusher run) compacts best. For patios and walkways, Techo-Bloc and Unilock both specify a minimum base thickness of 4–6 inches on sandy or gravelly soils and 6–8 inches on clay or silty soils. If you're in freeze-thaw country and your soil is clay-heavy, go with 8 inches.
Add the base material in 2–3 inch lifts, not all at once. Spread a layer, compact it thoroughly with a plate compactor, check your slope with a level and string lines, then add the next lift. Compact again. Repeat until you reach the correct elevation below your string lines (which should equal your paver thickness plus 1 inch for bedding sand). Trying to compact a thick layer all at once just creates a firm top crust over loose material underneath.
Screeding the Base for Slope
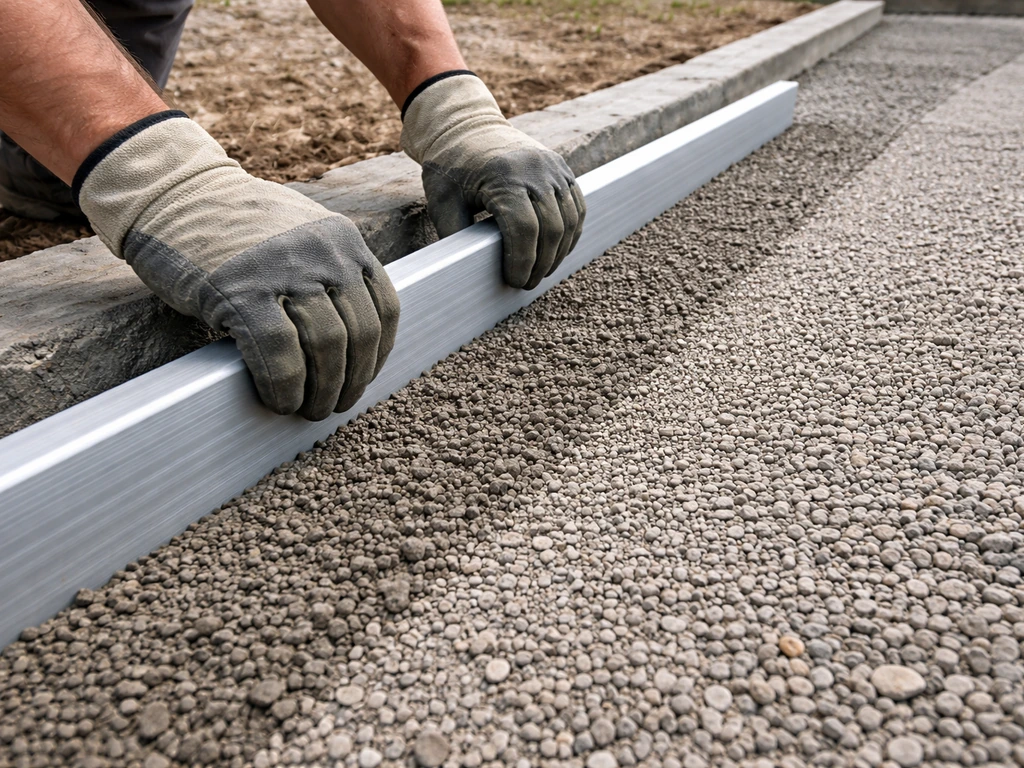
Once your final base lift is compacted, check that the slope is correct across the whole area using your string lines. The top of the compacted base should mirror your planned finished surface slope, sitting exactly 1 inch lower than your string lines (to account for the bedding sand layer). Use a long straightedge or screed board to verify this. Adjust any high or low spots, re-compact lightly if needed, then move on to bedding.
Setting Pavers: Layout, Pattern, Borders, and Cutting
Screeding the Bedding Sand Layer
Spread coarse bedding sand (concrete sand or ASTM C33 washed concrete sand works well for bedding) over your compacted base. Per ICPI guidance, the bedding sand layer should be screeded to a nominal 1-inch (25mm) thickness. Use two lengths of 1-inch diameter conduit pipe as screed guides, set them parallel along your work area, dump sand between them, and drag a straight 2x4 across the top to create a perfectly even 1-inch layer. Pull the pipes out as you go and fill those channels with sand, smoothing by hand. Do not walk on or disturb the screeded sand. Lay pavers directly from the edge without stepping on the prepared sand bed.
Starting the Layout
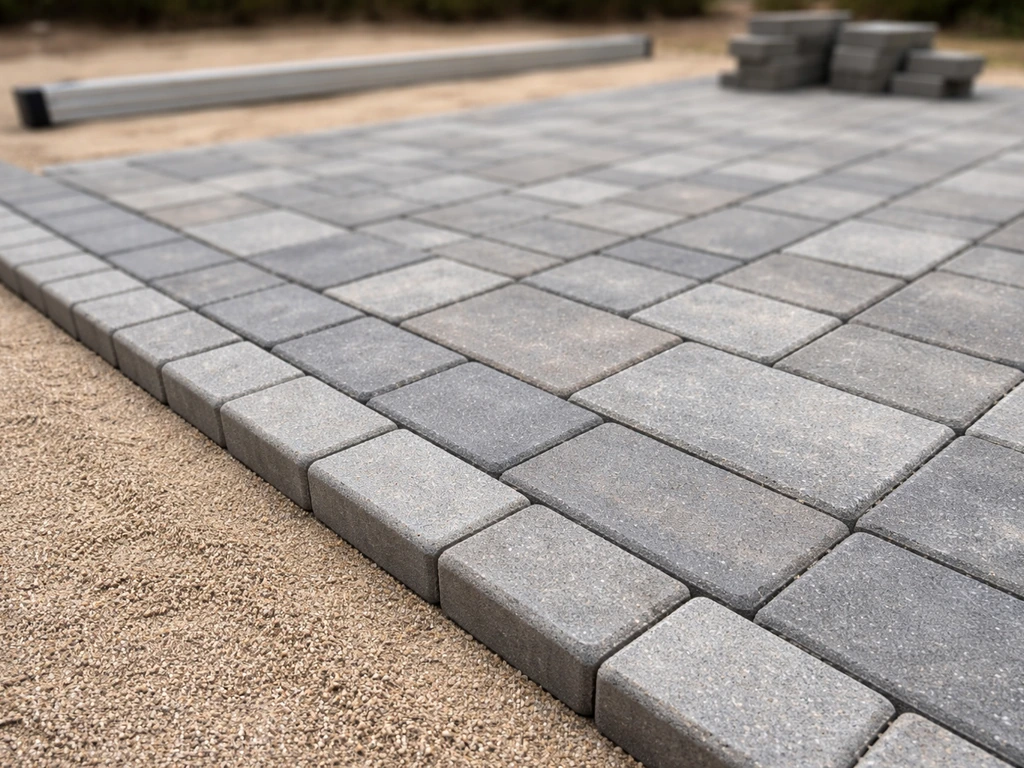
Start laying pavers from a straight edge, typically the house or a chalk line you've snapped across the area. Work outward in a pyramid or staircase pattern so you always have two straight reference edges to align against. Use plastic spacers or the built-in spacer lugs on most concrete pavers to maintain consistent joint width (typically 3/16 to 3/8 inch). Check your rows for straightness every 4–5 rows using a string line or long straightedge. Small misalignments compound quickly, so catching them early is much easier than correcting them later.
Borders and Edge Patterns
A soldier course border (pavers laid end-to-end in a single row around the perimeter) gives a clean, professional finish and makes cutting easier because it frames the field area. Install the border pavers last, after the field pattern is complete, so you can measure and cut each border piece exactly to fit. Alternatively, lay your border first as a guide if you have a complex shape or curved edge.
Cutting Pavers
You will need to cut pavers for edges, curves, and obstacles. A wet saw (also called a masonry saw or concrete saw) gives the cleanest, most accurate cuts and keeps dust down. An angle grinder with a diamond blade works for occasional cuts and curves but produces a lot of dust and requires good eye and respiratory protection. For straight cuts on basic concrete pavers, a rented splitter (guillotine-style) is fast but less precise. Mark your cut line with a pencil or chalk, make the cut in one smooth pass on a wet saw, and test-fit the piece before setting it in the sand. Always wear eye protection, hearing protection, and a dust mask at minimum when cutting.
Jointing and Finishing
Installing Edge Restraints
Before you sweep in any jointing sand, install edge restraints around the entire perimeter that doesn't meet a fixed structure like a house foundation, retaining wall, or steps. Edge restraints (plastic or aluminum paver edging secured with 10-inch or longer spikes driven into the base material) are what keep your pavers from slowly migrating outward under foot traffic and freeze-thaw cycles. This lateral movement is one of the most common long-term failures on DIY patios. Backfilling with soil is not a substitute for proper edge restraints, no matter how much soil you pile against the edges.
Compacting the Pavers Into the Sand
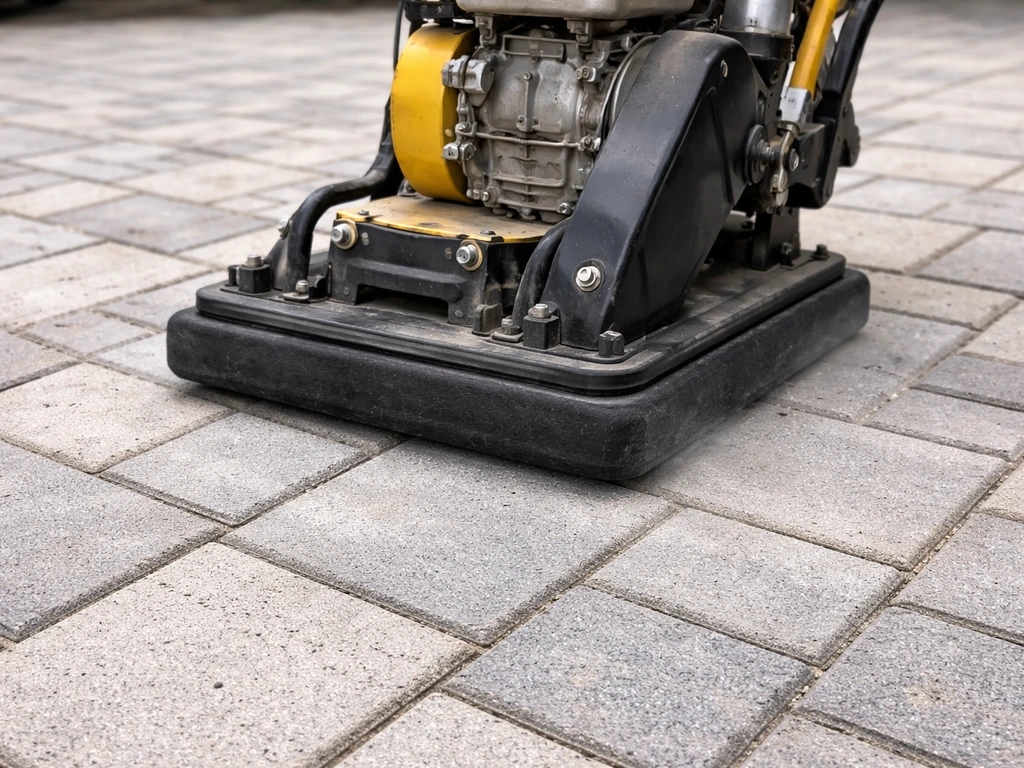
Once all pavers are laid and edge restraints are installed, run a plate compactor over the entire surface with a rubber pad or protective mat on the compactor plate to avoid cracking or scratching the paver faces. This seats the pavers firmly into the bedding sand and corrects any minor high spots. Do a final check with a long straightedge: any paver more than 3/8 inch out of plane should be pulled, sand adjusted underneath, and reset.
Sweeping in Jointing Sand
For the joints, you have two main options: regular coarse sand or polymeric sand. Polymeric sand contains binding agents that harden when wet, resisting washout, ants, and weed growth. It costs more (roughly $25–$40 per bag versus $5–$10 for regular sand) but is worth it for most homeowners. Whichever you use, make sure joints are clean and dry before you start.
If using polymeric sand, follow the bag directions exactly. Different brands (Pavestone PolySand, Techniseal, Alliance Gator Maxx, and others) have slightly different activation instructions, but the general process is: pour sand across the surface, sweep it into joints with a push broom, compact with the plate compactor to drive sand deeper, sweep again, compact again, then blow or brush off any excess from paver faces before misting with water to activate the binder. Excess polymeric sand left on the paver surface when you add water will leave a haze that's difficult to remove. Alliance Gator recommends that the final sand level sit about 1/8 inch below the top of the paver (or just below the chamfer edge) so it doesn't smear across the face during activation.
Sealing the Patio
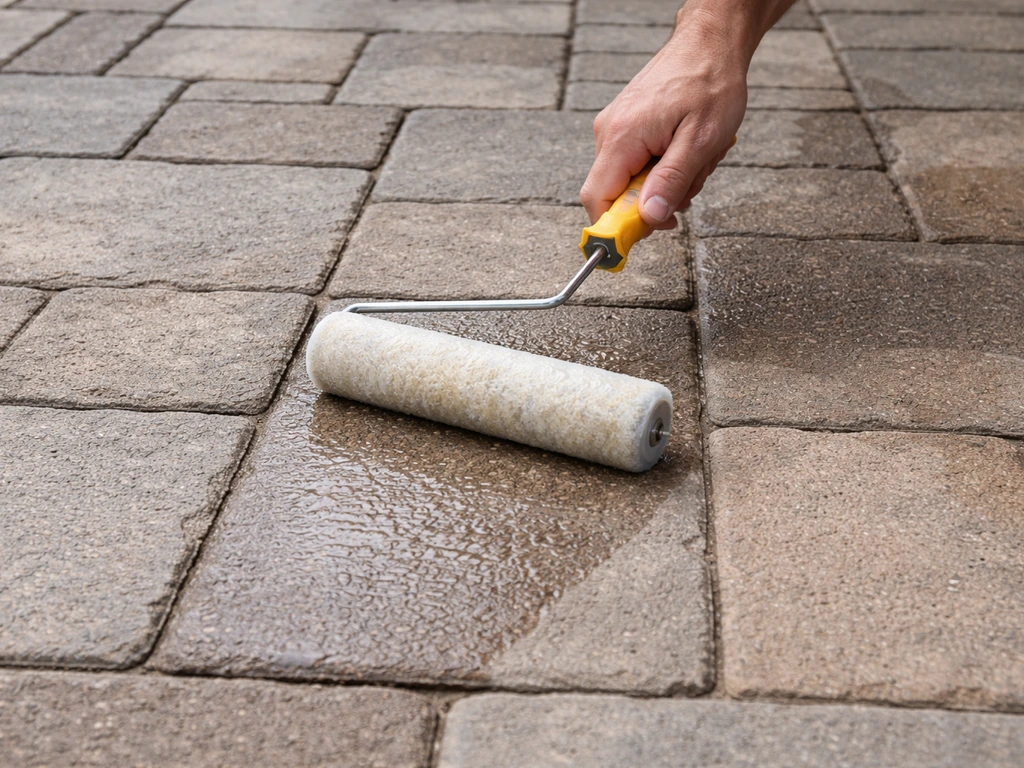
Sealing is optional but recommended for most concrete paver patios. Sealer protects against staining, enhances color, and helps lock polymeric sand joints. The key rule: wait 30–90 days after installation before sealing. This allows any efflorescence (white mineral deposits) to work its way out and gives moisture trapped during installation time to escape. Sealing too early traps moisture and can cause cloudiness or peeling. After the initial seal, plan to reseal every 2–3 years depending on your climate and traffic level. Apply sealer with a roller or pump sprayer on a dry day when temperatures are between 50–90°F.
Troubleshooting Common DIY Problems
| Problem | Likely Cause | Fix |
|---|---|---|
| Pavers sinking or settling unevenly | Insufficient base compaction or base too thin for soil type | Pull affected pavers, add and compact more base material, reset pavers and re-check slope |
| Water pooling on the surface | Inadequate drainage slope or low spot in the base | Pull the low section, re-grade base to restore 1/8–1/4 inch per foot slope, relay pavers |
| Pavers shifting or spreading apart | Missing or improperly anchored edge restraints | Install proper plastic or aluminum edge restraints with long spikes; backfill soil alone is never sufficient |
| Wavy or uneven surface | Bedding sand not screeded evenly, or sand disturbed before paving | Pull pavers in wavy section, re-screed sand to 1-inch thickness, relay and compact |
| Jointing sand washing out | Using fine sand instead of coarse, or polymeric sand not fully activated | Remove remaining loose sand, re-sweep with coarse ASTM C936 or polymeric sand, activate correctly |
| Pattern running off-square | Starting point not square or not checking alignment frequently enough | Snap a new reference chalk line across the patio and re-align rows; check every 4–5 rows going forward |
| Efflorescence (white haze) on surface | Mineral deposits migrating from concrete pavers during curing | Allow 30–90 days, then clean with an efflorescence cleaner before sealing |
| Weeds growing in joints | Using non-polymeric sand or polymeric sand applied incorrectly | Remove weeds, clean joints, apply polymeric sand correctly or use a joint stabilizing sealer |
Tools, Timeline, Cost, and Maintenance
Tools You'll Need
- Plate compactor (rent one; do not try to use a hand tamper for anything larger than a few square feet)
- Wet masonry saw or angle grinder with diamond blade for cutting pavers
- Rubber mallet for setting pavers without cracking them
- Long screed board (a straight 2x4 works fine) and 1-inch diameter conduit pipes for screeding sand
- String lines, line level, and wood stakes for establishing slope and reference lines
- 4-foot level and long straightedge for checking flatness
- Sod cutter or flat spade for stripping grass
- Wheelbarrow, work gloves, eye protection, and knee pads
- Push broom for sweeping jointing sand
- Chalk line for snapping layout reference lines
Realistic Timeline
For a 200–300 square foot patio, plan on a full weekend (two full days) as a minimum if you have a helper, and three or four days if you're working alone or have a lot of cutting to do. Day one is typically excavation, base material delivery and spreading, and the first round of compaction. Day two is finishing the base, screeding sand, and laying pavers. Day three (or a second weekend) is for cutting edge pieces, installing restraints, final compaction, and jointing sand. Sealing happens 1–3 months later. Don't rush the base phase. An extra two hours spent getting the base perfect saves you from tearing up the patio later.
Typical Cost Breakdown
| Item | Typical Range (per sq ft or flat) |
|---|---|
| Concrete pavers (basic) | $2–$6 per sq ft |
| Natural stone or porcelain pavers | $8–$20+ per sq ft |
| Crushed gravel base material | $0.50–$1.50 per sq ft |
| Bedding sand | $0.20–$0.50 per sq ft |
| Polymeric jointing sand | $0.30–$0.75 per sq ft |
| Edge restraints | $0.50–$1.00 per linear foot |
| Plate compactor rental (per day) | $80–$150 |
| Wet saw rental (per day) | $60–$120 |
| Paver sealer (per sq ft) | $0.15–$0.40 per sq ft |
A realistic total material cost for a DIY 200 square foot concrete paver patio lands between $800 and $1,800, depending on paver choice, base depth required, and whether you seal. Professional installation of the same patio typically runs $3,000–$6,000, so the DIY savings are real and significant.
Maintenance After Installation
Once the patio is installed and sealed, maintenance is straightforward. Sweep or blow off debris regularly to prevent organic buildup in joints. Rinse with a garden hose as needed; a pressure washer on a low setting is fine occasionally but can disturb jointing sand if overused. Inspect joints each spring: if sand has washed out or settled, sweep in fresh polymeric sand and re-activate. Reseal every 2–3 years to maintain stain resistance and color. If a paver chips or cracks, the beauty of a sand-set paver patio is that individual pieces can be pulled and replaced without disturbing the rest of the surface.
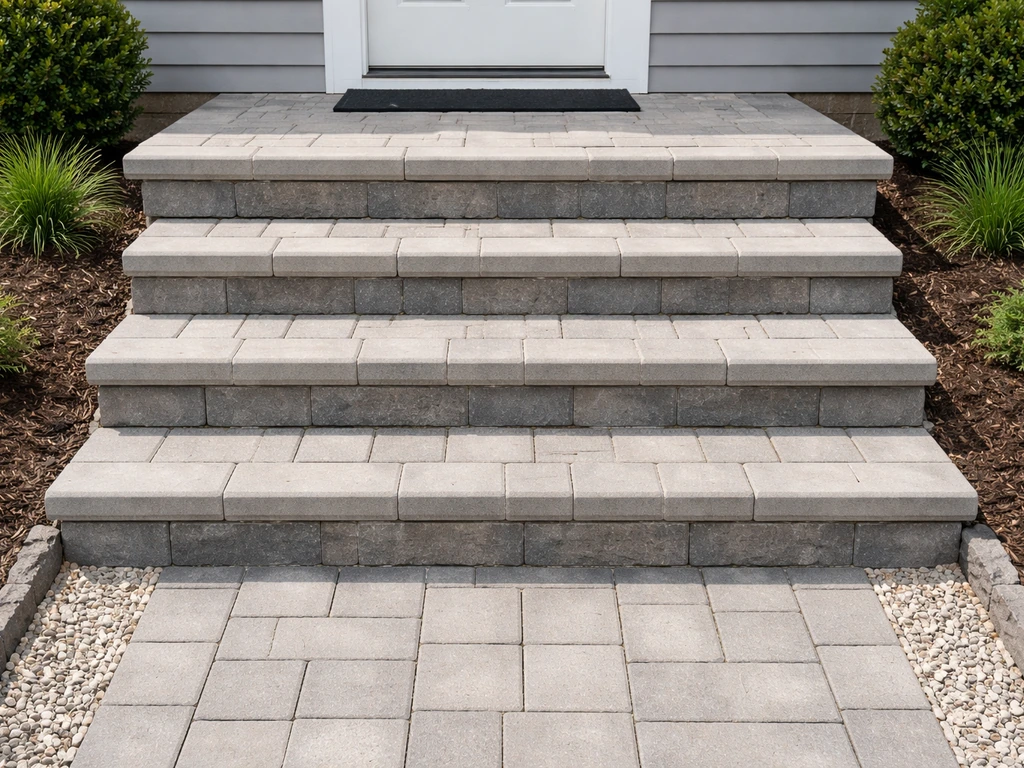
Adapting This for Sloped Sites, Raised Patios, and Fire Pit Areas
If your yard has a significant slope (more than 1 inch of drop per foot), you have two good options: step the patio down in terraced levels using retaining walls or paver steps, or build a raised patio with a structural wall on the downhill side. For a terraced layout, focus on installing paver patio steps with the same base and drainage approach so each tread stays level and secure.
Both require retaining or step structures that need their own planning. If you are adding steps, these patio paver steps ideas can help you plan the layout, drainage slope, and edging so the tread stays stable. For fire pit areas, the installation steps are identical to the rest of the patio, but leave at least a 2-foot non-combustible zone (bare pavers, no polymeric sand) directly around a wood-burning fire pit, since intense heat can scorch polymeric binders and degrade the sand over time. A ring of heat-resistant pavers or a gravel center for the fire pit itself is a clean, practical solution.
FAQ
Do I need to compact the native soil before adding gravel base, even if my ground seems firm?
Yes. Compacting the subgrade matters even when the soil looks solid, because foot traffic and freeze thaw can still create micro-movement. Use a plate compactor until the soil won’t “give” underfoot, then build the base in lifts and compact each lift.
What happens if I skip the grass/organic removal and just bury it under the base?
Eventually it will decompose and create voids. Those voids translate into sunken pavers or uneven settlement, usually first in wet or low areas where decomposing material breaks down faster.
How do I set the drainage direction correctly if my yard slopes toward the house?
Your patio still needs a fall away from the structure, typically 1.5 to 2% away from the house. If your yard overall drains toward the house, plan a controlled outlet (to a drain, garden bed, or yard low point that won’t flood) rather than letting water pool at the foundation edge.
Can I use the same base thickness everywhere, or should I vary it across the patio?
You usually vary excavation depth to keep the final base at the right elevation, but the base thickness should follow the recommended minimum. After excavation, re-check elevations so thicker base isn’t caused by accidental high or low spots, it’s driven by your planned grade.
What’s the easiest way to avoid lippage (uneven paver edges) when laying pavers?
Lippage usually comes from disturbed bedding sand or small alignment errors that compound. Keep off the screeded sand bed, check straightness every few rows, and after compacting, pull and re-set any paver that sits too high (more than about 3/8 inch out of plane) rather than trying to force it down.
Should I lay pavers tight to walls and steps, or leave an expansion gap?
Leave a controlled joint space where movement is likely, especially at fixed structures. If you butt pavers directly against rigid surfaces, seasonal movement and trapped moisture can cause cracking or pressure against edges, so follow your product and edging layout strategy for those transitions.
Is regular sand always a better choice than polymeric sand for joints?
Not always. Regular sand is cheaper but washes out more easily and typically requires more frequent joint replenishing. Polymeric sand is more resistant to washout and weeds, but it must be kept off the paver faces during activation and requires exact wetting instructions to avoid haze.
Can I seal immediately after installing, or do I really need to wait 30 to 90 days?
Waiting matters. Sealing too early can trap moisture and efflorescence, leading to cloudiness or peeling. If you’re in a cool, humid climate, it’s safer to lean toward the longer end of the wait window.
How do I know when it’s safe to activate polymeric sand, or how much water should I use?
Do it when the patio surface is clean and dry, then follow the bag’s exact activation steps. A common mistake is adding too much water or leaving excess polymeric sand on the face, which can cause a stubborn haze that’s difficult to remove.
Why do DIY patios sometimes shift outward even with a lot of base material?
Outward movement is usually an edge restraint problem, not a base problem. Pile soil against pavers and you can still get lateral migration from freeze thaw and foot traffic, so install perimeter restraints properly and secure them into the base.
Should I run the plate compactor over polymeric sand or only over pavers?
Compacting is part of the jointing process, but you should protect the paver face with a rubber pad or protective mat to avoid damage. After joint sand is swept in, compact to drive sand deeper, then sweep again and remove excess before misting for activation.
What’s the best way to cut pavers for a clean fit at edges and obstacles?
For accuracy, use a wet saw for most cuts and make test fits before setting the piece. Mark cut lines with a pencil or chalk, cut in a single smooth pass, and account for joint spacing at edges so the pattern doesn’t pinch as it approaches walls or steps.
My patio is on clay soil in a freeze-thaw area, do I need a different approach?
Plan for more base depth and extra attention to compaction and drainage. In clay-heavy soils, the recommended base thickness often increases, for example up to around 8 inches, and the slope must reliably shed water away from the structure to reduce freeze-related heave.
Can I install a paver patio over an existing concrete slab if it has minor cracks?
Only if the slab is structurally sound, not heaving, and drainage and elevation changes won’t create a trip hazard. If cracks reflect movement or the slab drains poorly, it’s safer to remove it so you are not transferring the old slab’s problems into the new surface.
What’s the typical maintenance schedule for joints and sealing after installation?
Plan for joint inspections each spring. If regular sand joints shrink or wash out, sweep in fresh sand and top them up. With polymeric sand, you may need periodic replenishment, and sealing is typically repeated every 2 to 3 years depending on sun, rain, and traffic.
Next Articles
Installing Paver Patio Steps: DIY Step-by-Step Guide
DIY guide to installing paver patio steps, from planning and drainage to setting, leveling, cutting, and sealing.
How to Build Patio Steps from Pavers: DIY Guide
Step-by-step DIY guide to build patio steps from pavers, from measuring and base prep to cutting, leveling, and sealing.
Patio Paver Steps Ideas: DIY Planning and Build Guide
DIY patio paver steps ideas with layouts, step dimensions, drainage, and prep tips to build safe, level paver stairs.