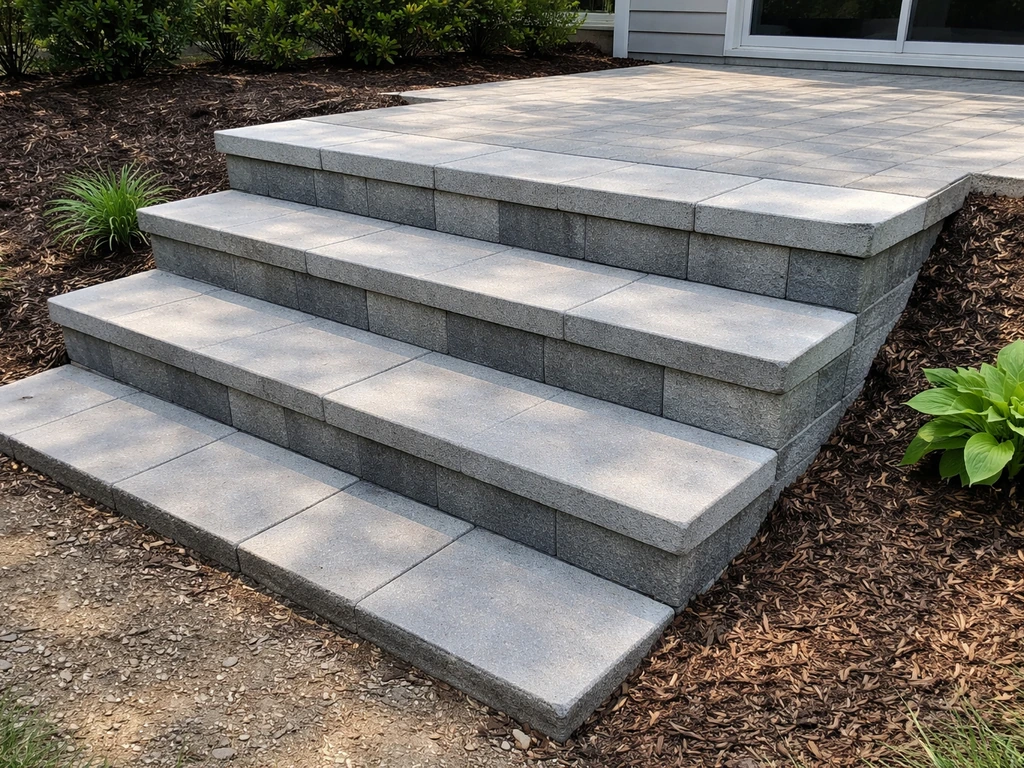
Building patio steps from pavers is a manageable DIY project if you get the foundation right. The basic process is: plan your rise and run measurements, excavate and compact a gravel base under each step, build up your risers with stacked pavers or concrete block, then lay your tread pavers on a 1-inch sand bed and lock everything in with polymeric sand and edge restraints. If you want a step-by-step walkthrough, a DIY paver patio steps guide can help you plan the risers, base, and treads correctly. Done correctly, the steps will be rock-solid, drain well, and match your patio for decades.
How to Build Patio Steps from Pavers: DIY Guide

Felix Rowe
27 May 2026
Planning your patio step design and measurements

Before you buy a single paver, measure your total rise: the vertical distance from the ground (or lower patio level) to the top of your finished patio surface. That number drives everything else. Divide your total rise by your intended riser height to get the number of steps you need.
For comfortable, code-friendly outdoor steps, aim for risers between 4 and 7 inches tall, with tread depths of at least 11 inches. ADA guidelines and the International Residential Code both land in this range, and for good reason: anything steeper than 7 inches feels like you're climbing a ladder, and anything shallower than 4 inches is a trip hazard. For a relaxed, welcoming outdoor stair, a 6-inch riser paired with a 12- to 14-inch tread depth is a sweet spot most DIYers land on.
One rule that matters a lot: keep your riser heights uniform across the entire flight. A variation of even half an inch between steps is enough to make people stumble. Calculate once, double-check, then commit.
Here is a simple planning formula. Say your patio is 18 inches above grade. Divide 18 by 6 (your target riser height) and you get 3 steps. Each step will need a tread depth of at least 12 inches, so the total horizontal run of your staircase will be about 36 inches from the patio edge to where the bottom step meets the ground. Sketch this out before you dig.
Also think about width. Outdoor patio steps feel most welcoming at 4 feet wide or more. Anything under 3 feet feels cramped. Wider steps can be a design statement; they also make it easier to carry furniture or groceries up and down. If you want more inspiration for layouts and styles, exploring patio paver steps ideas is a great starting point before you finalize your plan.
| Total Rise | Riser Height | Number of Steps | Tread Depth (min) | Total Horizontal Run |
|---|---|---|---|---|
| 6 inches | 6 inches | 1 step | 12 inches | 12 inches |
| 12 inches | 6 inches | 2 steps | 12 inches | 24 inches |
| 18 inches | 6 inches | 3 steps | 12 inches | 36 inches |
| 24 inches | 6 inches | 4 steps | 12 inches | 48 inches |
| 18 inches | 4.5 inches | 4 steps | 14 inches | 56 inches |
Tools and materials you'll need
Getting your materials list right before you start saves two extra trips to the hardware store (and we both know there will still be at least one). Here is what a typical paver step project requires.
Materials
- Concrete pavers for treads (match your patio pavers in size, color, and thickness if possible)
- Solid concrete block or extra-thick pavers for risers (standard 4-inch CMU block works well)
- 3/4-inch minus crushed gravel for the base (plan for at least 6 inches of compacted depth under each step)
- Coarse bedding sand (1-inch layer under tread pavers)
- Polymeric sand for joints
- Geotextile landscape fabric (especially useful in clay or sandy soils to prevent base contamination)
- Plastic or steel edge restraints with spikes
- Construction adhesive rated for masonry (to bond riser blocks to each other and to the base)
Tools

- Tape measure, framing square, and level (a 4-foot level is ideal)
- Mason's string and stakes
- Spade and flat-nose shovel
- Plate compactor (rent one; hand tamping is not adequate for a step base)
- Rubber mallet
- Wet saw or angle grinder with a diamond blade for cutting pavers
- Paver splitter (optional but fast for straight cuts)
- Broom for sweeping polymeric sand
- Garden hose with a shower-spray nozzle (for activating polymeric sand)
Renting a plate compactor for a weekend is usually $50 to $80, and it is non-negotiable for a stable step base. If you try to shortcut this with a hand tamper, expect the steps to sink and shift within a season or two.
Site prep and building the right base
This is the step that separates steps that last 20 years from steps that start tilting by year two. The base is everything.
Excavation
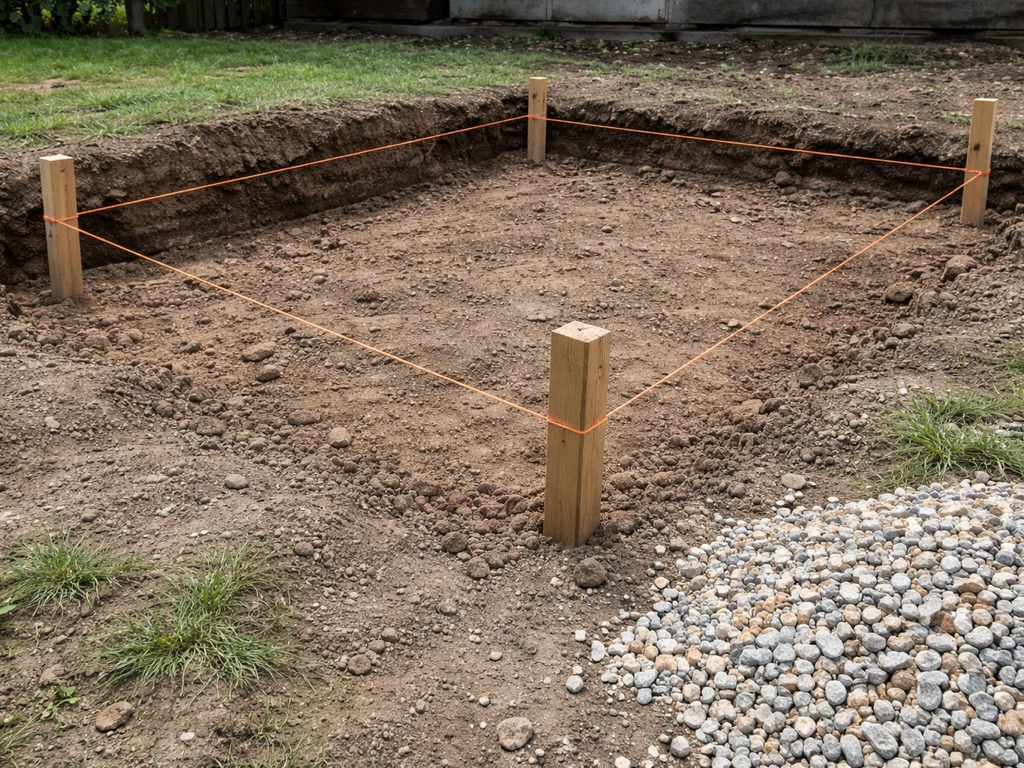
Mark the footprint of your entire staircase with stakes and string. Then excavate the soil beneath the lowest step's footprint down at least 8 to 10 inches below your finished grade. You need room for 6 inches of compacted gravel base plus your 1-inch bedding sand layer, and you need that base level and solid. For each step going up, you are building a stepped excavation that mirrors your planned stair geometry. Once your excavation and base are ready, you can focus on installing paver patio steps with the right alignment, drainage, and joint finishing.
If you hit soft or clay-heavy soil, lay geotextile fabric across the excavated area before adding gravel. This keeps soil particles from migrating up into your base over time, which is a common cause of settling. It is an easy extra step that pays off.
Base compaction
Add your 3/4-inch minus crushed gravel in 2- to 3-inch lifts, compacting each layer with the plate compactor before adding the next. Do not dump all 6 inches at once and then compact the top. Each lift needs to be individually compacted to achieve a truly solid base. After compaction, the top of your gravel base should be firm, stable, and level (or with a very slight forward slope for drainage, which we will cover later).
Once your base is compacted, install your edge restraints on the sides of the excavation to contain the gravel and the eventual paver installation. Spike them into the ground per the manufacturer's instructions. These are your step's boundaries, so they need to be exactly where you want the edges of your steps to land.
Building the risers and treads: from layout to leveling
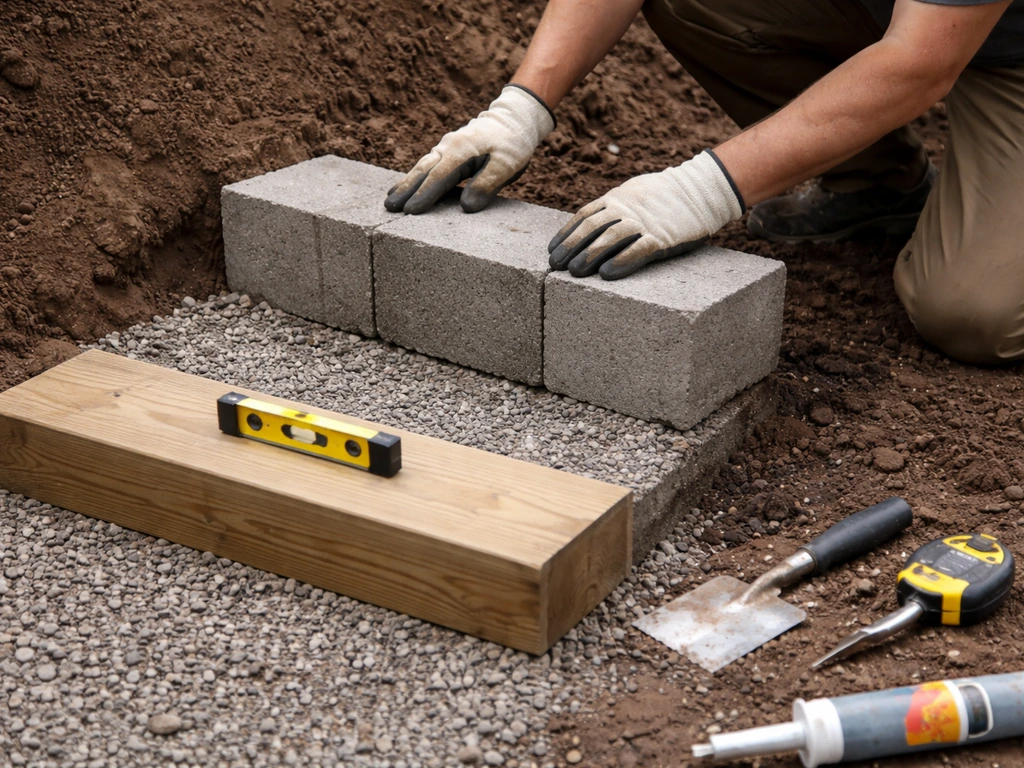
This is the heart of the build. Work from the bottom step up.
- Set your first riser course on the compacted gravel base. If you are using concrete block or solid pavers as risers, apply construction adhesive between courses and between the block and the base. Make sure this first riser is perfectly level side to side and front to back, using your level and rubber mallet to adjust.
- If your riser is two pavers or blocks tall (which is common for a 6-inch riser using standard 3-inch pavers), set the second course with adhesive, staggering the joints like a brick pattern for strength.
- Screed your 1-inch bedding sand layer behind and on top of the first riser to create the tread surface for step one. Use a straight board or screed rail to level it at exactly 1 inch above your compacted gravel.
- Lay your tread pavers on the screeded sand bed. Set them with a rubber mallet, checking for level constantly. The tread should slope very slightly forward (about 1/8 inch per foot) to shed water away from the patio.
- Repeat the process for each subsequent step, building each riser on top of the previous tread's base layer and checking that every riser height is identical.
- Once all pavers are placed, go back with your level and make final adjustments by tapping pavers up or down in the sand. This is your last easy chance to get everything flat and consistent.
A common mistake at this stage is rushing the leveling. Check every tread with your 4-foot level in two directions, and run your string line across the front edge of each step to confirm they are aligned. Misaligned step edges look sloppy and create trip hazards.
Where your steps meet the main patio surface, take extra care with the transition. The top tread should land flush with or very slightly below the patio surface (no more than 1/4 inch difference). A proud edge there will catch feet. If you are tying into an existing paver patio, you may need to lift and relay a course of patio pavers to make this transition seamless.
Cutting pavers, pattern choices, and finishing the edges
Most step builds require at least some cutting, especially at the sides of the steps or where the treads meet the risers. A wet saw with a diamond blade gives the cleanest, most precise cuts and is worth renting if you do not own one. An angle grinder with a diamond blade works for quick or curved cuts but requires more experience to get a clean line. A paver splitter is the fastest option for straight cuts on standard concrete pavers, though it will not handle curves or complex angles.
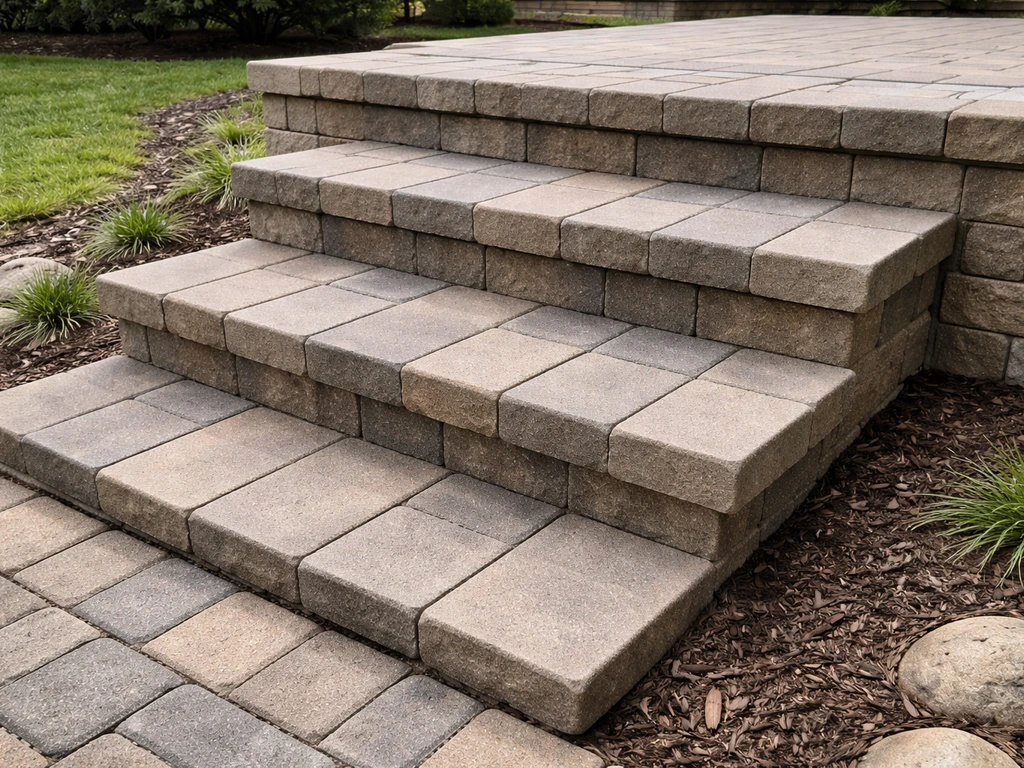
For tread patterns, the most common choice is to run pavers perpendicular to the step (parallel to the riser face). This looks clean and formal. Running them parallel to the step creates a different visual rhythm. If your patio has a specific pattern like herringbone or running bond, you can extend that same pattern onto the treads for a cohesive look, though this adds cutting complexity at the edges. Keeping the pattern consistent between steps and the main patio is a finishing detail that makes the whole project look professional.
Once all pavers are placed and leveled, fill the joints with polymeric sand. Sweep it across the surface with a broom, working it down into every joint. Do not overfill; you want the sand to be just below the chamfer (the slight bevel on most pavers). Run the plate compactor over the treads to compact the joint sand, which forces it down and locks everything together. Then mist the surface with a shower-setting spray (not a jet) to activate the polymeric binder. Follow your specific product's instructions exactly; some require a second misting after the first absorption. Leave it to cure without foot traffic for at least 24 hours.
Safety, drainage, and fixing common problems
Drainage: build it in from the start
Water is the biggest long-term enemy of paver steps. Without proper drainage, water pools under the treads, freezes in cold climates, and heaves the steps out of place. Build a slight forward pitch (1/8 inch per foot) into every tread so water runs off the front of the step. Also make sure your compacted gravel base slopes away from your house foundation if the steps are adjacent to it. If your site has poor drainage overall, consider adding a perforated drain pipe behind the bottom step before you backfill.
Dealing with uneven or sloped ground
If the ground where your steps land is uneven or sloped sideways, do not try to compensate with different amounts of sand under individual pavers. Fix it at the base level by excavating to a consistent depth and building your gravel base back up to a flat, level plane. Trying to use the sand bed to correct for uneven ground leads to thin spots that fail quickly.
What to do if a step sinks or shifts
If a step sinks or shifts after installation, the cause is almost always base failure, either insufficient compaction, inadequate gravel depth, or water eroding the base. The fix is to pull the tread pavers, re-excavate, add more gravel, compact thoroughly, and relay the pavers. There is no shortcut. Adding sand on top of a settled step just delays the problem.
Gaps and alignment issues
If you notice joint gaps widening or pavers shifting laterally, check your edge restraints first. Failed or missing edge restraints are the most common cause of lateral movement in paver installations. Add or replace restraints and re-fill joints with fresh polymeric sand. If riser blocks are separating, re-apply construction adhesive after cleaning both surfaces and clamping or weighting the block until it cures.
Safety callouts
- Always wear safety glasses when cutting pavers; wet saw or grinder debris travels fast
- Wear hearing protection when running the plate compactor for extended periods
- Wear a dust mask when cutting dry, or use wet-cutting methods to suppress silica dust
- Never work on a step base that has standing water; compact only dry or damp (not wet) aggregate
- Make sure finished steps have no lips or lips greater than 1/4 inch that could catch a toe
Sealing, maintenance, and keeping your steps looking great
Sealing paver steps is optional but genuinely worth doing. A good paver sealer reduces joint sand erosion, inhibits weed growth in the joints (by stabilizing the filler), protects against staining, and enhances the color of the pavers. Plan on sealing 30 to 90 days after installation, once the polymeric sand has fully cured and any efflorescence (the white salt haze that sometimes appears on new pavers) has had a chance to weather off.
Most pavers in a normal climate need resealing every 3 to 5 years depending on sun exposure, freeze-thaw cycles, and foot traffic. Steps take more wear than flat patio surfaces, so lean toward the shorter end of that range for your step treads. Before resealing, clean the surface thoroughly, check all joints, and top up any areas where polymeric sand has eroded.
For ongoing maintenance, sweep debris off the treads regularly (leaves and organic matter hold moisture and accelerate staining), pull any weeds that establish in joints promptly, and inspect the steps each spring for any shifting or settling after winter. Catching a small movement early means a quick relay of one or two pavers instead of a full rebuild.
One maintenance task people overlook: check the edge restraints annually. Ground movement and freeze-thaw cycles can work the spikes loose over time. A few extra spikes driven in takes five minutes and prevents the whole installation from slowly spreading.
Your next steps (literally)
If you are ready to get started today, begin by measuring your total rise and sketching your step layout on paper. That single measurement determines everything: how many steps you need, how much gravel and sand to order, and how many pavers to buy. Once you have a sketch you are happy with, check out a full paver patio step by step guide to see how the steps tie into the rest of your patio installation, and look at diy paver patio steps projects for realistic examples of what other homeowners have built at similar scales. Getting the plan right before you dig is the move that makes everything else easier. For the patio area itself, follow these paver patio instructions so the step landing and surrounding surface stay consistent.
FAQ
Can I build patio steps from pavers without renting a plate compactor?
You can, but it is high-risk. Hand tampers rarely achieve the same density, especially in 2- to 3-inch gravel lifts. If you cannot rent one, plan to add extra gravel depth and expect more frequent settling checks, but the long-term stability will still likely be worse than compaction with a plate compactor.
How do I choose the riser height if my patio level is already built?
Measure from the lowest adjoining ground point to the finished top of the patio surface, then divide by your target riser. If the math does not land on an even number of steps, adjust the riser height slightly to keep all risers uniform, rather than changing one step or relying on sand to “make it fit.” Uniformity matters more than hitting a specific inch exactly.
What if my steps have to meet an uneven lawn grade at the bottom?
Do not try to correct side-to-side slope with the sand bed under individual treads. Excavate to a consistent base depth, then rebuild the gravel base to a level plane (with only the intended forward pitch). If the soil is sloped, you may need a retaining edge or a deeper base on the low side.
Should I use geotextile fabric under paver steps on all soils?
Only soils that are prone to migrating fines, such as clay-heavy or soft ground, need it most. If your site has sandy or well-draining, stable soil, geotextile may not be necessary. Where you do use it, keep it smooth and fully covered so gravel can still bond and compact without gaps.
How do I make sure the base has the right drainage slope?
Aim for a subtle forward pitch on each tread, about 1/8 inch per foot. To support that, keep the gravel base consistent and level across the width, then confirm pitch using a straightedge or long level across the stair run. If you build an uneven base and then try to “fix” it with sand under pavers, the thin spots are where settling usually starts.
Do I need a drain pipe behind the bottom step in every climate?
No. Consider a perforated drain pipe when the area behind the bottom step collects water, when downspouts or grading direct flow toward the stair, or in places with seasonal saturation. If you have good site drainage and the gravel base can dry, you may be fine with proper tread pitch and grading away from the foundation.
What is the correct way to handle the transition where the top tread meets the main patio?
Keep the top tread flush or slightly recessed (no more than 1/4 inch). If you are tying into an existing paver patio, plan for removal of the affected paver course so the step tread can align with the surrounding elevation. Skipping this often creates a lip that becomes a trip point and causes later joint gaps.
Can I build the step treads and risers with the same paver size and pattern?
You can, but many paver shapes make risers harder to stack cleanly, especially when you need consistent heights. A common approach is using pavers for the risers and then using larger, flatter pavers for treads. If matching patterns for a cohesive look, do it only if you can execute clean cuts at the stair edges without compromising alignment.
What’s the best way to cut pavers for step edges so they still lock in?
Dry-fit the first cut so the face alignment is correct before you commit, then cut with a method that produces straight, accurate edges. For typical straight runs, a paver splitter is efficient, but for precision at corners and tight transitions, a wet saw with a diamond blade gives the cleanest results. Avoid oversizing gaps at edges, edge restraint placement depends on tight containment.
Should I fill joints with polymeric sand to the very top?
No. Leave the sand just below the chamfer or bevel so it can lock down during compaction. Overfilling can make excess material smear during compaction and misting, which increases discoloration and reduces long-term joint stability.
How long should I wait before walking on newly finished paver steps?
At minimum, avoid foot traffic until the polymeric sand has cured, typically at least 24 hours as a rule of thumb. Also avoid heavy rain exposure right after misting. If your product requires a second misting, follow that schedule, since the cure timeline depends on the specific binder instructions.
What do I do if a paver step loosens but the rest of the stair looks fine?
Check the joint sand and edge restraints first. Small movement often comes from missing or failed edge restraints, not from broad base failure. If the top is rocking, you may still have a localized base void, but before digging up, try re-placing restraints, cleaning joints, and refilling with fresh polymeric sand.
How often should I reseal paver steps compared with a flat patio?
Steps usually need earlier resealing because they see higher abrasion and frequent moisture exposure. Even if a flat patio might go longer, plan for resealing closer to the shorter end of the typical 3 to 5 year range for step treads, and always top up eroded joints before sealing.
Can I skip sealing paver steps and rely on polymeric sand alone?
You can, but polymeric sand mainly addresses joint stabilization. Sealing adds protection against staining and helps slow joint sand erosion and weed establishment. If you skip sealing, expect faster joint maintenance cycles and more frequent joint sanding or top-ups, especially on steps that get direct sun or heavy foot traffic.
What maintenance is most likely to prevent a full rebuild?
Two things: keep joints clear of organic debris so moisture does not sit, and inspect after winter for any lateral shifting or settling. If you catch a small movement early, you can often relay one or two treads, whereas waiting until multiple pavers lift or the risers separate usually forces a much larger section rebuild.
Next Articles
Patio Paver Steps Ideas: DIY Planning and Build Guide
DIY patio paver steps ideas with layouts, step dimensions, drainage, and prep tips to build safe, level paver stairs.
Paver Patio Step by Step: DIY Installation from Start to Finish
Paver patio step by step DIY guide: plan, prep, base, leveling, edging, pavers, cuts, sand joints, sealing and troublesh
How to Use Quikrete Patio Paver Jointing Sand: Guide & Tips
How to use Quikrete Patio Paver Jointing Sand: step-by-step application, tools, timing, coverage, and care.