You can build a durable brick paver patio yourself over a weekend or two if you get the base right. If you want to take the next step beyond basics, follow a detailed guide on how to build a small patio with pavers, including layout, base prep, and finishing. The work breaks down into six phases: plan and measure, prep the site, build a compacted gravel and sand base, lay and level the pavers, cut around edges and obstacles, then compact, joint with sand, and seal. Most DIY patio problems (shifting pavers, water pooling, uneven surface) trace back to skipping or rushing the base work, so that's where this guide spends the most time.
How to Build a Patio With Brick Pavers: Step by Step

Felix Rowe
29 May 2026
Phase 1: Plan and measure the layout
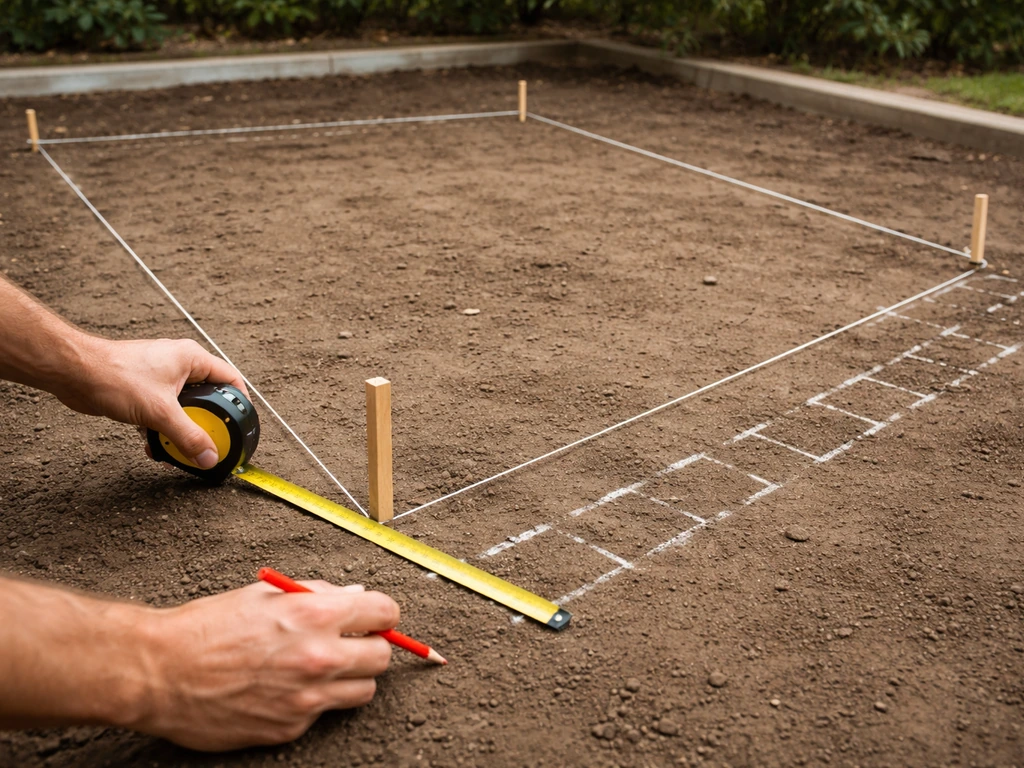
Before you touch a shovel, sketch the patio on paper with actual dimensions. Measure the area you want to cover, then mark it out on the ground with spray paint or stakes and string. This does two things: it shows you whether the space actually feels big enough, and it tells you how many pavers you need to order. A standard brick paver is about 4 x 8 inches, so one square foot takes roughly 4.5 pavers. Add 10% for cuts and breakage.
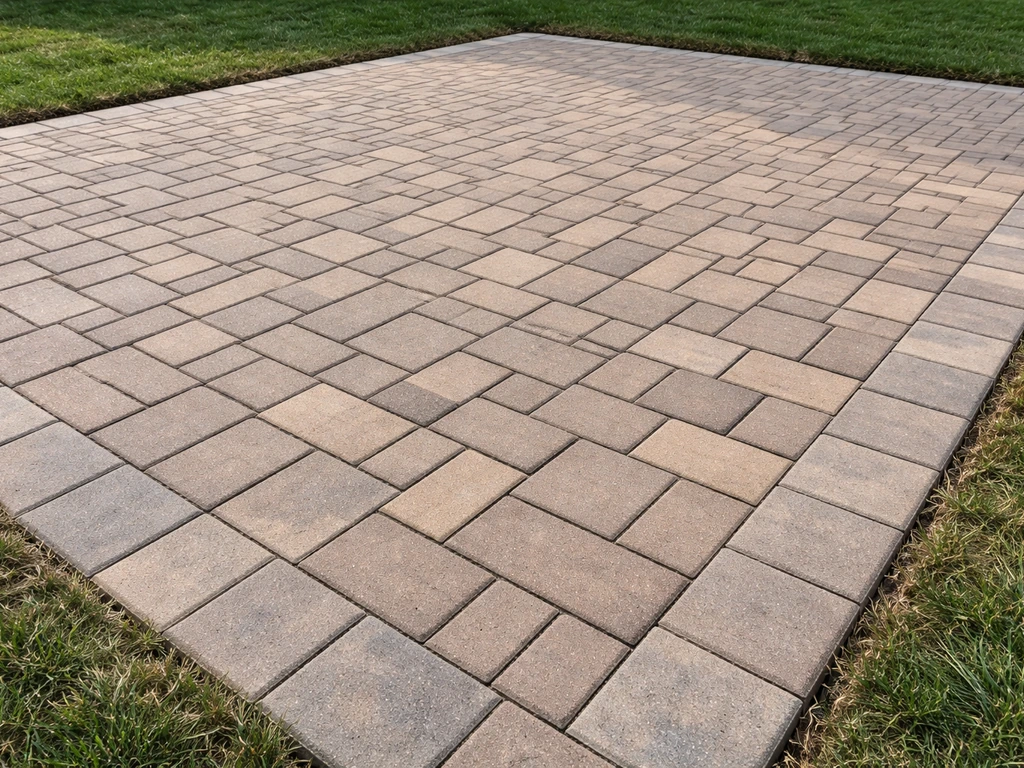
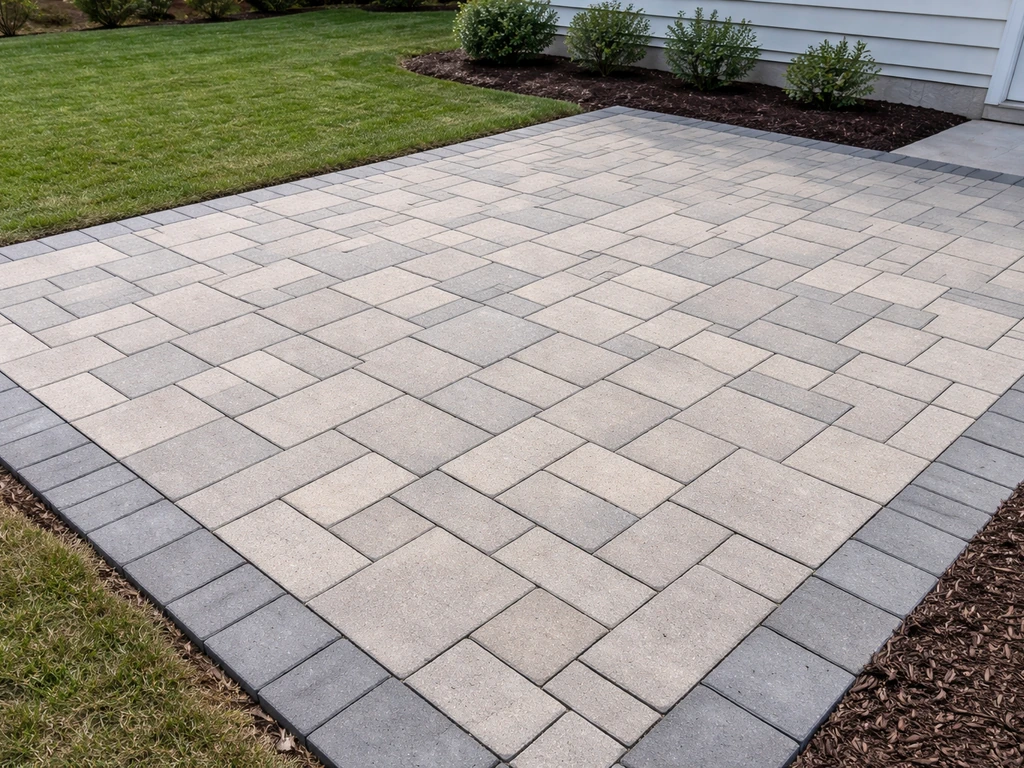
While you're planning, decide on your pattern. Running bond (offset rows like a brick wall) is the most forgiving for beginners. Herringbone at 45 or 90 degrees looks great and is very stable under foot traffic, but it creates more cuts at the edges. Basket weave is simple and symmetrical. Your pattern choice also affects your starting point, so lock it in before you dig.
Also settle the drainage question now. The finished patio surface needs to slope away from your house at a minimum of 1 inch over every 8 feet. Mark that slope in your string lines from the start. If water has nowhere to drain, it will undermine the base over time regardless of how well everything else was built. For sloped or raised patio situations, the approach changes somewhat, but for a standard ground-level patio, that 1-in-8 rule is your baseline.
Tools and materials to gather before you start
- Tape measure, level, and a long straightedge
- Mason's string and line level (or a laser level if you have one)
- Spray paint or marking chalk for layout
- Plate compactor (rent one — do not skip this)
- Rubber mallet and hand tamper
- Screed rails and a 2x4 screed board
- Shovel, garden rake, and a wheelbarrow
- Brick splitter or angle grinder with a diamond blade for cuts
- Broom and garden hose for jointing and cleanup
- Brick pavers, polymeric joint sand, gravel base material, and coarse bedding sand (ASTM C33 gradation)
Phase 2: Prep the site
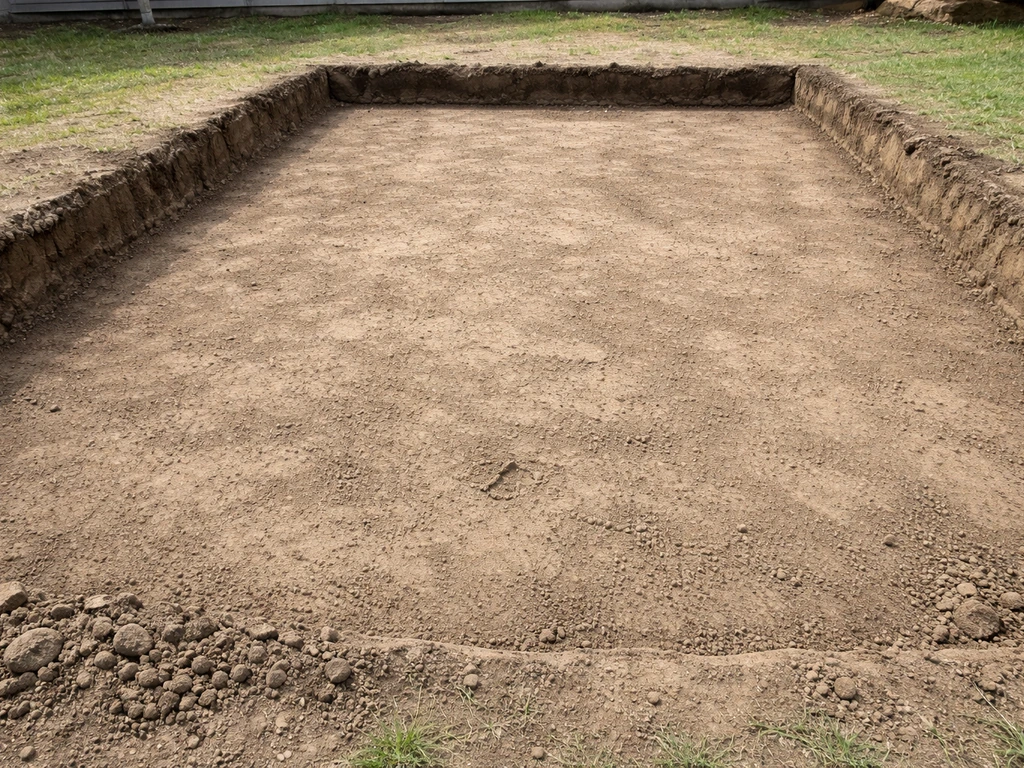
Excavate the entire patio area plus about 6 inches beyond each edge to give yourself room to install edging. Remove all sod, roots, and organic material. You're going to dig down far enough to accommodate your base layers plus the paver thickness. For a standard 2.25-inch-thick brick paver, the typical excavation depth is 7 to 9 inches total: 4 to 6 inches of compacted gravel, 1 inch of bedding sand, and the paver itself. Mark that target depth on a stake in the corner of your dig so you're not constantly guessing.
Once the soil is exposed, check for soft spots. If you press the tip of a screwdriver into the subgrade and it sinks easily, you've got weak soil. Pack those areas with extra gravel and compact them thoroughly before moving on. Never try to compensate for soft soil by adding more sand. Sand doesn't fix a weak subgrade; compacted angular gravel does.
Getting drainage right from the start
Set your string lines at the correct slope (1 inch per 8 feet away from the house) and recheck them after excavation. If the natural ground slopes toward the house, you'll need to add more gravel on the house side to build up the low spots, not just rely on the surface slope. On sites where water collects heavily, consider running a perforated drain pipe under the gravel layer before you compact it. That's much easier to do now than after the patio is finished.
Phase 3: Build the base and install edging
The base is the most important part of the whole project. A paver is only as stable as what's underneath it. Start by spreading your gravel in 2-to-3-inch layers, compacting each layer with the plate compactor before adding the next. This is called lifts, and it's how you get a truly solid, non-settling base. Two compacted lifts of 2 to 3 inches each will serve you far better than one 4-to-6-inch layer dumped in and compacted once. Use crushed angular gravel (often called crusher run or road base), not round pea gravel, which shifts.
With the gravel base compacted and at the right elevation, install your plastic or aluminum paver edging around the perimeter before you add the bedding sand. Edging keeps the outer pavers from migrating outward over time, which is the most common reason a DIY patio eventually looks sloppy. Spike the edging into the compacted gravel every 12 inches. On curves, use flexible edging and make small cuts in the top flange so it bends cleanly.
Once edging is in, spread your bedding sand (ASTM C33 gradation coarse sand works best) at roughly 1 inch deep across the entire area. Screed it flat using two screed rails set to your slope angle and a 2x4 dragged across them. The goal is a perfectly smooth, consistently thick bed that the pavers will sit on. Do not walk on the screeded sand after it's done. Lay a piece of plywood to kneel on as you set pavers so you don't leave footprints in the bed.
Phase 4: Lay and set the pavers

Start in a corner or along a straight edge like a house wall or a fixed boundary. Set each paver by pressing it down firmly into the sand with both hands, then give it two taps with a rubber mallet to seat it. Don't slide pavers into position, that disrupts the sand bed. Set them straight down. Keep consistent spacing between pavers: about 1/8 inch for tight-jointed patterns and up to 3/16 inch if you're using a tumbled or irregular brick. Most plastic spacers sold at hardware stores are designed for tile and are too wide for pavers; a few leftover paver chips or a homemade spacer jig works better.
Check your work frequently. Every 4 to 6 rows, lay your level or straightedge across the surface and look for high or low spots. A paver that's sitting high can usually be lifted, a bit of sand removed, and re-set. One that's low gets a little sand added underneath. It's tedious to fix later, so do it as you go. The ICPI surface tolerance target is 1/8 to 1/4 inch above adjacent drainage inlets for finished pavers, so the surface should be very close to flat with just the planned slope built in.
Dealing with uneven ground
If the subgrade itself is uneven despite your best efforts at grading, correct it in the gravel base layer, not in the bedding sand. The bedding sand layer should stay at a consistent 1-inch depth. If you are working with large-format pavers, you may need to adjust your base thickness and leveling approach to keep the surface stable bedding sand layer should stay at a consistent 1-inch depth. Adding extra sand in low spots to compensate is one of the most common mistakes on DIY projects, and it leads to settling and unevenness over time because thick sand layers compress differently than thin ones.
Phase 5: Cutting around obstacles and finishing edges
Once the field pavers are down, you'll have gaps around the perimeter, utility boxes, posts, tree surrounds, or anything that interrupted your layout. Measure each gap carefully and mark the cut line on the paver with a pencil or chalk. A rented or purchased brick splitter handles straight cuts quickly and cleanly. For curves, notches, and complex shapes, an angle grinder with a diamond blade gives you more control. Always wear eye protection, hearing protection, and a dust mask when cutting. Silica dust from cut pavers is a real respiratory hazard.
When cutting to fit around a curved edge or a circular obstacle, make a cardboard template first, transfer the shape to the paver, then make a series of small straight cuts that approximate the curve before cleaning up with the grinder. It's slower but far less wasteful than free-handing curves on expensive pavers.
Fill all remaining gaps with cut pieces, making sure no gap is smaller than one-third of a full paver (smaller pieces tend to rock and pop out). If you end up with a very narrow gap along an edge, it's often better to shift the whole layout over slightly at the start of the next row than to force in a sliver of paver that won't stay put.
Phase 6: Compact, fill joints with sand, and seal
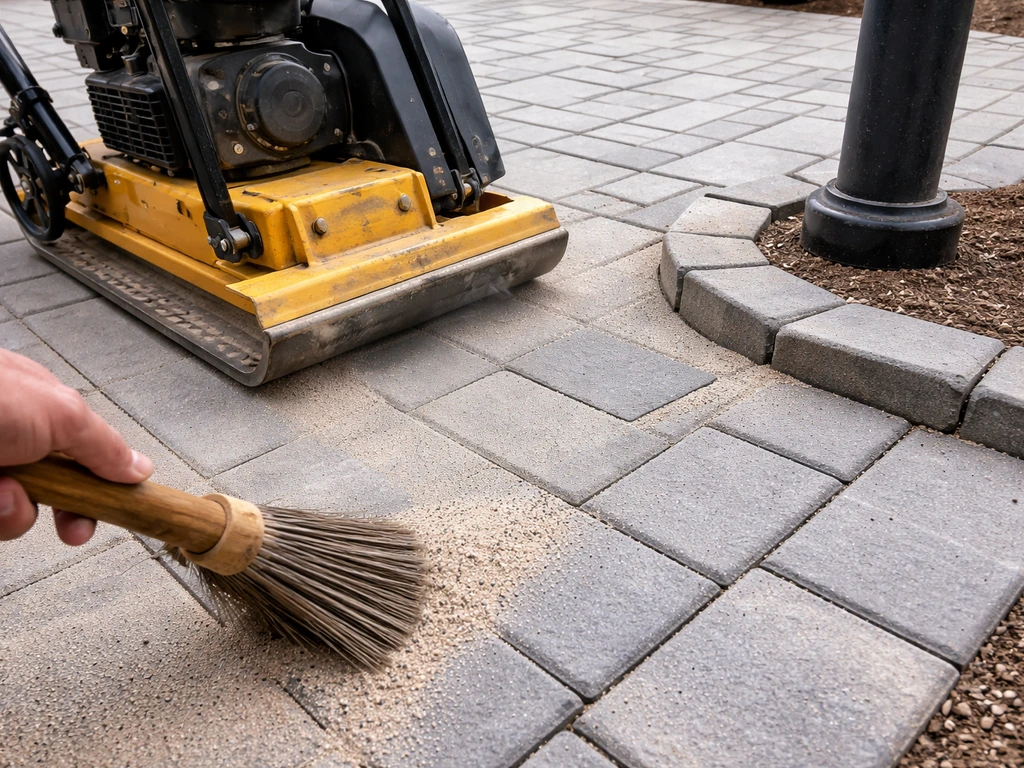
With all pavers set and cut pieces in place, run the plate compactor over the entire surface. Use a rubber pad attachment on the compactor plate to protect the paver surface from scratching. Make two or three passes in different directions. This vibrates the pavers down into the bedding sand evenly and locks the whole surface together. You'll often see the surface level itself out noticeably during this step.
After compacting, sweep polymeric joint sand across the surface and work it into all the joints using a stiff push broom. Polymeric sand contains a binder that hardens when wet, resisting weeds and insects far better than plain sand. Sweep multiple passes until the joints look full, then blow or brush off all excess sand from the paver faces. The sand should sit approximately 1/8 inch below the bottom of the paver's beveled edge. On non-beveled pavers, target 1/8 inch below the paver surface. Do not leave sand sitting on top of the pavers when you activate it.
Activate the polymeric sand by misting the surface with water according to the product manufacturer's instructions. Different products have different watering schedules, so read the bag. Generally you'll mist once lightly, wait a few minutes, then mist again more thoroughly. The sand will firm up as it dries. Keep foot traffic off for 24 hours. Run the plate compactor over the surface one more time after the first sand pass if you see joints settling, then refill any low joints before the final activation.
Should you seal the patio?
Sealing is optional but recommended for brick pavers, especially in climates with hard freezes or in areas with staining risk (outdoor kitchens, BBQ areas). Wait at least 30 days after installation before applying sealer so any efflorescence (the white salt haze that sometimes appears on new pavers) has time to work out. Use a breathable, penetrating paver sealer rather than a film-forming sealer, which can peel. Apply with a roller or pump sprayer in two thin coats, letting the first dry fully before the second. Plan to reseal every 3 to 5 years depending on traffic and climate.
How long does this take and what does it cost?
For an average 200 to 300 square foot patio, budget two full weekends for a solo DIYer: one for excavation, base prep, and edging; one for laying pavers, cutting, and finishing. If you have a helper, you can often compress that to one long weekend. Material costs for brick pavers, base gravel, bedding sand, polymeric sand, and edging typically run $8 to $18 per square foot depending on your location and the paver style you choose. Tool rentals (plate compactor, brick splitter) add roughly $100 to $200. A contractor doing the same job would charge $20 to $40 per square foot in most markets, so the DIY savings are real.
Troubleshooting the most common problems
| Problem | Likely cause | Fix |
|---|---|---|
| Pavers shifting or spreading apart | Missing or inadequate edging, or edging not staked deep enough | Re-install edging with longer spikes every 8 to 10 inches; refill and recompact joints |
| Water pooling on the surface | Slope toward the house or flat spots in the base | Pull affected pavers, re-grade the base, and relay with correct slope |
| Uneven surface after compaction | Inconsistent bedding sand depth or soft spots in subgrade | Lift low pavers, add a little bedding sand; lift high pavers and remove sand |
| Pavers sinking in one area | Soft subgrade or organic material left in excavation | Excavate the problem area, remove organics, add and compact extra gravel, relay pavers |
| Joint sand washing out | Used plain sand instead of polymeric, or didn't fully activate | Sweep in fresh polymeric sand and activate correctly with two misting passes |
| White haze on pavers (efflorescence) | Natural salts rising from new concrete-based pavers | Wait 30 days, then clean with a paver efflorescence cleaner and rinse thoroughly |
| Cracked pavers near cuts | Thin cut pieces under 1/3 paver width, or heavy point loads | Replace with properly sized cut pieces; avoid cuts narrower than 1/3 of a full paver |
Next steps and related projects
Once your patio is done and you've lived with it for a season, annual maintenance is simple: re-sweep joints with polymeric sand if they show gaps, pull any weeds that push through edges, and reapply sealer every few years. The base you built will last decades if the drainage stays correct, which is really the only thing to keep an eye on over time.
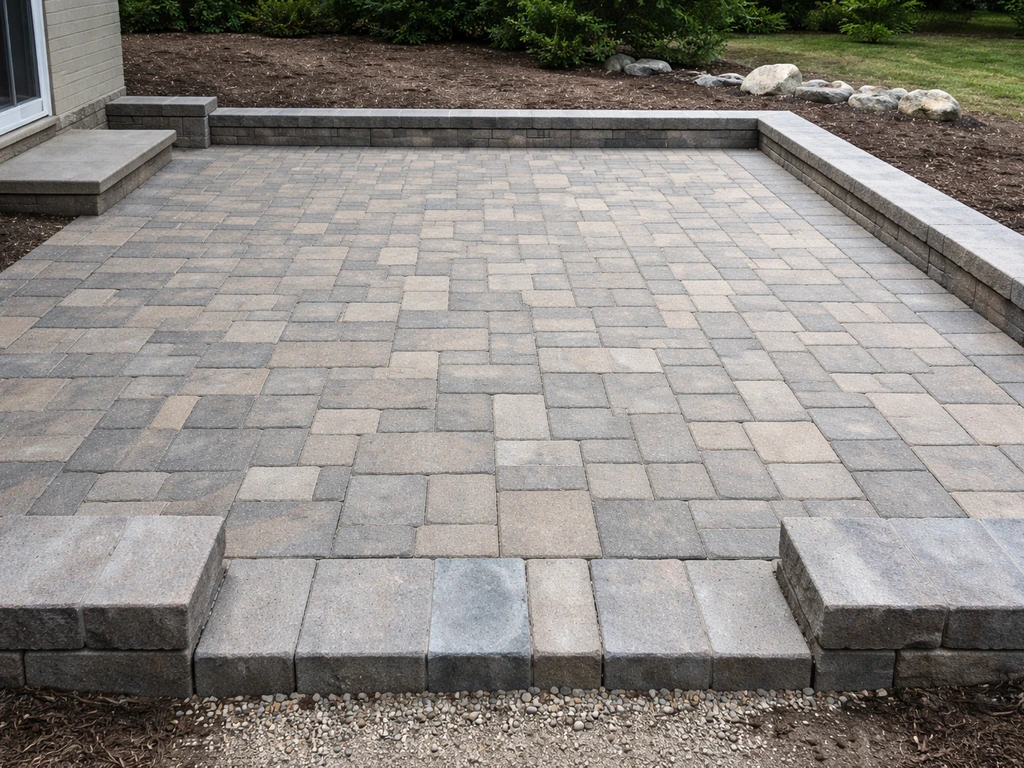
If you're thinking about adding a retaining wall, steps, or a raised section to the patio, those projects build directly on the skills you just used but involve some different structural considerations around soil pressure and footing depth. If you want to keep soil in place beside the patio, learning how to build a patio wall with pavers can help you plan the base, drainage, and layout for a long-lasting result retaining wall. If you want to take the patio up a step, this guide on how to build a raised patio with pavers will walk you through the extra height and base considerations raised section. Similarly, if your yard has limited space and you're working within a tight footprint, there are layout tricks specific to small-scale patio builds that can help you maximize the area without the patio feeling cramped. And if you're planning something grander with large-format pavers instead of standard brick size, the base requirements and cutting approach change meaningfully, so that's worth a separate look before you order materials.
FAQ
Can I build a brick paver patio over existing concrete or asphalt?
Yes, but you need a proper base plan and reinforcement. For a patio over existing concrete, you generally cannot just set pavers on top unless you create a stable, drained system (often a full paver base with granular layers and edging). If the concrete is solid and you only want minor leveling, consider removing protrusions and using a leveling surface only as needed, but do not rely on thicker bedding sand to “flatten” the slab. Also check whether the existing slab will trap water, since polymeric sand and paver bases require drainage.
What spacer should I use for brick pavers, and should I buy the plastic ones from the tile aisle?
The safest rule is to avoid plastic spacers marketed for tile. Those spacers can be too wide or too rigid for paver tolerances, causing inconsistent joints and joint sand loss. Instead, follow the joint width recommended by your paver type (regular brick pavers often target around 1/8 inch), use paver chips as a simple gauge, or make a small homemade spacer jig that matches your chosen joint gap.
What should I do if water pools on my patio after the pavers are installed?
Start by targeting the slope while you build the base, not after pavers are down. If you notice water pooling after installation, first confirm the slope is correct at the finished surface. Then identify whether low spots are due to base elevation errors (fix requires lifting pavers and adjusting gravel) or joint sand shrinkage (often fixable by re-supplying polymeric sand). Do not try to correct pooling by adding extra bedding sand, thick sand layers compress differently and can create new unevenness.
My pavers rock slightly. Is that normal, and how do I fix it?
Compacting the gravel matters more than people expect. If you see pavers that rock underfoot, it usually means the subgrade was soft, the gravel lifts were too thick, or the base wasn’t compacted enough. The common DIY mistake is dumping all base depth at once and compacting once, which leaves internal voids. Fixing rocking pavers typically requires lifting the affected area, removing loose bedding sand, correcting the gravel base with proper lifts, then re-laying and re-compacting.
How can I tell if my polymeric joint sand was installed correctly?
Polymeric sand performance depends on correct joint depth and correct activation. If joints look hollow after compaction, or if you activate before the joints are fully filled, the sand can wash out or fail to lock. After activation, avoid heavy traffic for at least 24 hours, and do not wash the area or hose it down. If it rains soon after activation, follow the product instructions, since some formulations need more careful timing.
What’s the best way to confirm my patio slope before I lay pavers?
Check the grade using a long straightedge and level across multiple directions, not just one measurement. Look for high spots near edges, and verify that the planned 1 inch of fall over 8 feet is consistent across the entire patio. If you used string lines, recheck after excavation and again after edging, because shifting base material can change elevations even when the pavers aren’t laid yet.
What if my property grade doesn’t allow a 1-inch-per-8-feet slope away from the house?
If your yard can’t maintain the 1-in-8 fall because of grade constraints, you can sometimes change the layout to drain around the patio (for example, a defined drainage channel on one side or a slightly raised planting edge). Another option is to design a different drainage approach, such as installing a drain pipe beneath the base where water collects. The key is that you must create an intentional drainage path, not rely on unevenness or joint weep patterns.
I see white haze on my new pavers. Should I seal anyway?
Efflorescence can happen on new brick pavers and it’s usually a surface salt haze, not a structural failure. The article’s rule of waiting at least 30 days before sealing helps it work out naturally. If you sealed early, you may trap moisture under the sealer and worsen appearance, so in that case wait longer for moisture to dissipate and follow the sealer manufacturer’s guidance for removal or reapplication.
Do large-format pavers require different base prep than standard brick pavers?
Yes, but it changes your base and your edging strategy. With large-format pavers, heavier weight and fewer joints per area mean small base inconsistencies show more quickly. You typically need a carefully leveled base and sometimes a different approach to base thickness or screeding consistency to keep bedding sand at the intended depth without creating weak, compressible areas.
What’s the safest way to cut brick pavers, especially along curves?
Safety and precision matter when cutting. Even if you wear a mask, use eye and hearing protection as well, and keep dust exposure down by cutting outdoors or using proper ventilation. For cleaner cuts, plan your pattern so you can use fewer small slivers, and use a wet-cut method if your setup allows it (when appropriate for your tool and paver type) to reduce airborne silica.
Why do paver patios often fail at the edges, and how do I prevent it?
A good perimeter detail prevents edge failure. Make sure edging is installed before bedding sand, spiked into compacted gravel at regular intervals, and supports the outer pavers against lateral movement. If you skip edging or install it late, the outer row is more likely to migrate, which creates gaps and makes future joint sand maintenance harder.
Next Articles
How to Build a Small Patio With Pavers Step by Step
Step-by-step DIY to build a small paver patio: layout, base, leveling, edging, drainage, cutting, sand joints, and fixes
How to Build a Raised Patio with Pavers Step by Step
Step-by-step DIY guide to build a raised paver patio: planning, grading, drainage, base prep, edging, paver laying, and
How to Use Quikrete Patio Paver Jointing Sand: Guide & Tips
How to use Quikrete Patio Paver Jointing Sand: step-by-step application, tools, timing, coverage, and care.