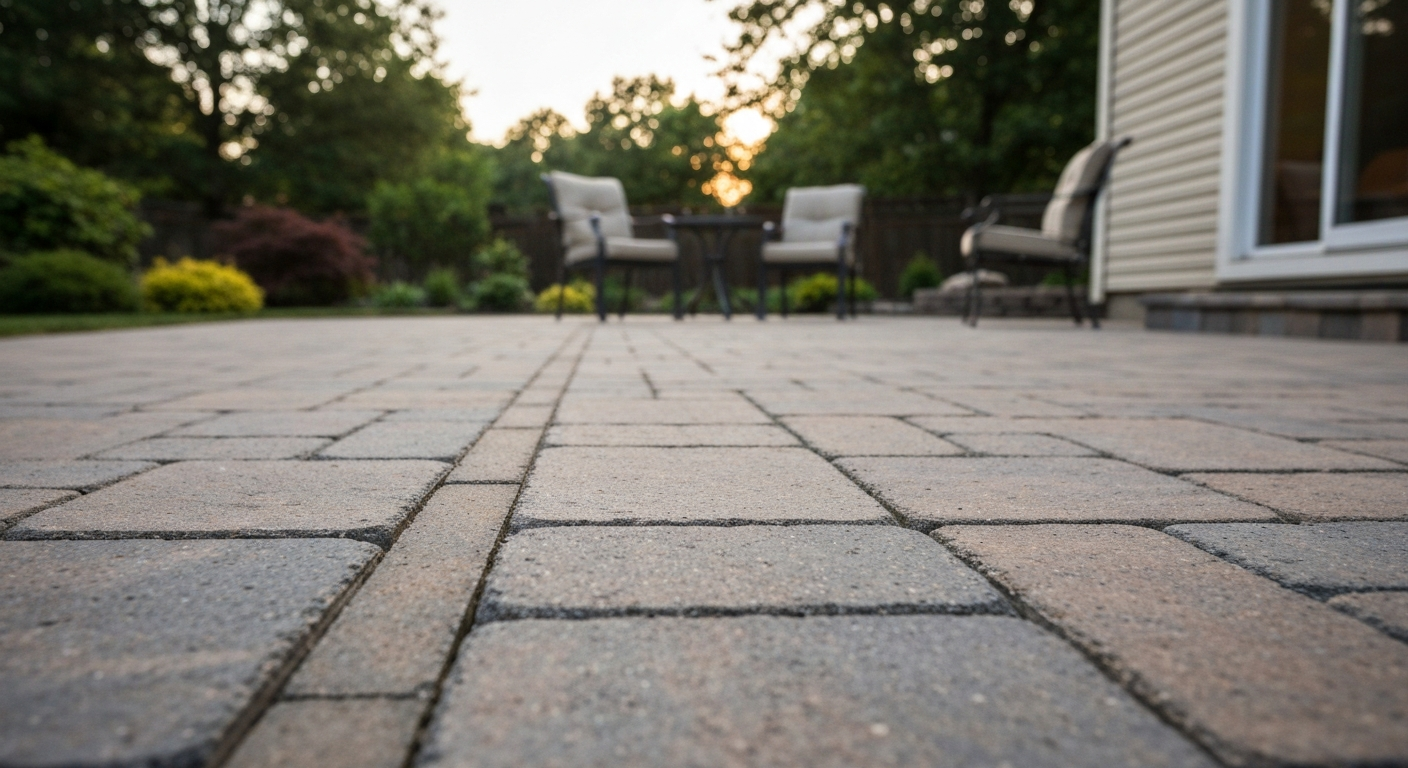
You can build a small paver patio yourself in a weekend or two. The process goes like this: mark out the area, dig down about 7 to 9 inches, lay compacted gravel, add a thin sand bed, set your pavers, cut the edges to fit, sweep in polymeric sand, and you're done. Do each layer right and the patio will stay level, drain properly, and look clean for years without much fuss.
How to Build a Small Patio With Pavers Step by Step

Felix Rowe
28 May 2026
Choosing the right pavers and layout for a small patio
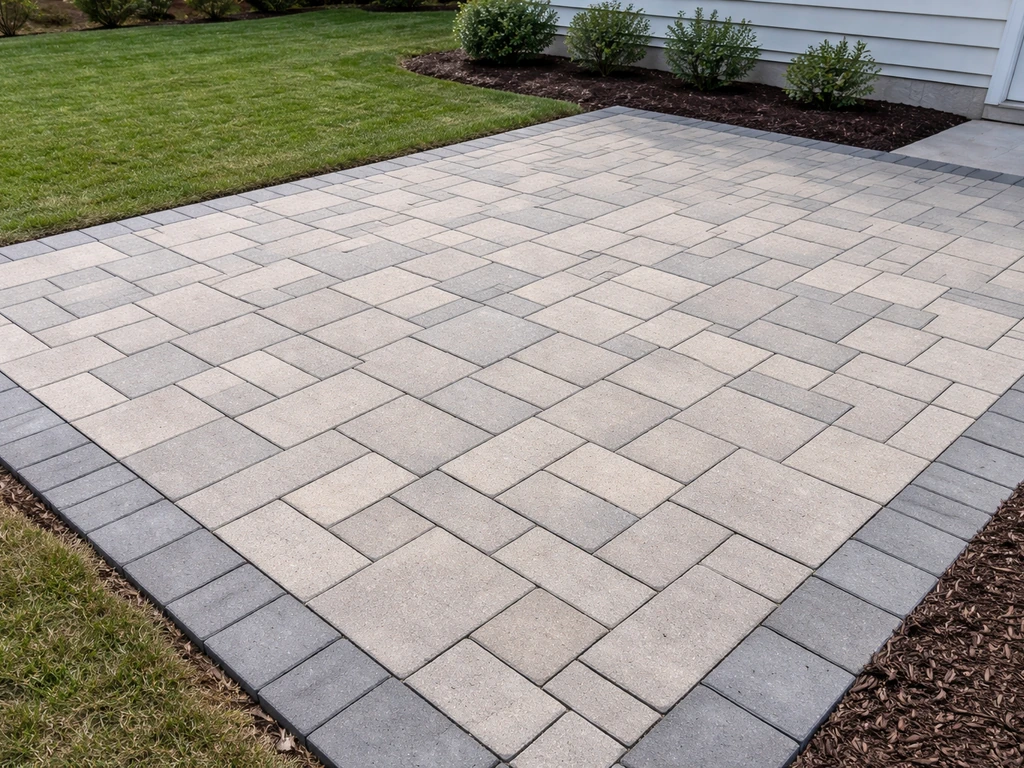
For a small patio, concrete interlocking pavers are the most forgiving choice. They're widely available, blank" rel="noopener noreferrer">consistent in thickness (typically 2 3/8 inches, or about 60 mm, which meets the ASTM C936 standard for pedestrian use), and manufactured to survive at least 50 freeze-thaw cycles without significant deterioration. That matters a lot if you live somewhere with real winters. Brick pavers are a great alternative if you want a classic look, and large-format pavers (12x12 or bigger) can make a small space feel more open. Natural stone looks beautiful but costs more and requires more cutting precision.
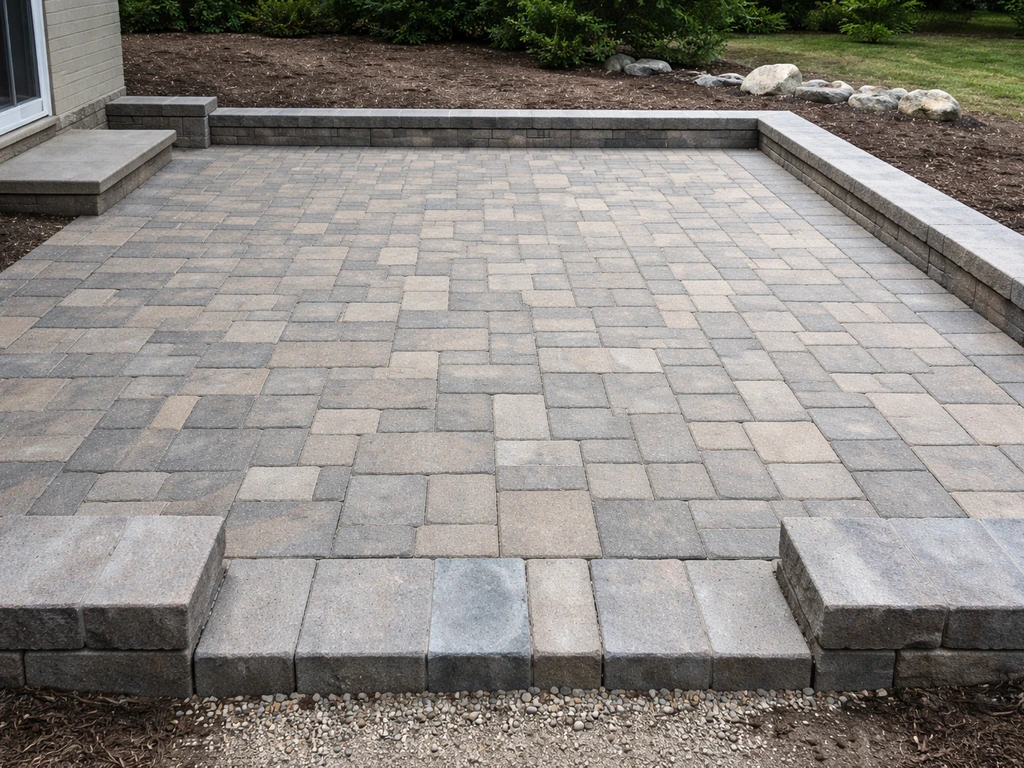
For most first-time DIYers, a 10x10 or 10x12 foot area is a perfect starting point. It's big enough to fit a bistro table and chairs, and small enough to finish in a weekend. If you're thinking about something elevated off the ground, that's a different project with additional structural considerations. Similarly, if you want a patio wall or a raised border, those deserve their own planning. A patio wall with pavers uses many of the same base and edging ideas, but you also need to plan for structural support and reinforcement. This guide focuses on a ground-level slab-style patio, which is the most straightforward version.
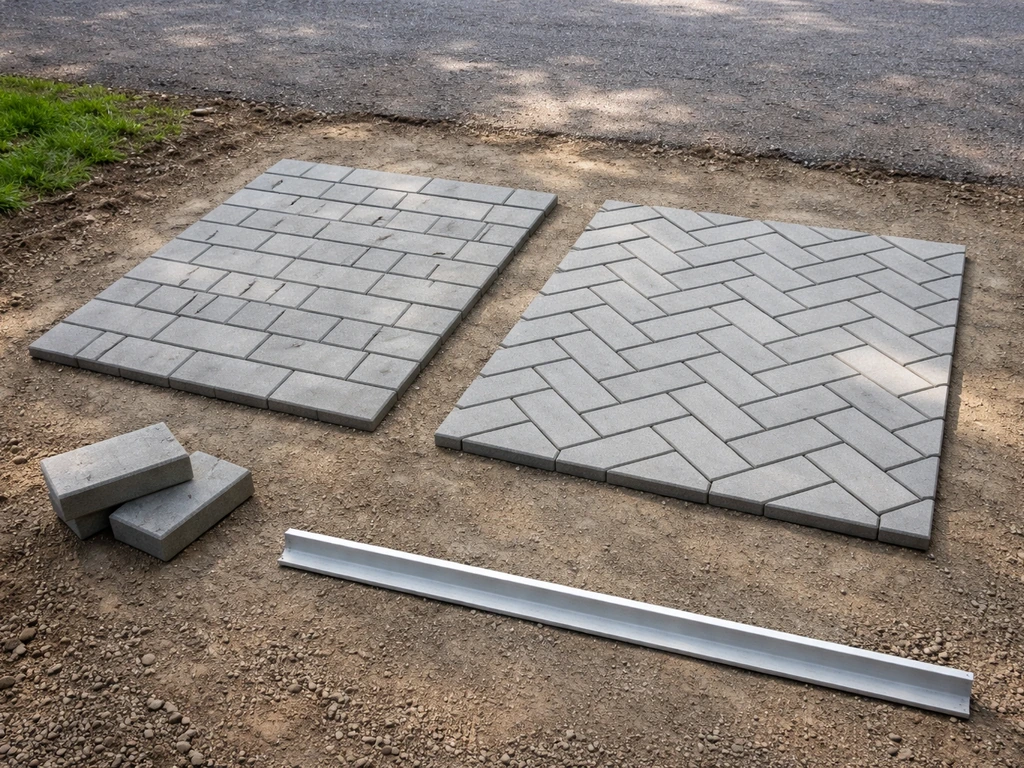
When it comes to paver shape and pattern, simpler is better for a small space. A running bond (like standard brick staggered by half) or a simple grid layout is easiest to install and looks clean. Herringbone patterns are strong and attractive but require more 45-degree cuts. Basketweave works well with square pavers and minimizes cuts. Pick a pattern before you buy so you can calculate materials accurately, and always add 10% extra for cuts and breakage.
| Pattern | Difficulty | Cuts Required | Best For |
|---|---|---|---|
| Running Bond | Easy | Mostly edge cuts | Rectangular patios, beginners |
| Grid/Stacked | Easy | Mostly edge cuts | Modern look, square patios |
| Herringbone | Moderate | Many 45° cuts | High foot traffic, visual interest |
| Basketweave | Easy-Moderate | Some edge cuts | Square pavers, classic look |
| Pinwheel | Moderate | Mixed cuts | Large square pavers with accents |
Measuring, marking, and designing the patio
Start by deciding your exact patio dimensions and marking them on the ground with spray paint or stakes and string lines. Use a framing square or the 3-4-5 triangle method to get true 90-degree corners: measure 3 feet along one string, 4 feet along the perpendicular string, and the diagonal between those two points should be exactly 5 feet. If it's not, adjust until it is. Square corners make everything easier, especially when you're fitting pavers into a pattern.
Before you finalize dimensions, do a quick dry layout on paper or the ground using your actual paver size. Adjust the total width and length so they divide evenly (or close to it) by your paver size. For example, if you're using 4x8 inch pavers in a running bond, size the patio so you minimize the number of cut pieces. You won't eliminate cuts at the edges, but you can reduce them. Also account for your border or edge pavers at this stage. A contrasting border row is an easy way to define the space and cover any irregular cuts around the perimeter.
Mark the excavation boundary about 6 inches wider than your finished patio on all sides. That extra width is for your plastic or aluminum edge restraints, which will be staked into the ground beyond the last paver. Don't skip this step in your planning. Those restraints are what hold the whole pattern together over time.
Site prep: removing grass, handling uneven ground, and base considerations
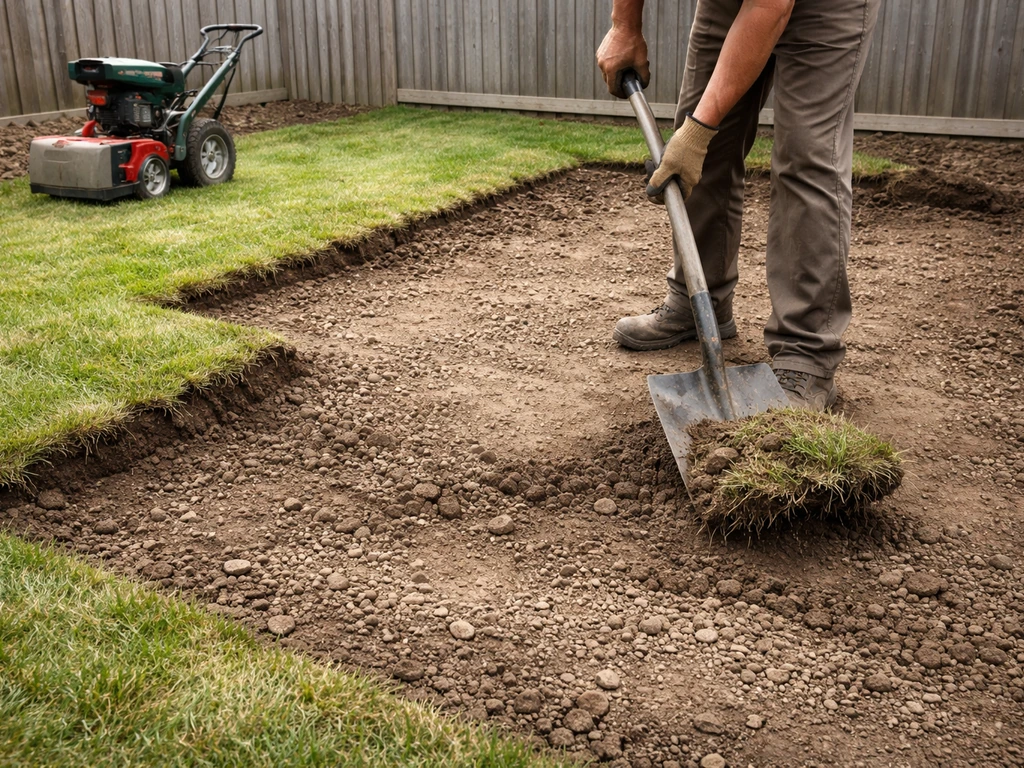
Excavation is the most physically demanding part of this project, and it's also the most important. The whole stability of your patio depends on what's underneath. Plan to dig down 7 to 9 inches below your desired finished surface height. That breaks down roughly like this: 4 to 6 inches of compacted gravel base, 1 inch of bedding sand, and about 2 3/8 inches of paver. Check local frost depth and soil conditions. If you're in a colder climate with clay-heavy soil, lean toward the 6-inch gravel base, not the 4-inch.
If you're removing sod, rent a sod cutter to make it faster. Cut the sod into manageable strips and roll them up. Don't just bury removed sod in your base, it will decompose and cause settling. Once the sod is gone, remove all the topsoil down to native subgrade. If you hit soft spots or areas that feel spongy underfoot, dig them out and fill with gravel rather than compacted soil. Soft spots will sink.
Uneven ground is common and totally manageable. You're going to be screeding a sand layer to create a perfectly flat surface anyway, so minor variations in the subgrade are corrected by your base layers. What you can't work around is major changes in grade across the patio area, like a slope of more than an inch or two per foot. In that case, you'd either need to build up the low side significantly or consider a different approach like a raised patio design. For gentle slopes, you actually want a slight pitch built in for drainage.
If you're working near or over existing concrete, the situation changes. You can lay pavers over a sound concrete slab if it's structurally solid (no major cracks or heaving), but you need to account for the added height. The patio surface will end up 3 to 4 inches higher than the slab. If the concrete is damaged or heaving, it's better to remove it or work around it entirely.
Building the base: compacted layers, edging, and drainage slope
A plate compactor is non-negotiable here. Rent one. Trying to tamp gravel by hand is not effective enough. Fill your excavated area with compactable gravel (also called road base, crusher run, or class II base depending on your region) in 2 to 3 inch layers, compacting each layer before adding the next. Never dump all the gravel in at once and try to compact it in one pass. It won't compact properly and will settle later.
Once your gravel base is fully compacted, install your edge restraints before you add the sand layer. Plastic snap-edge or aluminum edging is staked into the ground with 10-inch spikes every 12 inches or so. These hold the perimeter pavers in place and prevent the entire pattern from spreading outward over time. Without them, even a well-laid patio will start to show gaps and shifting within a few years.
Drainage slope is something you build into the base, not something you add later. The finished patio surface should slope away from your house at a rate of 1/8 to 1/4 inch per foot. That's enough to move water off the surface without being noticeably tilted. Set up your string lines to reflect this slope when you're screeding your sand layer. Run the slope toward a lawn, garden bed, or drainage area, never toward a foundation or neighbor's property.
With the edge restraints in place, add about 1 inch of coarse bedding sand (ASTM C33 sand works well) over the compacted gravel. Use two parallel screed rails (steel conduit pipes work great) set at the correct height and pitch, then drag a straight 2x4 across them to create a perfectly flat, sloped sand bed. Pull the screed rails out carefully and fill the grooves with loose sand, then leave the sand undisturbed. Do not walk on it before laying pavers.
Installing pavers: dry laying, leveling, cutting, and fitting

Start laying pavers from one corner, working in a pyramid or diagonal pattern outward, rather than row by row. This prevents small errors from compounding across the patio. Set each paver down gently, don't slide it into position or you'll disturb the sand bed. Butt them tight against each other. Interlocking concrete pavers have small built-in spacer nubs on the sides to create a consistent 1/16 inch joint. Trust those spacers and don't try to force gaps closed.
Check for level frequently, at least every 4 to 6 pavers in each direction. Use a long straightedge or a 4-foot level. If a paver sits high, pull it up, remove a little sand, and reset it. If it sits low, add a pinch of sand and reset. Never try to force a high paver down by stepping on it hard. That just creates a sunken spot in the sand below.
Once all the full pavers are laid, you'll need to cut the border pieces to fit. A diamond-blade wet saw (rentable) gives the cleanest, most precise cuts and is worth it for anything more than a handful of cuts. An angle grinder with a diamond blade works for quick cuts but creates a lot of dust. A brick splitter (also rentable) works for straight cuts on thinner pavers but can cause inconsistent breaks on thicker ones. Measure each cut piece individually rather than assuming all edge gaps are the same. They rarely are.
After all pavers are set, run the plate compactor over the entire surface. This seats the pavers firmly and evenly into the sand bed. Use a paver protection pad between the compactor plate and the paver surface to prevent scratching. Make two or three passes in different directions.
Finishing steps: jointing sand, sealing, and cleanup
Polymeric jointing sand is the right choice for most DIY patios. It binds when activated with water, hardens in the joints, resists weeds, and holds up to rain better than plain sand. Products like Quikrete HardScapes polymeric jointing sand or Techniseal EZSAND are designed for joints up to 2 inches wide. The process: pour the dry sand over the surface, sweep it into the joints with a stiff push broom, run the plate compactor over the surface again to pack the sand deeper into the joints, sweep again to top off, and then activate with a fine water mist according to the manufacturer's instructions.
One important note on activation: don't flood the surface with water. Use a gentle mist setting on your hose to wet the surface evenly. If you see water pooling on top, you've gone too heavy. Some manufacturers, including Techniseal, specifically flag this as a sign to stop and let the water absorb. After activation, keep foot traffic off for at least 24 hours, and avoid heavy rain for the same period if possible.
Sealing is optional but worth considering if you want to protect the color, reduce staining, and make future cleaning easier. Wait at least 30 to 90 days after installation before applying sealer, so the polymeric sand has fully cured. Use a paver-specific sealer, either a wet-look product for a slightly glossy finish or a natural-look penetrating sealer that doesn't change the appearance. Clean the surface thoroughly first. Apply sealer on a dry day when temperatures are between 50 and 90 degrees Fahrenheit.
Clean up is straightforward: sweep off any sand haze before it sets, remove edge restraint stakes if any are above grade, and inspect the perimeter to make sure all border pavers are flush and stable. Step back and take a look at the slope by running a hose over the surface. Water should sheet off uniformly in the direction you designed. If it pools anywhere, that area needs attention before you call it done.
Maintenance and troubleshooting after installation
A well-built paver patio needs very little ongoing maintenance, but there are a few things worth doing annually. Inspect the joints each spring. If polymeric sand has eroded or cracked, sweep new sand into the affected joints and re-activate with water. Check the perimeter edging for any sections that have lifted or shifted. Restake or replace them as needed. If pavers near a tree start to heave as roots grow, you'll need to pull those sections up, address the roots, and relay.
The most common problems and how to fix them
- Settling or sinking in spots: Usually caused by insufficient compaction in the base. Pull up the affected pavers, add and compact more gravel if needed, re-screed the sand, and reset. Don't just add sand on top without addressing the base.
- Uneven surface after a winter: Freeze-thaw cycles can shift pavers, especially if water got under them. Pull up the affected section, check the base, and relay. This is why proper drainage slope matters.
- Weeds growing in joints: Polymeric sand significantly reduces this but doesn't eliminate it entirely. Pull weeds by hand or use a paver-safe herbicide. Re-fill and re-activate those joints afterward.
- Joint sand washing out after heavy rain: Usually means the polymeric sand wasn't activated properly, or plain sand was used instead of polymeric. Sweep new polymeric sand into the joints and follow the activation steps carefully this time.
- Staining from furniture, oil, or rust: Clean as soon as possible. Most paver manufacturers sell dedicated cleaners. For rust stains, an oxalic acid-based cleaner works well. For oil, a degreaser applied quickly before it penetrates is your best bet.
- Pavers rocking or wobbling: The sand bed under those pavers was disturbed or was too thin. Pull them up, check the sand depth (should be 1 inch after compaction), add sand if needed, and relay.
One realistic expectation worth setting: some minor settling in the first year is normal. Soil continues to compact slightly under the load of the pavers and foot traffic. A few adjustments after the first winter are common and easy to make. It doesn't mean you did something wrong. After year one, a properly built patio should be very stable.
If you're happy with your ground-level patio and want to take the next step, a raised patio design or adding a patio wall for a defined border are natural progressions that use the same base-building principles but add height and structure. If you're ready for that, see how to build a raised patio with pavers for the extra structural steps and height planning raised patio design. The skills you build on a small project like this carry directly into those more involved builds. Get this one right first, and the rest gets much easier.
FAQ
Can I build a small paver patio directly over existing grass or dirt without excavating to 7 to 9 inches?
It usually fails over time. Pavers need a compacted base plus bedding sand depth, and the depth target (7 to 9 inches total below the finished surface) accounts for settlement and stability. At minimum, remove topsoil and keep the subgrade well-compacted, otherwise you risk sunken spots and joint loss.
What happens if my patio ends up slightly too low or too high after installing the pavers?
If it is low, water may not drain correctly and you could trip at the edges. If it is high, it can interfere with doors, sidewalks, or grading. The best fix is usually adjusting the bedding sand thickness during installation (lift and reset pavers as needed). After polymeric sand cures, major height corrections are much more difficult.
Is it okay to compact the sand bed with a plate compactor before laying pavers?
Avoid compacting the bedding sand before the pavers go down. The sand bed should be screeded smooth and left undisturbed, so pavers can seat into it. Compaction before laying pavers can leave a too-firm layer that prevents proper leveling and can create hollow spots.
How do I handle a patio that is not perfectly level, like a noticeable downhill grade?
You can build gentle drainage pitch, but larger grade changes require base redesign. As a rule, if the surface slope is beyond what a practical 1/8 to 1/4 inch per foot pitch can handle, consider rebuilding the base thickness on the low side or switching to a raised patio approach.
Do I need to install drainage with a drain pipe, or is the slope enough?
For many small patios, the built-in surface slope directs water toward a lawn or drainage area without additional plumbing. Use the slope and keep it away from foundations and property lines. If you have persistent pooling, a saturated yard, or a low spot where water collects, you may need a French drain or edge drain, because polymeric sand and joints do not replace proper site drainage.
How wide should the edging or restraint zone be beyond the finished patio?
Plan to excavate extra for restraints beyond the last row of pavers, typically about 6 inches wider than the finished patio. This gives room to seat and stake the edge system into undisturbed soil so the perimeter stays locked when the base expands and contracts with seasons.
Can I use regular sand instead of coarse bedding sand under the pavers?
Coarse bedding sand is preferred because it locks in and helps with leveling while resisting washing. Regular or too-fine sand can compact too tightly, clog drainage, or shift more easily, which increases the chance of movement and joint failure. If you change sand type, expect different seating behavior during installation.
What is the safest way to cut pavers if I do not want a wet saw?
For a handful of edge cuts, a rental brick splitter can work for straight runs on appropriate paver thickness, but quality varies by material. An angle grinder can cut more types of pavers, but dust control matters a lot, use proper eye and respiratory protection and plan for cleanup. Whichever tool you choose, dry-measure each piece individually rather than assuming uniform edge gaps.
Should I apply polymeric sand even if my patio joints look a bit inconsistent?
Do not force uneven joints closed while setting pavers. Polymeric sand works best when the joint size is within the product’s intended range and joints are mostly uniform. If joints are overly wide or small in multiple areas, correct the paver spacing first, then joint once the base and bedding are stable.
How do I know I watered polymeric sand correctly during activation?
You want even misting, not runoff. If you see water pooling or flowing across the surface, stop and let it absorb before continuing. Proper activation typically leaves the joints darkening slightly as it hydrates, and the sand should set without washing out.
When can I move furniture, walk on the patio, or drive over it after installation?
Keep foot traffic off for at least 24 hours after activation, and avoid heavy rain during that period if possible. For furniture placement, wait until the joints have fully set and the surface is dry to prevent tracking sand. Vehicle loads should generally be avoided entirely unless the patio is engineered for vehicular traffic with thicker base and different materials.
Do I have to seal a paver patio, and what is a common mistake if I seal it too soon?
Sealing is optional, but it can reduce staining and make cleaning easier. A common mistake is sealing before polymeric sand has cured, which can trap moisture and interfere with joint performance. Plan for a cure window of weeks after installation, and use a paver-specific product matched to your joint system.
How do I fix a single area where pavers have shifted after a winter?
Lift only the affected section, re-check the base and drainage pitch, then reset pavers on fresh bedding sand. If polymeric sand is disturbed, remove remaining loose joint material and re-joint that section. Also inspect the edge restraints nearby, since failures often start at the perimeter.
Can tree roots or nearby landscaping cause pavers to heave, and what is the practical response?
Yes. Roots can push up localized areas, often near corners, planters, or borders. The practical response is to remove the heaving paver section, address the root conflict, and relay the patio with appropriate base restoration so the area does not settle back incorrectly.
Next Articles
How to Build a Raised Patio with Pavers Step by Step
Step-by-step DIY guide to build a raised paver patio: planning, grading, drainage, base prep, edging, paver laying, and
How to Use Quikrete Patio Paver Jointing Sand: Guide & Tips
How to use Quikrete Patio Paver Jointing Sand: step-by-step application, tools, timing, coverage, and care.

How to Use Patio Paver Sand: Step by Step DIY Guide
Step-by-step guide to apply patio paver sand correctly: prep base, set pavers, fill joints, compact, and troubleshoot is