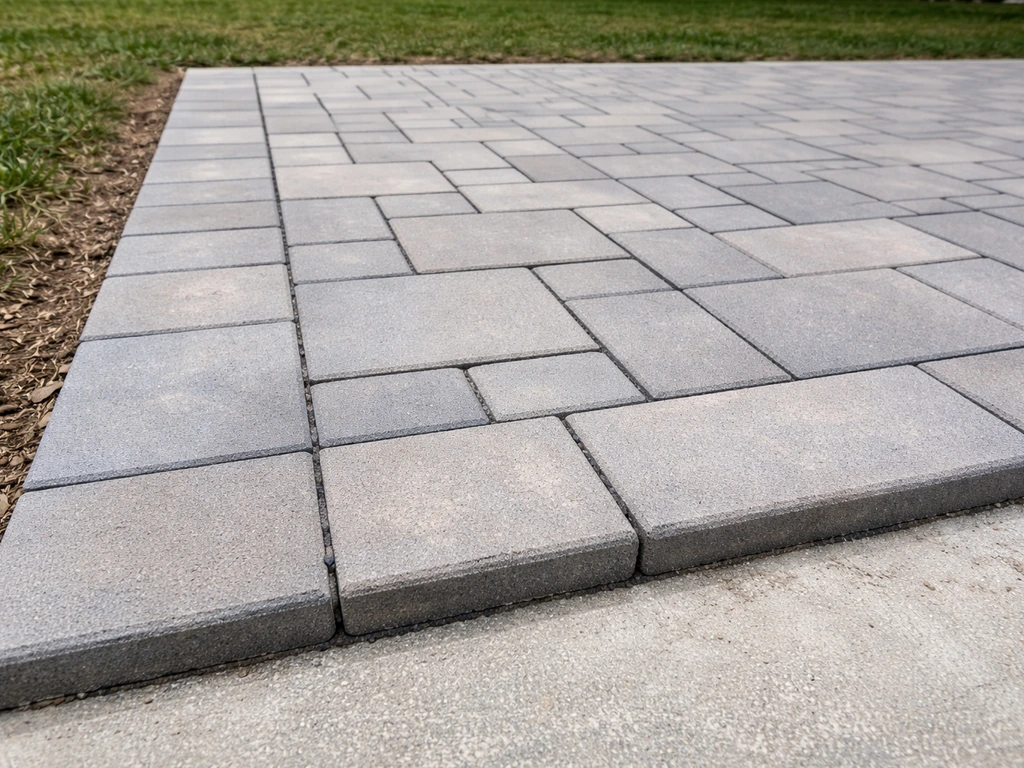
Yes, you can add pavers to an existing patio, and plenty of homeowners do it successfully as a weekend DIY project. The key is being honest about what's underneath. If your existing surface is solid, stable, and close to level, you can lay pavers right over it with a sand-set or adhesive method. If it's cracked, heaving, or badly uneven, you'll either need to do serious prep work first or reconsider whether an overlay is the right call at all. This guide walks you through the whole process, from that first assessment through final sealing, so you can make confident decisions at every step.
How to Add Pavers to an Existing Patio: Step-by-Step

Felix Rowe
4 Jun 2026
First, decide if an overlay is actually right for your situation
Before you buy a single paver, spend 20 minutes inspecting your existing patio. Overlaying only works when the surface underneath is doing its job. A concrete slab that's cracked but still solid and flat? That's usually fine to work with. how to install pavers over existing concrete patio concrete slab that's cracked but still solid and flat. A slab that's heaving, settled unevenly, or has large chunks breaking away? That's a problem that pavers on top won't fix. The new layer will just mirror the damage underneath, and you'll end up with rocking, uneven pavers within a season or two.
Here's the honest checklist to run through before committing to an overlay approach:
- Check for height at doors and transitions: adding pavers (typically 2 to 3.5 inches with a sand bed) will raise the finished surface. Make sure sliding doors, thresholds, and steps can accommodate that height change before you go any further.
- Look for major cracks or movement: hairline cracks are generally fine. Cracks wider than 1/4 inch, or sections that have shifted vertically relative to each other, signal underlying instability that needs addressing first.
- Test for drainage grade: water should always flow away from your house. Pour a bucket of water on the patio and watch where it goes. If it pools or runs toward the foundation, your existing grade has a problem that the overlay needs to correct.
- Check for soft spots on grass or gravel patios: walk the entire area and feel for spongy or sinking ground. Soft spots mean inadequate compaction and will need excavation and a proper compacted base before any paver goes down.
- Measure the total thickness you're adding: a standard paver is 2 3/8 inches thick, and you'll need at least 1 inch of bedding sand beneath it, plus edge restraints. Make sure that math works with your existing transitions.
If the existing surface fails more than one or two of those checks, it's often smarter to remove it entirely and start fresh. A full removal sounds like more work, but it actually gives you a cleaner, longer-lasting result. On the other hand, if your slab or existing patio passes the checklist, you're in great shape to move forward with the overlay.
Tools and materials to gather before you start
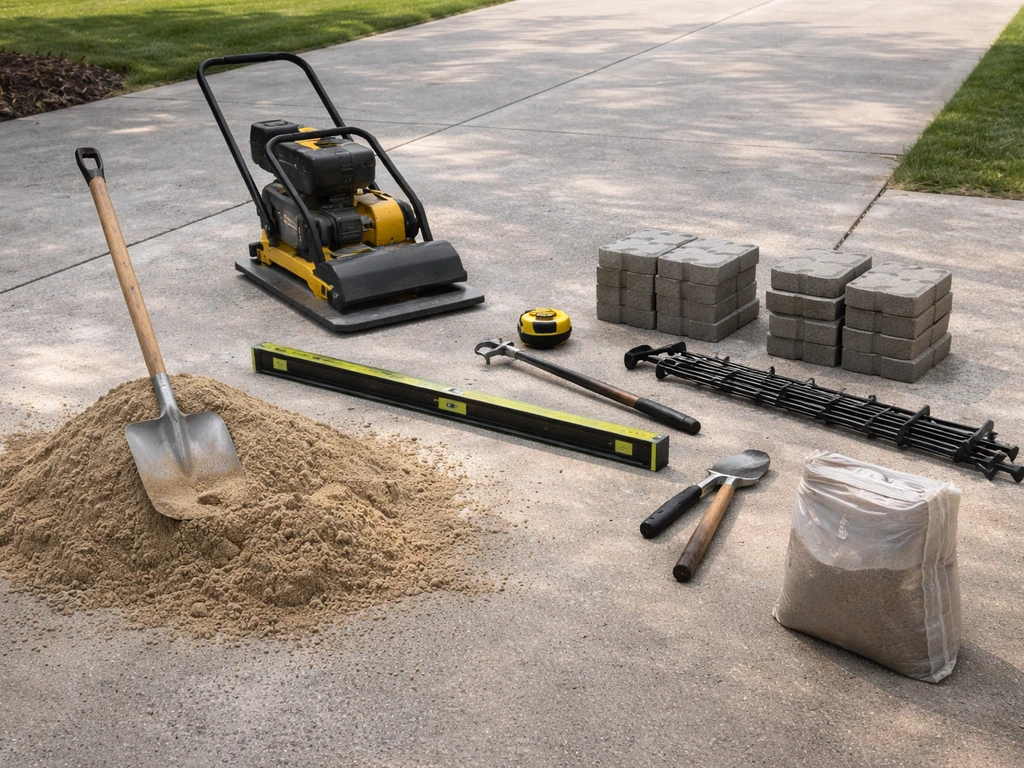
Having the right gear on site before you begin saves you multiple trips to the hardware store mid-project. Here's what you'll realistically need for a standard patio overlay project:
| Item | What It's For | Approximate Cost |
|---|---|---|
| Pavers (concrete or natural stone) | The surface layer itself | $2–$15 per sq ft depending on material |
| Coarse bedding sand (not play sand) | Leveling layer beneath pavers | $5–$8 per 50 lb bag |
| Polymeric sand | Locking joints between pavers | $20–$35 per 50 lb bag |
| Paver edge restraints (plastic or aluminum) | Keeping outer pavers from spreading | $1–$3 per linear foot |
| Plate compactor (rent) | Compacting base and setting pavers | $75–$150/day rental |
| Rubber mallet | Setting individual pavers without cracking them | $15–$25 |
| 4-foot level and long straightedge | Checking grade and flatness | $20–$60 |
| String line and stakes | Laying out pattern and slope | $10–$15 |
| Angle grinder or wet saw | Cutting pavers to fit edges | $40–$80/day rental or owned |
| Tape measure and chalk line | Marking layout lines | $10–$20 |
| Push broom and leaf blower | Sweeping sand into joints | $20–$40 |
| Garden hose with spray nozzle | Activating polymeric sand | Already owned typically |
| Safety glasses and gloves | Personal protection during cutting | $15–$25 |
| Pry bar and chisel | Removing old material or edge forms | $15–$30 |
For paver quantity, calculate your square footage and add 10 percent for cuts and breakage. If you're doing a pattern with angles or a border in a contrasting color, bump that up to 15 percent. Running short mid-project and needing a second batch from a different lot can result in color mismatches, which is frustrating to deal with after the fact.
Prep work: clean the surface, fix what's broken, and nail the grade
Good prep is what separates a patio that looks great for 20 years from one that starts rocking and shifting in the second season. Don't rush this part, even if it feels boring. Plan on spending half a day to a full day on prep alone for an average-sized patio.
Cleaning the existing surface
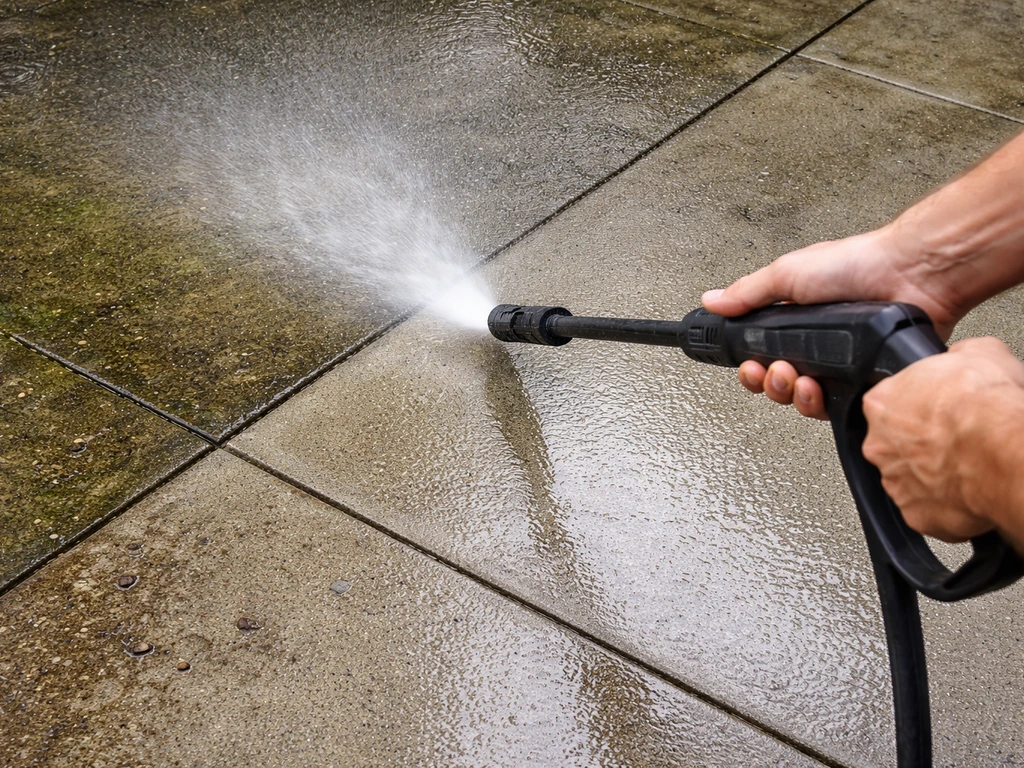
Start by pressure washing the entire patio surface. You're not just making it look nice, you're removing oil, algae, loose debris, and anything that would prevent your bedding sand or adhesive from bonding or sitting properly. For concrete, use a degreaser on any oil stains and let it sit before rinsing. Let the surface dry fully before moving on, ideally 24 hours if weather allows.
Removing what can't stay
Knock off any loose chunks of concrete or crumbling material with a chisel and mallet. Fill cracks wider than 1/4 inch with a concrete crack filler and let it cure according to product instructions, usually 24 hours. Remove any existing edge forms, rotted wood borders, or deteriorating materials that would interfere with your new edge restraints.
Checking and correcting the grade
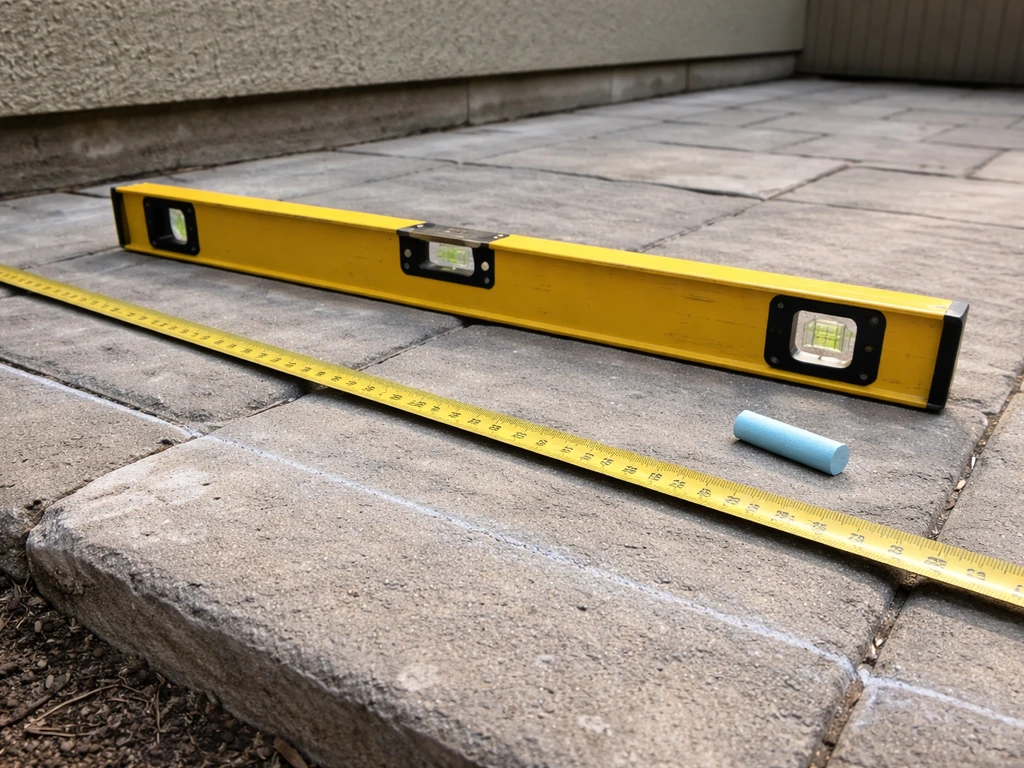
Your patio needs a minimum slope of 1/8 inch per foot away from the house for drainage. Use a 4-foot level and a tape measure to check this across the whole surface. Mark any low spots with chalk. If you have low areas on a concrete slab, you can fill them with a self-leveling concrete resurfacer to bring them up before adding the sand bed. Pavement Interactive notes that overlay-type surface work often uses leveling courses (prelevel) to fill low spots and avoid placing a new top layer over significant distortions without addressing the grade first low spots on a concrete slab. On a dirt or gravel base, you'll address grade during the base-building step. Don't skip this check: bad grade is one of the most common causes of patio drainage problems, and it's much harder to fix after the pavers are down.
Building the base: edge restraints, layers, and compaction
Whether you're overlaying concrete or starting from a grass or gravel surface, a proper base is what gives your patio its long-term stability. Think of it as building the foundation before the floor.
For overlays on existing concrete
When the slab is in good condition, you're essentially using the concrete as your base. Install plastic or aluminum edge restraints around the perimeter first, spiking them into the ground just outside the slab edge. Then spread a 1-inch layer of coarse bedding sand over the slab and screed it flat using two parallel pipes as guides. This sand layer lets you make fine adjustments to the finished height and gives the pavers something to settle into. Do not use mortar or adhesive for a full-coverage bond on standard sand-set paver projects over concrete, because it prevents the thermal expansion and contraction that keeps pavers from cracking.
For new bases over grass or bare ground
Excavate down at least 6 to 8 inches below your desired finished paver height. That gives you room for 4 inches of compacted crushed stone base, 1 inch of bedding sand, and the paver itself (typically 2 3/8 inches for standard concrete pavers). Remove all grass and organic material from the excavation. Lay landscape fabric to suppress weeds before adding your gravel. Add crushed stone in 2-inch lifts, compacting each lift thoroughly with a plate compactor. Skipping compaction between lifts is a classic mistake that leads to uneven settling later. After the gravel is fully compacted, add and screed the 1-inch sand bedding layer, then install your edge restraints around the full perimeter before laying a single paver.
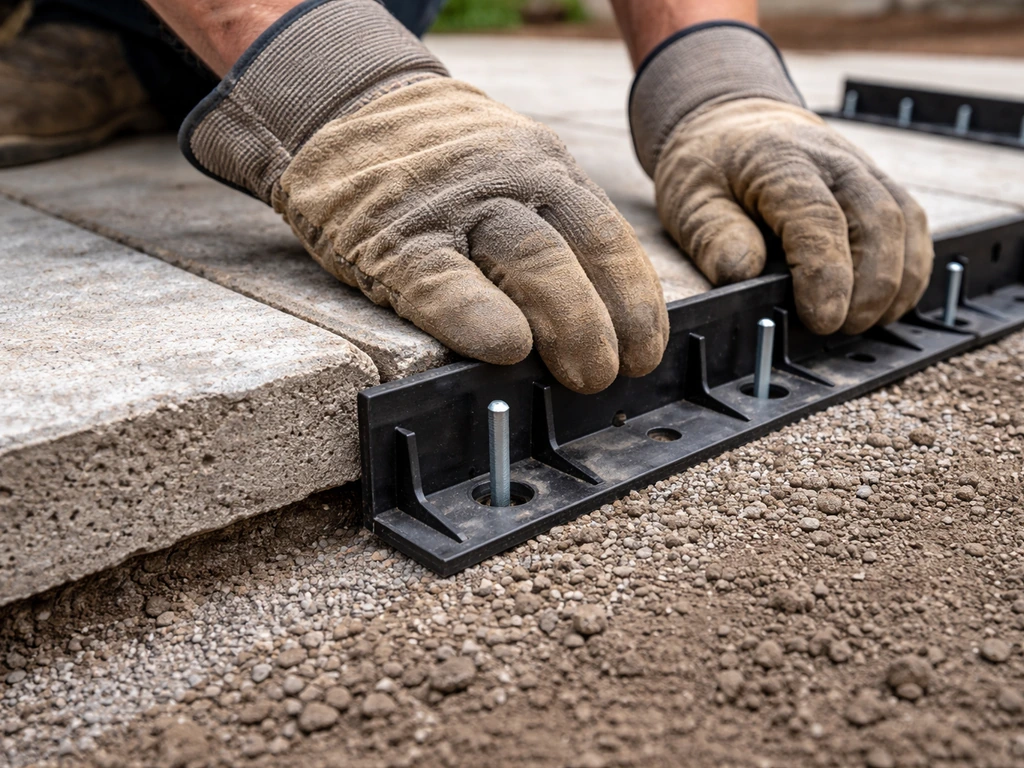
Edge restraints matter more than most people think
Edge restraints are what keep the whole installation from slowly spreading outward over time, which causes gaps and rocking pavers along the edges. Use spiked plastic or aluminum restraints and drive the spikes every 12 inches. For curved edges, use flexible plastic restraints. The restraints should sit tight against the outer row of pavers and be flush with or just below the paver surface so they're invisible in the finished patio.
Layout and pattern planning: slopes, borders, and clean transitions
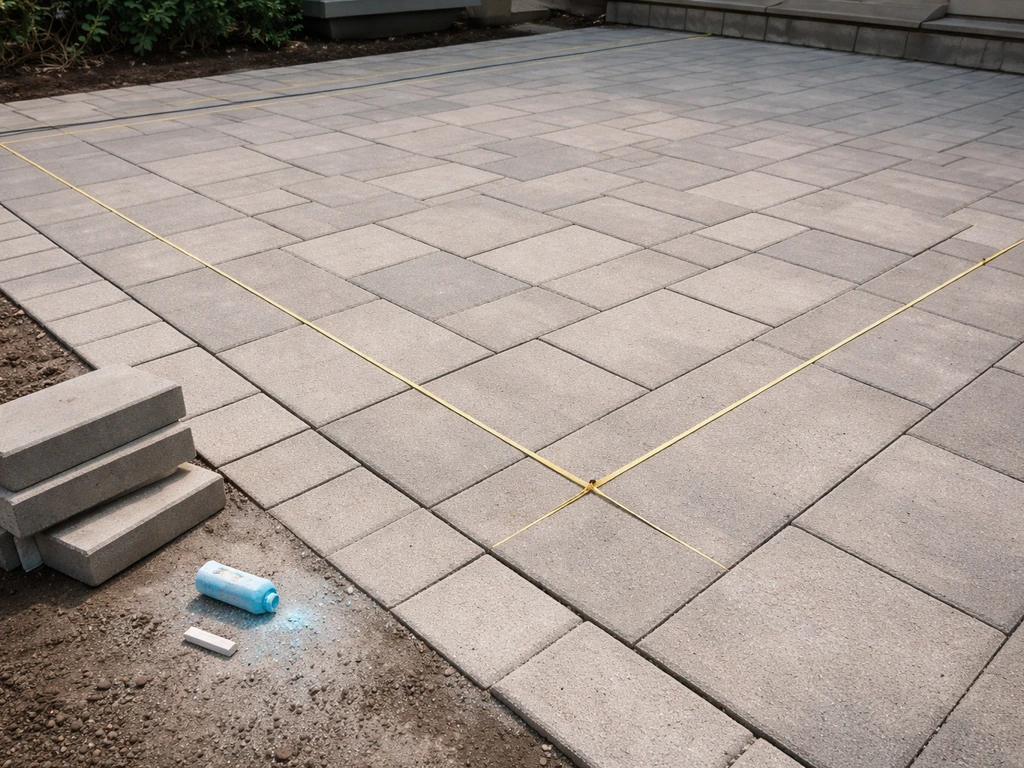
A little time spent planning the layout before you place the first paver saves a lot of frustration at the edges. The goal is to start in a spot that lets you minimize small, awkward cuts, keep your pattern consistent, and end at the borders with cuts that look intentional rather than like an afterthought.
Snap chalk lines or run string lines across the patio in both directions to establish your grid. Most people start laying from a corner nearest the house and work outward. If your patio is rectangular and your pattern is a basic running bond or grid, start centered on the longest wall and work toward the sides symmetrically, so any cuts at the edges are equal on both sides. For a herringbone or diagonal pattern (which looks great but requires more cuts), find the center of the space and work outward from there.
For slopes: build the slope into your bedding sand layer by adjusting the depth as you screed. A slope of 1/8 to 1/4 inch per foot away from the house is ideal. Use a level with a slight deliberate offset (you can tape a small shim to one end) to check slope consistently as you work. For borders and transitions: plan a contrasting border row around the perimeter if you want a finished look. Lay the border row first after your edge restraints are in, then fill in the field pattern toward it. This approach gives you clean, intentional cuts at the meeting point rather than a ragged edge.
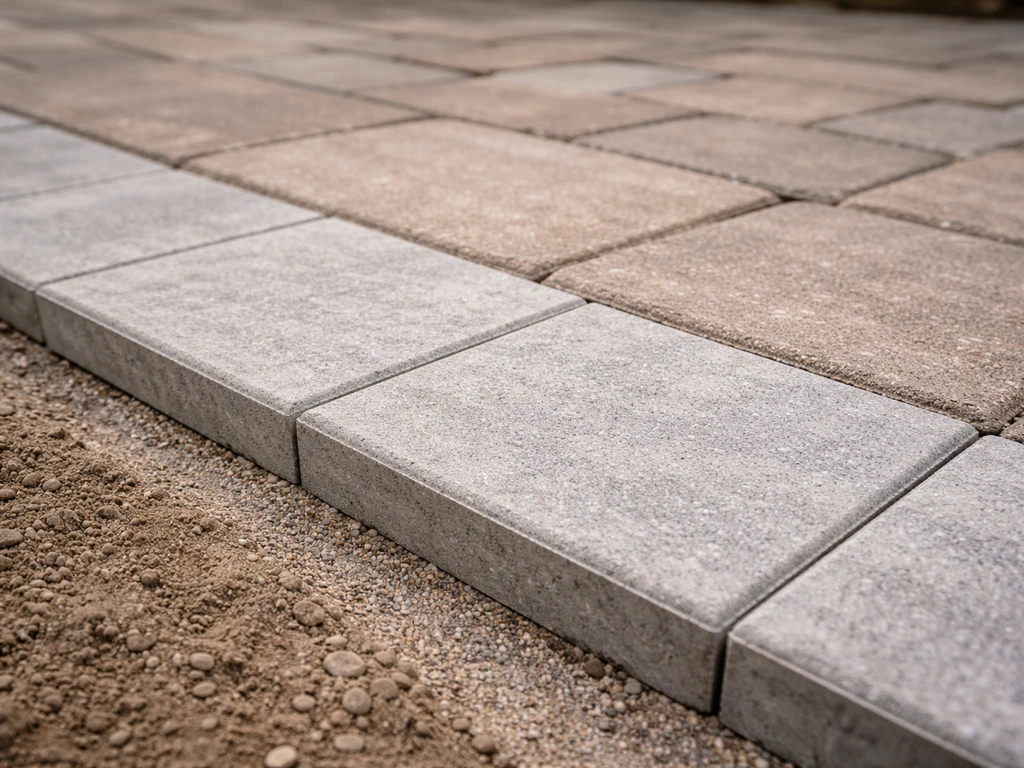
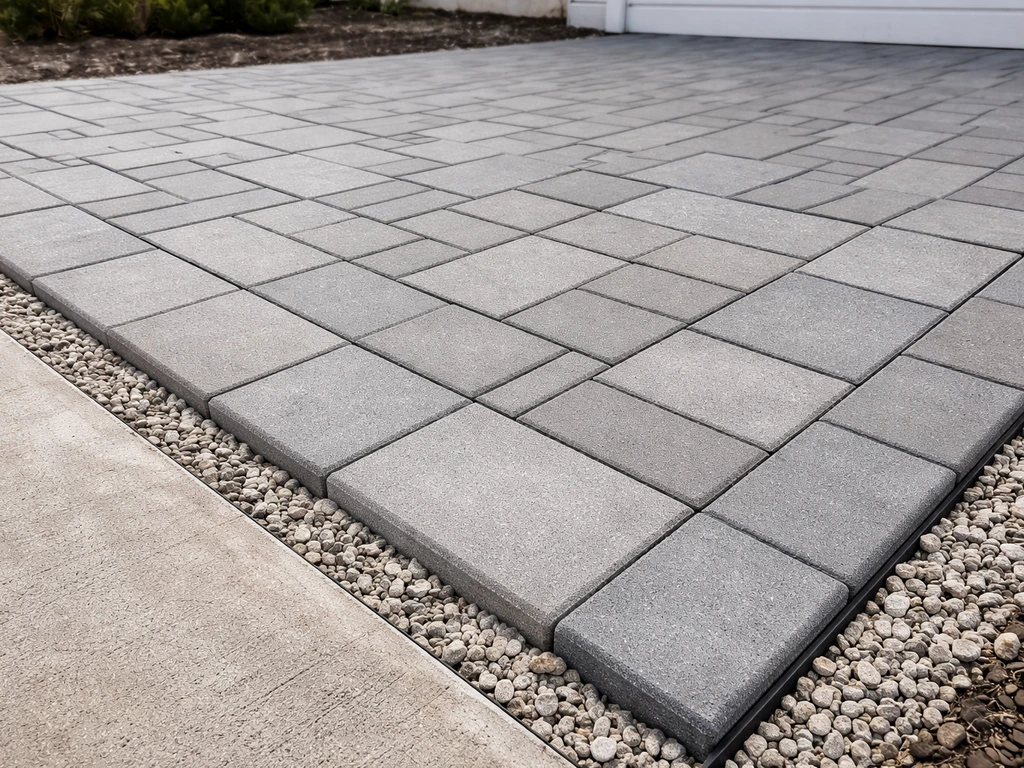
Where your new pavers meet an existing surface like a walkway, driveway, or existing patio section, you need a clean transition. A border row in a complementary size or color at the meeting edge reads as a design choice rather than a rough joint. If the height difference between surfaces is significant (more than 3/4 inch), consider a beveled edge paver or a small step to bridge the gap safely.
Installing pavers over different surfaces
Over concrete
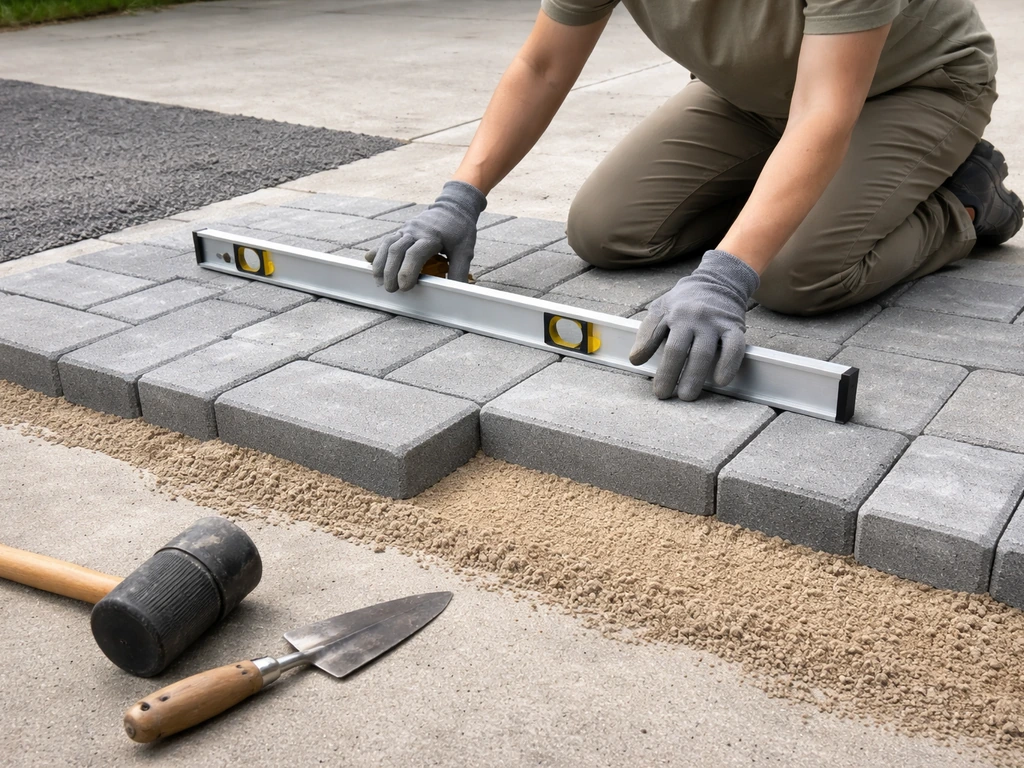
Laying pavers over an existing concrete patio is one of the most common scenarios, and it works well when the concrete is stable and level. The concrete acts as your base, so you skip the excavation and gravel work. If you’re wondering about how to cover a concrete patio with pavers using an overlay, the concrete acts as your base and you can skip excavation and gravel work install pavers over concrete. Spread and screed your 1-inch sand bedding layer directly on the clean slab. Then lay pavers starting from your reference corner, using a rubber mallet to tap each one firmly into the sand. Check for level constantly with your straightedge, adjusting the sand under individual pavers as needed. The main things to watch for over concrete are height changes at doors and thresholds (plan for this before you start) and any areas where the concrete is significantly out of level, which will require a leveling compound or extra sand work to correct.
Over grass or bare ground
This is where the most prep work happens, but it also gives you the most control over the final result. After excavation and base compaction as described above, laying the pavers follows the same process: screed sand, lay pavers in pattern, check with a straightedge, and tap level with a mallet. The difference is that you need to be more careful about ensuring the base is fully compacted and stable, because there's no concrete underneath to catch any mistakes. Take your time on the base, and the laying goes quickly.
Over uneven ground
Uneven ground requires more excavation work to correct the grade before you do anything else. Don't try to compensate for uneven ground entirely with the sand bedding layer, since that layer should stay close to 1 inch for proper stability. Instead, address major high spots by digging them down and major low spots by adding and compacting more gravel. Once the gravel base is level and compacted, the bedding sand handles the fine adjustments. If your ground has slopes for drainage purposes, those slopes should be built into the gravel base, not improvised during the sand step.
Cutting, fitting, and finishing: fire pits, raised areas, and sealing
Cutting pavers
Save all your cuts until the field pavers are fully laid. This way, you can measure actual gaps rather than relying on math alone. Mark each cut with a pencil or chalk and use a wet saw or angle grinder with a diamond blade. Wear safety glasses and gloves every time. For straight cuts, a wet saw gives the cleanest result. For curved cuts around fire pits or rounded features, an angle grinder with a diamond blade lets you follow the curve. Always dry-fit a cut paver before committing it to the sand bed.
Adding a fire pit area
If you're incorporating a fire pit into the patio, the pavers around the fire pit base need a few extra considerations. Use concrete or natural stone pavers rated for heat in the immediate zone around the pit, not standard clay brick. Create a circular or square pattern around the fire pit perimeter using a string tied to a center stake to scribe the cut line. Leave at least 2 feet of pavers around the pit perimeter before any wooden furniture or combustible surfaces. The fire pit itself typically sits on compacted gravel or a concrete pad at the patio level, not on top of the sand bedding layer.
Raised sections and steps
Raised patio areas require building up the base with additional compacted gravel layers and often a concrete block or paver retaining wall to hold the elevation. Each step rise should be between 6 and 7.5 inches, and each tread should be at least 12 inches deep for comfortable footing. Use the same paver or a complementary one for treads, and make sure the tread surface has adequate drainage slope (1/8 inch per foot forward) so water doesn't pool on the steps.
Polymeric sand and jointing
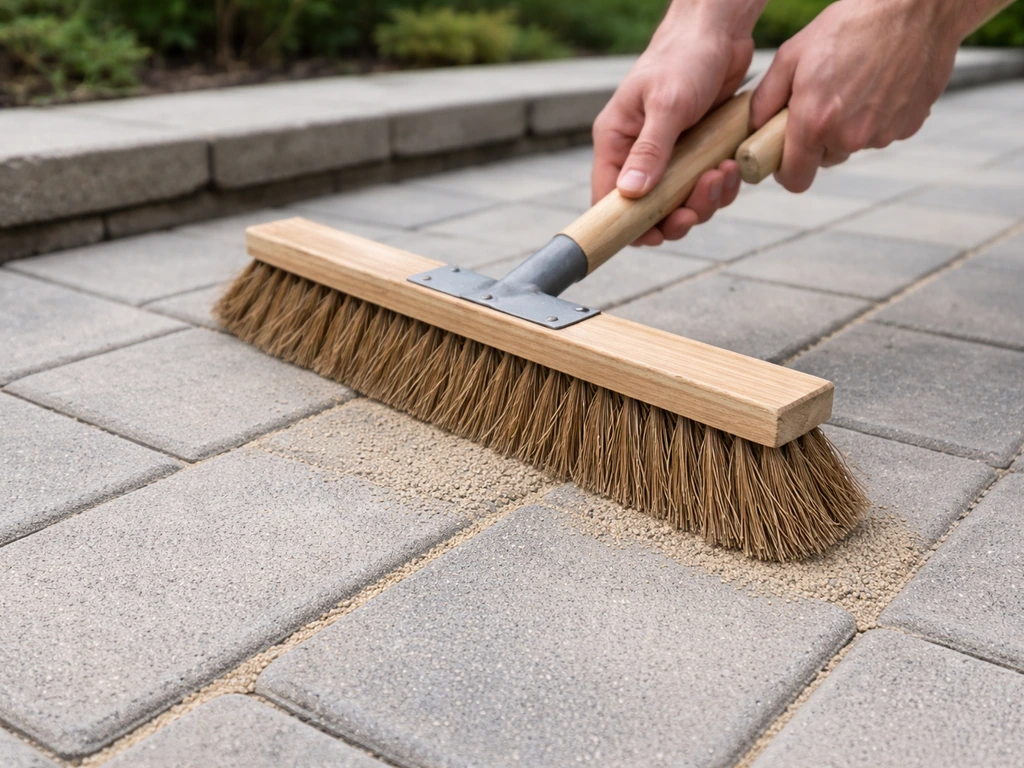
Once all pavers are set and you've done a final pass with the plate compactor (use a protective rubber pad between the compactor and pavers), it's time to fill the joints. Polymeric sand is the best choice for most residential patio projects because it hardens when activated with water and resists weeds and insects far better than regular sand. Pour the dry polymeric sand over the pavers and sweep it into the joints with a push broom. Sweep in multiple directions to make sure joints are fully filled. Then blow off all excess dust from the paver surface with a leaf blower before adding water. This step is critical: leftover dust on the surface will haze your pavers permanently when it gets wet. Lightly mist the entire surface with a hose, let it absorb, then mist again. Stop when the sand won't take any more water. Don't flood it, or you'll wash the sand out of the joints.
Sealing
Sealing is optional but recommended for concrete pavers and most natural stones. Wait at least 30 days after installation before sealing to allow the polymeric sand to fully cure and the pavers to settle. A penetrating paver sealer protects against stains, enhances color, and helps lock in the jointing sand. Apply it with a pump sprayer on a cool, dry day and avoid walking on it for at least 24 hours. Plan to reseal every 3 to 5 years depending on your climate and the amount of foot traffic.
Cleanup, maintenance, and fixing common problems
Right after installation
Once the polymeric sand has set (usually 24 hours), sweep the patio and inspect all joints. Look for any spots where joints are low or incompletely filled and top them off with a little extra polymeric sand before doing a second mist activation. Check that edge restraints are still flush and haven't shifted during compaction. Clear away all cut scraps, excess sand, and packaging before they become a debris problem.
Ongoing maintenance
- Sweep or blow off debris regularly to prevent organic material from building up in joints and feeding weeds.
- Re-sand joints every 2 to 3 years as needed. Polymeric sand does erode slowly over time, especially in high-traffic areas.
- Reseal every 3 to 5 years to maintain stain resistance and color.
- Remove weeds as soon as they appear by pulling them by hand or using a paver-safe herbicide. Don't use vinegar or bleach regularly since they can discolor some paver materials.
- Check edge restraints annually and drive any loose spikes back in before small movements turn into larger ones.
Common problems and how to fix them
| Problem | Likely Cause | Fix |
|---|---|---|
| Rocking or wobbly pavers | Insufficient sand beneath, or low spots in base | Pull up affected pavers, add sand to low spot, reset and compact |
| Uneven settling in one area | Inadequate base compaction below | Remove pavers, excavate and add more compacted gravel, relay sand and pavers |
| Weeds growing through joints | Joints not fully filled or polymeric sand washed out | Remove weeds, top up joints with new polymeric sand, re-activate with water |
| Pavers spreading at the edge | Edge restraints failed or weren't installed | Reset edge restraints with new spikes, realign border pavers |
| Water pooling on patio surface | Grade incorrect or insufficient slope | In severe cases, remove and relay section with corrected slope; for minor pooling, adding a drain at the low point may help |
| Hazy film on paver surface after polymeric sand | Dust not fully blown off before wetting | Try scrubbing with paver cleaner; severe haze may require professional cleaning or resurfacing |
Most of these problems are very fixable if you catch them early. The real risk is ignoring small issues like a slightly wobbly paver or a gap in the edge restraints and letting them grow into larger structural problems over one or two winters. A quick 10-minute check each spring is genuinely enough to keep a well-built paver patio in great shape for decades.
If you're planning to expand the patio footprint rather than just overlay the existing area, the approach shifts slightly since you'll be connecting new pavers to existing ones and matching height and pattern at the joint. When you need to lay pavers next to an existing patio, pay special attention to the transition height and edge restraints so the new section doesn’t settle differently over time lay pavers next to existing patio. If you want to extend your patio with pavers, focus on matching height, bedding, and the pattern at the transition joint extend the patio footprint. Similarly, if you're working entirely over an existing concrete slab, the base work is different from a ground-up install. If you’re specifically wondering how to install brick pavers over concrete patio, the prep and base steps above are the key starting points. Both of those scenarios have their own specific considerations worth planning for before you start.
FAQ
Can I add pavers directly over my existing concrete patio without removing anything, even if there are thin hairline cracks?
Often yes, as long as the slab is solid and the cracks are stable (no movement or heaving). Before overlaying, clean the cracks, fill only where needed, and verify the slab is close to level with a straightedge across multiple directions, not just in a few spots.
What is the biggest sign that overlaying pavers over my patio will fail?
Movement under load is the red flag. If you notice rocking pavers from the slab, soft or spalling concrete, or areas where the slab has clearly heaved or settled unevenly, that damage will transfer upward and you will likely have repeating problems after the joints lock in.
How thick should the sand bed be when overlaying pavers on top of concrete?
Use about 1 inch of coarse bedding sand for an overlay. Avoid making it thicker to “iron out” bad concrete, because it reduces stability and can make the finished patio height vary at joints and door thresholds.
Should I use polymeric sand for the base layer when doing an overlay?
No. Polymeric sand is for filling joints after the pavers are set, not for bedding or base layers. Use coarse bedding sand for the layer under pavers, then switch to polymeric sand only when filling the joints.
Do I need to use adhesive or mortar between the concrete slab and the pavers?
For most overlay installs on stable concrete, skip full-coverage mortar or adhesive. Standard sand-set installation relies on bedding and allows the system to handle expansion and contraction; bonding everything rigidly can increase the chance of cracking or debonding over time.
What if my patio slopes the wrong way toward the house after overlaying?
Fix drainage before you lay the pavers. If the existing slab pitch is opposite the needed slope, you may have to correct it with a leveling/resurfacing compound or plan a different approach, because you generally should not try to correct major drainage issues by piling sand under pavers.
How do I handle a height difference at a door, step, or threshold when adding pavers to an existing patio?
Plan the transition before installation. Measure the target finished height at the door and compare it to the paver thickness plus bedding sand. If you are more than about 3/4 inch higher, consider a beveled paver edge or a small step-down transition so the entry is safe and doesn’t create a trip hazard.
Will the existing patio’s edge condition affect whether my overlay holds up?
Yes. If the perimeter edge is deteriorating or not constrained, pavers can spread and gaps can open over time. Remove or replace failing edges that interfere with new edge restraints, then install restraints so they sit tight against the paver field and remain flush or slightly below the surface.
How far should I expand my patio plan for cuts and materials when adding pavers to an existing area?
Add at least 10 percent extra for standard layouts because cuts and breakage happen more often than expected. If you have diagonal patterns, angles, or a contrasting border, budget around 15 percent to cover the extra cutting waste and the possibility of needing matching paver lots.
Do I need landscape fabric when overlaying on existing concrete?
Usually not, because landscape fabric is primarily for weed suppression and separation when you excavate to a gravel base. For a concrete overlay, you’re not building a new subgrade with fabric in most designs; focus instead on cleaning, bonding conditions, and correct bedding and restraints.
How do I make sure my pavers stay level during installation if the concrete is slightly uneven?
Check level frequently with a straightedge and adjust with small amounts of bedding sand under individual pavers. Do not try to “float” whole sections upward by adding excessive sand, since that can create soft spots and uneven jointing after compaction.
Can I install pavers over concrete if my patio is slightly out of square?
Yes, but you should re-establish your layout reference lines and snap new chalk or string grids. If the slab is significantly out of square, centered and symmetric starting points help keep edge cuts looking intentional rather than progressively changing along a border.
What should I do if I need to match a pattern when joining new pavers to an existing patio section?
Match at the transition joint by aligning height first (finished level), then lock in the bedding approach, and finally keep the pattern grid consistent from the transition inward. If you see a measurable height gap risk, use a border row or a designed transition element to prevent differential settling.
When filling joints, how can I avoid haze or staining on the pavers?
Mist the surface to activate polymeric sand only after fully sweeping dust off the pavers. If fine dust remains on the surface, it can haze permanently once wetted. Blow off excess dust, then mist lightly in stages until the joints are saturated but not flooded.
How long should I wait before sealing after installing pavers with polymeric sand joints?
Wait at least 30 days after installation before sealing. This allows polymeric sand to fully cure and helps the sealer bond properly, reducing the chance of premature joint wear or uneven appearance.
Is it normal for a few pavers to feel slightly different after compaction, and when should I fix it?
Small height differences can happen, but a paver should not rock. If you find movement, fix it quickly before the joints fully lock in, by lifting and re-screeding that area. After joints set, changes are harder and may require removing surrounding pavers to correct base issues.
Next Articles
How to Lay Pavers Next to an Existing Patio Seamlessly
Step-by-step DIY for laying pavers next to an existing patio: matching heights, building base, seamless transitions, lev
Can You Lay Patio Pavers Over Concrete? How to Do It Right
Learn when you can lay patio pavers over concrete, how to prep, add base, ensure drainage, and avoid rocking or pooling.
How to Lay Patio Pavers on Concrete: Step-by-Step DIY
Step-by-step DIY for laying patio pavers on concrete, from prep and base choice to leveling, jointing, sealing, and fixe